
robin (no pronouns) | hobbies and crafting and skill-building and such
Last active 60 minutes ago
Don't wanna be here? Send us removal request.
Statistics
We looked inside some of the posts by queerbeanenjoyer and here's what we found interesting.
Average Info
Notes Per Post
287K
Likes Per Post
159K
Reblog Per Post
128K
Reply Per Post
446
Time Between Posts
4 days
Number of Posts By Type
Text
17
Last Seen Tumblr Blogs


Fun Fact
Tumblr has been banned in Indonesia for providing people with access to pornographic content.
Text
made some syrup out of 600g of blueberries. this wasn't everything I picked earlier this week but it's like 2/3 of it, I think?
either way, very excited for Italian sodas in particular!

1 note
·
View note
Text
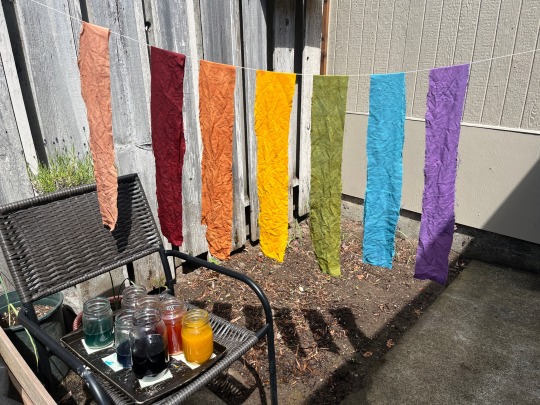
i loosely followed thedimelions’s tutorial for naturally dyeing a pride flag, with a lot of added research about natural dyes, stains, mordants, sewing, etc, and i wanted to share my results!!

process, notes, and more pics under the read more🌱
starting off i soaked my fabric (100% cotton acquired from joann's during their closing sale, rip joann's ;-;) in a 1:5 mixture of soy milk and water for 12 hours, then let dry on a clothesline in the sun, then dipped and dried two more times (the proteins in the soy milk help the natural dyes adhere to the fabric, creating darker colors and better colorfastness)

while that was happening i started making my dyes, which involved simmering my chosen dyestuffs in some water for 30-60 minutes. i didnt time it, just went until the color developed to a point i was happy with


as far as ratios i didn’t measure, but the more dyestuff = stronger color so err on the side of more
red: turmeric + baking soda, paprika, and yellow onion skin dye as the liquid base
orange: yellow onion skins
yellow: turmeric
green: red cabbage + baking powder (LOTS), turmeric
blue: red cabbage + baking powder
purple: red cabbage
for the red cabbage dyes, i added the baking powders and soda after simmering and just kept adding and stirring till i got the color i wanted. ((BIG NOTE red cabbage, and debatably most of the others that I used, are fugitive dyes, meaning its not a true dye and more of a stain that will fade with time and wash out more easily, especially without mordanting on additives like iron. keep this in mind if you end up doing this project or transfering these methods to cloth you will be using for clothes, ie washing and wearing more frequently))
i also tried to make a pink with avocado skins and pits, which did come out a lovely rosy color, but i didn’t end up using in the final flag, which i might use beet or red cabbage + lemon juice or another acidified for next time to get a more bright pink

now with my dyes ready and my cloth dried out from its previous soy milk dip i cut it into strips and stuck it in the jars, which were placed in the sun for the day (alternatively, you could simmer the cloth in the pot) and then left to sit overnight
the next day i squeezed out the excess dye and gave the ones with turmeric a light rinse to get the grit out, then hung them to dry
((small note i reused the dyes baths to see what would happen since they still looked just as pigmented, but the colors are much much much more faded on the second go around. all in all its doable, but I wouldn't recommend it.))

now time to sew! i procured a second hand sewing machine specifically for this project and had never sewed before, but thankfully this required the easiest stitch in the game (a straight stitch in a straight line). i looked up how to sew a flag specifically to get those clean lines rather than just overlapping, and this video was great (shoutout Suffolk Public Library)


as you can see my flag ended up quite long cause I left a lot of wiggle room, so I just look up flag ratios, trimmed it up (and used the extra strip of rainbow as decoration) then added a white strip folded over to make a way for me to hang it on a stick if I ever so desire.
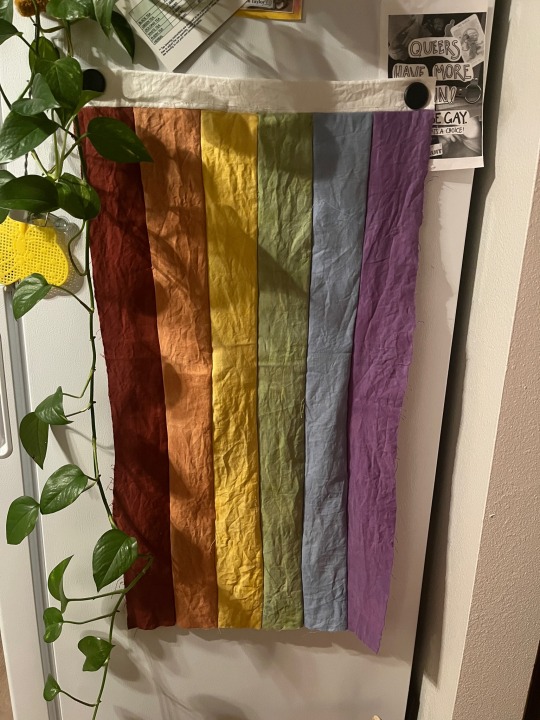
and ta daaa! i would still like to clean it up a bit, and do a zig zag stitch around the outside to stop the cloth from fraying further, but im happy with the unpolished look of it. once i figure out how to get a pink I like, and how to get browns and blacks, i want to make a progress flag and trans flag. also just started growing some indigo, so excited to see if I can get some blue dyes out of that.
2K notes
·
View notes
Text
Mom sent me a facebook link to a PBS news hour post about how the anti-lawn movement is growing. The vast majority of the comments on it were stuff like this:
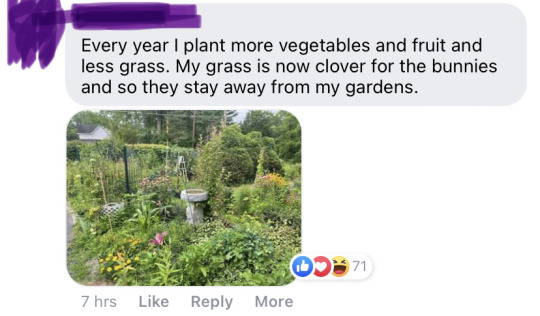


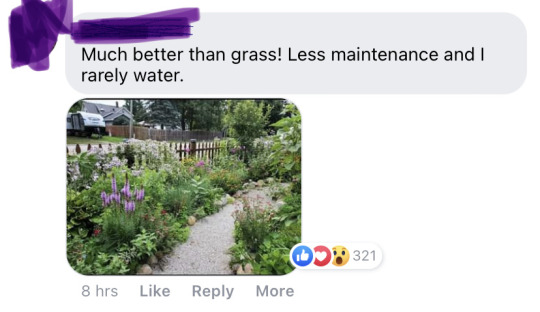


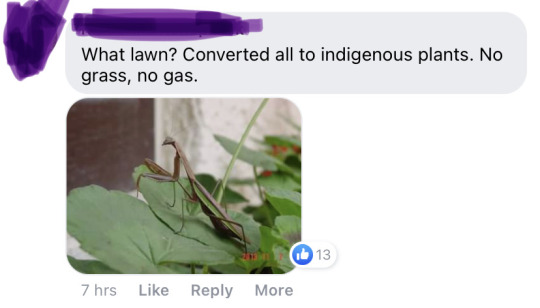
Most people are on our side here, even the so-called "boomers." We just have to be spreading ecological knowledge and practical means of creating useful habitat in back yards! Educate! Protect! Resist!
84K notes
·
View notes
Text

corn moment
101 notes
·
View notes
Text


finished the hand embroidery on my bellbottoms!! also showing of the crochet top my partner made for me 💕
the raspberry embroidery was referenced from a pattern on the DMC website but I free handed it & used the colors I happened to have in my floss collection
238 notes
·
View notes
Text

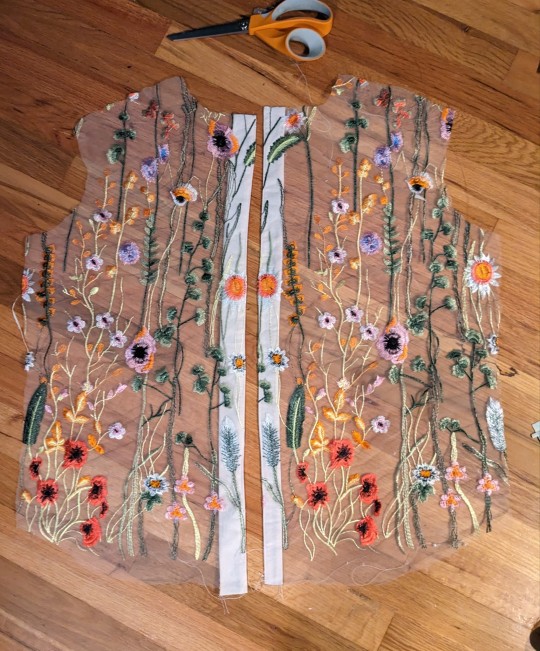
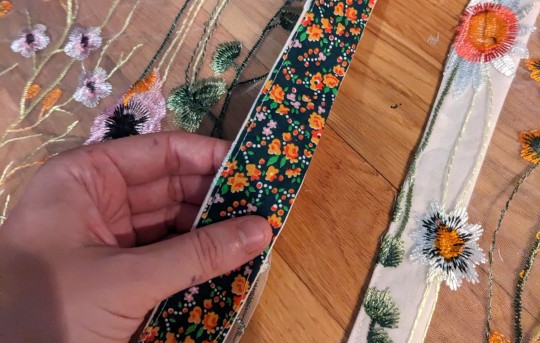
due to factors such as "time pressure" and "tulle is of the devil" my expectations for this shirt are not high. but i spent a lot of time imagining these button bands and they turned out pretty nice
31K notes
·
View notes
Text


Some close-ups of the dinos! The three layers broken out -- sky, land, and sea -- and some spotlights on my fave lil dudes, including the chonky and spiralsaw-jaw sharks, the toothy T.rexies, the not-so-Littlefoot, and an orange Nessie! (Pattern by UnaBuenaPieza.)
189 notes
·
View notes
Text
just because youre made of stardust & other gay shit doesnt mean that a bug isnt. be nice to a bug today
42K notes
·
View notes
Text
finally planted the pawpaw we bought last year.....
it has stopped putting out leaves so I thought I killed it with my neglect
but then it started leafing again this year!!!
so I wasted no time and instead dug a small hole in one of the less disturbed parts of our property and planted it.
it's pretty shaded so hopefully it'll do okay 🤞
0 notes
Text
"Unless you are a koi breeder, it is best to maintain a constant temperature throughout the winter of around 16C (61[F])."
-Holmes and Pithman, pg 90, Manual of Koi Health: How to Create a Healthy Environment for Your Koi and How to Treat Any Sickness That May Afflict Them

bro I could have been doing this the whole time why did no one tell me that!!!!!!!
tell me why I had to dig in a weird section of this book!!!!!!!!!!!!!
(btw we did have fry this year and I'm sad about it but there's always next year ig)
I wanted to do a brief write-up on how I'm managing my koi population during this breeding season.
Firstly, the information on preventing breeding is scant to none. None of my print reference materials cover it. I've sort of pieced together a game plan based on the books' instructions to foster breeding and the lamentations of the users in koi breeding and keeping forums.
Everything I've read says that koi tend to breed when the water is about 68F, and usually on a full moon, for whatever reason. Furthermore, you can tell they are breeding because they will be more aggressive, the water will be foamier, and the males will have little white bumps called tubercles on their face and fins (which disappear after breeding). As I'm an amateur koi keeper, so I'm not so good at sexing them and my ponds are really too deep to be able to see those kinds of details anyway.
So, to manage this, I'm feeding them scantly (two days between feedings) for a month or so. This in addition to 25% water changes more frequently than usual. The scant feedings will (hopefully) encourage egg predation, thus reducing the success of this year's clutch(es?). The water changes reduce the concentration of breeding hormones in the water.
I can't really tell how many or how few eggs there are in the ponds but this is my best plan. I had intended to order breeding surfaces for them and then remove them once they had eggs on them but I wasn't able to get them in time.
Time will tell if this works! So far it seems like it's been okay? I'll start feeding them daily once we start having temperatures reliably in the mid to upper 70s outside.
2 notes
·
View notes
Text


Listen very closely b/c a turtle laid eggs in the yard!
She's a yellow-bellied slider as far as the person at the department of natural resources could tell based on my description.
I called to ask about what we should do. They said to put a small cage around the eggs and keep kids/dogs away. They said there's no guarantee about racoons and other animals digging them up but a cage is what we can do. We'll remove the cage in a month so there's nothing in their way when it's time to leave.
To say I'm pogged is an understatement.....
Also the first photo looks weird b/c I'm still figuring out taking phone pics with my monocular lmao
2 notes
·
View notes
Text

solarpunk farmstead, built in the wreakage of a crashed spaceship. trying somthing a bit new with this one so hope you like it.
917 notes
·
View notes
Text

just finished my bead embroidery project 🪩 🐦
2K notes
·
View notes
Text
Grinding tree stumps is usually how we deal with them. If you have land to clear on your homestead, it could become quite a chore to get these stumps taken care of. But did you know that you can eat your stumps?
Well, that is not exactly true. If you head out there and start chewing on tree stumps, they won't taste very good. And there is no method of slow cooking that will make that poplar edible or appetizing.
However, one way you can both eat your stumps and hasten their decomposition is to inoculate them with a mushroom spore. I understand that is a mouthful of words that don’t really mean much to the average person.
What I'm saying is, you can buy wooden dowels that are covered with the spores of certain types of mushrooms.
These dowels can be easily inserted into your stumps and they will begin feasting on the wood. The best part is that you will get delicious mushrooms several times a year. These spores are prolific and will produce enough mushrooms that you will need to dry them.
If you do this to a field of stumps, you better get your e-commerce ready or set a booth up at the local farmers market.
Shiitake Mushrooms retail for between 8$ and $15.
I prefer the Shiitake because it looks very distinct and I love the taste as well. They also preserve well.
Mushroom Nutrition
The Shiitake mushroom is a delicious little cap. It's full of great nutrients like copper and selenium. It's also a decent source of Vitamin B2 and B6. It contains lipids and amino acids as well.
Shiitake have played a role in Chinese medicine for millennia. There are also studies on their ability to fight tumors. For the most part, though, they are just delicious and grow with little to no effort. You can eat them, dry them, or sell them.
Tools and Supplies
Drill and Drill bit of 5/16th inch bit
Hammer
Wax
Vessel for melting wax
Small Paintbrush
Shiitake Spawn (store in fridge until ready for use)
The Process
7. That’s it! It’s not a tough process. If you can melt some wax and use a drill, you can have all the mushrooms you want.
How to Activate the Spore
It takes about 6-12 months for the spore to initially spread through your stump. So, it will take at least a year before you get any production.
Your stumps will produce in spring and in fall. You may get some sparse production in summer, but the bulk of production happens in spring and fall. The spore will need to be distributed through the stump each season and activated.
The best way to do this is to first soak your stumps thoroughly. When I do this with logs, I toss them into a small creek on my property overnight. You can water the stumps a few times a day for about 5 minutes. Just get them nice and soaked.
Next, you will want to bang the stumps. You can use a bat to hit the stump. Don’t really crack the thing and damage the stump, but give it a couple whacks on all sides. This will kickstart production.
Other Tips
After 6 months, keep an eye on the logs or you may miss the first production.
Stumps in the shade will produce best.
Too much direct sun will dry out the stump and they will not produce.
Harvest them when the cap is between 3-4 inches.
To dry, put them in a 200-degree oven until the caps are shrunken and hard.
Of course, the other payoff is that these mushrooms will hasten the decomposition of that problem stump. It won’t work as quickly as a stump grinder, but you will get years of delicious mushrooms out of it!
153 notes
·
View notes
Text
Hey i’m a fashion design student so i have tons and tons of pdfs and docs with basic sewing techniques, pattern how-tos, and resources for fabric and trims. I’ve compiled it all into a shareable folder for anyone who wants to look into sewing and making their own clothing. I’ll be adding to this folder whenever i come across new resources
https://drive.google.com/drive/folders/16uhmMb8kE4P_vOSycr6XSa9zpmDijZSd?usp=sharing
126K notes
·
View notes
Text
so full disclosure: the point of my blog is to have fun and info-dump about my hobbies and so I don't want to spend too much time belaboring the rise of fascism and/or my horrendous mental and physical health
BUT
know that I am a queer & trans disabled leftist and that that very much informs my way of life
furthermore, FUCK the """right""" they are simps for fascists
0 notes
Text
sort of want to become a faceless youtuber tbqh
1 note
·
View note