
RadioGyan.com is a free educational website for radiology residents and healthcare professionals. We have a host of resources for residents and practicing radiologists to go through. As the tagline says, our goal is to make learning radiology as easy as possible.
Don't wanna be here? Send us removal request.
Statistics
We looked inside some of the posts by radiogyan and here's what we found interesting.
Average Info
Notes Per Post
1
Likes Per Post
1
Reblog Per Post
0
Reply Per Post
0
Time Between Posts
2 months
Number of Posts By Type
Photo
2
Text
14
Last Seen Tumblr Blogs


Fun Fact
Tumblr was the first site to host the blog for President Barack Obama in 2011.
Photo

Classic Trident sign in a patient with osmotic demyelination syndrome secondary to acute kidney injury and rapid correction of hyponatremia. Join our Telegram Group for more radiology cases. Link in bio. . . . . . . . . . . . #radiology #xray #radiologia #medicine #radiologist #medical #mri #radtech #radiologytech #xraytech #doctor #healthcare #radiographer #radiologystudent #imaging #radiologylife #ctscan #medicalimaging #covid #radiologiaporamor #ct #nurse #medstudent #xrays #ultrasound #surgery #hospital #xraystudent #medicina #FOAMrad https://www.instagram.com/p/CN7XSnzHrXg/?igshid=ypw4aexh1fjj
#radiology#xray#radiologia#medicine#radiologist#medical#mri#radtech#radiologytech#xraytech#doctor#healthcare#radiographer#radiologystudent#imaging#radiologylife#ctscan#medicalimaging#covid#radiologiaporamor#ct#nurse#medstudent#xrays#ultrasound#surgery#hospital#xraystudent#medicina#foamrad
0 notes
Photo

There is NO evidence that modern iodinated or gad-based IV contrast increases the risk of hypertensive crisis in patients with pheochromocytoma. Restricting contrast use or premedicating solely on the basis of a history of Pheochromocytoma is not recommended. Ref: 2021 @acronline Contrast Manual Follow me on Twitter for more search #radiology pearls . . . . . . . . . . #medical #medschool #doctor #medicine #nurse #medstudent #nurselife #medicalstudent #pharmacist #radiologytech #radiologylife #radiologystudent #interventionalradiology #radiologyresident #radiologytechnologist #neuroradiology #radiologydepartment #dentalradiology #oralradiology #doctorslife #medicallife #physician #medicalstudents #clinical #patientcare #oncology #doctorlife #premed #xrays (at Canada) https://www.instagram.com/p/CNJA5yMHvCO/?igshid=cmnv2b6zpyfl
#radiology#medical#medschool#doctor#medicine#nurse#medstudent#nurselife#medicalstudent#pharmacist#radiologytech#radiologylife#radiologystudent#interventionalradiology#radiologyresident#radiologytechnologist#neuroradiology#radiologydepartment#dentalradiology#oralradiology#doctorslife#medicallife#physician#medicalstudents#clinical#patientcare#oncology#doctorlife#premed#xrays
0 notes
Text
Spotters Set 44 - Aunt Minnie Radiology Cases 3

#RGCOD #10 What is your diagnosis for this #chestrad case?
More radiology cases: https://buff.ly/2OAvQVn
#FOAMed #FOAMrad #radiology #radiogyan #chestrad #radres #raded #frcr #frcr2b #MedEd #XRAY #radiologia #radiologyassistant
Read the full article
0 notes
Text
Radiology Conferences - A comprehensive guide!

RSNA 2018 Radiology conferences and CME meetings are essential for residents and radiologists to brush up their knowledge. For residents they not only do they help them appear their radiology exam/boards, but also are a great place to interact with senior radiologists and network for future opportunities. Once we are done with residency we get caught up in the daily routine. It is a vicious cycle and especially holds true while working in private diagnostic centers. Hence radiology conferences and CME meetings are a welcome change. There are additional perks for making new friends and exploring new places. A few years ago it was difficult for residents and most radiologists to attend overseas conferences but trends are changing and a lot of International delegates are now attending the ECR (European Congress of Radiology), RSNA (Radiology Society of North America), ARRS (American Roentgen Ray Society) and other international radiology conferences. International delegates often face a lot of problems as it is a new place, new culture and we are have limited time for adaptation! There are a lot of questions about the place and the conference. This is an attempt to simplify this process so that it is an even more memorable experience for all!
Introduction
To attend or not to attend, that is the (first) question! Before you decide on attending any conference you need to ask a few questions to yourself: WHY do you intend to attend the radiology conference? This is essential because it involves a lot of preparation and is definitely not cheap. Primary reason should always be academic, but you should also find time to explore nearby places. The other way round is also fine but not ideal. Do you intend to your research at the meeting? If yes then what do you wish to present - a scientific paper, educational exhibit? If yes, then you need to start preparing for these and plan your travel accordingly. If no, then the preparation is limited, but I would suggest that if you are attending the conference in person, you should present. How does one start preparing for an international conference? For international conferences, one needs to start preparing as early as possible. Conference registration and presentations, flight bookings, conference charges, and accommodations are all cheap if you book well in advance. Talk to your seniors who have been to the conference, they will always have some useful tips for you!
Conference registration and presentations:
Registration: Register for the conference as soon as possible as ALL conferences have early bird discounts. Students should register for all radiology organizations in the first year itself as they offer free membership with loads of perks for attending conferences. Go through the conference page in detail as there are often discounts for presenters, students, and young researchers. These are subject to change and details are available at individual pages. Here are few that I am aware of : Most conferences have reduced registration charges for residents and fellows. “Resident” is a loose term and even senior residents can try opting for this if you can procure a letter from the head of your department. RSNA has very low registration charges for radiology residents AND fellows. For 2018, the registration charges were 27 USD or approx 1900 INR which is very affordable. Most of the national conferences are costlier than this! RSNA also has a travel grant for International radiologists from select countries. ECR has Invest in Youth program for young researchers where they not only sponsor the registration but also provide lavish accommodation in Vienna. Korean College of Radiology provides fixed monetary remuneration for presenting at the conference. A lot of radiology departments provide grants to residents and fellows for presentations at radiology conferences. Some national organizations in India like the IRIA and Tata trust also provide grants for international radiology conferences. Presentations: Check the different presentation opportunities that the conference/meeting offers. A few common formats include educational exhibits and scientific presentations. Educational exhibit/ scientific poster: RSNA describes an educational exhibit as follows: Education exhibits should be designed to teach or review topics related to medical imaging. They may be presented as hard copy or digital posters. Another great Radiographics article elaborates on what should be contents of an ideal education exhibit: Education exhibits should be designed to review known facts, perhaps providing a synthesis of such facts, relating them in new ways, or extracting common threads from diverse data. There is no burden of proof. Education exhibits will most often be of general interest to those in practice or those at some stage of their education in matters radiologic in the widest sense. They should aim at being memorable, at potentially influencing clinical behavior, and at being as simple and direct as the subject allows. To put in simpler terms educational exhibits elaborate entities that we come across in routine radiology practice. Here are a few useful resources and examples: Educational exhibit from the SAR (Society of Abdominal Radiology) conference 2018: Cirrhosis: The Double-Edged Sword for CT and MRI Diagnosis of HCC by Dr. Chernyak V et al. Other presentations can also be accessed here: SAR 2018 Educational exhibits. SAR 2017 Educational exhibits. Ideal sample educational poster by ECR Gold Medal educational exhibit at ARRS 2018. Other presentations can be accessed on the ARRS award-winning exhibits page. RSNA does not have free access to educational exhibits. Best exhibits at RSNA are selected for Radiographics so you can go through these to get an idea about various topics. Check our collection of more than 350 Radiology research topics for ideas. You can also search for educational exhibits and other radiology presentations using this custom search engine for radiology presentations. These are available for viewing as well as downloadable PDFs. Here is a snapshot:

Search Engine for Radiology Presentations Scientific Paper Presentation / paper: RSNA describes scientific presentation as: Hypothesis-driven research that may be submitted as a paper to be presented orally or as a digital poster. Scientific posters should qualify as the type of material that otherwise might be submitted to a scientific session. They should present hypothesis-driven or translational research and be organized in such a way as to prove or refute a hypothesis on the basis of data that are appropriately reported and analyzed. Although of general interest, a poster might well appeal most to another investigator working in the same context.” - RadioGraphics Scientific posters and posters are presentations of a research study backed by data. Have a look at this sample scientific poster by ECR. Educational Exhibit:Radiographics:: Scientific Posters: Radiology Tips for preparing educational exhibits and scientific papers: Best presentations and scientific posters are awarded at conferences. Following awards were available at the recent RSNA: Magna Cum Laude Cum Laude Certificate of Merit Quality Improvement Reports Award Trainee Research Prize - Fellow Trainee Research Prize - Resident Trainee Research Prize - Medical Student Student Travel Stipend Award Identified for RadioGraphics You need to write an abstract while submitting educational exhibits and scientific papers. The Society of International Radiology shared a few good tips for writing a good abstract. Here is an excerpt: How to Write a Good Abstract Title: Use a short, specific title indicating the nature of the investigation. Avoid use of abbreviations in the title. Abstract body: Standard abbreviations may be used in the abstract body without definition (e.g., PTA). Nonstandard abbreviations must be placed in parentheses after the first use of the word(s) in the abstract; such abbreviations should be kept to a minimum. Use generic drug names. To ensure blinded peer-review, no direct references to the author(s) or institution(s) of origin should be made anywhere in the title, body, tables or figures. Misspellings, poor grammar, and typographical errors can jeopardize chances of acceptance. Follow the rules: Abstracts are graded in a blinded fashion. Identify and state your Purpose, Materials and Methods, Results and Conclusions. The purpose should define your question and its relevance; the methods describe your approach to answering the question; the results are your data; the conclusion must be related to and justified by the preceding three sections. Respect the character limit for the body of the abstract. Be brief and clear: Define relevance: Is this material appropriate for the Meeting? If it is not immediately evident from your abstract, reword it to make its relevance clear. Use a sentence or two of background in the Purpose section to help the reader understand why your work is important. Disclose: The strength of an abstract is increased when its weaknesses are disclosed by the authors. Avoid submitting multiple abstracts covering similar items, especially from a single database. Describe limitations, explain discrepancies and report all major complications. Any potential conflicts of interest and compliance with your institutional review board's (IRB) regulations should be disclosed. Avoid hyperbole: Abstracts lose points for exaggerating or overstating conclusions. Radiology is all about images! So make sure that you collect the BEST cases from your department and edit them to perfection. I am cannot call myself an expert at this but here are few tips from a great Radiographics review article: Primarily, the panelists judge exhibits on scientific accuracy and educational quality. Specifically, they assess exhibits according to five criteria: scientific merit, clarity of focus, pictorial quality, teaching value, and general interest. The review includes determining whether the exhibit has a message as opposed to being simply a collection of images or pictures, whether the exhibit expounds an accepted point of view, and whether the statistical analysis is accurate and appropriate. Make sure you read the conference page thoroughly as there are often different types of presentations for each of the conferences apart from educational exhibits and scientific papers. Resources to make great posters for conferences: Guide for making physical posters for conferences. Awesome template for a research poster with examples- Free PPT download Portrait template for a research poster Make sure you use Grammarly to correct your , , and plagiarism for these educational posters. Grammarly has affordable paid subscriptions, windows/MacOs apps, and FREE browser extensions as well. It is an excellent tool to avoid inadvartent inadvertent spelling mistakes in your research projects. It has an extensive built-in vocabulary, but you should make an account and add your own medical glossary to it.

How (and how not to) make a good medical research poster! https://www.youtube.com/watch?v=1RwJbhkCA58 Do these presentations amount to publication? Technically no, as these are not indexed in databases like the Medline/Pubmed. But you can always submit the research paper in journals for publications after you present them at the conference. Every conference has different rules so check before submitting your abstract whether the conference allows publication of research from the posters after the conference. In either case, a presentation at an international conference does add to your CV.
Flight tickets and Visa:
Now that we are done with the not-so-interesting part of the conference (for a few at least!), you can start preparing for the rest. Check the Visa requirements for your destination and apply ASAP as the wait times can be long. Flight tickets prices are always a mystery. If you book late they will be costly for sure but if you book too early they can be costly as well. So what is the best time to book an international ticket? Here is what data from a study done by CheapAir.com suggests:

Best time to book international flight tickets This data is based on American studies but you can extrapolate some of it for other places. Either way, booking early does help for sure. So don’t wait for those last minute elusive deals! Easier said than done! You can use the Hopper app to track airfares for your flights. Make sure you use it only for tracking and DO NOT buy tickets from the app directly as they are costly. If you are a radiology resident, use StudentUniverse.com to book flight tickets. You need to submit a valid ID proof to sign up. They are similar to other aggregate websites like SkyScanner and Kayak but have additional discounts for students. If you sign up using this link, you get an additional 20$ off on your first flight booking! For others, you can check prices using above airfare price aggregators. Check your current debit/credit card details for free lounge access at airports you are traveling to.
Accommodation: Hotels vs Hostels vs Airbnb
Airbnb is the cheapest and most convenient option. Check user reviews in detail before booking the place. SuperHosts should be preferred. You can ask the host details about the place before you make a booking. Make sure that your Airbnb is close to your conference center. Airbnb does not provide the exact address of the place so it can be difficult. Here is the solution: Airbnb provides an approximate location for the home as shown below:

Airbnb location search You can use the "Nearby landmarks" to get an approximate idea. But if you want an even closer search location to zoom into the map and try to locate a street close to the home with a unique name For eg:

Head over to Google maps and key in that street name with the city name (E 24 Pl Chicago in the above example) and the location of the conference. You will now have a near perfect estimate of the distance between the Airbnb home and your conference location. You can alternatively ask the host but you may not get a prompt reply, especially with the time difference.

Google Search for directions Sign up using this link and get an additional Rs. 2200 on your next booking at Airbnb. The other advantage is that Airbnb allows you to cancel your reservation for free up to 48 hrs in most cases. So you can book it right away and then cancel if you change your mind. Hostels are a good alternative to Airbnb, especially if you are traveling alone. You will share the space with other travelers and it is a good way to make some new friends. Hotels are always an option, but they are often costly. Most of the time you only need a place to rest in the night so either an Airbnb or Hostel should be fine. In fact, these provide better facilities like a common kitchen space, local guides, free breakfast and a friendly atmosphere as compared to the hostile environment of a Hotel! If you wish to save some more money, sign up with Airbnb with the link, then GivingAssistant (extra 5$) and book from Airbnb from there (Additional 5% cashback).
Foreign exchange and currency:
Make sure you carry enough international currency for the entire trip PLUS some extra amount for an unexpected emergency. Options include cash and travel cards. Carry a small amount of cash (approx 20%) and rest in the form of travel cards. Most places accept cards including small food stalls and private cabs. NEVER exchange currency at the Airport. The prices are exorbitant. Often your current credit card can offer you a zero international transaction charge, so check with your local bank. Also, confirm all the international charges with your bank and intimate about your travel to avoid your card being blocked.
Packing:
International flights usually allow two check-in bags, bag and o. Local cheap flight services often only allow one carry-on bag and a personal item. Confirm the baggage allowance while you book your ticket. Costs for additional check-in luggage can be more than the flight tickets. So if you have extra luggage book it beforehand! If you intend to travel a lot, avoid heavy check-in-bags. I prefer a carry on bag and a personal item (laptop bag). Most flight services are only concerned about the size of the carry-on bag. So make sure that you carry a small carry-on bag to avoid extra charges. "Personal item" also includes a laptop bag. No-one checks what are you carrying in your personal item so you can use it for some extra storage. Get a waist pouch like . It is a good place to store important documents, earphones, chargers and other small items. Plus no-one considers this as an extra bag, so more storage space. With check-in bags, you need to take care of the weight than the size. Most flights have a 23kg limit. Prefer a bag with a TSA approved lock and international warranty so that you are covered while traveling. Travel light! Mix and match your clothes so that you save valuable space! Make sure you check the weather and pack your clothes accordingly. Here are a few packing tips to get the multitude of things that you intend to carry in that small bag of yours: https://www.youtube.com/watch?v=HhaJBpNr5zs So far I have been using these without any issues: (alternative ), .
Tips for attending the conference:
All conferences will provide a detailed schedule of the program. Most International conferences are multidisciplinary and there will be synchronous lectures at the same time in different halls. You need to plan what lectures you wish to attend WITH the conference map/overview showing the lecture halls, otherwise, you will waste time jumping from one hall to the other. This is especially true for RSNA as halls can be located far apart and you will end up walking from one hall to the next one only to find that the lecture is already over. Most of the conferences have dedicated apps which will help you plan your schedule for the day. Check if there is a “virtual meeting” option available for the conference. Virtual meeting provides access to selected video lectures after the conference for a stipulated time. You can skip attending lectures in person as you can attend the webinar later at your convenience. ECR so far has been providing free access to the conference videos. Decide what kind of lectures suit you. For residents and most radiologists, the “Educational” sections are most beneficial as they cover aspects of routine radiology practice. “Scientific” sessions are useful for a specific audience who are involved in that particular niche. Case-based or interactive sessions are the most value for your time as they tend to keep you engaged. They also tend to have higher retention. Use note taking apps such as Evernote (my preferred app) and Google Keep to note down salient points from lectures. Look out for FREE lunch symposia/lectures. RSNA has a residents and fellows lounge. It is a great place to meet other radiology residents.

RSNA residents and fellow lounge
Exploring!
https://www.youtube.com/watch?v=4DMGfbje7NY Chicago - Home to the RSNA https://www.youtube.com/watch?v=JfKKjD0GSZo Vienna - European Congress of Radiology International Radiology conferences, for that matter all medical conferences are held in major cities. So make sure you take out enough time to explore the city, culture, and places around! Here are a few tips that I found useful: Most conferences are held from Monday to Friday, so plan your travel from Friday to Sunday so that you get those extra days for travel. Do a thorough search of places around the conference location which you can visit. Google/YouTube are your best friends! For example, if you have one day available after or before the RSNA, you can search: “One-day Iternary Chicago”. Read about transportation facilities in the city. Most places have a good local transport system like Metro/Subways/buses, but some do not (for eg, Florida does not have local transportation). In such cases your options are If you have an international drivers license you can hire a vehicle at the airport itself. This is the cheapest option as you will end up spending a lot more on cab services. It also gives you the convenience of exploring places farther away from the conference. If you do not have an International License then you can always take an Uber or Lyft (FREE rides for signing using the codes). Make sure that you explore the local cuisine. Most of the hostels have a common kitchen so you can get ready-to-heat food products to save some money. If you plan to visit local tourist attractions make sure you search for the relevant audio podcast. In my experience, visiting a place without knowing much about it is very boring. You can download this free walking tour app on (iTunes) or (Android). It is a handy companion, especially for solo travelers. Check out this sample audio guide by FreeToursByFoot FreeToursByFoot and FreeTours offer pay-as-you-like tours in major cities. These are great because the guides are locals and you get to have great insight into the culture and not-so-popular aspects of these places as well. https://www.youtube.com/watch?v=s7atAt5X_WQ Free Tours By Foot - Chicago

RSNA 2018! I have tried to cover a few tips that have helped me. We are planning to write similar guides for individual international radiology conferences like the RSNA and ECR as well. This article is by no means exhaustive. I am sure a lot of you have been attending a lot more conferences. What are your top three tips for residents preparing to attend International conferences? Do let me know in the comments section! Related content: https://radiogyan.com/radiology-resources/radiology-conference-updates/ Read the full article
0 notes
Text
Spotters Set 43 - Classic Radiology Cases!
This is a case of Medulloblastoma. Here are the important imaging features: - Malignant neuroepithelial tumor of the posterior fossa. - Most commonly seen in children - Always screen the spine in patients with posterior fossa tumors to rule out drop metastases - Differential is ependymoma https://radiogyan.com/spotters/classic-radiology-cases/ Visit the website for more radiology resources! #radiogyan #radiology #imaging #radiologist #radiographer #radreg #CT #MRI #ultrasound #xray #radres #radiologyresident #FOAMed #FOAMrad #advancedimaging # Read the full article
0 notes
Text
Biceps brachii distal tendon rupture - MRI


Elbow. Male, 31 years, acute pain and swelling after work out. Full-thickness tear of the distal biceps tendon. MR images showing retracted biceps tendon fibers (arrow) surrounded by edema. Note the thickened distal triceps tendon (asterisk) as a result of chronic overuse.
Biceps brachii distal tendon rupture:
Clinical Features: Most commonly in the dominant arm of males after the fourth decade. Most tears occur 1–2 cm above the radial tuberosity as this is a hypoperfused zone. Complete tears are evident clinically however, differentiation between complete and partial tears is difficult. Complete Tear Partial Tear Single traumatic event involving large force acting against resistance from an elbow flexed to 90° Minor trauma or not even associated with a traumatic event when the underlying tendon is degenerated) Usually acute Usually chronic presentation Hook test does not elicit pain. "Popeye sign" Hook test elicits pain Discontinuity with or without retraction At least some fibers are intact Surgical management Conservative to start with. https://www.youtube.com/watch?v=9HX7oq-CehI Ultrasound: Dynamic imaging can be used to evaluate continuity of the tendon or the abnormal movement of a disconnected proximal tendon. Partial tears show changed caliber with reduced echogenicity which is often difficult to evaluate. Posterior acoustic shadowing at the distal biceps has proven to be highly sensitive for a full thickness tear. Anisotropy at distal tendon end can mimic complete rupture. Tendon retraction of less than 8 cm correlates with an intact aponeurosis, whereas a retraction of more than that indicates torn aponeurosis. MRI Fluid-signal filled gap on STIR sequence, increased intratendinous signal intensity, and edema in the biceps muscle belly and surrounding soft tissues are characteristic for acute full thickness rupture. Partial tears show altered signal and caliber of the distal biceps tendon. FABS view: Flexed ABducted Supinated view is superior to routine imaging for evaluation of the distal biceps tendon.

FABS MRI biceps tendon shows an intact distal tendon Associated pathological conditions: Enthesophyte formation at the radial tuberosity which also can be a contributing factor. Bicipitoradial bursitis. Differentials: Brachialis muscle sprain. Further reading: USG of Biceps tendon rupture Radiographics: Distal Biceps tendon pathology RadSource. Case courtesy: musculoskeletal_rad_cases More radiology content at RadioGyan : Radiology resources Read the full article
0 notes
Text
Why did I take up Radiology?
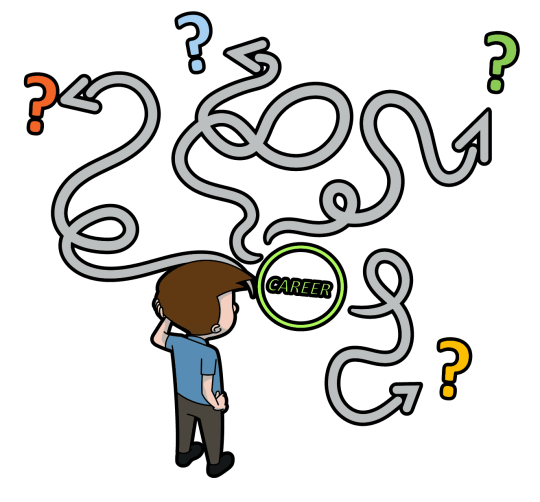
Why this Radiology Radiology ji?
Why did I take up Radiology?
How is radiology as a career choice? What made you take up radiology over other branches? This is a common question that a lot of undergraduate medical students have, especially after clearing their entrance exams (and securing a good rank without which getting into Radiology is quite difficult!). Every radiologist has different reasons. In this blog post, Dr. Devpriyo Pal, elaborates his reasons for taking up this elusive(?) branch! Most medical students do not know about the subject of Radiology when they enter medical school in India. Till the year I graduated, 2016, the exposure to this wonderful subject in undergraduate medical courses in India is practically non-existent. I took up MBBS idolizing my uncle who is a general surgeon and yet, here I am a first year resident in Radio-diagnosis trying to pen down the change in my perspective and life goals through the last 8 years that lead me to this point. I have divided the entire journey into three parts to keep it concise. Step One: At the end of MBBS: I wanted to be a general surgeon because, as mentioned above, I idolized a general surgeon and I really liked the subject during my MBBS. I was very good at anatomy and always had good visuospatial skills and I knew I'd get great training from my uncle. I was naive because the books gave me a very incomplete idea of the subject and I didn't know what surgery training was all about. What I imagined myself doing as a surgeon was similar to how schools are shown in Karan Johar movies. Step Two: At the end of the Internship: I worked in ALL the departments for weeks and had gathered some life experience. I was a bit more mature than before. I realized that surgery was not my cup of tea; I don't have the passion needed to sustain a budding surgeon through years of training - working for hours every day in the OR, being available till late for post-op care. I wasn't very sure I had the required nerves for ice cold steadiness in the OR when a patient is bleeding out and the anesthesiologist panics. I was also not enthusiastic about super-specialization and in this day and age, super-specialization after surgery is necessary. Based on my internship experience I changed my preference to Pediatrics. I liked the idea of managing various cases from ALL systems like neuro and cardio and an added bonus was the fact that super-specialization is not essential in Peds. (My HoD actively advised against it!) I love babies and children and thought it'd be cool to interact with them all my life. I was still naive. I didn't understand the difference between loving babies and playing with them and treating sick babies every day. Step Three: At the end of my House-staffship or Preparation year: During my House-staffship in Pediatrics, I realized that seeing sick babies die every day was not my cup of tea. I love seeing them healthy and laughing, and while I do have an excellent bedside manner I am not ruthless enough to do what is needed to save them. My feelings get in the way which makes me a bad pediatrician. I also wanted to get rid of critical patient contact. I was scared of the rising violence against doctors and did not want to put myself in a position where I had to face a mob. This factor in addition to my discovery that I did not possess the constitution for pediatrics made me seek other options. So, I began to look for other subjects. In summary, the criteria that I used to select or reject a subject is: End specialization (3-year course only) Less demanding lifestyle (No inpatient rounds) Little or no emergency This is when I truly began to become attracted to Radiology. I found out that most NEET-PG toppers take radio-diagnosis and I became very curious. I began to understand what this subject was all about and during my preparation for the NEET-PG exam I realized that this subject is a great fit for me. Below I have summarised the factors that most people consider when they think of a future in Radio-diagnosis. Passion/love: This is not a very common reason because most undergraduate doctors don’t know what radiology is and what it entails. Poor exposure in MBBS is the biggest reason behind this. Most of us find out about Radiology in our final years or internship when we start learning about NEET-PG and the top-ranked subjects. Consequently, for most of us, a residency in Radiodiagnosis is like a successful arranged marriage - Love happens, but later! But I’ve still found people who have always loved the idea of Radiology - an opportunity to study ALL the subjects. You can talk to the gynecologists about the staging of cervical cancer and the next second you’re meeting your neurosurgeon friend discussing an MRI brain. You call your ortho colleague and tell him about the possibility of Pellegrini-Stieda disease from an X-ray and then you are doing the USG brain of a baby who’s trying to stuff the probe into his mouth. Who else apart from our pathology colleagues can boast of this vast range of cases that they deal with? The spectrum of your practice is the biggest across all subjects. The idea of specializing used to make me sad because I kind of wanted to be able to work with every type of patient. In hindsight, I have realized that it was a childish thought, but radiology gets me the closest to that idea. Money: It is silly to talk about radiology and not talk about money. Many doctors are attracted to this branch because of the possibility of earning a lot of money. The advantage that radiology offers is quick money more than a lot of money. Radiologists start earning right after their post-grad/MD and have a better salary compared to their colleagues from other disciplines. However, the money reaches a plateau after a few years (again, compared to other doctors). Radiologists earn more on an average but are nowhere near the top earners among doctors - that position has always been occupied by Super-specialised physicians, surgeons, and orthopedics. Of course, converting your practice into a business promises more monetary returns but that applies to every subject. I have talked more about it below. Lifestyle: A vast majority are attracted to this subject because of the easy and flexible lifestyle it offers. You work mostly in air-conditioned rooms, for a fixed amount of time every day with the option to work longer if you want. No emergency on calls (unless you elect to work as an emergency doctor), no ward visits, no 6 hour long procedures, no phone calls from patients at the middle of the night. You also get leave easily. It’s a 9 to 5 job which gives you the thrill of a clinical subject without the demanding lifestyle associated with it. Many doctors who also have other interests in life (like yours truly) want to take up radiology for this reason. Violence or the rather the lack of it: Many doctors nowadays are choosing this branch out of fear. Especially those doctors who aren’t very passionate about a clinical subject - they are the fastest to jump to a subject that has the least patient exposure. Diagnostic radiologists are usually not directly associated with critical care and are never the first contact doctors. Since the patients and their family don’t even know that radiologists exist, they usually don’t blame them for anything. They are thus sheltered from the mob violence which has recently plagued both government and private hospitals frequently. I’d be lying if I didn’t acknowledge the role of this particular reason in my decision. Super-specialization: Radiology is no longer only diagnostic, there’s a booming sub-specialty called Interventional Radiology. These radiologists choose more patient contact, recognition, money and even get the thrill of surgery. This is perfect for those people who want to have slices from both pies. You have easy Mondays where you perform USG examinations and interpret CT scans and then you have awesome Wednesdays where you save a patient by coiling the aneurysm in their head or by embolization of the uterine artery. It’s very exciting! Business/Private centers: I personally do not think many doctors take up this subject with the sole intention of establishing their own centers unless they are a family of radiologists or are super-rich. Mostly because it takes a LOT of capital to do this. Apart from this, you need a huge space and need to employ technicians and other people and all said and done, it takes a level of entrepreneurship that not everyone has. It’s not easy but there are people who consider this aspect of the subject and there are several successfully radiologists who are running their own centers. So, there you have it. The story of how I ended up with radiology! Thanks, Dr. Dev for that awesome post. My reasons for taking up radiology were somewhat similar and I had faced similar dilemmas before taking up radiology. I was always a medicine person a "Harrisons- bhakt!". In the Indian context, it is often difficult to choose what branch we want to specialize as that depends on what rank we get, rather than what branch we like! The system is flawed and there is nothing much we can do about. The number of undergraduate medical seats are increasing while those for post-graduation are limited. There are a few who pursue their dream for the specialty of their choice but there a lot of other factors which decide what branch does medical graduate pursue.
Coming back to my story. I got a good rank and I was confused between medicine and Radiology. The lack of emergency working hours and relatively relaxed lifestyle is what made me think about radiology as a career choice. But as Dr. Dev pointed out we never have the exposure to Radiology during our UG postings so it is difficult to judge how working in Radiology actually feels like. I always advise people to follow what I did. I went to the Radiology department at KEM (where I did my undergraduation) and visited a few private diagnostic centers to observe what radiologists actually do. If that excites you and you can imagine doing that EVERYDAY for the rest of your life, then that's it! You do not need to seek advice from anyone else :). The whole idea of seeking to advise from seniors for post-graduation is flawed as one will always have a preference for his own branch, that is a basic human tendency. Remember what did the senior pursuing medicine say about Radiology? " It is a non-clinical/ para-clinical branch". Is it? I would definitely disagree, as would most radiologists. Radiology is as clinical as you want it to be. As Dr. Dev mentioned, you need to apply clinical features from each specialty to come to the right diagnosis. There is always Interventional Radiology (IR), for those who are inclined towards more patient interaction and surgery. As a Radiologist, you need to be the jack of all trades, and the master of some! The point I would like to stress is that be it any branch, you should always spend some time working in that department to get an idea of what exactly it is about. So is Radiology the best branch? No. It is definitely not. The best branch is the one that you excites YOU the most. Radiology has its own issues. Radiologists definitely earn significantly more when they start their careers, but there is a cap to what they can earn, unlike their surgery and medicine colleagues. There is always the option of starting your own center, but the stringent PC-PNDT rules and large capital required to deter a lot of radiologists from starting their own centers. Also managing a center involves more of management and less of radiology. There is some saturation in metro cities owing to a large number of radiologists moving to settle in these. There are nephrologists, gynecologists and neurosurgeons and cardiologists who want to have a part of the radiology "pie" The advent of teleradiology makes matter worse as the remuneration rates for these are paltry. There is artificial intelligence coming up as well. Some of our colleagues are headed to pursue havens outside India, like the UK / Singapore (via the FRCR) or North America (via Fellowships/ USMLE). So the grass is definitely not green on this side of radiology, I would rather say its "gray" like other things in radiology. Do I repent taking up radiology? Not at all. I love what I do and I am sure most of the radiologists you talk to would agree. To all my radiology friends: Why did YOU take up radiology? Do tell us in the comments section so that medical graduates get more insights into this elusive (still?) branch! And to medical graduates, fresh after securing single/double digit rank in the NEET-PG, welcome to Radiology! Before I end this post, here are more by Dr. Naveen Sharma (theradiologistpage) reasons to take up Radiology! Here is what Dr. Sumer Sethi from DAMS has to say: https://www.youtube.com/watch?v=Uek1gfyEgLQ Here are a few of PG toppers talking about radiology as a career choice: https://www.youtube.com/watch?v=IUBhiQhIbMo Check out a similar post from our friends in the UK: SRT: Why Radiology? Here is what KevinMD says about radiology as a career choice: Kevin MD Why Radiology? Head on to the RadioGyan home page for radiology resources! Image credit: Clip Art by Vector Toons Read the full article
0 notes
Text
Spotters set 40 - Radiology Artifacts

Radiology Artifacts: References and resources for radiology theory/practical exams:
This is a set of 10 radiology artifacts spotters set. These cases are contributed by Dr. M Venkatesh! Here are instructions about radiology cases and spotters: General instructions for spotters Radiology Artifacts are commonly asked in theory exam as a long question. Some viva examiners also like to ask questions about artifacts during practical exams. I am also posting relevant theory resources for various radiology artifacts. Most of the articles are available for free. You can request the ones that are not available or any other article for that matter in our radiology telegram group.
Radiology Artifacts: X-ray / RadioGraphy (Courtesy Dr. Mangal Mahajan):
Definition An unintended, unwanted visual aberration in an x-ray image Types of artifacts Positive density x-ray artifacts. They are DARK marks Generally, they occur in the developer step Negative density x-ray artifacts They are a LIGHT mark They can occur in any step in processing Transmitted x-ray artifacts These marks generally show up best looking through them on a view box Usually occurs in any processing step Reflected x-ray artifacts These are marks that show best by looking at light reflected off of the film Most commonly a washing problem Positive density x-ray artifacts Black Streaks Black Bands Black Spots Watermarks Developer streaks Black Streaks/Black Bands /Black Spots Cause Black streaks sometimes are a result of developer streaks Black bands and streaks are due to exposure of films to light Leak in the cassette If the film packet is kept open in the darkroom and the lights are put on accidentally Black spots could be a result of mottle or due to spillage of the developer on the film Power failure when the film is processed in an auto processor leading to dark wide band formation If these are due to cassette leak then it would appear at the same side of the film Light-exposed films from packet would show this defect mainly at the top of the films Watermarks Caused by water droplets on the film surface Appear-round dark spots of various sizes because of migration of silver particles How to avoid dark spots Improvement in dark room handling will solve the majority of these artifacts However, for mottle, replacement is the only option. Change of cassettes in case they are defective will eliminate this problem Developer streaks These appear as brown or black streaks or clouds appearing on the film Sometimes they can cover the entire film surface Usually not observed in all films in a packet, only some films will show such artifacts They are usually prominent in the white portion (specifically of chest radiographs) of X-ray film Causes Exact cause is not known Failure to agitate the films in the developer Failure to rinse the films adequately Failure to agitate the film when first immersed in the fixer Failure to stir the processing solution thoroughly after replenishment Seen very rarely in automatic processors, which clearly indicates this defect has a relationship to manual processing only Use of ice in developer tank can sometimes give rise to these streaks due to the formation of temperature as well as different concentration zones of developer How to avoid developer streaks Agitate film vigorously in stop bath or rinser for 10 to 15 secs to stop the action of developer completely Change water in stop bath every day. Dilution of high activity developer. Negative density artifacts (white spots) Appearance As diffused white spots (diffused negative kinks are sometimes misinterpreted as white spots) Shiny white spots with black centers Small white spots running parallel from edges of the film (white streaks) Generalized white spots all over the film sometimes alternating with tiny black spots Cause Moisture It is the most common cause of diffused white spots Incidences of such spots may increase during or immediately after monsoon Cassette marks Caused by dust, hair, fragments of paper etc or by screen defects Appear - Corresponding white mark on the radiograph Grid marks This gives rise to thin parallel white lines on the film Cause Using the grid upside down When the grid remains fails to move i.e. remains stationary during film exposure If the grid ratio is too high If the x-ray tube & the film distance is less the grid cut-off will be more Screen marks Any deposit on the surface of intensifying screen like dust particles, fluff, hair, surface scratches etc Image artifact-appears white on the radiograph Photoactivation of interleaving paper This causes Shiny white spots However, they will appear as tiny spots, as compared to dust spots Contamination of the interleaving paper or due to moisture absorption by interleaving paper Causes White Streaks These can be easily identified from the rest of the types of white spots since they would appear at one specific site and one specific dimension on the film Paper mottling artifact During manual loading of the film in the cassette in the darkroom the yellow paper remains along with it (towards the tube side of the cassette) & the film is exposed in this situation Air-bell marks Formation of air bubbles in the developer solution, which prevents the developer from reaching the underlying film Splashing of water drops on the film during manual handling Appear as small clear circular spot on the radiograph Aging of the screen After five years or so, the fluorescent crystals on the intensifying screens begin to lose their ability to fluoresce, leaving small areas of non-exposure (lack of black) which we see as "white" dots diffusely spread over the film. How to avoid Buy new intensifying screens It is possible to put new screens in old cassettes, but it is not recommended Finger marks Handling the surface of the film with fingers especially contaminated by contact of chemicals or metal causes transfer of moisture modifying the action of the developer during processing Manual handling carries the risk of spotting or splashing film surface with developer, fixer or water. Avoided by - Automated film handling How to avoid Proper storage under air-conditioned atmosphere and controlled humidity is the key Regular cleaning of screens will help to remove dust Usually, the inner pouch of films has enough margins to fold it back. A slight effort to fold it back after taking out the film would help minimize entry of moisture to some extent. This can avoid pre-exposure of films also White spots due to screens would appear due to a damaged super coat. In such cases, change of screens will eliminate such defects Transmitted x-ray film artifacts Positive transmitted x-ray film artifacts Pressure marks Static marks Slap lines Crescents Light Fog Pressure marks Occur due to the application of undue pressure to the film emulsion before or during the development Larger usually white marks Pressure damage before the exposure-white mark Pressure damage after exposure-dark mark The magnitude of pressure is also determinative in the appearance of the pressure marks Cause Pressure marks due to improper storage: Stacking of boxes of film on top of one other Pressure mark during developing in an auto processor: Usually, occur during the developer step when the swollen rollers press over the film emulsion too hard Pressure marks during the manufacturing process: Stress suffered by emulsion during film manufacturing How to avoid pressure mark Do not stack the cassettes one above other instead keep them vertical sidewise Check the rollers in the auto processor if they are swollen Static marks Cause Handling of the film by machine or operator produce static electricity during friction between the film & other objects like intensifying screen, loading bench etc that triggers chemical changes in the emulsion mimicking exposure Occur in the following situations - During film manufacture Film transport system of rapid film changes Feed mechanism of the film processors Cassette loading or unloading activities. Synthetic clothing materials like nylon Appearance Tree static Crown static Pin static Crows feet How to avoid static marks Use an antistatic mat, clean cassettes and feed tray with antistatic cleaner Regular cleaning of screens with antistatic screen cleaning solution helps to reduce incidences of branch static Ideally, screens should be cleaned once in 15 days Application of screen cleaner should be carried out as per instructions given on the bottle While cleaning screens, one should never use concentrated 'soap' solution Put a few drops of screen cleaner on a soft cloth (should not be a fibrous cloth), apply evenly on screens, and keep the cassette open for 10 minutes Allow the solution to dry completely and then close the cassette Handle the films gently Loading bench should be grounded to prevent the build-up of static electricity Slap lines Appearance A single dark line appearing at 1-2” from leading or trailing edge of the film (perpendicular to the direction of transport) How to avoid Check guide shoe alignment in developer rack and that the crossovers aren't slowing down the transport Crimp mark / crinkle marks / crescents / nail marks Cause Occurs due to careless handling in the darkroom due to acute bending of the films over the end of the finger especially the larger films Appears Curved black or white lines about 1cm in length How to avoid Proper handling, films should always be held from two diagonally opposite ends to avoid such artifacts Automatic daylight film handling system Fog It is the generalized darkening of the film Types Exposure to light - because Light leakage in the darkroom The safelight contains too large a bulb The safelight housing /filter is cracked The safelight filter series is incorrect Exposure of the film to the safelight is prolonged especially at short distances Light accidentally put on in the darkroom while box is open Leakage in cassette Film box accidentally being kept open Light leakage through pass box Do not allow light until the films have been fixed for at least one minute Exposure to x-rays or radionuclides The film should be shielded from this by sufficient distance & sufficient thickness lead Chemical fog - because Development for a long time Development at high temperature Using oxidized developer (it also stains the film brown) Prolonged or repeated inspection of the films during development Contamination from corroded tanks Age fog - because Outdated films (mottled or uniform fogging) Films stored under high temperatures Films stored under excessive humidity Negative transmitted x-ray film artifacts Pickoff Scratches Blocked screen Pickoff Cause Almost always a guide shoe alignment problem or swollen rollers forcing film into the shoes Appearance Small white specks where the emulsion has been removed on the film Appears anywhere on the film Scratches / Surface damage Cause Usually a guide shoe or loose hardware in one of the racks. May occur in any step of processing Abrasions to the film emulsion due to badly adjusted processor film transport system Appearance Appears parallel to the direction of transport Long parallel lines that may stretch the entire length of the film Pi marks Suggestive of damage produced by one of the transport rollers in the film processor Detected by - view radiograph under reflected and transmitted light, locate any roughness by fingers Reticulation / Frilling Partial or complete detachment of the emulsion from the base exposing the glossy base material due to the adverse processing condition Blocked screen Cause Usually when the radiation strikes the screen in the cassette it glows, exposing the film to blue or green light. A damaged or dirty screen will not glow properly so it is called a blocked screen Appearance Light spots or speckles will be seen on the processed film Reflected x-ray film artifacts Algae Improper washing Algae Appearance Appears as dark random marks on the film May scratch off with your fingernail How to avoid Drain wash tank when not in use Observe regular cleaning intervals using algaecide on the wash rack Clean rack and working tank with a strong bleach solution. Rinse well, rinse more. Adjust water supply so more water circulates through the tank. Use caution not to overflow the wash tank drain. Drain water when not in use Consider photo brome, but be aware this may damage some processors Always consult manufacturer before Improper washing Appearance The film may come out looking quite dirty or even sticky or wet. How to avoid Check that fixer and wash tanks are full of the appropriate fluid Stains They develop after months and years of storage Brown Use of oxidized developer Variegated color pattern Inadequate rinsing Grayish-yellow or brown Excessive fixation or use of exhausted hypo fixer agent which becomes firmly bound to the emulsion so that it cannot be removed, staining the film brown) followed by inadequate washing. Grayish-white scum Incomplete washing Presentation Courtesy Dr A.P. Jaganathan Images and further reading: Pictorial Review of Digital Radiography Artifacts General Radiography Artifacts
Radiology Artifacts: USG (Courtesy Dr. Hemanth)
https://www.youtube.com/watch?v=WrzisTDAZcM Further reading: US Artifacts - RadioGraphics Primer and Clinical Significance of Artifacts in Ultrasound
Radiology Artifacts: Doppler
Doppler has become the mainstay of diagnostic modality in imaging venous system, abdominal, pelvic and in obstetric scanning. Continuous wave Doppler. Pulsed wave Doppler. Colour Doppler. Power Doppler. Doppler Effect: Measures a change in the reflected sound frequency generated by the motion of the source or the detector. Doppler shift: Doppler signal is a shift or difference in frequency between the transmitted and the received ultrasound pulse. It displays the direction and speed of motion of detectors. An accurate signal is achieved when the motion is parallel to the ultrasound beam and no signal is generated when the motion is perpendicular to it. Doppler Shift formula. ΔF= Fr –ft = 2 x Ft x V/C x Cos θ. Fr= Reflected frequency. ft = Transmitted frequency. V= Blood flow velocity. C= Speed of sound in human tissue. θ = Beam Vessel Angle When the beam is angled 90 degrees to the vessel axis the frequency shift equals zero i.e. no signal is detected even if the flow is present. This difference falls in the frequency range detectable by the human ear and after amplification, this Doppler shift is the audible signal. This magnitude of Doppler shift is not only proportional to the frequency of the original signal but is also proportional to. Blood flow velocity Speed of sound in human tissue. Angle of the ultrasound beam relative to the long axis of the vessel. Various technical parameters should be in optimal range to prevent many artifacts in Doppler study. They are 1. Transducer Frequency. For superficial structures, 7-10MHZ is used. For deep abdominal structures – 3MHZ – 5MHZ is optimal. Choice of transducer frequency is paramount because the intensity of the scattered sound varies in proportion to the fourth power of the Doppler frequency. 2. Doppler Angle. Unlike in grayscale ultrasound imaging whereby the best image is obtained perpendicular to the US beam, in Doppler ultrasound, the strongest signals (and best spectra) result when the motion is parallel to the beam. Strongest signals of Doppler results when the motion is parallel to the beam A Doppler angle of 90 degrees does not display flow because no component of the frequency shift is directed back towards the transducer. Ideally, the angle should be 60 degrees and always less than 70 degrees. The larger the angle greater the correction is needed and more prone to errors. 3. Sample Volume. Ideal sample volume should be about two-thirds of the vessel width positioned in the center of the vessel. If the sample volume is more: - Spectral broadening happens (that may be incorrectly interpreted as post-stenotic turbulence). If the sample volume is less: Measured velocity is too low. Definition:-The sample volume is the three-dimensional space from which the Doppler frequency shifts are measured. 4. Wall Filters. Cut off of the low-frequency noises, a cleaner high-velocity blood flow signal is displayed. If it is set too high the blood flow is discarded if set low noise will be more. 5. Doppler Gain. Controls the amplitude of the color display in color or power Doppler mode and the spectral display in pulse Doppler mode. If the gain is too low, the flow may be present but not visualized. If the gain is high color or power signals may overwrite grayscale clot. 6. Velocity scale. Controls the range of frequencies displayed and it is critical in color and spectral Doppler imaging. If the scale is too high (similar to a too wide window in CT) the dynamic range is too large and low-velocity signals are missed simulating an area of thrombosis, particularly in low flow vessels such as the portal vein. If the scale is too low the dynamic range is too small to display the high-velocity signals accurately resulting in aliasing. The above-mentioned parameters are very important for optimal Doppler study. If these are inaccurate artifacts results in Doppler study. These are grouped into three broad categories. 1. Artifacts caused by technical limitations Aliasing. Blooming artifact /color Bleed. Directional ambiguity. Partial volume artifact. The absence of flow due to high-velocity settings. 2. Artifacts caused by Patient Anatomy. Pseudo flow. Flash artifact. Mirror image artifact. 3. Artifacts Caused by Machine Factors Edge artifact---Along cortical bone. Twinkling artifact----Beneath Calculi. Aliasing Artifact. It is an inaccurate display of color or spectral Doppler velocity when the velocity range exceeds the scale available to display it. Nyquist Limit: Accurate depiction of frequency shifts requires a scale that is twice as large as the maximum velocity. If the scale is too small, large shifts exceed the available range and are displayed as multiples of small shifts. Practically, the display “wraps around” the scale and overwrites the existing data. In spectral Doppler flow velocity peak is cut off at the top of the scale and the missing portion is written from the lowest portion of the scale back toward the top. In color Doppler, if the scale is low, aliasing within a vessel is displayed as adjacent colors from red to yellow to light blue to dark blue. Solutions: To reduce aliasing first drop the baseline or increase the available velocity range. If the scale is still inadequate, decrease the Doppler frequency shift by using a lower frequency or by increasing the Doppler angle. Power Doppler has no aliasing because it has no directional or velocity component. Disadvantage:- Disadvantage of aliasing is high velocity may not be accurately measured. Advantage: - 1. Aliasing is useful for localizing the highest velocity region. 2. It is used in identifying the abnormal area in transjugular intrahepatic portosystemic shunt, and in localizing arteriovenous fistulae. 2. Blooming Artifact (Colour Bleed). In this artifact, the color spreads out from within the vessel and bleeds beyond the wall into adjacent areas. It is caused by abnormally high gain settings. This causes the obscuration of thrombus or plaques in the vessel. This is also seen with ultrasound contrast agents and occurs soon after the bolus injection at the time the increase in signal strength is the highest. 3. Directional Ambiguity. Refers to a spectral Doppler tracing in which the waveform is displayed with nearly equal amplitude above and below the baseline in a mirror image pattern. This results when the interrogating beam intercepts the vessel at a 900 angle and is most commonly seen in small vessels, especially those that may be traveling in and out of the imaging plane. This artifact adversely affects transcranial Doppler blood flow velocities. This artifact should not be confused for bidirectional flow where the flow is never simultaneously symmetric above and below the baseline. The flow direction varies within the cardiac cycle. Eg: Blood actually flows in two directions, such as in the neck of pseudoaneurysm. Another type of bidirectional flow occurs in the setting of high resistance organ flow. (Eg torsion, venous thrombosis, or other causes of parenchymal edema) and is represented as diastolic flow reversal. 4. Partial volume artifact. It results from a slice thickness that is not infinitely thin. Echoes and Doppler signal are acquired from the objects that may be partly within the slice and partly outside of it. These signals in the US slice are summed together and the echoes produced are attributed to the structure in the assumed thin scan plane. In color flow imaging e.g. of this artifact is the visualization of a portion of the iliac artery within ovary giving the impression of abnormal cyst wall flow. This artifact is produced by grating lobes or side lobes. These generate information outside the expected path of the main beam. This is a transducer related artifact and depends on the crystal element size and the spacing of the array elements (seen mainly with the high frequency tightly curved, convex, linear arrays used in endocavitary probes.) Echoes returning from either of these additional lobe sources are displayed as though they originated from main beam. 5. Pseudo flow: Is defined as the presence of the flow of a fluid other than blood. It mimics real blood flow with color or power Doppler ultrasound, but no true vessel containing the fluid exists. The signal appears as long as fluid motion continues. These artifacts may be misinterpreted as flow unless Doppler spectral analysis is used. The spectral Doppler tracing does not exhibit a normal arterial or venous waveform. Pseudo flow is seen in ascites, amniotic fluid, and urine (bladder jets) 6. Flash Artifact It is a sudden burst of random color that fills the frame, obscuring the grayscale image. This artifact is caused by object motion or transducer motion. It is seen in the left lobe of the liver due to cardiac pulsation and in hypoechoic areas such as cysts and fluid collections. Flash artifact can be used to denote the fluid nature of solid appearing material. Power Doppler is more susceptible to this artifact because of longer time to build the image. Perivascular artifact or color bruit is a tissue motion artifact where motion is generated within an organ. This appears as a random color mosaic in the soft tissue due to vascular tissue vibration. Useful in detecting anastomotic sites, stenotic arteries or arteriovenous fistulae. 7. Mirror Image artifact : This artifact displays objects on both sides of a strong reflector, though they are located only on one side of it. The reflectors (diaphragm, pleural surface, and aortic wall) directs some of the echoes to a second reflector before it returns them to the transducer resulting multipath reflection. The machine assumes that the echoes comes from the initial transducer beam and from a distance corresponding to the actual time of flight. This results in a display of echoes deeper I the image than they should be. The resulting artifact shows up as the virtual object, deep to the original image but identical to it thus the term mirror. Duplication of subclavian artery (pleura reflector) and common carotid arteries are noted (carotid ghost) 8. Edge Artifact Refers to the Doppler signal generated at the margin of a strong, smooth, specular reflector displayed on imaging as persistent color along the rim of calcified structures, such as gallstones or cortical bone, and may mimic vascularity unless to spectral tracing is obtained (spectral noise). This is caused by low PRF on velocity scale and low wall filter setting. This is more common with power Doppler than with color Doppler ultrasound because of a larger dynamic range. 9. Twinkling artifact It is a mosaic of rapidly changing colors located deep to an echogenic reflector which is granular e.g: Renal Calculi, bladder calcification and cholesterol crystals in the gall bladder. In power Doppler signal location is the same but color is uniform. This is caused by a narrow band of intrinsic machine noise called phase jitter. To produce this artifact high colour write priority should be selected and grayscale gain kept to a minimum. This artifact is useful in identifying the small stones which do not produce acoustic shadowing but shows twinkling artifact. Stones made up of calcium oxalate dihydrate and calcium phosphate calculi produce the twinkling artifact. Calcium oxalate monohydrate and urate lack a twinkling artifact. Foreign bodies like iron filings, emery paper, ground chalk, wire mesh, aneurysm coil produce this artifact. On spectral Doppler, only noise is noted. Guidelines for an optimal color flow Doppler examination. The colour flow box should be kept as small as possible to allow better frame rate for better resolution and sensitivity. Adjust the gain and filter settings to obtain an optimal color signal and minimal color noise. Adjust the velocity scale (PRF) and baseline according to the flow conditions. A low scale is used for low flows and velocities; however, it may produce aliasing. A high scale reduces aliasing but is less sensitive for slow flows. Obtain an optimal Doppler angle by adjusting the beam steering and probe position. The angle should be 600 or less if velocity measurements are to be made. Adjust the pulsed Doppler sample volume size (gait) appropriately (2/3rd of the velocity diameter) to obtain accurate velocities. Avoid transducer motion. https://www.youtube.com/watch?v=cYx4vK_KU30 https://www.youtube.com/watch?v=JRecm5CwT78 https://www.youtube.com/watch?v=qpMZGmGev68 Further reading: Spectral and color Doppler artifacts Doppler Artifacts Doppler Artifacts and Pitfalls
Radiology Artifacts: Computed Tomography (Courtesy Dr. Ameet Mudda)
https://www.youtube.com/watch?v=ZMjhPo8KDTo Further reading: CT artifacts: Causes and reduction techniques Artifacts in CT: Recognition and Avoidance- Radiographics CT artifacts Radiology Physics Common artifacts in computerized tomography: A review
Radiology Artifacts: MRI (Courtesy Dr. Shalini)
https://www.youtube.com/watch?v=x05ZWlzr2no Further reading: An Image-based Approach to Understanding the Physics of MR Artifact MR artifacts
Radiology Artifacts: Mammography
Artifacts in Digital Mammography - AAPM Digital Mammographic Artifacts Quality Assurance in Mammography: Artifact Analysis Here is the list of rest of the radiology cases/spotters: Radiology spotters- RadioGyan.com. More Radiology resources: Radiology resources If you wish to contribute radiology cases/spotters please submit them here. If you have any suggestions/ corrections contact us here If you wish to support RadioGyan.com, you can do that here: Support RadioGyan for Free!. Read the full article
0 notes
Text
Spotters set 38 - Radiology Cases Quiz 2!

Radiology Cases Quiz
What is your diagnosis for the abdominal radiology case?
Check out the link for more cases and answers!
#radiogyan #radiology #imaging #radiologist #radiographer #radreg #CT #MRI #ultrasound #xray #radres #radiologyresident #FOAMed #FOAMrad #advancedimaging #FRCR #FRCRexam #raded #radreg #MedEd Read the full article
0 notes
Text
FRCR 2A notes by Dr Tamer Elhiti

FRCR 2A notes by Dr. Tamer Elhiti
Dr Tamer Elhiti had compiled excellent hand-written notes for the FRCR 2A exam. He has also agreed to share all these FRCR 2A notes with all of us for FREE. He has covered the exam topics under the following headings: Gastrointestinal radiology. Genitourinary system. Cardiovascular and Thoracic CNS and Head & Neck Musculoskeletal Radiology And Trauma Pediatric Radiology General Snippets A few introductory words from him: THE FINAL FRCR COMPLETE REVISION NOTES Dear Radiologists, These notes are the product of around 2 years of hard work. It is divided into 7 hand-written chapters representing the modules of the FRCR 2A SBA. Questions in form of important tips and points collected from the following references in about 600 pages set for the new FRCR2A exam system. 1. All MCQ books of FRCR 2A. 2. SBAs apple store application by British Institute of Radiology. 3. Crack the FRCR 2A books. 4. MCQonline.com. 5. EDIR Notebook for European Diploma. These notes are an excellent reference for FRCR 2A, Prometric and MD module exams. Other helpful sources if you have time: Learning Radiology. Radiology assistant. Here is the folder with all his FRCR 2A notes. Feel free to download and share these with your friends. You can also refer to our guide for the FRCR exam. More FREE exam related resources like books, PPTs can be found here: Radiology Exam Resources! You can request additional notes/resources/books on our telegram group Here are the complete notes. The folder will be available for view/download once you share the page on either of the social network. Here is a list of recommended books for the FRCR exam Part 1 . Part 2A : and . , a is available. Part 2B – MUST READ for Rapid reporting. . . Check out rest of the recommended radiology books here : Recommended Radiology Books More Radiology resources Radiology resources - RadioGyan.com Normal Imaging Anatomy modules.: Learn and revise imaging anatomy. Links are divided by anatomy and modality. Cases: Radiology cases with important diagnostic points. Videos: Radiology videos from other websites with important teaching points highlighted. Spotters: Sets of 10 radiology spotters, one minute for each spotter. Articles: Descriptive articles on common imaging topics, including Journal club. Guide for first-year radiology residents. Guide for final year radiology residents. Guide to the FRCR exam Compilation of Radiology Practical Exam Questions. Radiology Exam Resources Software: Links to common radiology software. Recommended Books for Radiology Residents. Radiology Conferences: Updates about upcoming radiology conferences and CMEs. If you wish to contribute radiology cases/spotters please submit them here. If you have any suggestions/ corrections contact us here If you wish to support RadioGyan.com, you can do that here: Support RadioGyan for Free!. Read the full article
0 notes
Text
Radiology Case: Lithium Nephropathy


Coronal and Axial CT images from a patient on long term Lithium therapy show innumerable micro cysts randomly distributed in both kidneys.
Lithium Nephropathy / Lithium induced renal disease
Radiology features Multiple innumerable micro cysts randomly distributed in BOTH cortex and medulla or predominantly cortex are characteristic radiology findings in cases of lithium induced renal disease/lithium nephropathy. Cysts are usually 1-2mm in diameter. Cysts arise from distal tubular structures and collecting ducts. Best seen on T2W MRI images.

T2W MRI images in another patient shows tiny subcentimeter sized in both kidneys. Cysts can also bee seen on USG : Lithium nephropathy sonographic findings Differentials diagnosis with imaging features: Autosomal polycystic kidney (ADPKD) Nephromegaly with large cysts. Cysts are often of varying sizes and few of them are complicated. Glomerulocystic kidney disease: Patients are usually children or young adult. Cysts arise from Bowman space so ONLY in CORTEX of the kidney. Medullary cystic kidney disease: Cysts are present in the medulla and corticomedullary junction but spare the cortex. Acquired cystic kidney disease Seen in patients on long term dialysis. Cysts are NOT uniform in size although they affect both cortex and medulla. Clinical features and pathology of lithium nephropathy: Lithium is used to treat unipolar major depression and bipolar affective disorders. Lithium toxicity spectrum includes: Acute intoxication. Nephrogenic diabetes insipidus / Polyuria-polydypsia syndrome: Harmless and reversible. Chronic renal disease (10-20 years): Chronic focal interstitial nephritis Approx. 30-60% patients on long term lithium therapy can have cysts. Patients with chronic interstitial nephritis and typical cysts are at risk of developing end-stage renal disease. References: RadCases Lithium-induced Nephropathy Radiology Chronic Lithium Nephropathy: MR Imaging for Diagnosis Lithium Nephropathy USG More than 400 interesting Radiology Cases: Radiology Spotters Cases More radiology resources at RadioGyan.com! @import url(https://radiogyan.com/wp-content/plugins/siteorigin-panels/css/front-flex.min.css); #pgc-2673-0-0 { width:100%;width:calc(100% - ( 0 * 30px ) ) } #pl-2673 #panel-2673-0-0-0 { } #pl-2673 .so-panel { margin-bottom:10px } #pl-2673 .so-panel:last-child { margin-bottom:0px } @media (max-width:780px){ #pg-2673-0.panel-no-style, #pg-2673-0.panel-has-style > .panel-row-style { -webkit-flex-direction:column;-ms-flex-direction:column;flex-direction:column } #pg-2673-0 .panel-grid-cell { margin-right:0 } #pg-2673-0 .panel-grid-cell { width:100% } #pl-2673 .panel-grid-cell { padding:0 } #pl-2673 .panel-grid .panel-grid-cell-empty { display:none } #pl-2673 .panel-grid .panel-grid-cell-mobile-last { margin-bottom:0px } } Read the full article
0 notes
Text
Spotters set 37 - Aunt Minnie Radiology Cases!

Aunt Minnie Radiology Cases
This is a set of 10 classic Aunt Minnie Radiology Cases. These cases are contributed by Dr. Anwar Adil! Dr. Adil sir has an excellent collection of classic Aunt Minnie conventional radiology cases and we are glad that he has contributed to RadioGyan! If you want more such cases from him, you can request in the comment section. At 20-30 percent of the radiology practical exam is focussed on chest radiology. is a good book for more such classic radiology cases. Here are instructions about radiology cases and spotters: General instructions for spotters Here is the list of rest of the radiology cases/spotters: Radiology spotters- RadioGyan.com. More Radiology resources Radiology resources - RadioGyan.com Normal Imaging Anatomy modules.: Learn and revise imaging anatomy. Links are divided by anatomy and modality. Cases: Radiology cases with important diagnostic points. Videos: Radiology videos from other websites with important teaching points highlighted. Spotters: Sets of 10 radiology spotters, one minute for each spotter. Articles: Descriptive articles on common imaging topics, including Journal club. Guide for first-year radiology residents. Guide for final year radiology residents. Guide to the FRCR exam Compilation of Radiology Practical Exam Questions. Radiology Exam Resources Software: Links to common radiology software. Recommended Books for Radiology Residents. Radiology Conferences: Updates about upcoming radiology conferences and CMEs. If you wish to contribute radiology cases/spotters please submit them here. If you have any suggestions/ corrections contact us here If you wish to support RadioGyan.com, you can do that here: . Read the full article
0 notes
Text
Radiology Practical Exams Questions compilation for MD/DNB/DMRD !

MD/DNB/DMRD Radiology Practical Exams Questions compilation!
Radiology Practical exams can be tricky, especially for DNB candidates. DNB candidates are usually allocated centers other than their own college/hospital. These can be conducted anywhere in India and the difficulty level depends on each center and the examiners that are going to conduct the exams. The examination system, in general, is flawed as it is not ideal to judge someone's radiology knowledge on the basis of his or her performance on one day. A candidate can be sincere all throughout his residency and one bad day can cost him 6 months or one year, which is not fair. To add to the misery the examiners can at times be strict which makes things worse. Passing rates at a few centers and for particular examiners can be abysmal. The system has been criticized in the national radiology journal, IJRI by prominent radiologist Dr. Bhavin Jhankaria in his article titled: "Why examiners should not forget to be decent human beings" and the reply to the above article titled: "Non-destructive testing in DNB/MD examination". All said and done, the chances of this improving in the near future are bleak. So to help residents we are trying to collect commonly asked questions in MD/ DNB / DMRD radiology/ radiodiagnosis exams. The list is compiled using responses of candidates from this form. It includes spotters, cases and viva questions. You can also refer to this post for final year residents for more exam related resources. Downloadable resources for radiology exam are available on this page: Radiology Exam Resources I request all residents who have cleared their exams to fill up this form. This will not take even a couple of minutes and the database we create can be useful for all future residents. For current residents, I would urge them to request their seniors to fill up the form. We have kept the form anonymous so that people can give their frank opinion. Also, there is no moderation of the form so kindly use this only for your reference. This list is no way exhaustive. The goal of this post is also not creating a bad impression about particular centers as it is a very subjective criterion. A particular center can be tough for someone on a particular day but to someone else, it can be easy. Although the sheet is compiled using experiences of Indian candidates at their radiodiagnosis practical exams, a few of the cases and questions are common for North American (US/ Canada) board review exams/ FRCR exam. The google sheet is best viewed on a desktop browser! You can view/share the sheet in full screen mode from here as well: Radiology Practical exams Questions. Here is the Google form for the sheet: Loading... Best of luck for your radiology practical exams! May the force be with you! More Radiology resources Radiology resources - RadioGyan.com Normal Imaging Anatomy modules.: Learn and revise imaging anatomy. Links are divided by anatomy and modality. Cases: Radiology cases with important diagnostic points. Videos: Radiology videos from other websites with important teaching points highlighted. Spotters: Sets of 10 radiology spotters, one minute for each spotter. Articles: Descriptive articles on common imaging topics, including Journal club. Guide for first-year radiology residents. Guide for final year radiology residents. Guide to the FRCR exam Software: Links to common radiology software. Recommended Books for Radiology Residents. Radiology Conferences: Updates about upcoming radiology conferences and CMEs. Image Courtesy: https://health.mil Read the full article
0 notes
Text
Spotters set 34 - Radiology Cases Quiz

Radiology Cases Quiz
This is a radiology quiz consisting of 10 classic Radiology Cases. These cases are contributed by Dr. M Venkatesh! Most of the cases are straightforward while few are difficult. Here are instructions about radiology cases and spotters: General instructions for spotters Here is the list of rest of the radiology cases/spotters: Radiology spotters- RadioGyan.com. More Radiology resources Radiology resources - RadioGyan.com Normal Imaging Anatomy modules.: Learn and revise imaging anatomy. Links are divided by anatomy and modality. Cases: Radiology cases with important diagnostic points. Videos: Radiology videos from other websites with important teaching points highlighted. Spotters: Sets of 10 radiology spotters, one minute for each spotter. Articles: Descriptive articles on common imaging topics, including Journal club. Guide for first-year radiology residents. Guide for final year radiology residents. Guide to the FRCR exam Software: Links to common radiology software. Recommended Books for Radiology Residents. Radiology Conferences: Updates about upcoming radiology conferences and CMEs. If you wish to contribute radiology cases/spotters please submit them here. If you have any suggestions/ corrections contact us here If you wish to support RadioGyan.com, you can do that here: Support RadioGyan for Free!. Read the full article
0 notes
Text
Interventional radiology wires and catheters!

Interventional radiology wires and catheters
This is a set of commonly used Interventional radiology wires and catheters. These instruments are contributed by Dr. Saurabh Joshi! These interventional radiology wires and catheters are often asked in the practical exams as table viva. Most of the radiology institutes do not have an interventional radiology (IR) suite, hence this is a good primer for them. You can also browse this RadioGraphics presentation on interventional radiology wires and catheters. Also, watch this YouTube playlist for Interventional Radiology spotters and table viva questions: Radiology Practical exam Videos We are preparing a blog on the basics of interventional radiology (IR) so that residents are aware of it before they chose it as a career option. Do take out some time and fill this questionnaire so that we know what are your queries and that will help make the blog better. Do share it with your radiology colleagues and friends so that we are able to answer maximum queries. Here is the questionnaire : Loading... Here are instructions about radiology cases and spotters: General instructions for spotters Here is the list of rest of the radiology cases/spotters: Radiology spotters- RadioGyan.com. More Radiology resources Radiology resources - RadioGyan.com Normal Imaging Anatomy modules.: Learn and revise imaging anatomy. Links are divided by anatomy and modality. Cases: Radiology cases with important diagnostic points. Videos: Radiology videos from other websites with important teaching points highlighted. Spotters: Sets of 10 radiology spotters, one minute for each spotter. Articles: Descriptive articles on common imaging topics, including Journal club. Guide for first-year radiology residents. Guide for final year radiology residents. Guide to the FRCR exam Software: Links to common radiology software. Recommended Books for Radiology Residents. Radiology Conferences: Updates about upcoming radiology conferences and CMEs. If you wish to contribute radiology cases/spotters please submit them here. If you have any suggestions/ corrections contact us here If you wish to support RadioGyan.com, you can do that here: Support RadioGyan for Free!. Note: The images used here are for learning purposes and the original trademark and copyright are with the manufacturers. If there are any issues regarding the images you can notify us here and we shall replace them. Read the full article
0 notes
Text
Spotters set 36 - Normal anatomy variants radiology

Normal anatomy variants radiology
This is a set consisting of 10 common normal anatomy variants radiology Cases. These cases are contributed by Dr. M Venkatesh! You will often encounter a lot of normal variants during routine reporting. It is important to be aware of these as one can erroneously report them as a pathology which will not only lead to unnecessary investigations and but also anxiety for the patients. You can compare these cases with normal anatomy modules which we have compiled. These are very important from the FRCR point of view as well. You can go through a few more anatomical variants here: Normal anatomy variants radiology. Here are instructions about radiology cases and spotters: General instructions for spotters Here is the list of rest of the radiology cases/spotters: Radiology spotters- RadioGyan.com. More Radiology resources: Radiology resources - RadioGyan.com Normal Imaging Anatomy modules: Learn and revise imaging anatomy. Links are divided by anatomy and modality. Cases: Radiology cases with important diagnostic points. Videos: Radiology videos from other websites with important teaching points highlighted. Spotters: Sets of 10 radiology spotters, one minute for each spotter. Articles: Descriptive articles on common imaging topics, including Journal club. Guide for first-year radiology residents. Guide for final year radiology residents. Guide to the FRCR exam Software: Links to common radiology software. Recommended Books for Radiology Residents. Radiology Conferences: Updates about upcoming radiology conferences and CMEs. If you wish to contribute radiology cases/spotters please submit them here. If you have any suggestions/ corrections contact us here If you wish to support RadioGyan.com, you can do that here: Support RadioGyan for Free!. Read the full article
1 note
·
View note