
We only have one mission and that is to make great plant containers. We strive to take care of our customers like they are family. That’s what we do. That’s all we do. We’re very happy and grateful to be doing this. We’re happy to answer any questions you may have and welcome any comments or suggestions.
Don't wanna be here? Send us removal request.
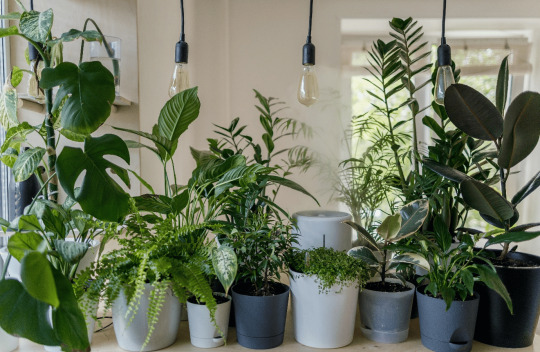
Statistics
We looked inside some of the posts by releasepots and here's what we found interesting.
Average Info
Notes Per Post
1
Likes Per Post
1
Reblog Per Post
0
Reply Per Post
0
Time Between Posts
7 days
Number of Posts By Type
Photo
1
Text
10
Last Seen Tumblr Blogs


Fun Fact
There are dozens of funny blogs to kill time on Tumblr.
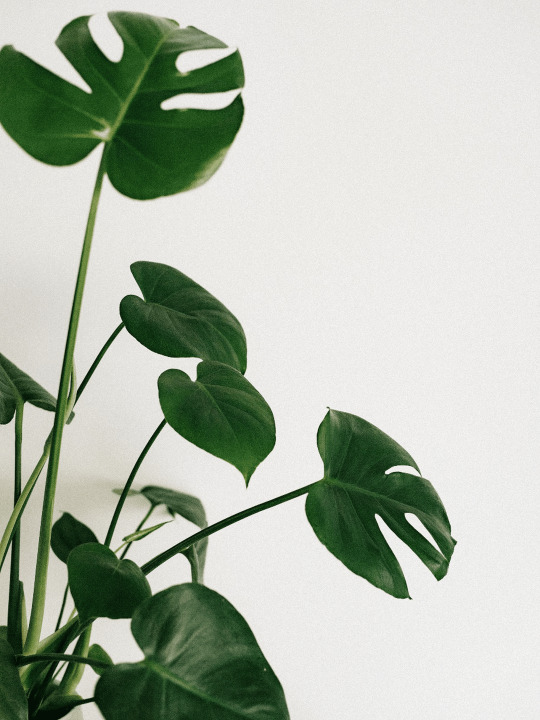
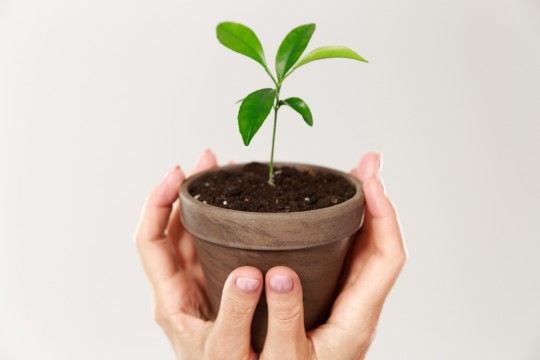
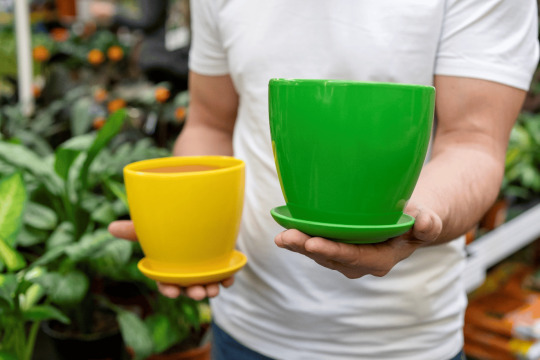
Photo
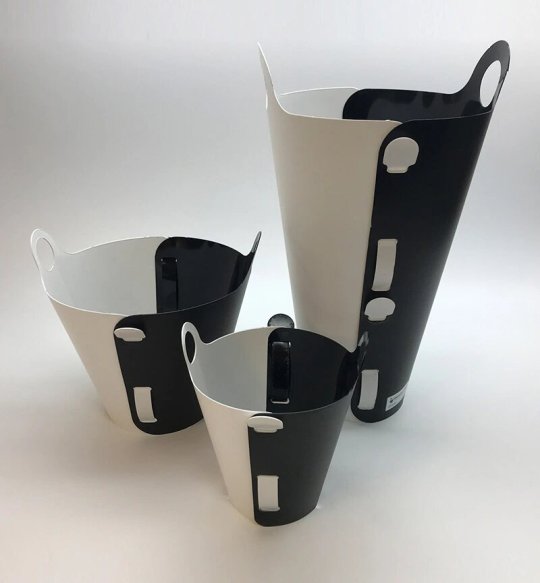
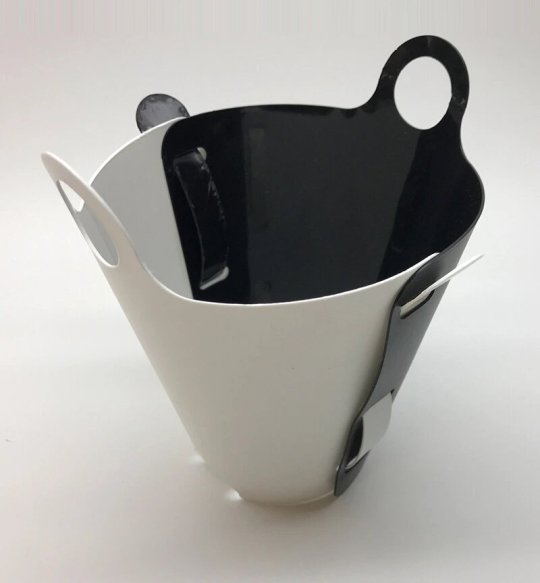

ReleasePots
The only reusable potting system that easily releases the root ball first time, every time. ReleasePots are made in the USA with recycled materials and are 100% recyclable. Release pots are available in 3 stock sizes and 2 stock color combinations. Multi packs include 1 of each size. Other sizes and colors available for custom orders. Visit our website to place an order at https://releasepots.com/product/releasepots/
0 notes
Text
A Guide to Using Slow-Release Fertilizers for Potted Plants
Slow-release fertilizer for potted plants releases nutrients into the soil gradually. It allows the plant to take up the nutrients when needed. This article highlights all you need to know about slow-release fertilizers.
What is a slow-release fertilizer?
Slow-release fertilizers gradually provide plants with necessary nutrients over an extended period. They can be organic or synthetic and are designed to release nutrients steadily.
Most slow-release fertilizers have a plastic resin or sulfur-based polymer coating, which breaks down under exposure to sunlight, heat, or water.
Quick-release fertilizers can cause damage to plants if not used properly, as they can be over-applied or not diluted correctly, resulting in “fertilizer burn.” Rain or watering can easily wash them out of the soil.
On the other hand, slow-release fertilizers reduce the risk of burning and stay in the soil for longer, providing a more consistent and steady supply of nutrients to plants.
Factors to consider when choosing slow-release fertilizer for your potted plants
Nutrient content
Ensure the fertilizer contains the nutrients for your plants, such as nitrogen, phosphorus, and potassium.
Release rate
Look for a fertilizer that releases nutrients at a consistent rate over some time. Most slow-release fertilizers are labeled with a percentage of the total nutrients immediately available, and the rest will be released over time.
Type of fertilizer
Slow-release fertilizers can come in different forms, such as granular, powdered or liquid. The form you choose will depend on your application method.
Plant type
Not all fertilizers are suitable for all plants, so choose a fertilizer appropriate for your growing plants.
Synthetic or organic
Slow-release fertilizers can either be organic or synthetic. While organic fertilizers are made from natural materials, synthetic fertilizers are chemical-based. Consider your preference and what best suits your garden needs.
Organic fertilizers

Organic fertilizers comprise manure and compost. They also have products derived from animals, such as feather meals, bone meals, and blood meals. They break down gradually, allowing the plant to absorb the nutrients.
Pelletized coated fertilizers
Another common type of slow-release fertilizer for potted plants is pelletized coated fertilizer. They have a plastic shell or sulfur-coated urea that breaks down over time, releasing nutrients into the soil.
Environmental impact
Some fertilizers may contain ingredients that are harmful to the environment. Consider the impact of the fertilizer on the environment before making your final decision.
Types of slow-release fertilizer
There are several slow-release fertilizers, among them:
Controlled-release fertilizers
CRF, or controlled-release fertilizers, use a built-in mechanism to slowly-release nutrients over time rather than relying on environmental factors in the soil. It makes them a useful option for people who need to provide their plants with a steady food supply over a specific period.
Liquid fertilizer
Although not as widely used as fast-release liquid fertilizer, water-soluble slow-release nitrogen fertilizer is an option for those looking for a more gradual release of nutrients. These liquid formulations release nutrients at a slower rate than typical water-based fertilizers.
Granular fertilizer
Granular fertilizer is a type of water-insoluble fertilizer that is available as granules or pellets. It releases nutrients slowly over time. The solid structure of the granules or pellets helps prevent leaching, which is the loss of fertilizer because of runoff during watering or rain, by keeping them in the soil.
Common nutrients in best fertilizers for potted plants
Magnesium
Supplementing your plants with magnesium can improve the chlorophyll in their health. This mineral helps in the photosynthesis process.
Calcium
Calcium helps plants grow strong and durable leaves, fruits, and flowers. Although it is not a primary ingredient in most fertilizers, it is often included in fertilizer mixtures.
Nitrogen
Nitrogen is one of the most commonly used fertilizer ingredients, coming in different forms, such as ammonium nitrate and methylene urea. Nitrogen is essential for the growth and health of plants.
Potassium
Potassium and potash, rich in potassium, can help plants resist pests and diseases. A proper level of potassium in fertilizer can improve the longevity of plants.
Phosphorus
Phosphorus is a vital plant mineral. It aids the potted plant at every phase of its life, from seed, germination, root formation, and gradual growth.
Tips for applying slow-release fertilizer for potted plants
Consider the type of potted plant
First, you should consider the plant you are applying the fertilizer on. For example, avoid using lawn fertilizer on a hydrangeas and rhododendrons flower bed. As such, you should seek fertilizer suited for the specific plant.
Test your soil

You can use an at-home testing kit to determine the nutrient content of your soil or send a sample to the agricultural department of a local university for testing. Review the results to find out if the soil naturally has high nitrogen, phosphorus, or potassium levels.
If the potting mix is high in a specific nutrient, you shouldn’t use fertilizer containing the nutrient. You can buy a test kit from your local store.
Choose organic fertilizer as it is eco-friendly
Choose slow-release fertilizers made with plant, animal, and mineral ingredients. For an environmentally friendly option, consider fertilizers that include fish emulsion and blood meal. And since it comes in water-insoluble pellets, they won’t dissolve when they come in contact with water.
Synthetic fertilizers are chemical-based and may include urea and ammonium nitrate. They work more quickly than organic fertilizers but also have a higher risk of causing damage to plants and vegetation. If possible, avoid them.
Select a well-balanced fertilizer
Look for a label on the fertilizer bag displaying three numbers separated by dashes. These show the fertilizer formula’s proportion of nitrogen, phosphorus, and potassium. Generally, most slow-release fertilizers for potted plants have the standard 3-1-2 ratio. Where possible, look for a fertilizer intended for the specific potted plant.
Choose the right longevity
Before buying a fertilizer, check the label to see the product’s duration to provide nutrients to your potted plant. Choose between 3-to4-month and 5-to-6-month fertilizers, depending on the type of the plant. Research shows that slow-release fertilizer can take up to 18 months to release all nutrients.
What are the benefits of using slow-release fertilizer?
You save money: Slow-release fertilizer for potted plants saves money and allows you to provide nutrients for up to three seasons.
Save time:Unlike liquid fertilizers that need frequent feeding, mixing, and buffering, slow-release fertilizer saves the grower’s time.
Save labor:You need little effort to apply slow-release fertilizers.
Reduced burn risk: Slow-release fertilizers are less likely to cause “fertilizer burn” (damage to plants caused by over-fertilization) than quick-release fertilizers.
Efficient release of nutrients: Slow-release fertilizers release nutrients over an extended period, allowing plants to take up nutrients as needed. This reduces the risk of nutrient loss through leaching or volatilization.
What are the signs of over-fertilization in potted plants?
Here are the most common signs of over-fertilization.
Fertilizer crust: It shows that the plant is not taking in the minerals, and they are accumulating on the surface of the soil.
Yellow, wilting leaves:Over-watering or inadequate light can also cause it, so it’s important to experiment and figure out the root cause.
Brown leaf tips:They suggest that the plant is not effectively taking in water, a sign of excessive fertilization.
Blackened roots:It is a sign of “fertilizer burning.”
Defoliation:Observe for leaves dropping off. It can also result from inadequate watering, so it is important to consider that.
Stunted growth: Plants require a proper proportion of nutrients to support their growth and metabolism. If there is no improvement, likely, the nutrients are not in balance.
How to cure an over-fertilized plant
Remove excess fertilizer
Removing the fertilizer on the plant or topsoil will stop further over-fertilization if you can see the fertilizer on the plant or topsoil. In addition, if the fertilizer salts have formed a crust (usually white), it also needs to be removed.
Leach the soil
Leaching helps move the plant fertilizer from the plant’s root system. It helps prevent further overfertilization, permitting the roots to heal. If possible, use distilled water.
Allow the water to drain
Allow the water to drain out the bottom. Repeat the process four times for optimal results to ensure excess fertilizer is washed away through the drainage holes.
Remove damaged foliage
Use a pair of scissors to cut off damaged leaves. It helps with the plant’s future health and prevents the accumulation of pests.
Repot
If possible, repot your plant after leaching soil in the old container. Repotting will help the roots heal, allowing the plant to rejuvenate.
Conclusion
Slow-release fertilizers for potted plants are no doubt better than conventional ones. They allow the plant to absorb the nutrient gradually while saving you time, labor, and time. Choose the right plant fertilizer based on the type of potted plant.
Original Source: https://releasepots.com/blog/a-guide-to-using-slow-release-fertilizers-for-potted-plants/
0 notes
Text
How To Naturally Get Rid Of Ants In Potted Plants

If you don’t know how to get rid of ants in potted plants, this article will share with you several natural remedies. The best part? They will not kill your potted plant and are safe around pets and humans. But why do ants’ nest in your potted plants? Here are some of the reasons.
Why do ants nest in potted plants?
Contrary to popular belief, ants do not nest in potted plants to eat or destroy them. However, there are several reasons why ants will invade your potted plant. Let’s look at them.
Potted plants provide a safe resting place
Potted plants provide ants with a safe place to rest and do their business. It is especially the case with plants perched off the ground. The ants are safe from predators and other elements. Potted plants also provide shelter, especially in bad weather. The leaves of the plant can offer protection from rain and sun rays.
Besides, since the roots of the plant are anchored in place, they provide a hiding place from floods or other natural calamities. Also, potted plants are warmer than the ground, making them an ideal spot during cold weather. Likewise, they provide much-needed relief during hot days.
Potted plants are a source of food
Ants are attracted to potted plants since they provide a source of tasty food. It is because they provide sugar-rich fruits or honeydew secretions, which ants enjoy feeding on. Organic waste in the potting soil is another attraction aspect. The organic matter is rich in nutrients which ants use to raise their young ones.
Besides, ants are an indication of underlying problems such as pest infestation. For example, ants like feeding on mealybugs and aphids. To prevent ants from nesting in potted plants, ensure to get rid of aphids and mealybugs. In addition, you can remove flowers, buds, and mature fruits to reduce their numbers.
Potting soil provides an ideal environment for raising the young
Like other organisms, ants like growing their young ones in suitable habitats and potting soil is a perfect spot. The soil is loose and easy to dig and offers ample warmth. The warmth helps to incubate the ant eggs.
Another reason why ants love potted plants is that the soil becomes hydrophobic. Hydrophobic soil stays dry because the water does not run into the soil. When you water the plant, the water collects at the top and drains quickly. It, therefore, offers the ants an ideal spot to create an ant colony.
Ants love the scent of potted plants
Potted plants produce a strong scent that is attractive to ants. The potting mix can also have such a smell due to its organic material composition.
They use the scent to protect themselves from predators since it can mask their smell. Besides, the potted plant scent can attract more ants, facilitating the creation of a large ant colony.
Natural ways to get rid of ants in potted plants
Use baking powder
You can use baking powder, sugar, and oil to eradicate the ants. Baking powder harms ants since it tends to interfere with their digestive system. Eventually, the ant will explode, leading to ultimate death. You should spread the mixture at all common entry points for optimal results.
Use vinegar
Vinegar is yet another effective natural method to get rid of ants. Mix equal amounts of vinegar and water. You can use apple cider or white vinegar. Next, spray the mixture on the ant hills and other areas where they tend to populate.
You can also spray on common entry points, such as crevices near the potted plant. The vinegar’s strong scent repels the ants, keeping the potted plant ants free.
Use essential oils
You can also use various essential oils to get rid of ants. Cinnamon oil, lemongrass oil, and citronella oil are the most effective. Peppermint is also a recommendation. Mix a few drops of the essential oil with water and spray it around the planter. The strong scent will help repel the ants. You can dip a cloth or a cotton ball in the mixture and place it near the ant trail.
Soak the soil
If the ant colony is large, you can consider soaking the soil. The water will drown the existing ants and discourage others from nesting in it. To get rid of the ants, fill a large container with water and place the infected planter in the container for at least half an hour before draining it. Repeat the process daily until all the ants are gone.
Use an ant bait
Ensure to buy natural bait since inorganic baits harm humans and pets. To eradicate the ants, place the bait where they can access it. Its scent and sugary taste will force them to carry it in their nest. Unfortunately, the chemical compound will eradicate the entire colony once they feed on it. Natural ant baits are safe around humans and pets and are, in fact, one of the best ways to get rid of ants.
Use lemon juice
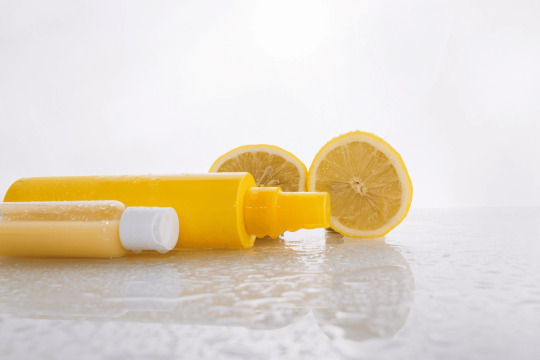
Lemon juice is one of the most effective and cost-effective ways to eliminate ants. Spray it on the ant hills and common entry areas. The citrusy scent will deter them from accessing the potted plant. Besides, the scent masks the natural scent they use to follow their trail.
Use diatomaceous earth powder
Using diatomaceous earth powder can also help keep ants off your potted plant. It is a compound made of the fossilized remains of algae. It works by interfering with the ant’s exoskeleton. Ideally, it cuts through the exoskeleton, dehydrates, then kills the insect. Sprinkle the powder around the base of the pant and on the ant hills.
Replace the soil
Replacing the soil is arguably the easiest way to get rid of ants. And the process is straightforward. Just replace the old potting mix with the new one. Also, ensure to clean the pot thoroughly. It will help remove any trails or nests that may be in the old soil. The new soil will also discourage other ants from nesting. Ensure to observe proper disposal so that the ants may not return.
How to prevent ants from nesting in potted plants
Now that you know how to get rid of ants, let’s see how you can prevent them from nesting in potted plants.
Inspect your potted plants regularly, checking for any ant signs. If any, ensure to remove them promptly. You should also look out for other bugs that attract ants,such as aphids.
Place a baiting product near the pot to lure the ants away. You can use a commercial option,or you can opt for a homemade version.
Avoid placing sugary substances near the pot since ants are attracted to sugary products.
Keep the planter clean and free from substances that can offer a hiding place for ants. If possible, avoid using excess organic materials to supplement the plant.
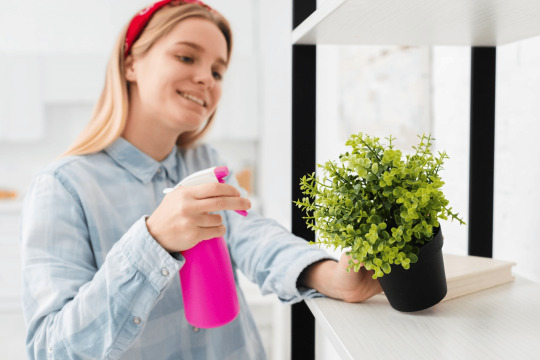
Keep your plant clean by spraying them with clean water at least once a week,depending on how clean or dusty the air is.
Problems associated with ants in potted plants
Ants may harm plant roots

One of the chief problems with ants in potted plants is that they destroy a plant’s root system. They tend to build their nest around them for added protection. It can cause the plant to suffer from stunted growth or wither away.
Ants may protect harmful pests
Ants feed on the honeydew that pests such as whiteflies and aphids produce. As such, they will ensure a robust supply of the sweet product by farming such pests. As a result, they will protect them against their natural predators, such as hoverflies and ladybirds.
As the number of aphids and whiteflies grows, they will suck the sap out of the potted plant, causing a deficiency in nutrients. Eventually, your potted plant could die.
Ants attack beneficial insects
Ants tend to attack insects that feed on pests. It is not uncommon for them to attack pollinators such as bees and pest predators such as ladybirds. As such, you must get rid of the ants before they cause more damage.
Conclusion
As you can see, ants can be a nuisance if not controlled. They can cause your potted plant to suffer from stunted growth or die. Now that you know how to get rid of ants in potted plants, you can protect your plants from ultimate death.
FAQ
What kills ants but won’t kill my plant?
Citrus oil in lemon and orange is harmful to ants but not to your plant. Essential oils do not harm the plant too.
Why are my plants covered in ants?
Well, it indicates your plants are infested with honeydew, excreting pests such as aphids and whiteflies. As such, ants will protect the pests producing the sugary substance, hence the overcrowding.
Do ants eat plant roots?
No, ants do not eat the roots of a plant. However, they can cause damage since they excavate the soil around them. It makes the roots susceptible to pests, diseases and drying out.
Original Source: https://releasepots.com/blog/how-to-naturally-get-rid-of-ants-in-potted-plants/
0 notes
Text
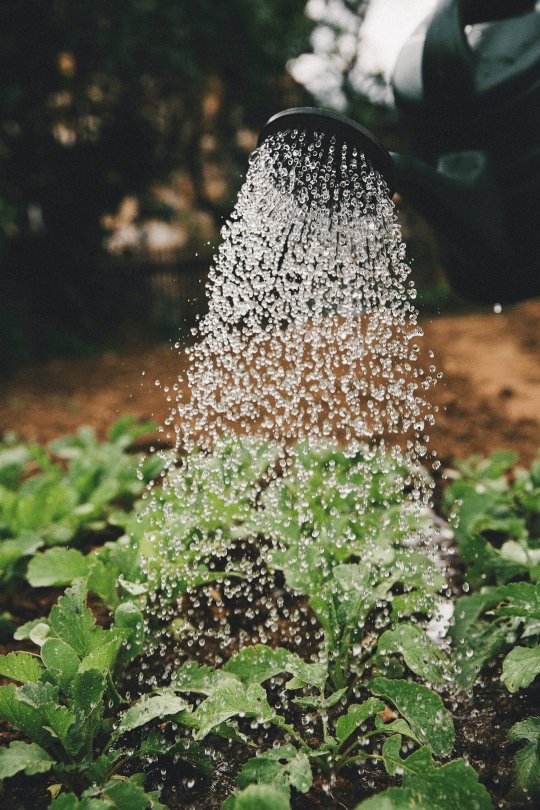
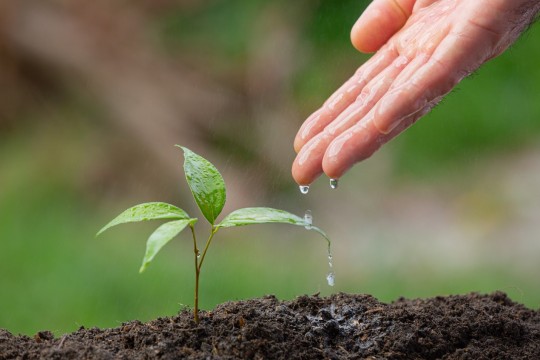
How Often Should You Water Plants & Flowers in Pots?
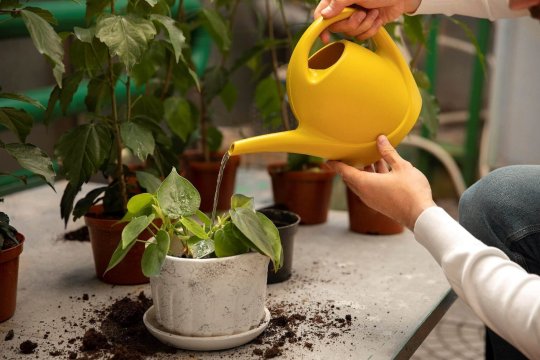
Watering potted plants and flowers is a crucial part of plant care, but it can be difficult to know exactly how often to water. Overwatering can lead to root rot and other problems, while under watering can cause plants to wilt and die. So how often to water pot plants?
In this article, we’ll explore the factors that influence how often you should water potted plants and flowers, and provide some general guidelines to help you keep your plants healthy and thriving.
How often should you water your potted plants?
The frequency of watering potted plants depends on a number of factors, including the size and type of the plant, the size and type of the pot. Here are some general guidelines for watering potted plants:
Water small plants (such as herbs and succulents) more frequently than larger plants, as they have smaller root systems and dry out faster.
You should water plants in clay pots more frequently than those in plastic pots, as clay pots tend to dry out faster.
Water plants in well-draining soil more frequently than those in soil that retains moisture, as the latter can stay too wet and lead to root rot.
Those in dry environments should be watered more frequently than those in cooler, more humid environments.
Finally, water plants that are actively growing more frequently than those that are dormant.
One way to determine when to water your plants is to check the moisture level of the soil. Stick your finger about an inch into the soil. If it feels dry, it’s time to water. If it feels moist, wait a few more days before watering.
Watering techniques for potted plants

There are several watering techniques that can be used for potted plants, depending on the size, type of the plant and the soil. They include the following:
Top watering
This is the most common method of watering potted plants. To top water, simply fill the pot with water until it begins to drain from the bottom. This method is easy and convenient, but it may not be as effective at reaching the roots of the plant, especially if the pot is large or the soil is dry and compacted.
Bottom watering
In this method, fill a tray or saucer with water and place the potted plant in it. The plant will absorb water through the holes in the bottom of the pot. This method is more effective at reaching the roots of the plant, but it’s important to make sure the pot is not left standing in water for too long, as this can lead to root rot.
Drip watering
With drip watering, a hose or watering can with a long spout is used to slowly and evenly water the soil around the base of the plant. This method is good for plants that need a lot of water, but it can be time-consuming and may not be suitable for plants with small pots or shallow root systems.
Watering can
A watering can is a convenient tool for watering small potted plants. To use a watering can, fill it with water and gently pour it over the soil until it is evenly moistened. It is ideal for plants that need a moderate amount of water.
Self-watering pots
Self-watering pots have a reservoir at the bottom that holds water, which is gradually absorbed by the soil as needed. This method is good for plants that need a consistent supply of water, but it’s important to monitor the water level in the reservoir and refill it as needed.
It’s important to choose the watering method that is most suitable for your plants and their needs. Overwatering can be a problem, so it’s important to be cautious and not water your plants too often.
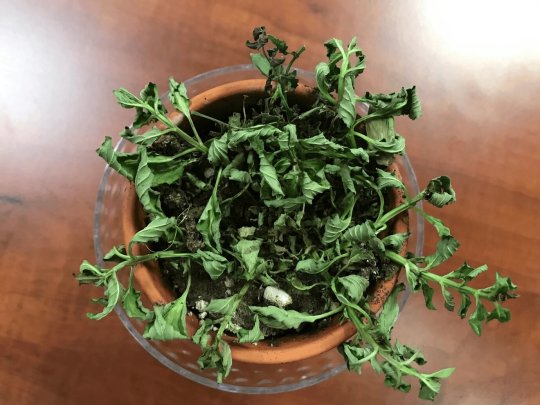
Signs for overwatering potted plants
There are several signs that a potted plant may be overwatered:
Soggy or waterlogged soil
If the soil in the pot feels soggy or waterlogged, it may be a sign that the plant is being overwatered.
Yellowing or wilting leaves
Plants that are overwatered may develop yellowing or wilting leaves, as the excess water can cause the roots to rot and prevent the plant from getting the oxygen it needs.
Foul smell
If the soil in the pot starts to smell sour or rotten, it may be a sign of overwatering. This is because excess water can cause bacteria and fungus to grow in the soil, leading to a foul smell.
Stunted growth
Overwatering can cause plants to stop growing or grow more slowly than they should. It is due to dilution of nutrients that support plant and flower growth.
Mushy or black roots
If the roots of the plant look mushy or black, it may be a sign of root rot, which is often caused by overwatering.
If you suspect that your potted plant is overwatered, it’s important to reduce the frequency of watering and allow the soil to dry out slightly between waterings. It may also be necessary to repot the plant in fresh, well-draining soil to help prevent further damage.
Signs that a potted plant is underwatered
Here are several signaling a potted plant may be underwatered:
Dry or brittle soil
If the soil in the pot feels dry or brittle, it may be a sign that the plant is not getting enough water.
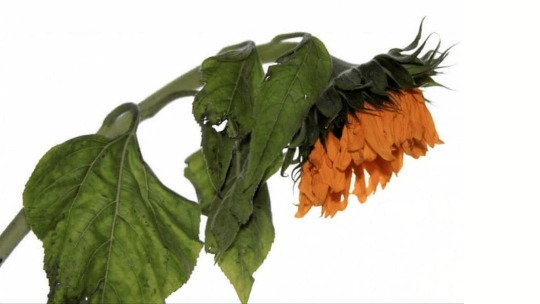
Yellowing or wilting leaves
Plants that are underwatered may develop yellowing or wilting leaves, as they are not getting enough moisture to support their growth.
Stunted growth
Underwatered plants and flowers may grow slowly or stop growing altogether.
Dry, crispy leaves
If the leaves of the plant feel dry and crispy to the touch, it may be a sign that the plant is not getting enough water.
Curling leaves
Some plants may curl their leaves to reduce surface area and conserve water when they are underwatered.
Best watering techniques for potted plants and flowers
Here are some best practices for watering potted plants:
Check the soil moisture level before watering: Stick your finger about an inch into the soil to check the moisture level. If it feels dry, it’s time to water. If it feels moist, wait a few more days before watering.
Water thoroughly, but not too often: When watering, it’s important to make sure the soil is evenly moistened. However, it’s also important not to water too often, as overwatering can lead to root rot.
Avoid getting water on the leaves: Watering the leaves of a plant can cause fungal diseases to develop, so it’s best to avoid getting the leaves wet. Instead, focus on watering the soil around the base of the plant.
Use lukewarm water: Cold water can shock the roots of a plant and cause stress, so it’s best to use lukewarm water when watering.
Use the right watering tool: Choose a watering tool that is suitable for the size and type of your plant. For example, a watering can may be suitable for small potted plants, while a hose or drip watering system may be more appropriate for larger plants.
Water at the right time of day: It’s best to water potted plants in the morning or early evening, as the cooler temperatures and lower light levels will help prevent evaporation and minimize the risk of fungal diseases.
By following these watering practices, you can help ensure that your potted plants are getting the moisture they need to thrive.
Now that you know when to harvest potted plants, let’s look at the benefits of planting in pots:
Watering indoor plants potted plants Vs. outdoor potted plants
Watering outdoor potted plants and indoor potted plants can have some similarities, but there are also some important differences to consider.
One similarity is that both types of plants need to be watered regularly to ensure that they receive sufficient moisture. Both types of plants will also benefit from being watered thoroughly, so that the water reaches the roots and the soil is evenly moistened.
However, there are a few key differences to consider when watering outdoor and indoor potted plants:
Climate
Outdoor potted plants are exposed to a range of weather conditions, including sun, wind, and rain. This can affect how often they need to be watered, as well as the amount of water they require. Indoor potted plants are typically protected from these elements and may need less frequent watering as a result.
Soil type
Outdoor potted plants are often grown in potting soil that is designed to drain well, while indoor potted plants may be grown in a variety of soil types, including potting soil and soil-less mixes. The type of soil you use can affect how quickly it dries out and how much water your plant needs.
Light levels
Indoor potted plants are typically grown in lower light levels than outdoor plants, which can affect their watering needs. Indoor plants may need less frequent watering than outdoor plants because they are not exposed to as much sunlight and heat.
Overall, it’s important to pay attention to the specific needs of your outdoor and indoor potted plants and to water them accordingly. This may involve checking the soil moisture level regularly and adjusting your watering schedule as needed.
Conclusion
In general, potted plants and flowers should be watered regularly, but the specific frequency will depend on a variety of factors such as the type of plant, the size and type of pot, the climate, and the soil mix. Since you know how often to water pot plants, ensure to follow the tips to have healthy plants in your backyard or balcony.
Original Source:
https://releasepots.com/how-often-should-you-water-plants-flowers-in-pots/
0 notes
Text
When Should You Harvest Different Potted Plants?
Most novice and, interestingly, avid growers don’t know when to harvest pot plants. Unlike conventional gardening, pot plants do not have a distinctive harvesting season since you can grow them anytime. This article looks at the popular potted plants and when they are ready for harvesting.
Vegetables
● Beans
Beans are one of the most popular staple foods worldwide. You can grow greens in pots, whether indoors or outdoors. You can choose between the bushy option, which grows with minimal maintenance and climbing variety that needs trending. Whichever the case, the minimum pot depth should be 12 inches. You should harvest your beans within 45 to 64 days.
● Beets
Beets are another ideal potted plant. They are easy to grow and require little to no monitoring. There are several varieties to choose from, such as Chiogga and Detroit dark red. You should, however, provide them with a deep pot for optimal growth. Ideally, the minimum depth should be 12 inches. You should harvest your beets after 6 to 8 weeks.
● Chard
Chard is some of the most colorful veggies to grow in a pot. With varieties such as ruby red and rainbow mixture, it will make your balcony or backyard colorful. They are fast-growing and do not require deep containers. With an 8-inch-deep pot, you will get your harvest within 8 to 10 weeks.
● Chili peppers
Let’s face it; chili peppers are some of the most popular species in the world. Thanks to their small size, they can be planted in pots in balconies, backyards, and kitchen gardens. That said, they need ample sunlight and warmth for ample fruition.
You can choose between jalapeno early and Thai hot, depending on how hot you want. It requires a pot with a minimum depth of 12 inches. On average, pot chili peppers take between 65 and 85 days to mature.
● Kale
Kale is a nutrient-rich vegetable ideal for planting in pots. The best part? You can plant several kales in one pot. You can add them to your smoothie or use them in salads. With a handful of kales, you will surely supply your family with a month of harvest. They require a pot with a minimum depth of 8 inches and are ready for harvest within 30 days.
● Onions
Onions are among the best vegetables to grow in containers. They are easy to propagate and can grow in different places in your home. A small container can accommodate at least five plants. White Lisbon and Tokyo Long White are the most popular onions grown in pots. All require a pot within a minimum depth of 4 inches. The former can be harvested after 60 days, while the latter is ready after 100 days.
● Radishes
Like onions, radishes can grow in small containers with ease. All you need is to scatter the seeds and water them regularly. If you choose the Solaris Hybrid variant, it should be ready for harvesting after 24 days. The Cherry Belle variant will be ready after three weeks.
● Spinach
Like kale, spinach is another green, leafy vegetable you can add to your pot. It is easy to grow in different conditions, such as partial shade. But a balcony or backyard is the best option.
The best part is that they don’t require a deep pot. A 6-inch-deep port is enough and ready for harvest within 45 to 55 days.
● Tomatoes
Its no doubt tomatoes are one of the most popular potted plants. They are cheerful and delicious, making them a staple for almost any dish. Besides, they are productive in pots as they tend to grow well when restricted. With one plant, you can harvest up to 10 pounds per season.
Since they need ample sunlight, you can plant them around sunny windowsills or backyards. The pot should have a minimum depth of 12 inches. Tomatoes are ready to harvest after an average of 75 days, depending on the variety.
● Sweet peppers
If you want a versatile potted plant, sweet pepper is the perfect choice for you. You can use them in stir fries and salads for that added flavor. They are loved for their crisp and sweet taste. The ideal sweet pepper varieties to plant in a pot include Confetti Hybrid and Jungle Parrot. They require a pot with a minimum depth of 12 inches. They should be ready for harvest between 55 and 85 days.
Fruits

You can also grow different fruits in pots. The most popular include:
● Apples
Dwarf apples grow well in large pots. Ideally, the pot should be about 23 inches wide. They, however, require a sheltered and sunny spot to grow well. You can grow a self-fertile variety, from which you will graft the rest of the apples. You can opt for the M26 or M9 variety. Apples take at least 1 to 3 years to mature. You can harvest them between August and the end of September.
● Blackcurrants
If you want to add color to your backyard, consider planting blackcurrants. They also attract pollinators such as bees. As such, they can help pollinate other plants and flowers in your backyard. The grit should be planted at least 6cm below the potting soil, and the pot should be 20 inches wide. They should be ready for harvesting during summer.
● Blueberries
Unlike most potted plants, blueberries require acidic soil, which is easy to use as a potting mix. They are attractive thanks to their flowers and fruits. And once in autumn, you will love the colorful leaves. Blueberries require a sheltered and sunny spot to grow optimally.
If possible, water with rainwater instead of tap water. Ensure to protect the plant from birds. The pot should be 12 inches wide. You should harvest blueberries between June and August.
● Cherries
Cherries are yet another fruit you can plant in your pot. They blossom in spring and have elegant leaves in autumn. Sweet varieties such as Gisela 5 require ample sunlight, while soar varieties like Colt can withstand shade. The pot should be at least 23 inches wide. Generally, they are ready to harvest between December and February.
● Figs
The fig tree grows well when its growth is restricted. And one way to go about it is to grow them in pots or containers. Grow them in a warm, sunny spot and provide ample water. The potting mix should allow water to drain if you want your fig tree to grow to maturity. The container should be 18 inches wide. You should harvest the fruits in autumn.
Benefits of growing plants in pots
Now that you know when to harvest pot plants, let’s look at the benefits of planting in pots:
● You can plant anytime
Outdoor gardening has season restrictions and is not ideal for all plants. For example, in temperate regions, you can only plant as you approach winter, while in the tropics, planting starts in the rainy season. Fortunately, you don’t need to wait for the perfect season with container gardening.
Instead, you can garden anytime, especially if your containers are on a balcony or a greenhouse. The best part is that some vegetables, such as onions and tomatoes, can grow indoors.
● You don’t need to worry about space
It is normal for city dwellers to think they don’t have space to plant vegetables or other potted plants. However, you can turn it into a thriving garden with a few containers on a balcony. While you won’t deal with large plants, you can garden small veggies such as radishes, kale, spinach, and onions. Besides, you can grow different varieties in one container.
● You can grow plants indoors
There are thousands of plants that do well in indoor environments. Vegetables are the best fit, but you can still grow fruits under the right conditions, and thanks to technology, you can use artificial light to garden your plants. For example, cool white light in the blue spectrum produces lush leaf growth on compact plants.
● Saves water
Gardening outdoors requires a lot of water, most of which is wasted. Evaporation causes water to evaporate from the soil’s surface. As such, you’ll end up watering at least twice per day. Plants in pots require less water since there’s minimal water loss through evaporation. However, you need to monitor soil dampness which can cause the roots to rot.
Conclusion
There are many plants you can garden in a pot. You can plant something from fruits, flowers, and vegetables regardless of the current space. The benefits are many ranging from saving on fertilizers to reducing water wastage. Now that you when to harvest pot plants, which one will you garden? Let us know in the comment section.
Original Source: https://releasepots.com/when-should-you-harvest-different-potted-plants/
0 notes
Text
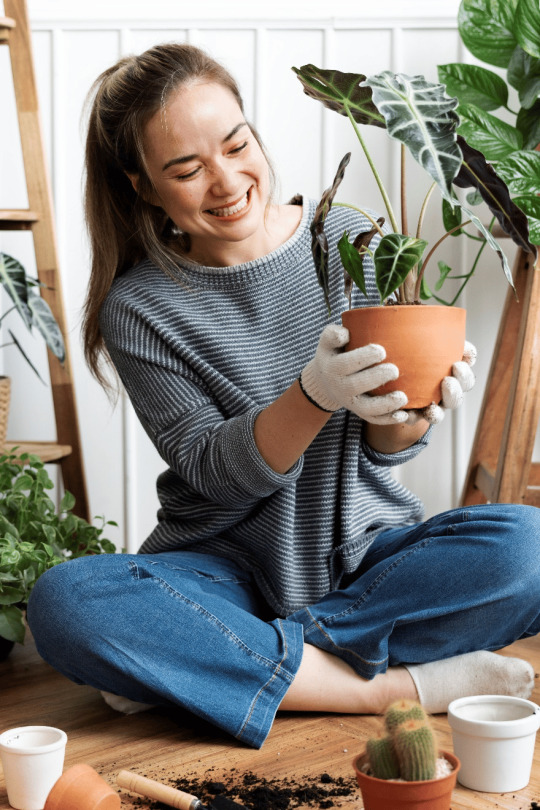
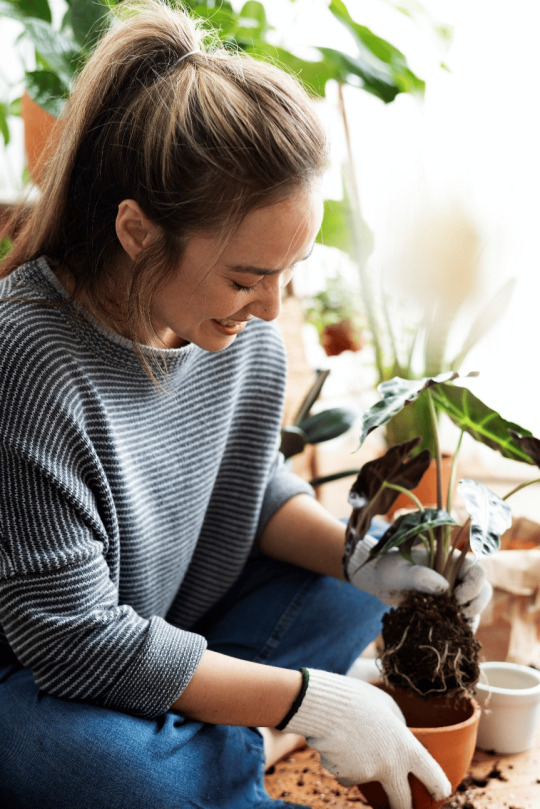
How to Properly Transplant a Potted Houseplant?
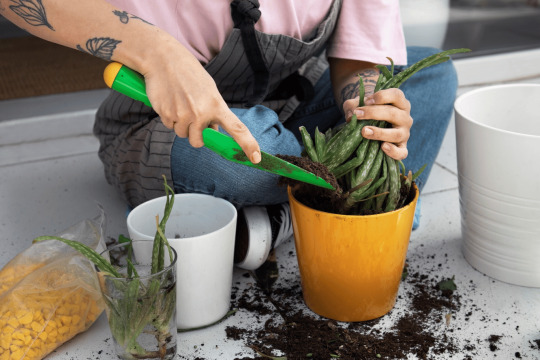
If you’ve been looking over at that plant that needs some love but are too scared to know how to transplant a plant, then look no further. Release Pots is here with all of your questions answered. Transplanting a potted plant can be daunting. While it may seem like a small task for some, when it’s your favorite plant, the pressure is on.
Having your home filled with houseplants is one of the great joys in life. The best part about having houseplants is you really can’t have too many. Who knew adding greenery to every room could be so much fun?
But it gets to a point where the plant starts slowing down in growth and isn’t looking green anymore but rather yellow and brown. These are some telltale signs to watch when deciding if your houseplant needs a new home.
Roots Growing Through The Existing Pot
Seeing those roots sticking out the bottom of the pot is a big sign that your plant needs a new home. Although you want your plant to grow to the restrictions of its current pot, you don’t want it to exceed this. When a plant becomes root bound, it will grow its roots right to the edges of the pot, with no more room to grow. Leaving your plant to become root bound can make for a tricky swap if you’re not using Release Pots.
Slower Growth
Unless it’s the middle of Winter, your houseplant shouldn’t be slowing down all that much in terms of growth. Slower growth without any reason behind it can be a sign of suffering without you even knowing it. This can be due to the roots being suffocated and not receiving the oxygen they need to ensure the plant is thriving.
Losing Leaves Or Yellowing Leaves
When your houseplant loses its leaves or the leaves start to turn yellow, while it’s a generalization this usually means there are issues with watering or the current pot it’s in is too small. Check your water situation and see what’s really going on in that soil. If the water isn’t affecting the plant, then it’s most likely the roots needing some more room. The roots are key to a healthy plant, so using pots like Release Pots is a great way to keep your houseplant happy and keep an eye on those roots.
Two Thirds Pot, One Third Plant
While this isn’t necessarily a sign, it’s definitely helpful when it comes to assessing each individual plant. Stick with the rule of thumb; you should have two thirds of pot to one-third plant. It needs to be repotted if you’ve got too much plant-to-pot ratio. But if you’ve not got enough pot for the little plant, you may need to size down. It’s a great way to keep the right proportions of a healthy houseplant.
When Is The Best Time To Transplant Plants
Before we get into the process of how to properly transplant a plant, we need to look at when is the best time to do so.
If your plant can hang out until Spring, then leave it until then. Springtime is the perfect time for transplanting. Not only is it when everything in nature is in full force, but it’s also the perfect temperature for plants. When you transplant a plant, you put it into shock. This is maximized even more so if you were to transplant during Winter. If you can’t wait until Spring to repot, then anytime during the warmer months will be your best bet.
How To: Transplant A Potted Houseplant, The Steps
These are our broken-down steps of how to properly transplant a houseplant.
1. Identify The Problem
As we’ve mentioned in the list above, there are signs to look for when determining if a houseplant needs to be repotted or not. As an added note, this process is much easier to complete if the soil is dry. This doesn’t mean you need to skip months of watering. However, consider skipping its weekly water the week before your transplant.
2. Prep Your New Pot
If you’re using Release Pots, go ahead and easily set up your pot. If not, make sure you’ve got the desired pot ready to go. In your desired pot, fill the bottom inch or so with soil and a small amount of fertilizer. How much soil you need for each plant will depend on the pot size.
3. Remove Plant From Existing Pot
If you’re not using a Release Pot, this is where it could get tricky. But if you happen to be using a Release Pot, you’re in luck, as they make this step easy and quick. For those who are using a regular plastic pot, you’ll want to gently squeeze the side of the pot, loosening the roots. Roots should easily come away from the sides of the pot. Once you’ve loosened the soil, place your hand gently over the top of the soil, carefully holding the plant in place, and tip the plant upside down. The plant should fall out gently into your hand.
4. Put Into New Pot
Once the plant is gently in your hand, this is where you can carefully place it into its new pot. When you complete this step, be sure to separate the roots gently, so they have room to grow. This can be done gently with a small hand rake, or with your hands working perfectly. Once you’ve placed the plant in its new pot, add some soil to fill in the gaps.
5. Water And Sunlight
Once you’re happy with how your new plant is looking in its new home, give it some much-needed water and sunlight. Your plant will go into temporary shock after being transplanted, so it’s time to give it all of the much-needed love and care.
Final Thoughts
Release Pots is a fantastic solution when transplanting pots and needing to keep plants healthy. Not only are you able to ensure the plant’s root ball is kept intact when repotting, but you’re also able to ensure correct drainage, keeping those roots and plant happy. So, if you’re wondering the best way to transplant a houseplant or how to transplant a plant, Release Pots is your ideal solution
Original Source: https://releasepots.com/how-to-properly-transplant-a-potted-houseplant/
0 notes
Text
Are Ceramic Pots Good for Plants? Ceramic Vs Plastic & Fabric
But really, are ceramic pots good for plants? It’s a question that gets thrown around in the houseplant world all the time, and one here at Release Pots, that we’re no stranger to. What pot you choose for your houseplant is always debatable, some plant parents swear by terracotta, and others love ceramic. People debate over it and get into discussions about what works for them because it matters to the health of your plants.
What pot you keep your plant in impacts the overall health of the plant and how well you can keep it alive. This is our breakdown of ceramic Vs plastic Vs fabric pots and, ultimately, which is the better choice for your plants.
Why Does It Matter So Much?
As we mentioned before, it matters so much because it impacts the overall health of your plant. The type of pot you choose to keep your houseplants in effects almost every factor. We’ve listed just some of these below.
How Quickly The Soil Dries Out In Between Watering
There are two types of people when it comes to watering. Those that overwater and those that underwater. If you’ve managed to find a middle ground, you should let the rest of us in on your secrets. Watering your plants is how you keep them alive and happy, but if you overwater them, not only do you run the risk of drowning them, but you also run the risk of root rot. This is where your plant’s roots are wet for too long, and they don’t get the chance to dry out. Roots need oxygen, so having them wet for too long will end up killing your plant.
Overall Growth
The roots of your plant are a huge determining factor in whether or not your houseplant will thrive. With most traditional pots, you’re unable to see the roots, they’re what you want to pay attention to. The roots and root ball of the plant are the reason why your plant will sustain its growth over a period of time. Selecting a pot for your houseplant will influence this factor even further.
Healthy Roots
As we mentioned, healthy roots are the key to a healthy plant. If you’re choosing between pot materials, you can run the risk of choosing a pot that will suffocate the roots and leave them to suffer.
Drainage

Drainage is a huge factor when deciding between pots, and it is because of the importance it plays not only in the plant roots’ health but also in how well the plant can drain, getting rid of the excess water. When watering, you want a good balance of a plant that’s not wet, and that’s not dry. Selecting the right pot is the reason a plant can regulate this balance.
Drainage holes also play a part when choosing a pot. If you choose a pot that doesn’t have any drainage, then you run the risk of it being drowned, whereas if you choose a pot that has drainage holes or several, your plant can drain well and get that much-needed oxygen.
Ceramic Pots
Starting with those pretty ceramic pots. They’re glazed in all sorts of colors and patterns and come in all types of shapes and not to mention sizes. But, while they sound great, and houseplants can work a treat for some, are they really the best choice for your houseplants?
Pros
The pros of ceramic pots, of course, are that they’re a standout. When purchasing ceramic pots, you’re able to purchase pots that can match the style of your home or room. Ceramic pots can also be used as a ‘cover pot’. This is when you place your houseplant in a plastic pot or one of our Release Pots, which is used to cover the pot. By doing this, you’re able to still ensure healthy drainage and a healthy plant.
Although not every plant prefers to be in a ceramic pot, there are some that are the exception. As ceramic pots retain moisture within the pot itself, plants such as pothos, spider plants, Boston fern and maidenhair fern are among some of the plants that will do fantastic in ceramic pots.
Cons
While they are beautiful, they often don’t provide the practicality your houseplants need. The majority of ceramic pots don’t come with drainage holes. In addition to this, they’ll break if you drop them. Depending on where you purchase your ceramic pots from, they can also be very costly. Now while that’s fine for a few here or there, if you are planning on filling your house to the brim with houseplants, they’re not the most sustainable choice. Ceramic pots are also notoriously hard to remove plants from when it comes time to transplant.
Plastic Pots

The dreaded plastic pots it’s what every nursery is filled with. When you purchase a new plant, they usually come in a plastic pot, and while it may be what you start with, it doesn’t mean it’s what your plant needs to stay in.
Pros
They’re cheap. Plastic pots come with your houseplant, so you don’t need to go and buy an additional pot to put your houseplant in. Along with this, plastic plants also have fantastic drainage, which is one reason why nurseries use them. The majority will come with 3-5 drainage holes.
Cons
While they are cheap, you only get what you pay for with plastic pots. They aren’t going to last you a lifetime, and if you are planning to fill your house with plants, you’ll end up going through quite a few. Over time and when exposed to the sun for long periods of time, they can crack and become brittle. Not to mention, plastic isn’t great for the environment. It’s a material that won’t ever break down, which is something to consider when needing to purchase your next pot.
Fabric Pots
The dreaded plastic pots it’s what every nursery is filled with. When you purchase a new plant, they usually come in a plastic pot, and while it may be what you start with, it doesn’t mean it’s what your plant needs to stay in.
Pros
One of the main benefits of fabric pots is the fact that if you drop them, they won’t break. This is great for those trying to fill their plant shelf with as many plants as possible to get the ultimate shelfie. Another big pro of fabric pots is their ability to display moisture levels from the outside. You’re able to feel if the pot is too wet, and you can avoid overwatering. Fabric pots also provide a much more breathable environment for the plant’s roots, giving you an overall healthier plant.
Cons
Similar to a plastic pot, your fabric pot isn’t going to last you a lifetime. Although they are durable, they do have a shelf life, and the more you use them, the shorter that becomes. Unlike ceramic and plastic pots, fabric pots aren’t as sturdy. This can make for an annoying and messy situation when needing to transplant a plant or move plants around within a space.
Release Pots
Of course, we had to give Release Pots a mention. Release Pots are an ideal choice for avid houseplant lovers. This signature style of pots makes it easy to remove, plant, and transplant it to another pot.
Pros
Release Pots are innovative. Our pots have handles on the side, making them perfect for moving around your shelf or home, and you won’t ever get that awful feeling of a pot slipping out of your hands ever again. The biggest pro of our Release Pots is the ease of transplanting and moving. With the pull-apart system, it’s incredibly easy to use. This system is perfect for plants like succulents and cactuses that have sharp and spiky edges.
Cons
As all plants are different, not all of them may enjoy being in a Release Pot. While Release Pots have so many other benefits, it’s always best to put your plant in a pot that works best for it.
Final Thoughts
Here at Release Pots, we’re passionate about plants, big and small. Our innovative potting system has been designed to help you along the way in the green thumb journey. When deciding if ceramic pots are good for plants, Release Pots always recommends you look at the plant’s needs.
Original Source: https://releasepots.com/are-ceramic-pots-good-for-plants-ceramic-vs-plastic-fabric/
0 notes
Text
Tips On How to Move a Potted Plant
Physically Moving the Plant
Drainage holes in pots are crucial to the plant’s health. However, most growers ask one question: are pots without drainage holes bad? This article will show why they aren’t bad when used on several plants such as pothos. But first, what are drainage holes?
Check Plant Hydration
The first thing you need to do before moving your plant is to determine whether it needs water by checking the soil. If it is dry, add water to the pot and let it soak in. Do not overwater as you need to provide the soil time to soak up the water before adding more.
Secondly, you need to check your plant’s leaves for signs of dehydration, such as wilting or dryness on leaves and stems. If there are any visible signs of dehydration, give your plant water before moving it so that it does not lose too much moisture during transport.
Release Pots use less water than standard pots. They are designed to drain more slowly, allowing more water to be absorbed by the roots. At the same time, it prevents stagnant water by using patented angled bottoms to allow for drainage.
Test Plant Weight
You must also be sure to test how heavy the plant is before you move it. Potted plants can vary in weight based on their size and composition, so it is important to know if yours is too cumbersome for you to move alone. It might also affect how intact the plant will be once it reaches its new spot.
Using a Release Pot in this process will provide a sense of ease when transferring plants into the ground or transferring a larger pot, as it saves you precious time and lowers your labor costs. They have large and manageable carry handles for smaller plants so that you will never have a pot slip out of your hand again.
If the plant does feel too heavy, consider enlisting the help of a friend or family member to assist you. If the pot is too big for you to transport safely by yourself, consider breaking it into smaller pieces first, which will also make the transporting process easier.
Physically Moving the Plant
Once you have assessed your plants before the move, the next step is physically transferring the plants from one location to another. Knowing how to move a potted plant correctly is vital to keeping it secure, healthy, and intact in its new home.
Lifting the Plant
If you are transferring a relatively small plant to a new pot, grasp the stem in one hand while holding the stem close to the top of the soil with your other. Lift carefully while keeping your hands close together for better control and avoid spilling soil from your potted plant’s container.
To lift plants in a large container, place one hand under the rim of the container while you cup your other hand over the top of the soil. With your hands positioned this way, you can easily move the pot without damaging its roots or spilling dirt all over your floor.
As an even better solution, Release Pots offer large and easy-to-carry handles and are available in multiple sizes so that the plant, no matter what size, is easier to carry and transport from one place to another.
Transporting the Plant
If you are driving to a new location, there are strategic ways to transport your plant safely and securely. Place your plant in a box or use newspaper or packing material to keep the pot from sliding around during transport. Make sure to place your plant on a level surface. If it is an uneven surface, you can use a towel to protect seats or floors from getting wet or dirty should the plants or soil spill over.
It is best to place your plant in your vehicle at the last possible moment to prevent it from being exposed to drastically different temperatures and it can still have good airflow.
Securing the Plant in a New Spot
You can use a dolly or wagon to transport a plant if it is too heavy. This will protect the roots from being squished and allow you more control over how much weight is distributed across them. It also prevents the plant from tipping over during transit; if your pot has drainage holes on its bottom, then water could spill out onto whatever surface is below it – which is also not good!
Release Pots are new and versatile plant containers that are the only guaranteed way to safely transplant your plants or trees into the ground if moved outside or into a new pot. Have a look here for how easy it is to place in fresh soil.
Additional Points for How to Move a Potted Plant

Potted plants can be moved in a variety of ways, so here are a few more basic tips that will help ensure your plant stays happy and healthy during the process:
Move the plant while it’s still healthy and hydrated. It will recover faster if there aren’t any leaves damaged or bruised on its way to its new home.
Make sure you keep an eye out for bugs like mites or aphids, which are tiny insects that suck sap from leaves. If these critters make their way into your potted plant, try using products made especially for getting rid of them, like insecticidal soap spray or insecticidal bags of dust from your local hardware store. Or you could also call an expert gardener if you need help with handling infestations.
You may also want to cut off any dead leaves with water before moving; this helps the plant focus its efforts appropriately and also reduce the chances of spreading disease between pots.
Account For Plant Stress After Move
Replanting as soon as possible will reduce further stress on the plant so it is somewhat vital that you know how to move a potted plant fairly quickly. When you move a potted plant, the process can be stressful for both the plant and its new environment. Here’s why:
Moving plants essentially take them out of their natural environment and place them in an unfamiliar one. Plants are used to having certain conditions that they need to survive – including soil, light, temperature, and air circulation – and if these conditions are not met when they are moved, they might die.
Some plants may also need time to adjust to their new environment. In reaction to the move, they might lose their leaves or wilt, but it is normally only a temporary defensive reaction that should pass after you and the plant have settled in.
If you don’t move your plants soon after transplanting them into new containers or into completely different soil, they may become ill or die due to a lack of water or nutrients, so hydration is also another key factor to their survival.
Some plants just do not like being uprooted from their original environment; others will thrive no matter where you put them! Either way, it’s always good practice to move a plant with care. It not only helps reduce strain on the plant but because there is less chance of damaging roots, if done properly, before putting into a new potting mix with added fertilizer.
Conclusion
Whether you’re transplanting to a bigger pot, relocating, or just redecorating, it’s important that you take extra care when transporting your plant and know the relevant steps to move a potted plant. Potted plants can be heavy and awkward to carry, but there are many ways to make the process go smoother. And with the right tools and tips, it can be a breeze! With the simple steps that have been outlined in this article, you will be able to move any plant with ease. If you would like to make your life transplanting and moving your plants, then a Release Pot is your answer! Check out our array of pots and get repotting today!
Original Source:
https://releasepots.com/tips-on-how-to-move-a-potted-plant/
0 notes
Text
Here’s What You Need to Know About Drainage Holes in Pots

Drainage holes in pots are crucial to the plant’s health. However, most growers ask one question: are pots without drainage holes bad? This article will show why they aren’t bad when used on several plants such as pothos. But first, what are drainage holes?
What are drainage holes?
As the name suggests, drainage holes drain excess water from a pot. When you water your houseplant, the potting mix will absorb just the right amount of water while the rest settles at the pot’s bottom. Without drainage holes, excess water can cause the plant’s roots to rot, causing stunted growth or ultimate death.
Drainage holes allow this excess water to flow out of the pot, mitigating such scenarios. Some pots will have one large drainage hole, while others will have several small ones. There are other benefits of a pot having drainage holes. Let’s look at them.
Why you need drainage holes in pots
So, why are drainage holes necessary?
● Prevent nutrient buildup
Inadequate drainage can cause a buildup of fertilizers and salts and, if left for an extended period, can become toxic to the plant. It can cause stunted growth or death. Drainage holes ensure that excess nutrients are flushed out of the potting mix. With nutrient buildup, your plant’s leaves will turn yellow reducing photosynthesis, hence slowed or no plant growth.
● Mitigates microbial growth
As you’d expect, fungi and bacteria thrive on moist surfaces, making overwatered plants an ideal spot. While most fungi are harmless, some will damage the soil and plant. Moreover, some can harm your health, especially those that produce toxic gases. Having drainage holes in a grow pot can help reduce soil moisture content. It can help minimize the risk of microbial growth. Not only will the plant be healthy, but you’ll be less susceptible to toxic gasses.
● Restraining invasive plants
Most invasive plants grow in dump soil. They compete with the primary plant for nutrients and water. It can cause your houseplant to lack adequate water and nutrients, leading to stunted growth. To avoid this, you must ensure proper pot drainage, mitigating invasive plants from spreading around the houseplant.
Can plants grow in a pot without drainage holes?
So, are pots without drainage holes bad? The simple answer: No.
Plants can still grow in pots without drainage holes. However, you’ll need to take precautions to ensure your plant’s health. Here are different ways to grow a plant in such as pot.
Placing a plant in a non-draining pot
It is the most basic trick you can use since it requires an extra pot only. You’ll need a planter and a cache pot. While the grow pot requires drainage holes, the cachepot should not have them. First, place the plant in the grow pot.
Next, put the grow pot in the cachepot, and you are good to go. You should, however, drain the excess water in the decorative pot. If possible, use a pot liner to avoid damaging the decorative pot.
Adding non-organic material as a base layer
If you don’t have a decorative pot, add non-organic material such as gravel or pebbles at the bottom of the grow pot. As mentioned, stagnant water at the bottom can cause root rot. However, if you place non-organic material, the water roots won’t rot.
You can add at least three layers of different materials, such as rocks, gravel, and hydro granules. The base layers lift the soil from the pot’s base mitigating standing water, hence healthier roots.
Placing the grow pot on a saucer
This method uses a decorative pot, a saucer, and a grow pot. First, place the saucer inside the decorative pot, ensuring it is leveled. Ensure the grow pot has drainage holes before placing it over the saucer.
Place the grow pot inside the decorative pot, ensuring it sits on the saucer. When you water your houseplant, the water will collect on the saucer. To empty the excess water, remove the grow pot and return it after emptying. This method is often for decorative purposes.
● Creating different drainage layers
Another effective but frown solution is creating different drainage layers in a non-draining pot. The layers allow the excess water to flow to the bottom of the pot gradually. However, it is not an ideal method for plants such as Ferns.
For this method to work, avoid overwatering your houseplant. Prepare the different drainage materials you use, such as rocks, active charcoal, and fresh soil.
Add the rocks first, as they are thicker than the other materials. Add a layer of active charcoal and ensure it covers the rocks. It prevents root rot. Finally, add a layer of fresh potting mix and place the plant on top of the soil.

How to create drainage holes
As mentioned, there are several reasons why you need drainage holes in pots. And if they are non-draining, here is a step-by-step process to create drainage holes.
What you’ll need
Drills bits for drill holes. Depending on the pot’s material, you can use plastic, metal, unglazed terra cotta, or thick glass bits.
Drill
Water
Nail
Spray bottle
With this at hand, it is time to make drainage holes. Pro tip: If you are working on an unglazed pot, it would be prudent to soak it overnight, making the drilling process seamless.
First, scratch where you want the drainage hole(s). Using the nail, make a slight curve to guide the drill bit.
Insert the drill bit into the drill. Start the drill with the drill in one hand and the spray in the other. As you make the hole, spray the pot’s surface with cold water to prevent the drill bit from overheating. It also prevents the pot from cracking.
You can apply gentle force if the drill is not moving anywhere. Ensure the drill is perpendicular to the pot’s surface. Placing it at an angle can cause the pot to crack.
Start with a small drill bit for optimal results and work your way to larger ones. It allows you to make even holes.
Now you have a grow pot with drainage holes.
How to cover drainage holes in pots
Drainage holes in pots are no doubt beneficial to the plant. But they can become impractical, especially if they are large. Often, they will allow the soil to fall out when moving your plants around. As such, you need to cover them to prevent such scenarios. Here are a few ways to go about it.
Using a coffee filter or similar material
The easiest method is to use a coffee filter. However, with this method, you will require a saucer or something similar. It works with not-so-heavy plants; those you can take to a sink, water, and let the water drain in the sink.
All you need is to cut a piece of a coffee filter to fit in the grow pot. Place it at the bottom of the pot, add fresh potting mix, and then add your plant. When you water your plant, the water will drain, although slowly. Since coffee filters break down quickly, you can use a more robust material, such as landscaping fabric.
Using clay or concrete
It is effective if you want to seal a drainage hole completely. While a controversial method, it is ideal for low-maintenance plants such as snake plants and succulents. All you need is clay or concrete mix, a bowl, and aluminum foil.
Place the pot over an aluminum foil or similar porous material. Next, mix the concrete in a disposable bowl, adding one part water for every four pieces of concrete you use. Once you achieve the desired consistency, pour it into the bottom of the pot and let it dry.
Once dry, remove the aluminum foil. The purpose of the pot sitting on the aluminum foil is to achieve uniform consistency at the base of the pot.
You can use clay if you don’t want to cover the holes permanently. Besides, it is less messy, and you can remove it whenever you want.
Using plugs
Another easy way to cover drainage holes is to use plugs. Some planters come with plugs, which allow you to add and remove the plug as needed. The downside to this method is it can be daunting to find the right size for your pot. You’ll also be forced to buy multiple plugs, which is unnecessary.
Conclusion
How to pot indoor plants shouldn’t be a daunting task as long as you follow the above tips. And if you find it hard to retain the houseplant’s rootball, you can use our unique release pot that makes repotting a piece of cake.
Original Source: https://releasepots.com/heres-what-you-need-to-know-about-drainage-holes-in-pots/
0 notes
Text
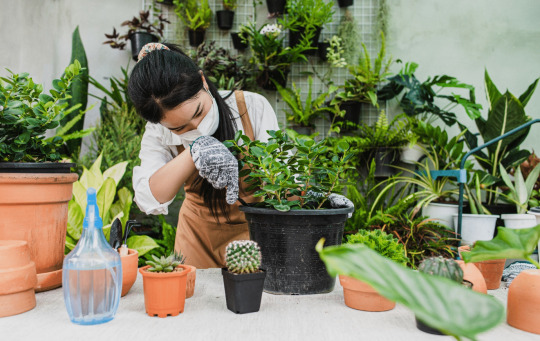
How To Pot or Re-Pot Indoor Houseplants? The Right Way!
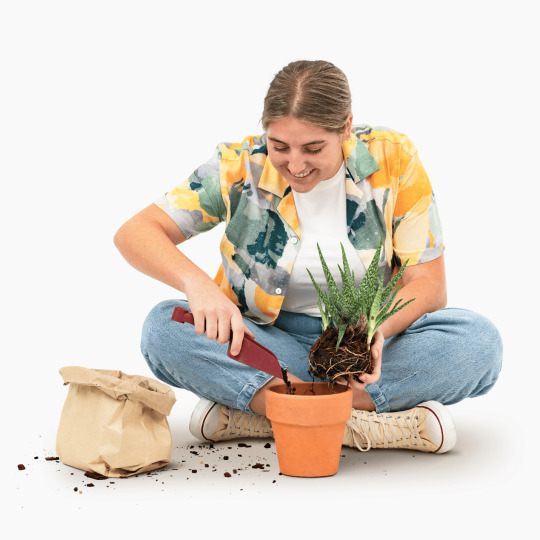
If you are wondering how to pot indoor plants, this article is for you. It covers all aspects of houseplant potting and repotting. The best part? It is a beginner-friendly guide, so you don’t have to be an avid houseplant grower. Let’s dig in!
How to pot indoor plants
As a beginner, potting your indoor plants the right way might be daunting. This section shows you how you pot or repot your plants without killing them. But first, let’s look at the things you’ll need.
New or current plant
Planter where you pot or repot the houseplant
Fresh potting mix
Rocks if the planter does not have drainage holes
Porous material such as a coffee filter
Watering can
Gloves
Here’s the step-by-step guide
1. Remove the houseplant from the pot
Generally, new plants come in large plastic containers, allowing the plant to grow uninterrupted. However, you don’t want to keep it in the container for long. Chances are the soil is nutrient-deficient, and the plant will soon outgrow it.
Besides, the cheap plastic containers are not pleasing to the eye. While plants will often pop out of the container easily, you can use scissors to cut the container if it’s hard to get them out. Furthermore, it is just a cheap plastic container.
By cutting the container, you also maintain the shape of the rootball, ensuring the roots stay intact. As you’d guess, most plants will have outgrown the container before adoption.
2. Trim the rootball
After removing the plant, it’s time to loosen and trim the rootball. Loosening the rootball allows air circulation and removal of overgrown roots. You can use your hands – but ensure to have gloves on you – to trim the rootball.
Alternatively, you can use sharp scissors. While doing so, leave the thick roots at the foliage’s base. If the roots have grown in tight circles, unbind them as much as possible.
3. Add fresh potting mix to the pot
If repotting your houseplant, you must remove at least a third of the old mix. It is because the plant has used some of the nutrients. As such, you’ll need to add fresh potting mix. Ensure the planter has drainage holes to prevent the roots from rotting.
If the pot has no drainage hole, you can drill one or layer the bottom with lava rocks, gravel, or rocks. The goal is to ensure optimal water drainage and retention of crucial nutrients. So how do you choose the right potting mix? Let’s find out.
Consider the houseplant’s needs
Each plant has unique needs, which you can find online, in plant identification books, or in tags accompanying them. You can, for example, consider the moisture needs. The snake and spider plants require less water, while wandering Jew and pothos require a lot of water. You can also consider the pH needs.
Water retention and location
Where you’ll plant your houseplant will also determine the type of potting mix to use. Houseplants in shaded areas will require a light mix, while those in direct sunlight will need a medium-weight potting mix. If you are always on the move, you can opt for a mix with water-absorbing granules that hold and release water at different intervals.
Organic vs. conventional soils
As you’d expect, plants will require various nutrients that are not always available in organic soils. Organic soils are eco-friendly, containing natural elements such as worms, decaying plants, and microorganisms.
The conventional potting mix contains added nutrients such as black hummus and manure. Some also come with synthetic fertilizers to boost nutrient density.
Consider repotting frequency
Some plants need repotting at the beginning of every season, while others can sit in the same soil for several seasons. Conventional soil is the most appropriate if your houseplants require fresh soil every season.
They last for one growing season and can be disposed of after that. You can recycle organic soil or even add eco-friendly material, replenishing it with nutrients.
4. Add your plant
Add the houseplant to the fresh potting mix, ensuring it is centered. Finally, add more fresh soil around the plant until it is secure. Do not pack too much potting mix since it might inhibit the roots from breathing.
5. Water
Ensure to give your plant a good watering and leave it for a week. Often, new houseplants will wilt as they acclimatize. So, this should not be a cause for alarm.

Different ways to pot or repot a houseplant
Using a cache pot and saucer
This method requires a decorative pot, saucer, and planter. Place the saucer in the decorative pot and put the planter on top of the saucer. If you need the plant to appear taller, you can place hydro granules or pebbles at the bottom of the planter.
If you want to water the houseplant, you can take it out of the decorative pot, water it and drain the excess water into a sink. Alternatively, you can moisturize in the decorative pot since the saucer traps excess water.
Using a decorative pot and pot liner
For this method, you will require the following:
Decorative pot
Pot liner
Planter
Drainage layer
Packing material or polystyrene foam filler
If you find it daunting to take the plant out of the decorative pot when it needs watering, then you can use a pot liner and a drainage material. Pot liners are made of plastic and come in different sizes, allowing them to fit in different decorative pots.
Furthermore, they prevent excess water from damaging the decorative pot. You can also trim them to the most appropriate size. They are ideal for taller plants or in situations where you want to raise the houseplant’s height. First, you need to fill the base of the decorative pot with packing material and then place the liner on top. Second, put a drainage layer, such as small pebbles or hydro granules, at the base of the pot liner.
Hydro granules absorb excess water, so you don’t need to empty them often. Finally, place the planter on top of the drainage material. For improved stability, you can add pebbles around the grow pot. If your houseplant requires excess watering, you’ll need to replace the drainage material often.

● Hydroculture
For this method, you will require the following:
Decorative pot
Pot liner
Hydroculture grow pot and hydro granules
Water meter
Adapted root system
Hydro granules filler
Packing material or polystyrene foam filler
Hydroculture is one of the most preferred planting methods by professional interior designers. It uses hydro granules rather than soil. The hydro granules, made of clay, hold water and nutrients, allowing them to pass to the plant gradually. As such, it mitigates pests, over/underwatering, and mess. The hydro granules at the base of the grow pot and liner trap and hold water and nutrients, allowing them to pass back to the plant.
This method ensures the plant’s roots have optimal moisture, air, and nutrient environments. As such, the plant will be healthier and more robust compared to those in conventional pots.
The best part is that you can plant two different houseplants in one decorative pot since they will take up only what each need.
How to use the hydroculture method
Finally, hold your plant upright and press it firmly into the new pot. Add a layer of fresh soil around the plant until it is secure. Finally, water to allow it to settle.
Fill the excess void in the decorative pot with packing material while ensuring it is compact to avoid compression over time.
Insert a pot liner with a size similar to the decorative pot. You can use sharp kitchen scissors to trim the pot liner to achieve a neat rim. Ensure the hydro granule pot will sit at the bottom of the pot liner at the plant’s ideal height.
Place your houseplant in the hydroculture grow pot.
Place the water meter beside the hydroculture grow pot so you can tell when it needs watering.
Fill the grow pot’s surroundings with extra hydro granules to create a uniform layer of granules. As you’d expect, when watering, the hydro granules in the grow pot and pot liner will trap and hold excess water and release it back into the plant.
You can even cover the hydro granules with decorative pebbles to improve the aesthetics of your interior.
Do you need to pot or repot your houseplants?
How to pot indoor plants shouldn’t be a daunting task as long as you follow the above tips. And if you find it hard to retain the houseplant’s rootball, you can use our unique release pot that makes repotting a piece of cake.
Original Source: https://releasepots.com/how-to-pot-or-re-pot-indoor-houseplants-the-right-way/
0 notes
Text
Everything You Need to Know About Repotting Houseplants

How to repot plants can be daunting, especially if you are a beginner. Luckily, we have a few tips to help make it a success. From choosing the right pot and soil, and giving you a straightforward step-by-step process, this article has you covered. Let’s dive in.
How often should you repot plants: Signs it is time to do it
Roots coming out of the pot’s bottom
Look at the pot’s bottom. If the roots are coming out of the drainage hole, they have outgrown the current pot; hence, the plant needs repotting to have more room to thrive. Roots can also circle at the bottom or top of the pot. It is another sign you need to repot your houseplant.
When roots outgrow the pot, they lose their effectiveness. They will not take up crucial nutrients and water. And if they are entangled, they will inhibit smooth water flow. As such, the plant will gradually be deprived of nutrients, leading to ultimate death.
Your houseplant starts losing leaves
A houseplant that suddenly starts losing its leaves could be a sign it needs repotting. Leaves play a crucial role in the survival of a houseplant. Thanks to chlorophyll, they provide the plant with energy. Without them, the plant will have stunted growth.
When the roots come out of the pot or are bound together, your houseplant responds by shedding more leaves than usual. Once you rule out diseases and underwatering, it’s time to repot it.
The leaves are drooping
There are several causes of drooping leaves. If you underwater the houseplant, the leaves will gradually droop since they are not taking up enough water. Likewise, the plant might have excess water if you overwater, causing the leaves to wilt. If neither of the above is the cause of the leaves wilting, it’s a sign you need to repot your houseplant.
While several pot issues cause drooping, the common source is problems with the root system. When the roots cannot take up ample water and nutrients, the stem, branches, and leaves will not receive adequate water, causing the leaves to droop. Once you repot the houseplant in a larger pot, the plant will gradually regain its strength.
The houseplant leaves are yellow
Yellowing leaves are among the top houseplant problems. Many factors cause leaves to turn yellow, including inadequate sunlight, overwatering, underwatering, and diseases. One overlooked cause is the plant outgrowing the pot, warranting repotting.
Generally, yellowing leaves are a sign of nutrient-deficient soil. While fertilizing may solve the problem, it will be short-lived, especially if the plant has been sitting in the same pot for many years. The only solution is to repot your houseplant. The new soil will hold nutrients, allowing the plant to take up as much as it needs.
Your houseplant stops growing
It might be hard to identify a houseplant that is not growing since they tend to grow slowly. However, if it is clear it has stopped growing, it’s time to repot. As you’d guess, most houseplants are from the tropical family, growing in nutrient-rich soils. In fact, if left in the wild, they can grow to massive heights, such as trailing pothos.
While the confines of a pot do not meet such standards, the houseplant still grows, although slowly. Therefore, if your houseplant has stunted growth, you must use a larger pot. Stunted growth leads to many problems and death in the worst case.
Your houseplant is larger than the pot
Often, houseplants outgrow their pots. They might continue growing, but they will encounter problems later. For example, they might struggle to stay upright. The rule of thumb is your plant should never be 3x larger than the pot.
Tools required for houseplant repotting
Before you begin repotting your plant, ensure you have the following tools:
New pot: The pot should be larger than the previous one. Ensure it has ample drainage holes.
Porous material: This is used to cover the drainage holes. You can use coffee filters for optimal results.
Potting mix: Ensure extra soil where you’ll add fertilizers and other nutrients.
Trowel: It helps you to remove the houseplant without killing it.
Gloves: For protecting your hands from dirt.
Scissors: They come in handy when you want to cut extra roots.
Watering can: You’ll use this to water the houseplant after repotting.
How to repot plants
Here are repotting plants tips you should follow:
Choose a larger pot
The main reason for repotting is that the houseplant has outgrown the current pot. A larger pot gives the roots ample space to grow, allowing for adequate nutrients and water takeup. Ensure the new pot is broader and deeper for optimal results. Also, ensure it has drainage holes. They prevent the houseplant from rotting.
Cover the drainage holes with a porous material
The porous material, like a coffee filter, prevents the new soil from passing through the drainage holes while still allowing the water to drain. If you use terracota as your porous material, ensure to soak it to avoid absorbing water from the new soil.
Pour soil into the new pot
Add a base layer of soil, allowing the roots to grow. Ensure to add enough so the plant can have ample space without causing it to spill over.
Water the houseplant
Next, water the plant thoroughly. It will make removing it easier while maintaining the rootball’s compactness.
Remove the plant from the old pot
Without pulling the plant, turn the pot sideways, gently holding the stem, and tap at the pot’s bottom until it slides out. You might be forced to rotate the plant gently in both directions for it to loosen. You can also use a trowel or sharp knife to separate the houseplant and the pot.
Loosen the roots
Use your hands to loosen the rootball. Remove old roots that have outgrown the core rootball. Once you remove them, untangle the healthy roots so they can grow outward.
Remove part of the old potting mix
Remove a third of the old potting mix. It is because it is deprived of nutrients, and the plant needs to fit in the pot with the new potting mix.
Add the plant to the new pot
Finally, hold your plant upright and press it firmly into the new pot. Add a layer of fresh soil around the plant until it is secure. Finally, water to allow it to settle.
How often should you repot plants?
Typical houseplants require repotting every 12 to 18 months, depending on their growth rate. Slow growers such as snake plants or jade plants can sit in the same pot for many years. However, you need to replenish the soil with ample nutrients such as fertilizers.
The best season to repot your plant is early spring and late summer. Plants tend to grow actively during this period, requiring more space and nutrients.
Should you water plants after repotting?
Wait for up to seven days to water a repotted plant. The seven days period allows any damaged roots during repotting to heal. Ensure to keep the plant in a shadier and cooler spot to avoid unnecessary stress.
What is the purpose of repotting plants?
There are several repotting purposes among them:
Improving your home aesthetics
Besides improving the houseplant’s health, repotting can beautify your spaces. For example, you can remove a plant from a boring container into a much more appealing one, which complements the aesthetic aspect of its surroundings.
Potting divisions
As they grow larger, most houseplants afford you the luxury of dividing them into smaller ones. Each section is therefore planted in a new pot. As such, you’ll have many houseplants from the parent plant. You can then place the new pots in different rooms.
Using a new potting mix
Often, diseases and pests infest soil, depriving it of its nutrients. It means you need to provide fresh soil that is rich in nutrients. This is where repotting comes in handy. You can remove the poor old soil, thoroughly clean the pot, and pour in the new soil. Alternatively, you can use a new pot altogether.
Providing larger growing space
Another reason for repotting is to provide the houseplant with a larger growing space. As mentioned, houseplants outgrow their pots, causing the roots to grow outside the pot. It leads to stunted growth or death. Moving the plant to a larger pot allows the roots to grow, enabling the plant to thrive.
Do your houseplants need repotting?
How to repot plants can be daunting, especially for novice growers. Roots can be damaged, and the rootball may disintegrate. Luckily, a release pot makes repotting a walk in the park.
The modular design lets you release the plant seamlessly into a new pot with the rootball intact. Call us or visit our shop to get one today.
Original Source: https://releasepots.com/everything-you-need-to-know-about-repotting-houseplants/
1 note
·
View note