A "walkthrough" of sorts for the Houshin Engi Senkaiden 2 game for Wonderswan. More accurately just a blog archiving the screenshots that I took of the game. Feel free to take and use images though credit (a link back to the blog) or something would be nice.
Don't wanna be here? Send us removal request.
Statistics
We looked inside some of the posts by s2he-gamewalkthrough and here's what we found interesting.
Average Info
Notes Per Post
22
Likes Per Post
22
Reblog Per Post
0
Reply Per Post
0
Time Between Posts
2 days
Number of Posts By Type
Text
17
Last Seen Tumblr Blogs


Fun Fact
Mobile US users spent an average of 115.8 minutes on Tumblr app monthly.
Text
Part 22: Final Thoughts
I was initially going to make a pretty long post for this last part, detailing all my theories about how to unlock other characters in the game; and possibly other content (which I just couldn’t figure out).
But then I recently found out about this playthrough on nicovideo which basically renders most of my walkthrough kind of pointless. To be honest, I’m not even mad about this, as I can finally experience the Senkaiden 2 game in full.
(final thoughts under the cut)
Though... if anyone DID find this “guide” helpful, or found some use for all the screencaps I posted, then I’ll still be happy. (As a note, you are free to take and use screencaps without my permission. Credit back to the blog would be nice, but using them without credit is also fine. I don’t own anything from this game after all.)
Anyway my final thoughts:
I am not sure if this game is 100% canon to the HE universe--though most likely not. A very small number of characters that weren’t houshined at all are inexplicably brought back to life, and I feel like Dakki acts pretty out of character in this game. WHY is she a bad guy again? I thought she was pretty satisfied being the “Great Mother”? The plot of this game really feels like an excuse to have you fight through the enemies that were already houshined in the manga; and they made Dakki the “ultimate big bad” again just because they couldn’t think of anyone better. Even so, I appreciate that the story focuses on an older Tensho, who was a fairly minor character in the original series. And even if this game is not entirely canon, I do feel like this is a fitting “sequel” of sorts to the Houshin Engi manga. Pretty much everyone gets a happy ending here (minus most of the baddies).
Weird plot stuff (and Dakki’s ooc-ness) aside, this game appears pretty obviously aimed at Houshin Engi fans. There is A LOT of “fanservice” here. You can recruit many of the popular major (and minor!) characters into your party so they can fight alongside you; and there’s all these nice little events and extra snippets of dialogue between characters that reference established in-series relationships. Although games based on manga/anime series usually tend to be either average or “not so great,” I feel like there was a lot of heart put into the Senkaiden 2 game. All the character art looks like it was drawn by Fujiryu and then translated into game graphics. The BGM and overall sprite work is also pretty good quality for its time. Plus this game is pretty darn accurate to the plot of the Houshin Engi manga series.
Of course, Senkaiden 2 is not a perfect game--the game is not that long for an rpg. Furthermore, it also gets padded out with TONS of intentionally tedious dungeon designs and forces you to level grind quite a bit. But just being able to see all the old characters again, and to see Tensho actually grow up, makes all the minor annoyances a moot point. Even though I obviously missed a lot of extra game content, and barely knew what was going on due to my lack of Japanese knowledge, I still greatly enjoyed playing through this game. I’m glad I was able to revisit and revise this walkthrough.
Thanks for visiting this blog, and for reading this post to the end.
2 notes
·
View notes
Text
Part 21: The Final Battle
Time to face off against the final boss.
If you don’t know what this is about, please refer to this previous post.
[Any new comments by me will be designated by brackets.]
For the final boss fight, I brought along Nataku and Soushou, with everyone having levels in the late 60s.
Anyway, take the final warp point down (the one that I highlighted at the end of Part 15.)


Eh?! Is that Jyoka?!
Dakki and Shinkyohyo have a brief conversation. I don't know if the alien is really Jyoka or not (possibly a different one), but it seems Dakki wants to take over its body... again?


Shinkyohyo doesn't like this one bit, and prepares to fry the alien before Dakki can take possession of the body. [Also holy cow, look at Shinkyohyo’s stats!]


Unfortunately, the alien's body is guarded by some kind of barrier, so Shinkyohyo's lightning attack just bounces off of it.

Dakki teleports a bit further up and we get a full view of the alien. Whoah, is it really THAT big?

Tensho runs past Shinkyohyo and I guess argues with Dakki/tries to stop her from doing anything evil. Then out of nowhere, Youzen!
...Seriously, where'd he come from.

If you didn't already bring Nataku along for the final battle, then he sort of just shows up too. Huh.
Youzen and Nataku do a team attack against the alien. Unfortunately, it goes just as well as Shinkyohyo's attack--which is to say, badly.


And then Hiko! And Tenka! Out of nowhere!

Kou family attack!
But even THAT doesn't seem to work against this thing.

And suddenly... Soushou!

He comet blasts the alien, which seems to work. So Soushou tries attacking it again with a standard attack which... doesn't work. Soushou's confused by this, and then, suddenly; Kibi!


She rudely shoves Tenshou, Soushou, and Shinkyohyo back.

And then... Taiitsu?! I'm not gonna even bother thinking about how everyone got here...
Suddenly, the alien starts speaking? Except I think it's through telepathy or something. Or maybe that was just Taiitsu speaking through a speaker/communication device. That would certainly explain Taiitsu’s presence in this mess of a cutscene.
Tensho figures out a way to break the shield and does so... Then the music stops.


Dakki and the body disappears!

But wait! Things aren’t over yet! Dakki reappears!


Kibi transforms into the alien we saw before and... Dakki takes over her body?
...Wait, what?

Dakki then gets transformed into THIS.

And wow, Shinkyohyo is actually worried for once. You know that when someone as strong as Shinkyohyo is worried, then some serious crap is going down.

Only someone like Dakki could manage to look pretty even in alien form.

Shinkyohyo, are you SURE that's a good idea?
Shinkyohyo tries to fry Dakki, but he gets beat up instead. So Tensho steps up to the plate. (Insert long convo between Tensho, Shinkyohyo, and Dakki here.)
Tensho seems really upset during the whole conversation, so I think Dakki's trying to destroy the world this time instead of simply merging with it. Is she trying to follow in Jyoka's footsteps?!

Are you guys ready for the FINAL BATTLE? Because everything up to this point had been ALL CUTSCENE. And you have to sit through it EVERY time you try to fight Dakki again... wonderful.
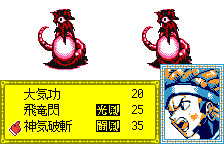
Have Tensho bomb her with special attacks, have Nataku attack her with his third attack until the special effect comes in (when the attack still hits after everyone's turn is over), then have him use his standard. Have Soushou attack with his special and/or standard and heal when necessary. It's vital that you save on EP for Nataku and Soushou. You don't have to worry so much about Tensho's EP, as I'll explain later. Soushou's is one you absolutely must worry about, as he will be the main healer of the group. His healing move, listed as his fourth move; heals the whole party. He'll make a more efficient healer than Tensho will, which is fine since Tensho (who deals way more damage) tends to be a better offensive fighter than Soushou anyway.

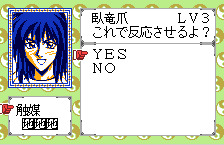
Dakki's special (shown above), not only stops all characters from attacking that turn; but she also reverts them back to their original forms/stats. Which is why it's not recommended to have Tensho and Nataku transform during this stage of the boss fight. (It'll just be a waste of EP.)
With a bit of luck, Dakki should be more focused on using supporting moves instead of attacking your team, so I didn't even have to heal once during this stage of the battle. She'll go down pretty easily too, if your level is as high as my team was. (The first time I fought Dakki in my first playthrough, my team was under level 50... yeah, you can figure out how well that went.)

However, the fight is not over yet. Oh no. The final boss isn't THAT easy. Dakki still has something up her sleeve.

She transforms into the Great Mother and you get to fight her again, without a chance to heal or save in-between.


Dakki actually looks really pretty like this. Too bad she only really wants to kill you this time around.

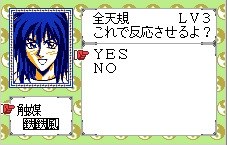
She converses with Tensho for a bit, and then you’re given two dialogue choices to choose from. I have never been more upset that I can’t read a word of Japanese. (For reference, I usually went with the first option.)
Ultimately, no matter which choice you choose, you still have to fight Dakki. Only Tensho's HP/EP is restored before the fight for some reason.
Okay, first off, have Tensho and Nataku tranform into their ultimate forms right off the bat. Dakki doesn't seem to have the annoying "revert all stats back to normal" move this time around. Have Soushou heal the whole party if you were pretty low on health at the end of the last battle.
After that, just spam both Tensho's and Nataku's specials, and Soushou's too (though still watch out for his EP so you have enough to heal when need be). Tensho should have enough EP at level 60-70 to last the whole fight just spamming his special, but Nataku probably can only do the special about four or five more times due to the last fight. It's not a big deal, because as long as he stays in his ultimate form, ALL of his attacks deal more damage--even his standard. So just switch over to his standard attack when he runs out of EP.

Dakki's second form is a lot faster and more powerful. She'll tend to attack more, have more multi-hit attacks, and her special HURTS. A lot. It's multi-hit and tends to critical hit too, sometimes dealing as much as 5000 HP damage to my lowest leveled fighter (Soushou, level 67-ish).
However, with a bit of preserverence, she'll still go down a lot easier than some of the optional bosses (*cough* Nentou and Bunchu).

After all that, Dakki completely disappears upon defeat.


Soushou (I guess) congratulates Tensho on the victory, and everyone warps back to Mount Kongrong.

Taiitsu congratulates Tensho, and I think says that Hiko and Tenka can go home with Tensho, finally. After Tensho leaves, Youzen talks to Taiitsu, who seems a bit worried about something. I don't think we find out what they’re worried about, as we are then warped to Tensho's hometown, where he talks to Ki Hatsu.


Ki Hatus is surprised to see Hiko alive, but in the end I think throws some kind of party to celebrate Tensho’s accomplishment? I'm not quite sure what happens here...


A little bit later, we see Tensho and his family all together. But then a messenger appears to give Tensho some news, and Tensho returns to see Ki Hatsu.
I guess there's still some more trouble that Tensho has to take care of, as Tensho returns to his family to tell them SOMETHING.


Then there's a scene change and we see Soushou standing at Geishitenson's grave. He says some stuff, and then everyone appears to have warped back to Mount Kongrong.

...I really wish I knew what they were talking about...
But I think the gist of it is that they were able to revive Genshitenson?

After that... Wow, this must be the best cg in the entire game. (With good reason!)

And then the credits roll as the souls fly back into the Houshindai, with Dakki's being the final soul, I guess.
After that... WALL OF TEXT.


[If someone could translate or summarize this, I would be eternally grateful.]

There’s one final shot of the Kou family... (I love that one of the first things Tensho and Tenka want to do after finally getting some free time is to battle each other, haha.)

Annnnd that’s the end of the game. Supposedly.
[In hindsight, I feel like I just got the “normal” ending, as there’s quite a bit of stuff I haven’t managed to unlock yet. I’ll be discussing those and my final thoughts in the next post.]
3 notes
·
View notes
Text
Part 20: Settling Old Scores
Tenka and Youzen both get some form of closure... through more optional boss battles.
If you don’t know what this is about, please refer to this previous post.
[Any new comments by me will be designated by brackets.]
[Many thanks to Zettaitaikun on LiveJournal for the info in this post]
If you bring Tenka along with you in your party and talk to Chuu Ou (who’s still hanging around in Roushi’s village), you’ll initiate a one-on-one battle between Tenka and Chuu Ou. It should be obvious by now, but SAVE before initiating the battle in case you lose.

Tenka and Chuu Ou recognize each other.
I guess they want a re-match because their fight before wasn't exactly "fair". (Chuu Ou was an old man with nothing left to live for, and Tenka was wounded/cursed AND didn't have his paopei with him.)

Surprisingly, this boss fight isn't as hard as others of it's kind. (Like with Nentou and Bunchu. The Bunchu fight still gives me nightmares.)
If you remember boss fights like these, you'll also realize that it's to unlock a special attack or move for the characters--in this case, it's Tenka. He can now go into super form! (Like Tenshou, Nataku, and Youzen.)

See that 50 EP move? THAT is the one you want. Select it.

Tenka has now officially gotten serious.
He now also has his "ultimate special." It's the last move listed and costs 35 EP to use.

For this fight, the only strategy is really: transform, spam special. My Tenka was at level 65, and his HP was high enough to withstand all of Chuu Ou 's attacks while just spamming his special. He can dodge a lot of Chuu Ou 's attacks while in super mode too, so don't worry about healing him. And don't bother using any other attack either-- Chuu Ou should go down before your EP's depleted.
At level 65, Tenka’s special does around 3000 points of damage, so Chuu Ou went down in about five hits. (I'm assuming Chuu Ou's HP is around 15000, yikes.)

Now that Tenka's proven that he's a better fighter fair and square, I guess he's satisfied? You get to keep his "transformation" and special so hooray!
After that, Chuu Ou goes back to saying the same thing he always says. I tried taking his son (In Cho) back to him again, but Chuu Ou disappears whenever In Cho is in your party. ...Huh.
Now that Tenka’s quest is finished, it’s time for a sidequest involving Youzen!

To activate this sidequest, you need to have both Youzen AND Gyokutei in your party. Go into the Houshindai, and keep going down right as far as you can (using the trains); and then go straight down. The floor is one of the two that's right above where Ou Tenkun is.
Now go into the house. This scene should activate:

It’s Youzen’s father, Tsuuten Kyoushu!
I guess Youzen didn't have enough courage to face his dad until his master was with him?

Boss fight time!

Except you're not in control. It's a cutscene battle! Youzen immediately transforms, then his dad special attacks him.


And then... Tsuuten Kyoushu starts rambling?
After a bit more dialogue, sad music plays... Has Youzen's dad finally regained control of his mind again? (Since he was pretty messed up after Dakki got to him.) Well, I guess so, since Youzen and Tsuuten Kyoushu seem to have made up afterwards.


[Their conversation is fairly brief. I assume there’s still a bit of awkwardness between Youzen and his dad as the two hadn’t seen each other in a long time; and Youzen was practically raised by someone else (Gyokutei).]
Anyway, what I've found out afterwards is that you can only see him when Youzen is in your party. He's not recruitable either... What a shame. Still, it’s nice that Youzen finally restored(?) his relationship with his father.
[That is all the sidequests I have been able to find out by myself and with other peoples’ help. We’ll be facing the FINAL BOSS in the next post. Be sure to look forward to that.]
To be continued...
1 note
·
View note
Text
Part 19: Passing of the Torch
In this part, we fight the optional bosses, Nentou and Bunchu. They are hard.
If you don’t know what this is about, please refer to this previous post.
[Any new comments by me will be designated by brackets.]
I'm only going to bother with upgrading attacks for Soushou and Tensho at this stage because they're the ones I'm going to use for the final boss.
To increase Tensho's weapon from level 3 to 4, just use this combo:

And after that, talk to Taiitsu and have him upgrade your weapon again. He'll do it automatically this time! And for free! (Choose the first option when given the chance.)
Five stars! Hooray!
Now Soushou's turn:
Level 2 to 3:
Level 3 to 4:
Yeah... It's the same combo for both. (If you look back at the level 1 to 2 combo, it's also the same... Convenient!) Unfortunately, Taiitsu can't increase it any higher.
I think at this point, you can visit Nentou (up in Taijou Roukun’s village) with Soushou in your party, and actually fight Nentou--with Soushou alone. Beware, as Nentou is HARD. He will use a lot of powerful attacks and support moves.

The best strategy I've found is to get all of Soushou's moves up to level four, with his level in the late 50s to early 60s. When you face Nentou, don't bother using Soushou's special move; just use his standard attack. Save all of Soushou’s EP for healing. Unfortunately, Soushou is slower than Nentou, taking away the "first hit" advantage.
Also, Soushou's healing move only heals about 1600-1700 HP. Nentou tends to deal out 2000+ HP damage... NORMALLY. This is mostly due to how much Nentou abuses--er, I mean, uses stat-boosting moves. There are two that he tends to use the most: a move that boosts his defense, and a move that boosts his attack. His special can do a hefty 2000 HP already (if you're lucky, it'll only do around 1500), so with an attack boost, he can sometimes hit you for 3000+ damage. Ouch.
So yeah, count on healing A LOT if your HP drops to the 3000-4000 range. Sounds like I'm being really cautious, but there's a reason for that. If you start skimping on the healing, you will die very, very quickly; because Nentou usually doesn't give you a second chance to heal. Also, there are times when he can cancel out your attacks. Luckily, it doesn't take away any EP if you've used a move that requires EP. Also, it doesn't let HIM attack either. But it's still pretty annoying as it tends to make this battle a lot longer than it has to be.
This is definitely one of the longer and tougher boss battles of the game, and it doesn't help that Nentou himself can heal (though only for a meager 1000 HP). It really is a battle of endurance and attrition. Just be patient, keep at it, and lo and behold, you've defeated Nentou!
For all that trouble, Nentou teaches Soushou some kind of final technique... which increases Soushou’s special to five stars! Hooray!

Now, for Bunchu... Yes, you can fight him too, with Cho Kei and his wife, Kouranei. So making an exception, here are the combos to upgrade their paopei/attacks:
Cho Kei:
Lvl 1 to 2:

Lvl 2 to 3:

Lvl 3 to 4:
Lvl 4 to 5: Talk to Taiitsu again.
Kouranei:
Lvl 1 to 2:

Lvl 2 to 3:
Lvl 3 to 4:

Lvl 4 to 5: Talk to Taiitsu again.
Anyway, you're going to have to level up Cho Kei and Kouranei if you even want to have a chance of winning. Bunchu is tough. Unfortunately, it doesn't help that Cho Kei and Kouranei know absolutely no healing moves. It also doesn't help that leveling them up is a huge pain in the behind because of their lack of pure offensive moves.
If you want to level them up efficiently, then go to the Houshindai and find the level where Raishinshi's brother Hakuyuukou resides. Just keep going down right as far as you can using the trains. At one of the "dead ends" (where you can't go right anymore), then that should be where Hakuyuukou lives. It's one of the levels above Bunchu’s old residence, if I remember correctly. Anyway, just go down the stairs there, and train near the red warp point. That way, you can level up, and heal quickly when your team's HP gets low (using Hakuyuukou).

After much trial-and-error, I have found a somewhat decent strategy for beating Bunchu.
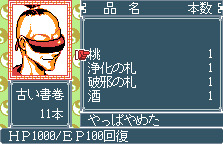
Before you fight him, Cho Kei, Kouranei, and Bunchu gain their most powerful moves/specials. It's recommended that you have Cho Kei's and Kouranei's levels be in the late 50s-early 60s, though the higher the level, the better. If you've maxed out the level on Cho Kei's paopei, spam his standard. It will do WAY more damage than his newly gained special attack. However, you'll want to spam Kouranei's newly awakened special, because if it critical hits, it can do around 3000 damage to Bunchu. Also, BRING LOTS OF HEALING ITEMS. Before, I thought that you couldn't heal senin with potions, but there's actually an item that you can heal them with... Which are these things:
You get these in chests, or by making Dokouson's master transform them (remember? Part 11a). To get the base form in the first place, you can buy them from one of the senins in Kongrong, if you have the right currency. But for the rest of us, then you'll have to either buy them from Roushi's place (the shop there sells them) or traverse alllll the way down to the vending machines in the final dungeon. One of the vending machines will sell them, for a mere 600 money, if I remember right.
...Yeah, just go get them from Roushi's place. It saves a lot of trouble and frustration. It's a really good idea to go ahead and upgrade them to the 2000 HP healing kind, even if it means losing the 100 EP restoration effect. With the damage Bunchu deals, it's better to worry about HP first, EP later.

Anyway, back to defeating Bunchu. Although he can't heal himself, he's still annoying because his riding beast Kokukirin will sometimes block your attacks. So like the Nentou battle, this one rides on a lot of luck. Just spam the above mentioned attacks, heal when you can, and pray that you'll land a lot of critical hits/not get too badly hurt.
After you get his exp low enough, Bunchu will "transform" into his more powerful form. Don't relax yet, because while he's almost close to defeat, he's even MORE powerful in this form. And faster, too. (In my playthrough, whenever he entered this mode, he became faster than Cho Kei... though luckily Kouranei was still the fastest.)
At this point, heal one more time, and just go all-out on him, because chances are, you won't have the time to heal anymore. Keeping Kouranei alive is your top priority though, as she'll always attack first, giving you an advantage. In this stage, Bunchu will almost always abuse his special, which can cause upwards of 4000 HP of damage! That's pretty much the amount of HP Cho Kei and Kouranei have! If you're lucky (luck again...) Kouranei will be able to dodge enough of Bunchu's attacks and finish him off. FINALLY.
Truthfully, I had to let Cho Kei get knocked out in this battle... His wife was the one who finally defeated Bunchu after evading like three of his attacks in a row.
[In case you’re wondering how many times I had to fight Bunchu before I actually beat him... it was over 20 times. OVER TWENTY TIMES]
After that nightmare, what do you get? Well, you get to keep the specials for Cho Kei, Kouranei, and Bunchu, of course!
Anyway, the new specials:

Cho Kei's special allows him to throw a huge boulder at one enemy and costs 40 EP. It's not that great, actually.
Kouranei's special (costing 50 EP) allows her to... shoot? Throw? many needles (the Taiyoushin) at the enemy. It hits all enemies on screen, and does a pretty decent amount of damage.

Bunchu's newly gained special move allows him “transform” into super mode. It costs 99 EP, sends all his stats through the roof, and makes his (original) special attack do tons more damage.
[We’ll be finishing up the last of the side-quests I’ve found in the next part. See you then.]
To be continued.
1 note
·
View note
Text
Part 18: Bunchu’s Request
In which Bunchu makes a request to Hiko.
If you don’t know what this is about, please refer to this previous post.
[Any new comments by me will be designated by brackets.]
~Extras Stuff~
If you bring Tenka along with you to the yokai village, you can find that the house blocked by dirt is actually a store!

It’s a store where you can buy the letters that go in the combinations to upgrade weapons.
Messing around, I also found some more team attack combinations.

You can activate the Kou family attack if you have Tensho, Tenka, and Hiko in your party. It does cost quite a bit of EP though.

Surprisingly, there’s also a special team attack involving Hiko and In Cho. Yeah, I don’t know. It’s certainly an interesting pair.
~Bunchu’s Request~
Okay, getting down to business--You'll need to have unlocked all the levels of the Houshindai. Bring Hiko along. (It doesn't matter who your third character is to activate this sidequest.)
Go all the way to the bottom of the Houshindai, and into Bunchu's residence. He and Hiko will have a conversation.

Bunchu asks Hiko to do something, and Hiko CAN NOT be removed from your party until it's done. Go out of the Houshindai and back into the abandoned palace where you fought Cho Koumei. (Bring Tenka along too)

This place really looks so much nicer without Cho Koumei turning it into some horrific puzzle. Anyway, Hiko can bust down the door here so you can get the chests.

He can also bust down the door here, which is where you want to go.
Before you go down the stairs, Hiko pauses for a bit and mentions something. Head down the stairs and you'll be greeted with a narrow passageway.
There's money in the barrel to the right, and Tenka can dig through the dirt wall seen above. There are also monster encounters here, though they're all pathetically weak.

Digging through the dirt path, there's more stuff in the barrels, and more stairs! Sadly, the stairs are only an exit way out of the place. Hmm, a hidden exit...

Now go up these stairs, which you were supposed to do in the first place.

Hey, it's the royal family burial grounds!

Go all the way up to the alter and Hiko will automatically leave something there.
Talk to Bunchu in the Houshindai again after doing this. After that, Bunchu’s residence will be empty, and Hiko will have left your party.
Warp back to M. Kongrong. Hiko will be back in his room there and Bunchu...

Becomes a recruitable party member, which you can take into battle.
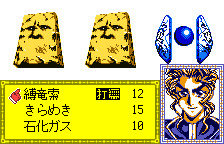
[Since I didn’t describe his attacks in detail before, Bunchu’s moves are--
First move: A standard whip attack with his Kinben. Hits all enemies on the screen.
Second move: (costs 6 EP) Like his standard attack but it hits harder.
Third move: (costs 30 EP) I have no idea what this does. I *think* it’s a defensive move that you can use to have Bunchu protect himself or other characters from taking damage.
Fourth move: (costs 12 EP) Lowers an enemy stat.]
If you take Bunchu into your party and bring him to Cho Kei in the yokai village:


Cho Kei and Kouranei then move into Mount Kongrong 2 as well and are also characters you can now add to your party!
[Cho Kei’s moves are--
First move: His standard attack. In case you were wondering if there were suddenly two Kinbens or something since Cho Kei inherited the whip after Bunchu’s death (in the manga); Cho Kei appears to have given the Kinben back to Bunchu in this game. So he’s back to using his original claw paopei. This standard attack is one where Cho Kei just slashes enemies with his claw weapons.

Second move: (costs 25 EP) Cho Kei traps an enemy in a pile of dirt, which seems to do a random amount of damage. Targets only one enemy.
Third move: (costs 10 EP) An escape move. Use to escape from battles. Possibly gives a higher chance of escaping than the standard “run away from battle” option.
Fourth move: (costs 10 EP) Appears to be a one hit-kill attack. Might have a chance of missing. Most likely will not work on bosses.
Fifth move: (costs 20 EP) I have absolutely no idea what this move does.
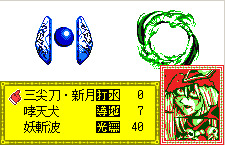
Kouranei’s moves are--
First move: Her standard attack. She throws needles at an enemy. It targets all enemies on the screen.
Second move: (costs 10 EP) Appears to raise one stat for all team members (I don’t know which stat unfortunately).
Third move: (costs 15 EP) I *think* this may cure status ailments in your party?

Fourth move: (costs 10 EP) Targets all enemies. Seems to infect them with status ailments. (It creates the weird purple amoeba things you see in the screencap above)
Fifth move: (costs 30 EP) I have no idea what this does.]

Being husband and wife, they obviously have a “team move” together. I’m not actually sure what it does, as it didn’t damage any of the enemies. I think it may just affect stats or something.

Hiko and Bunchu also have a “team move” together; that also doesn’t directly damage enemies. Again I have no idea what this actually does.
More side-plots will be wrapped up in the next post.
To be continued...
1 note
·
View note
Text
Part 17: Going Down Memory Lane
Time for a FLASHBACK moment between Tensho and Nataku; and also some other extra stuff that I couldn’t figure out where to put in the guide. This post is a bit of a mess, in all honesty.
If you don’t know what this is about, please refer to this previous post.
[Any new comments by me will be designated by brackets.]
Getting all the extras stuff out of the way first:
You can revisit Hourai Island (which has sunken into the sea), but the only reason you would want to do this is either for level grinding or to nab some of the last remaining treasures using Fugen’s “turn water into ice” ability.
If you take Hiko into your party, his “action ability” allows you to bust through certain types of doors and rocks.
Which means you can finally save that sheep in Taijou Roukun’s village!
It also means you can grab all treasure chests from previous dungeons, that were stuck behind locked doors or rocks! [Yeah I’m not gonna detail all of these locations, sorry.]
If you take In Cho into your party, his action button ability allows you to chop down certain types of trees, like so:
You can then walk over the stumps to grab any treasures blocked off by said tree. I have no idea why In Cho is the only character who can do this, considering that there are many other characters stronger than him (like Nataku???).
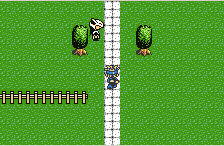
That said, remember that house with all the trees in Tensho’s hometown?
BEGONE ANNOYING TREES!
...Three paths. With spikes.
The middle path is the longest, which should be remedied by having Nataku in your party. But for the other two paths, you'll need someone that can dig through walls of dirt (Tenka) and bust through rocks (Hiko). Keep in mind that you'll have to keep In Cho in your party to get inside this place at all, and what you have a really annoying house.
Going in with Tenka or Hiko, you'll have to resort to healing constantly whenever your HP gets low. If you let it reach zero for all party members, you WILL get a game over screen. Are the treasure chests here even worth the trouble? ...I honestly don’t remember.
I *think* at this point in the game, you should have already gotten an item that allows you to unlock doors (the ones that are locked that Hiko can’t bust through).
Remember that room on the left of Ki Hatsu in his palace? Well, if you have the item needed to unlock the door...

Whooo! Treasure!
As a note, the first room on the right (in Ki Hatsu’s palace) is now occupied by Suu Kokuko! I think he gives you an item? [My memory is so fuzzy on these last few parts of the game, I’m sorry.]
Going back to Genshitenson's place, you can talk with the villagers there. Some of them have dialogue choices, and if you choose the first option for all of them I *think* you get some items.
The guy near the entrance may give you this:
It looks like a love letter of some sort???
More importantly, there will be a man standing in front of a door. If you talk to him he apparently gives you something to put on Genshitenson's grave, so do so. After that, speak to Hakutsuru and go inside Genshitenson’s hut.
Remember that pot on the right that I talked about before? Well, now Tensho can finally activate it.
It leads us to this room. A secret basement!
All the boxes have something. If I recall correctly, they’re all fairly rare items too.
Alright, alright. Time for the actual important part of this post.
[I am not sure EXACTLY when this triggers. Perhaps it’s dictated by Tensho’s or Nataku’s level, or it could be plot-related. It’s also very likely that this event could have been triggered much earlier in the game. I unfortunately didn’t find out about it until near the end-game.]
Anyway, if you have Nataku in your party when you go to sleep at Tensho’s house...
This scene will occur.
Nataku and Tensho will have a short convo.
Then there's a flashback inserted here, as we suddenly see kid-Tensho!
I didn't bother to screencap the rest of the scene, but it's basically that Nataku takes kid-Tensho flying on his back to a cliff over-looking the sea. Tensho is sad because many members of his family died. (His mom and auntie first, then his dad and brother.) I think this follows the same scene towards the end of the manga where Tensho is worried that everyone he loves will die and leave him all by himself. If that's the case, then after kid-Tensho's rant in-game, Nataku promises Tensho that he (Nataku) will always be there to look after Tensho; or something along those lines.
Back in the present, you are then treated to a mini-battle with Nataku.
You both only land one hit on each other before stopping, though.
I think Nataku remarks on how strong Tensho has gotten since they last met (which was probably when Tensho was a kid since Nataku became pretty busy after the events of the manga).
Both Tensho and Nataku continue fighting in cutscene style.
And hooray, Nataku's now unlocked his ultimate form! (...Which kind of doesn't make sense in-universe since wasn't he already in this form at the end of the manga?)
Details aside, Nataku gets five stars for everything after this event. This is the only way that you can upgrade Nataku's attacks/paopei to five stars (the max level in this game).
Both Tensho and Nataku gain their "final" moves after this cutscene. Both final moves cost quite a bit of EP, and allow them both to "transform."
Tensho's “transformation” (listed as the very last move, costing 50 EP) is less form-altering; I guess he just powers himself up instead. It ups his stats and allows you to perform a secondary special (costing 35 EP) with the cg shown earlier. It’s a really powerful attack, and really handy for big boss fights.
Nataku's transformation (costing 50 EP)... is an actual transformation.

After transforming, Nataku gains the Kinkosen (formerly Cho Koumei’s paopei), and a new special (costing 48 EP) that allows him to summon DRAGONS. Pretty awesome.
[This is probably one of the reasons why I enjoy the Senkaiden 2 game so much--enough to play through it despite not knowing a word of Japanese and even to make a guide for it. It's really rather sweet of the game producers to put the little cutscene in the game, to highlight the relationship between Tensho and Nataku.
Anyway I’ll see you again in the next post.]
To be continued.
1 note
·
View note
Text
Part 16: Juunisen Character Stats
I walk through some of the character stats and attacks for the members of the Juunisen that can be recruited into your party.
If you don’t know what this is about, please refer to this previous post.
[Any new comments by me will be designated by brackets.]
[In this post I’ll detail the attacks and stats of the other three Juunisen members you can take into your party. I already detailed Fugen’s stats all the way back in Part 9 of the guide.]
It took me an embarrassingly long time to figure this out, and I’m sure you could have taken him into your team way earlier; but you can actually get Taiitsu to join you in battle.

[Just talk to him in his room on the first floor and select the second option. He won’t always be available due to plot reasons.]

[His “defense” and “knowledge” stats are the highest... what a nerd.]
Taiitsu’s attacks are:
First move: A standard attack where he shoots some kind of fire arrow, thingy.


Second move: (costs 5 EP) He uses his paopei Kyuuryuu Shinkatou to I think incapacitate an enemy so they can't do anything.
Third move: (costs 10 EP) Heals one character.
Fourth move: (costs 15 EP) Raises a stat.
If you happen to also bring Nataku along in your party, Taiitsu and Nataku have a special team move!

It costs 30 EP for both characters. It appears to just raise a stat and doesn't do any damage to enemies. All things considered, Taiitsu is definitely more of a support character than an offensive fighter (which is fitting for him).

Taiitsu’s action button ability is that he can create maps of the area Tensho is currently in. Not as useful as it sounds, though, as you have to progress through an area first before the map is composed, and the map is reconstructed every time you enter a different area. Also, the map doesn't show the invisible path you need to take when trying to access Roushi's place (in the clouds).
Next up, Dotoku!

Fittingly enough, his power/strength stat is the highest. Which makes sense considering how much the dude loves sports and exercise. His attacks are...
First move: Standard attack, slashes with his paopei, the Bakuya no Houken II.

Second move: (costs 25 EP) A super slash. WITH FIRE. It targets all enemies.
Third move: (costs 25 EP) It shows the same cg as above except with different text. A downward fiery slash that only targets one enemy. It's a more concentrated attack, basically.

Fourth move: (costs 20 EP) Raises stats/a stat.
Fifth move: (costs 30 EP) I think it revives characters, as when I tried using it on all my un-K.O.’d characters, it wouldn't work.

He has a team attack with Tenka if you also brought Tenka along in your party. It costs 60 EP though (yikes) and it only targets one enemy.
And finally, Gyokutei’s stats:

His “skills” stat is the highest, which makes sense for the paopei he uses.

His first move is: Standard attack, he slashes with his paopei, the Zansanken.

Second move: (costs 8 EP) Same attack as above, just targets all enemies.
Third move: (costs 5 EP) He identifies the enemy and shows their HP/EP, etc. Kind of like Youzen's move does.
Fourth move: (costs 20 EP) Some kind of support move that I think affects all characters in your party.
Fifth move: (costs 30 EP) A super attack. (There’s no CG shown for it, unfortunately)

As with the others, Gyokutei also has a team attack with his disciple, Youzen. It costs 60 EP for both characters and targets all enemies.
[I know, this is kind of a weird and short post, but I couldn’t figure out where to put this information in the guide. I’ll be detailing something a bit more interesting next time.]
To be continued!
1 note
·
View note
Text
Part 15: The Final Dungeon
In this post, I make a guide about the last dungeon found in the game; but we don’t actually fight the “final boss” until much, much later on.
If you don’t know what this is about, please refer to this previous post.
[Any new comments by me will be designated by brackets.]
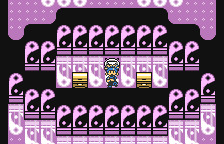
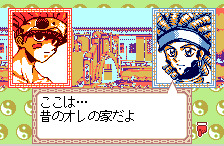
Upon entering the final area of the game, you’ll be greeted with this sight:

A mountain high up in the clouds...
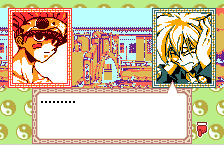
Taking the stairs down, you will then see this:

Two paths.

...Two more paths?

Just how many pathways are there?!

Yeah, there's only one real stairway down. The rest of the paths lead to dead ends. Though you should still check out the pots as most have items. (So it's not a complete waste of time if you take the wrong path.)
Just take the leftmost path to begin with, then continue taking the right path when it branches. That should lead you to the stairs.
The monsters here are pretty easy if your party's level is in the 50s.

Another maze like area.
I actually highly recommended that you take Fugen and Nataku into this dungeon on your first time through, and collect all the treasure you can. You can create shortcuts on those patches in the water with Fugen’s “action button” ability.

The next room has spikes. Tons of spikes. And it's laid out in a way where you only have one path to take. The producers seriously tried to lengthen this dungeon a lot using cheap tricks. Be aware that you’ll still be having random encounters in every room of this dungeon.
Stepping on the spikes results in everyone in your party losing 1000 HP with each step. Saying "ouch" is an understatement.
[The game never actually tells you this, but if you have Nataku in your party, you’re able to walk over spikes without taking damage. I assume Nataku just carries your entire party on his back over the spikes or something.]

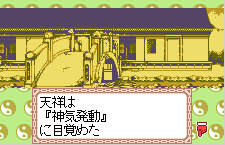
But seriously though, look at all these spikes. After taking the stairs in the Spike Room of Death, you will see this:


This game loves Yin-yang symbols.

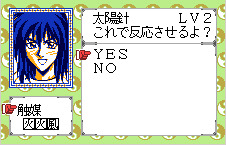
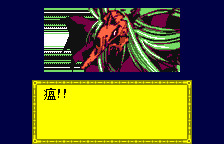
Tensho POUNDS the ground AGAIN. For some reason.


This ends up creating a big crack right down the middle of this room.


Dakki shows up, and converses with Tensho. Some dialogue choices appear but it doesn’t seem to matter which choice you pick. There’s no difference in the conversation text that appears afterwards.

Shinkyohyou arrives on the scene!
Then Kibi appears out of thin air while Dakki disappears.

Shinkyohyou and Kibi fight. Sadly, you do not get to fight Kibi yourself.
Shinkyohyou easily dodges Kibi’s attack and lightning bolts her.

She takes the attack less than well. Then she promptly disappears (deeper into the dungeon, I assume), and so does Shinkyohyou.
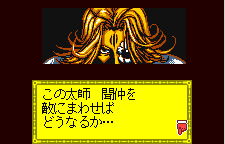
You automatically get warped back to Mount Kongrong 2 because CUTSCENE.
Tensho has a conversation with Taiitsu and Youzen.

Suddenly, Nentou appears! He returns with Soushou, who's apparently finished his training.
A loooong conversation follows. After that, return to the final dungeon. There are still some things there left to do (although we still won't be fighting the final boss just yet).
Yes, you're going to have to go through the annoying first half of the dungeon again... And don't even get me started on the SECOND HALF.
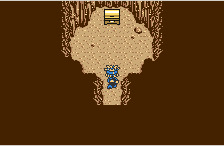
When you come back to the crack in the ground, step ON the crack. Yes.
You'll be transported here:

It kind of looks like the interior of Hourai Island, except with much less purprle.
These next few levels are essentially mazes. There are also chests scattered about, and once again, you might as well take them all the first time through.
If you're looking for a way to the stairs, just take a left, go up, then down, all the way to the wall at the bottom. Go right, and take the first path up that opens up. After that, the path is pretty straight-forward. Unnecessarily long and annoying, but straight forward, yes.

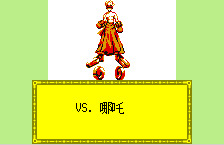
Oh hey, what's this?

A surprise mid-boss fight!

This dude’s name is Koukaku, and he’s the enemy that Cho Kei fought in the coliseum matches (volume 21 of the manga).

His special move is... he heals himself. While annoying, it could have been worse.
Have Tensho and co. special attack him like there's no tomorrow, and he should go down pretty easily.
After beating Koukaku and stepping on the downwards warp panel, you get to go through yet another maze.
Go down, right, take the path up, left, follow the path through, up, right, down, and here we are! (Yeah, probably really confusing if you're just reading this walkthrough, but you'll understand what I mean when you're playing the game.)

Another yokai enemy!


You now get to fight Kyuuin, the earthwrom yokai senin that Tensho single-handedly houshined as a kid.

Yeah, the dude’s pretty pathetic for a mid-boss. His special attack is weak and only damages one person.
Just use your own, superior special attacks to defeat him.

On the next floor are vending machines! You can buy things here if you have the money and the space.

All the way to the left and up are places where you can heal HP and EXP! Neat! (You'll have to touch the one on the left for it to work.)

Going down from there... If you still have Fugen, you can get an item from the pool of water here.

Spikes! If you still have Nataku, you can get...

Three treasure chests! Wow.

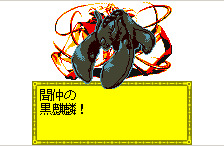
To get to the next floor, you’ll have to defeat yet another yokai mid-boss.


Is he a pile of slime of an bloated looking dust cloud? WHO KNOWS?
[In all seriousness, this is Bazen, the “formless-type” yokai. He was pretty violently defeated by Youzen’s Rikukonhan. Technically he shouldn’t have been revived either since his soul wasn’t sent to the Houshindai...]

Special attack him and watch your health. Bazen’s pretty strong compared to his other two companions.
Taking the warp panel down, yet another room! And what's this?

Apparently, it's a table. You can pick up an item from the cube thing if you have room. Directly opposite are two more chests!

One final yokai mid-boss...

It’s Chintou! One of Taikoubou’s first enemies (and houshins).


At the risk of sounding repetitive... SPECIAL ATTACK SPECIAL ATTACK SPECIAL ATTACK. And heal when you need to.
After that, the warp panel's clear!

Walking down... THIS is the final warp panel. After this, it's the point of no return and the FINAL BOSS.
...Which we are not going to do just yet. Quick backtrack out of here!

You can use the item highlighted above to warp out of any dungeon quickly. This is really nice for the final dungeon, seeing as how annoyingly long it is to go in and out.
[Now you might be wondering, “why aren’t we defeating the final boss now?”
To that, I say:
1) The final boss is EXTREMELY hard to beat, so you’ll most likely have to do tons of grinding unless the party you plan to bring to the fight are already leveled up to their 60s or 70s.
2) Senkaiden 2 doesn’t have a post-game. The game just automatically ends once you defeat the final boss. If you start up the game again, you’ll be spit out at the place you last saved at before defeating the final boss.
3) There are TONS of side-quests that you can complete at this point in the game, involving characters gaining new ultimate and special attacks and it’s just really cool. I’ll be covering all the ones that I’ve been able to find in the next few posts.]
To be continued...
1 note
·
View note
Text
Part 14: Yokai Village and Finishing the Houshindai
Tensho pays a visit to a yokai senin village. We also complete all the levels in the Houshindai in this part.
If you don’t know what this is about, please refer to this previous post.
[Any new comments by me will be designated by brackets.]

After taking the warp panel at the bottom of Mount Kongrong 2, we are dumped into this place:

Ooooh, creepy music.

Well, there's only one path here... which is up and into the cave.
The cave is pretty straight-forward, so I won't bother writing out a detailed guide for it. You can fight the monsters here if you want, but be careful. The monsters here look deceptively weak. However, they all have around 5000-4000 HP. They are pretty hard to take down with just Tensho alone. There's also a monster that can one hit kill you (the red thing), which will automatically lead to a game over as you only have Tensho in your party currently.


After passing through the cave, you eventually arrive at a yokai senin village.

The village is surprisingly small. Nearly all the unimportant villagers are given shadowy face portraits like the one shown above. There are two shops (one of which is blocked with rubble), and two houses. The house on the right...

...belongs to Cho Kei and his wife.
The house on the left...

Hey, it's Venus! I assume her two sisters are living with her too, the game producers just never bothered to make face portraits for them.
After talking to her, return to M. Kongrong via the cave and warp panel.
After that, talk to Taiitsu. If he still says the same thing as last time, try talking to Hiko, Tenka, and Nataku; and THEN go talk to Taiitsu again. [Admittedly, I don’t know the exact requirements to trigger the next part of the plot, although doing all of these things did seem to work.]
After a long convo between Tensho, Taiitsu, and Youzen; you're finally free to leave Mount Kongrong 2!

Oh hey, Mount Kongrong’s position has changed! And there are two new locations you can access from the map:

A sunken Hourai Island (a.k.a. Dakki's pink heart shaped planet of DOOM).

And this place. Another cave?!
Okay, I might as well spoil it for you here. This cave is actually the last dungeon of the game, where the FINAL BOSS resides. That was pretty quick, huh?
Fortunately, this game has quite a few sidequests so I'll detail those first before finishing off the game for good. Our first order of business is actually completing the remaining levels of the Houshindai.

Oh hey, it’s the crown prince In Cho!

He immediately wants to fight you. Just special attack him to death. He's not that hard. (Though three against one is a little unfair...)
After In Cho’s defeat, In Hon rushes in to stop everyone from fighting each other.
In Hon then stays at his brother's place in the Houshindai, and In Cho has disappeared off to someplace...

Spoilers: He’s now residing in Mount Kongrong (first floor) and is another character you can take into battle.
And last but not least...

Bunchu! (Which is kinda weird since we already saw him at Hourai Island, but Houshindai shenanigans I guess!) After meeting with Bunchu, you’re finally finished with the Houshindai. Sort of.

There looks to be another set of stairs down on Bunchu’s “floor,” although it is blocked by none other than...

Ou Tenkun!
[He won’t let you pass; probably not until you meet a very specific and arbitrary set of game requirements. No, I do not know what those requirements are. No, I do not know what happened to Fukki either.]
That’s all for this post. See you in the next one.
To be continued.
1 note
·
View note
Text
Part 13b: Hourai Island (continued)
Time to rescue the best dad in the Houshin Engi series.
If you don’t know what this is about, please refer to this previous post.
[Any new comments by me will be designated by brackets.]
Continuing on from last time, after defeating Ouma and Ri Kouha, you suddenly come face to face with Bunchu.

And Kokukirin!

[In hindsight, Kokukirin’s revival in this game makes no sense? They weren’t houshined, they just died... The only people who have been revived in this game were those that had their souls sent to the Houshindai; otherwise why not just go and revive Tensho’s mom and aunt as well? I think this was an oversight on the game developer’s part...]
You're given a choice between two text options during the conversation with Bunchu. I think the second one is the better choice, based on the music that plays.
Either way, both Shisei members will disappear from your path after this encounter.
On the next floor, first collect the treasure chest left, then go up to talk to the mad scientist looking guy.

SAVE SAVE SAVE BEFORE YOU DO. More dialogue choices are coming up, and the next one actually counts for something.

Ugh, it’s Ryogaku. You'll have to fight him immediately upon touching him.
Well, not HIM specifically. More like his son, Bagen. (The poor kid that got a paopei implanted into him...)
Of course, Tensho and Tenka are VERY pissed about this.

Special Attack him LIKE MAD. If you brought along Nataku (which is hightly recommended for this dungeon) then just have him use his standard or second listed move. If you're really lucky, Tenka will manage to land critical hits EVERY TIME.
Ryogaku revives Bagen and then you have to fight him AGAIN. Use the same strategy detailed above and he should go down quickly enough.
The quack doctor is about to revive his son yet again, but Bunchu decides he's had enough of this tomfoolery and puts the smackdown on the doctor.


Apparently Bunchu also brought along Cho Kei and Cho Kei’s wife, Kouranei.

Bagen asks Nataku to put him out of his misery... again. Nataku reluctantly does so.
[Apparently, this is one of the few places in the game where the presence of certain characters can actually drastically change the boss battle. If you don’t have Nataku in your party when encountering Ryogaku, you apparently end up fighting both Bagen AND Ryogaku as Bunchu, Cho Kei, and Kouranei. I unfortunately can’t confirm this myself as I am way past this part of the game in my save file; but was informed of this by zettaitaikun on LiveJournal.]

After Bagen and Ryogaku are defeated... Dakki out of nowhere!

And Kou Hiko too!

Unfortunately, it still seems as if he's been brain-washed. It seems as if Hiko doesn't remember who Tenka or Tensho are...

Well, there's only one way to snap him out of this... by defeating him!
Special attack him like mad once again. This will be the last battle of the dungeon so don’t worry about conserving EP.
Hiko's actually pretty easy. I think he honestly has less than 10000 HP (which was what the Shisei had) so he went down in like two turns for me.
But he DOES still give 1000 exp upon defeat, like other bosses.

Apparently, he still wants to fight, though? Bunchu tries to talk to Hiko to make him snap out of it. But then Kouranei notices something odd...


Is that... a Suupu plush?


Apparently the “Hiko” we just fought was actually Kibi in disguise.
Dakki asks you something and you're given two choices... I went with the first one.
Dakki and Kibi disappear afterwards, much to Tensho's rage.


Okay, now Bunchu gives you two choices to choose from. This is, as far as I know, possibly the ONLY point in the game where a conversation choice actually gives you a distinct scenario based on what option you choose.
If you choose the second choice, Tensho is basically tasked with destroying the core of Hourai Island.


It’s pretty straightforward and fairly uninteresting--I’m actually surprised this was even listed as an option at all compared to the other choice.
Because the first choice allows you to go and personally save Tensho's dad, Hiko.


Bunchu temporarily joins your party! He has super high stats because he’s Bunchu!

Bunchu’s standard attack is a whip attack (pretty obviously), and it multi-hits all enemies.

His “super” attack is essentially the same thing except STRONGER.


After going through a few more areas you finally get to meet the real Hiko. And Tensho is so happy it’s heartwarming.

Tensho tries to break down the bars by RUNNING into them. Uh, not the smartest idea, but you've got to give him credit for trying.

It doesn't work, even with Tensho's super strength. Hiko and Bunchu have a happy buddy moment and then Bunchu decides to bust through the bars and free Hiko himself.


Bunchu then disappears immediately afterwards and Hiko breaks down a freaking door because he can.

It’s one big happy family reunion!
After that, there is a long convo between EVERYONE which I couldn't be bothered screencapping because they just re-used face portraits.
When you regain control of Tensho again, talk to Taiitsu. It's another solo mission time. Head all the way to the bottom of M. Kongrong. The warp portal is now open!

To be continued...
1 note
·
View note
Text
Part 13a: Hourai Island
More plot, cameos, and battles ahead.
If you don’t know what this is about, please refer to this previous post.
[Any new comments by me will be designated by brackets.]
[I’m choosing to split this chapter into two parts, not necessarily because it’s particularly long, but rather because there are A LOT of images here. I don’t want to tax anyone’s internet too much.]

First order of business, paopei upgrades for Raishinshi. He's the only other character who gets free upgrades since his master, Unchuushi, automatically upgrades Rai's paopei if you visit Unchuushi with Raishinshi in your party.
I also decided to go and get the last two members of the Juunisen, so here we go! Into the Houshindai!

First off is Monju Kouhou Tenson, Kintaku’s master.


Next up is Raishinshi's brother, Hakuyuukou! (I just happened to have Rai in my party when we unlocked him.) He stays in the Houshindai, but he serves as a healing point, which is pretty helpful.

Next, FINALLY, is Tenka's master (Dotoku Shinkun).
If you go back to Mount Kongrong 2 and visit Dotoku’s room with Tenka in your party, you’re treated to a special cutscene.

You can get a special move for Tenka here, which is sweet. (Dotoku gives you two choices but nothing really changed with either choice so I guess it's just another one of those "conversation change" things.)

If you have space in your party, Dotoku is another character that you can bring along! Whoo!

And Kintaku's master that we unlocked before does... something? I don't know what it is, in all honesty.
If you’re ready to progress the plot, talk to Taiitsu on the first floor. After the convo, Tensho will have to check on Nataku in his (Nataku’s) room.

[Nataku’s all better now, although he seems confused. I guess because he’s basically unconscious while in “ball form” and a lot of PLOT happened in the meantime.]
After that, make Tensho sleep in his own room. Tenka will wake Tensho up the next day (I think).
Go talk to Taiitsu again.
He asks you if you're ready set off. (First choice is a no, second is a yes. I’m not sure if that’s exactly what the text says, but that's the basic gist of it.)
HERE is a point of no return. At least, for a little while. So gather all the supplies you need, get money from the money man, etc etc. After you're done, talk to Taiitsu and say you're ready.
Wait, ready for what, exactly? Well...

Air travel, Mount Kongrong style!

After that, you can't leave Kongrong because it's flying. BUT! Raishinshi is nice enough to drop you off at the Houshindai to do more training if you wanted to do that.
Just... waste time by talking to people. And going in and out of rooms. Keep checking in on Taiitsu to see whether the flight is over yet.
Eventually, talking to Taiitsu will get you a short convo. We've... landed?

Oh hey, that's Dakki's personal spaceship rock thing! (Hourai Island)


She's using Cho Koumei's projector paopei to project an image of herself.
After Dakki finishes talking, you can enter Hourai Island. Tenka is automatically put into your party, so you can bring one more character along. I'm choosing to bring Nataku. (He can also be upgraded once more by Taiitsu.)
Tenka and Nataku both have super attacks now!
(Costs 30 EP and 40 EP respectively.)

Tenka's super attack is a cool looking sword slash while Nataku's is just crazy--an attack that hits all enemies. He shoots laser beams, his paopei, and then flamethrowers everything. Talk about overkill.
Anyway, talk to Raishinshi and select this option:

To go to Dakki's horrifying pink heart-shaped planet of DOOM.


Wow, everything's purple.
New location, new enemies. Fortunately, if you have been training (like I have), and your level for the whole party is in the 40s, then there shouldn't be too much to worry about.
It doesn't matter which way you take (left or right) as you'll still end up here:

Hmm, what's this?

Hey, it's the Shisei! The guys who worked for Bunchu!

Or at least, two of the members.

Whooo, it's been awhile since our last boss fight, so here we go! The guy on the left is Youshin; the guy on the right is Kouyuuken.
Have everyone use multi-hit attacks.


Kouyuuken has water-based powers, while Youshin has earth-based powers.


Wow, the Shisei really don't waste any time--they straight out attacked me with their strongest attacks in their first turn. Youshin also has a one-hit KO attack so be wary of that too.
If you want to finish the battle quickly, go ahead and use team-attacks/special attacks, etc. It's still only the first floor so you can easily head back to M. Kongrong to heal up on HP/EP.
Tensho is now gifted with a special attack too! (I don't know if this is level based or plot-based, unfortunately.)
It costs 25 EP to use and does this:


It is a pretty rad attack.
After the battle, the Shisei decide to just kindly leave instead of getting re-houshined like so many other bosses in this game. It’s not necessary, but I recommend that you head back to M. Kongrong to heal because you'll be facing the rest of the Shisei soon enough.
On the second floor, head left. The right is a dead end but DOES have a treasure chest for you to collect.

I like the color purple but, ugh, this is just going overboard. Most of the enemies here are purple...


After a very roundabout route, we meet the other two members of the Shisei!

Ouma (left) and Ri Kouha (right). Unsurprisingly, we also have to fight and beat them.


Ri Kouha specializes in light-based attacks, while Ouma specializes in. Uh. Explosions.


For THIS boss battle, you actually want to focus your attacks and take one of them down first. It doesn't matter who, though I usually take out Ouma first. If you let them keep attacking together, they will deal massive damage that Tensho can't heal quickly enough. So yeah.
Other than that, they’re not too terribly difficult.
The rest of Hourai Island will be covered in the next post.
1 note
·
View note
Text
Part 12: In the Clouds
The part of the game where Tensho has to complete some finicky and very specific game requirements to progress the story.
If you don’t know what this is about, please refer to this previous post.
[Any new comments by me will be designated by brackets.]
[Oof, this chapter’s one of the messier ones... I’ve cleaned it up a lot from the original LiveJournal post, but it still jumps around a lot in places. Apologies for that.]
Before I get on with the plot of the game, I found some upgrades!
Tensho:
Lv 2 --> 3:

Tenka:
Second listed item, Lv 1 --> 2

Youzen's:
First listed item, Lv 1 --> 2

First listed item, Lv 2 --> 3

Second item listed, Lv 1 --> 2

Second item listed, Lv 2 --> 3

[I uh. Really hope these combinations are still correct as I am unable to test them out in the old saved game I have. I highly recommend upgrading paopei/weapons whenever you can because it helps to make all future battles significantly easier.]
Oh, I forgot to mention before, but you should have gotten a few equipable items by now. Those are marked with stars (in the item description) in the inventory menu:

You can equip them to characters by selecting the third “word” in the menu screen:

Some equipment items affect certain stats, while some I guess negate status ailments. If you don't know Japanese, then finding out the effects pretty much comes down to trial and error. (I won't be listing the specific effects of all the equipable items--Sorry!)
Cavechan was nice enough to translate the character stat screen for us in part 1, so that should be a big help when you're messing around with equipment. (Thank you again to Cavechan!)

In the end, I had to equip Tenka with an item to boost his attack because it was pathetically weak.
Also, I've recently found out that you can't use HP-restoring potions on doushi/senin. I have no idea why this happens. This means that if you want to heal these characters while in a dungeon, you have to use a character that has a healing move. Man, that's going to be annoying in a pinch.
Anyway, time for more level grinding in the Houshindai!
I will only be unlocking two senins in the Houshindai today because the monsters on the lower floor are getting harder and harder to beat.

Another of the Juunisen, and In Hon's master. His name's Seki Seishi. (Also, he apparently talks A LOT.)
I also unlocked In Cho's master! (Kou Seishi)
Their bonus is:

They both sell things for something other than cash. One seems to sell potions while the other just sells combo upgrades. I suppose it’s decently useful?
While training in the Houshindai, I messed around with some of Youzen’s new moves.
After having beaten Chou Koumei (yet again), Youzen can now transform into him (4th move, second option.)
Sadly, you only have one attack Chou Koumei (a whip-like attack) and it frankly sucks because it does such a small amount of damage. I think this form is balanced out with all the supporting moves you have at your disposal, though I admittedly never utilized Chou Koumei’s form much.
And oooh, the 60 EP move (unlocked from the cutscene between Youzen and Gyokutei) allows Youzen to go into yokai form!

His ultimate attack (costing 40 EP) does A TON of damage.
(For reference, I was only doing about 1000 points of damage with Tensho and Tenka at this stage in the game.)
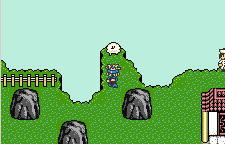
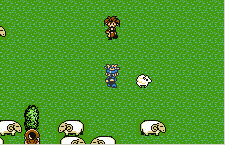
Anyway, time to head to the new location, finally. It looks to be someplace up in the clouds?

Hmm, that kid looks familiar...
Hey, it's kid-Tensho!
...Wait, what?
Yeah, this is actually all just an illusion. Those treasure chests scattered about are actually real, but you’ll have to find a way to get to them yourself because... Well, you’ll see why soon enough.
After the short convo, kid-Tensho beckons you to follow him, and he’ll move a few steps along some kind of invisible path. You have to follow kid-Tensho’s steps EXACTLY. Otherwise you'll fall off the clouds (Hitou saves you from falling to your death) and have to re-do the path all over again. This “invisible path” is ridiculously long, which is why they included a guide in the form of kid-Tensho. You have to follow him about six times. You can save at any time in this area; so if you're the type that has trouble following an exact path, then you might want to save in the middle so you don’t have to keep restarting all the way at the beginning if you make a mistake.
Also, don't follow too closely behind kid-Tensho, otherwise you might accidentally walk ahead too far when he turns. This happened to me many, many times. [I’m not going to give a guide on how to grab any of the treasure chests in this area, because honestly; I haven’t been able to figure out how to grab most of the chests myself.]
After all of that trouble, Tensho finds himself in a quant little village in the clouds. (It's actually a small village on top of a very high mountain, if you've read the manga.)
I'm going to just say this now for lack of a better place to bring it up: when you exit, you'll immediately leave the place. (You won't have to go through the invisble path in reverse or anything.) But you'll have to do the walkway “puzzle” again every time you try to visit the village. Really quite annoying. The next time you arrive, you'll be given three options on how to do the puzzle--slow, medium, or fast. This refers to how quickly kid-Tensho walks along the path. If you have amazing memory and want to save time, then you can choose the medium or fast option. I always go with slow, because it's the turns that get me...
The cameos in this village include:
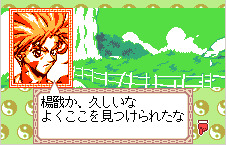
The Village Chief guy with a strong aura.

And surprisingly, an un-possessed Chuu Ou. I have no idea how he got here or even what he’s doing here, but I get the feeling Shinkyohyo had a hand in this somehow.
And of course, there’s Taijou Roukun (a.k.a. Roushi) sleeping amongst the sheep.

[Alright, this part... You’re supposed to talk to Taijou Roukun but he’s not an easy guy to get in contact with, as he’s almost always asleep. Even now I still don’t know the EXACT requirements on how you activate the next part of the game’s plot, but I have figured out a rough guideline... sorta.
Talk to EVERYONE in this location ONCE.
Yes, even the sheep. But ONLY once. If you talk to the same sheep twice by accident, the next cutscene won’t activate. This is an extremely specific set of requirements, I know.]
After having talked to everyone and every sheep ONCE, go up to Taikou Roukun and try talking to him. After the usual sleeping noises Roushi makes, Tensho will say something.
I "think" after doing EVERYTHING you possibly can do, Tensho figures it out and does the same thing Taikoubou did to talk to Roushi... Sleep.

No BGM plays in this mini-cutscene. That means important stuff. Too bad I can't read Japanese. You're given two different dialogue choices in a row. I don't think it really has much effect on the storyline, but I don’t have any real way of confirming that (due to my lack of Japanese language knowledge).
[I have no idea what this says but it’s probably important.]
In case you're wondering, I just went with the first choices for both “choose your dialogue” moment in the convo with Roushi. In this game, the first choice tends to be the better one, it seems.
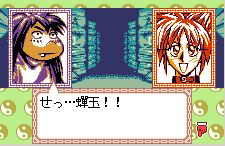
After that mini-cutscene...
Hey, you're--!
Nentou Doujin! (By the way, his BGM is AWESOME.) Talk to him, and you’ll get treated to a loooong conversation. After that, leave Taijou Roukun’s place. The dot over Mount Kongrong’s location should be flashing, and all your party members will be gone. Don’t worry--this is only a temporary thing.
To continue the plot of the game, you'll have to bring Soushou along to the village in the clouds. (His room is the back right one, on the first floor.) Then head back to talk to Nentou. I can’t remember if it was ever officially confirmed (or if I’ve already mentioned it in this guide), but Nentou is Soushou’s master.

After another long convo, Soushou stays behind, I guess to train under Nentou. You get the rest of your party members back here.

Like master, like disciple.
BONUS MATERIAL TIME (a.k.a. some extra stuff that I didn’t know where to put so it’s going in this post whoop whoop)
At this point in the game, some locations on the overworld have changed a bit. If you go back to the water cave area (the one with all the arrows), you'll find Sengyoku and Dokouson there now.

I have NO idea why they're even standing here. Maybe to guard the place? Maybe because Sengyoku thinks that it's a romantic spot?
Anyway, if you want to initiate a rather humorous scene; first have youzen transform into this:

Second, talk to Dokouson.

In case you're wondering who Youzen just transformed into, it's Hekiun, one of Ryuukitsu's disciples.
Dokouson starts drooling over her and his wifey gets mad.

There’s some pounding noises and the screen shakes.
You can also now find Mokutaku and Kintaku at the old battlefield area.

It took me a long time to figure this out, but Tenka’s “action button” allows him to bust through certain walls:
Apparently the one-off “Tenka as a construction worker” joke from the manga was so funny to the game creators that they included a special face portrait of Tenka in a hardhat.
Anyway, if you head back to Tensho’s hometown after finishing the Taijou Roukun cutscene, you’ll be given a lot of dialogue choices if you talk to the villagers. This doesn’t seem to do anything too important.
But if you choose the second dialogue option on one of the old men, he begins frantically running around the whole town. It's... somewhat amusing in a morbid kind of way.
The old dude freaking runs at the speed of light. I had to block him like this to get a screenshot of him.
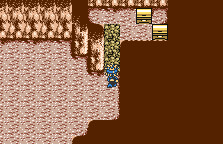
Going back to Genshitenson's place briefly...


A grave has been built for him. I think Hakutsuru built it?
Inside Geishitenson's hut, if you look at the right pot at the back of the room, Hitou will say something. THIS IS IMPORTANT. He doesn't do it when you look at the other pot (on the left) so you know something's up. We will return here later.
[That’s all for this post. I hope you guys enjoyed it, despite it being a bit of a mess.]
To be continued.
1 note
·
View note
Text
Part 11b: The Juttenkun Battles (continued)
The end of the boss gauntlet rewards us... with another boss battle?!
If you don’t know what this is about, please refer to this previous post.
[Any new comments by me will be designated by brackets.]
Continuing on from last time:


Luckily Haku Tenkun and Shin Tenkun have no one-hit KO attacks on them, but they can afflict your party with some annoying status ailments; such as one which completely paralyzes a party member so they’re unable to do anything at all.


Since they don’t have a one-hit KO attack, they’re not too difficult. Just multi-hit them to death. They also don't do very much damage (compared to the last three bosses) either.

(If you happen to get the status effect where your character can't do ANYTHING, just go to Unchushuu to get rid of it.)

Last statue!

Let's just get this over with...

[This time you’re fighting En Tenkun and Son Tenkun]


[By the way, Son Tenkun also has a one-hit KO attack so. Have fun with that. Your best strategy is to again just use multi-hit attacks, heal with Soushou as needed, and pray that Son Tenkun’s KO attack doesn’t hit anyone. These Juttenkun battles hinge on a lot of luck, which is why I despise them.]

[So that’s basically all the Juttenkun defeated (again), except for Ou Tenkun who is MIA.]
After the last boss, AVOID the finised yin-yang symbol and instead HEAL and SAVE. And stock up on potions again if that's your kind of thing. (If you use potions, then it'll probably be nearly depleted by now, what with the ridiculous boss battles.)
When you're ready, step on the finised Yin-yang symbol to activate the next part of the story.

(The symbol flickers in the game, but this is un-capturable in still shots)


[The happy BGM fades and Dakki appears. Tensho isn’t happy to see Dakki either.]

A CHALLENGER APPEARS!

Hey it's Chuu Ou! He died too, but I guess like everyone else in the Houshindai, he was revived. Maybe by Dakki?


[Chuu Ou then undergoes a hideous transformation. Which we have to fight. Because of course.]

Thankfully, after all the cheap bosses that were the Juttenkun, transformed Chuu Ou is not that hard--and he’s also thankfully not invincible like in the manga.


...That looks painful.
As a boss, Chuu Ou has a single-hit attack, a multi-hit attack, and the move shown above which *I think* increases all his stats.
Just have Tensho attack with his standard attack and use his healing move if you only need to heal one character; have Tenka attack with his second move (it’s stronger than his standard one), and have Soushou use his special because it does more damage than his standard (and of course, heal with him if the need arises).
Apparently, "defeating" him in game is not really enough to DEFEAT him. So Tensho calls on the power of Hitou to create illusions of the people that Chuu Ou is closest to, to make him snap out of his madness.

(Hitou used illusion! It’ super effective!)


[We get some nice cameos of characters who have and haven’t appeared yet.]

He's back to normal! Hooray!
Chuoh then quickly exits the scene. Well, at least he's not possessed by Dakki anymore?

I think Tenka attempts to attack Dakki next.


Wait, what?

Apparently, Hiko has been possessed by Dakki now...

Unfortunately, Hiko is so strong that he single-handedly defeats Tenka AND Soushou.
Fortunately, Hiko doesn't take down Tenshou too; but unfortunately, Tensho can only watch in horror as Dakki whisks herself and Hiko somewhere unknown.

((cue ground-pounding))
You are immediately returned to Mount Kongrong 2 (at full health! Nice!)
Soushou's booted out of your party and replaced with Youzen. Long time no see, Youzen!
You'll have to get out of M. Kongrong to activate the next plot point. But first...

You can visit Youzen's master on the 2nd floor of Mount Kongrong, if you’ve already unlocked him. [A special scene will play.]
Youzen and Gyokutei have a nice long chat. Afterwards, Youzen gains this move:

...60 EP to use? Yikes. I think this may be Youzen's ultimate attack.
Anyway, as when you try to get out of Kongrong, guess who appears?

Ugh, this guy is a bad omen, seriously.
After the convo, Shinkyou leaves. As usual. He also opens up a new location! It's a place in the clouds?

(If you've read the manga, I think you can tell who we will meet next...)
To be continued!
[I also wanted to include this image that I put together because I thought it was hilarious.]

1 note
·
View note
Text
Part 11a: The Juttenkun Battles
This was originally one loooong chapter but I’m choosing to split it up due to the massive amount of screenshots present.
If you don’t know what this is about, please refer to this previous post.
[Any new comments by me will be designated by brackets.]
Now that Cho Kou Mei's annoying dungeon is out of the way, let's see what our heroes will discover next.
I made a short trip through the Houshindai, to level up Tensho and co. and to unlock some more characters. If I haven't said this previously, then I will say this now: I won't be detailing much of the Houshindai since all the levels are essentially the same. However, I will show off all the characters you can meet.
First off, this guy:

It's Reihou Daihoushi! Not that big a character in the series, but his bonus is my favorite.

After you unlock him and talk to him in Mount Kongrong 2, he'll let you hear all the tracks in the game. I think it's pretty cool.
Second, I unlocked this character:

Hey, isn't that In Hon? Tensho seems to know him, which in itself is pretty surprising. (Wasn't Tensho around ten years old when In Hon died? Did Tensho even see his face at that battle?)
In Hon disappears after you talk to him. We'll see him again later, though.
Next up, another of the Juunisen!

It’s Doukouson's master, Kuuryuuson Daihoushi.

His bonus is... he upgrades a certain type of healing item.

This...

Becomes this.
It goes from healing 1000 HP and 100 EP to healing just 2000 HP. Not a bad upgrade, but since I don't use potions/healing items much anyway, its a pretty useless bonus (for me). Plus you can only upgrade THAT certain item, which decreases the usefulness.
I like even numbers, so lets nab ourselves one more character to make a total of four.
Hello, who's this?

Ooooh, Youzen's master, Gyokutei Shinjin! His bonus is that he can be taken into battle.

Unfortunately, I'm at a point were neither Tenka nor Soushou can be booted out (they're needed for plot stuff), so I'll have to show off his attacks later. In all honesty, I'd have to say that he's much weaker than his disciple, Youzen. It seems that most of the senin/doushi characters you can bring into your party are pretty weak attack-wise. But I digress.
It’s time to go the new location now! When you enter, you'll immediately be forced into a short convo. After that, SAVE. Why?

Where'd you come from?! (seriously, he just appears out of thin air.)
He's one of the Juttenkun...

And hey, Ou Tenkun gets mentioned! (I like that they used black as the background here... whereas for almost every other character the BG is white)

What’s this?! A boss fight BEFORE going through a dungeon? BLASPHEMY!

This guy (his name’s Chou Tenkun) is really easy, fortunately. His boss fight is basically a repeat of the Cho Koumei fight--Main baddie in the middle, with two familiars on the sides. Just use the same exact strategy used in the Chou Koumei battle and he'll go down easily enough.

He CAN bury underground at times (which is the only difference from the Chou Koumei battle), making him a bit harder to hit him than Chou Koumei, but he's still relatively easy. His sand people do heal (him) and attack (you), but for no where near the amount that Chou Koumei's plants could. Even still, you should play cautiously (save before battle, heal when necessary) to prevent any game overs.
He only gives 500 exp upon defeat too, contrary to the usual 1000 that bosses give. That should be more than enough indication that he's a weak boss.
Now that that guy's gone, you can explore the place a bit.

This place looks to have been a battlefield of some kind, with an ominous looking black spot in the middle. What is it’s purpose? Well, you'll find out soon enough.

Treasure! This is the only one I'll bother screencapping. You can find more treasure chests strewn about around here. They’re easy enough to find.

Okay, the gimmick of this “dungeon” is that there are four paths from the main entrance. Each of them lead to a place with these statues:

And a symbol like this:

Yup! You guessed it, we're going to have to move the statues onto the symbols! You can press the a/z/action button to push the statues. However, Tensho can only push a statue in one direction (the direction he's facing). This makes the puzzle a tad more challenging, but not by much. Also, yeah, you're going to have to do this four times.
BUT THAT'S NOT ALL!
You'll have to fight a boss every time you push a statue onto the symbol. I strongly recommend healing (either at Tensho’s house or at Mount Kongrong) after every boss fight. It will be annoying having to go back and forth between locations, but it's even more annoying trying to fight when you've run out of EP. The bosses here WILL annihilate your party if you’re not careful.
Regular monster encounters are also common here, but it's better just to run away from them, unless there's only one monster to fight. (If you've already leveled up in the Houshindai, you should be fine.)
I also won't be showing you how to solve the puzzles specifically, because it's really no too hard. If you end up “stuck,” then you can refresh the puzzle by simply leaving the screen and going back.

Also, SAVE right before you shove a statue onto the symbol, otherwise if you fail to defeat the boss the first time, you'll have to re-do the puzzle if you did not save right there.
(For anyone having trouble with the cat statue, you'll have to take the long route right to get it onto the symbol. The left route is shorter, but impossible.)

[Tou Tenkun appears. I’m sure Tenka and Tensho remember him well.]

As if a boss fight gauntlet wasn’t bad enough, most of the Juttenkun fight in pairs. This time it’s Chou Tenkun and Tou Tenkun.
This fight is (I think) the first one that introduces one-hit KO attacks from the bosses. The only way you can heal KOs is with a potion at this point, since no one in your current party (Tenshou, Tenka, or Soushou) know how to revive people--at least, not to my knowledge.
Prepare to restart your game a lot here. You CAN just go on and win with one or two party members down, but its not recommended as you get a lot of exp in boss fights, but downed party members don't get any. It's a waste of a good amount of exp.

Strategy: MULTI-HIT ATTACK EVERY TURN
...But heal with Soushou if you need to, because chances are, you'll likely have a lot of characters at low health in this battle.
These two guys are ANNOYING. Chou Tenkun can heal and increase (their) defense, while Tou Tenkun can instant-kill one of your party members. You'll pretty much be using multi-hit attacks all the way through this fight, but if you must, then kill Tou Tenkun first. That is top priority.

Actually, if you're really worried about Tou Tenkun going KO happy on you, then have Tenka attack Tou Tenkun with his second move while everyone else multi-hits. (And ABUSE Soushou's special when you're not using him to heal.)

[After Tou Tenkun goes down, the boss battle gets much easier. I’m pretty sure my entire party was wiped out about five times attempting this boss fight because Tou Tenkun would not stop abusing his one-hit KO attack.]

GOOD RIDANCE!

1 of 4 parts down! Three more to go.

By the way, you can cross this "bridge."

Another boss fight, here we come! (I think the statue is a turtle.)

...Soushou's looking awful cocky there.

This battle is relatively easy compared to the horror of the last bast battle. Though Kinko Seibo still does TONS of damage, so don’t get too complacent. You'll likely be healing with Soushou non-stop after the damage starts flying your way.

Don't worry too much about the dude in blue. That's another "familiar" that the main boss summons. (It's a "shadowman.") As such, he only does meager damage. He goes down pretty easily too.
...Do I even need to go into battle strategy specifics here? Multi-hit, then heal with Soushou when needed. (Your main priority is taking down Kinko Seibo, obviously.)

[After defeating her, you’ll come face to face with You Tenkun.]
You're given two dialogue choices after he stops talking, though I don’t think it really matters which one you pick because you'll still have to fight him.

Yes, it’s a consecutive boss battle.
Since you’re only ONE enemy this time, just spam your strongest attacks on him.
Beware, though, as he can counter your attacks (and it gets very, very annoying). Like Tou Tenkun, he ALSO has a one-hit KO attack. I think it’s awfully cruel of the game creators to put in such a “cheap” boss right after another one (you aren’t even given the chance to save the game after the Kinko Seibo fight).
[I don’t really have a strategy for this guy, just spam your specials and hope that luck is on your side, and that you’ll manage to defeat him before he KO’s one of your team members.]
I’ll be detailing the rest of this “dungeon” and the Juttenkun fights in the next post.
To be continued.
1 note
·
View note
Text
Part 10: Chou Koumei’s Revenge
In this chapter, there is a gimmicky (and annoying) dungeon, as well as a potentially challenging boss fight.
If you don’t know what this is about, please refer to this previous post.
[Any new comments by me will be designated by brackets.]

A new dungeon... which means there is a new puzzle gimmick.
I absolutely despise this dungeon, for multiple reasons.

First of all, what kind of color scheme is that?! The neon green color is blinding!
Second of all... I really hate the monsters here. The encounter rate is ridiculously high, and paired with this awful puzzle gimmick, having to fight enemies just becomes incredibly annoying.

DIE. (*chi blast*)
Third... THIS PUZZLE. This puzzle is the standard, "rotating doors"-type puzzle.

Do you see these flowers scattered all over the floor? Well, you can walk over the ones with the closed buds; but once you do...

You can not go back. So to break it down for you:
Closed budded flowers: Can walk over Open flower: Can't walk over.
The main reason why this type of gimmick is annoying is because it gets very easy to trap yourself if you're not careful. It also doesn't help that the screen for the wonderswan is so small that you can't even see where all the "entrances" are located.
Anyway, if you want to level up, it's best to do that NOW. Because once you get to the second room, it's almost guaranteed that you will not be able to go back out. (Well, you can... It's just ridiculously annoying to find a way back out.)
Also, you might want to go and upgrade Soushou's paopei, because his attacks are pretty weak at this point.

(His combination is the same as Tensho's...)
Oh yeah, I need to detail Fugen's and Soushou's moves.
Okay, Fugen's moves are:
1st move: I have no idea what this does (and you can choose from three options) but IT LOOKS PRETTY.


Seriously, he gets THREE screens of CG. (Noteventhefinalbossgetsthat) And it's not even a "special attack" nor does it cost any EP.
I... think it makes Fugen put up a force field, or something? I have no idea.
2nd move: His sole attack move. It makes the enemies... explode? Or he messes with their atoms. (That sounds painful...)
3rd move: He analyzes the enemy to reveal their stats, similar to Youzen's move except not as detailed. It only shows their HP.
4th and 5th move: I think one of those heals status problem and the other does some kind of stat boost?
Soushou's moves: (he's got a few more than "Kibi-in-disguise" does.)
1st move: A standard attack. A simple strike with his paopei. (You don’t really get a good look at it in this game, but he apparently wields a pair of tonfas.)
2nd move: Hit all ememies attack.
3rd move: His "super" attack. The one shown last chapter. (It makes lasers fall from the sky to damage all enemies.)
4th move: THIS move is what makes Soushou really useful. It's a move that heals all members in your party. In the really tough battles, I tend to just have Soushou heal because a) he has more EP, and b) he heals everyone, so I don't have to keep using Tensho to heal. It can be used outside of battle too, like all other healing moves.
5th and 6th moves: Supporting moves. I don't know what their effects are.
Alright, now to try to get through this mess of a dungeon...
I'll show you the way to get all the chests here also.
Note: This walkthrough assumes that you are ready to go all the way to the end of the dungeon, meaning that you have leveled up as much as you wanted, and have healed up. SAVE THE GAME ON EVERY FLOOR. Seriously, if you mess up, I don't think you want to try resetting this dungeon because that in itself is a huge pain in the behind.
From the entrance (the one shown in the second screenshot of this chapter), go through the first budded/closed flower on the left. Go down, take the chest, and then go right to exit. (The flower that was in bloom before should be closed, now.)
Now go through the first closed flower on the right, go down to take the chest, but INSTEAD of exiting through the left, go up and through the closed flower at the top.
Go up again, and take the chest.
Then go right three times and you will see a flight of stairs leading up. Take it up, and you will be shoved into a nightmare of a floor.
[screenshot missing because I hated this dungeon and wanted to take as few screencaps of this place as I could]
Okay, first off, go down through one flower. Then go right. Then go down and left through the next flower. Then go down to take the chest. After that, go right past another flower, and keep going right until you hit another chest. Then go up past a flower and take the chest in the very top right corner. Go left past one flower, then go down. Go towards the room in the center of the floor, and the flower stationed at the entrance SHOULD be closed, meaning you can walk past it. Do so, and take the stairs up.

Third floor! The last and hardest floor. (Seriously, there are so many ways to screw yourself up, here.)
First, go down through the flower, then go down again. Take the chest, and go right. Avoid the flower placed in the middle of the room, and go up three times. That should land you in the room with another chest and a flower in the middle of the room.
Take the chest, step on the flower in the middle of the room, and go down three times. Then take a left two times. Avoiding the flower in the middle of the room, go up three times, and you'll find the third and last chest. Take it, activate the flower in the middle of the room, and go down three times.
Now go right two times, and step on the flower in the MIDDLE of the room this time. Go left two times. Go up two times, and take a right. Now, you'll see something like this if you do it correctly:

(If you get to this room from the right side, the first flower won't be closed, meaning you can't get through.)
Step on the flowers and you'll automatically be sent to the boss.

His sprite *sparkles* because of course it would.
Heal with either Tensho or Soushou and SAVE.
Chou Kou Mei is... reasonably challenging.

...His flower face scares me. And I think it scares Tensho a bit too.
The fight begins!

Chou Koumei's "real" body is the middle one. With the face. His "allies" on the side will still hurt you though. And they can heal Koumei too, which is extremely annoying.
Can you say "multi-hit attack"? Make all your characters (those that have it) do multi-hit attacks, so that you can take out Kou Mei's allies. If one of your characters don't have a multi-hit attack (like Fugen... since I brought him into this battle), then just have them target Cho Koumei. USE SOUSHOU'S SPECIAL ATTACK LIKE MAD. It will make things a whole lot easier.
Have Tensho and/or Soushou heal when necessary. The main thing to worry about isn't Chou Koumei's allies, but Chou Koumei himself. His "special" attack does tons of damage and hits all characters in your party.

The slight advantage you have in this fight is that Chou Koumei will be more worried about reviving/creating more allies than attacking... so if you should happen to destroy one (or both), then he'll basically waste a turn just trying to revive them.
DON'T bother using Tensho's and Soushou's team attack... because it doesn't do much damage to Cho Koumei himself and wastes too much EP.

(Here's the CG of it, though)
If you're lucky, then you shouldn't have to heal too much, and Fugen's attacks will do critical damage a ton of times. (Like in my run-through.)

Back to the Houshindai with you!

You're given two choices... Um.
I think Cho Kou Mei just tells you something different depending on what you say. (I went through both of the choices and didn't really see a difference)

Anyway, yay, Tenka's back!

Ugh, Shinkyohyo. What do you want this time?


He and Soushou get into a fight... for some reason. And Tensho gets mad and pounds the floor again.

TALK TALK TALK BLAH BLAH I WISH I KNEW HOW TO READ JAPANESE BLAH.

Then Shinkyohyo uses his paopei to destroy something, but I don't know what. He then quickly makes his exit. Tensho and co. warp back to Kongrong to talk to Taiitsu.

(...Soushou smiles a lot, doesn't he.)
After the convo, you can wander around Kongrong 2 a bit... Let's check up on Nataku.

...Don't worry, he'll get better.
Rest up in your room, then go talk to Taiitsu.

Whoah, he looks tired. Guess he was up all night(?) creating something?
Anyway, when given the chance, just choose the first convo option. (The second option is a "can you repeat that?" option.)
After that, Taiitsu either mentions or gives you something important. [Admittedly I haven’t been paying too much attention to my important items list at this point, whoops.]

New area on the map!
And that's it for this chapter, see you next time!
(As a note, even though he's tired, Taiitsu is still willing to upgrade your paopeis on the 2nd floor. I guess he's just THAT dedicated.)
To Be Continued...
2 notes
·
View notes
Text
Part 9: To the Houshindai!
Are you ready for more character cameos?
If you don’t know what this is about, please refer to this previous post.
[Any new comments by me will be designated by brackets.]
After messing around with the upgrade combos, and I found one for Tenka!
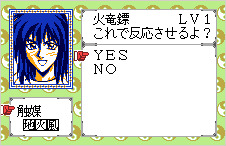

This one upgrades the flame paopei Karyuuhou so they do more damage.

We still have two places on the map we can go to now... The Houshindai (the dot next to Mount Kongrong 2), and another palace type place. We'll deal with THAT later. For now, let's visit the Houshindai! Hopefully, we may be able to see some familiar faces there...
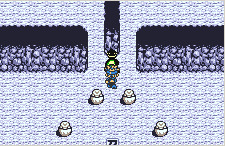
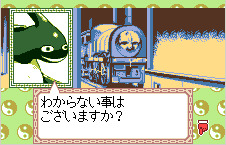
Inside, the first thing you'll meet is that turtle-like youkai who guards the entrance to the Houshindai. He's basically there just to give you info on how this "dungeon" works.
The Houshindai acts sort of like a "monster tower" in this game... It's a place with a lot of levels and is great for leveling up. Instead of going up, however, this tower goes down. The farther down you go, the harder the monsters/enemies will get.
Like many other tower-like dungeons in other games, you also get rather big rewards by progressing through the levels! You'll see what a mean in a short moment.
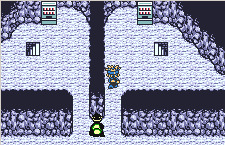
The Houshindai houses many split paths--you'll be faced with split path choice right away. Don’t worry too much about choosing a “correct” pathway. Some paths do converge, and (if I recall correctly) they all eventually lead the same dead end.

True to the series, there are also these talking trains. (You can talk to them by using the action/talk button on the vending-machine looking sprites.)
They won't be in use until you "unlock" the floor below. Once you unlock the next floor, the trains can be used as a shortcut to get to the lower floors quickly.
I'll only be covering a few floors for now; and I'll only document a bit of the levels you’ll trek through, since all the levels in the Houshindai are essentially the same. Only the floors in-between are different.
Onward!
Going down the right stairway, you're immediately treated to this:
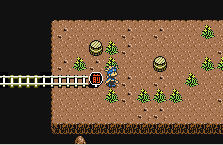
...Or something similar. All the "levels" in-between floors are randomized, but the goal is the same. If you're going down, you'll start on the red symbols (shown above) and your goal will be these green symbols:
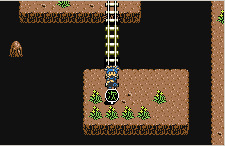
They act as warp points, essentially. Feel free to take any of the treasure on your way down.
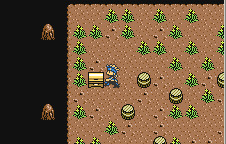
Some items are hidden in the barrel(?) type things too.
As these levels are randomized, there’s no “cheat” to quickly finding the warp point to the next level. Your best bet is just following the train tracks and seeing where they go (since the two warp points are connected by train tracks). Sometimes you'll get lucky and find the next warp point right next to you--other times, you won't. It all comes down to luck and chance, basically.
Probably the most annoying thing about this "dungeon" is the encounter rate. Since this is a place meant for you to train in, the encounter rate is pretty high.

The enemies also tend to attack in groups here, which does yield more exp, although they can be a pain if you’re under-leveled. In this playthrough, I completed the first two floors with a party level around 15, and it wasn’t that bad.

[Once in a while, you’ll also randomly encounter Kokutsuru (I think that’s him--the dark version of Hakutsuru). Anyway, if you see him, try to defeat him. He will give you 1000 exp EVERY TIME, regardless of your level. And he's pretty easy to defeat too. The only problem is that his encounter rate is very low, and he’s fast and usually tends to run from battle.]
There are about 5 "levels" until you unlock the first floor... I think all the floors have 5 levels between them, but it's been a while since I've played so I'm unsure.
You'll always know when you've reached a floor because this screen shows up:

And the train is now in use!

Just choose the second option. It's active both ways, meaning you can take it to go down or up quickly. Neat!
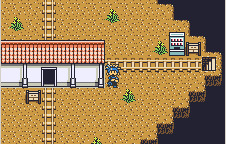
Also, there's a house and more stairs down, hm...
Who lives here, I wonder?
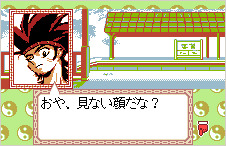
Hey... It's one of the Juunisen! (Jikou Doujin)
After a short convo between him and Tensho, you'll notice that his house will be empty. Hmm... But more on that later.
Taking the stairs to the left (at the very beginning of the Houshindai) will lead you to another floor/house with another character.
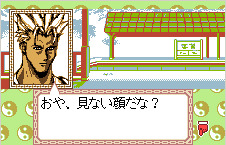
Another of the Juunisen! This time it’s Kouryuu Shinjin. (I think you can tell where this is going... not all the characters who live in the Houshindai are one of the 12 great senins, though.)
Going back to the first floor on the right (Jikou Doujin’s residence), and taking the rightmost staircase down, we eventually come to another floor which houses...

Fugen!
Now to head back to Mount Kongrong before we face the palace dungeon.
Long story short, the reason that the senin you talk to in the Houshindai disappear is because... yes, they return to Mount Kongrong. [You can find them all on the 2nd floor of Mount Kongrong. Just head into their rooms to talk to them.]
I guess they just manifested a new body, or something? (It's probably explaned in the game, but since I don't know any Japanese... Yeah.)
Most of the Juunisen will provide bonuses of some sort.

Jikou Doujin, for example, will let you fight an enemy if you choose the first option when given two choices. It seems to always be the same enemy (a crow-type youkai), and it doesn't give much exp. I assume this is an easily accessible and weak enemy meant for testing out your attacks or something. You get so little exp from the fight that it can't have been meant for leveling up characters.
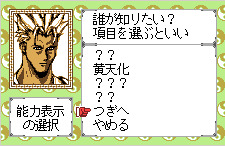
Kouryuu Shinjin let's you view a list of all the obtainable characters you have befriended so far. It also shows you their current level. (Even if you don't bring them along in your party, characters will still level up to an extent as you progress through the game.)
Each page only lists four characters. The second to last option let's you see the next page, and the last option let's you quit the screen.
There are... four pages with four characters listed on each page, which means there are a total of 16 unlockable characters in this game.
Oh yes, and Fugen...
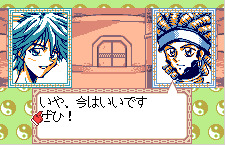
If you talk to him (with an empty space in your team) and choose the second option when given the chance...
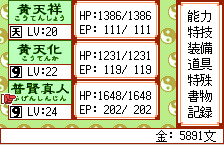
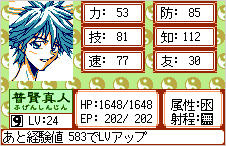
He joins your party!
Unfortunately, he only has one attack. He's meant to be more of a support character, like Igo.
Getting back to business, we still have one more new location to check out, but before that, let me talk about Fugen's special ability.
Since Fugen can manupulate atoms using his paopei Taikyokufuin, you can cross water using spots like these:
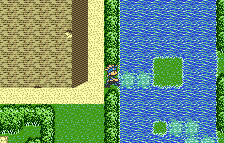
Just use the action keys ("a, s, or d" keys) to activate his ability.

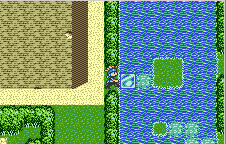
Fugen’s ability turns these weird blocks into ice, allowing you to cross certain stretches of water! You can get a few treasures by doing this, and such places can be found all around the game map. I'm not going to detail where, (you can find it yourself easily enough), and it's really more of an extra thing, so I'm leaving it up to those of you playing through the game.
Okay, now to finally go to that other palace type place.

Hmmm, I think this is Chuu Ou's palace... Or it used to be, at least. Now it's just abandoned--
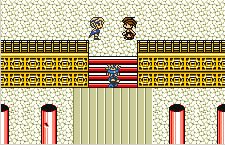
Hmm?!

Oh, hi there Soushou. (Don't worry, it's the real one this time)
Looks like he's talking to someon--
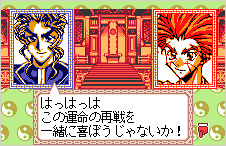
OH GODS IT'S CHOU KOUMEI!

Being the most show-off-y villain in Houshin Engi, his battle screen is arguably the most pretty and detailed out of all the bosses in the game. [His boss theme BGM is also pretty... amazing.]
There is a cutscene in which Soushou and Chou Koumei fight while Tensho and Tenka watch on. (Soushou and Chou Koumei appear to not have noticed Tensho and his brother yet.)
Chou Koumei tries to pull a first strike on Soushou, to which Soushou counters with this attack:
It is Soushou’s most powerful attack.
After this attack, Tensho gets Soushou's attention, and I think Tenka goes to fight Chou Koumei while Tensho and Soushou try to talk about something.
However, Chou Koumei then goes nuts and does THIS:

He goes and covers the ENTIRE palace with plant vines.
Annnnnnd, it's return of Chou Koumei's flower form! ((auuuuugh))
And apparently, he's trapped Tenka, so Tenka gets booted out of your party and Soushou joins in his steed.
How dare he kidnap Tensho's brother! Let's save Tenka!
...In the next chapter.
To be continued...
2 notes
·
View notes
Text
Part 8: Reunion
In this chapter, we explore a watery cave and also meet up with someone from Tensho’s past...
If you don’t know what this is about, please refer to this previous post.
[Any new comments by me will be designated by brackets.]
Alright, we were stuck in a really long cutscene last time, so I'm continuing on from there. After the whole bit with Hiko in the Houshindai, you're instantly whisked away to Mount Kongrong 2, where Tensho, Youzen, and Taiitsu basically just have one big discussion about something. [I unfortunately have no idea what they’re talking about here.]

Nentou’s name comes up during the conversation, though. (The real on this time--not Soushou.)

Then Taiitsu goes on to explain some more things (which I still don’t understand).
Youzen then leaves your party, and Taiitsu hands you this:

I am assuming he made it from the meteorite you found earlier in the game.
Here’s the explanation screen for this thing, if anyone is interested:


Once the whole convo is done, you'll find yourself on the first floor of Kongrong. You should probably rest up in your room before heading out. Also, you should really save the game if you haven’t yet.
Upon trying to exit Kongrong, you’ll see Raishinshi blocking the exit again.
There's a lengthy convo here, and then you're given two choices.

I don't really know if the choices here will affect anything plot-wise, but I know for sure that the first choice will make you lose an important item (I think it's the thing that you got from winning against Raishinshi earlier), and the second choice will let you keep it. Either way, he'll move out of the way and you'll be able to pass.
I choose to hold onto the item.

Oh hey... TWO new spots on the map! (One is located next to Mount Kongrong, and the second location is another cave thing.)
You can really go to either place first, but I'm choosing to go to the cave, because that's a pretty easy (and short) dungeon. Plus, I know what happens at the end of it...

[The cave entrance.]

Yeah... These are panels that, when stepped on, will force you to move in that direction until you get deposited on a space that doesn’t have an arrow. It's not as bad as it sounds, trust me.
When you first walk in the door, just step on the arrow straight ahead of you. You'll be sent to the far end of the room. Don't worry, though; just take the arrow (going down) below that, and continue taking arrows until you reach this place:

Don't bother thinking too much about which arrow you need to take, because you'll eventually get to your destination anyway by just continuing to take the next set of arrows after you get dropped off somewhere. And feel free to take any of the treasure along the way, though there are a few that you can't reach yet. (You'll need the help of a certain character to get those.)
There are monster encounters here, but they're all really easy, especially since you had to fight these same monsters in the last dungeon. Anyway, once you get to the stairs shown above, go down and you'll find yourself in another room full of arrows.

Take this set of arrows (the one Tensho is standing next to).

Then take this set. (Once again, the ones Tensho is standing next to.)

If you do it right, you'll be deposited right in front of the next flight of stairs. Nice!
SAVE HERE. And heal. But don't bother healing Nataku because, uh... well. You’ll see.
Take the stairs down and walk upwards. You'll see this scene:

Ou Kijin!

And Ko Kibi! And...

...DAKKI?! WHAT?! I thought you joined with the earth years ago!
After a short convo, Dakki and Kibi leave, leaving Kijin to deal with you and Nataku herself.
Didn't Nataku single handedly defeat her though in their last battle though--


Well CRAP!
Tensho gets mad that Kijin put Nataku out of comission, so he tries to fight her with little success... It's because that darned Hagoromo (the scarf thing) Kijin has is reflecting all the attacks!

Just as all hope seems lost, someone else appears from the shadows...

.....
.....
.....................

Hey, it’s Tenka!

Kijin tries to pull the same attack that injured Nataku, but Tenka counters and attacks with the flame paopeis, Karyuuhou; burning up her Hagoromo for good! Now her protective barrier is gone, and we can finally fight her on even ground.

[This scene really warms my heart. Apparently Tensho’s saying “big brother!” here.]

Okay, now to actually fight her for real this time. (All the stuff that happened before was just a cutscene.)
And since Tensho is fighting with his brother, you get a new team attack!

(The animation was too fast for me to screencap, though...)
Alright, Kijin is probably the first "hard" boss you'll encounter. But at this point, you'll still probably just be using standard attacks with Tensho. If you're at a high enough level, you'll get a super attack (it will be listed as Tensho's fifth move), but it costs a heck of a ton of EP (20 EP!). It makes rocks appear out of the ground to hit the enemy.
Tenka has... pretty much all attacks and no supporting moves at this point. You can really choose any attack you want, though its probably best just to stick with his standard and low EP attacks for this fight.
(I'll detail all his attacks fully after the boss fight...)
Kijin is only really "hard" because she tends to abuse her super attack (the one where a cg image is shown). It does a decent amount of damage and hits all characters in your party. However, if you keep an eye on your HP and heal when necessary, then this fight should still be reasonably easy.


After reducing her HP to zero, she promptly turns back into her true form: a stone lute. To be honest, I don't really feel any pity for her after what she did to Nataku.
Unfortunately, before you can smash the lute for good, Kibi appears and whisks it away...
Ah well... At least Tensho has his brother back! And Nataku's still alive!

...Well, barely alive. Tensho and Tenka quickly rush him back to Mount Kongrong 2, and Taiitsu is... less than pleased.
Taiitsu quickly goes to work on repairing Nataku.

After the cutscene, the only thing you can do is in your room in Mount Kongrong. After doing that, head back to Taiitsu's room and you'll find out that Taiitsu will have finished reparing Nataku. Unfortunately, Nataku won't be conscious for a while... Which means he won't be fighting alongside you for a while. Not to worry, though--He'll make his return soon enough.
The only thing you can do now is to press forward. And, since you now have an extra space in your party, you can take along another character!
At this point, you can either take along Igo (first floor, far left room), or Raishinshi (top of M. Kongrong).


To get either of them, just choose the second option when given the chance. (You'll have to do this twice on Igo, though; because he needs convincing.)
(Hint/tip: Remember, if you want to switch out a character, you'll have to talk to Li Sei, who can be found eternally standing on top of Mount Kongrong. Some characters can't be dropped off, though; such as Tenka at this stage. He's needed for a plot point coming up.)
For this run-through of the game, I'm going to go with Raishinshi, because he has a wider range of attacks. (Igo’s meant to be more of a support character)
Anyway, Tenka's in-battle moves are:
1st move: A single sword slash 2nd move: A double sword slash 3rd move: He throws the Sanshintei at all enemies (the mini-light saber knives) 4th move: He throws the flame paopei, Karyuuhou 5th move: He powers himself up, I think. (His attack was increased after I used that move)
And I guess I'll just detail Rai's and Igo's moves too...
Raishinshi moves are:
1st move: A slashing attack, hits all enemies. 2nd move: Lightning strike, hits all enemies. 3rd move: Some kind of kick attack.

4th move: A supporting move that paralyzes the enemy. (Makes them lose a turn or more.) However, it also makes Raishinshi lose a turn.
Igo's moves are: 1st move: A strike attack 2nd move: A support attack that I think heals status ailments 3rd move: A paralyzing support move
Okay, that's all for today; so see you guys next time!
To be continued...
1 note
·
View note