
|| Please do not repost/ edit any of my works || Likes/ follows from well-and-true || FAQ Art Tag ao3 ||
Don't wanna be here? Send us removal request.
Statistics
We looked inside some of the posts by singeart and here's what we found interesting.
Average Info
Notes Per Post
638
Likes Per Post
502
Reblog Per Post
121
Reply Per Post
15
Time Between Posts
5 days
Number of Posts By Type
Text
16
Note
1
Last Seen Tumblr Blogs


Fun Fact
In Q3 of 2020, 31% of US users access the Tumblr app daily.
Text

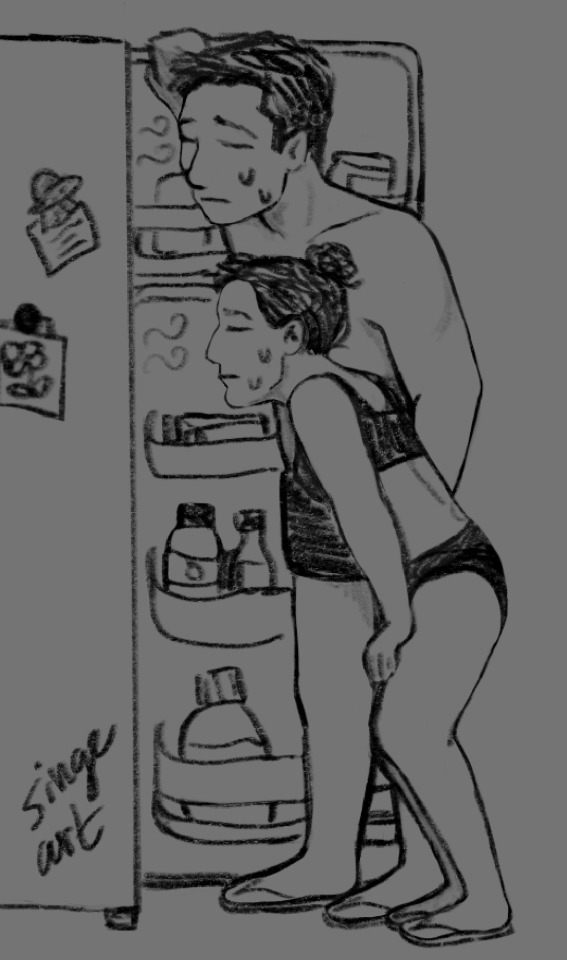
Decon shenanigans
55 notes
·
View notes
Text
#😳😳😳😳😳😳#it just happened idk#will post 2morrow if i still like it in the morning#(diff than other piece w bg woes- its been a busy nite)
1 note
·
View note
Text
can everyone be cool abt the fact tht i didnt want to do the background on my next piece...new 'its not AI i just didnt want to do itt' thang
2 notes
·
View notes
Text
Wait I'm cured??? Comic cancelled!!!! JK I might still do it as an AU....
I have Very mixed feelings about bee gee three but I'm high-key bummed finding out I missed my chance to romance Wyll my best friend Wyll with the prettiest droopy eyes augh...
#feel a little jerked around ngl#but the endgame was fun to play so it brought my final rating up 😂👍#delete later
2 notes
·
View notes
Text

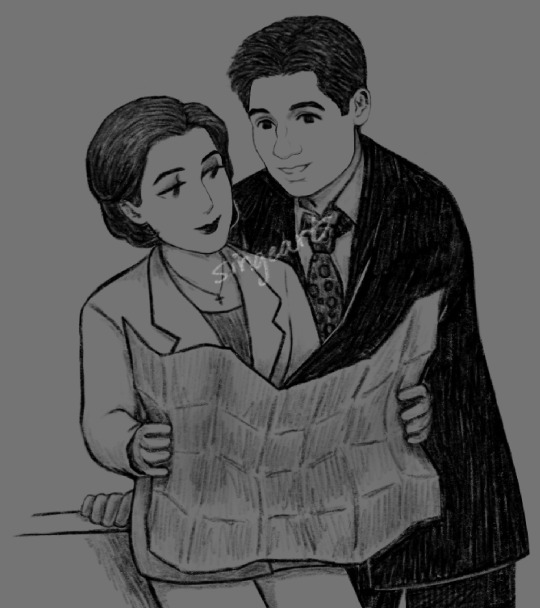
En Ami never happened and she wore the dress on a date night <3 there fixed it <33
#x files#txf fanart#msr#mulder x scully#doodles#tried to make Mulder's expression more...ykno but instead he just looks happy to be here LOL
63 notes
·
View notes
Text
I have Very mixed feelings about bee gee three but I'm high-key bummed finding out I missed my chance to romance Wyll my best friend Wyll with the prettiest droopy eyes augh...
#delete later#still going to draw [comic] w him and my tav tho#bc she deserves it !!!!!!!! and I'm mad on her behalf#this is so vague but for those who know--its about what happens at start of act3 💀
2 notes
·
View notes
Text
Doing it Scared: Mirror!Janeway Costume (Part 2/2)
Part 1 here
The accessories were really what made me realize how complicated this costume was but I persisted. I started with mockups and went from there, slowly building up the weapons and armor. Everything was made out of cardboard I had stashed away for precisely this purpose, put together with hot glue. I then painted everything with a couple of layers of gesso and finished up with acrylic paint.

I made the dagger first and it took me between a week to 10 days to complete, don’t exactly remember. Crafter’s audacity had me design and make the blade removable from the scabbard; I looked up real daggers for reference and found that the shape was closest to an American tanto. It looked empty at the base so I added a triangle shape to reflect the bottom of the front armor.


The final dagger and scabbard:

I used stick-on velcro on the scabbard and belt to attach everything together. The belt is a nylon webbing strap from a shoulder bag; I simply swapped out the clip attachment for a buckle closure (surprisingly hard to find! I ended up ordering one from a scuba shop!). I painted the fabric padded piece with fabric paint as a base then acrylic on top.


The phaser took three days to make, I probably learned a thing or two from doing the dagger! With the general shapes in mind, I mostly built it out as I went, seeing how pieces of cardboard fit together.


I used some thicker butcher paper to smooth out holes and rough patches with the hope that the paint would hide it. I think the final phaser is a smidge larger than the one in the show but I don’t think it’s noticeable IRL. It felt like a good size when I held it.


Remember the back plates I struggled with? They ended up being too high up on the tank top, but I did not want to unpick and resew them on! So, I pivoted and extended the back armor further down. This made it so I had to rethink the front too and basically I tried on a bunch of mockups over the tank top over and over to get the alignment of the side clasps to work.


Originally I was going to make the side clasps out of cardboard as well, attached to the front and back with more velcro, but I was having trouble figuring out how big they should be so instead I went with fabric straps that I would paint the same color. This was a far better idea because it would mean that the armor could move a little with my body and I wouldn’t risk having the clasps pop away. I attached a strip of faux leather (from a thrifted skirt’s belt) to the front piece (on the right) and a loop on the back piece (left) for it to go through before being reattached to the front piece.

Let’s get to the final costume pics already! Okay speedrunning– I added a thin ribbon to a pair of boots I got off of eBay with super glue and reinforced with stitches in a few different spots (should’ve sewed it on from the beginning, it was easy to pierce the faux leather).


I made a head mold by pressing aluminum foil to my face then adding paper mache on top of it to form the eye piece. I then cut out a few spots and painted on the rest of the details. This was attached to my skin with spirit gum.

I got regular gloves from eBay as well and cut off the fingers. The arm bands were a sun protectant sleeve that I cut and hemmed. The sash was just a long strip of red fabric that I tied together.

The armor and Terran empire badge (also cardboard) attached to the top with pieces of velcro that I stuck onto small pieces of fabric and then sewed on (in case I ever wanted to remove them). I finished the tank top with bias tape around the arm and neck holes which made it feel very professional!
Shots of the tank top and pants:


And finally, everything together; here I am regenerating at the convention lol:

I had a great time and it was so fun to see so many people in costume! There were even a few people who came up to me to compliment mine I was !!!!!!! so grateful for that!!!!!!! Very validating after so much work haha! And some people even asked for pictures??!
Okay time for Lessons I Learned:
I’ll be so fr I burnt out doing this, I am not built for longterm projects with no breaks for other things. I would not do this again on a time crunch. Also it made my thumbs hurt lol
Not really related to sewing/crafting but I also wouldn’t enter the cosplay contest again (yeah I entered this time hehe but didn’t make it past the prejudging); it kind of took over my experience and I feel like I would’ve enjoyed the convention that much more if I didn’t do it
I should have just gotten a tank top pattern, it would’ve saved so much time!
I don’t like sewing applique it’s hardd. Luckily I don’t foresee myself doing it for future sewing projects
I need a dress form, and a better ruler...
I titled this “doing it scared” because I really was; my brain was so so resistant for every little part of this and I don’t really know what to do with that other than try to keep building discipline (which this was def good practice for!) and take much needed breaks to come back refreshed. I can’t say I exactly enjoyed doing it overall for all the reasons above but again, I am soo proud that I didn’t give up and I am pleased with the quality of it and how accurate I think it is!
Thanks for reading! I swear 🫵 next thing I finish will be the Scully blouse!!
#star trek prodigy#star trek: prodigy#star trek cosplay#prodigy cosplay#mirror!janeway#cracked mirror#long post#singesewing#wish i was better at chatting with people ill have to work on that before my next convention--#i kinda just said thank you!! :D and then nothing else lol#o also i used theatre hair paint for the white streak and lipstick to draw the scars >:]
27 notes
·
View notes
Text
Doing it Scared: Mirror!Janeway Costume (Part 1/2)
When I decided to attend STLV this year there was only one costume I had in mind to wear, Mirror!Janeway from Star Trek Prodigy. I think her outfit is cool and I want to put her in a jar to study. This would turn out to be far more bitten off than I could chew and my brain was fighting me every step of the way, but I am overall very proud of the results of two solid months of work!!
Let’s start with the tank top. In hindsight I really should have gotten a pattern but I had the crafter’s audacity in full swing and decided to draft one from a top I already owned.
This took Forever.
I had to learn how to draft a pattern, make the mockup, do multiple rounds of fitting with more mockups and then draft the red patterning to go on top. All while thinking through how to construct the final garment. Did I mention my sewing machine decided to snap its decades old motor belt and I was hunting for a new one during all this?
The first pattern vs the final one, plus the red front and back pieces:


The fabric I landed on was a polyester knit so it would be close fitting and I would be able to pull it on over my head, no zippers or closures needed. I went for a thicker black base for comfort, rather than something more catsuit-like. This did make me fear the 100+ temps in Las Vegas but I was actually totally fine in the brief walk to and from the car into the air conditioned convention center!
I learned a couple of new sewing techniques during this project: darts, applique and the zig zag stitch. Darts were not so bad, here I did a long basting stitch to help mark out the dart:

The zig zag stitch, while a tad intimidating, also wasn’t that bad! I highly, highly recommend testing out your different fabrics/ threads/ needles beforehand and making a little “cheat sheet” to refer to when sewing with each one. I was able to switch machine settings quickly and keep the flow going instead of trying to re-figure it out for each step. I also tested sewing the different fabrics on top of each other, which leads me into the next part. Applique. *shudder*

The white strips are toilet paper to test out using a stabilizer, which is very funny because I ended up finding a solution to my machine being too loud for my apartment. That’s right, I sewed this whole costume in my bathroom. 😂 The tiles are more sturdy there, I guess?
The “back plates” as I’ve been calling them, were officially my least favorite part of the entire costume. For some reason I really struggled to understand their shape, size and position, both as overlapping pieces, but also relative to the larger garment. I also had to figure out measurements for how to sew without the needle plate guides because the fabric would completely cover it. I marked on tape where to line up the presser foot and it went okay! However, I do not recommend using this kind of tape. It was very tedious to pick out all the little bits from under the stitches. Some say she’s still finding pieces to this day…


But, I still used the tape for the hem and sewing on the red pieces to the top lol.


Originally I did buy a pattern for the pants but as I progressed I realized I did not have time for that so I bought a pair of pants and drafted the gray designs for the front and back by taping where they should fall while the pants were on me.


I hand basted around the gray pieces then sewed them by hand onto the pants. I was using clips to hold the “hem” down but found it much faster to measure as I went instead. After that I just had to hand sew on the strips of ribbon to both the top and pants.


I finished up the clothing parts of this costume the day before I was due to fly out hahaa but I did finish everything in time! Big improvement from last year in that sense!
>Thanks for reading this far! Part 2 is next!
#star trek prodigy#star trek: prodigy#star trek cosplay#prodigy cosplay#mirror!janeway#cracked mirror#long post#singesewing#idk what else to call it so applique is what we're gonna use here 👍#free sewing like tht is sooo scary lol
7 notes
·
View notes
Note
heyy!! i was curious to see if you use procreate :) i love love love your x files art!!
Thank you!! ☺️☺️
yep I use procreate! I really don’t know anything about brushes but I use the hb pencil for sketching and the medium hard airbrush for erasing~
3 notes
·
View notes
Text

Whatcha got there scully? (Wip)
11 notes
·
View notes
Text
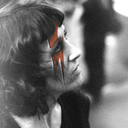
“Scully it’s so hot” “It’s the heat”
#x files#txf fanart#mulder x scully#msr#doodles#took my walk and it was in fact very hot out#thought of this on the way back#can only imagine how bad DC gets in the summer
21 notes
·
View notes
Text
Maybe one day I'll do art fight....
1 note
·
View note
Text
Quick Links 🤲
#x files
#mulder x scully
#star trek voyager
#janeway x chakotay
#singeart (most polished art)
#doodles
#singesewing
#ask
#not art (text posts, tag challenges, fanfic boosts)
1 note
·
View note
Text
Their asses are not reading the HR reminders emails…
93 notes
·
View notes
Text
Perfect Enough (1586 words) by singeart
Chapters: 1/1
Fandom: The X-Files
Rating: Teen And Up Audiences
Warnings: No Archive Warnings Apply
Relationships: Fox Mulder/Dana Scully
Additional Tags: there was only one backseat, sleeping in their rental car, Late Night Conversations, affirmations, valentines day mention, this is loosely set in late s5 after Chinga but doesnt spoil anything post s1
Summary:
This was already further than they usually got whenever they ended up talking about the non-work related parts of their lives. But like a dog with a bone—or Mulder with a case for that matter—she felt compelled to keep at it.
13 notes
·
View notes
Text
💞
102 notes
·
View notes
Text


234 notes
·
View notes