
Stick figures > AI "art". Finger painting > AI "art". Scribbles > AI "art". Anything you take the time and effort to make will always be better than AI "art". Hello! I graduated from art school and learned (almost) nothing about art :D So I've learned to find answers and tutorials on my own from Tumblr, YouTube and more. I want to share as much as I can here to help motivate myself and others!Struggling to do or find something in particular? Send me an ask! I have approximate knowledge of many things including: drawing, animation, digital art, graphic design, typography, photography, and more! (I don't really do traditional painting but I know enough about oil, acrylic, and watercolour to help get you started or point you to resources).
Don't wanna be here? Send us removal request.
Statistics
We looked inside some of the posts by start-your-art and here's what we found interesting.
Average Info
Notes Per Post
131K
Likes Per Post
75K
Reblog Per Post
56K
Reply Per Post
206
Time Between Posts
1 month
Number of Posts By Type
Text
8
Last Seen Tumblr Blogs


Fun Fact
Tumblr Inc. has $15.1M in annual revenue.
Text
I wish I woke up tomorrow in a world where I don't have to see a single AI generated image ever again
59K notes
·
View notes


Text
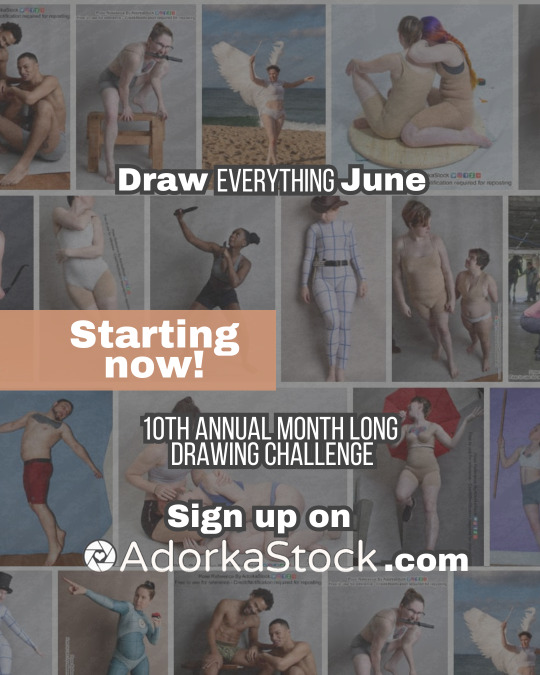
Draw Everything June kicks off TODAY and you get 1 pose in your email every day (weekdays only ❤️). You have until mid July to finish all drawings! If you draw EVERYTHING in all poses for all days, you'll get a special prize pose pack! Sign up now on my website!
86 notes
·
View notes
Text


Art Hacks for Physical Disabilities!!
I know art can be inaccessible to physically disabled people for a lot of reasons, and I think art should be accessible to everyone, so here’s a couple of the things I found to help for a few different issues you may face that stop you participating!
I have a link to all these items (UK) in my link tree!!
IMAGE DESCRIPTION
Slide one: illustration of a white woman with pink hair, wearing a pink outfit, sitting in a power wheelchair, looking at the viewer with thumbs up. Text Reese “hacks to make art more accessible”
Slide two: illustration of three different kinds, using three different types of pencil grips. One hand uses a circular grip. 100 is a large, rectangular grip. Another uses a grip that is ergonomic and fit into the hand. Main text reads “Paul, grip, strength and dexterity”. Subtext reads “there are loads of different types of pencil, grips or design for different disabilities and conditions. Increasing the width of the pencil can give more texture for a better grip using a pencil with a thicker with also reduces the amounts of pressure needed to hold a pencil you can make your own using items like pool noodles. KT tape an air dry clay. You can also put these groups on things like paint brushes.“
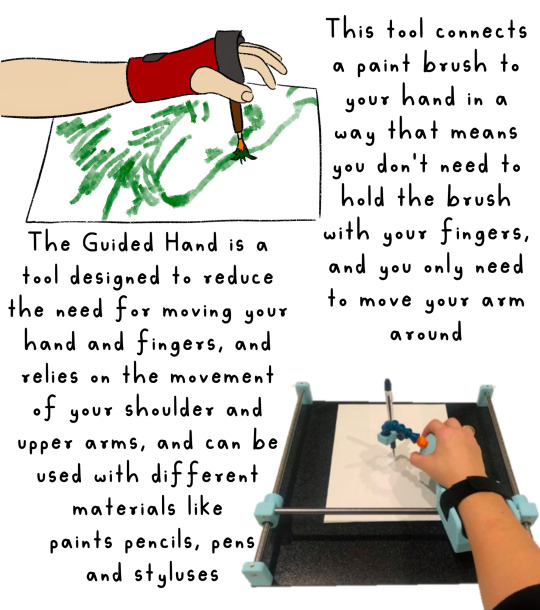
Slide three: illustration of a hand using a tool that looks like a wrist support with a paintbrush connected to it text next to it reads “this talk next a paintbrush to your hand in a way that means you don’t need to hold the paintbrush with your fingers and you will need to move your arm around“ on the bottom right hand corner is in photograph of a guided hand device. Text read “regarded hand as a tool designed to reduce the need for moving your hands and fingers and relies on the movement of your shoulder and upper arms and can be used with different materials like paintbrushes, pencils, pens and styluses.
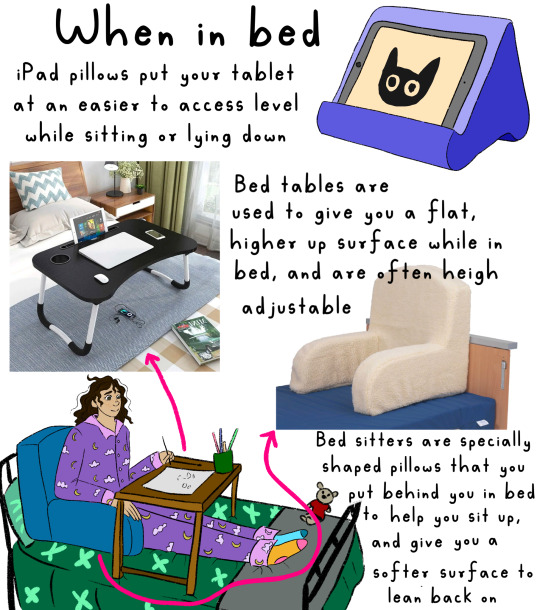
Slide four: main header reads “when in bed“. Illustration of an iPad pillow with a iPad in it is next to text that reads “iPad pillows, put your tablet at an easier to access level when sitting or lying down“. In the bottom left hand corner is an illustration of a girl sitting in bed in her pyjamas with a pillow behind her and a bed table as she is drawing. On the left hand side is a photograph of a bed table with the text reading “bed tables are used to give you a flat tire up surface while in bed, and are often height adjustable”. In the bottom right hand side is a bedsit, a pillow with the text underneath, reading “ bedsitters of specially shaped pillows that you put behind you in bed to help you set up and give you a soft surface to lean back on”.
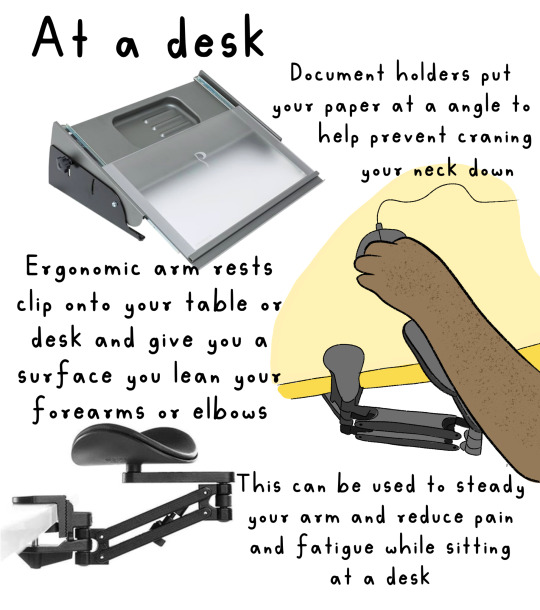
Slide five: maisie had a read out “at a desk left”. On the left hand side is a photograph of the document holder with the text “document holders put your paper at an angle to help prevent crane in your neck down”. On the right hand, middle side is an illustration of someone using a armrest and on the bottom left hand side is a photograph of the armrest. Text next to them reads “economic arm rests clip onto your table or desk and give you a surface you lean you’re forearms or elbows on. This can be used to steady your arm and reduce pain and fatigue while sitting at a desk”.
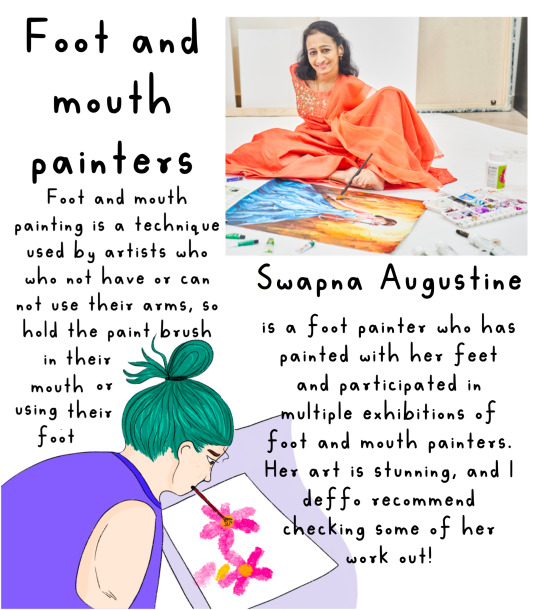
Slide six: maisie reads “foot and mouth painters” . on the right hand side is an photograph of swapping Augustine, an Indian woman with no arms, wearing a sari painting with her left foot. In the bottom left hand corner is an illustration of a woman with green hair painting using her mouth. Text reads “foot and mouth painting is a technique used by artists who do not have, or cannot use their arms so hold the paintbrush in their mouth or using their foot. Swapna Augustine is a foot painter who has painted with her feet and participated in multiple exhibitions of foot and mouth painters. Her art is stunning and I would definitely recommend checking some of help work out.“
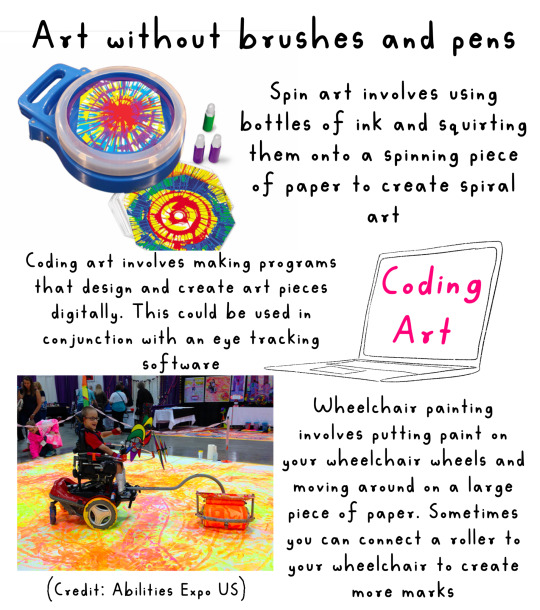
Slide seven: main text reeds “art without brushes and pens”. On the left-hand side is a photograph of a spin art device. Text next to read it reads “spin out involves using bottles of ink and squirting them onto a spinning piece of paper to create spiral art. On the middle right hand side is a illustration of a laptop with coding art written on the screen. Text me next to it reads “coding art involves making programs that design and create art pieces digitally. This could be used in conjunction with an eye tracking software.“ On the bottom left hand side is a photograph of a child in a power wheelchair with paint on their wheels painting onto a large piece of paper. Next to this is text reading “wheelchair painting involves putting paint on your wheelchair wheels and moving around and large piece of paper. Sometimes you can connect a roller to create more marks.“
Slide eight: text reads “what do you do to make art accessible for you?”
End of ID.
8K notes
·
View notes
Text
Art Hacks for Physical Disabilities!!
I know art can be inaccessible to physically disabled people for a lot of reasons, and I think art should be accessible to everyone, so here’s a couple of the things I found to help for a few different issues you may face that stop you participating!
I have a link to all these items (UK) in my link tree!!
IMAGE DESCRIPTION
Slide one: illustration of a white woman with pink hair, wearing a pink outfit, sitting in a power wheelchair, looking at the viewer with thumbs up. Text Reese “hacks to make art more accessible”
Slide two: illustration of three different kinds, using three different types of pencil grips. One hand uses a circular grip. 100 is a large, rectangular grip. Another uses a grip that is ergonomic and fit into the hand. Main text reads “Paul, grip, strength and dexterity”. Subtext reads “there are loads of different types of pencil, grips or design for different disabilities and conditions. Increasing the width of the pencil can give more texture for a better grip using a pencil with a thicker with also reduces the amounts of pressure needed to hold a pencil you can make your own using items like pool noodles. KT tape an air dry clay. You can also put these groups on things like paint brushes.“
Slide three: illustration of a hand using a tool that looks like a wrist support with a paintbrush connected to it text next to it reads “this talk next a paintbrush to your hand in a way that means you don’t need to hold the paintbrush with your fingers and you will need to move your arm around“ on the bottom right hand corner is in photograph of a guided hand device. Text read “regarded hand as a tool designed to reduce the need for moving your hands and fingers and relies on the movement of your shoulder and upper arms and can be used with different materials like paintbrushes, pencils, pens and styluses.
Slide four: main header reads “when in bed“. Illustration of an iPad pillow with a iPad in it is next to text that reads “iPad pillows, put your tablet at an easier to access level when sitting or lying down“. In the bottom left hand corner is an illustration of a girl sitting in bed in her pyjamas with a pillow behind her and a bed table as she is drawing. On the left hand side is a photograph of a bed table with the text reading “bed tables are used to give you a flat tire up surface while in bed, and are often height adjustable”. In the bottom right hand side is a bedsit, a pillow with the text underneath, reading “ bedsitters of specially shaped pillows that you put behind you in bed to help you set up and give you a soft surface to lean back on”.
Slide five: maisie had a read out “at a desk left”. On the left hand side is a photograph of the document holder with the text “document holders put your paper at an angle to help prevent crane in your neck down”. On the right hand, middle side is an illustration of someone using a armrest and on the bottom left hand side is a photograph of the armrest. Text next to them reads “economic arm rests clip onto your table or desk and give you a surface you lean you’re forearms or elbows on. This can be used to steady your arm and reduce pain and fatigue while sitting at a desk”.
Slide six: maisie reads “foot and mouth painters” . on the right hand side is an photograph of swapping Augustine, an Indian woman with no arms, wearing a sari painting with her left foot. In the bottom left hand corner is an illustration of a woman with green hair painting using her mouth. Text reads “foot and mouth painting is a technique used by artists who do not have, or cannot use their arms so hold the paintbrush in their mouth or using their foot. Swapna Augustine is a foot painter who has painted with her feet and participated in multiple exhibitions of foot and mouth painters. Her art is stunning and I would definitely recommend checking some of help work out.“
Slide seven: main text reeds “art without brushes and pens”. On the left-hand side is a photograph of a spin art device. Text next to read it reads “spin out involves using bottles of ink and squirting them onto a spinning piece of paper to create spiral art. On the middle right hand side is a illustration of a laptop with coding art written on the screen. Text me next to it reads “coding art involves making programs that design and create art pieces digitally. This could be used in conjunction with an eye tracking software.“ On the bottom left hand side is a photograph of a child in a power wheelchair with paint on their wheels painting onto a large piece of paper. Next to this is text reading “wheelchair painting involves putting paint on your wheelchair wheels and moving around and large piece of paper. Sometimes you can connect a roller to create more marks.“
Slide eight: text reads “what do you do to make art accessible for you?”
End of ID.
8K notes
·
View notes
Text

The hair tuft is adorable! Back legs can be hard to draw for sure especially because you can't see where they attach to the body as easily.
I can see that you're going for an almost side view. It looks to me like that leg is very curved either because your reference had the leg curving behind the front legs or because you noticed that that back leg appears more bent because we can't see the top of the thigh.
From some angles that leg will appears shorter / higher up than the others (like the first image below). And from some angles it won't (like the second image below).


My tip if you were to draw another Eevee would be to look up references for Eevee or even some real life examples of animals with four legs that are similar in proportion to Eevee. Like dogs, cats, foxes, etc. That are posed similarly to what you are aiming for.
-
If you want to practice drawing that back leg I'd pay close attention to those references and observe:
Where is that back leg in relation to the front legs? Is there any overlap?
Where is that back leg in relation to the other back leg? Is there any overlap?
Where do the legs connect to the body?
It's not only helpful to look at the shape the legs make but to look at the shapes that the space between the legs take (the negative space). In the first image the negative space between the back legs is very narrow and ends almost in a point at Eevee's belly. In the second image the negative space between that back leg and the front legs starts very wide (because it shows some of the curve of the thigh) and almost forms a fang-like shape that curves down and to the left.
Additional Tip: When you're trying to breakdown or nail the shape of something it can be helpful to have a printout and draw over it or "ghost" over it by allowing your pencil to hover over and trace the image. This can help you get a feel for the shape you're trying to draw before you put pencil to paper.
Additional image references that may be helpful are included below.
If you decide to look for more reference I highly recommend searching for smaller cats / dogs / animals or specifically cubs. You'll get shorter, chubbier legs that will look more like Eevee's.


I tried drawing an eevee today! Honestly, I don't think it looks very good 😅 Does anybody have any art tips?

8 notes
·
View notes
Text
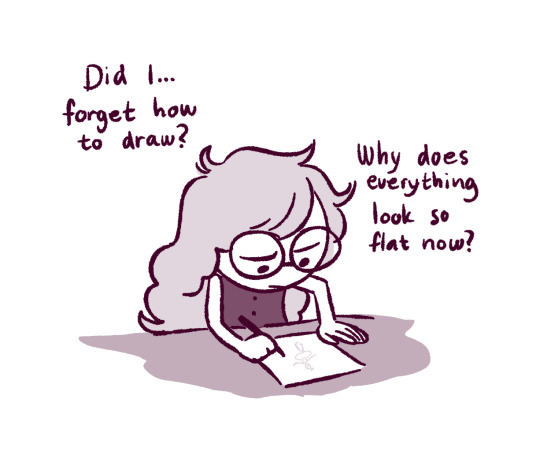
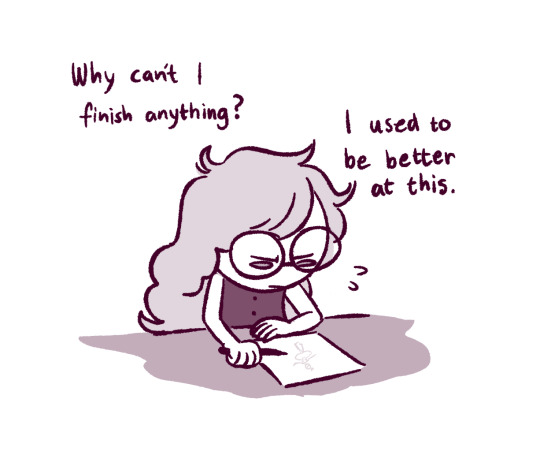
Some of your old art will be better than your new art, just as some of your new art will better than your old art, and that's OK.
We need to stop seeing old art in such a negative way. That art not only paved your way into your new art and your improvement, but it also shows how you were at that specific moment in time mentally, emotionally, and if you're plural with multiple artist alters, the alter who was fronting when it was made.
It's OK if some of your old art looks better than some of your new stuff. It doesn't take away your improvement, it doesn't invalidate you or define you as you are now. Instead of hurting yourself by mentally yelling at yourself over it, instead look at the old art as a memory to enjoy. Share it with others. Whether old or new, it's still YOUR art, it's still a part of YOU as a whole.
Despite everything, it's still you. And you're being mean to yourself with all the self doubt. DW about it. You will continue to draw better art on better days. Just as you did in the past and just as you will in the future when your current art becomes the old art. :)
Keep truckin'. You're stellar. All parts of you. Old and new. 💖
5 notes
·
View notes
Text
Art is NOT a talent. It's a skill.
Absolutely nobody picks up a pencil or paintbrush for the first time and creates a masterpiece.* Nobody is born automatically "talented."
*If you're trying out a new medium like say acrylic painting and have previously built up skill drawing with pencils there ARE transferable skills and some people can still make amazing artworks their first time but there is still a learning curve! Your mileage will just vary.
But so much of what we see online and in galleries and in textbooks is finished artwork from artists that have spent years or even decades developing their craft and their skills. It's not fair to compare beginner artwork to that but we do. It's easy to feel like some people are talented and some people aren't.

Image ID: A photo of The Starry Night painting by Vincent Van Gogh. The lower 1/3 of the painting depicts a small village. To the left is a large dark mass that stretches from the bottom of the canvas to the top. The sky is built out of thick black, blue and white brushstrokes that form swirling shapes. As well as yellow stars encircled by lighter brushstrokes and a big yellow crescent moon in the top right corner. End ID.
So how do we stay motivated to learn a skill when we don't feel talented?
Practice 1: Don't compare your work to anything else. This is ideal but really hard to do! Especially when the internet makes it so easy to access art from anywhere, anyone, and any time! And it's pretty impossible to go your whole life without interacting with art whether it's film, music, paintings, sculpture, posters, books, etc.
In practice this might mean going offline when you feel bad about your art or your work. It might mean avoiding engaging in art an hour or so before you begin work on something. Or avoiding the internet while you're working.
Practice 2: Compare your newer work to your older work. It can be really helpful to see how far you have come. But it can also still be frustrating if it's not at the level you want it to be. It can also be frustrating to see older work that's "better."
In practice this might mean keeping a folder or portfolio of work you are proud of that's easy to access whenever you need a boost of inspiration. You can also try sharing your work with friends and family if you can rely on them to express joy at seeing your work and lift your spirits when something doesn't turn out exactly as you wanted it to.
Side note: I have run into many cases on Tumblr where people say it's IMPOSSIBLE to get worse at your chosen craft. It's not. Skills aren't linear. If for any reason you have to take a break from your craft you will probably be rusty when you return to it. Sometimes trying something new with your craft won't have the results you want. And even if you practice every day and get really good at your craft, you're still human. Humans have bad days. It happens. But this is why even comparing yourself to your own art isn't perfect. (And if you are losing skills because of mental or physical health problems that can be uniquely frustrating but know that even if you can't create at the supposed "higher level" you were at before, any art you make is still wonderful and worth making and sharing!)
Practice 3: Seek out and enjoy different kinds of art! Seek out beginner art. Seek out different kinds of art!
In practice you can try following so-called amateur artists online with small follower counts and uplift each other in the comments. You can seek out new art forms and styles that don't meet the "perfect" or "highly talented" standards you set for yourself. (Hint: Linda Berry's art is great for this. She intentionally creates art the way a child might and has done small workshops at art schools demonstrating how freeing it can be to let go of notions of perfect anatomy, perfect proportion, etc).
I have one final thought:
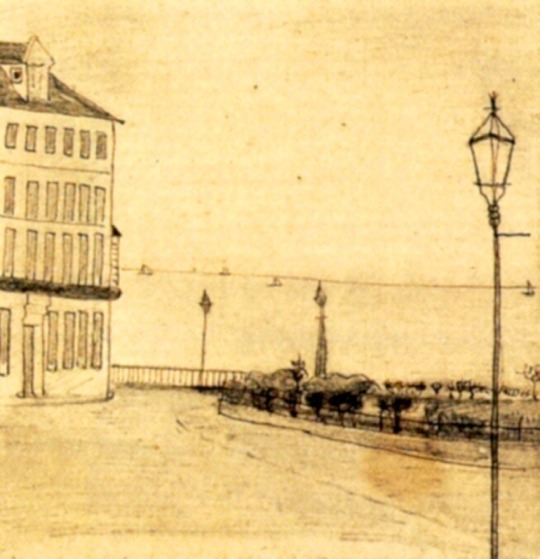
Image ID: A sketch on what looks like a yellowed piece of paper. On the left is a building constructed out of simple rectangles. Extending from the right of it is a simple line for the horizon with a couple tiny triangles and half circles representing boats in water. There is a flat railing made of two horizontal lines and many small vertical lines in-between that divides the water and the land. Roughly sketched plants in a gated area beside it. And a simple lamp post extending from the bottom right of the page towards the top. End ID.
If this were hanging in a museum across from The Starry Night would you think it belongs there? Do you think the artist that made this drawing is less talented than the one that made The Starry Night? What if this artist kept drawing landscapes? What if this artist took up painting? What if this artist tried experimenting with colour? What if this artist experimented with brushstrokes? What if I told you that Van Gogh was the artist that made this sketch called View of Royal Road, Ramsgate in 1876, thirteen years before he painted The Starry Night?
You can visit this page to see hundreds of his early works if you don't believe me: https://www.wikiart.org/en/vincent-van-gogh/all-works#!#filterName:all-paintings-chronologically,resultType:masonry
Practice 4: Look up old works from your favourite artists if you can. What they created when they started will likely be much different from what they're known for. And it might be something easier for you to aim for if you wish to practice to create like them.
Everyone starts somewhere.
-
TLDR:
Art is NOT a talent. It’s a skill.
Nobody is born automatically “talented.”
It’s not fair to yourself to compare your work to finished artwork made by artists that have spent years developing your craft.
So instead:
Try hard not to compare yourself to others. Minimize how much or when you engage with other art if needed.
Remind yourself of work you’ve done that you love and how much you have learned and accomplished. Work to enjoy the process of creating more than the finished product.
Seek out different kinds of art that’s made by beginner artists or that doesn’t look “perfect”. You'll be less hard on yourself for not meeting unrealistic standards.
Take inspiration from your favourite artists but not just the work they’re known for. If you can, seek out their beginner, rougher work. Their work that you admire will seem much more possible when you can understand how they got there.
Everyone starts somewhere.
My hope is that my new blog @start-your-art will be a good resource for anyone looking to start or continue their art journey.
#art tips#artists on tumblr#art#art motivation#artblr#art resources#art tools#art inspiration#art resource#art journey#learning art#beginner artist#art guide#art help#art advice
46 notes
·
View notes