
Probably busy drawing hot vikings - main is @synintheraven (I follow/like with that one too!)
Last active 2 hours ago
Don't wanna be here? Send us removal request.
Statistics
We looked inside some of the posts by synindoodles and here's what we found interesting.
Average Info
Notes Per Post
14K
Likes Per Post
9K
Reblog Per Post
4K
Reply Per Post
29
Time Between Posts
5 days
Number of Posts By Type
Text
16
Photo
1
Last Seen Tumblr Blogs


Fun Fact
130K people were victims of a chain letter scam that affected Tumblr in May 2011.
Text

Felt like doing small drawing sets to hopefully sell something and here's the biggest one of the bunch with 6!! drawings (digital, all sized to an A4) of The Last Kingdom's prettiest Dane aka Sihtric (;
Most of these drawings are also available individually, but decided to add another 2 which are either part of a bigger drawing (like the lower middle one, which is originally part of my Sihtric + Skade drawing) or custom works that I figured maybe someone would want (aka SKMD Sihtric, which is originally bigger and was made for a friend)
Each drawing would be sold for $12 each, but decided to be extra nice and make the whole set $30! So yeah grab it >here< before it's too late!
#my art#pen art#art#fanart#drawing#pen artwork#the last kingdom#art for sale#tlk art#tlk fanart#the last kingdom art#the last kingdom fanart#sihtric kjartansson#sihtric#the last kingdom sihtric#tlk sihtric
25 notes
·
View notes
Text

KJ (2025)
Pet portrait painting of a brown tabby cat named KJ. His portrait was painted with acrylics on an 8x10 inch canvas, completed July 9, 2025. KJ is missing an arm, which was the result of an injury when he was a 6 week old kitten. He has adjusted very well to being a tripod, and has a very strong personality per his owner!
108 notes
·
View notes
Text

I gave my all to the ruffles of his shirt then gave up with the rest lol
#my art#pen art#art#fanart#drawing#pen artwork#dune prophecy#dune fanart#harrow harkonnen#duneart#dune prophecy fanart#dune prophecy art#house harkonnen#edward davis
5 notes
·
View notes
Text
Update 7/9/25 - edited the code a little bit so it works better, fixed the boxes overlapping the scrollable character section and the text over the image moving to the side, now everything stays in place!

Freyja - a multimuse page
Back with *another* multimuse page because being picky and creating themes whenever I'm bored is my favorite hobby lol
Another freebie I did which is meant for historical/fantasy characters mostly; has a side bar where you can pick characters and then each box has plenty of space for information and a small moodboard at the side. Everything can be edited to your liking, just keep the credit and general look so it's recognizable (;
Relevant information can be found under the cut ~
Note: I strongly recommend to test the theme on another tab as it will look pretty weird through Tumblr's customizing page.
live preview // free download on patreon
x Muse list: all pictures are automatically fitted to the available box and will have a black and white filter - also in the code each picture is linked to a character box, so make sure the "#" is the same as the id="" so it works properly. !! Note: if the character boxes (except for the first one) are not properly overlapping the first and the pictures in the list get cut by your screen's border then change the "width" value in ".muse-list" with a higher number until you see everything as it is in my preview, I tested it myself but for some reason Tumblr likes to ruin it :p
x Information over the main picture can be whatever you want, technically you can write more than one line but doing so will enlarge that box and also the others.
x The facts and background text can be changed as much as you want, the top facts can be longer but don't add a lot or it will get a bit crowded - as for the background text and lower facts you can get carried away there as the sections will automatically scroll (;
x Moodboard pictures are also automatically adjusted to each box, you can also add more if you wish and you can simply scroll down to see all of them!
#late night update :p#my themes#tumblr theme#tumblr page#muse page#muse theme#characters page#character page#theme#page theme#multi muse theme#multi muse#multi muse page#muses page#character page theme#characters page theme#muses page theme#muse page theme#muses theme
14 notes
·
View notes
Text

I hate drawing wavy hair so mind the mess but hey what matters is that I got her judgy expression right hehe
#my art#pen art#art#fanart#drawing#pen artwork#dune prophecy#duneart#dunefanart#dune prophecy fanart#dune prophecy art#dune art#dune fanart#princess ynez#ynez corrino#ynez#sarah sofie boussnina
10 notes
·
View notes
Text

Reposting this one because idk if Tumblr ate my post or I forgot to post it but uhm it's not showing up on neither of my blogs ??
#my art#pen art#art#fanart#drawing#pen artwork#vikings valhalla#vikings: valhalla#vikings valhalla art#vikings valhalla fanart#harald sigurdsson#leo suter#harald sigurdson#fixed it hehe
18 notes
·
View notes
Text

Pouty Atreides
#tzr#time zone reblog#come on I know my drawings have been flopping lately but one note is offensive 😭#art#fanart#artwork#artists on tumblr#drawing
7 notes
·
View notes
Text
Pouty Atreides
#my art#pen art#art#fanart#drawing#pen artwork#dune prophecy#dune fanart#dune prophecy fanart#dune prophecy art#dune: prophecy#dune: prophecy fanart#keiran atreides#kieran atreides#house atreides#chris mason
7 notes
·
View notes
Text

Miss "I love causing drama and showing up to an event uninvited" aka Francesca 🤭
#pen art#my art#art#fanart#drawing#pen artwork#dune#dune fanart#dune art#dune prophecy#duneart#dune prophecy fanart#dune prophecy art#sister francesca#francesca#tabu
12 notes
·
View notes
Photo

Blindekuh, by German painter Adolph von Menzel (1867). In private collection.
425 notes
·
View notes
Text

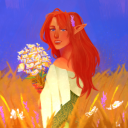
Tea Time
my art book and prints are available here
patreon / youtube / twitter / instagram / website
13K notes
·
View notes
Text

Valya's royal puppet aka Emperor Javicco Corrino :p
#my art#pen art#art#fanart#drawing#pen artwork#duneart#dune prophecy#dune fanart#dune art#dune#dune: prophecy#javicco corrino#emperor javicco#emperor javicco corrino#mark strong
16 notes
·
View notes
Text

Surtr - a single & multimuse page
Made this page quite quickly recycling part of another page that turned out badly, but as I still liked this part figured I could edit it to make it work (;
Single version has the same "muse tab" from the multimuse page, but without the section where you can pick a different muse - Multi version is the one shown in the gif above and the live preview!
Left a lot of notes inside the code this time so it should be quite easy to use and edit, should you have any question feel free to send me a dm and I'll help you (:
live preview // free download on patreon
#my themes#free themes#free pages#tumblr page#tumblr theme#multimuse page#multimuse theme#muse page#muse theme#single muse page#single muse theme#characters page#characters theme#rp resources#roleplay resources
48 notes
·
View notes
Text

Desmond's #1 stand aka Empress Natalya <3
#my art#pen art#art#fanart#drawing#pen artwork#duneart#dunefanart#dune art#dune fanart#dune prophecy art#dune prophecy fanart#duneprophecyfanart#duneprophecyart#dune prophecy#dune: prophecy#duneprophecy#dune#natalya corrino#empress natalya#jodhi may
21 notes
·
View notes
Text

The Emperor's bastard aka Constantine Corrino (;
#fun fact: this is actually my second attempt at drawing him because the first one looked like a random italian guy#(another fun fact is that said italian constantine is behind this one because your girl wasn't going to waste paper lol)#my art#pen art#art#fanart#drawing#pen artwork#duneart#dunefanart#dune fanart#dune prophecy fanart#dune prophecy art#dune prophecy#constantine corrino#josh heuston
19 notes
·
View notes
Text

Commission • Pencil on paper
Did this for a college friend as a gift for his parents' 42nd wedding anniversary: the idea was to do a sort-of before and after with a picture from their wedding day (upper portraits) and a more recent version of them now (lower portraits) as a way to showcase they've been together for many years. I also added a few tree branches of a Carob tree, which is very common in the province they're both from and therefore represents their background. ~ Pic size had to be lowered to fit Tumblr's standards, but hopefully it still looks good 😅
| instagram |
5 notes
·
View notes
Text
Freyja - a multimuse page
Back with *another* multimuse page because being picky and creating themes whenever I'm bored is my favorite hobby lol
Another freebie I did which is meant for historical/fantasy characters mostly; has a side bar where you can pick characters and then each box has plenty of space for information and a small moodboard at the side. Everything can be edited to your liking, just keep the credit and general look so it's recognizable (;
Relevant information can be found under the cut ~
Note: I strongly recommend to test the theme on another tab as it will look pretty weird through Tumblr's customizing page.
live preview // free download on patreon
x Muse list: all pictures are automatically fitted to the available box and will have a black and white filter - also in the code each picture is linked to a character box, so make sure the "#" is the same as the id="" so it works properly. !! Note: if the character boxes (except for the first one) are not properly overlapping the first and the pictures in the list get cut by your screen's border then change the "width" value in ".muse-list" with a higher number until you see everything as it is in my preview, I tested it myself but for some reason Tumblr likes to ruin it :p
x Information over the main picture can be whatever you want, technically you can write more than one line but doing so will enlarge that box and also the others.
x The facts and background text can be changed as much as you want, the top facts can be longer but don't add a lot or it will get a bit crowded - as for the background text and lower facts you can get carried away there as the sections will automatically scroll (;
x Moodboard pictures are also automatically adjusted to each box, you can also add more if you wish and you can simply scroll down to see all of them!
#my themes#tumblr theme#tumblr page#muse page#muse theme#characters page#character page#theme#page theme#multi muse theme#multi muse#multi muse page#muses page#character page theme#characters page theme#muses page theme#muse page theme#muses theme
14 notes
·
View notes