#<- for the little tutorial. in case anyone else wants to rip files
Explore tagged Tumblr posts
Visit Tumblr Blog
Explore Tumblr blogs with no restrictions, modern design and the best experience.
Last Seen Tumblr Blogs


Fun Fact
Tumblr Inc. is funded by 13 investors.
Note
are you able to access the direct image files of pentiment? id love to but i havent figured it out yet. if you can, could you access the little manicule cursor thats used throughout the game? i think it would be great to have on its own. thank you!!!!!
hey hey! i did extract some files from the game a couple years back -- i've been meaning to do a replay but as of now i don't have the game installed, nor the program i used to unpack. i'll get round to it as i can, but in the meantime you might give it a go on your own - it's easy and fun:
-download a unity unpacking program (i think the one i used was assetripper?)
-find the pentiment file in your game folder
-browse the files for the cursor (which is probably a static image file. if you're very lucky, the file is also called "cursor" so you can search for it directly)
-if the file is not in a format you want/can use, search for "[file extension] to [jpg/png/whatever you need] converter online" and use that
-chill for 20 minutes and serve at room temperature. garnish with lime
#thank you for your interest!! i have been meaning to poke around in the files again. it's a lot of fun. and you learn a little about how#the game was put together/how the nuts and bolts are made to do what they need to do#people who develop games in unity frighten and awe me#pentiment#<- for the little tutorial. in case anyone else wants to rip files
3 notes
·
View notes
Text
About Me
Why am I doING THIS FUCK HOW DO YOU WRITE THESE
Uhhh sup, y’all can call my Casey or Rex. I’m 21 (birthday is May 29th), a woman, and I like to draw and play vidya gamez. I’m also autistic so if I ever seem awkward in an interaction, that’s probably why lmao. Most of my blog consists of the stuff you’d typically expect on a tumblr blog; funny posts and fandom stuff. It is also worth noting that as I am an adult, this blog will occasionally contain content with adult themes.
This blog is basically just for my niche interests/hyperfixations and random shit. On this blog, you’ll find (almost exclusively reblogged) content for the following:
Corpse Bride (I’m most known for this hyperfixation)
Popee the Performer
Pokèmon
Doki Doki Literature Club (Yuri IS best girl and I WILL fight you in a Denny’s parking lot over this)
Breath of the Wild (Yes my favorite champion is Mipha, no I am not ok)
Danganronpa (mostly V3 but sometimes the other games as well)
Warrior Cats (Runningnose is my favorite character)
Minecraft
Left 4 Dead
Criminal minds
Here’s some other things I’m interested in but either haven’t really had a chance to dive into, or aren’t hyperfixations:
Kid Icarus: Uprising
Tales From Moominvalley (I’m also somewhat interested in The Moomins Return!)
Beastars
ENA
Payday (the second game, specifically)
Bojack Horseman
The Walten Files
Harmony and Horror
Five Nights at Freddy’s
My Little Pony: Friendship is Magic
SCP Foundation
Sally Face
Poppy Playtime (wanna be clear that no, I do not support the creators morally and have no plans to support them financially- but the game is cool and the talent that the devs put into it is worth acknowledging!)
Avatar: The Last Airbender
Jojo’s Bizarre Adventure (I’ve only watched the anime tho so I’m currently clueless abt anything past Stone Ocean lmao)
The Blacklist
One Piece (RIP Ryunosuke ;-; I promise that’s not a spoiler lmao)
Zombieland Saga
My ask box is always open! Whether you wish to discuss theories or opinions about a shared fandom, get to know me better, or anything else, you’re always welcome to send something my way! I love and am honored when people are interested in my ramblings, so never worry that you’re bothering me or anything, I promise you’re not.
Sometimes you’ll occasionally see some random tags on a post I’ve rebloged. This is a guide to what they mean!
‘Favs’: my favorite posts! Sometimes they’re fandom related, sometimes I just think they’re funny.
‘S.I’: stands for “self indulgent”, it’s basically a tag of me being thirsty for fictional characters (mostly Victor Van Dort). Fair warning, a good portion of it is NSFW because I have brain rot and need to be banished to the shadow realm bc horny jail isn’t enough for me anymore.
‘Answered asks’: every ask I’ve answered, compiled under a tag for your convenience! If you’re interested in my thoughts/opinions/theories/etc about corpse bride, this tag is a good place to start.
‘Might come in handy’: things that I want to save incase I need them later. Mostly drawing references/tutorials, but there’s some other things scattered about this tag as well.
‘Vent tag’: A tag where I can reblog posts with ideas or feelings I strongly relate to; I tag all my negative reblog posts with this. It will likely contain themes of depression, anxiety, trauma, suicidal ideation, etc. If this sort of content is a trigger, I would recommend blacklisting this tag.
‘A hot original on tungle dot hellsite’: all of the posts that I’ve made! This tag is a WIP so bear with me lol.
Also, please note that I am only human, and, again, autistic. This means that I may sometimes say or do the wrong thing. If I do this, it is probably because of human error, rather than malice. Please assume this is the case and let me know so I can correct my mistake. I try to make sure I don’t reblog from anyone sketchy but sometimes I can’t find a post anywhere else so if that occurs, reblogging does NOT equal endorsement here!!
Whelp, that’s about all I can think of for now. I’ll probably update this post as time goes on! Thanks a lot for reading; I hope you enjoy your visit to my little corner of the internet! Stay as long as you need, traveler /ᐠ๑•ω•ᐟ\ฅ
35 notes
·
View notes
Text
3D Printing Mega-Post (with links!)
Being a member of the maker community means I am surrounded by people who are totally in love with 3D printing. There’s no other group with whom I can have a 30 minute discussion about bed adhesion, lol. While the cosplay community is also generally supportive of the technique, every now and then I will come across somebody who thinks it is akin to cheating. Most recently it happened on a blog I really enjoy. When I read posts like that, I can only shake my head and assume that person must not really understand all the work that goes into 3D printing. Even in the best case scenario where you find a ready-to-print model and own a printer large enough to accommodate it, there is still tons of work that goes into taking a raw print from... well, a raw state to something beautiful. Hence I have decided to type up an overview of 3D printing; what it is, how it works, and all the steps it takes to create a cosplay prop. This is not a detailed tutorial; rather, it’s a high level scope of all the steps. Without further ado, here’s 3D Printing 101!
*12/20/17: Updated with new information on the latest printing technology plus even MORE links!
How does 3D printing work?
3D printing is an additive manufacturing process used to create three-dimensional objects; think of it as the opposite of sculpting where you start with a block of material and cut parts away (subtractive manufacturing). There are actually many types of 3D printing technology, but the most common for hobbyists by far is Fused Deposition Modeling—or FDM for short. In plain English, FDM means the printer head is essentially a hot glue gun that “draws” the cross-section of a model, building it up one thin layer at a time. After tens or hundreds of layers, ta-dah! You have a 3D object! You can check out this link for more info on other types of 3D printing.
The workflow for printing looks like this: find/make a 3D model, optimize that model for printing, convert it to G-code with a slicer, and send it to the printer. Once printing is complete, you need to assemble any separate parts, fill major gaps, fill/prime/sand the surface, and then paint. If any of those terms are confusing, don’t worry! I will explain them all.
Finding, Modifying, or Making a Model
Sourcing models is one of the topics where I see, “Cheater!” start to sneak in. There is a misconception that you can find just about any model you want, download, and hit print. This can be true depending on what you’re trying to build; popular cosplays like Iron Man, Halo, and Star Wars do have a plethora of models available for free, and many are already optimized for printing. Once you get outside well known characters, however, it gets much more challenging. If someone has 3D printed components in their cosplay, it’s never safe to assume the person just downloaded them.
Downloading Models
It’s always worth hunting around for the files you need even if the character isn’t well known. Even if you want to build everything from scratch, it is nice to see how someone else tackled the same challenge. There are a couple websites I like for searching for printable models:
Thingiverse: Run by Makerbot, Thingiverse is a huge collection of models designed specifically for 3D printing and all of them are free! This is where I always start my search for 3D printing files. Most come with some degree of instruction and suggested optimal print settings.
GrabCAD: I don’t use this site as frequently for costuming since the focus is engineering, but it’s very possible to find some cosplay goodies there. Other than scaling, most models should be ready to print.
SketchFab: While this was originally a place to share 3D models, some users also make theirs available. If you need a file for printing, be sure to search through the Downloadable section. (and even if you can't download the file, a 3D reference beats 2D refs any day!)
When selecting a model, try to find something that specifies it was made for 3D printing. Otherwise, you may need to do some manual cleanup and that can be challenging. Just FYI, game models are never ready to be printed but if you want to start with them, Source Film Maker has hundreds to select from. it’s also worth Googling to see if anyone has offered ripped models for free, but be aware that these should NOT be used for profit. Steriolythography (or .STL for short) and Wavefront (.OBJ) are the two most common file types, but get an STL if you can. OBJs will often come with texture files (.mtl), but those are not needed for printing. Aim for highest resolution you can find unless you want the low-poly look. Trust me, you don’t want to be filling in faceted planes with heaps of Bondo later.
There are a few products and processes that allow for multi color printing, but for the most part FDM machines are limited to one or two colors. If you are bound and determined to have multiple hues, you can check out Prusa’s new Multi-material upgrade, the new Da Vinci Color, or the Palatte Filament Splicer. I suspect that multi color printing is going to be one of the next major features to hit hobby printers, but for the time being most methods are either rudimentary or really expensive. It can also be fun to print with multiple materials such as combining rigid and flexible pieces, but that is best reserved for a dual extruding printer. When it comes to cosplay, I would either suggest printing in the object’s final color or preparing to paint. Even if you choose to paint, try and pick a filament color that will make sense if it is revealed through wear and tear.
Modifying Models
If something wasn’t specifically made for FDM, how do you know if it’s printable? Most commercial 3D modeling or CAD software have tools to check and correct issues with models—sometimes automatically. Unfortunately the easy-to-use, open source options in this area are a little barren but there are still ways to do it. Here are some free options for both checking and repairing mesh issues:
MakePrintable is an online paid service, but it will let you repair a set number of models per month for free. In my experience, this is best for basic issues but it couldn’t get any easier.
Microsoft STL Repair: Similar to MakePrintable, but unlimited and free. The downside is that you have zero control in the process, and files need to be opened with Microsoft’s free 3D Builder (from there you can export as an STL).
MeshMixer: An Autodesk product that has a number of capabilities for manipulating meshes. It’s more complex than MakePrintable and Microsoft 3D printing, but you have way more options.
Meshlab: Ah, Meshlab. This program has been around for a long time, and in many ways it is incredibly capable. Unfortunately, it’s also somewhat unstable and has bad documentation, so tutorials are hard to find.
Blender: A popular open source 3D modeling program, Blender also has a 3D printing add-on with some mesh analysis tools. This is the most robust option I have tried, but Blender has a steep learning curve and it can be intimidating for newbies.
Making Models
There is a good chance that you won’t be able to find ready-to-print files, so you might need to heavily mod or even make your own from scratch. Unfortunately, you will need to jump into 3D modeling software to make this happen. There are two major categories of software types: engineering (computer assisted drafting, or CAD for short) and artistic. In a nutshell, CAD is usually meant for objects (cars, wrenches, buildings, etc) and offers tight control over dimensions, surfaces, and shapes. Artistic software can be used for just about anything from trees to characters to spaceships, but it can be more challenging to make precise mechanical objects. I use both depending on what I need to create. There are actually a ton of free 3D modeling tools, so I will list the ones I have experience with and can recommend.
TinkerCAD: This is probably one of the most popular free CAD programs, and for good reason. It’s browser-based and very intuitive to use, thus it has become popular in schools. The entire thing revolves around building objects out of primitives, so if you need something complex it might take a little creativity to get there. TinkerCAD also has its own library of downloadable objects and it can export items for 3D printing (or even send them to a printing service!).
Google Sketchup: Available in both free and paid versions, SketchUp is a lot more complex than TinkerCAD but still very approachable. For some reason, it would drive my professors nuts when anyone used this software for homework. Be sure to check out the hefty list of extensions as they can significantly increase the program’s capabilities.
Autodesk Fusion 360: I will admit that I haven’t used this one very much, but it has been getting very popular very quickly. Fusion 360 is a fully-featured, professional CAD program meant for industry use, but it is available for free to students, startups, and hobbyists. If you want to grab the bull by the horns and work with maximum potential, get this software. It can be intimidating for someone who has never set foot in CAD before, but it is one of the most approachable fully featured CAD suites I have ever seen.
Sculptris: And now for something completely different! Sculptris is the baby brother of Z-brush, an industry standard software for digital sculpting. It’s actually very capable, and if you need to model something organic or CAD just isn’t making sense, give Sculptris a whirl.
MeshMixer: MeshMixer’s site calls itself, “a Swiss Army Knife for 3D meshes,” and that’s pretty accurate. It has some CAD capabilities mixed in with artistic tools and a few unique things to boot. It’s reasonably easy to use, although there could be more tutorial support in my opinion.
Blender: Ah, good ole’ Blender. Completely free now and forever (unlike many Autodesk programs), it’s the most capable and robust open source software I have ever used. Blender is definitely on the artistic side although it has add-ons that make CAD a little less painful. The major downside is the interface; simply put, Blender is incredibly unintuitive. Thankfully, Youtube has tons of high quality tutorials to get you started.
Slicing
Once you finally have a printable model in your possession, it’s time to send it to a 3D printer. If you are using a 3D printing service, congratulations! You can send them your model and call it a day. The rest of us will need to use a Slicer. Remember how the printer moves a hot glue gun around to draw a shape? Well, the computer needs to tell the printer head where to move, how fast to move there, and when to start and stop drawing. It uses a language called G-code to do this. A slicer’s job is to convert a 3D model into G-code so the printer knows what to do.
I use a free slicer called Cura from Ultimaker, but Slic3r and Repetier Host are popular options too (although more advanced). If you want ultimate control, cutting edge features, and don’t mind paying for it, Simplify 3D is considered the best slicer on the market. Cura is my slicer of choice due to its friendly interface. In the photo above, you can see how it has made layers out of a model (hence the name “slicer”).
The first thing to do will be properly scaling your print. Cura assumes your units are millimeters by default, so you may need to convert to your original modeling unit (inches, my my case). Unless you are printing a small prop or have a very large printer, your parts will probably be too big to fit on the print bed. If this is the case, return to your modeling software and split into smaller pieces.
When it comes to 3d printers, you get what you pay for. The more expensive models ($1500+) offer the closest thing you can get to plug-and-play experience, but even they will have failed prints, clogged extruders, and other common issues every now and then. The rest will need some degree of hand-holding. It took me about a week to get my $200 Monoprice Select Mini printing to the best of its ability, and that involved a lot of fiddling in Cura and 18 test prints. Spend some time optimizing your software for the fastest, highest quality prints; you’ll be grateful you did once you get to the sanding phase.
Update: After 10 months of regular, reliable performance, the board on my Monoprice Mini has died. At $160, I definitely got my money’s worth and other users have had theirs much longer. I am upgrading to a Prusa i3 MK3 kit, but I would still recommend the Select Mini v2 as a good gateway machine.
Printing
With your slicer ready to export G-Code, now is the time to set up your printer! A 3D printer’s “ink” is spools of plastic string called filament. There is a variety of plastics to choose from, but Polylactic Acid (PLA) and Acrylonitrile Butadiene Styrene (ABS) are the most common. PLA is cheap, readily available in many colors, and is made from plant starch. For most people, it’s the go-to choice but it is not the strongest material. ABS can provide better structural integrity, but it’s a little more finicky to print and the fumes are noxious and require ventilation. This link has a good summary on various types of filament on the market.
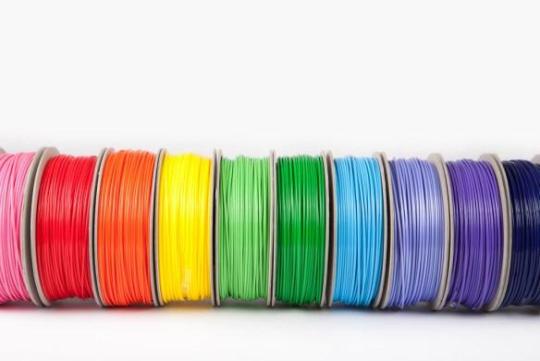
If you search Amazon or Google for 3D printing filament, you will get approximately 82376483456978938 results. Be sure that you are searching for the proper diameter filament; most printers are 1.75mm, but some are 2.85-3.0mm. Reliable brands of PLA that I have worked with are Hatchbox, Matterhackers, ProtoPasta, and ColorFabb. Be wary of no-name brands off places like Ebay or Amazon; not all filaments are created equally and I have definitely wasted money trying to be thrifty on Amazon.
With your filament loaded in the printer, it can be a good idea to extrude some and make sure everything is working properly. Next, verify you set the proper export settings in the slicing software. Different plastics need different speeds and temperatures, and often the packaging will give you a good suggestion. When all is ready, slice the model and send the G-code to your printer!
I always stick around to watch the first few layers of my print because most mistakes happen at that point. Bed adhesion in particular can be troublesome. My solution of choice for PLA is a layer of blue painter’s tape with a light misting of hair spray. Others have used glue sticks, but that didn’t work well for me. If you notice any problems, pause immediately and try to fix the issue. A small clog can turn into a major problem if plastic goops all over your extruder.
When the print is done, it can be tempting to pull the model off the bed but have a little patience! The plastic can warp while it is still warm, plus your printer will still be hot. Let it cool down slightly, then pop it off the bed.
Surfacing
Now comes the tedious part! First of all, remove any supports (or if you have a dual extruding printer, dissolve support filament) with pliers. Depending on the support type, a box knife or X-acto can be handy. I have also heard that deburring tools are handy for this. Next, assemble separate parts with glue. CA or epoxy are good choices, or you can get fancy with friction welding. If you printed with ABS, acetone can help glue pieces together and even smooth your model.
Next you will need to fill any major gaps such as those found along seams or where errors may have occurred in the print. Bondo Glazing and Spot Putty is a popular option for large holes and epoxy can be used as well. You can also use wood filler although I would reserve this for parts that will not be subject to a lot of handing or strain as it can be a little brittle.
Now you have to do something about all those layers.
Your options are sanding, smoothing, or a combination of the two. In the past I have wet sanded the plastic starting from 120, 220, and 400 grit wetdry sand paper. The “wet dry” part is important because PLA will heat quickly from friction and then you have to wait for it to cool again. If I wanted the plastic to show, then I would take it to 1000 grit or even a bit higher. 220 is the minimum for a matte appearance and slightly rough feel whereas 1000 starts to approach injection molded plastic. Bear in mind that dark filaments will show scratches and need sanding at finer grits to look clean. If you intend to paint, 400 grit paper is high enough. Then you will need to spray your model with primer. Allow to thoroughly dry (no longer cold to the touch) and sand with 600 or 800 grit paper. Reapply primer and continue sanding until you are satisfied with the surface. I have found 3 or 4 coats to be sufficient. Paint will hide very few defects, so you can’t take shortcuts with this step.
You can circumvent some obnoxious sanding by filling the layers first. Automotive filler primer works wonderfully although the fumes are terrible and it will need be to used in a well-ventilated area. Filler primer is much thicker than normal primer and with enough coats, it will fill in all those grooves. I found that 3-4 light coats built up a good base to start sanding, and then another 3 coats with sanding between each application gave an excellent finish. This might sound tedious (and it is, to be honest) but the primer sands much easier than PLA. I was satisfied with the finish 220 grit sandpaper provided.
I have heard that CA glue is also good for filling grooves, and Smooth-On makes a self-leveling product called XTC-3D that you paint over your model. I haven’t tried either of these, but they get good feedback from others. Finally, if you have printed in ABS you can try vapor smoothing your part; just be careful playing with acetone, and don’t do it too long or you’ll melt your piece.
Now with all that said, my experience with finishing 3D prints was with the intention of creating a production-quality model (aka something that looked like you bought brand new it from the store). Every print needed to be practically flawless when viewed at close range. For cosplay, this is unnecessary. Nobody is going to hyper-analyse your work from inches away; rather, you can rely on the 10 foot rule. Also, weathering will hide many defects
Focus your efforts on pieces that will show the most. For Soldier 76, this means I will be spending many hours making his mask smooth and pristine, but I’m not even going to paint the brackets on his boots.
Painting
Now you are on to the last step! Unless you wish to control texture through brush strokes, I always recommend spray painting or airbrushing. Rattle cans are available in a myriad of colors these days, but if you have an airbrush they are handy for detailed work. I had a professor who wouldn’t let a can of Rustoleum in his classroom and demanded we use Krylon, so I guess you should also use Krylon? The artists I know who use spray paint swear by the Montana brand, and they have a huge range of colors to select from.
Anyway, all your spray painting should be done outside or in an area with plenty of ventilation. I always wear a dust mask--not because I’m worried about paint fumes (dust masks don’t stop fumes anyway)--but because I don’t want to breath in teeny paint particles. Even if paint is non-toxic, it doesn’t belong in your lungs. I also like to tape down a huge backdrop so I don’t get any over-spray surprises. Your coats of paint should be incredibly light, almost like dusting the model with pigment. It will take many coats, but the slow buildup guarantees even application. I promise the effort is worth it, plus thin coats of paint dry quickly anyway.
Sealing
Last step! I have always used rattle can clear coats to seal my models. This step should not be skipped because your paint job can be marred very easily, but the sealer will help protect it. Always, always, always use the same brand of sealant as your paint or test on scraps first. I cannot reiterate this enough; not all products will get along together, and nothing ruins your week (or month) quite like destroying a detailed paint job. If your model will be going through a lot of wear and tear, you may consider coating it in clear resin for durability.
Conclusion
So as you can see, there is a LOT more work to 3D printing besides downloading and hitting print. I didn’t even go into detail and the post is huge. Any of these topics will have more information if you search on Youtube or Google, plus my Ask is always open. I hope this helps somebody!
71 notes
·
View notes