#'here is how to use an angle grinder for cutting'
Text
why is learning how to buy and use power tools so fucking hard for no reason
#it shouldn't be!! it feels like it should be very easy!! AND YET#'for this kind of task and project you will need an angle grinder. angle grinder is the tool for grinding and cutting.'#'here is how to use an angle grinder for cutting'#oh okay rad :)#[orders an inexpensive but brand name and well reviewed angle grinder] [reads instructions] [it expressly forbids using it for cutting]#hey man what the fuck!! how could I possibly have avoided this!!#nowhere on the listing or the packaging or anywhere does it say 'THIS tool that in general is for cutting and grinding is NOT for cutting'#why is that even A THING what the FUCK#why is the cheaper and as far as I can tell worse everything one at harbor freight allowed to cut but not this one#this has been my experience CONSTANTLY it's so FRUSTRATING#I want to be a Tools Guy and a home DIYer but no one has ever shown me how to do it#and getting a foot in the door being self taught is so fucking weird and impenetrable for no fucking reason#anyway NOW I know to look up the manual before buying one. because sometimes The Tool For Cutting is not for cutting. fuck off#about me
10 notes
·
View notes
Text
Pro-gamer!Gojo, Geto, Sukuna, and Toji
Writing this on my phone because life been putting me thru a meat grinder and i dont have the time to write an actual fic so i'mma ramble about the fic i been writing in my head when i dissociated
Imagine e-sport AU JJK
Youre a girl that's joining a 5 members first person shooter esport team call Curse Technique (CTQ) cuz women respresantation in esport fucking damn it
Your teammates are Gojo (Sixeyes), Geto (spiriteater), Sukuna (malevolent), and Toji (topji)
Theyre all streamers turn pro-gamers and are the most cocky bastard alive. The have never lose a single tournament ever since the game launched.
They got scouted by CTQ organizations from their stream when the game first launch
They fight each other for the second position on the leader board.
Note how i say second
Because someone with the in-game name KandyCat have the top position. Undefeated. Many have tried. But they cant even come close to thag ranking score
And goddamn did the 4 of them tried. They did a 1 week subathon with the sole purpose of tryna take the number 1 spot. They got their ass handed to them by said KandyCat in their solo rank games. So they temporarily gave up.
They always curios who this KandyCat is tho, becaude they are not a streamer, there are nothing about them on the internet beside the fact that theyre number one on the game leaderboard.
Over times, their curiosity and completitiveness against KandyCat before some sort of admiration and obsession. They really want to know who this person is and learn from them.
Now let's talk about when the team manager introduced you to them.
They thought you were their new assistant. They were expecting their last teamate would be another well known streamer or pro-player
The disbelief on their face when your manager said "this is y/n, she's your 5th member and also will be your in-game leader"
You almost let out a snicker
They threw a tantrum. That's for sure. Not cuz youre a girl. It's cuz theyre prideful as fuck
They cant fathom how a literal no body, someone they never heard of before, be their leader?!? Theyre literally the top 5 players of the game. Impossible. No. If leader is one of them, the rest will be bitter but they still relinquish. But their leader is someone they have never heard of before??? They wont stand for this
No. They refused "she can be our leader if she can beat all 4 of us in 1v1s" sukuna scoff and for the first time theyre all in agreement about something.
"Sure!" You said "let's make it more fun by placing a bet, whoever win get a wish from the loser"
Your manager, nanami, just sigh a long sigh and let yall duke it out on the game.
You logged into your account (y/n0nt0p) and gojo immediate poke fun of you "after this you should chsnge it to y/nthebottom"
They were all so confident. Already thinking of what their wish gonna be.
LOL MAN DID THEY GOT THEIR ASS HANDED TO THEM
They could not even land a shot on you
For the first time in their career they went negative on their Kill Death ratio. It was tragic. You were abusing mechanic they have never seen before. Taking angle they didnt know exist. Shooting through wall they didnt know were made out of paper.
They were floored
Complete. Utter. Defeated.
"How?" Toji, the last one to went against you, ask in disbelief.
" You surely dont think this is my main account right? I dont even have any cosmetic on here" you said with a smirk, hinting to them that this isnt the account you will be competing under.
Nanami let out another sign, he need painkiller after this "if you would let me finish introduced her before throwing a tantrum, you coulda save your pride." He said while shaking his head "y/n will be competing under an alias "KandyCat" or Cat, she specifically put in the contract that she does not want her identity to be out in the public including her appearance so----"
"KANDYCAT?!" Gojo shouted cutting nanami off once again.
"The. KandyCat??? Number one player on the leader board. That KandyCat?" Getou said, not believing his ears
Poor men.... theyre going thru so many shocking things in one day. It's like their word just got turned upside down.
Honestly, i havent thoughts about it after this but it would be fun to be like a choose your own adventure fic. Where they all fell head over heel for you over the course of the competitive season.
#gojo satoru#jujutsu kaisen#jjk#geto suguru#prairie's rambling#geto#gojo#ryomen sukuna#jjk sukuna#sukuna x reader#gojo x reader#suguru geto x reader#jjk headcanons#toji#toji x reader#gojo headcanons#geto headcanons#sukuna headcanons#toji headcanons#jujutsu kaisen fanfic#jujutsu sukuna#gojo jujutsu kaisen#jujutsu geto#jujutsu gojo#jujutsu ryomen#jujustsu kaisen x reader
165 notes
·
View notes
Note
tell me about stained glass
yay!! it's so fun i can't wait to do it again i'm gonna tell you the whole process
so first you need to pick out your pattern/draw the design, make sure there's no weak points (lines directly through the entire piece etc)
once that's set you get to pick out your glass :D some glass is thicker than others but it doesn't matter too much unless you want it to be all the same, there's lots of different textures as well whcih can look really cool
next step is to trace the pattern into the pieces, you wanna go for the edge of the glass to save as much as possible for future projects, and if it's too opaque you need to either use a light box or cut out that part of the pattern
when it's all traced you're gonna start cutting. so get your little tool, make sure you're standing in order to get the pressure and right angle
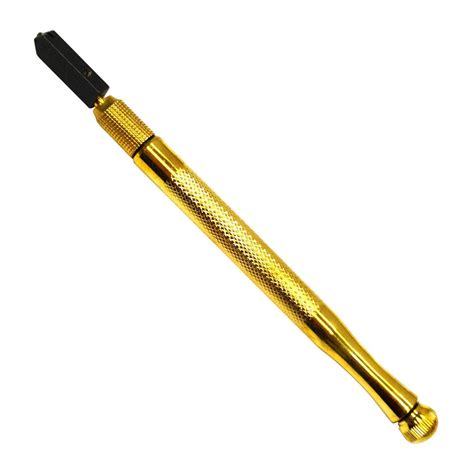
this is the glass cutter ^^
now you gotta smooth that shit down so here's this guy

he's a glass grinder he sands down the sides into the right shape and makes sure you don't cut yourself as much. the bit is in the middle and you hold the glass with ur fingers and press it into the bit to grind it down
next is foiling but before that is cleaning bc the grinder has water in it and it mixes with the glass particles and makes it all icky so get some glass cleaner and wipe it down with a cloth
now time for foiling
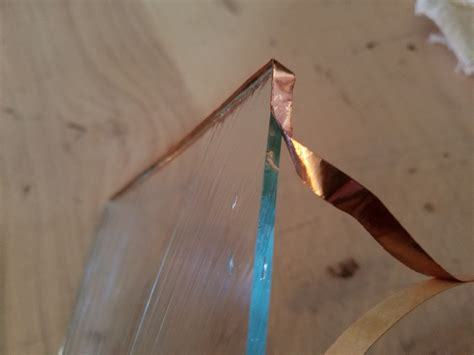
this is copper foil, it comes in rolls with different thicknesses. generally one size fits most glass but thicker ones need thicker foil so it covers the side and equally on the front and back of the glass
i tend to start near a corner, then you're going to wrap it around being careful that the glass goes in the middle of the foil. once it's wrapped around once make sure it overlaps with the beginning about 1/4-1/2 inch, here you cut it
press the foil down on the sides and top and bottom of the glass, then get some kind of tool (can be anything tbh even a pencil or ruler) and rub the foil into the glass so it is fully pressed down

(random piece i found on the internet with foiled glass)
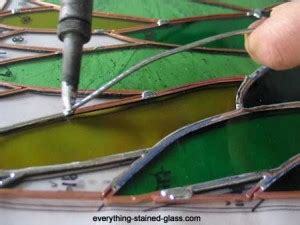
onto soldering :D
once it's foiled you're going to put the pieces together how you want them to lay in the final product. first is tacking, aka putting a small amount of solder on the intersections of glass. before soldering anything you need to put flux on the section you are soldering. (btw solder only sticks to foil not glass) flux basically is a liquid that prevents oxidation on the copper foil, making the solder stick.
there's lead free and leaded solder, i've only worked with lead free but many professional stained glass artists use leaded. it acts a bit differently when soldering but works just as well.
after tacking is the actual soldering. basically you take a stick of solder and a soldering iron and hold the solder right behind the iron so it melts and sort of drips down the edge of the iron onto the foil as you bring your iron across the foil. once you solder one side, flip it over and do the other, then the sides which is a bit different, with more tacking
after soldering you gotta clean it cuz it's dirty again so head to the sink and get some soap and a brush and scrub that shit off
then if you want you can add patina which can make the solder black or other colors i think
then there's polishing which you just scrub on with a cotton pad, you can buff it after this with just a cloth to make it extra shiny but yeah that itttt
ty for letting me rant about this if you have any more questions lemme know <3
21 notes
·
View notes
Text


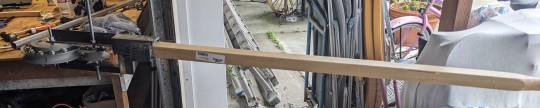
Getting ready to record making the next page in Eivor's herbarium: silver birch from Grantebridge
After a few weeks of being really sick, & the heatwave mayhem, I'm finally prepping this. Here's how it goes, & what's on the page...
Process
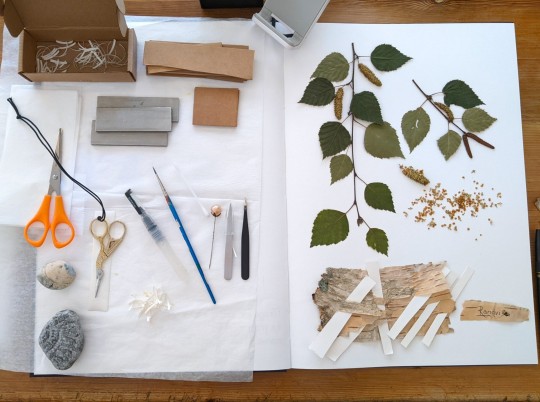
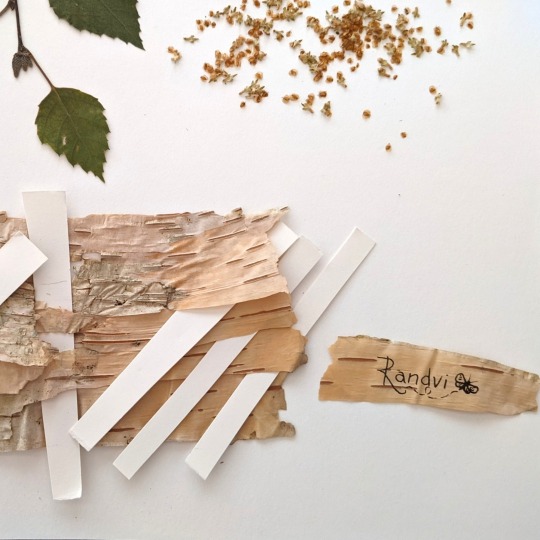
I arrange the pressed birch so that there's room on the page for some writing, and so nothing is too close to page edges. We've got both male and female catkins, leaves and seeds here. Pretty pleased with how it all pressed!
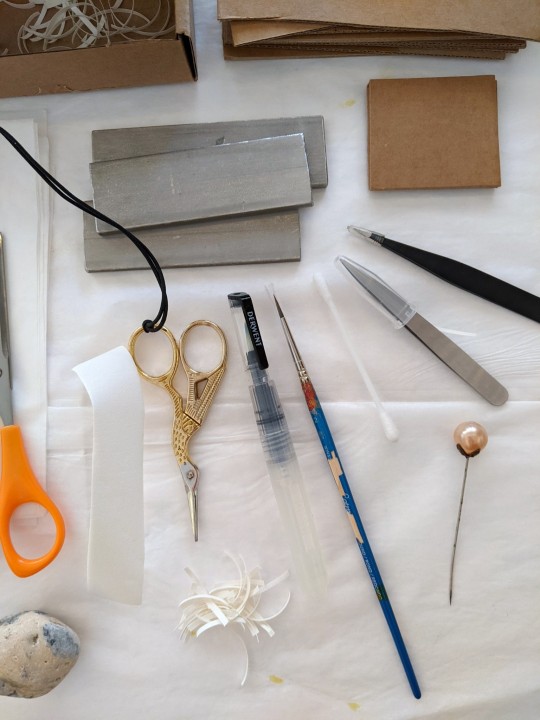
After arranging the plant material on the page, I use archival gummed linen tape to stick it down at various points. I cut the tape into tiny strips that I can pick up with tweezers, & brush with a little water to make them tacky. I press the strips down and use the flat steel bar sections as weights to hold them down until dry. I put some acid-free flimsy paper or cardboard underneath so the metal doesn't mark the paper.
The bark and seeds will be stuck down directly with archival pH7.0 adhesive. I'll also glue the two separated catkins in place to their twig.
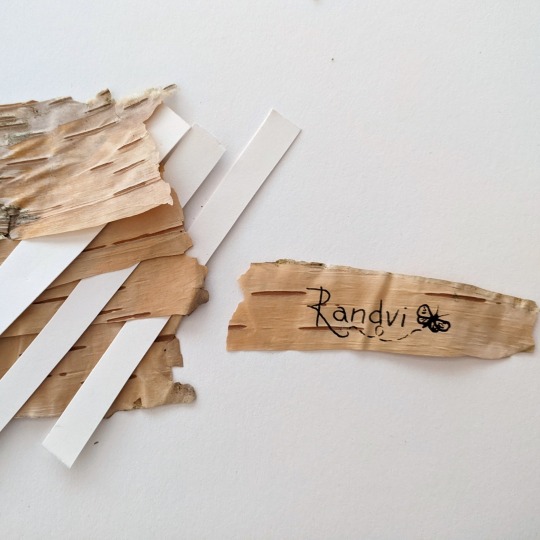
I've separated the bark layers so that I can sneak in a tiny hidden note to Randvi that won't be visible unless you lift the top layer of bark.
Resting on the page below you can see all the ingredients I need - tape strips, tweezers, water brush, weights etc. The hat pin is v. useful for nudging tiny strips and seeds etc into place. Because I can't feel all my fingers any more it's not super safe for me to use angle grinders/saws/cutters anymore. So I had to get some help cutting the bar weights to length. But they really are the best shape for herbarium weights!
#eivors herbarium#eivor's herbarium#videogamebotany#video game botany#ac valhalla#assassinscreedvalhalla#assassins creed valhalla#eivor varinsdottir#eivor wolfkissed#sciart#botanic#botany#botanical art#book herbarium#herbarium#pressed plants#pressed flowers
23 notes
·
View notes
Text
How to Cut Stainless Steel Cable
Whether you're a DIY enthusiast or someone who needs to cut stainless steel cable for a home improvement project, it's important to know how to do it right. In this article, we'll guide you through the process of cutting stainless steel cable safely and efficiently. We'll cover everything from choosing the right tools to cutting techniques and safety tips. By the end of this guide, you'll have all the information you need to confidently cut stainless steel cable.

Choosing the Right Tools
To cut stainless steel cable effectively, you need the right tools. Here are the most common options:
Cable Cutters: These are designed specifically for cutting cables and provide a clean, smooth cut. They're the go-to tool for cutting stainless steel cable.
Angle Grinder: An angle grinder with a metal cutting wheel can also be used for cutting cable, but it may not provide as clean a cut as cable cutters.
Bolt Cutters: While they can cut through stainless steel cable, they may not provide the precision you need.
Safety Tips
Before you start cutting stainless steel cable, take these safety tips into account:
Wear Safety Gear: Always wear gloves and safety goggles to protect your hands and eyes from flying debris.
Secure the Cable: Make sure the cable is secured and won't move during the cutting process.
Work in a Well-Ventilated Area: Cutting stainless steel can generate sparks and dust, so ensure you work in a safe environment.
How to Cut Stainless Steel Cable
Now that you have the right tools and safety measures in place, let's get down to the actual cutting process:
Measure: Determine the length you need to cut and mark it with a permanent marker.
Secure the Cable: Use a vice or clamp to hold the cable in place.
Position Your Tool: If you're using cable cutters, place the blade around the marked spot. For an angle grinder, position the wheel just above the mark.
Cut: Apply steady pressure to cut through the cable. For thicker cables, you may need to make multiple passes with an angle grinder.
Conclusion
Cutting stainless steel cable doesn't have to be a daunting task. With the right tools, safety precautions, and techniques, you can achieve clean and precise cuts for your projects. Remember to take your time and prioritize safety throughout the process.
0 notes
Text
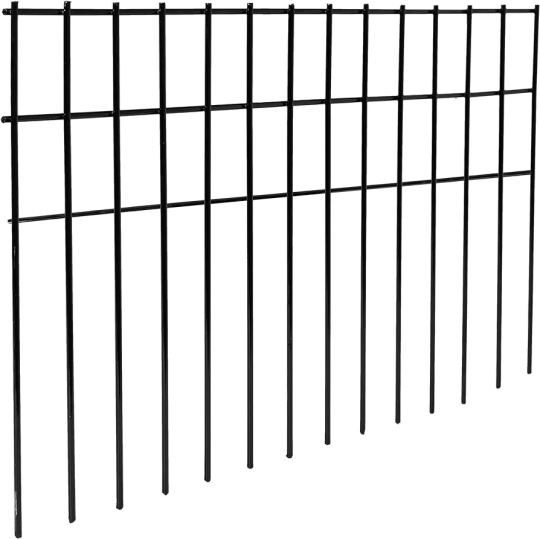
Cut Metal Fence Post : 10 Powerful Techniques for Effortlessly Cutting Metal Fence Posts
To cut a metal fence post, use a reciprocating saw or angle grinder with a metal-cutting blade. When cutting, ensure proper safety gear and caution are taken.
Metal fence posts can be challenging to cut due to their sturdy construction, requiring the use of specialized tools for a precise and clean cut. The process involves selecting the right cutting tool, marking the post at the desired length, and then making the cut with steady and controlled movements.
Safety precautions such as wearing protective gear and securing the post are essential to prevent injuries and ensure a successful outcome. In this guide, we will discuss the step-by-step process of cutting a metal fence post effectively and safely for your DIY project or repair needs.
Credit: www.amazon.com
Choosing The Right Tools
Choosing the right tools is crucial when it comes to cutting metal fence posts effectively. Two primary tools you can use for this task are the Angle Grinder and Metal Cutting Saw.Angle Grinder
- An angle grinder is versatile and can make quick work of cutting metal fence posts.
- Ensure you have a cutting wheel suitable for metal to achieve a clean and precise cut.
- Always wear protective gear like gloves and safety goggles when using an angle grinder.
- Secure the metal post in place before cutting to ensure stability and safety.
- Take breaks during prolonged use to prevent overheating of the tool.
Metal Cutting Saw
- A metal cutting saw is ideal for more precise and controlled cuts on metal fence posts.
- Choose a saw blade specifically designed for cutting metal to avoid damage to the tool or material.
- Follow the manufacturer's instructions for setting up and operating the metal cutting saw.
- Ensure a stable work surface and clamp the metal post securely before cutting.
- Periodically check the blade for wear and replace it as needed to maintain optimal cutting performance.
Preparation And Safety Measures
Cutting metal fence posts can be a rewarding DIY project, but it is essential to prioritize safety and proper preparation. Before jumping into the cutting process, take the necessary precautions to ensure a safe and successful outcome.
Gathering Safety Gear
- Wear gloves and safety glasses to protect your hands and eyes.
- Use ear protection to safeguard against loud noise during cutting.
- Ensure you have a work apron and closed-toe shoes for added protection.
Marking The Cut Line
- Measure and mark the exact point where you intend to cut the metal fence post.
- Use a metal ruler or measuring tape for precision in marking the cut line.
- Consider using a metal scribe or permanent marker to make the marking clearly visible.
Techniques For Cutting
When it comes to installing a fence, cutting metal fence posts to the correct length is an essential part of the process. Using the right techniques for cutting metal posts will ensure a clean and precise result, making the installation process smoother and more efficient. In this section, we will explore two effective techniques for cutting metal fence posts: using an angle grinder and using a metal cutting saw.
Using An Angle Grinder
An angle grinder is a versatile tool that can be used to cut metal fence posts with ease. Follow these simple steps to achieve accurate cuts:
- Secure the metal post in a vice grip to stabilize it during cutting.
- Mark the cutting line on the post using a marker or a piece of chalk.
- Put on protective gear including safety goggles and gloves before starting the angle grinder.
- Start the angle grinder and carefully guide the cutting wheel along the marked line, applying gentle pressure to the post.
- Once the cut is complete, remove any burrs or sharp edges using a metal file or sandpaper.
Using A Metal Cutting Saw
A metal cutting saw provides a precise and efficient method for cutting metal fence posts. Here's how to use it effectively:
- Place the metal post securely in a vice or clamp to prevent movement during cutting.
- Select the appropriate blade for cutting metal and ensure it is securely attached to the saw.
- Measure and mark the cutting line on the post using a straight edge and a marker.
- Switch on the metal cutting saw and carefully guide the blade along the marked cutting line, maintaining a steady and controlled motion.
- After the cut is complete, inspect the edge for any roughness and remove it using a deburring tool or file.
Credit: www.instructables.com
Alternative Methods
When it comes to working with cut metal fence posts, there are a few alternative methods that you can consider. These methods, such as plasma cutting or using an oxy-acetylene torch, offer different options for cutting and shaping metal fence posts according to your preference and needs.Plasma CutterIf you're looking for a precise and efficient method for cutting metal fence posts, then a plasma cutter is the way to go. This tool uses high-velocity jets of ionized gas to melt and cut through metal, providing clean and accurate cuts.With a plasma cutter, you have the flexibility to cut through various metals, including stainless steel and aluminum. It is also capable of cutting through thicker materials, making it a versatile option for your metal fence post cutting needs. Additionally, plasma cutting creates minimal heat-affected zones, resulting in less warping or distortion of the metal.When using a plasma cutter, safety precautions should be followed. Make sure to wear appropriate protective gear, such as gloves and eye protection, to ensure your safety while operating this powerful tool.Oxy-acetylene TorchIf you prefer a more traditional approach to cutting metal fence posts, an oxy-acetylene torch can be a suitable alternative. This torch uses a mix of oxygen and acetylene gas to create a high-temperature flame, allowing you to cut through metal with ease.An oxy-acetylene torch offers flexibility in terms of portability, making it suitable for on-site cutting. This method is particularly useful for cutting through thick and heavy-duty metal fence posts.
Advantages of Plasma Cutter and Oxy-Acetylene Torch
Plasma Cutter
Oxy-Acetylene Torch
Ability to cut various metals
Portability for on-site cutting
Precise and efficient cuts
Ability to cut through thick materials
Minimal heat-affected zones
When using an oxy-acetylene torch, it is crucial to take necessary safety precautions. Ensure proper ventilation, use flame-resistant clothing, and make sure you have a fire extinguisher nearby.Before choosing a method for cutting metal fence posts, consider your specific requirements, the type of metal you're working with, and the desired level of precision. With the right alternative method, you can achieve the perfect cut for your metal fence posts.
https://www.youtube.com/watch?v=aUTHbArkPu0
Finishing Touches
Once you have installed your cut metal fence posts, it is important to take the necessary steps to ensure they are properly finished. This will not only enhance the look of your fence but also protect it from rust and prevent any injuries caused by sharp edges. In this section, we will cover two essential finishing touches that should be applied to your cut metal fence posts: smoothing edges and applying rust protection.Smoothing EdgesWhen working with cut metal fence posts, it is common for sharp edges to be left behind. These edges not only create an unattractive appearance but can also pose a safety hazard. Smoothing edges is a straightforward process that can be achieved with the use of a metal file or grinder. By running the tool along the edges of the cut metal, you will be able to remove any protruding or jagged edges, creating a smooth and safe surface.Applying Rust ProtectionTo ensure the longevity of your cut metal fence posts, it is crucial to protect them from rust. Rust not only deteriorates the appearance of the posts but can also weaken their structural integrity over time. There are several rust protection options available, including primers, paints, and protective coatings. Before applying any rust protection, make sure to clean the surface of the metal thoroughly, removing any dirt or debris. Then, apply the chosen rust protection product in accordance with the manufacturer's instructions. This will create a barrier between the metal and the elements, preventing rust from forming and keeping your fence posts looking their best for years to come.

Credit: staytuff.com
Frequently Asked Questions On Cut Metal Fence Post
How Do You Cut Metal Fence Posts?
To cut metal fence posts, use a reciprocating saw with a metal cutting blade. Mark the desired cut line, wear protective gear including safety goggles and gloves, and slowly cut through the post using the saw. Ensure a stable work surface and take precautionary measures to prevent injuries or damage.
Can I Cut Metal Fence Posts With A Hacksaw?
Yes, you can cut metal fence posts with a hacksaw. However, it may take more time and effort compared to using a reciprocating saw or an angle grinder with a metal cutting disc. Ensure the hacksaw blade is suitable for cutting metal and follow the same safety precautions as with other cutting tools.
What Is The Best Tool To Cut Metal Fence Posts?
The best tool to cut metal fence posts is a reciprocating saw with a metal cutting blade. It offers versatility and ease of use, allowing you to make precise cuts in various angles. If you have limited access or require a fine cut, an angle grinder with a metal cutting disc can be a good alternative.
How Long Does It Take To Cut A Metal Fence Post?
The time it takes to cut a metal fence post depends on various factors, including the thickness of the post, the tool you use, and your experience. Generally, it can take anywhere from a few minutes to half an hour to cut a single post.
Factors such as preparation time, setup, and clean-up should also be considered.
Conclusion
To sum up, cutting metal fence posts doesn't have to be a daunting task. With the right tools and techniques, you can achieve a clean and precise cut while ensuring safety and accuracy. By following the steps outlined in this guide, you can easily tackle your metal fence post cutting project with confidence and efficiency.
Read the full article
0 notes
Text
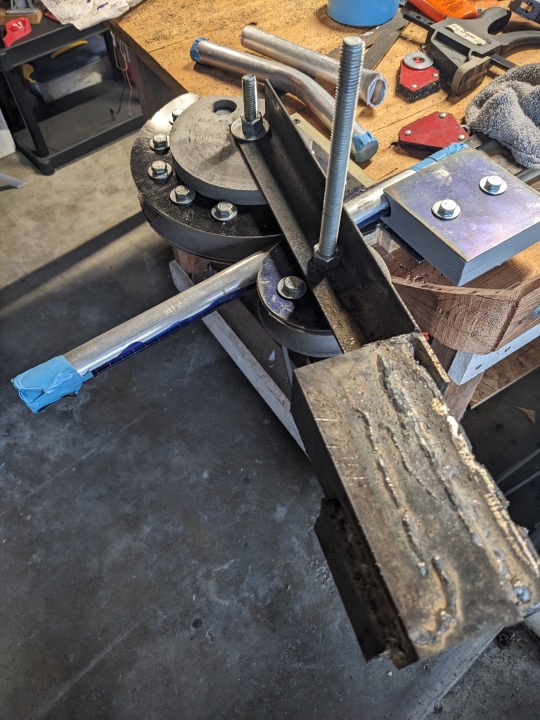
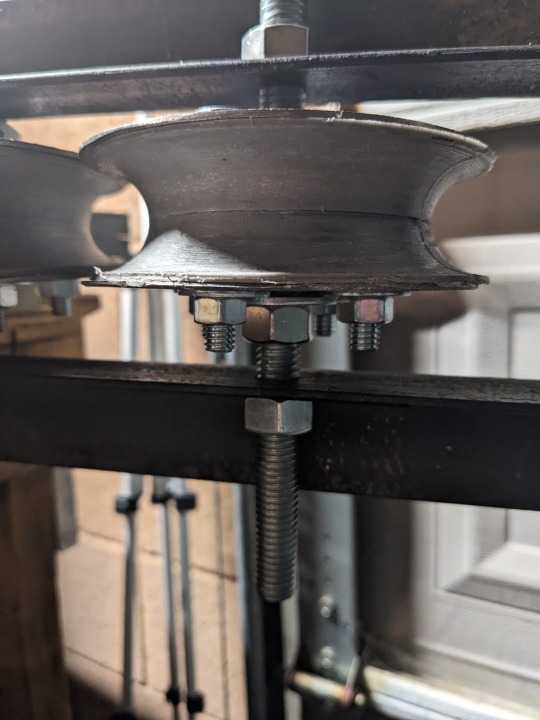
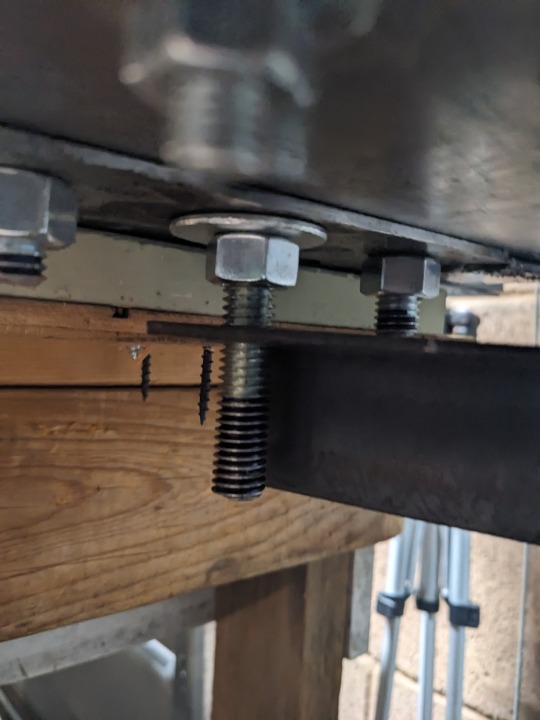
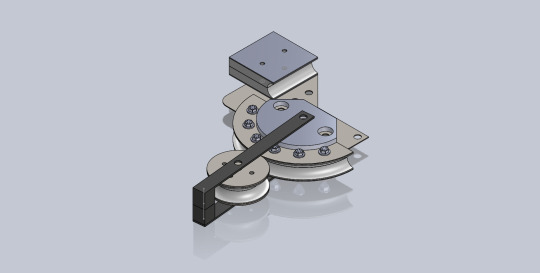
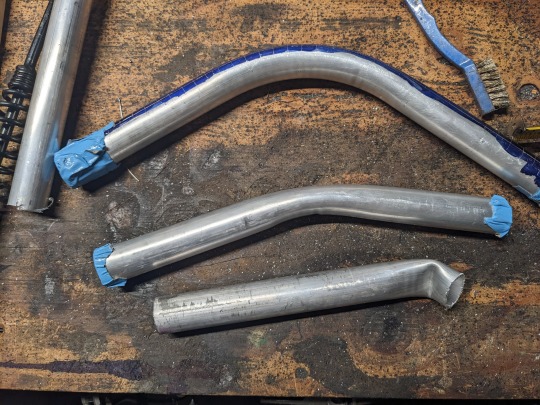
Tube bender project [Completed]
Here's a rough guide, blue prints and stl files
*Tools needed and recommended
-angle grinder
-A Belt sander would be preferable however you could use a file if you need a workout or just starting out
-A Welder of your choice (Mig,Tig, stick...Etc)
-A pack of the cheapest files from harbor freight.
-Dykem Blue layout fluid
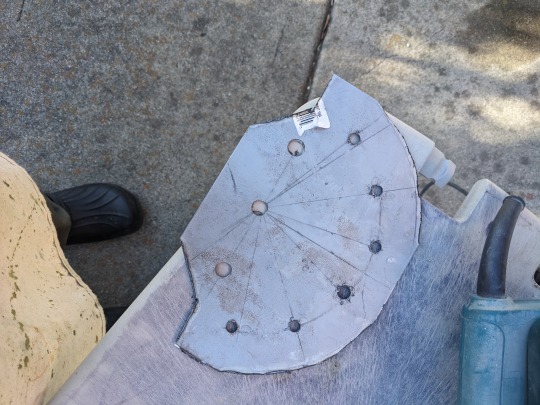
1.How to cut out parts
*Rough cut out with an angle grinder
Sand out the edges
Use a center punch to mark the holes and use a cutting oil on your drill bits
Drill
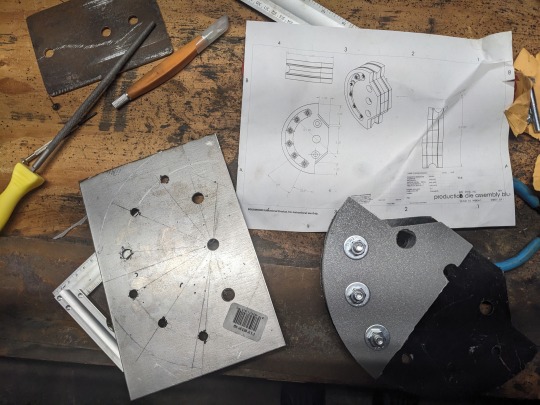
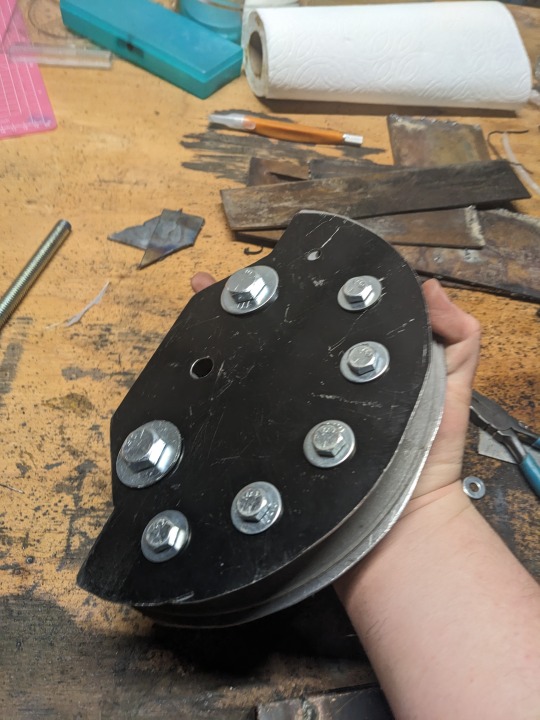
2.How its assembled
*Parts needed
-for the base plate i used approximately 11 gauge steel off a rusted work truck but you could go lighter.
-For the die assembly and tube holder assembly its 16 gauge screwas
-About 8 qty of 5/16 bolts and 13 washers
-2 qty of 1/2 inch bolts, nuts and washer
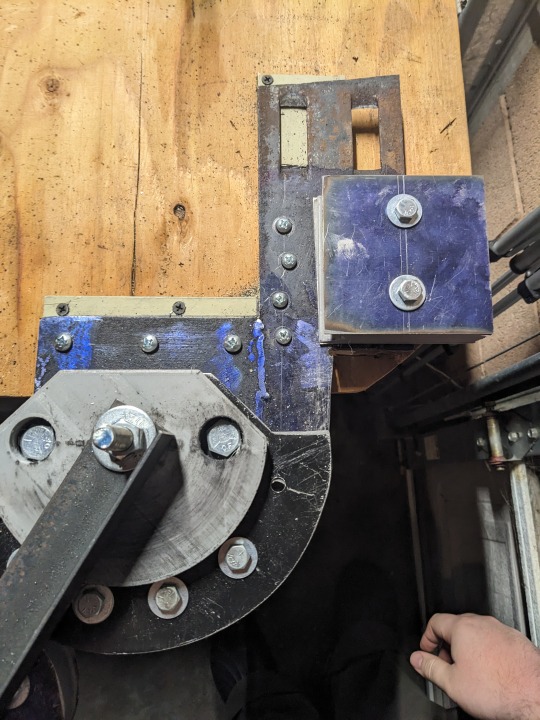

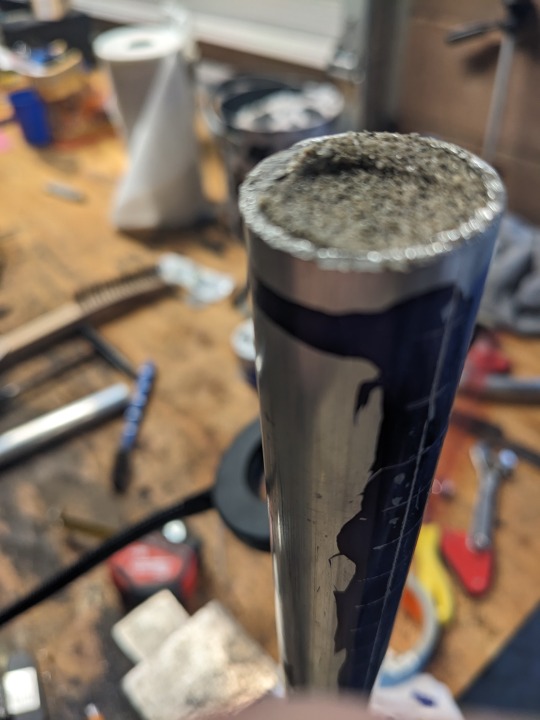
3.How to bend tubes.
-Cut off desired length
-Tape One end
-Fill and compress as much sand as possible
-Tape the other end
-Bend

-
4. STL Files
Files can be found on my thingiverse account.
0 notes
Text
Top 10 Must-Have Tools For Any DIY Project
Top 10 Must-Have Tools For Any DIY Project
Have you ever had an urge of wanting to build something? Something unique or something custom. But the cost of ordering a custom design is just too much. So you decide to take matters into your own hands. But don’t know where to begin? Well, we are here to help you. We can help you with this expedition of creating something custom and unique right at your home. This article will explore the top 10 tools you require for any DIY Project.
Top 10 Beginner Friendly DIY Tools
· Tape measure
A tape measure or measuring tape is a flexible tool, used for measuring length. Depending on whether you want to use it for general household DIY or for professional use you can either get the 30m tape measure or the 50m tape measure.
· Adjustable spanner
An adjustable spanner is an open-ended wrench with a movable jaw that can be adjusted to any size. It is advised to get an adjustable spanner set for home use as it saves you from getting an entire wrench set from which you will have to sort through to get to the right sized wrench that you need.
· Wrench
Having a wrench for home projects can come in very handy. They are generally used for gripping, fastening, turning, tightening and loosening things like pipes, pipe fittings, nuts and bolts. This not only assists you in your DIY urges but will also help in home renovations and fixing.
· Utility knife
A utility knife; also called a box cutter, a razor blade knife, a carpet knife, or a stationery knife; is a common tool used in various trades and crafts for a variety of purposes. It is a safe-to-use tool as it is covered with a PVC handle and can only open when certain buttons/levers are moved.
· Screwdriver
A screwdriver is used to insert or remove any screws. It is advised to have a screwdriver set for easy repair of any cracks or broken windows or hinges. Not only that, they can also be used for creating any connections in your DIY Projects and leave no loose screws.
· Hammer
A hammer for DIY Enthusiasts is as useful as their dominant hand. You can use this for used for general carpentry, framing, nail pulling, cabinet making, assembling furniture, upholstering, finishing, riveting, bending or shaping metal, striking masonry drills and steel chisels, and so on. With so many uses, it is a must-have item in your toolkit.
· Drill machine
Moving on to power tools, a safe-to-use drill machine is a must-have for all DIYers. Why? Because it is used to cut holes into or through metal, wood, or other materials. Not only that it can also be used to create small attachments and other home projects where you have to hang something on a wall.
· Circular saw
The most common function of a circular saw is to make cuts in a straight line on pieces of lumber. A circular saw is most suitable for any type of woodwork. Especially for people who are new to DIYing and don’t know how to cut straight pieces, this tool is very handy.
· Angle grinder
An angle grinder for home renovation can make your home look new and shiny. It is used for grinding, polishing, cutting and a lot more. This multi-use tool is a must for your DIY toolkit, especially if you want it to turn into a regular activity.
· Jigsaw
A jigsaw is used for cutting metal, wood, resin and almost all materials. As a result, when you want to create some funky shapes or some unique design that is only in your head, you can use this tool and bring it to life.
Must Haves In Your Safety Kit
Safety is the most important thing when it comes to any and all types of DIYing. You need to make sure that you are taking care of yourself and are using safety equipment like goggles, gloves, etc. As the saying goes, “Safety First”, you must have a safety kit wherever you are doing some form of home renovation or DIY Project. Along with that make sure you also have a medical kit with bandages, gauze, and disinfectant at your place, in case of any injuries.
Links:
https://atozshop.co.in/?s=tape%20measure
0 notes
Text
Stone Equipment: Essential Tools for Construction and Landscaping
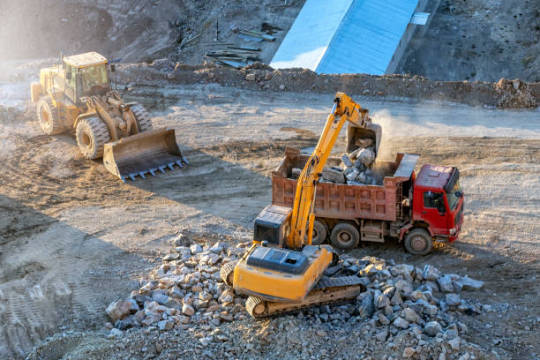
Whether you're involved in construction or landscaping projects, having the right equipment is crucial for your success. One type of equipment that is commonly used in both industries is Stone Equipment. From cutting and shaping stones to handling heavy loads, stone equipment makes the process efficient and cost-effective. In this article, we'll explore the essential tools used in working with stones and how they can benefit your projects.
Stone Cutters:
A stone cutter is a power tool designed to precisely cut through stones. With various types of blades and sizes available, stone cutters can handle different stone materials, such as granite, marble, or limestone. Stone cutters are not only used for cutting stones into desired shapes and sizes but also for creating precise angles and edges. These tools come in handheld or tabletop models, providing versatility and ease of use.
Diamond Blades:
When it comes to cutting stones, diamond blades are the go-to choice for professionals. Unlike conventional blades, diamond blades are designed with diamond segments embedded in the rim. The diamond particles make the blades incredibly durable and allow them to cut through stones with precision and speed. Diamond blades are available in various sizes and can be used with stone cutters or other power tools like angle grinders.
Stone Polishers:
Once you've cut and shaped the stones, the next step is to give them a polished finish. Stone polishers are specialized machines that use abrasive pads or discs to smooth and polish the surface of the stones. Depending on the desired level of shine, the stone polishers can be adjusted to different speed settings. They are commonly used in the stone countertop industry to achieve a glossy and professional finish.
Stone Lifting and Handling Equipment:
Working with stones often involves lifting and moving heavy loads. Stone lifting and handling equipment, such as stone clamps, suction cups, and lifting trolleys, provide a safe and efficient solution for lifting stones of different sizes and weights. These tools not only help prevent injuries but also make the transportation and installation of stones more manageable, get more insights about this topic here!
In conclusion, stone equipment plays a crucial role in the construction and landscaping industries. From cutting and shaping stones to polishing and handling heavy loads, these tools make the process efficient and productive. Investing in quality stone equipment will not only save you time and effort but also ensure the superior quality of your projects. So, be sure to equip yourself with the necessary stone equipment for your next construction or landscaping endeavor.
An alternative post for more info on the topic here: https://en.wikipedia.org/wiki/Heavy_equipment.
0 notes
Text
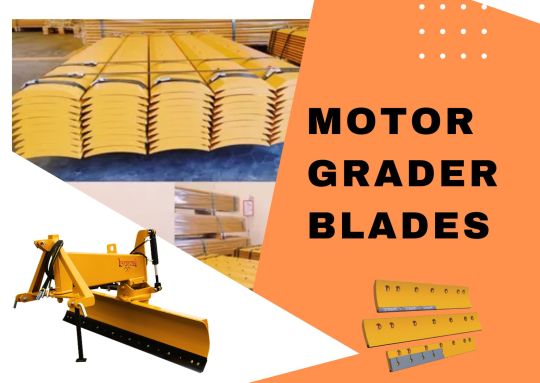
What is a Motor Grader Blade and Why is it Important to Keep it Sharp
If you're in the construction industry, then you know how important it is to have top-performing equipment. One such piece of machinery that plays a crucial role in any construction project is the motor grader blade. This component is responsible for leveling and smoothing soil surfaces, making it vital to keep it sharp and well-maintained at all times. In this blog post, we'll explore everything you need to know about motor grader blades, why they need to be sharp, tips on keeping them maintained, and step-by-step instructions on how to sharpen them effectively. So if you're looking for ways to improve your construction projects' efficiency and effectiveness, read on.
What is a Motor Grader Blade?
A motor grader blade is an essential component of heavy machinery used in construction projects. It's a large, flat metal plate that attaches to the bottom of the motor grader and serves the purpose of leveling and smoothing soil surfaces.
The blade is adjustable, allowing it to move up or down as needed depending on the surface it's working with. This adjustability also allows it to cut into hard surfaces like rocks or remove soft material like sand efficiently.
Motor grader blades come in various shapes and sizes, each designed for specific purposes such as cutting, mixing materials together, and spreading gravel evenly over a surface.
Without these blades' use in construction projects, achieving smooth roads or level foundations would be impossible. Therefore, it's necessary to keep them sharp at all times so they can perform their duties effectively.
Reasons for Keeping the Motor Grader Blade Sharp
There are many reasons why keeping the motor grader blade sharp is crucial for maintaining a high level of performance. Firstly, it ensures that the machine can operate at peak efficiency and effectiveness. A dull or damaged blade can lead to uneven cutting and grading, which in turn slows down operations and increases fuel consumption.
A well-maintained motor grader blade also facilitates precision work on the road surface, allowing for better control over the finished product. This translates into smoother surfaces that require less maintenance in the long run.
Another reason for keeping your motor grader blade sharp is safety. A dull or damaged blade can cause accidents on job sites by throwing debris around or causing other machinery to malfunction due to improper grading.
Regular sharpening of blades extends their lifespan, reducing wear and tear on other components of the machine such as hydraulic systems and engine parts. This ultimately saves money in costly repairs down the line while enhancing overall operational efficiency.
Sharpening your motor grader blades regularly has numerous benefits including improved efficiency, greater safety measures on worksites as well as reduced wear-and-tear costs associated with prolonged use without maintenance upkeep.
Tips and Tricks for Keeping the Motor Grader Blade Sharp
Keeping a motor grader blade sharp is crucial for achieving an efficient and smooth road grading process. Here are some tips and tricks that will help you maintain your grader blade’s sharpness:
Firstly, always ensure the blade is clean before attempting to sharpen it. Dirt or debris can cause uneven wear on the blade, which may lead to poor performance. Use a pressure washer or a wire brush to remove any dirt.
Secondly, inspect the cutting edge of the blade regularly. If there are nicks or dents in the cutting edge, they must be smoothed out with a hand-held grinder.
Thirdly, use lubrication when sharpening your motor grader blades. Lubricants such as oil prevent overheating of the metal during grinding and reduce friction between abrasive surfaces.
Fourthly, make sure to maintain consistent angle and depth while sharpening your blades. A slight variation in either can hinder their efficiency significantly.
Consider investing in high-quality replacement blades from reputable manufacturers like Bonai India: The Best Grader Blades Manufacturer In India.
By following these simple tips and tricks regularly, maintaining sharp grader blades becomes easier than ever!
Step by Step Instructions on How to Sharpen a Motor Grader Blade
Keeping the motor grader blade sharp is an essential task for ensuring smooth and efficient operations on any construction site. A dull blade can lead to poor grading performance, uneven surfaces, and increased fuel consumption. The good news is that sharpening a Motor Grader Blades is not as complicated as it may seem.
Firstly, you need to prepare your tools for the sharpening process. You will require a bench grinder or angle grinder with a grinding wheel suitable for steel blades, safety goggles, gloves, and ear protection.
Next, secure the blade onto a workbench using clamps or vice grips. Make sure it's stable before proceeding further.
Start by inspecting the edge of your blade to assess how much material needs removing during sharpening. Using your angle grinder or bench grinder start grinding away small amounts from each side of the edge until achieving desired sharpness.
Remember always to keep moving back and forth across both sides of the blade while maintaining equal pressure on each pass so that you don't over-sharpen one side more than another.
After you finish sharpening one end of the blade flip it over and repeat this process on the other ends making sure they are all equally sharp before reattaching them back onto their respective positions on the machine.
Keeping your motor grader blades sharp is crucial for maintaining its efficiency in performing heavy-duty tasks at construction sites. By following these step-by-step instructions mentioned above with precision and care; anyone can quickly learn how to maintain their equipment properly without needing outside help from professionals.
Conclusion
Keeping a motor grader blade sharp is crucial for maintaining the efficiency and productivity of your equipment. By having a properly sharpened blade, you can ensure that your grader will operate at its optimum level, providing high-quality results every time. It's important to remember that regular maintenance of your motor grader blade is not only cost-effective but also helps prevent more significant problems from occurring down the line.
By following these tips and tricks on how to maintain and sharpen your motor grader blade, you can prolong its life span while minimizing downtime. Remember always to choose a high-quality Grader Blades Manufacturer In India or Grader Blades Supplier in India when purchasing replacement blades as they'll have superior durability.
So if you want to keep up with the competition in today's fast-paced construction industry, make sure to prioritize regularly checking and sharpening your motor grader blades - it will pay off in dividends.
0 notes
Text
How To Cut Pool Table Slate?

Investing in a pool table is a big decision, and once you have one, you want to make the most of it. However, over time, you may need to replace parts or want to repurpose your pool table. One part that you can reuse is the slate, which is the flat playing surface of the table. In this guide, we will walk you through the steps of cutting pool table slate to help you repurpose it for various projects.
Step 1: Gather the Necessary Tools
Before you start cutting your pool table slate, it's essential to have all the necessary tools. Here are the tools you'll need:
Hammer
Safety glasses/goggles
Marker/pencil
Measuring tape
Chisel
Clamps
Circular saw or an angle grinder
Step 2: Decide on the Final Look You Want for the Slate
Before you start cutting, you should decide on the final look you want for the slate. Consider the various shapes, sizes, and colors available. Reject thin slates and those with unmatched colors. You want to ensure that the slate will be useful for your intended project.
Step 3: Measure the Slate and Dimensions of Each Piece You Want to Cut
Once you have decided on the final look, it's time to measure the slate and the dimensions of each piece you want to cut. Ensure that you have a clear plan in mind to avoid wasting any of the slate.
Step 4: Mark a Straight Edge on the Slate
Using a marker or pencil, mark a straight edge on the slate. This will serve as a guide for the cutting process.
Step 5: Mark Both Sides Before Cutting (If Using a Hammer)
If you are using a hammer to cut the slate, you should mark both sides before cutting. This will prevent the slate from breaking unevenly.
Step 6: Use Safety Glasses or Goggles
While cutting the slate, ensure that you wear safety glasses or goggles to protect your eyes from the dust generated.
Step 7: Clamp Down the Side You Want to Cut and Use a Circular Saw or an Angle Grinder
Lay the slate on a workbench and clamp down the side you want to cut. This will prevent the slate from moving during the cutting process. Use a circular saw or an angle grinder for the final outcome. A circular saw is best for straight cuts, while an angle grinder is useful for curved cuts.
Conclusion
Cutting pool table slate can be a tricky process, but with proper preparation and hard work, it's achievable. Follow the above steps to repurpose your pool table slate for various projects. Remember, safety should always be a top priority, so wear safety glasses or goggles and use clamps to secure the slate during the cutting process.
Main Article -
0 notes
Text
Best Angle grinder Review
Angle grinders are an incredibly useful tool for a variety of projects. Whether you're a professional or a weekend DIY enthusiast, best angle grinder is a must-have tool. With so many options on the market, it can be hard to decide which angle grinder is right for you. That's why we're here to help! In this blog post, we'll provide you with a detailed review of the best angle grinder currently available. We'll cover the features, pros, and cons of each, along with a comparative analysis so you can make an informed decision when it comes to purchasing the best angle grinder for your needs. Whether you're tackling a construction project or sharpening a garden tool, we've got you covered with the best angle grinder reviews. Keep reading to find out which angle grinder is the best choice for your next project.
1. Overview of the best angle grinders available on the market
The best angle grinders on the market offer a combination of power, performance, and durability. With a wide range of available models, there is something for every user—from the DIY enthusiast to the professional contractor. Angle grinders are versatile tools that can be used to cut, grind, and polish materials of various shapes and sizes. They are ideal for removing rust, sharpening, and cleaning surfaces. When selecting an angle grinder, it is important to consider the size of the motor, the speed of the motor, and the type of disk attachment. These features, along with the length of the handle and the weight of the grinder, will all affect the user experience.
2. Comparison of features and performance
The next criterion for our best angle grinder review is a comparison of features and performance. When comparing features, it is important to consider the additional features that each angle grinder offers. For example, some angle grinders offer variable speed settings, dust collection systems, or ergonomic designs. Performance should also be taken into account when evaluating the features of the angle grinder. This includes the maximum power of the grinder, its RPM range, and its ability to handle heavy-duty tasks. In addition, the ease of use and accuracy of the angle grinder should also be taken into consideration.
3. Durability and cost analysis
Durability and cost analysis are critical factors when it comes to choosing the best angle grinder for your needs. To determine the best angle grinder for your project, look for models made with durable materials and components, such as metal and plastic. Additionally, consider the cost of the grinder and its associated components, such as blades and discs, as well as any additional features it may offer. Ultimately, the best angle grinder for your project should be both durable and cost-effective.
4. Safety guidelines to consider when using an angle grinder
When using an angle grinder, it’s important to follow certain safety guidelines in order to ensure your safety and the safety of those around you. First, always wear protective gear, such as eye goggles and gloves, when operating an angle grinder. Make sure the area is free of debris and other objects that could be thrown by the grinder. Additionally, be sure to check that the grinder is properly grounded and that any power cords are in good condition. Finally, always keep the angle grinder firmly in both hands when in use, and be sure to always keep your fingers away from the disk. Following these safety guidelines can help ensure a safe and successful angle grinding experience.
5. Professional tips to use an angle grinder
The angle grinder is a versatile tool that can be used for a variety of tasks. To ensure safety and optimal performance, here are five professional tips on how to use an angle grinder:
1. Ensure the workpiece is firmly attached to the workbench or table.
2. Wear protective clothing, including safety goggles and gloves.
3. Do not force the angle grinder; let the grinder do the work.
4. Keep the angle grinder at an angle to the workpiece and never directly in line.
5. Use a steady speed while grinding and avoid sudden movements.
By following these tips, you can ensure that your angle grinder can be used safely and effectively.
6. Common uses of an angle grinder
One of the most versatile and widely used power tools today is the angle grinder, and it can be used for a variety of tasks. Here are six common uses for an angle grinder: grinding metal, cutting tile and stone, sanding wood and metal, polishing metal, removing rust, and sharpening blades. Angle grinders are powerful tools, and must be used with caution to avoid injury; always read and follow the manufacturer’s instructions and safety guidelines when using an angle grinder. With the right safety precautions, angle grinders can be a useful and powerful tool for any job.
7. Maintenance tips for angle grinders
For the best performance and longevity of an angle grinder, proper maintenance is key. Here are 7 essential maintenance tips to keep in mind:
1. Regularly inspect the gearbox and brushes - these should be in good condition to ensure the angle grinder runs reliably and efficiently.
2. Replace the brushes when they become worn out.
3. Clean the vents and inlet of the grinder, as dirt and grime can affect performance.
4. Check the electric cord regularly, as any fraying or exposed wires can lead to a hazardous situation.
5. Lubricate the angle grinder regularly, as this can improve efficiency and can help to extend the life of the angle grinder.
6. Make sure the motor is running smoothly and without any excessive noise from the bearings.
7. Make sure the grinder is working within the prescribed amperage and voltage of the motor - if not, it may need to be serviced.
8. verdict
To determine our final verdict on the best angle grinder, we weighed up all the features and benefits we encountered. We considered the power, speed, design, ergonomics, and warranty information. After assessing all of these factors, we have concluded that the Dewalt DCG413B Cordless angle grinder is the best angle grinder in this review. It offers a powerful motor and high-speed performance, with a comfortable and easy-to-use design. Plus, it comes with a 3-year limited warranty, making it an excellent purchase for any project.
In conclusion, the best angle grinder for you will depend on your individual needs. Consider the size and weight of the grinder, the power source, the available attachments and accessories, and your budget. With these factors in mind, you should be able to find an angle grinder that will meet your needs and help you tackle any project that comes your way.
0 notes
Text
How Do I Pick The Best Company For Floor Sanding Services?
If you have hardwood flooring, it's important to keep it in good condition. This means that you need to regularly clean and refinish the floor. There are a lot of different companies out there that offer these services, so how do you know which one is right for your home?
Here are some things to consider when looking at Best Flooring in Adelaide companies in your area:
Do you want to sand or screen?
Sanding is done with a power sander or drum sander, which uses sandpaper and operates on the principle of abrasion. The sanding process removes the old finish from the floor to prepare it for staining.
Screening is done by hand using a screen, either before or after sanding. It is usually used in conjunction with other processes such as stripping or stripping and sanding.
Both methods can be used together if you wish to have a completely polished surface after you've finished working on your floors but it depends on what type of floor finish you want at the end and what kind of floors they are made from.
In most cases, however, people prefer either one method over another because there's no real benefit from doing both during each stage except that it may take longer than expected if there was much more work involved than anticipated.
What kind of stain do you want?
There are several different types of wood stains to choose from. Oil-based stains are the most popular, but they're also the most expensive and may require more maintenance over time.
Wax and lacquer finishes are less expensive, but they can be harder to apply evenly. Polyurethane finishes are a good middle ground between cost and ease of application; however, they take longer to dry than other types of stains.
Do you want to oil, wax, lacquer, or polyurethane the floor?
Oils, waxes, and lacquers are the most popular choices for floor finishes. The type you choose will depend on your lifestyle and the area of the country where you live.
Oil-based polyurethanes are harder to clean, require more maintenance, and take longer to dry than lacquer or wax. They also produce a thicker finish that can interfere with some types of floor coverings such as carpeting or rugs in high-traffic areas.
On the other hand, oil-based polyurethanes provide excellent durability because they contain highly saturated resins that resist wear and scuffing better than lacquers or waxes can do alone—making them ideal for floors exposed to heavy traffic such as kitchens or living rooms but not ideal if you want an easy-to-care-for finish like oiled wood floors which require little maintenance once they're installed properly!
What kind of equipment does the floor sanding company use?
There are a number of different types of equipment that floor sanding companies use, each with its own pros and cons. The type of equipment that you choose will depend on the surface you want to sand and how smooth it is.
For example, if your floor is made from hardwood or tile then belt sanders might be more appropriate because they can get into the grooves in these materials better than other kinds of machines. However, if your floor has a varnish coating or is made from the carpet then angle grinders might be best because they cut down on dust production.
There are many factors to consider when choosing which machine to rent from a floor sanding company.
Make sure you're clear about what kind of material you want to work on before making an order so that they send over the right tool(s) for your job!
We hope this article has given you a better idea of what to look for in a Floor Sanding in Adelaide company, and how they can help you with your floor.
Source: How Do I Pick The Best Company For Floor Sanding Services?
0 notes
Text
What are Diamond tools and Just How Are They Used?
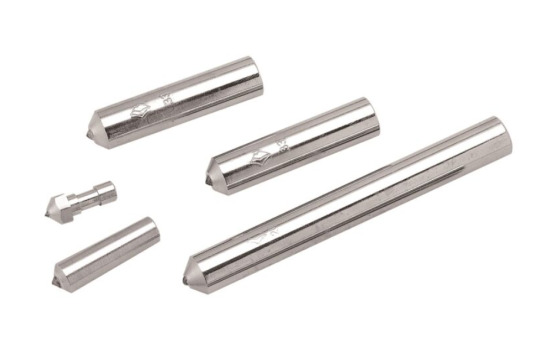
Ever heard the term diamond tools being utilized? What is a Diamond Tool anyways? I'll give you a pretty good concept in easy terms so you can have a better understanding of what they are as well as how they work.
Primarily Diamond Tools are thought about as any type of tool that uses Diamonds as an unpleasant for reducing. Typically the "cutting teeth" are metal sections composed of metal powders as well as ruby crystals. These sectors are after that shaped into rectangular teeth and then bonded to the steel core of the device.
There are various types of diamond tools being used each day in the construction industry for cutting a wide range of products such as Strengthened Concrete (Concrete with Rebar), Cured Concrete (Old Hardened Concrete), Asphalt, Asphalt over a layer of Concrete, Block, Block, Stone, Marble, Granite, Ceramic Tile, Glass, Ceramics, Porcelain & a lot more products. Right here are 3 most typical sorts of diamond tools and also their usages:
Ruby Blades
A Ruby Blade is a round saw blade made use of over Rate Gas Powered Cut-Off Saws, Stroll Behind Saws, Angle Grinders, Table Saws, Tile Saws, and so on. They are used for making straight cuts in just about any sort of product known to a guy. They are used every day by contractors and also by building and construction companies all over the globe.
Grinding Cups
A Grinding Mug is a circular grinding tool with diamond sections on one side only. They are made used for grinding unequal surface areas to leave a level & smooth surface. They can be utilized for grinding concrete, granite, marble, and also other hard products. They are typically utilized on angle mills.
Core Bits
A Core Little bit is a lengthy hollow tube with diamond segments on the tip. Core Bits are made for piercing openings with Granite & Marble Countertops, Concrete Walls, Reinforced Concrete, and also various other comparable products. They are generally used in the construction industry for all kinds of exploration, such as electrical installations.
There are many more kinds of diamond tools such as Concave Diamond Blades for reducing contours in Counter Tops (Installing Sinks in Countertops), Ductile Blades for cutting steel, Diamond Sprucing Pads for Polishing Marble, Tuck Pointers for removing mortar as well as recovering old brick walls, Split Chasers for repairing fractures in walls and also a lot more.
0 notes
Text
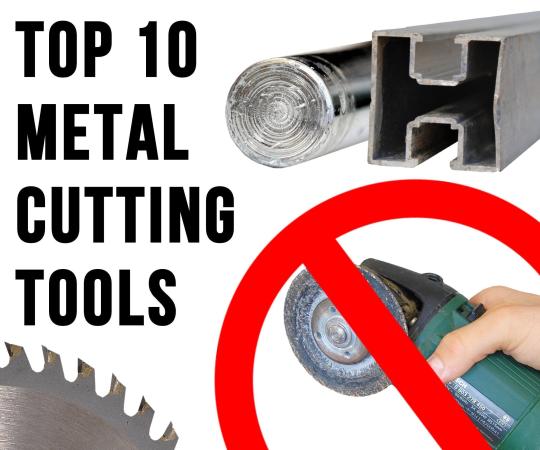
A Complete Guide to Metal Cutting Disc: Comparing Metal Cutting Methods

Simple question: What do you think of when someone mentions a metal cutting disc? Probably this is a thing that spins around at high speeds and cuts through a thick piece of metal fast as lightning. But like anything, there is a much deeper meaning to it than one meets the eye, which we will go into detail about here.
A metal cutting disc is a versatile tool that can be used to cut intricate shapes in various materials. It is one of the tools every metalworker must invest in. The disc is great for cutting both ferrous and non-ferrous metals of various thicknesses. The tool is designed in such a manner that it can be used to cut through smaller pieces of metal as well as thicker sheets.
Your project may require different types of metal cutting disks and discs. In that case, you need to have some understanding of the fundamentals of metal cutting. Metal cutting is as important as it is dangerous. But don't worry; if you consult a knowledgeable expert familiar with your type of work, you can do the work efficiently.
If you’re preparing to cut metal for the first time, there are a lot of options. Knowing what type of Metal Cutting Disc you need will be important when making that selection. In this guide, compare and contrast the following methods: plasma cutting, water jet cutting, laser cutting, abrasive wheel cutting and thermal technologies like oxyfuel gas cutting (aka oxyacetylene).
Metal cutting discs are essentially made from hard materials like alloys and tungsten carbide. These discs are razor-sharp and are capable of high-speed rotation. They are used to cut components made out of metals of different strengths.
A Complete Guide To Metal Cutting Disc: Comparing Four Popular Methods
The metal cutting disc is one of the most common tools that you can find in any workshop. This tool is used for cutting metals and other materials. There are many different types of metal cutting discs available in the market, but we will be focusing on four popular methods in this article:
1. Disc grinder
Disc grinders are a type of hand tool used in metalworking to cut off material by grinding it against a rotating disc. Disc grinders are used for cutting off large amounts of material, for example, when removing annealed steel from the inside of a pipe or tube. They can also be used to remove welds from sheet metal and other materials.
2. Cutting discs for angle grinders
The best cutting discs for angle grinders are abrasive discs. These are made of metal and come in a variety of sizes and shapes. They are typically used to cut through thick objects like steel and other metals. The cutting disc is attached to the angle grinder using a wheel guard, which is a protective cover that helps prevent your hands from coming into contact with the spinning blade.
3. Cutting discs for rotary tools
Cutting discs for rotary tools work by spinning at high speeds, which allows them to cut through any material. This is accomplished by using both the metal blade of the cutting disk as well as its serrated edge. The serrated edge helps to provide a grip on the material being cut while also allowing you more control over how much pressure you apply during your cut.
4. Chainsaw milling cutter
Chainsaw millers use a circular blade with teeth on the edge that cuts through the material by grinding them against it. The teeth create friction between the material being cut and the disc itself, which heats up quickly and then melts into a molten stream that flows out behind the blade as it cuts through the material. This allows them to cut through harder materials than other types of disc because they remove material at a faster rate than other methods allow.
0 notes
Text
Proteus bikes


Place: Proteus Bicycles | 9217 Baltimore Avenue | College Park | MD | 20740 | 301.441.2928ĭig out your backpacks, racks, panniers. After the golf course, there's a spur off to the right that goes up to Route 1 near the bike shop, and there's a new traffic light to cross over. The trail goes under University Blvd and around the Paint Branch golf course. It's also pretty easy to get to Proteus from the University of Maryland campus - just take the Paint Branch trail north from the campus (near the Comcast center). Here is a link to a bike route to the shop from College Park Metro () ( )Īnd here is a link to the bike route from the Greenbelt Metro () ( )

Here is the link to the announcement ( nuHmXPKUjW2QG3jyqR0ui0%3D), and I've pasted the text of the announcement below if that link doesn't work. We'll probably explore some of the shortcuts cyclists in the area use to get around the region. I'm not sure the exact route, but it will be mostly on residential streets and local roads with bike lanes.
Some of us might do mock shopping just for the challenge and experience - I'll probably have a backpack full of groceries by the time we're done! The goal is for customers and friends to experience errand/shopping riding with other riders on a low-traffic time of the week (Sunday morning). In fact we are not aware of any other manufactured non-cuttable material in existence as of now.My LBS is hosting a utility fun ride (probably around 10 miles) on October 30. This material could have lots of useful and exciting applications in the security and safety industries. "The ceramics embedded in this flexible material are also made of very fine particles which stiffen and resist the angle grinder or drill when you're cutting at speed in the same way that a sandbag would resist and stop a bullet at high speed. "If you get through the jelly you hit the nuggets and the material will vibrate in such a way that it destroys the cutting disc or drill bit." "Essentially cutting our material is like cutting through a jelly filled with nuggets," said Stefan Szyniszewski, lead author and assistant professor of applied mechanics at Durham's engineering department, according to a blog post on Durham University's website. Source: Durham University / YouTube Nuggets and jelly cancel cutting motion This CT scan of the Proteus material shows how cellular aluminum structure is wrapped around ceramic spheres - failed attempts to cut with a grinder are on the bottom right. These, in turn, make it even more difficult to cut - since the faster one grinds or drills the harder cutting gets "due to interatomic forces between the ceramic grains," and "the force and energy of the drill is turned back on itself, and it is weakened and destroyed by its own attack," according to the researchers, reports New Atlas.Īdditionally, the new material has equally effective resistance to water jet cutters - obviously rare among bike thieves - because the spherical shape of ceramic chunks widens the water jet, increasing the area of applied force, and thus weakening the pressure of the cut. Proteus' outer plate will give way to drill bits or angle grinders, but when either reaches the embedded ceramic spheres, the material begins to vibrate in a way that blunts the tool's sharp edges as fine particles of ceramic dust fill in the gaps of the matrix-like structure of the metal. Stemming from the U.K's Durham University and Germany's Fraunhofer Institute, the novel material takes inspiration from the durable and cellular skin of grapefruit, in addition to the rock-hard, fracture-resistant aragonite shells of mollusks. Named Proteus, the new material consists of ceramic spheres arranged in a cellular aluminum structure to resist angle grinders, drills, or similar brute-force cutting tools. RELATED: LINE-X: THE SPRAY THAT CAN MAKE ANYTHING INDESTRUCTIBLE Researchers claim they've manufactured the world's first non-cuttable material - with a mere 15% steel's density - which they say could be made into a lightweight armor or indestructible bike lock, according to a paper recently published in the journal Scientific Reports.
0 notes
Last Seen Blogs