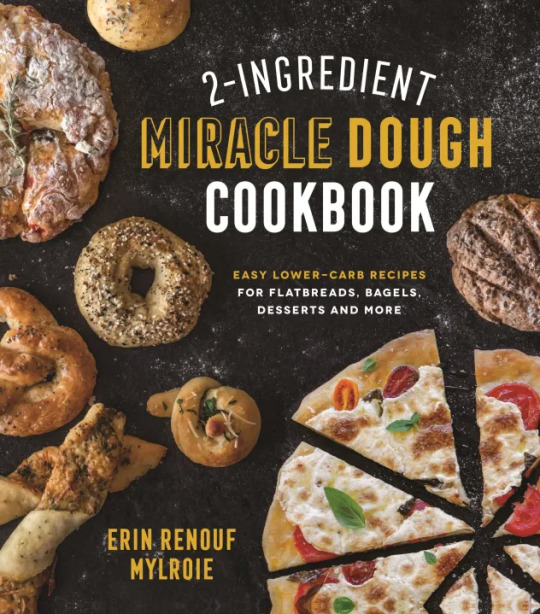
#2-ingredient miracle dough cookbook
Text
Cookbook features recipes for two-ingredient dough that anyone can make
When it comes to baking, making a pie crust and recipes requiring yeast intimidate many people, including me. Let’s be honest, at least perception-wise, baking with yeast is more complex and sophisticated than baking methods that are quicker.
But why? Activating the yeast properly could be intricate, and the rising process requires time and patience. And without the exact measuring of ingredients and timing of when ingredients are added, you could end up with not-so-appealing results. Let’s not forget accurate baking time and having a properly calibrated oven.
When it comes to a recipe that lists yeast as an ingredient, many pass right by it. The chemistry behind baking, and the preciseness required for the chemical reactions that must occur to end up with a product that has the right texture and flavor, scares home cooks. This is usually not the case when it comes to other cooking techniques.
During my interview with author Erin Renouf Mylroie for my recent soup column, she mentioned her previous title, “2-ingredient Miracle Dough Cookbook: Easy Lower-Carb Recipes for Flatbreads, Bagels, Deserts and More” (2019, Page Street Publishing, $21.99). I was determined to get a copy.
She was originally skeptical when she came across two-ingredient dough while browsing online. Considering herself to be an avid baker, and not minding the hours to produce aged pizza dough to perfection, and other quality baked goods, she said: “The idea of a dough that could be ready in minutes with only two ingredients seemed almost like fool’s gold … and probably too good to be true.”
After trying a few recipes, she was sold on this new technique of baking.
“Anyone who can hold a spoon can make two-ingredient dough,” she writes. “Everyone can remember the ingredient list: equal parts Greek yogurt and self-rising flour. There’s no waiting, no rising, no complicated or fussy techniques here.”
Another plus she mentions is this dough is lower in calories and carbs. Why?
“Half of the bulk of the dough comes from protein-rich Greek yogurt,” she said. “You’ll always want to use Greek yogurt for two ingredient dough because of its thick texture. Regular yogurt will be too watery to get the thick and only slightly sticky dough. Greek yogurt is also a better source of protein than regular yogurt, so you’ll get more health benefit from this type.”
When asked about using this technique and the difference in the outcome vs. using yeast, she responded: “The leaveners in the self-rising flour react with the yogurt in the dough to create a light and fluffy baked good. It’s not exactly the flavor of yeast, but it gets the job of done with fantastic results!”
I asked her to pick her two favorite recipes from the book.
“I really love the bagels in the book,” she said. “It was the first two-ingredient recipe I tried, and the one that I return to must often. They make an excellent breakfast sandwich in the morning, a great snack with a schmear of protein, and they slice up nicely to make bagel chips if you’re blessed with any leftovers.
“I also love buttery parmesan and garlic knots. It’s hard not to love anything slathered with garlic butter. One of the sweet treats that I love is the Ginger and Brown Sugar banana cake. It’s a bit of a stretch to call it two- ingredient dough since I throw in a few more things, but it sure is scrumptious!”
What does she hope the reader learns from the book?
“I hope that readers of ‘2-Ingredient Miracle Dough’ will enjoy creating baked goods that are a little healthier, a little faster and a little easier than yeast risen baked goods you would normally make at home,” she said. “I hope it gets some readers back in the kitchen!”
She concludes the book’s introduction with, “Two-ingredient dough might seem a little too good to be true, but that’s the miracle.”
For the recipe for Four Seasons Sheet Pan Pizza—Pizza Quattro Stagioni visit https://bit.ly/4c2u0nY
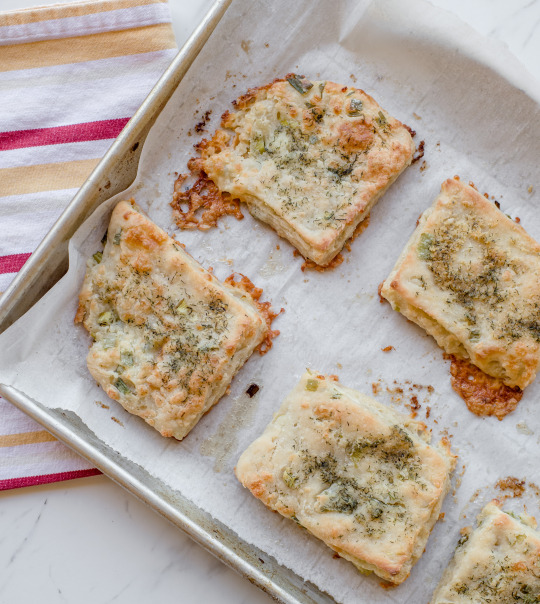
Monterey Jack Cheese, Dill and Scallion Biscuits
The headnotes says: “I love biscuits with barbecue in the summertime and with pot roasts in the winter. Biscuits come together so quickly, but like all warm breads, they make a meal seem almost holiday-special. If you have any leftover biscuits, these make a spectacular sandwich with leftover shredded barbecue meat and a little coleslaw.”
Makes 6 biscuits
Ingredients:
1½ cups self-rising flour, plus more for work surface
1½ cups plain Greek yogurt
3 tablespoons cold butter
½ cup Monterey Jack cheese, shredded
¼ cup sliced scallions
2 tablespoons butter, melted
½ teaspoon garlic powder
1 teaspoon dried dill weed
Directions:
Preheat the oven to 425 degrees and line a baking sheet with parchment paper.
In a medium bowl, mix the flour and yogurt until just combined. Grate the cold butter, using the large holes from a box grater, directly into the bowl with the flour and yogurt. Gently stir together. Stir in the shredded cheese and scallions.
Dust a work surface generously with flour. Transfer the dough to the work surface and knead until smooth, about 30 seconds. Press the dough into a rectangle, about 9 x 6 inches. Using a sharp knife, cut the dough into six equal-shaped square biscuits. Transfer the biscuits to the baking sheet, spacing about 2 inches apart.
In a small bowl, combine the melted butter, garlic powder and dill. Brush about half of the butter mixture over the tops of the biscuits. Bake for about 16 minutes, or until they are golden brown. Remove the biscuits from the oven and brush them with the remaining butter mixture. Cool for 5 minutes before eating.
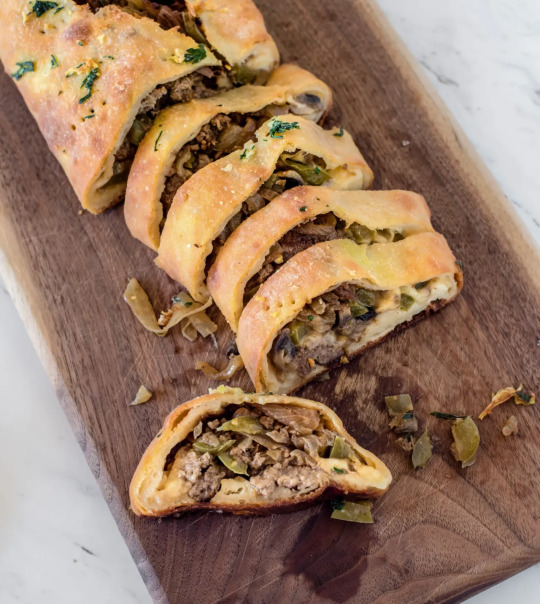
Philadelphia Cheesesteak Strombolipays homage to the two great Philadelphia food favorites: cheesesteak and stromboli. (Courtes of Ken Goodman)
Philadelphia Cheesesteak Stromboli
The headnote says: “This hearty dish pays homage to the two great Philadelphia food favorites: cheesesteak and Stromboli. The debate rages on over what is the proper cheese for a Philly cheesesteak, but I prefer provolone here because it melts beautifully and adds a hint of creamy sweetness. You could swap out the provolone for any cheese you like. One more note: this Stromboli is a Superbowl tradition at my house. Cut it small if you want to serve it as an appetizer.”
Serves 6
Ingredients:
1 tablespoon vegetable oil
1 pound tender beef sandwich steaks, raw, thinly sliced
1 green bell pepper, thinly sliced
1 onion, thinly sliced
6 ounces mushrooms, thinly sliced
1 tablespoon Worcestershire sauce
1¼ cups self-rising flour, plus more for work surface
1¼ cups plain Greek yogurt
8 ounces provolone cheese, sliced, or substitute shredded mozzarella
2 tablespoons butter
1 clove garlic, minced
1 tablespoon minced parsley
Directions:
Heat the oil in a large skillet over medium-high heat. Add the beef and cook about halfway through, about 3 minutes. Add the bell pepper, onion and mushrooms. Cook for about 7 minutes, or until the meat is cooked through and the vegetables are softened. Add the Worcestershire sauce and stir. Turn off the heat and let it cool slightly.
Preheat the oven to 425 degrees and line a standard baking sheet with parchment paper.
In a medium bowl, combine the flour and yogurt with a wooden spoon, stirring until a sticky dough forms. Generously flour a work surface. Turn dough out onto the work surface and knead, adding a dusting of flour from time to time, until the dough is no longer sticky. Roll or press the dough into a rectangle about 15 x 10 inches. Place the cheese in a long line parallel to the long edge of the dough, leaving a 4-inch margin. Cover the cheese with the beef mixture.
Roll up the dough, cinnamon roll style, until you have a tight cylinder, and pinch the edges shut. Transfer the Stromboli to the prepared baking sheet.
In a small microwaveable dish, heat the butter and garlic until the butter is melted and the garlic is fragrant, about 40 seconds. Add the parsley. Brush the dough with half the butter and garlic mixture. Cut a few slits along the top of the dough to allow steam to escape.
Bake the Stromboli for 14 to 18 minutes, or until it’s golden brown. Brush the Stromboli with the remaining butter mixture. Let it cool for 10 minutes before slicing into segments and serving.
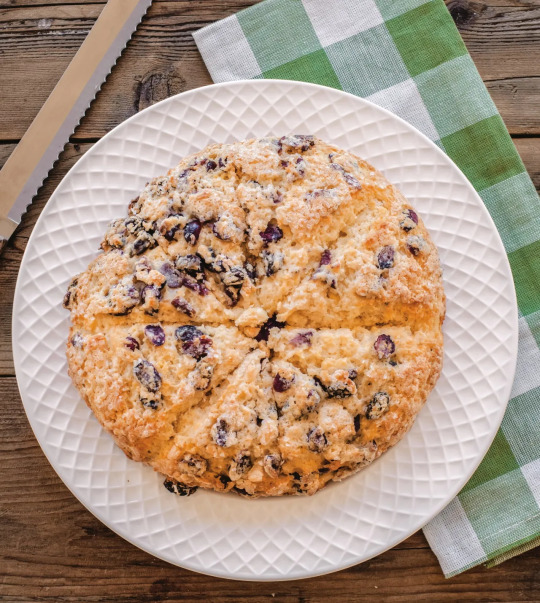
Sweet Irish Soda Bread with Currants and Raisins is perfect for St. Patrick’s Day. Serve it warm with a generous dollop of creamy Irish butter. You can add caraway seeds if you like for an interesting sweet and savory twist, (Courtesy of Ken Goodman)
Sweet Irish Soda Bread With Currants and Raisins
The headnote says: “I’m duty bound to make this special bread for St. Patrick’s Day every year, but it would be wonderful any day, especially if you serve it warm with a generous dollop of creamy Irish butter. You can add caraway seeds if you like for an interesting sweet and savory twist, but I like it best with dried fruit and a crunchy sugar topping. “
Serves 8
Ingredients:
½ cup dried currants or dried cranberries
¼ cup raisins
1½ cups self-rising flour, plus more for work surface
1 cup vanilla-flavored Greek yogurt
4 tablespoons sugar
1 egg
2 tablespoons cold butter, grated
2 tablespoons cream or milk
2 tablespoons turbinado or coarse sugar
Directions:
Place the currants and raisins in a small dish and cover with 1 cup boiling water. Set aside for 10 minutes.
Meanwhile, line a baking sheet with parchment paper and preheat the oven to 425 degrees.
In a medium bowl, combine the flour, yogurt, sugar, egg and butter. Drain the currants and raisins and stir them into the dough.
Generously flour a work surface. Turn out the dough onto the work surface. Knead the dough until a smooth dough forms, about 1 minute. Place the dough on the prepared baking sheet and brush with the cream and sprinkle with the turbinado.
Using a sharp knife, score the bread into eight pieces, cutting pie style into wedges, but not cutting all the way through to the bottom. Bake for 22 to 24 minutes, or until it’s golden brown. Serve in wedges with whipped butter if you like.
Recipes reprinted with permission from “2-Ingredient Miracle Dough Cookbook” by Erin Renouf Mylroie (Page Street Publishing Co., 2019)
Stephen Fries is professor emeritus and former coordinator of the Hospitality Management Programs at Gateway Community College in New Haven, Conn. He has been a food and culinary travel columnist for the past 16 years and is co-founder of and host of “Worth Tasting,” a culinary walking tour of downtown New Haven. He is a board member of the International Association of Culinary Professionals. Email him at [email protected]. For more, go to stephenfries.com.
0 notes
Text
Four Seasons Sheet Pan Pizza—Pizza Quattro Stagioni

The headnote says, "This pizza is a bit of a showstopper, maybe a bit of a show off too. It’s just so pretty to see a sheet pan full of four different pizza choices. If you’re like me, you’ll want a square of all four choices. If you’ve got picky eaters in your group, you could top one quadrant of the pizza with just plain cheese."
Serves 6
Olive oil cooking spray
2 tbsp (25 g) cornmeal
1½ cups (180 g) self-rising flour, plus more for working with the dough
1½ cups (375 g) plain Greek yogurt
1 (14-oz [400-g]) can petite diced tomatoes, drained
3 tbsp (75 g) tomato paste
3 tbsp (45 ml) olive oil, divided
1 tsp garlic powder
½ tsp crushed red pepper flakes, optional
1 tsp dried basil
½ tsp dried oregano
Pinch of sugar
Salt and pepper
3 cups (345 g) mozzarella cheese, shredded
4 oz (115 g) cremini or button mushrooms, thinly sliced
3 oz (90 g) prosciutto, thinly sliced
1 cup (170 g) marinated artichoke hearts, drained and thinly sliced
3 large Roma tomatoes, thinly sliced
10–12 small basil leaves
Preheat the oven to 425°F (220°C). Coat a sheet pan with cooking spray and the cornmeal.
For the dough, in a medium bowl, combine the flour and yogurt until a shaggy dough forms. Knead the dough in the bowl for a few turns, just until the dough forms a smooth ball. Turn out the dough onto the prepared baking sheet. Press the dough into the pan, sprinkling the top of the dough with a bit of flour as needed to prevent sticking, until the dough reaches the edges of the pan.
For the sauce, in a medium bowl, combine the diced tomatoes, tomato paste, 1 tablespoon (15 ml) olive oil, garlic powder, red pepper flakes, basil, oregano and sugar. Season to taste with salt and pepper. Spread the pizza with 1 cup (240 ml) of the sauce, leaving a 1-inch (2.5-cm) border all around. Spread the mozzarella cheese on the pizza.
For the assembly, in a small bowl toss the mushrooms with 1 tablespoon (15 ml) olive oil. Place the mushrooms on one-fourth of the pizza, creating a square area for each of the seasons. Place the prosciutto on one-fourth of the pizza, the artichokes on another one-fourth of the pizza and finally the tomatoes and basil on the remaining quadrant, tucking the basil underneath the sliced tomatoes. Drizzle the tomatoes and basil with the remaining 1 tablespoon (15 ml) of olive oil.
Bake the pizza for about 22 minutes, or until the cheese is melted and beginning to brown. Let the pizza cool for about 5 minutes before serving.
Recipes reprinted with permission from 2-Ingredient Miracle Dough Cookbook by Erin Renouf Mylroie. Page Street Publishing Co. 2019. Photo credit: Ken Goodman.

0 notes
Text
[ad_1]
It was hard to narrow down this list from every item I tried in 2022! This is especially true because I was much more intentional with my purchasing habits and ended up finding things that really worked for me.
The products below are my favorite things from the entire year…
1. One: Pot, Pan, Planet by Anna Jones
$24
I got a handful of new cookbooks at the beginning of this year and this one was by far my favorite. The format is so practical and it’s full of not only recipes but also very actionable tips for being more resourceful in the kitchen. The author included a section for different ways to cook with common ingredients (e.g., 10 Ways to Cook Potatoes, 10 Ways to Cook Peas) and I’ve found it so helpful for cooking things on the fly. For someone who already loves cooking, this book has helped me become more creative in the kitchen and even more excited to cook. I want everyone to have it.
2. Saie Sun Melt Natural Cream Bronzer
$32
This bronzer purchase was influenced by the lovely Sarah of Whoorl fame. I look more alive and awake when I wear it. I love how it glides on and blends seamlessly into the skin—it’s really hard to mess up the application process. If you’re not a pro at applying makeup and want to do a bit of contouring, this is a great place to start.
3. West Elm Fluted Acrylic Drinking Glasses
$28 – $64 for a set
I initially bought these glasses for use outdoors, as an option that wouldn’t break if dropped on the patio. Yet I surprised even myself by using them all the time, both outdoors and indoors. I love the style, durability, and that there are four color options available. I love when practical items look great, too!
4. Dr. Jart Cicapair Tiger Grass Color Correcting Treatment
$20 – $52
I’ve been using this cream in the morning lately and it’s made a massive difference. My skin has a tendency to get really red, particularly after a workout and a shower. This cream reduces the amount of visible redness immensely. I call it my miracle cream!
5. Molly J. CBD Gumdrops (gifted)
$45 – $65
I always approach trying a new CBD product with skepticism because I find the quality to be broad, the taste and texture to not always be appealing, and the brand experience to often be lacking. Molly J., however, BLEW MY MIND. Their gummies taste good and bring a noticeable calming effect. Beyond the products themselves, I love the thoughtfulness of their educational tools and the gorgeous presentation of their packaging (which makes them great for gifting!). 10/10 would recommend.
6. Toshiba Rice Cooker
$90
I wish I wouldn’t have waited so long to get this! While I can and have made rice in my Instant Pot, it never cooked exactly to my liking (too sticky, too soggy, stuck to the bottom of the pot, etc). I’ve used this rice cooker more times than I can count now and have never had a bad batch of rice come out of it. It also keeps the rice warm after cooking (for hours) without any sticking or drying, which makes for super easy cleanup. If you’re looking for an easier way to cook rice (and other grains!) at home, I highly recommend this!
7. Foodheim by Eric Wareheim
$28
I’ve been loving this cookbook! It’s one I keep reaching for whenever I want to cook something simple that’s still really well done. His technique for pizza dough is the best I’ve used and it’s relatively easy. His writing is really funny too! It’s like having a friend in the kitchen with you, helping you along the way. I feel like I’m becoming a better home cook when I cook from Eric’s recipes.
8. Lulu and Georgia x Sarah Sherman Samuel Checkerboard Rug (gifted)
$498+
Not only is the quality and design of this rug top-notch, but the ENTIRE collection is also stunning.
We added this rug to our peach room and I love the way the checkerboard pattern in a beautiful ochre color ties the space together. 10/10!
Editor’s Note: This article contains affiliate links. Wit & Delight uses affiliate links as a source of revenue to fund operations of the business and to be less dependent on branded content. Wit & Delight stands behind all product recommendations. Still have questions about these links or our process? Feel free to email us.
Kate is currently learning to play the Ukulele, much to the despair of her husband, kids, and dogs. Follow her on Instagram at @witanddelight_.
!function(f,b,e,v,n,t,s)
if(f.fbq)return;n=f.fbq=function()n.callMethod?
n.callMethod.apply(n,arguments):n.queue.push(arguments);
if(!f._fbq)f._fbq=n;n.push=n;n.loaded=!0;n.version='2.0';
n.queue=[];t=b.createElement(e);t.async=!0;
t.src=v;s=b.getElementsByTagName(e)[0];
s.parentNode.insertBefore(t,s)(window, document,'script',
'https://connect.facebook.net/en_US/fbevents.js');
fbq('init', '374634936281400');
fbq('track', 'PageView');
[ad_2]
Source link
0 notes
Text
Swiss Sandwich Puffs (vintage 1963 recipe)

recipe attempt under the cut
So, most of the time I have absolutely no idea what to expect out of these recipes, other than y best bet considering the ingredients involved. I’m still, in most regards, a novice cook. the area that I have the least experience in, it seems, is appetizerish stuff or party foods. So why not give something like that a whirl this week. Mayo and onion sandwiched in between bread and swiss cheese? Sure. Should be fine.
I think I have a lot to learn.
This week we’re back in the Better Homes and Gardens Creative Cooking Library. This time in the Snacks and refreshments cookbook. We’re going back to 1963, the year Patsy Cline was killed in an airplane crash in TN, the maximum high- security prison Alcatraz was closed, and Walt Disney’s The Sword in the Stone was released in theaters.
Ingredients:

16 slices tiny “ice box” rye bread
½ c. mayonnaise or salad dressing (I used Miracle Whip as you see in the pic)
2 T. snipped parsley
¼ c finely chopped onion
8 slices process swiss cheese
::ingredients note:: I’m still not what sure what the recipe means by “ice box” rye bread- but according to what I found online it probably was just chilled rye dough? Well, that doesn’t help me out much. My first idea was to use those tiny little loafs of bread sold for appetizers and stuff (evidently called cocktail bread) but I couldn’t find any in rye. So I just decided a regular loaf would do.
First off, to take care of the already listed ingredient prep- chopping the parsley and onion (hindsight alert! I’m thinking, when it says finely, it means really finely)
Now that we have that, and the subsequent onion tears, out of the way we address the rye bread. First step according to the directions is to toast it, but all according to your method of toasting and the size of the rye bread, you might want to cut it first instead of waiting, like I did. I skipped ahead here and went and cut things down to size. I’ve got normal sized pieces of rye, so instead of cutting the cheese into circles like it says in the recipe, I cut the ends off of my bread.

Next up, we combine the mayo (or salad dressing like I used), onion, and parsley,

and spread that on the toast.

Erm... Yeah... should have chopped those onions better... It’s a little chunky...
Now we place the swiss cheese over the bread and mayo mix and broil the (soon-to-be) puffs 3-4 inches from the heat until the cheese is puffy and golden, for about 2 to 3 minutes... well… as long as you actually put the cheese that close to the broiler. I forgot and ended up with mine in the oven for about five minutes, at least.

Doesn’t look to have hurt them too much.
Optionally you can put a sliced pitted olives on the top, but I skipped that. Olives aren’t really my thing. Also, they’re meant to be served hot.
My thoughts-
Well, it looks good. The lightly browned cheese is nice- it did puff up a bit. Looking at it, I can easily imagine this being served up as an appetizer/party food in the 1960s. The smell isn’t overly strong, just enough to get your nose curious I think, mainly due to the onion. The texture, however is a little off. I like the toasted rye bread, but the cheese is a bit tough. Also, when your teeth go through the layer of cheese, suddenly you hit a pocket of warm mayo/salad dressing and crunchy onions; overall, not a big fan of that element. Granted, if I hadn’t had mine in the oven for so long the mayo would have been cooler, but I don’t know if that would have been much better.
Okay, now as for the flavor… ooch. The problem is that there’s only five ingredients- and the onion (and maybe the salad dressing I used) really overpowers everything else. I didn’t use the strongest of onions either. In addition, I used Miracle Whip, which has it’s particular sour whang (do people outside of Appalachia use that word?) and I’m not sure the flavor of the swiss cheese (partially my fault for using store brand) is strong enough to compete. Anyway, it’s an interesting idea, but I’m thinking it might work better with some different ingredients.
Okay, so trying something new here...
Appearance – 4/5
Texture 3/5
Taste 2.5/5
Odor 3/5
Overall - 3/5 - okay, but has some problems
1 note
·
View note
Link

2-Ingredient Miracle Dough Cookbook: Easy Lower-Carb Recipes for Flatbreads, Bagels, Desserts and More
0 notes
Text

2-Ingredient Miracle Dough Cookbook - Erin Mylroie https://books.apple.com/us/book/2-ingredient-miracle-dough-cookbook/id1419648274?uo=2&utm_source=dlvr.it&utm_medium=tumblr https://books.apple.com/us/book/2-ingredient-miracle-dough-cookbook/id1419648274?uo=2&utm_source=dlvr.it&utm_medium=tumblr
0 notes
Link
0 notes
Text
2-Ingredient Miracle Dough Cookbook - Erin Mylroie
2-Ingredient Miracle Dough Cookbook
Easy Lower-Carb Recipes for Flatbreads, Bagels, Desserts and More
Erin Mylroie
Genre: Methods
Price: $9.99
Expected Publish Date: March 12, 2019
Publisher: Page Street Publishing
Seller: Macmillan
Whipping Up Homemade Bread Is As Easy As 1, 2… Making dough for pretzels, pitas, flatbreads and more couldn’t get any easier—just combine Greek yogurt and self-rising flour, and you’re well on your way to snacking on Pesto-Parmesan Twists, Curried Potato and Pea Samosas, Cini-Mini Churros and Bacon, Fig and Gruyere Volcano Rolls. With 2-Ingredient Miracle Dough Cookbook, there’s no need to fuss with yeast or wait for dough to rise. Whether you’re baking for breakfast, dinner, dessert or anywhere in between, there is a simple, flavorful recipe to satisfy your craving, and as an added bonus, two-ingredient dough is naturally lower in carbs than traditional bread. Plus, it’s simple to alter the dough to be lower in fat, gluten-free or vegan without sacrificing any flavor. Your friends and family will never guess that the best breads they’ve ever had were so quick, easy and healthy. http://bit.ly/2F5i8US
0 notes
Text
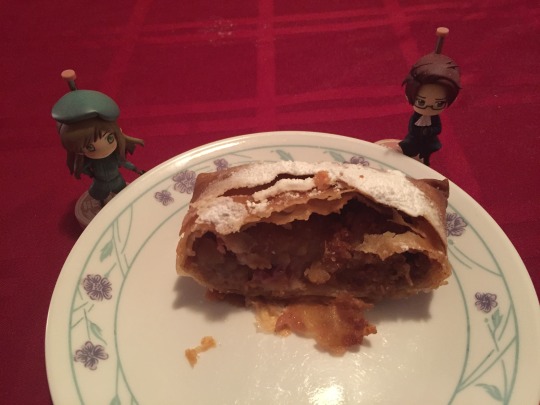
AUSTRIA/HUNGARY (Part One): Cherry Apple Strudel (Happy 150th)
Not straight from the

this is a horrible picture but it was midnight by the time I finished this and my dining room lighting is horrible
I’m not overinvested, your FACE is overinvested
Okay! So! Figuring out recipes for them is super tricky because, I mean, what makes it unique to the ship? They share so much food culture already. This and any other recipe one can come up with for both of them could easily belong to either of them individually. But, at least in my mind, I tend to associate apple strudel with Austria, and cherry strudel with Hungary. Both countries make both, but whatever, this is my brain. Hungary is also known for its sour cherries!
Note: I referenced several recipes for this, and I’m not 100% happy with the dough. This is only the second time I made strudel, and it was harder to work with this time around (by some miracle, I nailed the first one - I’m not even really a baker at all, so it was a pleasant surprise). So this recipe may be more of a guideline - if I make this again, and it comes out better, I’ll update.
WARNING this is really image heavy.
Ingredients:
FILLING:
6 cups sliced apples (Granny Smith or Golden Delicious - more on this later)
1.5 cups sour cherries (WELL DRAINED if using jarred)
1 cup plain breadcrumbs
6 tbsp butter
Lemon juice (half a lemon’s worth is fine, it’s just to keep the apples from browning)
1/4 tsp(?) of cinnamon (I think I used more - taste and check the balance to your liking!)
3/4 cup(?) granulated sugar (more or less, depending on the sweetness of your apples and cherries. Again, taste it to check!)
DOUGH** (again, I fucked up here, but this is what I started with):
2 cups all-purpose flour
Pinch of salt
1 egg
100 ml lukewarm water (yes I just changed systems mid-post but most measuring cups have both cups and ml)
OTHER:
Melted butter
Confectioner’s sugar
A clean bedsheet (I’m serious)
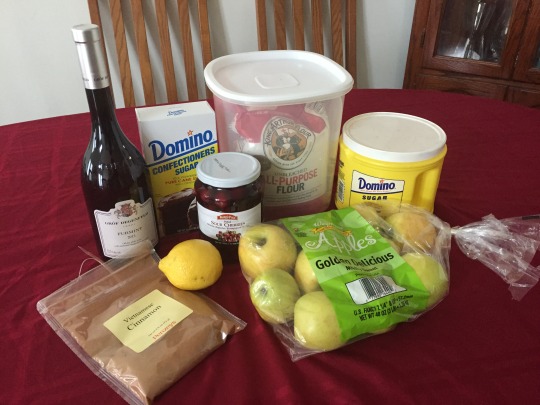
Here’s everything except the eggs, butter and breadcrumbs, plus wine - the recipe in my “Imperial Recipes” cookbook I got in Prague had 2tbsp white wine in the dough. I was skeptical, it was the only recipe I saw that had it, so I ended up skipping it.
A NOTE ABOUT THE APPLES: I knew Granny Smith apples were supposed to be best for strudel because of the tartness (they also don’t disintegrate easily). But since I was using sour cherries, I was worried it would come out too tart. In the end, it was just fine, if not a bit too sweet. If you’re using jarred cherries, which have added sugar, you’ll probably be fine with Granny Smith - and you may want to lower the amount of granulated sugar to 1/2 cup instead of 3/4 cup. If you’re using fresh sour cherries, bless you for having the patience to pit them, and since there’s no added sugar, keep it at 3/4 cup and Golden Delicious is probably fine.
Also:

i care about these things. also it’s what i had in the house
STEP ONE: PREPARE THE FILLING

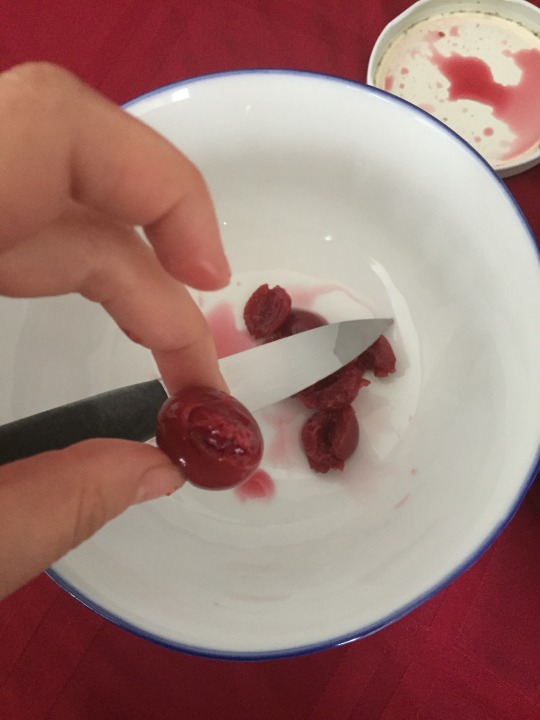
If you’re using jarred cherries, slice them, leave them in a bowl for a while, then leave them on a plate with a paper towel to dry. Slicing them will both ensure that there are no pits (see the picture!? it might still have pits even if it’s pitted!) and also that the texture is better with the apples. You do NOT want much of the syrup in this; it will create too much moisture and your strudel may burst while baking. (Spoilers: mine did anyway. So be careful. It still came out pretty well.)
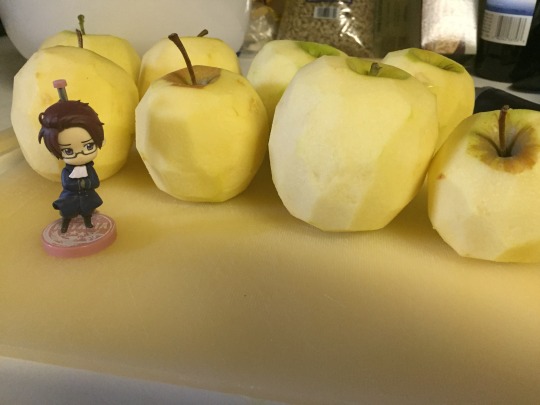
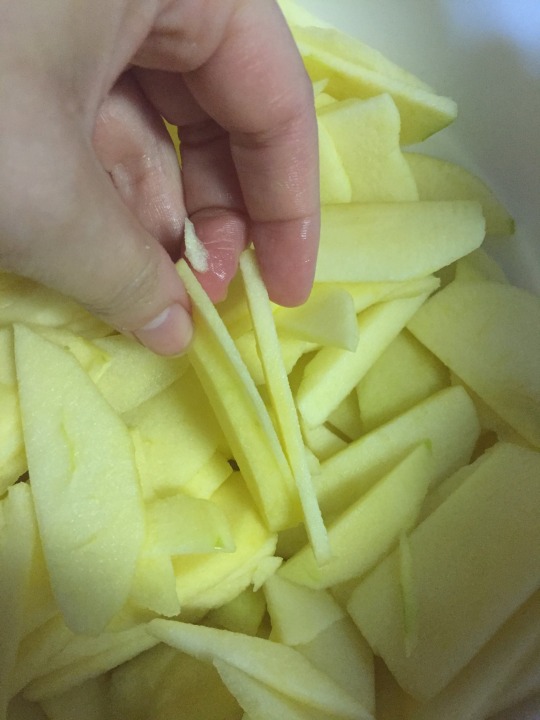
Peel and slice your apples like this. For best results, have an inanimate object look judgy over your handiwork
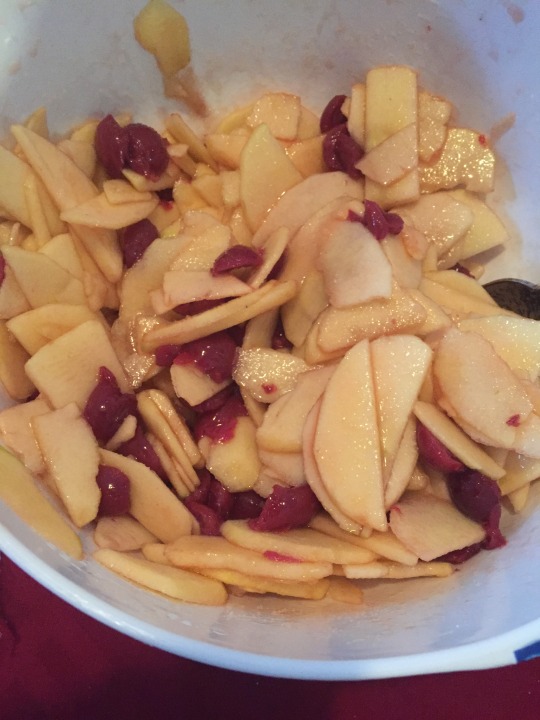
After the cherries are well drained, combine in a bowl with the lemon juice, cinnamon, and sugar, and cover while you prepare your dough. This seems backwards but trust me - even more liquid will come out of this while it sits there. AND IT STILL BURST IN THE END.
STEP TWO: PREPARE BREADCRUMBS
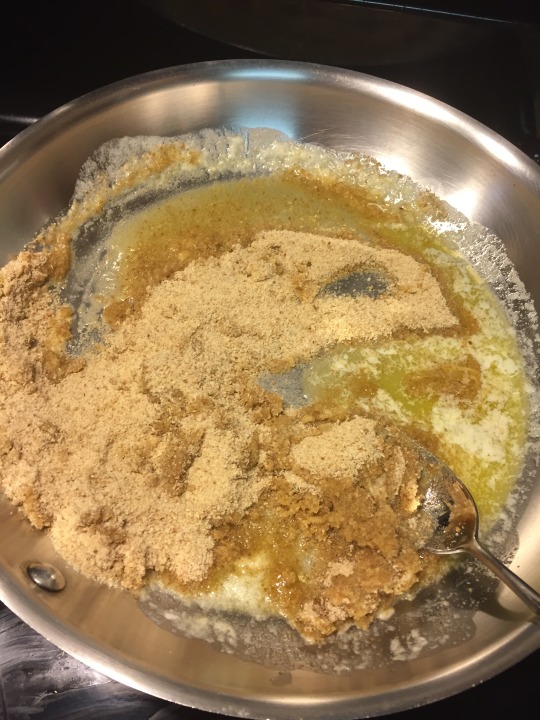
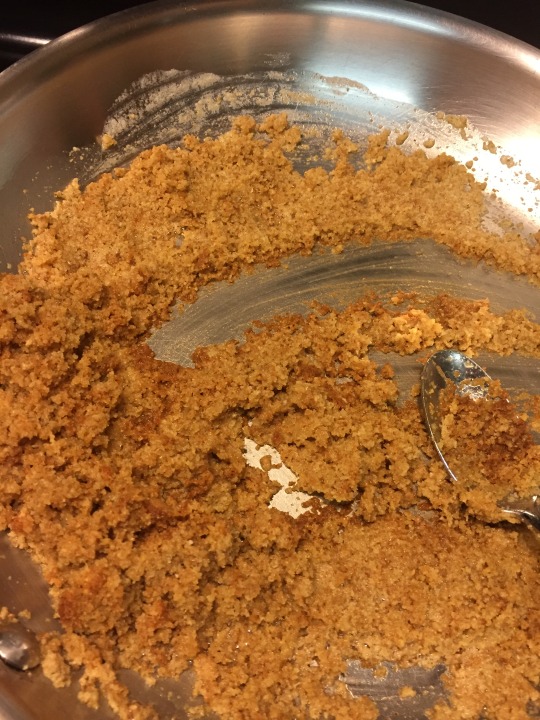
Melt butter in a pan. Throw your breadcrumbs in. Toast until brown. Don’t burn. Set aside to cool.
STEP THREE: DOUGH
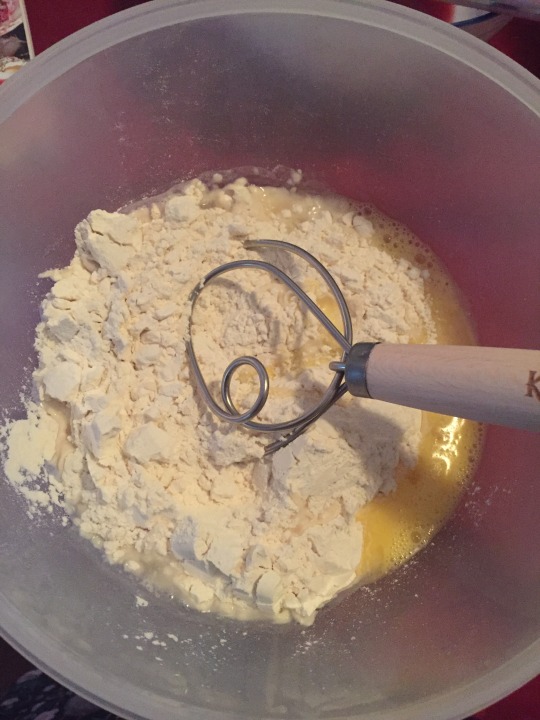
Combine flour, egg, and salt, and gradually add the water as you mix. Form it into a ball once it’s done. I didn’t get photos of this because you try holding your phone and doing it.
NOTE: I beat the egg well beforehand because some cute old lady on youtube with an incredible sturdy dough did. No other recipe I saw had it - many used a well, like when making pasta. This method may be better.
Here’s where my dough went weird: I noticed it looked too dry, so I added a tiny bit of water. Then I added a tiny bit of flour because it was too sticky. So I’m pretty sure my proportions were off. I should have been more patient with it - my guess is it would have been okay without anything extra if I just worked the dough more and trusted it. Also, I was approximating from a recipe that used grams, because I don’t have a scale. Bad idea. I’m going to buy a scale.
Knead the dough. You want to knead it a LOT. Science time: kneading activates the gluten which gives dough its elasticity. For something like pancakes, you don’t want to overmix because too much agitation activates the gluten too much and it can make them tough. But this is strudel - you’re going to be stretching the dough out a lot, and it should be paper-thin, and not tear. It’s going to need to be on the tough side.
I had a video of myself doing a fun kneading technique but apparently you can’t directly upload and embed here (I’m not doing youtube)? So go to this video, which uses a different dough recipe which you may want to try (and canned whipped cream in the middle?! wtf), but the fun part starts at 5 minutes in:
youtube
Also, THAT VIENNESE ACCENT. If you ever wonder what Austria might sound like. I imagine something like this but 20 years younger and more oboe-like in timbre. Anyway.
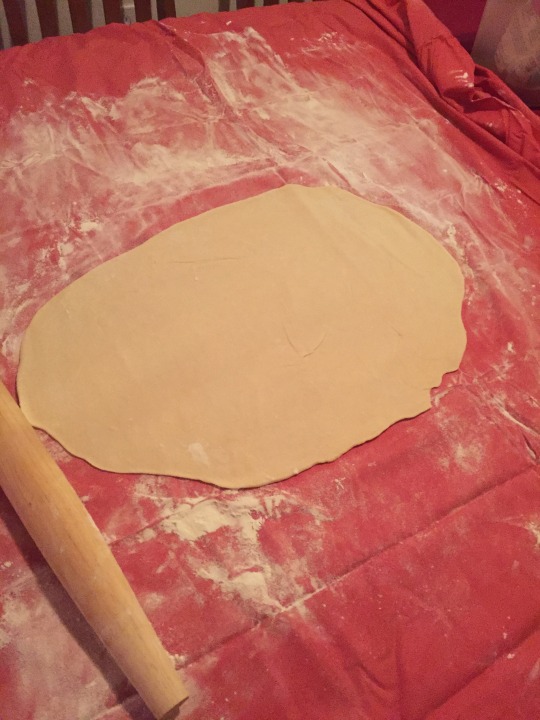
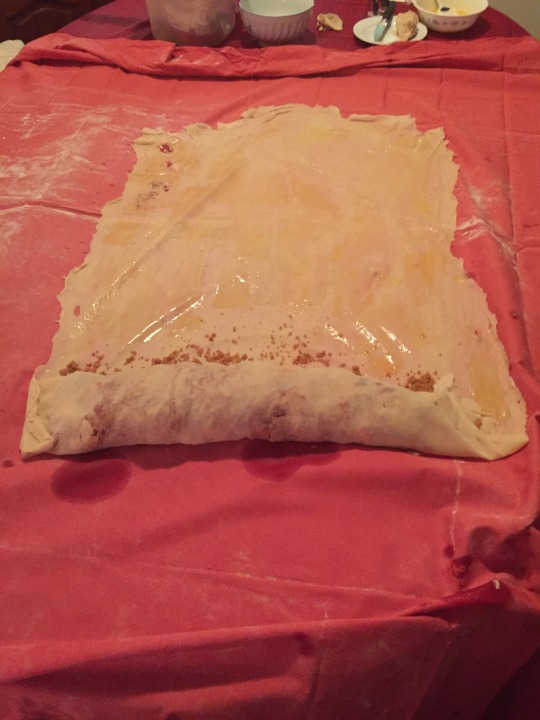
Spread your clean sheet over the table, and flour it well. Roll out the dough first, then stretch using your fists (phrasing). I also could not get footage of this because I was working alone. Again, refer to the above video. THIS IS THE HARDEST STEP. Be patient, but also work quickly. Gravity is both your friend and your enemy here - you want gravity to do the work, but if you leave it for too long on your hand, it’ll tear the dough. You may end up with a few holes anyway - depending on how big they are, you can either leave them or patch them up. This is going to get several layers upon rolling, so it’ll be naturally patched up, but it’s thinner in those spots so you risk bursting. If you look closely you can see where I patched it up.
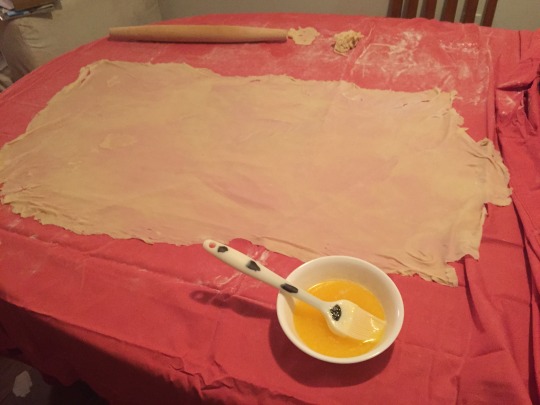
You also want to cut away the thick edges, because they will make the strudel lumpy and weird. Brush the whole thing with butter. I almost forgot, which you can see in the pictures below.
Also, I did this sideways, because it was late and I remembered wrong. DON’T DO IT SIDEWAYS. Put the filling along the LONG edge, not the short one. I was so tired. However, if you know you have a small baking sheet, this may be better. It’s your call but it’s better to do it the long way...

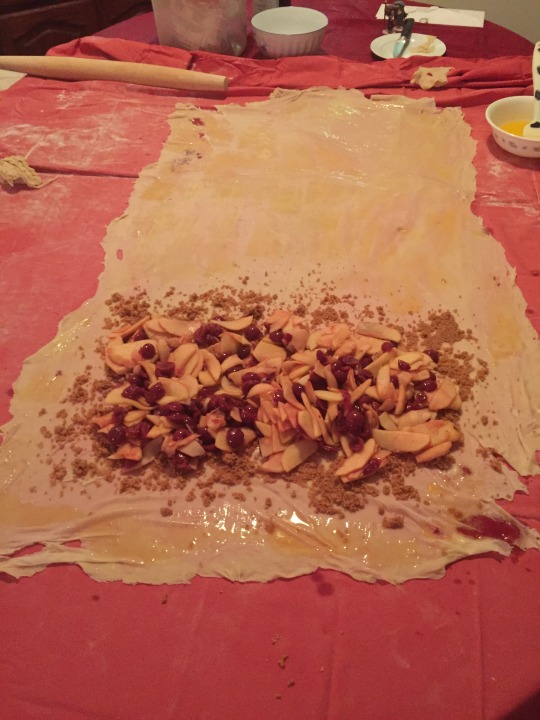
Whatever, the breadcrumbs HAVE butter in them, right? Nah, don’t forget this step like I did. Butter it, spread the breadcrumbs, then put the filling over it. I used a slotted spoon because it was so damn soppy.
For the next step, which is The Moment Of Truth, also please refer to the above video, because again, YOU NEED TWO HANDS FOR THIS.
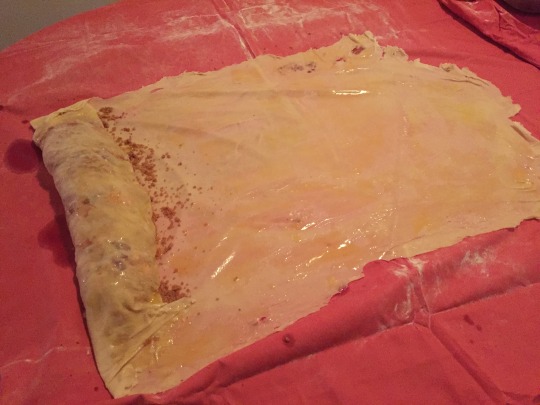
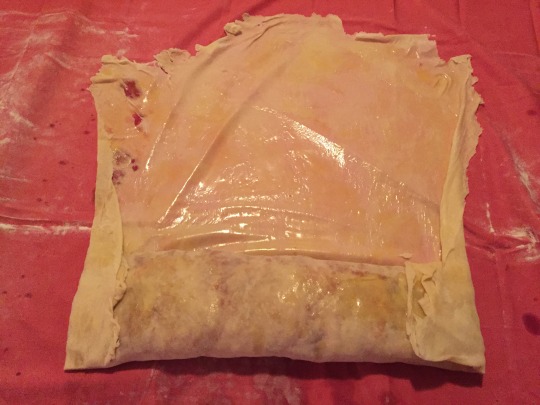
Yeah, so this was supposed to be rolled the other way, but what you do is pull the sheet up and flop it over on itself repeatedly, folding in the edges about halfway through like a gigantic egg roll or burrito. You can butter the top of the rolled part on each step, but I’m not sure how necessary it is because the other layer it’s touching is also buttered. I did it, because butter is great.
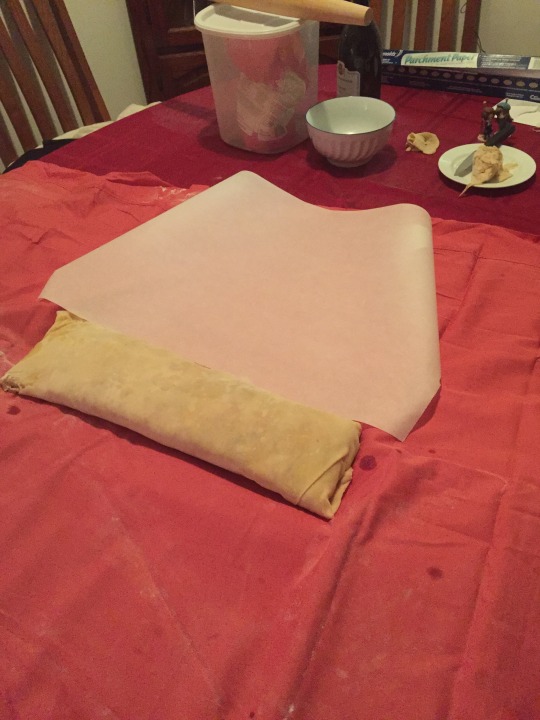
IF you do this the right way, you can place it on a baking sheet in stages and snake it, or a U shape like in the video. If you do it the wrong way or your baking sheet is small, roll it one more time onto the parchment, but butter the parchment first.
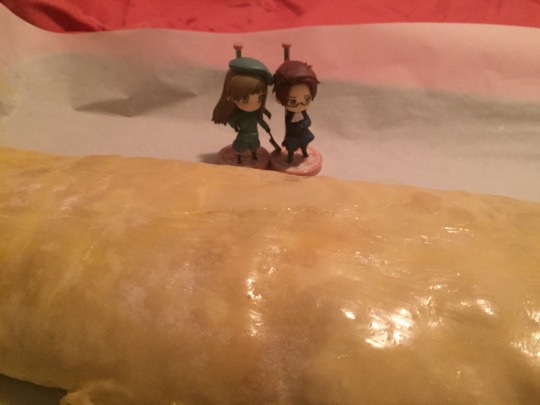
Brush the top with more melted butter. Don’t put One Coin figurines in the oven.
Bake at 375F for about an hour - it may need more.
And now for The Other Moment Of Truth:
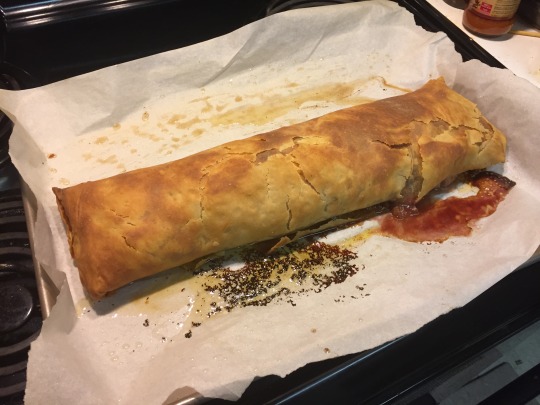
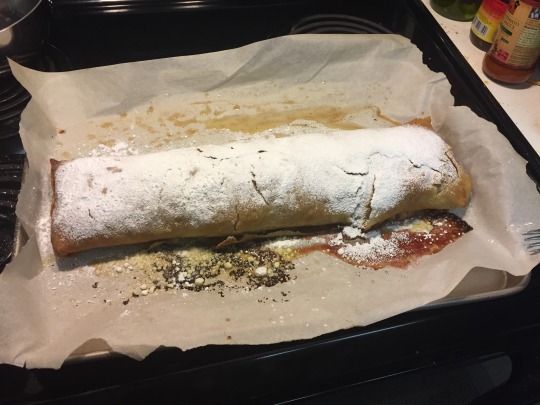


So this is what happens when it bursts. But it’s nicely golden brown at least! Top it with sugar while it’s still warm, but let it rest for a half hour before you cut into it.
NOTE: This serves A LOT OF PEOPLE, but strudel freezes incredibly well, if it’s well-wrapped. I had strudel that was several years old and it was still pretty immaculate. I think it survives better months in the freezer than it does for a week in the fridge, because the fridge can make it soggy. Freezing it preserves the crispiness, and you can reheat it in the oven. Please don’t microwave it, you’ll make Oma cry.
Enjoy!!!
4 notes
·
View notes
Link
0 notes
Last Seen Blogs

kailynrosecreative
Kailyn Rose Creative

purplempuss
Ma Random Things

yairtinkpi
AUROR

biblichor-lisztomaniac-blog
Books&Music

ritterregan0-blog
Untitled