#Arduino alternative
Explore tagged Tumblr posts
Visit Tumblr Blog
Explore Tumblr blogs with no restrictions, modern design and the best experience.
Last Seen Tumblr Blogs


Fun Fact
The total number of visits Tumblr.com received during January 2021 is 327 million.
Text
TagoIO: Primeiros passos para leigos
TagoIO é uma plataforma IoT que simplifica o gerenciamento e análise de dados de dispositivos conectados. Neste post, você verá como criar aplicações com uma interface intuitiva, acessível via web e mobile.
TagoIO é uma plataforma poderosa para IoT que facilita o gerenciamento e a análise de dados de dispositivos conectados. Neste post, vamos explorar boa parte da plataforma ao ponto de deixar tudo o mais “mastigado” possível, o suficiente para conseguir montar suas aplicações. 1. O que é TagoIO? TagoIO é uma plataforma de IoT (Internet das Coisas) que permite coletar, armazenar e analisar dados…
#Arduino TagoIO#Tago.io alternative#Tago.io analysis#TagoAI#tagoio#TagoIO admin#tagoio api#TagoIO Arduino#tagoio community#tagoio dashboard#tagoio esp32#TagoIO login#TagoIO MQTT#TagoIO pricing#TagoIO SDK
0 notes
Text
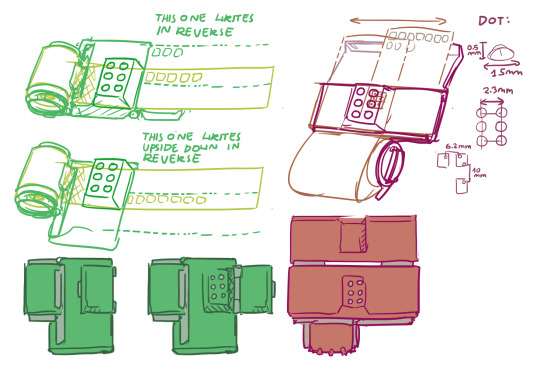
Please Reblog, I'd like to design a cheap braille typewriter (prototyping by 3d printing, final design will be machined) I stumbled upon linked YouTube short and a thought: "designing 6/8 button typewriter is within my technical capabilities"
youtube
I have many design questions I wish I could test out
My roadblock is I don't know anyone who's visually impaired, and casually seeking random place to peddle my soon-to-be-invention is not something I'm capable of
Many design questions:
Paper type: what is minimal quality/density of paper for dots to be readable. Can thermal receipt paper be used for notes?
Embossed vs punched out: is that significant for the typewriter to not break paper? It's important for "undo", but that's pretty far in my building a typewriter plan
Typewriter size: My initial idea was something like a portable cash register with receipt paper spool and little tray for it to glide along (I quickly realized it's a bad design because it can't fit more than 7 characters, or I can make infinite scroll of a single line with questionable ergonomics). Ultimately is related to page size, so what would be best for it? A4 standard paper? Is being portable important?
Keyboard layout: Perkins Brallier have all it's buttons inline forming long row. Wouldn't single-hand keyboard in similar layout as braille dots be more convenient? (straight grid or mimicking angle of computer keyboard letters)
Typing feedback: should typed letter be instantly accessible and not obstructed by typewriter? Maybe typing with one hand and instantly proof-reading with another hand?
Typewriter or printer?: alternatively, I can make a little annoying-noise-making servo-powered printer that will punch out text. Arduino or Raspberry PI based (I have experience with both) It would be USB powered most benevolent printer, because it don't require ink to work
Thanks for reading! [I'm not transcribing my design scribble, because it's absolute dogshit, but it helped me formula requirements. I will add transcription to actually thought of designs]
Alternatively, if I'm tweaking right now and if that thing would be needed it would already exist, I'll go back to trying to get hired by random megacorp and that's the last time you hear of me talking about it 💀
#braille#accessibility#inclusivity#blindness#blind#visually impaired#actually blind#low vision#visual impairment#Youtube
66 notes
·
View notes
Text
I was looking at Arduino stuff at the library and found a book about programming AVR chips and fell down a rabbit hole, so now I'm thinking about that as an alternative to trying to incorporate an entire Arduino board...
The scope creep is real
2 notes
·
View notes
Text
HOW DO YOU START MAKING A GAME?
hihihihi- I'm adding to this because I want everyone to make games. My current top recommendations for books is A Playful Production Process, Rule of Play is a classic, so is Game Feel
This is long- so get ready
Other engines
Construct 3: Browser based game stuff!
Pulp: Extremely similar to Bitsy- make games for the PlayDate
PICO-8: Make tiny games and programs for a fantasy console!
LÖVE: Lua based 2D game framework!
Scratch: Educational engine, chances are if you're under a certain age you've had a school program use this!
microStudio: More browser based engine stuff!
babylon.js: Open source engine
For games adjacent things like alternative controllers, events, or installations
LIKELIKE online: Arts based open source online art gallery, remixable on glitch- there's even a template
Processing: Open source, 20 years of documentation, and super flexible if you wanna be experimental
Arduino: Make physical games using programming, or robots, or escape rooms!
Makey-Makey: Much simpler plug and play Arduino!
Okay but how do I make a game?
Fast answer- you just start. But a pretty straight forward workflow would be
Write down ideas, make flowcharts of ideas, scripts, mechanical descriptions. From that think of how systems interact
Paper prototype, see what works and doesn't work when playing through things without being restricted to programming
Jam, fail often and fast because each project is a lot like a sketch- they take a long time to do though. the quicker you are to kill your darlings and start anew the faster you'll get better
Do a game deconstruction- break it down into tiny pieces and stare into it. What made it fun? What were the small things that stuck out to you?
"But I want to make a complicated-"
Shhhh- no you don't. You'll burn out. Make the cube move first. Make it jump. Does the jumping feel good? No? Start over. Make the cube move again, but slightly differently- does the jump feel good yet? No? START OVER. As soon as you get stuck, abandon what you're doing and start over
And I'm not kidding, game making is an iterative process. The more projects you do the better, faster, and easier it gets. If you whittle away on something you'll never finish
Okay, jump feels good now, great now interact with something in the scene. So on and so forth until you have scripts you like and understand and these become your building blocks for projects
Make the smallest thing you can- smaller, smallerSMALLER- here's a breakdown of a dating sim game with a final 3-4 hours of content per playthrough, similar to something like Hatoful Boyfriend or Doki Doki Literature Club
Need To Have
Title card and a way to start the game.
A dialogue system including the ability to show text, click on buttons, and track choices.
Includes both NPC and player names along with dialogue.
One dateable character including tracking relationship points with the player, one friendship cutscene, one romantic cutscene, and one final cutscene.
Ending card and credits.
Want To Have
In addition to above:
An option screen that changes basic user interface, save and load system, player name input with pronouns, music volume and quality of life settings, so on.
An external narrative building up the world in which the game is played including a mystery for the player to solve.
Four dateable characters with individual narratives including 3 friendship cutscenes, 3 romantic cutscenes, and a final ending cutscene for each.
A resolution to the mystery.
Dream To Have
In addition to above:
A hidden menu that allows the character to make interesting alterations to the game and becoming the antagonist of the mystery
Mystery narrative is branching with several endings where the player can either fail or succeed without dating any of the characters
Friend only narrative choices and ending.
Two extra gag romance characters with diverge narratives unlike the others in the game
Jealousy/approval between characters depending on narrative choices.
Options to create poly relationships between compatible characters, options to betray or cheat on characters, and options to matchmake characters without dating them.
Multiple endings to resolve the mystery including hidden antagonist role.
I often reference this tiktok on how everything piles up
Game making takes a long time and wildly complex very fast. For my timelines I add a minimum of 3 months for each year.
Quick and dirty advice for once you've got something going
Call your grant officers if you got local funding, it’s their job to answer your questions!
Research the desired outcomes before asking someone for money; be that the government, a publisher, or yourself
Never pay for event submissions or showcases until you’re making significant revenue if you don’t have to, I suggest following Game Conference Guide’s calendar
Even if you’re working for free track your hours and costs so if/when you are making budgets in the future you know how fast you and your team work
Learn when to say something is good enough; cut mechanics or features early and often to avoid the project ballooning out of scope
Don’t quit your day job until it makes sense- it’s more sustainable to work on something without funding if you’re still able to pay your bills
Shipped is the best feature, some great advice from Mark Darrah
Make smaller, shittier, and messier games more often
Go forth, make games, then tell me about them and I'll play them if I can. I love when folks make games- you can do it!

🎮 HEY I WANNA MAKE A GAME! 🎮
Yeah I getcha. I was once like you. Pure and naive. Great news. I AM STILL PURE AND NAIVE, GAME DEV IS FUN! But where to start?
To start, here are a couple of entry level softwares you can use! source: I just made a game called In Stars and Time and people are asking me how to start making vidy gaems. Now, without further ado:
SOFTWARES AND ENGINES FOR PEOPLE WHO DON'T KNOW HOW TO CODE!!!
Ren'py (and also a link to it if you click here do it): THE visual novel software. Comic artists, look no further ✨Pros: It's free! It's simple! It has great documentation! It has a bunch of plugins and UI stuff and assets for you to buy! It can be used even if you have LITERALLY no programming experience! (You'll just need to read the doc a bunch) You can also port your game to a BUNCH of consoles! ✨Cons: None really <3 Some games to look at: Doki Doki Literature Club, Bad End Theater, Butterfly Soup
Twine: Great for text-based games! GREAT FOR WRITERS WHO DONT WANNA DRAW!!!!!!!!! (but you can draw if you want) ✨Pros: It's free! It's simple! It's versatile! It has great documentation! It can be used even if you have LITERALLY no programming experience! (You'll just need to read the doc a bunch) ✨Cons: You can add pictures, but it's a pain. Some games to look at: The Uncle Who Works For Nintendo, Queers In love At The End of The World, Escape Velocity

Bitsy: Little topdown games! ✨Pros: It's free! It's simple! It's (somewhat) intuitive! It has great documentation! It can be used even if you have LITERALLY no programming experience! You can make everything in it, from text to sprites to code! Those games sure are small! ✨Cons: Those games sure are small. This is to make THE simplest game. Barely any animation for your sprites, can barely fit a line of text in there. But honestly, the restrictions are refreshing! Some games to look at: honestly I haven't played that many bitsy games because i am a fake gamer. The picture above is from Under A Star Called Sun though and that looks so pretty
RPGMaker: To make RPGs! LIKE ME!!!!! NOTE: I recommend getting the latest version if you can, but all have their pros and cons. You can get a better idea by looking at this post. ✨Pros: Literally everything you need to make an RPG. Has a tutorial inside the software itself that will teach you the basics. Pretty simple to understand, even if you have no coding experience! Also I made a post helping you out with RPGMaker right here! ✨Cons: Some stuff can be hard to figure out. Also, the latest version is expensive. Get it on sale! Some games to look at: Yume Nikki, Hylics, In Stars and Time (hehe. I made it)

engine.lol: collage worlds! it is relatively new so I don't know much about it, but it seems fascinating. picture is from Garden! NOTE: There's a bunch of smaller engines to find out there. Just yesterday I found out there's an Idle Game Maker made by the Cookie Clicker creator. Isn't life wonderful?
✨more advice under the cut. this is Long ok✨
ENGINES I KNOW NOTHING ABOUT AND THEY SEEM HARD BUT ALSO GIVE IT A TRY I GUESS!!!! :
Unity and Unreal: I don't know anything about those! That looks hard to learn! But indie devs use them! It seems expensive! Follow your dreams though! Don't ask me how!
GameMaker: Wuh I just don't know anything about it either! I just know it's now free if your game is non-commercial (aka, you're not selling it), and Undertale was made on it! It seems good! You probably need some coding experience though!!!
Godot: Man I know even less about this one. Heard good things though!
BUNCHA RANDOM ADVICE!!!!
-Make something small first! Try making simple: a character is in a room, and exits the room. The character can look around, decide to take an item with them, can leave, and maybe the door is locked and you have to find the key. Figuring out how to code something like that, whether it is as a fully text-based game or as an RPGMaker map, should be a good start to figure out how your software of choice works!
-After that, if you have an idea, try first to make the simplest version of that idea. For my timeloop RPG, my simplest version was two rooms: first room you can walk in, second room with the King, where a cutscene automatically plays and the battle starts, you immediately die, and loop back to the first room, with the text from this point on reflecting this change. I think I also added a loop counter. This helped me figure out the most important thing: Can This Game Be Made? After that, the rest is just fun stuff. So if you want to make a dating sim, try and figure out how to add choices, and how to have affection points go up and down depending on your choices! If you want to make a platformer, figure out how to make your character move and jump and how to create a simple level! If you just want to make a kinetic visual novel with no choices, figure out how to add text, and how to add portraits! You'll be surprised at how powerful you'll feel after having figured even those simple things out.
-If you have a programming problem or just get confused, never underestimate the power of asking Google! You most likely won't be the only person asking this question, and you will learn some useful tips! If you are powerful enough, you can even… Ask people??? On forums??? Not me though.
-Yeah I know you probably want to make Your Big Idea RIGHT NOW but please. Make a smaller prototype first. You need to get that experience. Trust me.
-If you are not a womanthing of many skills like me, you might realize you need help. Maybe you need an artist, or a programmer. So! Game jams on itch.io are a great way to get to work and meet other game devs that have different strengths! Or ask around! Maybe your artist friend secretly always wanted to draw for a game. Ask! Collaborate! Have fun!!!
I hope that was useful! If it was. Maybe. You'd like to buy me a coffee. Or maybe you could check out my comics and games. Or just my new critically acclaimed game In Stars and Time. If you want. Ok bye
#game stuff#please let me play your games#send them to festivals#okay tyty#i go back to making my jam game
36K notes
·
View notes
Text
Warum der Arduino trotz ESP32 & Co. nicht ausgedient hat

„Arduino? Das nutzt doch heute keiner mehr…“ Wer sich in den letzten Jahren mit Mikrocontrollern beschäftigt hat, stolpert überall über den ESP32. Dual-Core, WLAN, Bluetooth, 240 MHz, massig Speicher – und das alles für ein paar Euro. Kein Wunder also, dass der gute alte Arduino UNO im Schatten der neuen Mikrocontroller-Generation zu stehen scheint. Die Kommentare in Foren und Social Media klingen dann auch oft so: „Warum noch einen Arduino benutzen, wenn es doch den ESP32 gibt?“ Aber ist das wirklich so? Hat der Arduino tatsächlich ausgedient? Oder gibt es gute Gründe, auch heute noch auf den betagten Klassiker zu setzen? Und vor allem: Wenn ich gerade erst einsteige – sollte ich dann überhaupt noch mit einem Arduino anfangen, oder direkt auf einen ESP32 setzen? Genau um diese Fragen geht es in diesem Beitrag. Und so viel sei schon mal verraten: Leistung ist nicht immer alles.
ESP32 – das moderne Powerpaket (aber nicht für alles nötig)
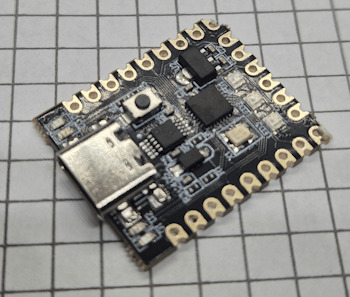
Wenn man sich heute in der Maker-Szene oder auf YouTube umschaut, könnte man fast glauben, es gäbe nur noch den ESP32. Und das ist auch gar nicht so abwegig: Der ESP32 bringt schon ab Werk eine ganze Menge beeindruckender Features mit, die früher nur mit viel zusätzlicher Hardware möglich waren. 🔥 Ein kurzer Blick auf die Highlights: - Dual-Core mit bis zu 240 MHz - WLAN und Bluetooth direkt integriert - Bis zu 520 kB RAM und mehrere Megabyte Flash - Viele GPIOs, PWM, ADC, DAC, I2C, SPI, CAN, Touch-Sensoren, … - Bereits ab ca. 3 € (je nach Ausführung und Händler)
ESP32-S3-Matrix
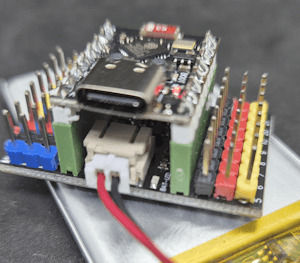
ESP32-C3 mit LiPo Batterie
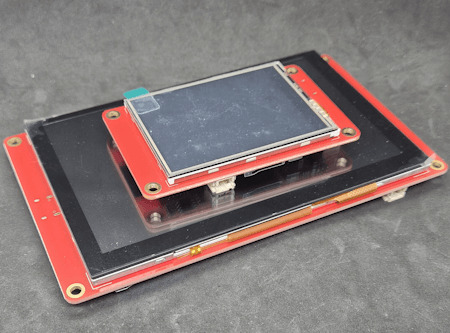
zwei Elecrow CrowPanels 2,4" & 5.0"
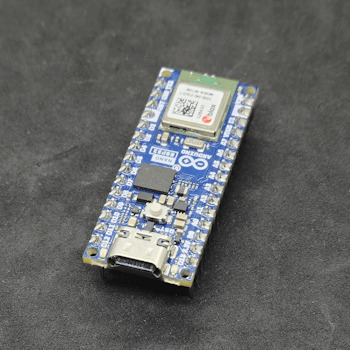
Arduino Nano ESP32
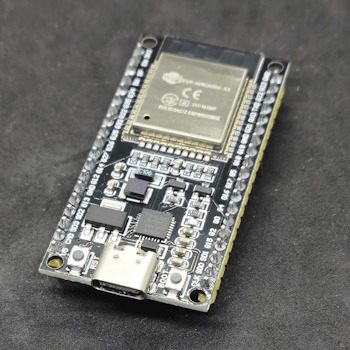
Generic-ESP32 Mikrocontroller

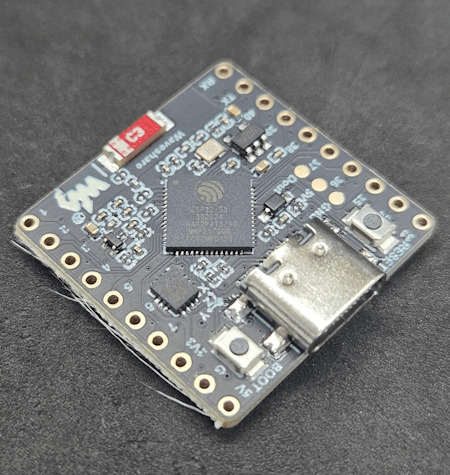
ESP32-C3 Super Mini

ESP32-S3-Zero Und dann wäre da noch ein echter Publikumsliebling: die ESP32-CAM.

Vergleich ESP32-CAM und ESP32-S3 CAM

ESP32-CAM mit externer Antenne und Board

ESP32-CAM

ESP32-CAM Modelle Für rund 5 € bekommt man hier nicht nur die Rechenpower des ESP32, sondern auch gleich eine kleine Kamera mit bis zu 5 Megapixeln dazu. Damit sind Projekte wie: - Überwachungskamera, - QR-Code-Scanner, - Fotos per E-Mail oder Telegram senden ganz einfach umsetzbar – ohne zusätzliche Hardware. Der Raspberry Pi Pico (RP2040) mischt kräftig mit – und bekommt Verstärkung Doch der ESP32 ist nicht allein auf dem Platz. Der Raspberry Pi Pico mit seinem RP2040 Dual-Core Cortex-M0+ Prozessor (133 MHz) hat sich schnell als leistungsfähige und günstige Alternative etabliert – und das in mehreren Varianten: BoardWLANBluetoothBesonderheitenRaspberry Pi Pico❌❌Basisversion, ohne FunkRaspberry Pi Pico W✅✅ (per Firmware)WLAN onboard, BT aktivierbarRP2350-Boards❌❌Mehr Power, keine Funkmodule (derzeit)


RP2040:bit
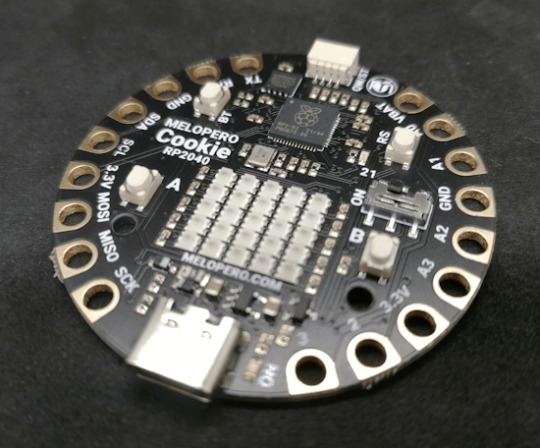
Melopero Cookie RP2040
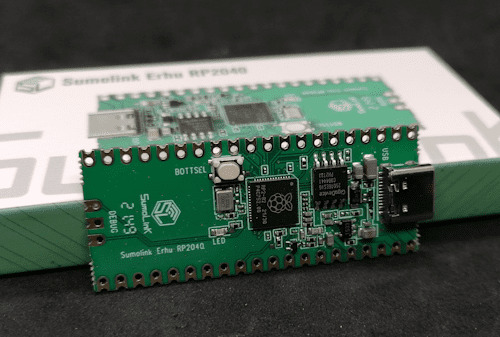
Sumolink Erhu RP240

Mikrocontroller - XIAO RP2040 & Raspberry PI Pico

Raspberry Pi Pico 2 - RP2350A

XIAO RP2350 Mit dem neuen RP2350-Chip steht mittlerweile ein leistungsstärkerer Nachfolger in den Startlöchern. Er wird derzeit auf einigen neuen Boards verbaut (z. B. auf Prototypen oder Dev-Boards asiatischer Hersteller) und bringt: - Höhere Taktraten (bis 200 MHz möglich), - Verbesserte Peripherie, - Und bleibt trotzdem kompatibel zur RP2040-Familie. Was aktuell noch fehlt: WLAN und Bluetooth sind (noch) nicht integriert – was den Chip für reine IoT-Projekte (noch) weniger attraktiv macht, aber für USB-HID oder Highspeed-Sensoranwendungen interessant sein kann.
Arduino – Der Klassiker mit Kultstatus (und vielen Gesichtern)
Wenn man „Arduino“ sagt, denken viele sofort an das gute alte Original: Arduino UNO R3, Made in Italy, stabil, bewährt – aber auch nicht ganz billig. Und genau da beginnt der kleine Konflikt, den vermutlich viele kennen: ➡️ Das originale Board unterstützt die Plattform, die Entwicklung und das Open-Source-Projekt. ➡️ Aber: Der Preis liegt oft bei 20 € und mehr – während Clones für 2–3 € zu haben sind. Doch: Genau das ist eben auch der Spirit von Open Source. Die Arduino-Plattform wurde so entwickelt, dass jeder (mit Einhaltung gewisser Auflagen) eigene Boards bauen und verkaufen darf. Und das tun viele Hersteller – vor allem in Asien. Dabei gibt es längst nicht nur einfache UNO- oder Nano-Kopien. Die Vielfalt an Arduino-kompatiblen Boards ist inzwischen riesig: Board / CloneBesonderheitPreisbereichNano Clone (CH340G)Klassiker für einfache Projekte2–4 €Pro MiniOhne USB, super klein und sparsam2–4 €Nano mit integriertem OLEDAnzeige direkt am Mikrocontroller4–8 €Nano mit 2,4 GHz Funk (nRF24L01) oder 433 MHz ModulIdeal für Funkprojekte ohne WLAN5–10 €Nano mit ESP8266-Modul onboardWLAN-fähig, bleibt aber Arduino-kompatibel5–10 €Nano mit Bluetooth HC-05 oder HM-10Kabellose Kommunikation über BT Classic oder BLE5–10 €

Arduino Nano mit nRF24L01 Erweiterungsboard

Microcontroller BLE-Nano von Keywish

Arduino UNO R3
Arduino UNO R3 Clone von der Firma Sunfounder


Arduino Nano V3 , ATmega328P

Arduino Mega 2560 Pro mini

Arduino Nano V3
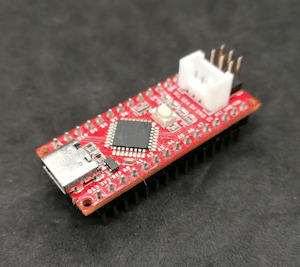
Seeeduino Nano Gerade diese Vielfalt an spezialisierten Clones und Abwandlungen ist ein echter Vorteil: Man wählt sich für sein Projekt genau die Features, die man braucht – und spart sich den Ballast von Funktionen, die gar nicht benötigt werden. ➡️ Keine WLAN-Probleme, wenn das Projekt gar kein WLAN braucht. ➡️ Keine Bluetooth-Komplexität, wenn ein simples Relais geschaltet werden soll. ➡️ Aber: Wenn ein Display gewünscht ist, einfach ein Clone mit integriertem OLED nehmen. Teures Original oder günstiger Clone? Das Original aus Italien unterstützt natürlich die Entwickler, die die Plattform erst möglich gemacht haben. Gerade wenn es um professionelle Projekte, Support oder Weiterentwicklung geht, ist das ein guter Grund, auch mal bewusst zum Original zu greifen. Wer dagegen einfach ein kleines Hobby-Projekt umsetzt oder ein günstiges Board für Lernzwecke sucht, wird vermutlich bei einem Clone aus Fernost landen – und das ist auch okay so. Beides hat seine Berechtigung. Im nächsten Abschnitt schauen wir uns an, warum diese Einfachheit und Flexibilität dem Arduino einen Platz auf dem Basteltisch gesichert haben – auch wenn ESP32, RP2040 & Co. daneben liegen. Clone statt Frust: Warum gerade Anfänger mit günstigen China-Boards besser fahren Seien wir ehrlich: Wer mit Mikrocontrollern anfängt, wird früher oder später mal einen Fehler machen. Ein Kabel verpolt, einen Pin aus Versehen kurzgeschlossen, eine Lötstelle zu heiß… ➡️ Passiert. Gehört zum Lernen einfach dazu. Wenn dann das teure Original-Board abraucht, ist der Frust groß – und das Projekt vielleicht erst mal gestorben. Anders sieht es aus, wenn das eingesetzte Board nur 2–3 € gekostet hat. Dann bestellt man sich einfach ein neues und weiter geht’s. Genau deshalb finde ich: ➡️ Gerade Anfänger sind mit einem günstigen Clone gut beraten. Das senkt die Hemmschwelle, etwas auszuprobieren, und macht es viel leichter, aus Fehlern zu lernen. Ob Arduino Nano Clone, Pro Mini oder einer der vielen China-Nachbauten mit Zusatzfeatures wie OLED oder Funk – hier kann man für kleines Geld experimentieren, lernen und Spaß haben. Und wenn das Projekt später stabil läuft und vielleicht sogar „ernsthaft“ eingesetzt werden soll, kann man immer noch überlegen, ob man auf ein höherwertiges Original umsteigt.
Wann ESP32, wann Arduino? – Entscheidungshilfe für Projekte
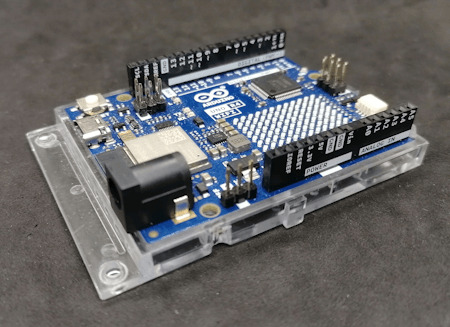
Natürlich ist es immer verlockend, einfach zum leistungsstärksten Mikrocontroller zu greifen. Aber genau das ist oft gar nicht nötig – und manchmal sogar umständlicher. Denn: Der beste Mikrocontroller ist der, der genau das kann, was dein Projekt braucht – nicht mehr und nicht weniger. Um dir die Wahl etwas leichter zu machen, hier eine kleine Entscheidungshilfe: ProjektideeEmpfehlungWarum?Blinkende LEDs, Relais steuern, Taster abfragenArduino UNO, Nano, Pro MiniEinfach, stabil, günstig, kein OverkillLCD/OLED-Anzeige mit Temperatur-/FeuchtesensorArduino oder PicoWLAN meist nicht nötig, einfache UmsetzungDaten per WLAN ins Netz (z. B. ThingSpeak, MQTT)ESP32, Pico WWLAN/BT bereits integriert, viele Beispiele vorhandenMobile Projekte mit Akku und langer LaufzeitPro Mini (mit LowPower-Mod) oder ESP32 mit Deep SleepStromsparend, je nach FunkbedarfKamera-Projekte (Foto/Video-Streaming)ESP32-CAMKamera onboard, einfache EinbindungUSB-Tastatur-Emulation, MacroPads, HID-GeräteArduino Leonardo / Micro oder Raspberry Pi Pico (RP2040)Beide unterstützen native USB-HIDFunkprojekte ohne WLAN (z. B. 433 MHz, nRF24L01)Arduino Nano Clone mit FunkmodulKein unnötiges WLAN, einfache FunkanbindungEchtzeitkritische Anwendungen mit viel GPIO und TimingRP2040 oder RP2350Schnelles Realtime-Processing dank PIO, viele GPIOs 💡 Zusatz-Tipp: Für USB-Tastatur-Emulation (z. B. MacroPads oder automatisierte Eingaben) ist der Arduino Leonardo eine super Wahl, weil er den ATmega32u4 verwendet, der USB nativ unterstützt. Alternativ funktioniert das auch mit dem Arduino Micro oder dem Raspberry Pi Pico (RP2040), dort oft über die TinyUSB-Bibliothek.

Keyestudio Leonardo

Arduino Leonardo Clone

Mini RP2040 Developmentboard
Fazit: Alt, aber alles andere als nutzlos!
Ja, der ESP32 ist ein echtes Powerpaket. Ja, der Raspberry Pi Pico (RP2040) mischt kräftig mit und hat auch seinen Platz auf dem Basteltisch. Und ja – es gibt mittlerweile zig Alternativen mit WLAN, Bluetooth, Kamera, HID und noch viel mehr. Aber: Gerade das macht den guten alten Arduino so sympathisch: Er will gar nicht alles können – sondern einfach das, was man für viele kleine bis mittlere Projekte wirklich braucht. Ein Relais schalten? Ein paar LEDs blinken lassen? Einen Sensor auslesen und auf dem Display anzeigen? ➡️ Warum dafür einen Dual-Core mit WLAN bemühen, wenn es ein Nano für 3 € auch tut? Und genau das ist der Punkt: 🔹 Der Arduino ist einfach. 🔹 Er ist stabil. 🔹 Er hat eine riesige Community und viele erprobte Bibliotheken. 🔹 Er eignet sich perfekt zum Lernen – und bleibt auch danach oft die pragmatische Wahl. Gerade Anfänger profitieren enorm davon, sich nicht direkt mit komplexen Themen wie WiFi-Stack, Sleep-Modes oder USB-Treiberherausforderungen herumschlagen zu müssen. Und: Auch fortgeschrittene Bastler greifen gerne zum „alten Bekannten“, wenn es mal schnell, unkompliziert und robust sein soll. Mein Fazit: Der Arduino hat seinen festen Platz – auch im Jahr 2025. Nicht überall, aber da, wo „Keep it simple“ gefragt ist, ist er oft genau die richtige Wahl. ➡️ ESP32, RP2040 & Co. sind keine Gegner – sie sind Mitspieler im Team der Mikrocontroller. Die Kunst ist es, je nach Projekt den passenden Baustein auszuwählen. Jetzt bist du dran! Arbeitest du noch mit dem Arduino? Oder hast du komplett auf ESP32, RP2040 & Co. umgestellt? Welche Projekte hast du schon umgesetzt – und welcher Mikrocontroller war dafür die beste Wahl? 👉 Schreib es mir gerne in die Kommentare – ich freue mich auf den Austausch! Read the full article
0 notes
Text
12V DC Adapter: A Comprehensive Guide
Introduction
A 12V DC adapter is a common power supply unit used in various electronic devices, from routers and LED strips to security cameras and small appliances. It converts alternating current (AC) from a wall outlet into a stable 12-volt direct current (DC), ensuring safe and efficient operation. This guide explores its functions, types, applications, and how to choose the right one for your needs.
What Is a 12V DC Adapter?
A 12V DC adapter is an external power supply that provides 12 volts of direct current to electronic devices. It typically consists of:
A plug for the AC wall outlet
A transformer to step down voltage
A rectifier to convert AC to DC
A regulator to maintain a steady 12V output
These adapters come in different sizes, power ratings, and connector types to match various devices.
Types of 12V DC Adapters
Not all 12V DC adapters are the same. Key variations include:
1. Fixed vs. Adjustable Voltage
Fixed 12V adapters deliver a constant voltage, ideal for devices requiring stable power.
Adjustable adapters allow voltage adjustment (e.g., 3V-12V), useful for testing electronics.
2. Regulated vs. Unregulated
Regulated adapters maintain a steady 12V output even under load fluctuations.
Unregulated adapters may vary in voltage, suitable for simple, low-power devices.
3. Plug Types & Polarity
Connector types (barrel jack, USB, etc.) must match the device.
Polarity (center-positive or center-negative) must align to avoid damage.
Common Uses of a 12V DC Adapter
12V DC adapters power a wide range of devices, including:
Networking Equipment: Routers, modems, and switches.
LED Lighting: Strips, bulbs, and signage.
Security Systems: Cameras, monitors, and alarms.
Consumer Electronics: Radios, speakers, and portable TVs.
DIY Electronics: Arduino projects and small motors.
How to Choose the Right 12V DC Adapter
Selecting the correct 12V DC adapter involves checking:
1. Voltage & Current Rating
Must match the device’s requirements (e.g., 12V, 2A).
Higher amperage is acceptable, but voltage must be exact.
2. Connector Size & Polarity
Measure the device’s jack diameter (e.g., 5.5mm x 2.1mm).
Verify polarity markings (e.g., "+" on the inner pin).
3. Safety Certifications
Look for UL, CE, or RoHS compliance for reliability.
Troubleshooting a Faulty 12V DC Adapter
If your device isn’t working, check:
Loose connections (wiggle the plug).
Burnt smell or overheating (indicates internal failure).
Voltage output (use a multimeter to test).
If the adapter fails, replace it with a compatible model.
Conclusion
A 12V DC adapter is a versatile power solution for many electronics. Understanding its types, applications, and selection criteria ensures optimal performance and device safety. Always verify specifications before purchasing to avoid compatibility issues.

1 note
·
View note
Text

Un nuovo sciopero di 8 ore scuoterà oggi, 9 aprile 2025, l’aeroporto internazionale Falcone-Borsellino di Palermo, con ripercussioni che potrebbero toccare anche i tanti agrigentini pendolari. A proclamare l’astensione dal lavoro, dalle 10:30 alle 18:30, sono stati i sindacati Filt Cgil, Fit Cisl, UilTrasporti e Ugl Trasporto Aereo, che rappresentano i dipendenti della Gesap, la società che gestisce lo scalo palermitano. La protesta segue un primo sciopero di 4 ore, tenutosi il 28 febbraio scorso, e nasce da una vertenza che si trascina da mesi senza soluzioni. I sindacati puntano il dito contro la Gesap, accusandola di aver chiuso le porte al dialogo e di aver ignorato ogni tentativo di costruire un rapporto costruttivo. “L’azienda continua a delegittimare il tavolo sindacale, lasciando i lavoratori senza risposte su questioni cruciali”, si legge in una nota firmata dai rappresentanti Fabio Lo Monaco (Filt Cgil), Concetta Arduino (Fit Cisl), Katia Di Cristina (UilTrasporti) e Domenico De Cosimo (Ugl). Tra le critiche mosse, spiccano la mancata applicazione di un piano di riqualificazione del personale e l’assenza di una strategia chiara per migliorare l’efficienza dello scalo, temi su cui la Gesap avrebbe promesso interventi mai realizzati. “È un momento delicato, lo sappiamo, ma l’irresponsabilità della Gesap ci lascia senza alternative”, spiegano i sindacati, che hanno lanciato un appello al sindaco di Palermo, Roberto Lagalla, affinché convochi un tavolo urgente con tutte le parti coinvolte. Read the full article
0 notes
Text
I had to run by a Radio Shack on a few occasions for electronics components right up til their eventual closure. They had the “electronics components” as a category, but they were largely supplying them from a small stack of cabinets, and not even all of that was populated, alongside maybe two or three types of ‘general starter electronics kit’. Forget “building a radio”: the local place didn’t even have a full E6 resistors or magnet wire. And their staff would be better trained to sell RC cars or cell phones (the latter of which was nearly half the store by 2012) than to answer even simple electronics questions.
((Note the lack of transformers even listed on those cabinets; at best they’d have a couple variable-voltage wall warts.))
Their online catalog was better in variety -- I got a lot of copper-plated boards during their going-out-of-business sale -- but it was nowhere near competitive with online sellers even before dropshipping ate the world. In many cases you’d be looking at three- to five-fold markup over McMaster-Carr or DigiKey prices, even including shipping.
Which... kinda points to the issue with foone’s alternate proposal. A RadioShack trying to sell to hobbyist enthusiasts would have still had to compete with the internet, and hobbyists ended up being pretty fickle about large purchases, too, no matter how much brand loyalty they might have had at a day-to-day basis.
With good reason: those electronics components cabinets often had a 10-fold markup over buying the same from local used electronics shops or 20-fold from online vendors, but if you needed a D-25 or a stack of LEDs in a hurry you’d be willing to pay a couple bucks for the convenience. And those really weren’t enough to keep the lights on or doors open at the scale -- even small family used electronics shops have to operate at a drastically different format. Meanwhile, if you wanted to make even a moderately-complicated electronics circuit, you’d be looking at tens if not hundred of dollars in price differences between RadioShack’s local options and online sellers.
((And, separately, the modern education system had absolutely slaughtered any interest in low-level electronics pre-Arduino, and not just as primary or secondary school levels. I’ve talked with post-grad EEs who hadn’t touched a component smaller than a NAND gate. The internet has done amazing things for connectivity and community among hardware enthuisiasts, but we’re still a dying breed.))
But RadioShack’s pre-00s business model sold the small stuff like transformers and capacitors so that it could also sell the big stuff: sound systems, full radio kits, so on. Even back in the 1980s, they were far more . The point of selling mechanical keyboards, had they made it to today, wouldn’t be to sell a handful of 50-cent cherry switches for $3 each, but that they could sell a 50-buck mechanical keyboard kit for $200. I think that would have been a more successful approach in retrospect... but it’d also be the sort of thing that would have been ‘successful’ on the scale of a few hundred stores at most, rather than the thousands that RadioShack was operating (and often locked into).
((They did sell Arduino and RaspberryPi-style kits, mostly MAKE magazine or Seeed-variant stuff, just around 2012-2013. But they were very much marketed at Young Children Educational Gifts rather than viable projects.))
Microcenter and some hardware stores have taken that approach, and they do exist -- though it’s still not their core focus so much as a way to drive other sales -- but they’re the sort of business that can only support a location or two per city, rather than the convenient strip-mall front that RadioShack aimed for.
Does anyone remember what happened to Radio Shack?
They started out selling niche electronics supplies. Capacitors and transformers and shit. This was never the most popular thing, but they had an audience, one that they had a real lock on. No one else was doing that, so all the electronics geeks had to go to them, back in the days before online ordering. They branched out into other electronics too, but kept doing the electronic components.
Eventually they realize that they are making more money selling cell phones and remote control cars than they were with those electronic components. After all, everyone needs a cellphone and some electronic toys, but how many people need a multimeter and some resistors?
So they pivoted, and started only selling that stuff. All cellphones, all remote control cars, stop wasting store space on this niche shit.
And then Walmart and Target and Circuit City and Best Buy ate their lunch. Those companies were already running big stores that sold cellphones and remote control cars, and they had more leverage to get lower prices and selling more stuff meant they had more reasons to go in there, and they couldn't compete. Without the niche electronics stuff that had been their core brand, there was no reason to go to their stores. Everything they sold, you could get elsewhere, and almost always for cheaper, and probably you could buy 5 other things you needed while you were there, stuff Radio Shack didn't sell.
And Radio Shack is gone now. They had a small but loyal customer base that they were never going to lose, but they decided to switch to a bigger but more fickle customer base, one that would go somewhere else for convenience or a bargain. Rather than stick with what they were great at (and only they could do), they switched to something they were only okay at... putting them in a bigger pond with a lot of bigger fish who promptly out-competed them.
If Radio Shack had stayed with their core audience, who knows what would have happened? Maybe they wouldn't have made a billion dollars, but maybe they would still be around, still serving that community, still getting by. They may have had a small audience, but they had basically no competition for that audience. But yeah, we only know for sure what would happen if they decided to attempt to go more mainstream: They fail and die. We know for sure because that's what they did.
I don't know why I keep thinking about the story of what happened to Radio Shack. It just keeps feeling relevant for some reason.
34K notes
·
View notes
Text
Understanding C++ cstring strchr() Function: A Comprehensive Guide"
The C++ cstring strchr() is part of the C standard library, located in the header. This powerful function is used to locate the first occurrence of a specific character in a C-style string. Let’s explore its syntax, usage, and some practical examples to understand it better.
Syntax cpp Copy code
include
char* strchr(const char* str, int character); Parameters:
str: The C-style string to be searched. character: The character to locate, passed as an int. Return Value:
Returns a pointer to the first occurrence of character in str. If the character is not found, it returns nullptr. Key Points The strchr() function is case-sensitive. It stops searching as soon as it finds the first occurrence of the character. If the character is '\0' (null terminator), strchr() will return a pointer to the end of the string. Example 1: Basic Usage cpp Copy code
include
include
int main() { const char* str = "Hello, World!"; char target = 'o';char* result = strchr(str, target); if (result) { std::cout << "The first occurrence of '" << target << "' is at position: " << (result - str) << std::endl; } else { std::cout << "'" << target << "' not found in the string." << std::endl; } return 0;
} Output:
arduino Copy code The first occurrence of 'o' is at position: 4 Example 2: Searching for the Null Terminator cpp Copy code
include
include
int main() { const char* str = "Find the null terminator."; char target = '\0';char* result = strchr(str, target); if (result) { std::cout << "The null terminator was found." << std::endl; } else { std::cout << "The null terminator was not found." << std::endl; } return 0;
} Output:
csharp Copy code The null terminator was found. Example 3: Character Not Found cpp Copy code
include
include
int main() { const char* str = "Search me!"; char target = 'z';char* result = strchr(str, target); if (result) { std::cout << "The first occurrence of '" << target << "' is at position: " << (result - str) << std::endl; } else { std::cout << "'" << target << "' not found in the string." << std::endl; } return 0;
} Output:
c Copy code 'z' not found in the string. When to Use strchr() Parsing input strings to find specific delimiters or markers. Searching for specific characters in a C-style string. Locating the start of a substring by finding its first character. Alternatives in Modern C++ For modern C++ applications, consider using the std::string class, which offers safer and more flexible methods like find().
Example:
cpp Copy code
include
include
int main() { std::string str = "Hello, World!"; char target = 'o';size_t pos = str.find(target); if (pos != std::string::npos) { std::cout << "The first occurrence of '" << target << "' is at position: " << pos << std::endl; } else { std::cout << "'" << target << "' not found in the string." << std::endl; } return 0;
} Conclusion The strchr() function is a simple and efficient way to search for characters in C-style strings. While modern C++ practices encourage the use of std::string, strchr() remains valuable in scenarios where legacy code or performance constraints are involved. Always remember to handle nullptr safely to avoid undefined behavior.
0 notes
Text
Price: [price_with_discount] (as of [price_update_date] - Details) [ad_1] If you're looking for a new hobby that's tons of fun—and practical to boot—electronics might be right up your alley. And getting started has never been easier! In Electronics All-in-One for Dummies, you'll find a plethora of helpful information, from tinkering with basic electronic components to more advanced subjects like working with digital electronics and Arduino microprocessors.Whether you're just getting started and trying to learn the difference between a circuit board and a breadboard, or you've got a handle on the fundamentals and are looking to get to the next level of electronics mastery, this book has the tools, techniques, and step-by-step guides you need to achieve your goals—and have a blast doing it! You'll learn: Critical safety tips and strategies to keep yourself and your environment protected while you workUseful schematics for everyday devices you can put to work immediately, like animated holiday lights and animatronic prop controllersHow to work with alternating current, direct current, analog, digital, and car electronics, as well as Raspberry Pi technologiesPerfect for anyone who's ever looked at a circuit board and thought to themselves, "I wonder how that works?", Electronics All-in-One for Dummies is your go-to guide to getting a grip on some of the coolest electronic technologies on the market. [ad_2]
0 notes
Text
Wave share Double Eye LCD module is a high-tech alternative to googly eyes

Waveshare has recently launched the Double Eye LCD module (also known as the 0.71inch DualEye LCD module), a high-tech alternative to googly eyes, with two 0.71-inch round IPS displays with 160×160 pixels of resolution and 65K color depth. It uses the GC9D01 driver and communicates via an SPI interface.
The module operates at a 3.3V or 5V and is designed so that both ESP32 and Arduino boards can drive it. These features make this device useful for applications like wearables, robotics, IoT devices, etc…
Waveshare Double Eye LCD module specifications:
Display Type – Dual 0.71-inch round LCD displays Resolution – 160×160 pixels Panel – IPS (wide viewing angle) Colors – 65K colors Pixel Pitch – 37.5 × 112.5 µm Controller and Driver Driver – GC9D01 Interface – SPI Operating Voltage – 3.3V / 5V Dimensions Display – 18 mm ∅ per round LCD Module – 51 x 20 mm
0 notes
Text
Junior Robotics Course in Dubai
Dubai, a city renowned for its technological innovations and forward-thinking outlook, is becoming a center for innovation and education. Junior robotics classes stand out as a vibrant and captivating approach to expose kids to the world of science and engineering among the many fascinating alternatives the city offers young brains. In addition to encouraging creativity, these classes give students the tools they need to succeed in the quickly changing digital world. Why Choose a Junior Robotics Course?
Practical projects provide students the opportunity to construct and program their own robots, which improves their comprehension of STEM (Science, Technology, Engineering, and Mathematics) ideas.
Critical Thinking and Problem-Solving Skills: Children who work on robotic tasks get the ability to reason logically and imaginatively conquer challenges.
Teamwork and Collaboration: Group projects are a common feature of robotics courses, which encourage peer cooperation and communication.
Future-Readiness: Since automation and artificial intelligence are reshaping sectors, students who study robotics will have an advantage in their future employment.
What Makes Dubai an Ideal Place for Robotics Education?
Modern Facilities: Robotics classes in Dubai are frequently held in state-of-the-art labs furnished with the newest instruments and equipment.
World-Class Teachers: Skilled educators who are passionate about teaching and have knowledge of robotics lead students through the educational process.
Global Exposure: Students can work together with classmates from different backgrounds in Dubai's multicultural setting, which improves their educational experience.
Government support: Programs like the UAE's emphasis on artificial intelligence and the creation of smart cities are a wonderful fit with the goals of robotics education.
What to Expect in a Junior Robotics Course?
Overview of Robotics: Fundamentals of robotics, parts, and how they work.
Programming & Coding: Acquiring programming skills through user-friendly platforms such as the Arduino IDE or Scratch.
Robot Building: Practical projects involving the assembly and programming of robots to carry out particular tasks.
Challenges and Contests: Chances to take part in friendly contests that promote creativity and cooperation.
Project Showcase: An opportunity for pupils to showcase their work that enhances their self-esteem and public speaking abilities.
A junior robotics course in Dubai is an investment in your child's future, not just an extracurricular activity. These courses create the groundwork for success in the twenty-first century by encouraging creativity, technical proficiency, and a drive for innovation. Your child can be in the vanguard of this change, helping to shape a better future as Dubai continues to lead the way in technological breakthroughs.
To know more, click here.
0 notes
Text
Components for a DIY BCI
EEG (Electroencephalography) Hardware:
The most basic BCIs rely on EEG sensors to capture brainwaves.
OpenBCI is a popular, relatively affordable option for DIY BCI projects. While it costs a few hundred dollars, it is one of the most versatile kits available.
NeuroSky MindWave or Muse Headband are other cheaper alternatives, ranging from $100-$200. These are commercially available EEG devices for consumer-grade BCIs.
OpenEEG is another open-source project that allows you to build your own EEG hardware from scratch, though it requires more technical skill.
Electrodes:
You’ll need wet or dry electrodes to attach to your scalp. Wet electrodes give more accurate readings but are messier, while dry electrodes are more convenient.
You can order pre-gelled electrodes online or even repurpose ECG/EMG electrodes.
Amplifier:
The signal from the brain is very weak and needs to be amplified. Most consumer-grade EEG headsets already include built-in amplifiers.
If you're building your own, you’ll need to add an instrumentation amplifier like the INA114 to your circuit.
Microcontroller (optional but recommended):
You can use a microcontroller (e.g., Arduino or Raspberry Pi) to process and transmit the EEG signals.
This allows you to handle signal conditioning (filtering noise, extracting frequency bands like alpha or beta waves) before passing the data to a computer.
Signal Processing Software:
To interpret the brainwave data, you’ll need software to process the EEG signals.
OpenBCI GUI or BrainBay (open-source software for EEG processing) are good choices.
If using a commercial device like the Muse headband, you can use their respective apps or SDKs.
Python libraries like MNE-Python or OpenBCI_Python can be used for more advanced data processing and visualizations.
Steps to Build a Basic DIY BCI
Choose Your EEG Hardware:
If you're starting from scratch, something like OpenBCI Cyton board is a good start. It’s open-source, has good community support, and includes everything from the signal acquisition to the interface.
Set Up Your Electrodes:
Attach electrodes to specific parts of the scalp. The 10-20 system is commonly used in EEG to position electrodes. For basic experiments, placing electrodes on the frontal or occipital lobes is common for reading alpha and beta waves.
Amplify the Signal:
If you're using raw hardware, you need to amplify the EEG signal to make it usable. Most DIY kits or premade EEG headsets have built-in amplifiers. If you're building one from scratch, the INA114 or a similar instrumentation amplifier can be used.
Capture the Data:
Use a microcontroller or a computer interface to collect and transmit the amplified EEG data. For example, with an Arduino or Raspberry Pi, you can read analog signals from the amplifier and stream them to your PC via serial communication.
Process the Data:
Use software like OpenBCI GUI, BrainBay, or MNE-Python to filter and visualize the brainwave data. You’ll want to filter out noise and focus on frequency bands like alpha waves (8–12 Hz) for meditation or relaxation signals.
Analyze and Create Control Mechanisms:
Once you have the processed data, you can start building applications around it. For instance:
Detecting Alpha waves: You can trigger certain actions (e.g., turning on a light or moving a cursor) when you detect increased alpha activity (indicating relaxation).
Training with Neurofeedback: Users can learn to modulate their brain activity by receiving real-time feedback based on their brainwave patterns.
DIY EEG Project Example: Arduino-based EEG
Here’s a simplified example of how you could set up a basic EEG using an Arduino:
Materials:
Arduino Uno
EEG electrodes (you can buy inexpensive ECG electrodes online)
Instrumentation amplifier (e.g., INA114 or an open-source EEG shield for Arduino)
Resistors, capacitors for noise filtering
Cables to connect electrodes to the amplifier
Steps:
Assemble the amplifier circuit:
Build a simple differential amplifier circuit to pick up the small EEG signals from the electrodes.
Use the INA114 instrumentation amplifier to boost the signal.
Connect to Arduino:
The amplified signal can be connected to one of the Arduino’s analog inputs.
Write an Arduino script to read the analog value and send it to the PC via serial communication.
Filter and Process the Signal:
On your PC, use Python (or Processing) to capture the signal data.
Apply digital filters to isolate the EEG frequency bands you’re interested in (e.g., alpha, beta, theta waves).
Visualize or Control:
Create a simple application that shows brainwave activity or controls something based on EEG input (like blinking an LED when alpha waves are detected).
Further Ideas:
Neurofeedback: Train your brain by playing a game where the user must relax (increase alpha waves) to score points.
Control Mechanisms: Use the brainwave data to control devices, such as turning on lights or moving a robotic arm.
Estimated Cost:
EEG Kit: If using pre-made kits like Muse or NeuroSky: $100–$200.
DIY EEG Build: OpenBCI costs around $300–$400 for more advanced setups, while OpenEEG might be built for less, but requires more technical expertise.
Challenges:
Noise Filtering: EEG signals are weak and can easily be corrupted by muscle movements, electrical interference, etc. Filtering noise effectively is key to a successful BCI.
Precision: DIY BCIs are generally not as accurate as commercial-grade devices, so expect some limitations.
Building a homebrew BCI can be fun and educational, with a wide variety of applications for controlling electronics, games, or even providing neurofeedback for meditation
0 notes
Text
Grafische Programmierung mit Open Roberta

In diesem Beitrag möchte ich dir zeigen, wie du mit der grafischen Programmierung in Open Roberta startest.

Die grafische Programmierung für Mikrocontroller habe ich dir bereits mit der Anwendung ArduBlock und MakeCode gezeigt.
Was ist Open Roberta?
Das Open Roberta Lab ist eine kostenfreie Open-Source-Plattform vom Fraunhofer-Institut. Die Zielgruppe von Open Roberta sind Lehrkräfte, Schüler, Azubis und Studierende. Dieses wird möglich, da die Software technische und fachliche Barrieren durch einfache und intuitive Bedienung ersetzt hat. Wenn du mehr darüber lesen möchtest, dann empfehle ich dir den Wikipedia Artikel dazu. Seite „Open Roberta“. In: Wikipedia – Die freie Enzyklopädie. Bearbeitungsstand: 5. Januar 2023, 09:36 UTC. URL: https://de.wikipedia.org/w/index.php?title=Open_Roberta&oldid=229508414 (Abgerufen: 17. März 2023, 11:03 UTC)
Was benötige ich zur Programmierung in Open Roberta?
Du benötigst einen Computer oder Tablet sowie ein USB-Datenkabel. Für die Entwicklung am Tablet benötigst du ein OTG Datenkabel, welches du zum Beispiel auf ebay.de für wenige Euro* findest. Hinweis von mir: Die mit einem Sternchen (*) markierten Links sind Affiliate-Links. Wenn du über diese Links einkaufst, erhalte ich eine kleine Provision, die dazu beiträgt, diesen Blog zu unterstützen. Der Preis für dich bleibt dabei unverändert. Vielen Dank für deine Unterstützung!

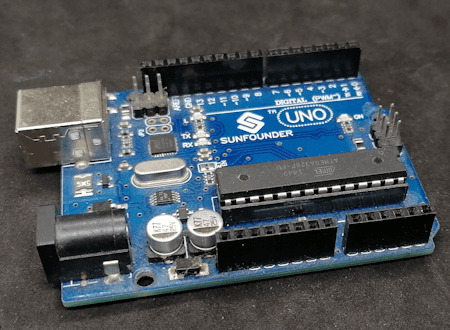
OTG Kabel für die serielle Verbindung zu einem Mikrocontroller Du kannst mit dieser Entwicklungsumgebung diverse Mikrocontroller programmieren. In diesem und nachfolgende Beiträge zeige ich dir die Entwicklung am Arduino UNO. Diesen Mikrocontroller kannst du entweder direkt im Onlineshop bei Arduino bestellen oder auch als günstigen "China Klone" schon ab 5 € auf ebay.de*.

originaler Arduino UNO

Arduino UNO als China Klone

Arduino UNO von Keyestudio Eine günstige Alternative zum originalen Arduino UNO habe ich dir im Beitrag Review Funduino UNO vorgestellt. Dieser ist, wie ich finde, dem originalen schon sehr nahe.

Original Arduino UNO & Funduino UNO
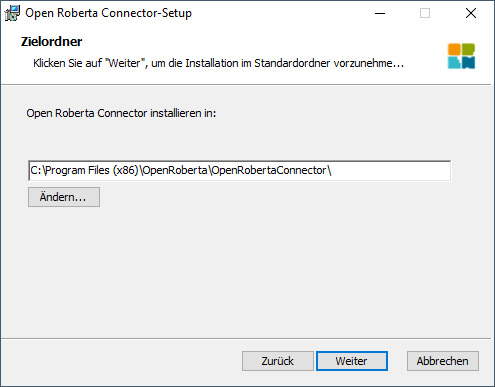
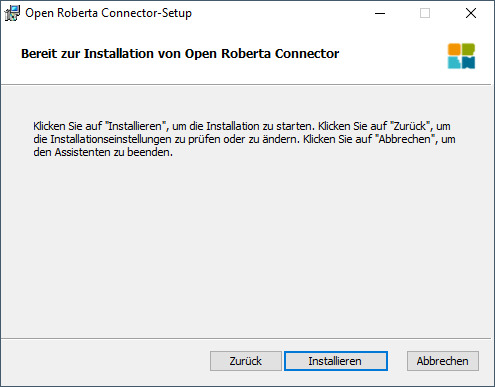
Installieren des Open Roberta Connectors
Damit du später deinen Arduino aus Open Roberta programmieren bzw. ein Programm auf diesen spielen kannst benötigst du den Open Roberta Connecotor welchen du vom GitHub Repository OpenRoberta/openroberta-connector für diverse Betriebssysteme herunterladen kannst.
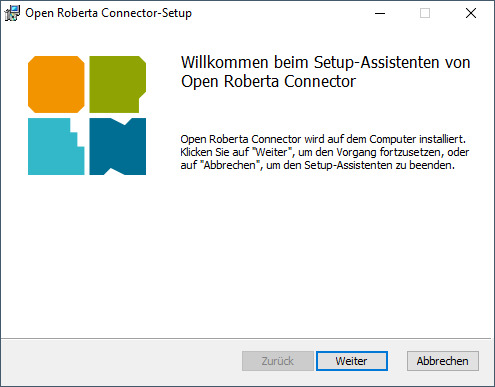
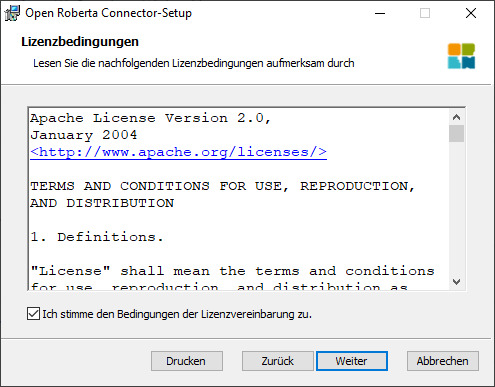


Zusätzlich benötigst du noch ein installiertes Java 1.8 welches du ebenfalls kostenfrei herunterladen und installieren kannst.
Erste Schritte in Open Roberta
Wagen wir nun die ersten Schritte in Open Roberta mit dem Arduino UNO. Dazu öffnen wir als Erstes die Seite https://lab.open-roberta.org/ und wählen dort das System "Nepo4Arduino" aus.
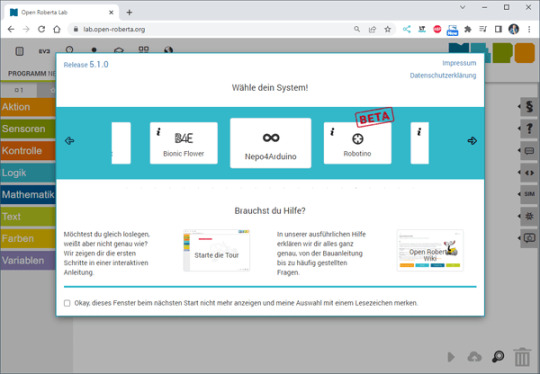
Auswahl - System "Nepo4Arduino" in Open Roberta Lab Im nächsten Schritt wählen wir den Mikrocontroller aus, derzeit unterstützt das Tool lediglich den Arduino UNO, Nano sowie den Mega.

Unterstützte Mikrocontroller der Arduino Familie im Open Roberta Lab Die Wifi Rev2 Variante ist derzeit im Status DEPRECATED und wird nicht mehr unterstützt. In meinem Fall nutze ich wie erwähnt den Arduino UNO und wähle hier "Nepo4Arduino Uno" aus.
Aufbau einer Verbindung mit einem Mikrocontroller
Wenn der Mikrocontroller an den Computer mit einem USB-Datenkabel angeschlossen wurde, dann müssen wir zunächst den zuvor installierten Open Roberta Connector starten. Dieser sucht dann automatisch nach einem Mikrocontroller und wir erhalten nach einem Klick auf die Schaltfläche "Verbinden" ein Token.
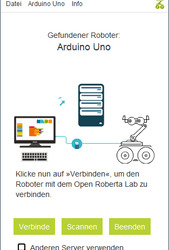

Mit der kleinen, grünen Schaltfläche neben dem Token können wir diesen in die Zwischenablagen ablegen. In der Webseite navigieren wir nun über Roboter > verbinden ... zum Dialog zur Eingabe des Tokens.

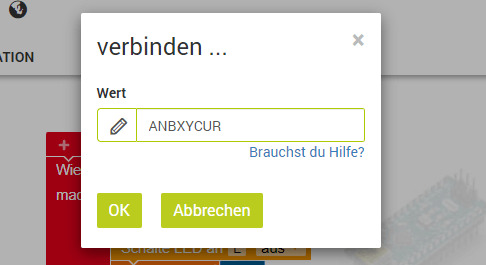
Diese Eingabe bestätigen wir mit der Schaltfläche "OK" und somit sollte im unteren Bereich die Schaltfläche zum Überspielen eines Codes aktiviert werden.

LED blinken lassen
Starten wir jetzt mit einem einfachen Programm und lassen die interne LED am digitalen Pin D13 des Mikrocontrollers blinken. Im nachfolgenden YouTube-Video erläutere ich dir, wie du eine Verbindung von deinem Computer zum Mikrocontroller aufbaust und das kleine Programm zum Blinken einer LED programmierst. https://youtu.be/VyzjWcSH3uk Wenn du bereits mit MakeCode oder ArduBlock Erfahrung gesammelt hast, dann musst du dich nicht viel umstellen, außer dass du bei der grafischen Programmierung in Open Roberta noch zusätzlich die Schaltung abbilden musst. Die Schaltung erstellst du im Reiter "ROBOTERKONFIGURATION". Hier ist als Erstes bereits eine LED konfiguriert.
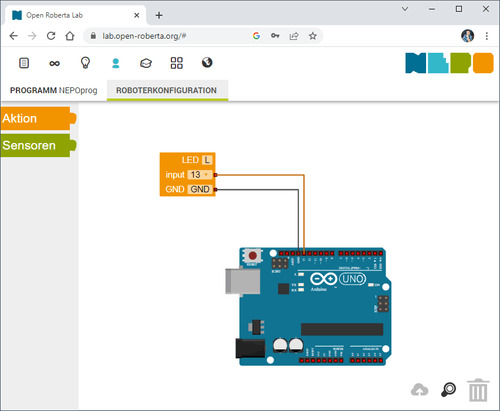
Diese LED mit der Bezeichnung "L" können wir jetzt im Code referenzieren und mit definierten Elementen zum Blinken bringen.

Read the full article
0 notes
Text
The Rise of Arduino Compatible Boards - An Exploration of the Expanding Ecosystem
The Genesis of an Open Source Movement When Arduino was launched in 2005, it helped spawn the age of accessible, affordable microcontroller boards and platforms. By providing a common hardware and software standard that was simple to use but still powerful, Arduino opened the door for non-engineers and electronic hobbyists to easily create interactive projects and prototypes. This drastically lowered the barrier to entry for physical computing and embedded systems. Within a few years, the Arduino platform had grown into a thriving global community with developers of all skill levels sharing code, tutorials, and ideas. The Growing Demand Inspires New Options As Arduino gained popularity and demand increased, companies recognized an opportunity to expand the ecosystem. Rather than competing directly with Arduino, many started releasing boards that were compatible with the Arduino software and libraries. These clones and derivatives allowed users to benefit from Arduino's openness while also having alternative hardware options at lower price points or with additional features. Some boards were nearly identical clones while others incorporated unique enhancements. Regardless, their compatibility with the Arduino IDE gave users the flexibility to choose a board that best fit their specific needs and budgets. A Proliferation of Board Types and Form Factors Today, the variety of Arduino Compatible boards available is staggering. In addition to the classic Uno and Nano form factors, there are boards shaped as mini PCs, single-board computers, wearables, educational kits, drones, robots, and more. Each brings something new while still maintaining the foundational principles that make Arduino great. For example, some focus on size and portability while others emphasize power, connectivity, or cost. Educational boards make learning to code more interactive and hands-on. Industrial boards enable Arduino to be used in professional contexts that require certifications or rigorous testing. A World of Enhancements Beyond the Original Spec Many Arduino compatible boards one-up the original Arduino specs by including features like WiFi, Bluetooth, GPS, high-speed microprocessors, more memory and flash storage, additional input/output pins, and specialized sensors. Some push processing power to the level of Raspberry Pi while shrinking the board size. Others add compatibility for new languages beyond just C/C++. Interfaces like Ethernet, USB, and add-on shields expand what these boards can interface with. Many also supply dev kits with components, sensors, motors and displays to simplify prototyping of specific project types. Get more insights on Arduino Compatible
Unlock More Insights—Explore the Report in the Language You Prefer
French
German
Italian
Russian
Japanese
Chinese
Korean
Portuguese
Vaagisha brings over three years of expertise as a content editor in the market research domain. Originally a creative writer, she discovered her passion for editing, combining her flair for writing with a meticulous eye for detail. Her ability to craft and refine compelling content makes her an invaluable asset in delivering polished and engaging write-ups.
(LinkedIn: https://www.linkedin.com/in/vaagisha-singh-8080b91)

#Arduino Compatible#Microcontroller#Open-Source Hardware#Electronics#Prototyping#DIY#Hobbyist#Maker#Microcontroller Board#Arduino Uno
0 notes
Text
Introducing the Arduino Mega 2560 CH340: Power Meets Affordability!
Looking for a robust microcontroller with all the power of the Arduino Mega 2560 but at a more budget-friendly price? Meet the Arduino Mega 2560 CH340! Perfect for large-scale projects, this board features the same powerful ATmega2560 microcontroller, giving you 54 digital I/O pins, 16 analog inputs, and plenty of space to bring your complex ideas to life.
But what sets this version apart? The CH340 USB-to-Serial converter replaces the traditional ATmega16U2, making it a cost-effective alternative without sacrificing performance. Ideal for educators, hobbyists, and anyone looking to expand their electronics toolkit without breaking the bank.
Key Features:
Microcontroller: ATmega2560
USB-to-Serial Converter: CH340
Digital I/O Pins: 54 (of which 15 provide PWM output)
Analog Input Pins: 16
Flash Memory: 256 KB (8 KB used by the bootloader)
SRAM: 8 KB
EEPROM: 4 KB
Clock Speed: 16 MHz
Whether you're into robotics, 3D printing, or advanced automation, the Arduino Mega 2560 CH340 is your go-to board for powerful performance at an unbeatable value.
Get yours now and start creating something amazing!
Click here to purchase the product: https://dhakarobotics.com/.../1037-arduino-mega-2560-ch340/
Contact Us: +8801740298319
visit our website: https://dhakarobotics.com/

#ArduinoMegaCH340#Microcontroller#TechOnABudget#DIYElectronics#InnovationForAll#Robotics#IoT#MakersMovement#dhakarobotics
0 notes