#BackgroundColor
Explore tagged Tumblr posts
Visit Tumblr Blog
Explore Tumblr blogs with no restrictions, modern design and the best experience.
Last Seen Tumblr Blogs


Fun Fact
Post activity is at the highest at 4:00 pm EDT; notes peak at 10:00 pm EDT.
Text


“Peace symbol gold 3D” Direct link to the
Bucket hat: https://www.redbubble.com/i/bucket-hat/Peace-symbol-gold-3D-by-CreaTwinkles/168237292.S29A5?asc=u
Baseball cap: https://www.redbubble.com/i/hat/Peace-symbol-gold-3D-by-CreaTwinkles/168237292.9AAXL?asc=u
Kids T-shirt: https://www.redbubble.com/i/kids-t-shirt/Peace-symbol-gold-3D-by-CreaTwinkles/168237292.VXRIW?asc=u
Holographic sticker: https://www.redbubble.com/i/holographic-sticker/Peace-symbol-gold-3D-by-CreaTwinkles/168237292.A3LW6?asc=u
Zipper pouch: https://www.redbubble.com/i/pouch/Peace-symbol-gold-3D-by-CreaTwinkles/168237292.440R3?asc=u
Discover more products with this peacesign on Redbubble: https://www.redbubble.com/shop/ap/168237292 This 3D goldcoldcolored peacesymbol can be found on various products on TeePublic: https://www.teepublic.com/t-shirt/71807102-peace-symbol-gold-3d Like the: Classic Hoodie: https://www.teepublic.com/hoodie/71807102-peace-symbol-gold-3d Magnet: https://www.teepublic.com/magnet/71807102-peace-symbol-gold-3d Trucker Hat: https://www.teepublic.com/hat/71807102-peace-symbol-gold-3d Just so you know: often other backgroundcolors for apparel can be chosen on TeePublic. So if you’re not into red, choose another color.
#redbubble#print on demand#redbubble artist#redbubble shop#teepublic#teepublic artist#teepublic store#red#black#gold#golden#peace sign#peace#peace symbol#3d#cap#hat#hoodie#tee#t shirt#shirt#magnet#sticker#holographic#pouch#zipper pouch#classic hoodie#kids t shirt#clothing#apparel
2 notes
·
View notes
Text
React.js State
Understanding State in React: A Beginner’s Guide
Hello, friends! Welcome back to my blog. Today, we’re diving into one of the most fundamental and exciting concepts in React – React State. By the end of this post, you’ll have a solid understanding of how state works and how you can use it to add dynamic functionality to your projects. We'll explore two interactive examples to demonstrate the power of state:
Changing the background color on hover.
Building a simple counter application.
Let’s get started! 🚀
What is State in React?
In React, state is an object that stores data. When the data changes, React automatically re-renders the UI to reflect the updated state. It’s used in scenarios requiring dynamic behavior, such as:
Form inputs
Toggle switches
Changing themes or colors
To better understand state, let’s dive into our first example:
Example 1: Hover to Change Background Color
Imagine creating an effect where the background color changes dynamically as you hover over an element. Here’s how to implement it using React state:
Codeimport React, { useState } from 'react'; function HoverColorChange() { const [bgColor, setBgColor] = useState('#f0f0f0'); // Initial light color const handleMouseEnter = () => { setBgColor('#333'); // Dark color on hover }; const handleMouseLeave = () => { setBgColor('#f0f0f0'); // Light color on mouse leave }; return ( <div style={{ height: '100vh', display: 'flex', justifyContent: 'center', alignItems: 'center', backgroundColor: bgColor, transition: 'background-color 0.5s', }} onMouseEnter={handleMouseEnter} onMouseLeave={handleMouseLeave} > <h1 style={{ color: '#fff' }}>Hover Over Me!</h1> </div> ); } export default HoverColorChange;
How It Works
useState Hook: The bgColor state variable is initialized with a light color.
Event Handlers:
handleMouseEnter changes the background color to dark when the mouse hovers over the element.
handleMouseLeave resets the color to light when the mouse leaves the element.
Smooth Transition: The transition property ensures a smooth color change.
This simple yet powerful example demonstrates how state can add interactivity to your applications.
Come Join Us!
Visit for more Info :-
2 notes
·
View notes
Note
All hail the great chimichanga.
https://image.spreadshirtmedia.com/image-server/v1/products/T1459A839PA3861PT28D1048656688W8333H10000/views/1,width=800,height=800,appearanceId=839,backgroundColor=F2F2F2/chimichanga-king-sticker.jpg
All hail the great chimichanga >:3
That’s a cute sticker btw
4 notes
·
View notes
Text
the way you do inline styling in react/MDX is so stupid and it's poisoned me. instead of <style="background-color: white"> you have to go <style={{backgroundColor: 'white'}}>. fucking camel case!!
13 notes
·
View notes
Note
Saw a dad wearing this same shirt at the store, only it was purple.
https://image.spreadshirtmedia.com/image-server/v1/products/T210A1PA4301PT17X13Y13D1017294241W30667H36804/views/1,width=550,height=550,appearanceId=1,backgroundColor=F2F2F2,modelId=1147,crop=list/unicorn-and-tacos-t-shirt-cinco-de-mayo-mexican-food-kids-girls-boys-rainbow-squad-cute-gifts-party-mens-t-shirt.jpg
LET THIS BE ALMA'S FATHER'S DAY GIFT TO HER PAPÁ! 😭 💕 🦄 🌮
(enchantedchocolatebars)
@enchantedchocolatebars YES OMG ABSOLUTELY
Philip loves the shirt very much and wears it as many times as he can
4 notes
·
View notes
Video
youtube
color key effect premiere pro remove backgroundcolor key effect premiere pro remove background, premiere pro track matte key effect & shape circle, How To Create holographic objects effect in Premiere Pro, image control effect by adobe premiere pro, adobe premiere pro generate effects tutorial bangla, How To create shake effect Premiere Pro 2025, adobe premiere pro distort effect, Text Fade In and Fade Out Animation in Premiere Pro 2025, adobe premiere pro color correction effect bangla tutorial, editing in premiere pro blur effects bangla tutorial 2025, gaussian blur premiere pro, motion blur effect premiere pro, motion blur transition premiere pro, adobe premiere pro effect editing bangla tutorial, adobe premiere pro effect editing channel bangla tutorial,
0 notes
Text
HarmonyOS NEXT Practical: Pattern Password
Objective: Set a pattern password.
PatternLock pattern password lock component, used for password verification scenarios by inputting passwords in a nine grid pattern. When the finger is pressed in the PatternLock component area, it enters the input state, and when the finger leaves the screen, it ends the input state to complete password input.
interface [code] PatternLock(controller?: PatternLockController) [/code] controller: Set the PatternLock component controller, which can be used to control component state reset. PatternLockController: The controller of the PatternLock component, which can be used to reset the component state.
Component Properties [code] .sideLength(value: Length) //Set the width and height of the component (with the same width and height). When set to 0 or negative, the component does not display. .circleRadius(value: Length) //Set the radius of the circular dots in the grid. When set to 0 or negative, take the default value. .backgroundColor(value: ResourceColor) //Set the background color. .regularColor(value: ResourceColor) //Set the fill color of the grid dots in the "unselected" state. .selectedColor(value: ResourceColor) //Set the fill color of the grid dots in the "selected" state. .activeColor(value: ResourceColor) //Set the fill color of the grid dot in the "activated" state, where the finger passes through the dot but has not yet been selected. [/code]
Component Events [code] .onPatternComplete(callback: (input: Array) => void)//This callback is triggered when the password input is completed. [/code] input:An array of numbers in the same order as the selected grid dots, with the numbers being the index values of the selected grid dots (the first row of dots from left to right are 0, 1, and 2, the second row of dots is 3, 4, and 5, and the third row of dots is 6, 7, and 8). [code] .onDotConnect(callback: Callback) //When the password is entered and the grid dot is selected, this callback is triggered. [/code] The callback parameter is the number in the order of the selected grid dots, which is the index value of the selected grid dots (the first row of dots from left to right are 0, 1, 2, the second row of dots is 3, 4, 5, and the third row of dots is 6, 7, 8).
Actual combat: PatternLockPage [code] import { LengthUnit } from '@kit.ArkUI'
@Entry @Component struct PatternLockPage { @State passwords: Number[] = [] @State message: string = '请设置图案密码' private patternLockController: PatternLockController = new PatternLockController()
build() { Column() { Text('PatternLock实战练习') Text(this.message).textAlign(TextAlign.Center).margin(20).fontSize(20) PatternLock(this.patternLockController) .sideLength(200) .circleRadius(9) .pathStrokeWidth(5) .activeColor('#707070') .selectedColor('#707070') .pathColor('#707070') .backgroundColor('#F5F5F5') .autoReset(true) .activateCircleStyle({ color: '#707070', radius: { value: 16, unit: LengthUnit.VP }, enableWaveEffect: true }) .onDotConnect((index: number) => { console.log("onDotConnect index: " + index) }) .onPatternComplete((input: Array) => { // 输入的密码长度小于5时,提示重新输入 if (input.length < 5) { this.message = '至少要连接五个点' return } // 判断密码长度是否大于0 if (this.passwords.length > 0) { // 判断两次输入的密码是否相同,相同则提示密码设置成功,否则提示重新输入 if (this.passwords.toString() === input.toString()) { this.passwords = input this.message = '设置密码成功:' + this.passwords.toString() this.patternLockController.setChallengeResult(PatternLockChallengeResult.CORRECT) } else { this.message = '两次密码不一致,请重试' this.patternLockController.setChallengeResult(PatternLockChallengeResult.WRONG) } } else { // 提示第二次输入密码 this.passwords = input this.message = "请再次设置密码" } }) Button('重置密码').margin(30).onClick(() => { // 重置密码锁 this.patternLockController.reset() this.passwords = [] this.message = '请设置密码' }) }.width('100%').height('100%') } } [/code]
0 notes
Text
실시간으로 업데이트되는 사이버 범죄 통계
서론
사이버 범죄는 현대 사회에서 날로 증가하는 문제입니다. 기술의 발전과 더불어 사이버 범죄의 형태도 다양해지고 있으며, 이에 따라 실시간으로 업데이트되는 사이버 범죄 통계에 대한 필요성이 점점 더 커지고 있습니다. 이 글에서는 최신 사이버 범죄 통계를 분석하고, 특히 몸캠사기와 같은 주�� 범죄 몸캠피싱 유형에 대해 심층적으로 살펴보겠습니다.
실시간으로 업데이트되는 사이버 범죄 통계
사이버 범죄는 단순한 해킹을 넘어 다양한 형태의 사기, 데이터 유출, 그리고 개인 정보 침해를 포함합니다. 매년 수많은 사람들이 피해를 당하며, 그 수치는 갈수록 증가하고 있습니다. 최근 발표된 보고서에 따르면, 2023년에는 전 세계적으로 약 4억 건 이상의 사이버 공격이 발생했습니다. 이는 이전 연도 대비 약 30% 증가한 수치입니다.
사이버 범죄의 정의와 유형 해킹: 시스템이나 네트워크에 무단 접근하여 데이터를 탈취하거나 손상시키는 행위. 피싱: 사용자로 하여금 개인 정보를 입력���도록 유도하는 사기 행위. 몸캠사기: 피해자가 노출된 사진이나 영상을 사용하여 금전을 요구하는 사기. 랜섬웨어: 데이터를 암호화하여 접근을 차단하고 몸값을 요구하는 악성 프로그램. 사이버 범죄 통계 데이터 출처
다양한 기관에서 사이버 범죄 통계를 제공합니다. 여기에는 정부 기관, 보안 회사 및 연구소 등이 포함됩니다. 이러한 데이터는 정책 결정과 예방 대책 마련에 중요한 역할을 합니다.
주요 데이터 출처 국제 경찰 조직 INTERPOL 미국 연방 수사국 FBI 한국인터넷진흥원 KISA 2023년 사이버 범죄 통계 현황 전 세계적인 사이버 공격 현황
2023년에 들어서면서 전 세계적으로 발생한 사이버 공격의 수가 급증하고 있습니다. 특히 기업과 정부 기관이 주요 타겟이 되고 있으며, 이로 인해 막대한 경제적 손실이 발생하고 있습니다.
주요 국가별 사이버 공격 통계
| 국가 | 공격 건수 | 피해 규모 (USD) | |------------|-------------|------------------| | 미국 | 1억 건 이상 | 200억 달러 이상 | | 한국 | 5천만 건 | 10억 달러 이상 | | 일본 | 4천만 건 | 8억 달러 이상 |
몸캠사기 발생 현황
특히 눈여겨봐야 할 점은 몸캠사기의 급증입니다. 많은 피해자들이 자신의 민감한 정보가 노출될까 두려워 신고를 주저하는 경우가 많습니다.
몸캠사기 통계 요약 2022년 대비 몸캠사기 사건이 50% 증가함. 평균 피해 금액: 약 500만 원. 한국 내 사이버 범죄 동향 한국에서의 사이버 범죄 유형별 비율
한국에서도 다양한 형태의 사이버 범 crime이 발생하고 있으며, 그 중에서도 피싱과 몸캠사기가 큰 비중을 차지하고 있습니다.
범죄 유형 비율 그래프
var ctx = document.getElementById('crimeChart').getContext('2d'); var crimeChart = new Chart(ctx, type: 'pie', data: labels: ['피싱', '몸캠사기', '해킹', '랜섬웨어'], datasets: [ data: [40, 25, 20, 15], backgroundColor: ['red', 'blue', 'green', 'yellow'] ] ); 피해자의 연령대 분석
연령대별로 보면 젊은 층 특히 20대와 30대가 가장 많은 피해를 보고 있으며, 이는 인터넷 사용 빈도가 높기 때문입니다.
각종 사이버 범 crime 예방 팁 개인 정보 보호 방법 강력한 패스워드 사용 정기적인 소프트웨어 업데이트 의심스러운 이메일 열지 않기 몸캠사기에 주의하기 위한 팁 친숙하지 않은 사람과 영상통화를 삼가세요. 상대방에게 신뢰할 수 있는 인증 방법 요청하기. 의심스러운 상황에서는 즉시 종료하세요. 정부 및 기업의 대응 방안 정부의 정책 및 법률 강화
한국 정부는 최근 몇 년간 사이버 범 crime에 대한 법률을 강화하고 있으며, 이를 통해 피해��를 보호하려고 노력하고 있습니다.
주요 법률 개정 사항 개인정보 보호법 강화 전자상거래법 수정 기업의 보안 대책 강화 필요성
기업들도 내부 보안을 더욱 철저히 해야 합니다. 보안 교육 프로그램을 운영하거나 최신 보안 솔루션 도입이 필수적입니다.
FAQs Q1: 몸캠사기를 피하려면 어떻게 해야 하나요?
A1: 신뢰할 수 없는 사람과 영상통화를 하지 않고, 만약 의심스러운 상황이 생긴다면 즉시 대화를 종료해야 합니다.
Q2: 최근 가장 많이 발생하는 사이버 범 crime은 무엇인가요?
A2: 현재 피싱과 몸캠사기가 가장 많이 발생하는 주요 범 crime으로 알려져 있습니다.
Q3: 정부는 어떤 조치를 취하고 있나요?
A3: 정부는 관련 법률을 강화하고 피해자 보호 프로그램을 운영하며 예방 교육을 실시하고 있습니다.
Q4: 개인 정보 유출 시 어떻
0 notes
Note
https://image.spreadshirtmedia.com/image-server/v1/products/T210A1PA4301PT17X61Y37D1021011965W20831H24997/views/1,width=1200,height=630,appearanceId=1,backgroundColor=F2F2F2,modelId=1543,crop=design/your-boyfriend-my-boyfriend-funny-work-out-mens-t-shirt.jpg
Opinion on this image..?
[lol silly shirt]
0 notes
Text
26.4 JavaScript 객체 디스트럭처링
JavaScript 객체 디스트럭처링 JavaScript 객체 디스트럭처링(Destructuring)은 객체 속성을 쉽게 추출하고 변수를 할당할 수 있는 편리한 방법입니다. 이는 코드의 가독성을 높이고, 데이터를 보다 쉽게 다룰 수 있게 해줍니다. 이번 포스팅에서는 객체 디스트럭처링의 기본적인 사용 방법과 다양한 활용 사례에 대해 자세��� 설명하겠습니다. 기본 문법 객체 디스트럭처링은 중괄호 {} 안에 객체의 속성 이름을 넣어 해당 속성의 값을 변수로 추출합니다. const person = { name: 'John', age: 30, city: 'New York' }; const { name, age, city } = person; console.log(name); // John console.log(age); // 30 console.log(city); // New York 변수 이름 변경 디스트럭처링을 할 때 변수 이름을 변경할 수도 있습니다. 콜론 :을 사용하여 객체 속성 이름과 변수 이름을 매핑할 수 있습니다. const person = { name: 'John', age: 30, city: 'New York' }; const { name: personName, age: personAge, city: personCity } = person; console.log(personName); // John console.log(personAge); // 30 console.log(personCity); // New York 기본값 설정 해당 속성이 객체에 없을 경우 기본값을 설정할 수도 있습니다. const person = { name: 'John', age: 30 }; const { name, age, city = 'Unknown' } = person; console.log(city); // Unknown 중첩 객체 디스트럭처링 중첩된 객체 속성을 디스트럭처링할 수도 있습니다. const person = { name: 'John', age: 30, address: { city: 'New York', zipcode: 10001 } }; const { name, address: { city, zipcode } } = person; console.log(city); // New York console.log(zipcode); // 10001 나머지 속성 가져오기 디스트럭처링을 할 때 특정 속성만 제외하고 나머지 속성을 가져올 수도 있습니다. const person = { name: 'John', age: 30, city: 'New York' }; const { name, ...rest } = person; console.log(name); // John console.log(rest); // { age: 30, city: 'New York' } 함수 매개변수에서의 디스트럭처링 함수의 매개변수로 객체를 전달할 때도 디스트럭처링을 사용할 수 있습니다. function printPerson({ name, age, city }) { console.log(`Name: ${name}, Age: ${age}, City: ${city}`); } const person = { name: 'John', age: 30, city: 'New York' }; printPerson(person); // Name: John, Age: 30, City: New York 예제 종합 위에서 배운 내용을 종합하여 예제를 작성해보겠습니다. const book = { title: 'JavaScript: The Good Parts', author: { firstName: 'Douglas', lastName: 'Crockford' }, year: 2008, publisher: 'O'Reilly Media' }; // 중첩 객체 디스트럭처링과 변수 이름 변경 const { title, author: { firstName: authorFirstName, lastName: authorLastName }, year, publisher: bookPublisher = 'Unknown' } = book; console.log(title); // JavaScript: The Good Parts console.log(authorFirstName); // Douglas console.log(authorLastName); // Crockford console.log(year); // 2008 console.log(bookPublisher); // O'Reilly Media 배열 디스트럭처링 객체뿐만 아니라 배열에서도 디스트럭처링을 사용할 수 있습니다. const numbers = ; const = numbers; console.log(first); // 1 console.log(second); // 2 console.log(rest); // 실용적인 예제 디스트럭처링은 실제로 어떻게 사용될 수 있는지에 대한 몇 가지 실용적인 예제를 살펴보겠습니다. API 응답 처리 API로부터 받은 JSON 응답을 처리할 때 유용하게 사용할 수 있습니다. const response = { data: { user: { id: 1, name: 'John Doe', email: '[email protected]' }, status: 'success' } }; const { data: { user: { id, name, email } }, status } = response; console.log(id); // 1 console.log(name); // John Doe console.log(email); // [email protected] console.log(status);// success 설정 객체 함수에 전달되는 설정 객체의 디스트럭처링 예제입니다. function setupCanvas({ width = 600, height = 400, backgroundColor = 'white' } = {}) { console.log(`Width: ${width}, Height: ${height}, BackgroundColor: ${backgroundColor}`); } setupCanvas({ width: 800, height: 600 }); // Width: 800, Height: 600, BackgroundColor: white setupCanvas(); // Width: 600, Height: 400, BackgroundColor: white 파라미터 디폴트 값과 조합 함수의 파라미터 디폴트 값과 디스트럭처링을 조합하여 사용할 수 있습니다. function createUser({ name = 'Anonymous', age = 0, isActive = false } = {}) { console.log(`Name: ${name}, Age: ${age}, Active: ${isActive}`); } createUser({ name: 'Alice', age: 25 }); // Name: Alice, Age: 25, Active: false createUser(); // Name: Anonymous, Age: 0, Active: false 결론 JavaScript 객체 디스트럭처링은 다양한 상황에서 유용하게 사용할 수 있는 강력한 기능입니다. 이를 활용하면 코드의 가독성과 유지보수성을 크게 향상시킬 수 있습니다. 이번 포스팅에서 소개한 다양한 예제를 통해 객체 디스트럭처링을 보다 효과적으로 활용할 수 있기를 바랍니다. Read the full article
0 notes
Text

This textdesign is for sale on TeePublic! Other sorts and backgroundcolors can be chosen :)
0 notes
Text
ISSUU reader embeds, follow the link below to see the full pdf of the magazine: https://e.issuu.com/embed.html?backgroundColor=%23bdaaad&d=spot37_by_cfa_press&doAutoflipPages=true&u=circlefoundationforthearts
Circle Arts Spotlight Magazine.
I have 4 pages, two spreads:
0 notes
Text
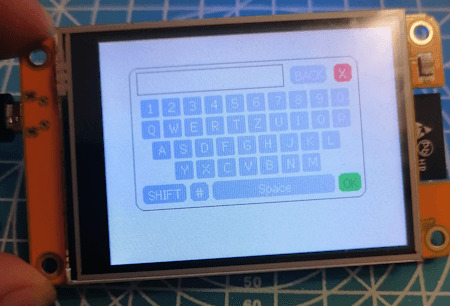
ESP32 & Touchscreen - Bildschirmtastatur programmieren

Auf dem ESP32 mit Touchscreen kannst du nicht nur geometrische Figuren zeichnen, sondern mit etwas Geschick und Zeit auch Dashboards. In diesem Beitrag möchte ich dir daher nun zeigen, wie eine Bildschirmtastatur programmiert wird. https://youtu.be/oQ_NSk1W470 Die hier vorgestellte Bildschirmtastatur wird in einem weiteren Beitrag benötigt, jedoch finde ich das es ein Eigner Beitrag wert ist, weil dieses kleine Feature kannst du für viele Anwendungsfälle verwenden.
Wie soll die Bildschirmtastatur am ESP32 mit Touchscreen aussehen?
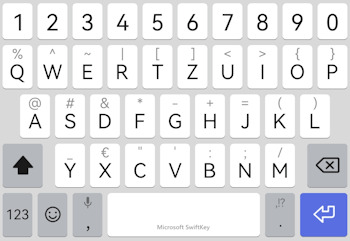
Eine Bildschirmtastatur kennst du bestimmt schon von deinem Handy und genau von dort nehme ich mir eine Vorlage. Aus dieser Vorlage streiche ich jedoch die Funktion für die Smileys und füge für die Sonderzeichen eine zusätzliche Taste ein.
Hier jetzt ein Bild wie das Ergebnis aussieht, wenn du diesen Beitrag durcharbeitest oder dir ganz bequem vom GitHub Repository StefanDraeger / ESP32_Development_Board_ESP32-2432S028R dir den Code herunterlädst und ausführst.
Programmieren der Bildschirmtastatur in der Arduino IDE
Fangen wir jetzt an und programmieren die Bildschirmtastatur. Wie man geometrische Figuren zeichnet und auf ein Touch Event reagiert, habe ich dir bereits in den nachfolgenden Beiträgen gezeigt. - ESP32 Development Board mit 2,8 Zoll Touch Display: Programmieren für Anfänger - ESP32 Development Board: Touchfunktion programmieren Ausgangsstruktur für das Programm Zunächst das kleine Programm, welches wir als Basis nutzen möchten: #define LGFX_USE_V1 #include #include "lgfx_ESP32_2432S028.h" //Größe der Zeichenfläche definieren #define MAX_X 319 #define MAX_Y 239 //Felder für die ermittelte Position //bei einem klick uint16_t x = 0, y = 0; //Instanz des Displays static LGFX lcd; void setup(void) { //beginn der seriellen Kommunikation mit //115200 Baud Serial.begin(115200); //beginn der Kommunikation mit dem Display lcd.init(); //drehen des Displays lcd.setRotation(1); //füllen des Displays mit der Farbe Schwarz lcd.fillScreen(lcd.color332(0,0,0)); //eine kleine Pause von 100ms. delay(100); } void loop() { if (lcd.getTouch(&x, &y) == 1) { if (x > MAX_X || y > MAX_Y) { return; } } //eine Pause von 50 Millisekunden. delay(50); } Zusätzlich benötigst du noch die Datei "lgfx_ESP32_2432S028.h" welche du vom GitHub Repository OttoMeister/ARDUINO_ESP32-2432S028R herunterladen kannst. Nachfolgend eine ZIP-Datei mit dem Code und der benötigten Datei. Grundprogramm - ESP32 Development Board mit TFT TouchdisplayHerunterladen Schritt 1 - Struktur für die GUI Elemente anlegen Zunächst erstellen wir die Strukturen für die Schaltflächen und das Eingabefeld, denn schließlich wollen wir unseren Code effizient und optimiert aufbauen. Auf der Tastatur findest du zwei verschiedene Buttons, zum einen für die Buchstaben, Zahlen und Sonderzeichen sowie die Funktionstasten, Löschen (BACK), Umschalten (SHIFT), Leerzeichen (SPACE), Schließen (X) und OK. Dafür benötigen wir nun zwei Strukturen. Schritt 1.1 - Struktur für die Funktionstasten struct ButtonFunction { uint8_t backgroundcolor; //Hintergrundfarbe uint8_t textcolor; //Textfarbe int coord_x; //X Koordinate der Schaltfläche int coord_y; //Y Koordinate der Schaltfläche int width; //Breite int height; //Höhe int roundEdge; //Wert ffür die Rundung der Ecke String caption; //Text }; Schritt 1.2 - Struktur für die Schaltflächen Buchstaben, Zahlen & Sonderzeichen Die Buttons haben alle eine gleiche Größe & Farbe und daher entfallen hier die Attribute für backgroundcolor, textcolor, width & height. struct Button { int coord_x; //X Koordinate der Schaltfläche int coord_y; //Y Koordinate der Schaltfläche String caption1; //Text normal String caption2; //Text umgeschaltet }; Schritt 1.3 - Struktur für das Eingabefeld Das Eingabefeld hat zusätzlich ein Attribut für eine Rahmenfarbe. struct InputField { uint8_t backgroundcolor; //Hintergrundfarbe uint8_t bordercolor; //Rahmenfarbe uint8_t textcolor; //Textfarbe int coord_x; //X Koordinate int coord_y; //Y Koordinate int width; //Breite int height; //Höhe }; Schritt 2 - Anlegen der Schaltflächen und speichern im Array Wie erwähnt schreiben wir unseren Code optimiert, dazu reduzieren wir Redundanzen im Code, wo es geht. Die Schaltflächen werden dazu gleich im Array erzeugt, was jetzt nicht so gut lesbar ist, aber die Codezeilen reduziert (Die Belegung des Speichers bleibt dieselbe.). Da die Zeilen der Tastatur nicht gleichartig aufgebaut sind, habe ich ein zusätzliches Array implementiert, in welchem die Anzahl der Schaltflächen pro Zeile definiert sind. //Wieviele Schaltflächen sollen pro Zeile angezeigt werden? int rowButtonCount = {10, 10, 9, 7}; //Maximale Anzahl der Schaltflächen pro Zeile const int NUM_BUTTONS = 10; //Anzahl der Zeilen const int NUM_ROWS = 4; Button keyboard = { { { 0, 0, "1", "!" }, { 0, 0, "2", """ }, { 0, 0, "3", ":" }, { 0, 0, "4", "$" }, { 0, 0, "5", "%" }, { 0, 0, "6", "&" }, { 0, 0, "7", "/" }, { 0, 0, "8", "(" }, { 0, 0, "9", ")" }, { 0, 0, "0", "=" } }, { { 0, 0, "Q", "q" }, { 0, 0, "W", "w" }, { 0, 0, "E", "e" }, { 0, 0, "R", "r" }, { 0, 0, "T", "t" }, { 0, 0, "Z", "z" }, { 0, 0, "U", "u" }, { 0, 0, "I", "i" }, { 0, 0, "O", "o" }, { 0, 0, "P", "p" } }, { { 0, 0, "A", "a" }, { 0, 0, "S", "s" }, { 0, 0, "D", "d" }, { 0, 0, "F", "f" }, { 0, 0, "G", "g" }, { 0, 0, "H", "h" }, { 0, 0, "J", "j" }, { 0, 0, "K", "k" }, { 0, 0, "L", "l" } }, { { 0, 0, "Y", "y" }, { 0, 0, "X", "x" }, { 0, 0, "C", "c" }, { 0, 0, "V", "v" }, { 0, 0, "B", "b" }, { 0, 0, "N", "n" }, { 0, 0, "M", "m" }} }; Dasselbe machen wir auch für die Schaltflächen der Sonderzeichen: //Anzahl der Schaltflächen pro Zeile const int NUM_BTN_SYMBOL = 5; //Anzahl der Zeilen const int NUM_BTN_SYMBOL_ROWS = 4; Button symbols = { {{ 0, 0, "+", "" }, { 0, 0, "-", "" }, { 0, 0, "/", "" }, { 0, 0, "#", "" }, { 0, 0, "'", "" }}, {{ 0, 0, "_", "" }, { 0, 0, ".", "" }, { 0, 0, ":", "" }, { 0, 0, ",", "" }, { 0, 0, ";", "" }}, {{ 0, 0, "", "" }, { 0, 0, "|", "" }, { 0, 0, "?", "" }, { 0, 0, "!", "" }}, {{ 0, 0, "{", "" }, { 0, 0, "}", "" }, { 0, 0, "", "" }, { 0, 0, "~", "" }} }; Schritt 3 - Zeichnen der Schaltflächen Die Schaltflächen haben wir zuvor in einem Array abgelegt und den "Style" in einem weiteren Array definiert, mit diesen Informationen läßt sich nun recht einfach die Schaltfläche zeichnen. Wie du sicherlich gesehen hast, sind die Koordinaten jeweils mit 0 vorbelegt, diese Koordinaten werden beim Zeichnen berechnet und an die Schaltfläche gespeichert. //Zeichnen eines Buttons void drawButton(int row, int btnIndex, Button &button, int offset_X) { int x = start_X + offset_X; //Für den ersten Button die Berechnung der neuen X Koordinate überspringen if (btnIndex > 0) { x = start_X + (BTN_WIDTH + BTN_MARGIN_HORIZONTAL) + offset_X; } // Y Koordinate vom durchlauf zuvor verwenden int y = start_Y; lcd.fillRoundRect(x, y, BTN_WIDTH, BTN_HEIGHT, 2, LIGHT_GREY); lcd.setTextColor(WHITE, LIGHT_GREY); lcd.setCursor(x + 7, y + 2); lcd.print(isShiftActive ? button.caption2 : button.caption1); //Speichern der Koordinaten am Button button.coord_x = x; button.coord_y = y; //Speichern der Koordinaten an den Feldern für den nächsten durchlauf start_X = x; start_Y = y; } Die Funktionstasten sind ähnlich, jedoch haben diese zusätzliche Attribute welche behandelt werden müssen. //Zeichnen einer Funktionstaste void drawFunctionButton(ButtonFunction &button) { //Wenn die Shift-Taste oder die Symbol-Taste betätigt wurde, dann soll die jeweilige //Taste mit dunkelgrauem hintergrund dargestellt werden. if ((button.caption == "SHIFT" && isShiftActive) || (button.caption == "#" && isSymbolActive)) { lcd.fillRoundRect(button.coord_x, button.coord_y, button.width, button.height, BTN_ROUNDEDGE, DARKER_GREY); lcd.setTextColor(button.textcolor, button.backgroundcolor); } else { lcd.fillRoundRect(button.coord_x, button.coord_y, button.width, button.height, BTN_ROUNDEDGE, button.backgroundcolor); lcd.setTextColor(button.textcolor, button.backgroundcolor); } //Die Leertaste ist deutlich länger und damit der Text zentriert angezeigt wird, muss hier eine If-Bedingung erfolgen. if (button.caption == "Space") { lcd.setCursor(button.coord_x + 50, button.coord_y + 3); } else { lcd.setCursor(button.coord_x + 6, button.coord_y + 3); } lcd.print(button.caption); } Schritt 4 - Zeichnen des Eingabefeldes Das Eingabefeld ist eigentlich nur ein Rechteck in welchem ein Text geschrieben wird. Daher ist das Zeichnen von diesem recht einfach. void drawInputField(InputField inputField) { lcd.drawRect(inputField.coord_x, inputField.coord_y, inputField.width, inputField.height, inputField.bordercolor); lcd.fillRect(inputField.coord_x + 1, inputField.coord_y + 1, inputField.width - 2, inputField.height - 2, BK_GREY); lcd.setTextColor(inputField.textcolor, inputField.backgroundcolor); lcd.setCursor(inputField.coord_x + 4, inputField.coord_y + 5); int maxTextLength = 15; int textLength = inputText.length(); if (textLength > maxTextLength) { lcd.print(inputText.substring(textLength - maxTextLength, textLength)); } else { lcd.print(inputText); } } Da keine TrueType Font zur Verfügung steht habe ich zur ermittlung der maximalen Eingabe den Buchstaben "W" genutzt, es wurde ermittelt das maximal 15 Zeichen in dieses Eingabefeld passt. struct InputField { uint8_t backgroundcolor; //Hintergrundfarbe uint8_t bordercolor; //Rahmenfarbe uint8_t textcolor; //Textfarbe int coord_x; //X Koordinate int coord_y; //Y Koordinate int width; //Breite int height; //Höhe }; Schritt 5 - Anzeigen / Zeichnen der Bildschirmtastatur Die Funktion showKeyboard wird genutzt um die Bildschirmtastatur zu zeichnen und wird auch aufgerufen wenn die SHIFT / Symbol-Taste betätigt wird. //Zeigt die Bildschirmtastatur an, wird ebenso verwendet um //die Bildschirmtastatur neu zu zeichnen. void showKeyboard() { //Die Bildschirmtastatur ist sichtbar! keyboardIsVisible = true; //Koordinaten der Bildschirmtastatur start_X = DEFAULT_START_X; start_Y = DEFAULT_START_Y; //Hintergrundfarbe lcd.fillScreen(BK_GREY); //Rahmen zeichnen lcd.drawRoundRect(30, 30, 250, 155, 10, DARK_GREY); //Zeichnen der Funktionstasten drawFunctionButton(closeBtn); drawFunctionButton(backBtn); //Wenn die Symbol-Taste aktiviert ist, dann soll //die Shift-Taste nicht gezeichnet werden if (!isSymbolActive) { drawFunctionButton(shiftBtn); } drawFunctionButton(symbolsBtn); drawFunctionButton(spaceBtn); drawFunctionButton(okBtn); //Zeichnen des Eingabefeldes drawInputField(inputField); //Wenn nicht die Symbol-Taste aktiviert ist, //dann soll die normale Tastatur gezeichnet werden. if (!isSymbolActive) { //Schleifen über die Arrays for (int row = 0; row < NUM_ROWS; row++) { start_X = DEFAULT_START_X; //Berechnen der X Koordinate für Zeilen größer als 1 if (row > 0) { start_Y = DEFAULT_START_Y + (row * (BTN_HEIGHT + BTN_MARGIN_VERTIKAL)); } //Schleife über die Schaltflächen im Array, zusätzlich wird hier aus dem Array //rowButtonCount die maximale Anzahl entnommen for (int btnIndex = 0; btnIndex < rowButtonCount; btnIndex++) { int offset_X = 0; //Berechnen eines Offsets if (rowButtonCount < 10 && btnIndex == 0) { //Abhängig von der Anzahl der Schaltflächen soll die Zeile eingerückt werden. switch (rowButtonCount) { case 9: offset_X = BTN_WIDTH / 2; break; case 7: offset_X = BTN_WIDTH * 1.5 + BTN_MARGIN_HORIZONTAL; break; } } //Zeichnen der Bildschirmtastatur drawButton(row, btnIndex, keyboard, offset_X); } } } else { //Wenn die Symbol-Taste aktiviert wurde, dann sollen die Sonderzeichen gezeichnet werden //Die Sonderzeichen sind als Block von 5x4 abgelegt. for (int row = 0; row < NUM_BTN_SYMBOL_ROWS; row++) { start_X = DEFAULT_START_X; if (row > 0) { start_Y = DEFAULT_START_Y + (row * (BTN_HEIGHT + BTN_MARGIN_VERTIKAL)); } for (int btnIndex = 0; btnIndex < NUM_BTN_SYMBOL; btnIndex++) { int offset_X = 0; if (btnIndex == 0) { offset_X = 60; } drawButton(row, btnIndex, symbols, offset_X); } } } } Schritt 6 - Aktionen an der Bildschirmtastatur am ESP32 behandeln Wie man eine Aktion am Touchscreen am ESP32 behandelt habe ich dir bereits im Beitrag ESP32 Development Board: Touchfunktion programmieren erläutert, hier nutzen wir den Code und wandeln diesen lediglich etwas ab. //Aktionen an der Bildschirmtastatur behandeln //Als Parameter werden die geklickten Koordinaten am Display erwartet. void handleKeyboard(int x, int y) { //Felder ob die komplette Bildschirmtastatur neugezeichnet werden soll, oder //nur das Eingabefeld. bool redrawKeyboard = false; bool redrawInputField = false; //prüfen ob die Symbold-Taste aktiviert ist. //Hintergrund: Es wird geprüft ob sich an einer X/Y Koordinate eine Schaltfläche //befindet. Da die Bildschirmtastatur jedoch zweischichtig ist, kommt es hier zu //Überlagerungen von Schaltflächen. if (!isSymbolActive) { for (int row = 0; row < NUM_ROWS; row++) { for (int btnIndex = 0; btnIndex < NUM_BUTTONS; btnIndex++) { Button button = keyboard; if (checkCoordButton(button, x, y)) { redrawInputField = true; addSignToInputField(isShiftActive ? button.caption2 : button.caption1); } } } } else { for (int row = 0; row < NUM_BTN_SYMBOL_ROWS; row++) { for (int btnIndex = 0; btnIndex < NUM_BTN_SYMBOL; btnIndex++) { Button button = symbols; if (checkCoordButton(button, x, y)) { addSignToInputField(button.caption1); redrawInputField = true; } } } } //Prüfen der Funktionstasten if (checkCoordButton(closeBtn, x, y)) { //Hier wird die Schaltfläche X behandelt. } else if (checkCoordButton(shiftBtn, x, y)) { //Wenn die Shift-Taste betätigt wurde dann soll der //boolsche Wert umgekert werden isShiftActive = !isShiftActive; //Auf jedenfall soll dann auch die Symboltaste als deaktiviert gelten isSymbolActive = false; //neuzeichnen der Bildschirmtastatur, entweder werden nun //die kleinen Buchstaben oder die großen angezeigt. redrawKeyboard = true; } else if (checkCoordButton(symbolsBtn, x, y)) { isSymbolActive = !isSymbolActive; isShiftActive = false; redrawKeyboard = true; } else if (checkCoordButton(spaceBtn, x, y)) { //Ein Leerzeichen dem Eingabefeld hinzufügen. addSignToInputField(" "); } else if (checkCoordButton(okBtn, x, y)) { //Hier wird die Schaltfläche OK behandelt. } else if (checkCoordButton(backBtn, x, y)) { //Taste zum löschen des letzten Zeichens im Eingabefeld //Wird jedoch nur ausgehührt wenn die Länge des Feldes größer 0 ist. if (inputText.length() > 0) { inputText = inputText.substring(0, inputText.length() - 1); //nur das Eingabefeld neuzeichnen redrawInputField = true; } } if (redrawKeyboard) { showKeyboard(); } else if (redrawInputField) { drawInputField(inputField); } } Schritt 7 - Einbinden der Bildschirmtastatur in die Loop In der Funktion loop müssen wir nun nurnoch eine kleine If-Bedingung implementieren in welcher zunächst geprüft wird ob die Bildschirmtastatur sichtbar ist und wenn dieses so ist, dann soll der Klick bzw. die Koordinaten ausgewertet werden. void loop() { long currentMillis = millis(); if (lcd.getTouch(&x, &y) == 1 && (lastClick + CLICK_DELAY < currentMillis)) { lastClick = currentMillis; if (x > MAX_X || y > MAX_Y) { return; } //Nur wenn die Bildschirmtastatur sichtbar ist, soll diese behandelt werden. if(keyboardIsVisible){ //Aufrufen der Funktion mit den geklickten Koordinaten. handleKeyboard(x, y); } } //eine Pause von 50 Millisekunden. delay(50); Read the full article
0 notes
Text
MXML nedir ve ne işe yarar? MXML (Macromedia Flex Markup Language), Adobe Flex Framework’ünün bir parçasıdır ve Flex uygulamaları için kullanılan bir XML tabanlı dilidir. MXML, Adobe Flex Builder ve diğer geliştirme araçları ile kullanılarak, zengin internet uygulamaları oluşturulabilir. MXML, geliştiricilere, kullanıcı arayüzü oluşturma, olay yönetimi, veri bağlama ve dinamik içerik eklemeyi sağlayan bir araçtır. Bu sayede, web uygulamalarının geliştirilmesi hızlanır ve daha verimli hale gelir. MXML dosyaları, kullanıcı arayüzlerinin tanımlanmasını sağlayan etiketlerden oluşur. Bu etiketler, bir web uygulamasının nasıl görüneceğini ve nasıl davranacağını belirler. Ayrıca, MXML dosyaları, ActionScript kodları ile birleştirilerek web uygulamasının mantıksal kısmını oluşturur. MXML, Adobe Flex Framework’e entegre edilmiş olması nedeniyle, zengin internet uygulamaları geliştirmek isteyen geliştiriciler tarafından tercih edilmektedir. Bu dil sayesinde, görsel arayüzlerin kolayca tasarlanması, veri bağlama işlemlerinin yapılması ve olay yönetiminin gerçekleştirilmesi mümkün hale gelmektedir. MXML dosyaları nasıl oluşturulur?MXML dosyaları, Adobe Flex Builder veya diğer bir MXML düzenleyicisi kullanılarak oluşturulabilir. Öncelikle, bir MXML dosyası oluşturmak istediğiniz projeyi açın veya yeni bir proje başlatın. Ardından, projenizin içinde yeni bir MXML dosyası oluşturun. Bu dosyayı oluştururken, dosyanın adını ve kaydedileceği yeri belirtmelisiniz. Bu adımları tamamladıktan sonra, oluşturduğunuz MXML dosyasını açarak tasarımını ve içeriğini düzenlemeye başlayabilirsiniz.Bunun yanı sıra, MXML dosyalarını oluşturmak için XML tabanlı bir yapı kullandığı için metin tabanlı bir düzenleyici de kullanabilirsiniz. MXML kodunu elle yazarak, dosyaları istediğiniz gibi özelleştirebilir ve düzenleyebilirsiniz. Bu sayede, daha fazla kontrol ve esneklik elde edebilirsiniz.Ayrıca, MXML dosyalarını oluştururken dikkat etmeniz gereken bir diğer nokta da dosyanın uzantısının .mxml olmasıdır. Bu uzantı sayesinde dosya, MXML düzenleyicileri tarafından tanınır ve düzgün bir şekilde işlenebilir.Son olarak, MXML dosyalarını oluştururken projenizin gereksinimlerine ve tasarım ihtiyaçlarına uygun olarak dosyanın yapısını ve içeriğini planlamanız önemlidir. Bu sayede, projenizdeki MXML dosyalarını verimli bir şekilde kullanabilir ve geliştirebilirsiniz.MXML etiketleri ve özellikleri nelerdir? MXML (Metadata eXtensible Markup Language), Adobe Flex uygulama geliştirme platformunda kullanılan bir XML tabanlı bir dilidir. Bu dil, Flex uygulamalarında kullanılan etiketler ve özellikler ile birlikte kullanıcı arayüzlerinin tanımlanmasını sağlar. MXML'in etiket ve özellikleri, Flex uygulamalarının oluşturulması sürecinde büyük bir öneme sahiptir. MXML etiketleri arasında en yaygın olarak kullanılanlar mx:Application, mx:Canvas, mx:Button, mx:Label, mx:TextInput gibi etiketlerdir. Bu etiketler aracılığıyla kullanıcı arayüzlerinin düzenlenmesi ve eleman eklenmesi mümkün olmaktadır. Bununla birlikte, MXML'in özellikleri de uygulamaların görünüm ve işlevselliğini belirlemede büyük bir rol oynamaktadır. Özellikler arasında id, width, height, backgroundColor, color, fontSize gibi özellikler bulunmaktadır. Bu özellikler aracılığıyla arayüz elemanlarının özellikleri ve davranışları belirlenebilmektedir. MXML etiketleri ve özellikleri, Flex uygulamalarının geliştirilmesi sürecinde geliştiricilere büyük bir esneklik ve kontrol imkanı sağlar. Bu sayede, kullanıcı arayüzlerinin istenilen şekilde tasarlanması ve özelleştirilmesi mümkün hale gelir.MXML ile veri bağlama nasıl yapılır?MXML, veri bağlama işlemini gerçekleştirmek için kullanılan bir XML tabanlı dosya biçimidir. Veri bağlamak, genellikle kullanıcı arayüzü öğeleriyle (UI) veriler arasında ilişki kurma işlemidir. MXML ile veri bağlama yapmak için, öncelikle veriyi görüntüleyecek olan UI elemanını belirlememiz gerekmektedir.Bunun için Binding etiketi kullanılır. Binding etiketi, bir UI öğesine veri eklemek veya veriyi göstermek için kullanılır.
Bu etiket, veri kaynağından gelen değişiklikleri anında UI öğesine yansıtmak için kullanılır.Veri bağlama işlemi sırasında, veri kaynağındaki değişiklikler otomatik olarak UI öğesine aktarılır. Bu, veri güncellendiğinde, UI'nin otomatik olarak güncellenmesini sağlar.MXML ile veri bağlama işlemi, UI öğeleri ve veri kaynaklarını birbirine bağlayarak, veri değişikliklerini otomatik olarak algılamak ve UI öğelerini güncellemek için kullanılır.MXML ile olay yönetimi nasıl gerçekleştirilir?MXML ile olay yönetimi, kullanıcı etkileşimlerini yönetmek için kullanılan bir teknolojidir. Bu etkileşimler, kullanıcının uygulamayla etkileşim kurması sonucu gerçekleşen olaylardır. MXML etiketleri ve özellikleri, bu olayların nasıl gerçekleştirileceğini belirler. Örneğin, bir kullanıcının bir düğmeye tıklaması, bir olayı tetikleyebilir. Bu olayın nasıl yönetileceği, MXML ile belirlenir.MXML dosyaları, olay yönetimini sağlamak için olay dinleyicileri ve olay atıcıları kullanır. Bu mekanizma sayesinde, bir olay gerçekleştiğinde belirli bir işlemi tetikleyebilirsiniz. Örneğin, bir düğmeye tıklandığında bir metin kutusunda belirli bir yazı görünmesini sağlayabilirsiniz. Bu işlevsellik, MXML ile olay yönetimi sayesinde gerçekleştirilir.MXML ile olay yönetimini gerçekleştirmek için, öncelikle olayı tanımlamanız gerekir. Ardından, bu olaya bir dinleyici eklemelisiniz. Dinleyici, olay gerçekleştiğinde tetiklenecek olan işlemi belirler. Son olarak, olayı tetikleyebilecek bir bileşen ekleyerek, olay yönetimini tamamlamış olursunuz.MXML ile olay yönetimi, uygulama geliştiricilerine kullanıcı etkileşimlerini ve olayları kolayca yönetme imkanı sağlar. Bu sayede, kullanıcı deneyimini geliştirmek ve uygulama performansını artırmak mümkün hale gelir. Ancak, kullanıcı etkileşimlerinin karmaşıklığı ve olay sayısının artması durumunda, olay yönetimi daha zor bir hale gelebilir.MXML'in avantajları ve dezavantajları nelerdir?MXML'in avantajları ve dezavantajları nelerdir? MXML, Adobe Flex framework'ünün kullanıldığı bir XML tabanlı bir işaretleme dilidir. Bu dil, Adobe Flex Builder veya diğer geliştirme araçları tarafından derlendiğinde, Flash player tarafından çalıştırılabilen SWF dosyaları oluşturur. MXML'in en büyük avantajlarından biri, zengin kullanıcı arayüzleri oluşturmak için güçlü bir araç olarak kullanılabilmesidir. Bu, geliştiricilerin kolayca kullanıcı dostu ve etkileyici arayüzler tasarlamasına olanak tanır. Bununla birlikte, MXML'in dezavantajlarından biri, XML tabanlı bir dil olması nedeniyle kodun karmaşıklığının artmasıdır. Bu, geliştiricilerin daha karmaşık MXML dosyalarını anlamalarını ve işlemelerini zorlaştırabilir. Ayrıca, MXML dosyaları genellikle tasarımla birlikte bakımı zorlu bir yapının içinde bulundurur ve bu da dezavantaj olarak kabul edilebilir. Bununla birlikte, MXML ile veri bağlama ve olay yönetimi kolaylaştırılabilir. Veri bağlama, kullanıcı arayüzündeki değişikliklerin otomatik olarak veri modelinde yansıtılmasını sağlar. Aynı şekilde, olay yönetimi, kullanıcı etkileşimlerini ve uygulama etkinliklerini dinlemek ve işlemek için kullanılır. Genel olarak, MXML'in avantajlarının dezavantajlarından daha fazla olduğunu söylemek mümkündür. Bu, Adobe Flex framework'ünün gücünü ve esnekliğini gösterir, ancak geliştiricilerin MXML'in karmaşık yapısını anlamaları gerektiğini unutmamak gerekir.
0 notes
Text
Protótipo de Interface ARINC 661 com suporte a Hotfix XML
WPT: XXXXX <!-- Indicador de Velocidade --> <Label id="LBL_SPD" x="50" y="150" width="200" height="40" font="Standard" textColor="#00FF00" backgroundColor="#000000"> <Text>SPD: 250 KT</Text> </Label> <!-- Indicador de Heading --> <Label id="LBL_HDG" x="50" y="200" width="200" height="40" font="Standard" textColor="#00FFFF" backgroundColor="#000000"> <Text>HDG: 135°</Text> </Label> </Window>
HF-2025-ND-V1 ND_DISPLAY_MODULE SHA3-512:0x9a3f…23ab Equipe EMB-Delta 2025-05-28T10:30:00Z Low
onDataMismatch HF-2025-ND-V0
true /var/log/arinc661_patchlog.nd enabled
0 notes