#But some of the highlights and textures of blended areas are unusual
Text
IKEA Custom Cabinet Doors Can Transform Your Kitchen

IKEA has been a go-to choice for households all over the world when it comes to designing a fashionable and efficient kitchen. IKEA is a popular destination for all things home decor due to their unique designs, low prices, and simple-to-assemble furniture. The IKEA kitchen line, which comprises a wide choice of kitchen cabinets and accessories, is one of their most popular items. Consider updating your IKEA cabinets with custom cabinet doors if you want to take your kitchen to the next level. In this blog, we'll look at the advantages of adopting bespoke doors for IKEA cabinets, as well as the various varieties available to suit your taste.
Why Should You Choose Custom Cabinet Doors for IKEA Kitchen Cabinets?
While IKEA has a wide range of cabinet door types and finishes, choosing custom cabinet doors can open up a world of possibilities. Here are some compelling reasons to think about upgrading:
Custom cabinet doors allow you to personalize your kitchen to fit your distinct taste. You may get custom doors that precisely match your concept, whether you like a contemporary, modern, or historic style.
High-Quality Materials: When you order bespoke doors, you have the option of using higher-quality materials than what comes standard with IKEA kitchen cabinets. This might contribute to improved resilience and longevity in the design of your kitchen.
Unrivalled Aesthetics: While IKEA's in-house designs are fashionable, custom cabinet doors often have a more sophisticated and distinct appearance. To get the style you want, you can choose from a variety of colours, treatments, and textures.
Increased Functionality: Custom doors can be designed to satisfy specific functional requirements. To create visually appealing focus areas, for example, you can combine unusual storage solutions, integrated handles, or even a blend of materials.
Custom Cabinet Door Styles for IKEA Cabinets

There are numerous IKEA custom cabinet door styles to choose from, and we'll highlight some of the more common options below:
Slab Doors: Slab doors are elegant, simple, and contemporary. They have flat, unadorned surfaces that give your kitchen a minimalist and contemporary feel. Slab doors look great in modern and Scandinavian-inspired kitchen designs.
Shaker Doors: Because Shaker doors are ageless and flexible, they are a popular choice for a variety of kitchen types. They are made of five pieces and have a recessed centre panel and elegant lines. Shaker doors can be designed to have either a traditional or a transitional appearance.
Slim Shaker Cabinet Doors: Slim shaker cabinet doors provide a more refined look to those looking for a slight twist on the standard shaker style. They have thinner stiles and rails, resulting in a more refined and updated version of the original shaker style.
Selecting the Best Custom Cabinet Doors
Keep the following tips in mind when choosing custom doors for your IKEA cabinets:
Take into account the general style of your IKEA kitchen. For a unified and harmonious aesthetic, make sure the custom doors you choose compliment other features like as worktops, backsplashes, and flooring.
Material Selection: Investigate various materials such as solid wood, MDF (Medium-Density Fiberboard), thermofoil, and laminate. Each material has advantages and disadvantages, so choose one that fits your lifestyle and budget.
Hardware and Accessories: Choose hardware and accessories that compliment your custom cabinet doors. Handles, knobs, and pulls can have a big impact on the overall look of your kitchen.
Conclusion
Upgrading your IKEA kitchen cabinets with bespoke cabinet doors is an excellent way to improve the beauty and usefulness of your kitchen. Custom doors' customisation choices, high-quality materials, and unrivalled beauty ensure that your kitchen stands out as a true representation of your taste and lifestyle. Whether you prefer the sleekness of slab doors or the timeless appeal of shaker doors, the appropriate bespoke slim shaker cabinet doors will definitely enhance your IKEA kitchen and turn it into the centre of your house for years to come.
#Ikea#IKEA kitchen#kitchen cabinet#cabinet doors#doors for ikea cabinets#ikea cabinet#slab doors#shaker doors#slim shaker cabinet door#ikea custom cabinet
0 notes
Photo
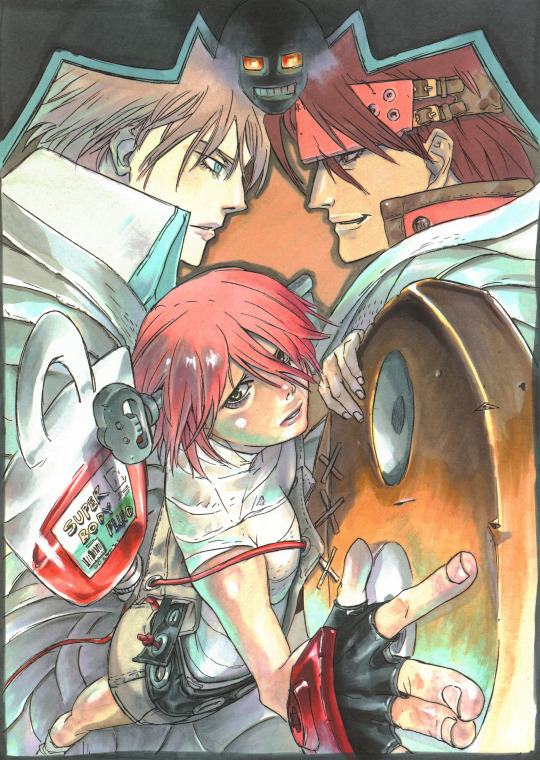


Damn it! A.B.A. is getting more and more girly! Among my other regrets, I remember a fangirl asking me, “Why did you make Ky’s cheeks so blushed?” and at the time I quickly answered, "Because I wanted to.” But that's incorrect, and the real answer is because Ky was still a young kid at the time. The colors just didn't blend nicely, ugh! Coloring is so difficult, isn't it?
Cover for the Japanese release of Guilty Gear Isuka on the PlayStation 2. Scan and caption from Artworks of Guilty Gear X 2000-2007 by Daisuke Ishiwatari.
#guilty gear#guilty gear isuka#daisuke ishiwatari#playstation#playstation 2#fgc#sol badguy#order sol#ky kiske#aba guilty gea#a.b.a.#my scans#my translations#guilty gear scans#This is a rare one where I can't actually tell with confidence what media Daisuke used for it#He definitely did the usual penciled work scanned and then printed out after being sharpened/cleaned digitally technique he used back then#But some of the highlights and textures of blended areas are unusual#It almost looks like watercolors or extremely diluted acrylic/gouache paint#Though some of the more saturated sections like the outline between Sol and Ky's faces look like markers#I know he uses correction fluid and sometimes colored pencils in his marker work#So I wonder if the base of this is in markers and he diluted the correction fluid for the unusual highlights on Paracelsus and the faces?#The tumblr compression might conceal it but you can make out some colored pencil texture at the bottom right of-#Paracelsus' head and it looks like a bit in the Robo-Ky motif at the top too where it blends into Ky/Sol's heads#Hmmm... I'm betting on the markers with diluted correction fluid#Something else that's interesting about this illustration is that you can see the back part of Sol's headband too#Usually it's covered by his hair but in a handful of these GGX/GGXX illustrations you can see it#I like to imagine that my art professors would be so disappointed in me for using my half-baked fine arts degree on analyzing-#-obscure Japanese fighting game illustrations hahahah
301 notes
·
View notes
Text
The Wands of Fantastic Beasts
So this is very different from what I normally post. I hope y’all enjoy and if you agree or disagree, I would love to hear what you have to say. This post is long and very picture heavy so I will continue below the cut.
Let me say that I think most of these wands are actually well executed individually, and I think the team who designed and made these wands is very talented. That being said, some have large flaws and when seen as a collection, they feel very lazy, especially the wands from the second movie. I am aware of three other wands (Bunty’s, one labled “Auror’s wand” and a purplish wand). However, I was unable to find good pictures or other reviews online, so I was forced to exclude them.
1) Tina’s Wand
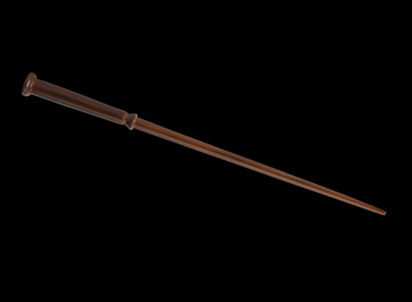
Tina’s wand features a well-defined handle and cleanly tapered shaft. It has very plain lines, and primarily adds visual interest with the grain and mild color variation. This wand is somewhat unusual because it is not in the Art Deco style. However, this works because Tina has a no nonsense, no frills approach to life, and this wand reflects that. The simple and clean lines speak to practical mind and an appreciation of a quiet beauty, much like Tina herself. This wand is my favorite because it really does reflect its master and its understated beauty.
2) Bernadette’s Wand

Bernadette has a pale wand with a nodular shaft/handle and an offset pommel that has been carved into a face. Frankly, this wand is great. The detailed carving and the pale color make it stand out. I have seen the face described as either a mummy’s face or a faun’s. In either case, it is a unique and somewhat bold choice that I think paid off. That being said, I personally find the face a little creepy which is why Tina’s wand is Number 1.
3) Rosier’s Wand

Vinda Rosier wields a rather neutral looking wand. The wand is a rich, dark brown wood with reddish tones that become more pronounced towards mid shaft before fading into dark brown at the tip. The wand itself is made of several elongated ovals separated by smooth dips.
While I do not like silhouette of this wand, I think the color is lovely, and I applaud the designers for not giving a dark looking wand to a dark character.
7) Skender’s Wand
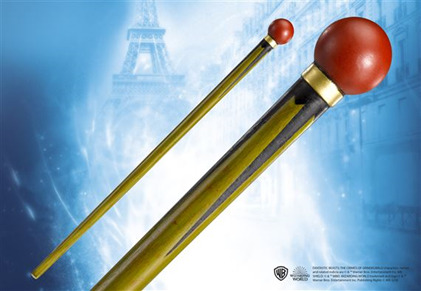
Skender’s wand has a ball pommel and a minimally tapered shaft with a thick square tip. The two sections are joined by a gold band. What really stands out on this wand is the color: the shaft is a yellowy olive with pointed black striping and the pommel is bright red. The simple design really lets the colors be the stand out feature on this wand.
8) Spielman’s Wand

Spielman has a somewhat unusual square cross section wand. The shaft is a clean black taper. This simplicity forms a sharp contrast with the detailed off-white and silver handle. The pommel is a heavy silver thing with two meander/Greek key borders. A meander is also used to decorate the small silver cross guard. The bulk of the bone/ivory(?) handle is divided into four sections by three silver bands. All of these sections have a small silver stud on each face.
This wand is very well designed. The colors complement each other, and the meander is expertly used to highlight the square cross section. I like playing with the cross sections on wands, so seeing a well-executed square one is nice. That being said, I do think some decoration on the plain shaft would balance out the rich handle.
9) Leta’s Wand

Leta uses slender black and silver wand. The handle features two wide silver bands both covered with delicate, hammered scroll work. The remainder of the handle is made of an elegant, multi strand twist. The shaft is long and quite thin, giving the wand a unique silhouette.
This wand is well designed. It is feminine and classy, but not overstated.
10) Percival Graves’ Wand

Perceval Graves has a deceptively simple wand. The glossy black shaft is separated from the handle by a thin silver ring. The silver pommel resembles an inverted rook, and is joined to the handle by a thinner silver rod.
I think this is a well-designed wand, and while I am generally not a fan of wands with lots of metal, I think it works in this case. Part of this comes from the wand echoing some of the more futuristic Art Deco schools, and part come from the black and silver color scheme. In the first series black and silver wands were rare, so this wand stood out because of the unusual colors. However, black and silver wands have become more common and robbed this wand of some of its uniqueness.
11) Abernathy’s Wand

Abernathy’s wand features a black handle with an asymmetric spiral and a large ¾ ball pommel. A silver band separates the handle from the plain, medium brown shaft.
I think this is serviceable wand. I like the asymmetrical twist, and think it goes nicely with the pommel. However, while the colors do complement each other, the shaft is very plain, and almost looks like it was made from a different material from the handle, though it is possible that the handle was painted.
12) Yusuf Kama’s Wand

Yusuf Kama’s wand shares a similar color palette with Abernathy’s: the shaft is slightly darker and there is a touch more silver. The additional silver comes in the form of a broad pommel cap that has a slightly pitted finish. From here, the wand flows into a slim handle with two raised rings marking the middle. The silver cross guard slightly tapers to the shaft. While most lines on this wand (the grooves, rings and color transitions) run perpendicular to the wand, the cross guard has some delicate fluting that lies parallel to the wand. While subtle, this does serve to make that element the focal point of the wand.
I like the fluting on the cross guard, and overall, think the wand is generally fine, even if the shaft is a tad plain.
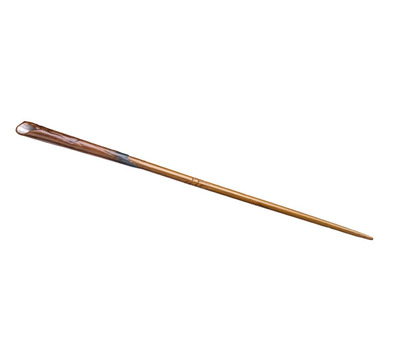
13) Theseus’s Wand

Theseus Scamander’s wand has a simple, gently tapered silhouette, and a plain warm toned wooden shaft. The shaft contrasts nicely with the rich gold and tortoise shell handle.
I like the similarities in the Scamander brother’s wands: both are simple baton style with shell accents. In Theseus’ case the similarities have all been polished and the wand looks like it belongs to a member of the British upper class. That being said, this wand really does feel like a non-wood handle was added to the wand.
14) Newt’s Wand
Newt’s wand is a simple baton, with a rustic, well used finish. The darker handle is separated from the shaft by a blueish band. The wand has a hollow pommel lined with mother of pearl.
I do not like the hollow pommel, as that is a weak spot, susceptible to breaking, and it will get filled with dirt, water, and other debris. I know that the designers wanted a natural look, with animal elements, but I think they tried too hard and it shows.
15) Queenie’s Wand

Queenie’s is mostly a slim black shaft. The visual interesting parts are located in the elongated two-part pommel. The first part is bright gold, miter-eques band that is decorated with an incised banner pattern. The band grips a mother of pearl column which cumulates in a delicate shell. When seen in a void, this wand is incredibly Art Deco, both in materials and motifs.
I have read that this wand was supposed to be “sexy”, but I personally don’t see it. I question the inclusion of that much shell, which would be fragile and likely to break (although if this is painted wood, I applaud the skill that went into the carving and painting.). I also think too much emphasis is put in the pommel/handle to the detriment of the shaft. Part of Art Deco is showing of the richness, and if in every day use all you can see it the very plain shaft, it kind of fails as an Art Deco piece.
16) Flamel’s Wand

Flamel uses a very plain brown wand. Much like Queenie’s, the plain shaft makes up most of the wand. The handle/pommel is made from a slightly curved horn. The horn is joined to the shaft by an aged gold band that has a slightly raised, swirling pattern.
I am very, very, disappointed with this design. Flamel is ancient and you would think his wand would have a radically different look. Instead with the very plain shaft and fancy handle, this wand fits in with the modern wands in the rest of the collection. I would expect this wand to have significant gothic influence, with intricate, allegorical scenes, lots of fine details, and, possibly, painted areas to mimic stained glass.
17) Albus Dumbledore’s Wand

Dumbledore uses a black and silver wand. It features a broadly flared silver pommel that flows into the black handle. The handle is joined to the shaft by a broad silver band etched with runes. Just distal to this band is a delicate three-part hollow twist, smooth in the outside, yet rough on the inside. This then blends smoothly into the rest of the shaft.
This wand is visually interesting. But I have serious issues with the hollow twist. The location is where you would expect the most stress to be if you hit something while holding the wand, and with that area weakened, where you would expect the wand to snap. Additionally, how does the core run through that section?
18) Seraphina Picquery’s Wand

Seraphina uses a wand with a large amethyst crystal handle that draws most of the attention. The crystal is griped by a delicate silver cage which joins it to the shaft. The wood shaft is a very simple dark brown baton. Overall the color plate work’s well, and the silver cages serves as a textural focus point, with both the crystal and wood having almost no texture.
While this wand does preserve the Art Deco feel, the large crystal looks like it belongs on a high fantasy fairy wand or a Wiccan wand rather than a Harry Potter wand. Additionally, the crystal is clearly grafted onto wood shaft, which raises questions about how the wand was originally constructed. Were the crystal and silver handle originally part of the wand? If so what was the cost of the wand? Was it added later, and how did that change the balance of the wand? To my mind, this wand is the epitome of an overly extravagant, inorganic handle grafted onto a very, very plain wooden shaft.
Overall thoughts:
Let me be clear, I think the props designers are fantastically talented, and by and large most of these wands are individually very well done. And there are some fantastic wands and some really awful ones. However, when you look at the overall collection it feels…lazy and over decorated.
Art Deco was clearly a major inspiration for the wands. I have also read that the design team wanted to go in a different direction, and separate these wands from those in the original series. And I think both ideas are good: it’s a different time, and Art Deco really is big at this point. But I think they got too wrapped up in the new, Art Deco direction and failed to adhere to the basics, both in wand design and in Art Deco.
Too many of the wands look like they are plain batons grafted onto decorative handles. While there is nothing wrong with having a plain shaft, and most wands will have a plain shaft, here it is taken to an extreme. Queenie, Picquery, Theseus, Speilman, Leta, and to a lesser extent Flamel, all have very rich, extremely detailed handles, that often seem to be made of non-wood materials. These handles stand in stark contrast to the shafts, all of which are very plain, and few have any notable grain. This contrast sharply with the books, in which wands are wood and the original series, where non wood accents are used sparingly. These new wands with their large non wood sections are a substantial reversal from the wood wands of both movie and book cannon. Secondly, as I noted for Queenie’s wand, part of Art Deco is showing off the rich exotic materials you are using. While these wands undoubtably have such materials used in their construction, they are exclusively confined to the handle which is covered in normal use. This means what you see most of the time, is a plain shaft, which really isn’t Art Deco.
The color palate is somewhat condensed, and this detrimental the Art Deco theme. A third of the wands use black and silver. This combination is very classy and elegant, but it is overdone. Before black and silver wands were unique, and stood out: now it is common, and slightly cheap. Wood comes in a staggering array of colors, and this collection does not reflect that. There are a myriad shades of brown, cream, tan and colors beyond that too. There is Padauk, Redheart, Redwood, Bloodwood, (all varying shades of red) Canarywood (gold and brown striped), Yellowheart (bright yellow), Osage Orange (orange), Purpleheart (purple), Pink Ivory (ranges from a pale pink to watermelon red), Lignum Vitae and Sassafras (both are often an olive green), and Holly (one of, if not the, whitest wood). And then there is grain. Black and White ebony is noted for its striking black and white stripping. Ziricote is valued for it’s beautiful landscape like grain, and the cream and chocolate stripping of zebra wood is always stunning. Spalting adds unique patterns and colors, while figured grain is not uncommon and can and an extra bit of oomph to another wise simple design. Using some of the above mentioned could have contributed that richness in the Art Deco style and added more variation.
There is also a huge missed opportunity here to show how different countries and wandmakers have different styles. There are American, British, German, and French wands here, but there is no real difference in the style, with the exception of Bernadette’s. We get a glimpse of this in the original series, with both Gregorovitch wands having a strong organic aesthetic (one can also include Grindelwald’s original wand in this group, as he appears to come from the same region). Unfortunately, this does not carry over into this series.
Sources:
http://cdn.shopify.com/s/files/1/0221/1146/products/Porpentina_Goldstein_Collectable_Wand_2_grande.png?v=1532942253
https://ae01.alicdn.com/kf/HTB12FqqSVXXXXXEXVXXq6xXFXXXY/Newest-Metal-Core-Deluxe-Harry-Potter-Fantestic-Where-to-find-Bernadette-Magic-Wands-Stick-with-Gift.jpg_640x640.jpg
https://www.youtube.com/watch?v=CpBiah84Xy4&t=429s (a very different take on these wands, that I would suggest watching, to get another view point)
http://www.thedailyowl.gr/wp-content/uploads/2018/10/vinda-rosier-wand.jpg
https://www.wbshop.com/collections/fantastic-beasts-wands
https://www.noblecollection.com/Fantastic-Beasts-Wands
15 notes
·
View notes
Text
Creating My Own Collage
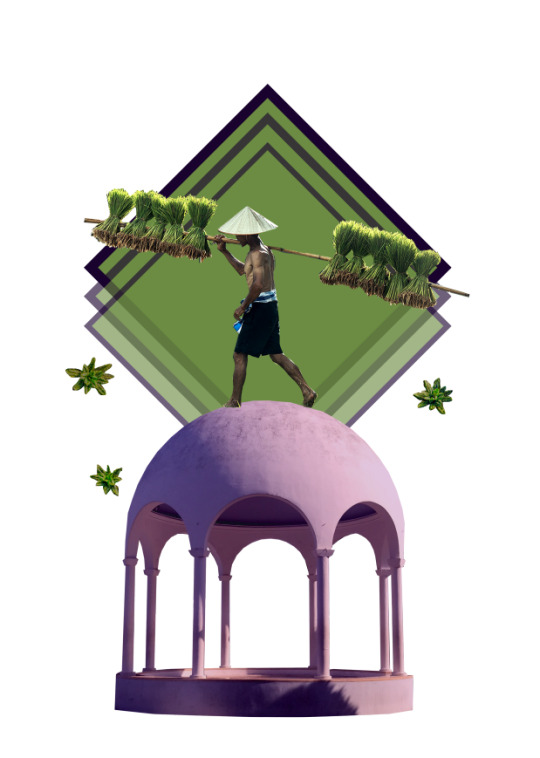
Here, I will now be creating my first collage inspired by Zerka’s work that I have previously looked at. I am hoping my own piece will incorporate some elements from his work but I will also go my own direction too. To produce it, I will have to use all the skills I already know and maybe even some new ones along the way too. Additionally, I will be relating these collages to my theme of palm oil, to try and get a message across to the viewers of the effects. As well as this, I will use Photoshop to do this task.
Below, I started by bringing this image over to Photoshop, to which I got it from my own camera roll. I have mentioned before, that I wanted to try and use a couple of my own images as I feel this will make the overall collage feel more personal. This is because I took the images myself meaning I will have a connection with each one. This picture was taken on a holiday a few years ago as I was attracted my curves of the structure. I also drew to the brightness of the white as the sun was hitting on it. My initial thoughts on how I could use this was that I could cut out the structure so there is no background showing and then have an orangutans face inside the centre. I thought this could show the animals being trapped as it would look like jail bars. Although, when I was looking through Pexels (free copyright images) there was nothing that really stood out to me that I could use.

Beneath, is showing my cutting out the image, where I had got rid of the background space and just had the inside sections left to cut out. I used the ‘polygonal lasso tool’ to do this.

Once I had cut this out, I went back to Pexels to try and find another image that could work. I tried typing in many differing words and phrases to find something I could use. These include: ‘orangutans’, ‘orangutans deforestation’, ‘palm oil’ and 'palm oil plantation’. I ended up managing to find this image. I thought of placing his onto of the structure. This doesn't really represent anything but I thought I could look unusual. However, I noticed that this man isn't carrying palm oil as it its transported like this. I found this image mentioned grass in its name which is obviously not really relating to my theme. Although, I decided to go with it as I thought I could maybe add some other images along side it which do relate. I found there wasn't really loads of images that I could use, which made it very limiting to what I could use.

I have started to cut the man out from the rest of the image, where I was slightly worried that the image wasn't going to bold enough to use. I was going to leave some background space showing around him, but found it looked quite messy as you can no longer see what it is. To cut this out I used the ‘lasso tool’ because I found it easier to go around all the curves. I was also able to show the grass shape more effectively.

After that, I brought this image to the file where I was arranging and creating my collage. I did this because it was simpler to cut and edit the images on a separate page. Next, I did what I was first intending to do, which was to place him onto of the the structure. At this point I had decided on my colour palette so I chose this green colour showing on the diamond shape, where I used the ‘eyedropper tool’ to get it from the grass. Also, I chose purple as I felt this was compliment the green well. The reason for using a colour from the actually image was because I discovered Zerka did this in a few of his pieces and I thought it brought the whole design together a bit more.
Now that I had chosen the two colours I wanted to slightly change the colour of the structure as this would then contrast against the image a little more. I went into ‘colour overlay’ where I chose this dark green. I then just went through all the ‘blend modes’ to get to ‘difference’ where it shows the opposite colour on the colour wheel. This was purple. I didn't actually know at the time but felt that it was the colour I wanted anyway. I also felt this blend mode was really effective as it looks quite realistic.
As you can see I have also placed this diamond shape behind the man and structure. I did this as I thought it could make the man standout from the rest. I thought to have the fill as the green I prevsioluy chosen and a thick purple stroke.

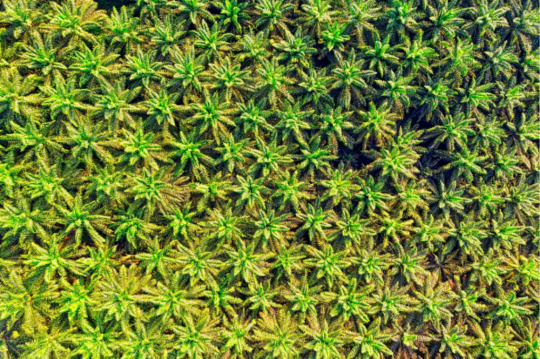
Next, I decided to emphasise the shapes a bit more so I thought to copy and paste it, where I arranged them slightly lower than the previous one. Along with this, I decreased the opacity for each as well. Another this I included was these palm oil trees.
I got this image from Pexels, where I then cut out a few of them and placed them onto my design. This picture is showing the trees from above as I found there that there was no images from the ground view. I thought that placing them on her would show the viewers a connection to palm oil.
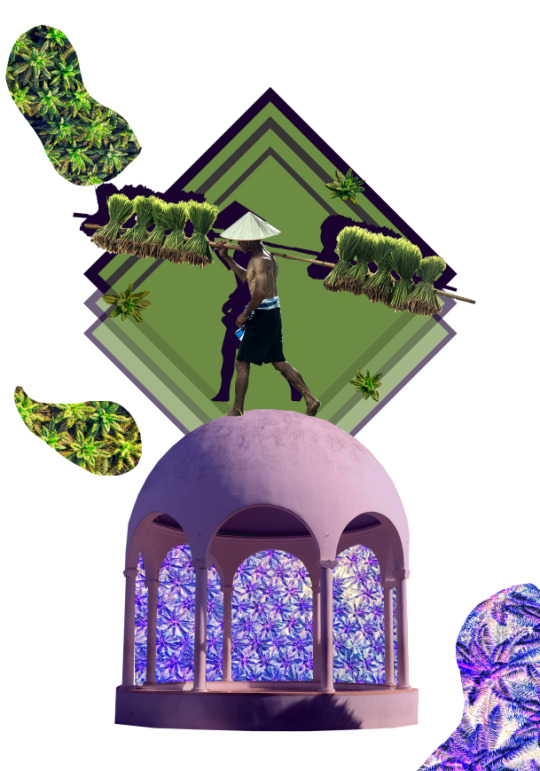
Here, I then decided to go back to this image on a sperate page, to which I used the ‘lasso tool’ to cut out weird shapes from the image. The reason for doing this was because Zerka used this technique of showing unusual shapes around the design. I thought to try this concept shape instead of a solid fill out using a more textured based instead of a fill colour. I experimented with this idea to which this was the outcome. I found it didn't look anywhere near as effective as his, but I wasn't sure why. I questioned whether it was the fact that it is a texture or that I wasn't positioning them right. As you can see, I have also shown sections of this image in a more purple tone. To do this, I used the options at the right side of my screen, where I got to ‘difference’ again and found this effect come up. I thought this was really striking as it matches with my colour palette but also completely changes the picture too.
Another thing I added to this design was an extras outline of the ma to which I placed behind him. To do this, I copied and pasted this man and changed the fill to purple. I thought this could make him more engaging to the viewers.
Here, I have played around with the shape as I have now swapped it a circle with only a stroke. I did try this shape with only a fill too but found it didn't really work as it too flat looking. This screenshot below, is showing with a stroke but I feel its a little boring now.
I then thought to add another image in and try to swap it with the palm oil trees. I found this image of some logs stacked up on Pexels, where I felt this would relate.

I used the ‘elliptical marquee tool’ to create a circle on top of the image. I then copied and pasted the shape. This is then how I ended up with this design below. I positioned this circular image slightly off centre from the other shape.

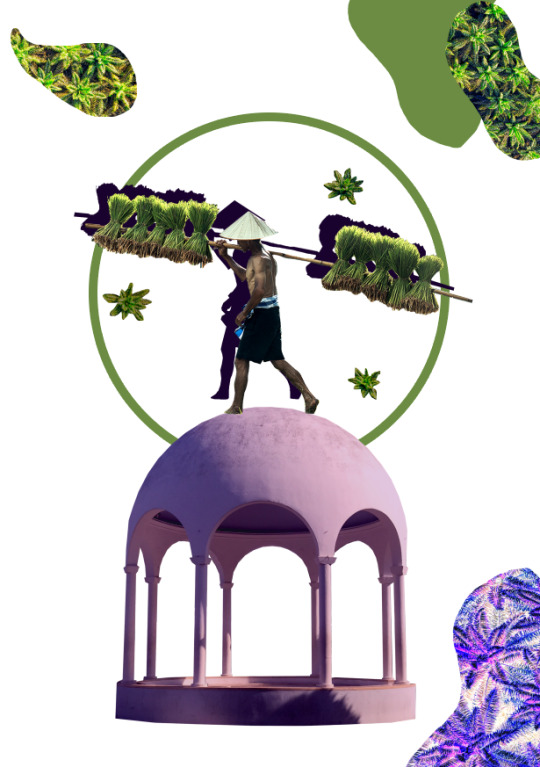
I thought this looked slightly weird and not really very successful so I then decided to get rid of all the aspects apart from the man. Instead, I changed the original image of the man so that he was now a threshold. I felt this looked striking with the purple silhouette arranged behind. As you can, I have also placed the palm oil trees back, but this time, I drew over the image to change its overall look. I then brought back the other smaller shapes from earlier. I tried to show the look of the image falling apart. This idea came from one of Zerka’s pieces of work where he used a picture of a woman in a pond with lily pads around her. The artist presented sections of the lily pads almost floating away. In my case, I thought this could show the messgae of the palm oil taking over the forests.
Here, I have then played with the shape again, to which I chose a circle this time. I also thought to add this outline shape. I created it by going into the ‘ellipse tool’ and changing the stroke to green and ‘stroke options’ to these dashes. I thought doing this would highlight this centre area a bit more.

After that, I swapped the image to the stack of wood, where I then brought in the cut out palm oil trees, where I placed them inside the circular shape. As you can see, I also played around with the thickness of the dashes but also moved the position of the purple silhouette too. Without realising it, I have actually ended up with a more logo looking design as I would definitely not call this a collage. However, I still think its looks quite effective and I will be saving this as a separate design just in case I ever want to go back on it.

0 notes
Text
Creative interior design ideas to spruce up your home and beautify it!
It doesn’t really matter if your house is a modern apartment in a metropolitan city or a quaint house in a small town, Indian homes are always oozing with liveliness and elegance! It is the rich Indian culture and heritage that is boasting with colors and is reflected in our homes. When it comes to interior design ideas for our homes, the smallest things can make the biggest impact. Solutions that are ranging from smart storage to highlighting visual elements that make your room look larger, we bring to you home interior ideas that will make your home look spacious and chic! Home is our comfort zone, it is our place, the place where we would love returning back to and feel like yourself in. interior decoration can be a very pleasurable activity for you as an owner. So take the lead from our well established interior design ideas and clever hacks on house interior design and indulge in a very satisfying experience in building your own home! Creative and Clever Interior Design Ideas That Will Completely Transform Your Home! 1. Go soft on the colors for smaller rooms, they make your room appear to look large! Large windows with light colored walls give an optical illusion of the room seeming larger, this is one of the most basic interior design ideas. Light colored paints like cream, off-white, or white work well to amplify your space. Darker shades and hues make your place appear to be small and cluttered. Also, while doing the interior design for living room, lighter hues and natural tones are said to have a soothing effect, whereas contrasting colors and shades might come in with a feeling of exhilaration. Colors that blend easily with each other develop a great feeling of home interior. 2. Say Mirror Mirror On The Wall - Beautify your house and add instant light with mirrors! Mirrors are used mostly in interior design ideas for living room to make the place feel brighter. They bounce a lot of natural light into the room when placed cleverly using interior decorating ideas. Place the mirrors perpendicular to the windows instead of directly across. With mirrors placed across the window, the idea of home interior might get messed up because all the light will bounce back outside the window. It is a huge trend these days in interior design ideas to use large decorative mirrors in lieu of art to fill up empty walls in the house. These interior design styles also add dimension and natural light in abundance to your living space. 3. Wicker Baskets and Furniture With Built-In Storage! The most economical of all interior decorating ideas for your home is to use wicker baskets for storage. These baskets look stylish and elegant to store many household things like display books, towels, magazines, etc. Also, wicker baskets can be used brilliantly on the counters of the kitchen to lavishly display the spread of fruits. Again, furniture with built-in storage is another intelligent one among interior design ideas that serves multiple purposes. These home interior design ideas are a boon for people living in small spaces. 4. Mix and match patterns and textures to add warmth to your living space! Mix it up, blend family heirlooms alongside some modern furniture, these interior design ideas work brilliantly when mixed and matched well. It reflects who you are as a person, your personality, showing that you are still grounded to your roots. These home interior ideas make us believe that the past and the present can co-exist wonderfully in the same space. Blend some eclectic pieces of furniture with beautiful accessories to make your house interior have a more cozy and lived-in look! Maintain a proper balance of rustic and modern pieces and play with textures. 5. Use what you have to decorate and make your house a masterpiece in itself! All of us have baskets of miscellaneous things that we never give a second glance to, why not use the elements in these boxes as interior design ideas instead of running to the store straight away? You will be amazed with at the idea of how you can enhance your house interior with what you already have. Make a clock out of a really old rotary telephone, If you have lots of colorful buttons, come up with a button bouquet, decorate your wall with old vinyl records, turn old door knobs into wall hangers; all of these interior design styles can up your game instantly. 6. Go Green! Add some of nature’s beauty to your home interior ideas by growing a vertical garden that doesn’t really occupy a whole lot of space. Make a stunning floral display with your own hands. Add some romance in the air by using some beautiful wooden carvings on the walls, green pots having a cozy sitting setup. There is something really serene with greenery in your house. Including greenery in your interior design styles adds calmness. Make unusual flower pots and planters to make the place even more bright. Plants added to your house interior also balance humidity and clean the air. 7. Use colorful and area rugs for your hardwood floors - even better, make your own rugs! Rugs add warmth to your interior design ideas, and bring in an element of great texture, adding up to your personality. Area rugs with varying patterns and fabrics when fit together can add lots of fun and functionality to your interior design for living room. A beautiful rug to define the seating area enhances the space and the overall house interior. 8. Make the sofa talk to the chair - It eases people to have a conversation!Simplicity lies in beauty! Use this thought for your interior design ideas and play with curves. With a simple curvy sofa and some spectacular lighting, your space will be soaked in the magic of interior design styles. Place your furniture into little groups that invite a fun conversation. Don’t let your furniture float away from the walls! 9. Light up your life, layer the lighting! A beautiful layering of lights can add beauty to your house interior design. Use the right amount of lighting and watch how you spend the evenings admiring your own home. Let every room have a lighting of their own. The ambient kind, the task lights, and the accent lights. Let the sunshine in for some natural light and Vitamin D. The sun basking in through your windows early in the morning gives your day a great start. Also, the light enhances the complete look of your house interior making it even more appealing! 10. Don’t Tip The Scale - Create an illusion of fake height! Create strong verticals and try to avoid the horizontals as much as possible. Use these clever interior design ideas for living room and keep your furniture low-slung so that your house looks heightened. You can also paint the room in white and use the effect to make the room feel a little less claustrophobic. Try using vertically striped curtains that appear to elongate through your walls. Trick your guests into thinking that you have a taller room by hanging curtains and custom drapes that are higher than the windows.
0 notes
Text
Reflection: Tufting


Reflection on Tufting
General Approach
Piece 1
As a starting point I chose to create a design/pattern based on two shapes – an octagon and a ‘geometric pill’ like shape (hexagon). They flowed naturally from initial textile experiments at Margaret Street. As I did not want it to be an actual rug or standard tufting outcome, the pattern instantly became a problem mainly because its overall form was too clear also pattern design is synonymous with furnishings and interior design. I began to break the pattern in action; a ‘disintegrated geometry’ style emerged. I was constantly striving to hit a visual / aesthetic balance between materials and colour. The colours were selected to represent a dystopian feel – dark with swathes of acidic tones. Some wool was selected at the start but others were selected in action as a response to the unfolding design. The square void (top left) was not planned but became an important part of the balancing act. At this point I knew the negative space added something to the overall piece and had potential for elaboration but I was unsure as to what / how this could be done.
Piece 2
At this point I was confident using the tufting gun; I wanted to test its programmed and artistic capabilities. The design was revolved around a solid black line – a stretching and merging of two hexagon shapes. This line presented an opportunity to test the many nozzles for the gun which affect the length of the tuft. I wanted to blend the line from a short length at the bottom hexagon to the longest length at the top. A cluster of hexagons were sequenced to the left. Serving as mini capsules to test various materials. I realised these may end up looking independent from the rest of the design and so only allocated a small surface area. The outline is a mix of angles and curves employed to maintain overall balance. A shift in colour selection was required in order to distinguish between techniques within the design. For example, the solid red was implemented to highlight the black structure and perhaps suggest movement - a ‘ray’ or breaking through of the black mass. The green (complimentary – opposite of colour wheel) around this was used to create drama and contrast. The loose triangle shape (bottom left) provided a break in the overall form and almost looks ‘bolted on’ to test two tone zebra like concentric stripes. The yellow material is Rayon - a manmade fibre. The appearance is plastic like and cheap. It serves as a contrast to the wool. The gun is not designed to use such materials, this lead to the elongated strands which became a feature of design 2.
Piece 3
I took the view that the third piece would be the final in this trilogy of experiments. I hoped to elaborate on features found in 1 & 2 plus test remaining techniques for my enquiries. I was keen to use the stripes feature on a larger area. I realised I had not used any natural earth tones and so for variety wanted to integrate browns and beiges. I enjoyed how the form of piece 1 evolved naturally and so at first I did not want a prescriptive outline to work from. The negative spaces sat at the peripheries of the first two works and so once again for variety I wanted it to be centrally located. Ultimately I wanted this work to look wild and freeform. It developed from the centre outward. With the lack of form I struggled to add to the neutral tones in the centre. (Stretched diamond) I positioned 3 hexagons in the corners to work from. This provided points / axis’ to imagine an outline, suddenly there was a sequence of lines working around the design providing segmentation. Perhaps I had lost the wild element but it meant I had structure to continue with. The tuft lengths were explored again in the form of black dots towards the top. The ‘bolt on’ stripe section was implemented on the top right using green and black. The overall colour selection balanced neutrals with metallics. On the day that the true form of this design surfaced I was tired, irritable and needed sleep. I did not want to waste my trip to Birmingham and the unusually quiet workshop and so struggled on to ‘make something happen.’ Despite the calming neutrals and friendly silver specks, the final design has a sense of aggression, ugly beauty and an internal struggle; an erratic vortex shape pinned by 3 islands.
Technique and observations.
Nozzles: There are a set on different length nozzles from around 2cm – 6cm all at the same diameter. There is also a set of nozzles with a smaller diameter. 2cm – 4cm length options. The smaller nozzles work better for thinner yarns as the material is more compressed making it easier for the blade to cut.
Materials: The gun is designed for wool. The process is a lot easier using prescribed materials and results are ‘as expected’ of the tool. However other materials can be used as demonstrated in the 3 pieces. Problems arise with the cutting of the tufts, materials can wrap around parts of the gun that feed the materials through the nozzle. It is easily rectified but happens regularly and requires patience to finish large areas.
Feeding more than one material at a time: The most I successfully tufted with was 3 materials at once. Generally using thicker wool and two thinner cotton yarns. Once again this increases chances of jamming and because of the variety in thickness - sometimes there is not the required pressure on the thinner materials to drag the yarn through. When using more than one material, the space filled at the front is considerably wider than the allotted tuft area/design at the back. Forming a dense area of materials.
Larger wheel feeds wool faster: If you use a wider wheel meant for a longer nozzle it feeds the tuft through faster and therefore increases the length without having to change the nozzle.
Creating very long tufts: Squeezing the trigger gently can engage the air flow to suck the materials into the nozzle. The rotator wheels clamp the materials meaning they don’t continuously flow out the end of the gun. Therefore if you tuft the base material once and release the wheels or remove wool from the natural clamp of the wheels the yarn will fly right through. It is hard to gauge the length but all work can be trimmed with scissors post tufting.
Future potential:
It is important to note that on creation of the first piece I had the idea to combine glass cone shapes to protrude from the negative spaces. The tufting element could be considered as the first half of the process. As the final part of the balancing act the bespoke cone could prove to be an integral element, bringing overall harmony and completion of the form via a set of visual and textural contrasts. My initial plan was to facilitate learning and experimentation via the creation of three resolved tufting pieces; followed by reflection and then a similar approach to other materials to develop the cones. (potentially glass and/or resin)
Creating these works in such an ad-hoc manner has been highly rewarding. A substantial work can be created without a defined starting point. The three designs have evolved from two paper cut outs, an octagon and a hexagon. The way in which I have used the tufting gun could be described as ‘painterly.’ With this method comes many technical problems but luckily the machinery is of an industrial nature and can clearly handle unorthodox methods aided by general maintenance. Overall the pieces have a coltish energy, due to a combination of experimental, ‘searching’ approach and using ‘unknown’ materials; a feature I have struggled to achieve in graphic design practice. Exact replication of the object would be impossible due to the ‘in action’ approach but the loose design could be recreated if necessary.
The objects are visually strong in their current state; development could change them but not necessarily make them better. Therefore I could look to continue making the tufts in the same fashion. I appreciate their original form and the circumstances involved in their creation however going forward, there are points to consider....
The materials and colour palette could be pre determined /sourced for a specific design.
Better quality of materials could be used.
Is the overall aesthetic (abstract form and textiles) too craft like in appearance? Would it be more interesting to create a minimal design response using less colour and clever use of tuft length?
Overall size can double as I am currently only using half the bed
How are they displayed? Wall hangings or playfully positioned on the ground like a rug, but not as sharp glass points may protrude from the soft surface.
The back of the design (the side you work into) has a unique quality of its own. I am drawn to the line formed by the gun - overall it has more of a graphical feel when compared to the front. The colours are muted because they are compressed tightly into the base material.
In theory the base material could contain pre-printed designs before they are stretched to the bed. Sections could be tufted; others left blank forming an unusual interplay between the surfaces.
Textile materials have the potential to hold, secure and fasten other materials within them. Could this be explored further, not only through glass or resin....?
1 note
·
View note
Text
Photo editor for Windows
Read all about blur a photo with the photo editor download or easy photo editor Windows 10 for amateurs for functional saturate a picture and easy photos grayscale. Photo editor Windows 10 for Computer or edit a picture software to enhance a picture. Free download photo editor for pros and software edit photo to soften an image or softening photo.
As soon as we taking a photo at a normal area, it's tempting to focus in on anything details you're trying to shoot. Instead, attempt get closer to the theme, beside it is a small bird, in that case we would recommend maintaining your range or take the photograph in a normal area, and process it later. Photo editor Windows 10 performs have a few of the functions is effectively understood for, which comes pretty handy when you've decided on you've like to try your hand on something much more high end than correction of tonal value and photo mosaic. Photo editor Windows 10 may additionally bring in stills from video, together with varying documents. And also when you are actually really feeling a bit lazy or it is simply plain unconcerned regarding exactly how to use a few of the tools, a wizard may help you adjustment the basics like illumination, emphasis, shade, and also cutting of pictures. For them that love their pictures in widescreen versions, the software app aids you faultlessly produced images to generate a gorgeous image.
And if it is actually a chance to reveal off your digital photography capabilities, you can easily decide on among the photo plan style themes to instantly imprint them in a certain measurement.
Easy photo editor Windows 10 download
Top photo editor Windows 10 for trainees to convenient crop photos
This photo editor is actually most ideal for excited trainees with a lot of time in their manpower to identify the as well technological features that would frighten really first time photo modifying users. It additionally happen got ready with a full circle panorama program. Probably the glossiest treasure in the bundle will be actually the wonderful skin layer result, which evens out and clears away red places out the skin. Whereas there is actually no self-regulating shade remedy alternative quite necessary to solution the poor lighting up most electronic webcams catch, there are actually the conventional attributes of add symbols in photos.
One of the most well-known misunderstood parts of electronic photography is what happens after you make the photograph in fact modifying your photos. Here we will cover some concepts for modifying your photos, from the essentials like photo crop and also create a photo montage, with a lot more difficult functions. The cut out tool permits you to transform the dimension of your photo, and additionally to change the aspect ratio. For instance, you can cut out a picture from a rectangular form to a square form. There are lots of reasons you would intend to cut out, including for publishing in various styles as well as facet relations. Compared to the initial, I have actually chopped the picture with photo editor Windows 10 to remove the dark component of the left-hand side of the pic as well as reassembled utilizing the guideline of thirds. That makes the coloring screw more the focus of the shot. You may wonder why I did not simply compose correctly when taking the picture. So in this situation, I was organizing a very long direct exposure photo shot without needing a tripod, so had the electronic camera balanced on the side of the jetty for stability. That quite restricted my capability to flawlessly frame the moment, so I simply shot wider, knowing I had the ability to chop the picture suitably soon after the truth. In both situations, chopping is very basic as well as it is just involves you choosing the cut out tool and then picking the area you intend to keep with your PC mouse. You use the adjustments and your brand-new cropped image is all set to go. As we was looking for a very good photo editor Windows 10, all over sudden we tripped over this really good software download. Download this photo editor and brand new photo editor Windows 10 for PC with many practical options to practical soften a picture. Easy flip pictures with a photo editor Windows 10 for professionals to dynamic blending. Download photo editor for experienced or software photo editor to brighten a photo and photo copy and paste.
When the perspective band in an image is not even degree, one of my individual petty aggravations in photography is. Often if we are taken up in the moment, this essential regulation is failed to remember but the good information is such enhancing your images with the photo editor Windows 10 to make them degree is also really simple.
Stabilizing the video camera within the side of the pier indicated that the picture was uneven this is notably recognizable to the sight anytime the picture has a clearly identified perspective line, just like the sea. The leveling tool is part of the cut out method, and you can easily simply just spin the pic to suit. Whenever you take the level technique, a grate will definitely show up to help you get the alignment appropriate.
Regularize a photo is an actually simple job this will certainly take just a couple of moments, resulting in a lot more aesthetically hitting the spot picture.
In certain cases if we make a photograph, sections of the photo can wind up being brighter than we really want. We refer to the gloomy spots of the image as darkness, as well as the colorful locations of the picture as high light.
Contrast has to do with highlighting the difference in between the light fixture and darker areas of the picture. Enhancing the contrast of a photo can significantly enhance the graphical influence that had, by creating the boundaries in between these light and dark sections clearer. Color scheme correction is another very important piece of the photo editor. We are able to adjust photograph coloring in every kind of methods, from transforming the general warmness of the photo such as exactly how blue and yellow it shows up, to individually transforming the shade and also concentration of certain colorings contents of a photograph. We simply wish to deal with some very basic color variations anyone are able to use to create your images simply just a bit a lot more creatively amazing.
The simplest solution to change the coloring related to an image is using the hue technique from the photo editor. This transforms the look of each color or texture in an image to produce it essentially saturated. As with lots of styles, the secret is to choose a good equilibrium as well much saturating the photos often tends to seem rather unusual. Shading photography can easily be actually really efficient, and also naturally black and also bright white is an exceptional option for every type of scenarios, specifically, portraits, and also various surroundings images.
Smart crop a photo with a photo editor Windows 10 for starters to lens correction
Brand new photo editor Windows 10 for PC to cut pictures. More help about enhance images and photo mosaic is easy with the photo editor Windows 10 for PC and software to edit a photo. Free download photo editor for amateurs and editing photo software to cut an image or photos fisheye effect. Occasionally there certainly can be a single thing within a photo that you truly do not want to exist, just like a bothersome dark spot on anyone's face. That is simple to remove in every the leading photo editor Windows 10.
It is definitely very simple to erase any items taken away an image yet the photo editor Windows 10 performs ideal on distinct, little objects that are certainly surrounded by the same color tones. This is since the recover tool needs to replace the area you want to erase with another thing, and this functions best when it has a location close by that looks similar. So for instance, a dark spot on a face is bordered by a great deal of likewise colored skin, so the heal tool can conveniently determine what to change the red spot based on the surrounding area.
That is probably since the photo editor needs to remove and replace the spot you need to erase along with another thing, and this runs finest when it gets an area close by that seems very similar.
Photo editor has actually turned into absolutely intricate and also effective and it is actually feasible to control photos so they become absolutely various out of the initial. There actually are definitely loads of photo editor and multitudes of ways of accomplishing the very same or comparable results.
My intent very most when it comes to many photos I publish process is definitely to produce them seem being natural as possible. I know this is an optimal point to start off, even if you intend to continue on as well as create even more unique appearing pictures. Hue variety at a photo shot is usually one of the primary priorities. The eyes have the ability to generally see a wider range of hue than the cam can shot.
The meaning of picture editing and enhancing is the process of modifying a photo, put simply. Yet this is oversimplifying an issue that is really complicated. You can normally implement basic image editing and enhancing techniques such as remove unwanted elements rather easily and also rapidly however intricate methods and digital modifying might call for photo editor and more experience.
Photo editor Windows 10 is a gadget that anyone able to work with to control and also beautify photos. Due to the fact that pictures have a boosting number of usages, even more people are discovering techniques to reuse photos as well as make use of them on a wide range of media. Additional resources about brighten a photo and insert objects into photos with the photo editor Windows 10 download and brand new photo editor Windows 10 for experts to professional flip pictures. Photo editor for uncomplicated merge photos and simple crop photos. Download here free the photo editor Windows 10 for quick and simple scale pictures.
0 notes
Text
Window Treatment Ideas For Home
Window Treatment Ideas For Home
Having great windows is a major plus in any home–they add character and provide much coveted natural light. Without window treatments, however, the space will look unfinished.
Whether you choose blinds, cornices or curtains, windows are a good place to anchor the room’s overall design and inject your own personal style. Before deciding on a treatment, determine what function the window covering needs to serve and the aesthetic you want it to reflect. Is it for a home office? Blinds that block out glare from the sun are a good choice. Looking for an elegant touch to a dining room window? A cornice is a stylish option. Do you need privacy? Opt for an opaque material.
Custom curtains can be expensive, so think about both utility and style before making your decision. There’s many options for great window treatment ideas that work for every budget and skill level. Below are our five favorite trends.
Wood Cornices
Wood cornices are one of the most classic window treatment ideas, but they are often overlooked as an option in contemporary homes because of their traditional nature. Used alone, however, cornices can create a sleek, modern look. Though they can be paired with curtains, stained or painted, wood boxes are perfect for the kitchen and bath, where fabric can succumb to water damage. These are best built by a skilled carpenter for a custom fit, so they can be expensive if you aren’t handy. Cornices hide curtain hardware and blend well with luxurious detailing, like crown molding, to give your home a gracious, regal look.
#gallery-2 margin: auto; #gallery-2 .gallery-item float: left; margin-top: 10px; text-align: center; width: 50%; #gallery-2 img border: 2px solid #cfcfcf; #gallery-2 .gallery-caption margin-left: 0; /* see gallery_shortcode() in wp-includes/media.php */
Painted Windows
If you love the look of clean edges but lack the funds for custom cornices, you can still have a beautiful window without any soft goods at all by painting the window’s mullions, frame and sill instead of dressing it with curtains. Any DIYer with a steady hand and some masking tape can paint a window, and the color possibilities are endless. Try a bold pop of color to highlight the view, but for best resale value, choose a dark brown or black color for a chic look.
Swing Arm Curtains
Swing arm curtains are one of the more unique window treatment ideas, and they haven’t seen much use in the United States in recent years. They require a special hinged curtain rod that allows you to move the curtain to stand out at a 90-degree angle from the window. Swing arm curtains are a brilliant and surprisingly inexpensive solution for bedrooms where you want to be able to block light easily without having to worry about ruining a carefully pleated or artfully scrunched curtain fabric with daily adjustments.
Opaque Panels
No list of window treatment ideas would be complete without the ultra-rich look of opaque panels. Classic velvet is great for blocking light, and it can give your bedroom the feel of a sumptuous palace. Velvet’s beautiful drape allows it to look its best when tied back and allowed to cascade to the floor. Other great choices for opaque panels include sueded fabrics, chenille weaves and silk damask. Choose an unusual color for high impact in both traditional and modern spaces.
Sheer Panels
Sheers are a bestseller for a reason: they look great in every room without costing a fortune. Sheer panels offer privacy while still allowing for plenty of light in your room, so they’re a great choice for north-facing windows or high-traffic areas. White sheers create a beautiful, breezy feel and are at their best when hung from floor to ceiling. Sheer panels are also available in a variety of colors. Match the walls for an interesting textural variation, or add a touch of color to a neutral room by choosing sheers in a pastel shade that works with the overall palette of the room.
New Post has been published on https://www.tiny-ideas.tk/home/window-treatment-ideas-for-home.html
0 notes
Text
Create Unique Designs Using Cement Tile
A unique ceiling treatment is complimented by a patterned cement tile floor design.
Hand-made, colorful cement tile provides options for unique patterns and creative tile designs. First developed in Europe more than 150 years ago, cement creations are enjoying a resurgence in popularity throughout the U.S. and are fitting into many Madison WI projects for floors and wall tiling.
Originally, these tiles were designed to be used in a set of four where when placed correctly they create form an interlocking design. Modern applications have modified the geometric nature of installation to offer almost limitless pattern options.
What makes cement tile so appealing:
It is extremely durable
Hand-crafted, it provides one-of-a-kind character
In adds color and charm indoors and outside
It can be customized for any décor – and age-old look, art deco or contemporary
Cement Tile vs. Other Options
Popular magazines, decorating shows and home improvement websites are all promoting the wonders of tile made from cement. Are your asking: With so many ceramic and porcelain tiles to choose from why another choice? Is one better than another? How do I know? Adding to yourr confusion, these creative pieces have come to be known by other names including:
Victorian Tiles
Cuban Tiles
Hydraulic Tiles
Mission Tiles
Encaustic Tiles
TIP FROM A PRO — Cement tile is often confused with encaustic tile because they look similar. But, encaustic tile has a base of clay not Portland cement and it is fired in a kiln. The cement versions are compressed. Even with these important differences, the names are frequently used interchangeably in the marketplace. You might even see “encaustic cement.”
The most basic difference between ceramic and cement tiles is how they are made. The creative process is what sets them apart in performance, too.
How they’re made:
Ceramic tiles are made from colored clay – red, brown or white is most common – and either glazed or unglazed before being fired in a wood- or coal-burning kiln. Unglazed tiles usually have a matt finished appearance.
Cement versions are formed from sand, cement, color pigment and marble powder. The elements are poured into a metal mold and backed with a dry concrete mixture. It is then compressed under 2,000 pounds of pressure.
Tile Designs Benefit from Creative Options
Its durability, insulating properties and ability to combine form and function make using cement options popular throughout the house. They can be used on walls as art work or on the floor as a unique tile rug. And, of course, they’re popular for more traditional uses in bathrooms, kitchens, laundries and entryways.
Advantages of cement tile include:
Colorful, creative patterns – floral designs, geometric patterns, etc.
Environmentally friendly – created with all-natural components and no fossil fuels are burned during production
Slip-resistant – even when wet they don’t get slippery
Customizable – your imagination can go beyond stock colors, sizes, shapes and patterns
Robust – normally 5/8-inch thick tiles made from cement are chunkier than typical choices
TIP FROM A PRO — Because this tile is thicker than normal you will have to take into account how it will blend with molding and trim. You may have to make accommodations for these dimensional changes when going from the tile to another material – like from a tile floor to hardwood or laminate.
Tips for Using These Creative Tiles
Some areas of your home are perfect for a creative touch and these tiles can provide a rich, artistic touch. For solutions to your design visions, consider using these versatile tiles as:
Backsplash in the kitchen
A focal point around a fireplace
A “statement” floor
Special treatment on a kitchen island
If bold colors and exciting designs aren’t what you’re looking for, you can stick to more subtle tones. Cements in black, white, cream make a good base that will allow highlights to really “pop.” Highlights such as:
Colored or textured faucets
Decorator sinks
Painted cabinet
Textile accents
Select your tile carefully. Styles may not “mix and match.” Cement tile, with its unique one-of-a-kind appeal can turn basic cabinetry and fixtures from drab to exciting. Close attention to details results in a seamless, up-to-date installation.
A little goes a long way…
Hand-crafted tiles can be on the high end of the price scale, but that needn’t be a deterrent. In most cases, these unique pieces are used for visual impact and accents. So, you’re not likely to be covering a huge area – a few well-placed pieces do the trick.
Colorful tile creations and patterns offer tile designs for unique spaces. Using cement allows for spotlighting unusual areas – fireplace façade, a rug-look. Highlighting a special space can be done as “loud” or as softly as you desire. An installation of cement creations can accent a room or become the focal point.
TIP FROM A PRO — Before you complete your plans for installing cement, understand that these tiles ARE NOT pre-sealed at the factory. You will have to seal them with a good, penetrating sealer that’s designed for natural stone. Sealer is usually applied to clean tiles before grouting. Done right, water will bead up on the surface of the tile.
Look to Pros for Cement Tile Advice
For reliable tile installation and tile selection, contact Molony Tile, a source for unique, durable and elegant tile solutions.
Call or email Molony Tile, 608-268-8453 to complete your tile design and select the perfect cement tile for your Madison home.
Tile and Stone – Home Improvement Madison
http://bit.ly/2PHgxZi
0 notes
Text
51 Master Bathrooms With Images, Tips, And Accessories To Help You Design Yours
We see some pretty fabulous master bathroom designs on our endeavour to bring great new home designs to the masses, and feel it’s time to put them first (rather than at the end of pretty much every tour – that living room always has top billing no matter how showstopping the loo looks). So, we’ve corralled an extensive gallery of 51 master bathroom designs that feature creative layouts, stunning bathroom furniture designs, and some gorgeous bathroom accessories to throw in that final finesse. We’ve also added some hints and tips that will help you get on your way to creating your own magnificent master bathroom space.
Designer: Qusay Abubaker
Make a garden bathroom. You don’t even have to own a garden; a living wall can put any room in touch with nature. A skylight floods the one in this home with sunbeams…
Visualizer: Prosvirin Design
… Though focussed artificial lighting provides a dramatic effect too.
Designer: Andrey Avdeenko
A vertical garden can be fashioned anywhere in the room. They are especially useful for disguising an irregular shaped structure or support columns.
Visualizer: Giri Dwi Cahya
Put a bed of pebbles beneath the bathtub to connect the decor with a garden backdrop – whether it be a living wall, a bathroom courtyard, or a gorgeous view.
Visualizer: Alexander Barchan
You can use pebbles to easily and cheaply define a makeshift bathroom courtyard; simply plant a few pots in it. Putting the plants by the window is a good idea, so that they get plenty of natural sunlight to grow.
Visualizer: La Alegría Dhifaoui Samiha
Add a slice of interest with contrasting floor treatments and wall tiles. It’s not unusual to pick out more than one style of tile for your bathroom to define a shower floor or a raised platform, but why not push it beyond parallel lines? Cut tiles or boards on the diagonal to make a stand out space.
Visualizer: Alexandra Macevich
Open up a master bathroom to be part of the bedroom. The combined square footage will make a more impressive sized suite. Privacy curtains can be drawn across whenever required.
Visualizer: Andrey Korniychuk
Highlight those edges. LED strips have many, many applications, but none so popular right now as the perimeter lighting track. Light up every edge of raised floor, dropped ceiling, shower wall and vanity mirror.
Visualizer: Albert Mizuno
LED perimeter lighting can make huge volumes appear weightless, as if floating just ever so slightly above the ground.
Visualizer: Amr Abdeen
Add a little shimmer to your wet wall. The extra sheen will bestow a look of glamour on the whole room. Team with some marble accents to take the trend high-end.
Visualizer: Jenpol Sumatchaya
Screen the scene. Decorative screens allow tantalising glimpses of scenic views to filter through, whilst still maintaining a level of privacy. Match dark metal screens with concrete bathroom decor for a strong aesthetic.
Visualizer: Joana Santos Ferreira
Layered rugs aren’t only for living rooms. The bathroom can sometimes feel like a sterile place, with hard wooden flooring or cold tile underfoot. Throwing down a rug or two can make a world of difference – not just to the look of the room, but to the literal feel of the space, and even the echoey acoustics.
Visualizer: Liuba Kushnir
Hang a modern chandelier over the bathtub – or set your tub below a magnificent central fixture.
Visualizer: Patricia Urquiola
Love to spa together? Why not recreate the couples spa experience at home with a double bathtub installation.
Visualizer: Shahid Jamal
Build a neoclassical bathroom blend. Incorporate modern bathroom furniture designs with classical touches, like elegant chandeliers and mosaic masterpieces. Don’t forget to add beautiful ceiling coving, corbels and wainscot.
Visualizer: Stanislav Kaminskyi
Fashion an eclectic modern bathroom. Pull together a collection of statement pieces that are each beautiful in their own right, even if they’re not necessarily ‘matching’. Use the intermittent decor to pull the elements together – like this colourful rug that echoes one circular coral table, and the stripes of an accent chair.
Visualizer: Vic Nguyen
Another stunning eclectic vision.
Visualizer: Artem Shelipov
Cram in a faux courtyard. Does your master bathroom design have standing room only? Not to worry, the plants can share the shower cubicle with you. Voila! A glass courtyard.
Visualizer: Christopher Czerwinski
Don’t have the budget, time or inclination to box in all that pipework or ducting? Go for an industrial bathroom style and let it all hang out instead.
Visualizer: Philippe Starck
Make it rain! Imagine rolling out of the bed and under that rainfall showerhead – it would be quite a wake up. It’s handy having the closet standing right on the other side of the glass shower screen too, which would make it possible to choose an outfit for the day whilst still shampooing…
Visualizer: 91D Design
Another master bathroom with walk in closet. This time there’s a tub too.
Visualizer: Mohanad Al Homsi
One statement piece can change everything. The room would still look smart without a hammock bath, but not nearly so impressive.
Visualizer: Vladislava Torgonsky Vladislava Torgonsky
A combined wet area doesn’t have to mean an over shower bath. Many designs now put the bath and a separate shower unit side by side behind a single splash screen, or up on a platform together to make plumbing and drainage simpler.
Visualizer: Prosvirin Design
Fill up on feature walls. Sometimes bathroom wall decor can take a back seat to the main and essential working parts. However, accent walls and wall art make a bathroom feel part of the rest of the house. Look at ways in which to incorporate warm wood panelling, stone or brick effect feature walls, and eye-catching prints.
Visualizer: Naresh Mistry
Include substantial storage solutions. Bathrooms aren’t always big on cupboard space, but when it comes to bringing in all those fluffy folded towels, you’re going to wish you had somewhere roomy to stash them all.
Visualizer: Iqosa
Section off the toilet in a larger sized room. If you have the space to install a small room within a room then you might like to make the toilet completely private, but a partial partition wall can work well too.
Visualizer: Joana Santos Ferreira
If you only invest in one special piece for your bathroom, consider a designer accent chair. Since accent chairs can be be repurposed just about anywhere in the home, you can really get your money’s worth – even after the next bathroom makeover.
Designer: Designer Visualizer: Natalia Pozdnyak
Side tables update a bathroom without making a permanent change. A set of white marble and jade green side tables accessorise this modern grey and white bathroom scheme.
Visualizer: J Lozgar
Follow the golden trend. Gold and rose gold accents are the perfect way to add luxe to a modern bathroom look.
Visualizer: Scaffold Group
Accessorise, accessorise, accessorise. Shiny bathroom pendant lighting, collections of decorative vases, multiple reed diffusers, a designer toilet seat, and colour coordinated fresh towels – this master bathroom has it all going on.
Visualizer: Bezmirno Architects
Let beautiful vessel sinks stand tall. Tall vessel basins look stunning set atop a low linear vanity unit.
Visualizer: Görkem Karakan
Stairway to bathing heaven. Make a production out of taking a bath, with a theatrical staircase lit and levelled with the side of the tub.
Visualizer: Kaminskyi
Large format bathroom tiles will make a room look more spacious.
Visualizer: Double Aye
Punctuate an all white bathroom scheme with dark accessories.
Visualizer: Joana Santos Ferreira
Looking for something different in vanity lighting? How about a bathroom floor lamp?
Visualizer: Lorenzo Pennati
A bathroom floor lamp would provide great reading light whilst soaking in the tub too.
Visualizer: STUDIO.O. organic design
Swing arm wall lamps provide repositional light at a vanity…
Visualizer: Spasm Designs
…. or how about a classic scissor lamp?
Designer: Haji Guliyev & Ulker Mirzaliyeva Visualizer: Vusal Abbasov
Reflect on natural light. Bathing your face in the morning sun, as well as at the basin, feels uplifting. But where do we put the vanity mirror when positioning bathroom sinks in front of windows? Have the best of both worlds by installing a ceiling mounted or stem affixed design.
Visualizer: Omar Saad
Make art out of pipework.
Visualizer: Artgroup
Be inspired by the greats, like the owners of this Mondrian style bathroom.
Visualizer: Nejc Kilar
Keep it simple and serene with a minimalist scheme.
Visualizer: 365 Design
This minimalist bathroom shows how great design is achievable on a smaller scale and budget.
Visualizer: Oleg Kucher
Divide and conquer. Build a dividing wall to section off a large shower enclosure, then use the new wall space to position a beautiful bathtub in pride of place.
Visualizer: Bloomsbury Design
This dividing wall is positioned directly down the centre of the room so that the toilet and bidet can also be set behind it.
Visualizer: Thao Uyen
Black bathroom decor sets a moody scene, like a cool nightclub.
Visualizer: Ahmed H. Ibrahim
Create high contrast with black and white wall tiles, like this stunning white marble and black herringbone design.
Visualizer: M11 Design
Turn up the texture with a wood ribbed feature wall.
Visualizer: Christoph Mensak
Create a warm runner of wooden floor panels.
Visualizer: Black Box
Master bathrooms in warmer climates can be made to connect seamlessly with the outdoors…
Visualizer: Elena Maximova
… Bring garden elements inside the room to make it a completely natural transition; use indoor plants, stone elements, wood grain features and pebble flooring. Install wall to wall sliding doors and let the breeze blow through.
1. Automatic touch-free soap dispenser 2. Luxury toilet paper holder 3. Menu pedal trash bin 4. Modern faucet 5. Copper ventilated laundry basket 6. Bamboo vanity accessory set 7. Luxury chandelier 8. Golden plant stand 9. Golden glass bathroom sink
Recommended Reading:
51 Bathroom Sinks That Are Overflowing With Stylistic Charm
43 Stylish Vanity Mirrors To Update Your Bathroom or Makeup Table
Related Posts:
51 Master Bedroom Ideas And Tips And Accessories To Help You Design Yours
51 Luscious Luxury Dining Rooms Plus Tips And Accessories For Decorating Yours
51 Bathroom Sinks That Are Overflowing With Stylistic Charm
3 Small But Super Stylish Apartments
Beautiful Contemporary Bathrooms from Neutra
A Luxury Home With A Jungle Gym Bedroom
from Interior Design Ideas http://www.home-designing.com/master-bathroom-interior-design-ideas
0 notes
Text
The Best Beard Oil of 2018 - Complete Reviews
Ignore the negative comments, because beards are here to stay for a long while. Each year, the beard trend is increasing in magnitude and becoming more and more popular. Every guy is either growing a beard or really wants to have one but is scared away by the idea of taking care of facial hair.
The easiest and most valuable approach to the upkeep and maintenance of a beard is using beard oil which will soften the hair and moisturize the skin underneath. All types of beard products are flying off the shelves, but none of them match the popularity and utility of beard oil. Carrying tremendous benefits for the facial hair and skin, here are the best beard oils discussed in detail.
Product 1: Bossman Beard Oil
This is the very first jelly beard oil in the world and has definitely disrupted the beard industry. Because of the increased viscosity of the jelly, it bonds robustly with the hair follicles and skin pores.
Product Highlights
Fashioned with carefully selected natural oils, beard growth is stimulated with the help of this product, and this proves to be a blessing for men who are already struggling with this issue. It gives the beard strength and thickness while keeping the tamed appearance.
The other oils are runnier in texture, so they dry out quickly as compared to Bossman Beard Oil. They are also unable to penetrate the pores and follicles whereas this beard oil does because of its unique texture.
You will find that most beard oils are only available in small 2 oz. bottles, but in Bossman Beard Oil the quantity is doubled. The scent of this oil is an exuberant blend of vanilla oil and rich sandalwood that gives you a warm aroma.
The Good/What I Like
The increased quantity available at a reasonable price is a major positive element of this oil. It is different from the rest of the beard oils available on the market because of its unusual texture and its ability to stay in the facial hair for a long while.
The Bad/What I Don't Like
The smell might be too strong for certain people, as it is definitely going to have a strong impact on their surroundings. Moreover, the beard oil might not be suitable for all skin types because of its exclusivity.
Pros
• Comes at a reasonable price
• Good quantity
• Easy application
Cons
• The smell might be too strong for some
• Not suitable for all skin types
Product 2: Badass Beard Care Beard Oil for Men
If you have dandruff in your beard or are tired of the frequent itching, this particular product is the answer to all your worries and will help in maintaining a healthy, long beard.
Product Highlights
Containing food-grade and organic ingredients, it is a handcrafted, completely natural product. It serves to hydrate the skin and will promote the healthy growth of your beard while making the hair softer.
One of the best things about this beard oil is that it is manufactured by experts who have been in the field for a long while. They are absolutely aware of what is right for the beard and what's not.
This beard oil is available in 12 different scents, so there are a myriad of options available. Ranging from soft to strong fragrances, it has everything to offer people with distinctive tastes.
The Good/What I Like
The natural ingredients used in this beard oil, combined with its excellent scents, give it an altogether different feel. The highlight of this oil is that it is handcrafted, so there is no doubt about its utility and the benefits it offers for the beard and facial skin.
The Bad/What I Don't Like
The oil comes in a very small bottle, so it is not going to last for a long time. You would need to place an order for the second bottle relatively soon after the first.
Pros
• There is a wide range of scents available
• Only the most natural ingredients are used
• All your beard-related issues will be resolved
• A trial pack is also available at a very reasonable price
Cons
• The size of the bottle is very small
• Quite expensive
Product 3: Beard Oil by MOUNT BEARDMORETM
Manufactured using a premium formula which consists of all natural materials, this beard oil has a very high standard in the market. It ensures a sleek, shiny, and handsome look for your beard.
Product Highlights
As the product is prepared using all natural ingredients, there are no side effects. It is free from alcohol and has never been tested on animals. The natural oils are used to provide moisture to your hair and to freshen up the skin.
It serves as a cure for the brittle, dry beard which is totally unmanageable. Just a few drops are enough, and this natural oil will penetrate the hair follicles, providing them with strength and rapid growth.
It doesn't have a greasy feel, so there will be no mess or oily residue after use. The area surrounding your beard will be completely dry, allowing you to use the oil with ease at any time.
The Good/What I Like
It is a perfect solution to all beard related problems, and the natural ingredients help you to bypass all kinds of side effects. The brand prides itself in the satisfaction it gives all of its customers.
The Bad/What I Don't Like
The scent is a bit different because of the addition of musk, so it might not appeal to everyone. Moreover, the quantity is very low.
Pros
• Manufactured using only high quality and natural materials
• No oily residue
• A cure for the dry and brittle beard
Cons
• The scent might not appeal to some people
• Very high price
Providing beardsmen with reviews and information on the best beard products available for caring and styling your beard at http://www.themadbeardshop.com
from Blogger http://bit.ly/2WzY4R8
via IFTTT
0 notes
Text
20 Ways to Add Plants in the Bathroom

Even If we will be able to see plants around the space within the outdoor space, we can also add it in the indoor. needless to say you have noticed how plants are getting used within the home. except for making it glance beautiful, it creates a refreshing appeal and it makes the space much more inviting. have you ever ever considered adding crops in the rest room? Smartly, don’t hesitate to do this as a result of the bathroom is humid and plants can thrive in it. apart from that, it'll additionally glance really nice with crops in. Now Not convinced? we now have collated a few pictures of loos that has crops inside it. After seeing the roundup, you will without a doubt notice that your toilet will look better. take a look at the photographs below.

Landmark Lofts Placing a few leafy crops in the toilet will add an natural, eco-friendly accessory to the bathroom. It provides the bathroom the very best spa-at-house glance.

City Interiors On A Regular Basis, toilets are white however it can also be black like this one. What I Really Like listed here are the crops at the wall which are being highlighted with built-in lighting.

VC Design Architectural Services And Products Create an effortless statement rest room like this one in a small house. Understand that it delivered a few crops to add some pops of green and freshness within the house.

Hastings Layout Love the combination of wood and white in this rest room. Including one small plant within the facet creates an enormous distinction in its air of secrecy because it compliments with the wood features.

C+M Studio Introduce inexperienced in potted plants or small bushes so as to add life to an all-white bathroom.

MAC Construction Solutions A Chic mosaic tile floor toilet with claw-foot tub. It seems good with black and white colors in it.

Kate Harris Interior Layout A compact bathroom with textured walls that add heat to it. It used other tones for the wall which makes it glance much more gorgeous. Including a few plants will alleviate its enchantment.

Accents + Interiors Tone on tone neutrals are observed on this rest room. It has blended fabrics that keep the bathroom feeling recent and bright.

Liebke Tasks This Toilet seating will also be used for more than simply sitting on. It may also be the easiest position to relax rolled up towels for the visitors and in addition to show potted plants.

Global Custom Designs A master rest room that makes use of herbal fabrics and textures to create the sensation of bathing out in nature. it's Japanese inspired with a contemporary combine in its design. The use of a bamboo ladder offers it a Jap really feel.

Domus Nova You'll spice up your toilet storage including a couple of crops. an effortless wire-shelf unit is used right here as an area-savvy solution. Bogs can incessantly benefit from foliage seeing that it could actually create a medical vibe.

LSA Architects Gray is the most popular palette for these days’s toilets. It seems great with the wooden options in it.

Vivid Not Unusual Structure & Design This Loo has a refined industrial really feel in it however its look is being upgraded with the hanging plants in it. It has black ground tiles that's the very best contrast.

Park + Pals This Luxury bathroom has vegetation simply out of doors its window. It has glass throughout it and i love how they did the structure.

Linherrhollingsworth A undying master rest room with a freestanding bathtub and an below mount sink. The planters additionally has a large have an effect on to the entire attraction of the gap.

Layout Platform White tiles and marble tile porcelain flooring are used on this rest room. The tall crops on each side of the window glance very nice.

Peti Lau Inc. A luxurious spa-styled rest room that introduced nature into the realm with an assortment of tropical plant. most of these crops create wireless calming impact.

White Rose Tiling & Toilets A Stylish grasp bathroom with beige tiles, a vessel sink, open cabinets, and medium tone picket cupboards. It also used picket countertops and a wall-mount rest room. in fact, allow us to no longer disregard the crops being added into it.

Coastal Designs Inc. This Contemporary rest room has ceramic flooring with limestone countertops. It has a pitcher enclosure for the bathe space.

Little England Invite nature in the bathroom with space crops from mini-succulent families to orchids. You'll even upload terrariums and vegetation under glass cloches. After seeing the above images, you're going to without a doubt believe us that any house would like contemporary and beautiful with vegetation in it. that may be why, it would be great to bring in plants into your home whether it is the bedroom, bathroom or lounge. it is such as you are bringing the beauty of nature inside of the home. for sure, you are going to agree with me that the bogs above glance stunning with vegetation in it. Imagine the areas with out crops and you'll understand the difference! Now, may you think about adding crops in your bathroom?
Read the full article
0 notes
Text
Formative feedback
Student name Kathy Jones Student number 516021 Course/Unit Drawing skills
Drawing 1
Assignment number 5 Type of tutorial (eg video/audio/written) Video tutorial
And short report
Overall Comments
I understand your aim is to go for the Painting Degree and that you plan to submit your work for assessment at the end of this course. In order to meet all the assessment criteria, there are certain areas you will need to focus on, which I will outline in my feedback.
It feels as though you have been grappling with pushing colours and portraiture together, merging ideas and approaches.
What is evident is that you have been generating an overview of the course which is an appropriate route for assignment 5.
When it came to the last assignment I wanted to push myself outside my comfort zone. I could have chosen to draw a portrait of just the face using skills that I am most confident with. Instead I have tried to utilize newly acquired skills and test my ability of putting them into practice.
Firstly, I wanted to create a more complex composition by including a mask and mirrors within my self-portrait, a decision that was heavily influenced by my artist research conducted over the last few months.
Kiki Smith’s and Louise Bourgeois’s symbolic references as well as the works of Matisse, Modiglianni and Giacometti that had been influenced by tribal masks, played a part in my decision. Maybe these influences have not been clearly reflected within my assignment post and I should have included more references to them.
My tutor’s feedback on the online tutorial was that my choice of mask was a bit too specific and a bit too ‘strong’ in terms of colour which made it stand out more than the portrait itself. A toned down mask would have provided a more balanced effect in terms of colour and focus.
To me, the mask was a reminder of the good times I had had in South Africa, of the culture and of its people. So I didn’t really consider how others would perceive it or interpret it within my work. While drawing and colouring the mask, (which is almost black in real life), I tried lightening it by using brown tones and a few coloured highlights here and there so it would fit in with the rest of the tonality within the portrait.
Following my tutor’s feedback I drew a few more mask studies, some simpler than others, using less intense colours. I tried to imagine them within my portrait submission and I could see what my tutor meant by saying that the mask was a bit too specific. A simpler mask would have been more open to interpretation without referencing a specific culture. Less colour intensity would have meant that the mask would have blended better within the portrait and not detracted from the face.
Secondly, I wanted to use colours to portray my subject matter since my personal research was about Colour and emotion. My art in the past was mainly in monochrome and it felt appropriate to try and be bold and use colour. Technique wise, I layered my pastels and worked in a tonal way to create depth and bring the form to life in a similar way I would have done with charcoal or graphite.
I agree with the tutor’s statement that my last assignment reflects an overview of the course as I tried to take all my prior learning into account whilst taking a leap forward.
You seem more aware of why you are drawing and thinking and more critically aware of the process. Looking at your research I can see why you have worked in the way that you have, there is a slight whimsy within the images at times especially the assignment piece.
The tutor recommended artist research really inspired me to attempt something that I wouldn’t have done before. It made me look more deeply within myself and try to find out what really interests me rather than just draw what I see in front of me.
The distortion is interesting and at times there is potential within this process for your drawing, the way the hands, or features become enlarged out of proportion.
Having previously questioned the technical drawing skills within the work it is interesting that you have used a technical process to distort and alter your images and self-portraits.
My visits to the Matisse, Modiglianni and Giacometti exhibitions as well as researching Picasso’s work, were an eye opener as they showed me that the face and figure don’t have to be drawn in a realistic way to capture the attention of an audience or to create a compelling narrative. As a result of this distortion and expressionistic approach their portraits appeared full of intrigue and character while generating multiple questions about the stories being told by the artists.
Looking back at part four it appears that I was already playing with ideas relating to distortion; my monochromatic self-portrait submission had elements of distortion within it. The freehand drawing of my self-portrait drawn while looking into the mirror had created an unusual , slightly distorted angle on its own but I also think that Jenny Saville’s and Schiele’s distorted pieces had influenced many of my decisions.
In assignment five, rather than distort or disfigure my portrait using freehand I used a distorted grid as suggested by R. Kaupelis, (Experimental Drawing), so it could be used as a way of measuring and controlling the degree of distortion, (through adjusting the grid lines (as shown in my two examples within the assignment). I could then use my favourite ‘distorted grid’ for future projects to help me achieve a similar kind of effect.
Throughout my experience of drawing I have tried and tested various ‘technical’ methods to help me achieve a more realistic effect within my art. For example I have used a standard grid and a proportional divider to enlarge or shrink images but the most pleasurable and rewarding method of all is to draw using freehand, without a shadow of a doubt. Freehand drawing is what makes everyone’s art stand out and show the uniqueness, a bit like handwriting. (I have noticed certain similarities of mark-making within my quick, preparatory work and maybe I should focus more on that spontaneity to help me develop my signature style).
I have found distorting effects fascinating and it is something I will experiment with in my future art. I will also look into more artists who employ the use of distortion within their work, as suggested by my tutor.
What is so interesting and positive to read is that you have gained so much through the experience so far, the drawing the connections and the thinking.
Here your drawings begin to look like you are underwater the distortion allows the face to wobble as tough in a pool, lying down, submerged. Can you see how the work starts to be driven by the choices you have made through the methods – even if these are different from initial intentions?
Yes, I can see how the thinking process move and can affect the final outcome of an artwork.
Your technical skills were something that challenged you at times in part 4, trying to marry what you saw and what you drew and articulated on the page was not always as successful as you hoped. However, there is an awareness in this part of the course where you have used certain skills to create images that reflect your thinking and emotional responses.
The seated figure from assignment four had preoccupied me in terms of depicting its foreshortening in a believable way. I should have submitted the larger, brighter collaged drawing as my final piece as it had more character and appeared more ‘fluid’.
There are issues with some of the drawing (mask being treated differently to the rest of the work) that you could unpack in terms of your reflection.
You have let the research, personal voice become part of the imagery more strongly and this seems like a positive step for you.
I agree that the research I have conducted throughout the course has had a massive impact on me and has made me realise the importance of not just being able to draw but also having the ability to express thoughts and ideas in a visual manner and in a unique style.
Feedback on assignment
Demonstration of technical and Visual Skills, Quality of Outcome, Demonstration of Creativity
It is interesting that you begin (in earlier versions) with distorting the figure yet the mask remains the same this creates an odd effect and destabilises the image, the mask is more defined, outlined drawn, and the figure is less significant, and slips and moves through the distortion.
I can now see how this comes across. The squares of the grid the mask was in, were very close to being ‘regular’ squares and therefore the mask’s features appear unaffected by the distortion, (sorry the grid lines are a bit faint). I agree that I should have considered this point which in a way destabilizes the whole image and places more emphasis on the mask rather than the portrait itself. However, I saw the whole body disfiguration as an experimental preliminary study and decided not to develop it further.
The mask in real life is fairly big and I would probably have had to use a much bigger sized support and work on a larger scale. Alternatively, I could have changed the direction of the grid lines.
Supportive study
The gridded image below was the one I used to produce my final piece for the assignment. When comparing the mask in both versions, (distorted and normal), it does appear to be almost the same and therefore unaffected by the distortion.
Assignment five, FINAL
You can see you have been informed by recent research and your drawing reflects that as your approach changes with texture and line and narrative (Kiki smith?)
I really like the naivety of Kiki Smith’s drawings and the suggestion of the metaphysical or celestial. Her tapestry of ‘Sky’ is particularly interesting, especially with regard to the way she has portrayed the figure which is surrounded by the textures of birds, butterflies and stars.
Going forward it is important to really understand how you are treating each of the elements in the drawings through the drawing skills, what it communicates and how you can edit back or add more appropriately
There is often a naivety in the imagery that is at times fluid and confident and at other times can question technical skill. If you want the naivety or the expressive components outside of a literal representation you need to make that clear within the work, by knowing those lines, marks and decisions without hesitation.
Reflect carefully on your decision making, outcomes, composition.
You have worked hard to try new ways of working and really consider colour through the practical work and the research.
All above points raised have been taken on board.
I will include an update section in the blog post: Assignment five, The process and self-reflection against the assessment criteria. Please visit relevant post.
Sketchbooks
Demonstration of technical and Visual Skills, Demonstration of Creativity
The progression of ideas within this
In this part of the course there has been a sense of negotiating your practice and way of drawing, this is seen through different self-portraits and experiments with distortion.
There is a range in the quality of the drawings and observation but more importantly you are trying to find your line, your mark your intention and at times this is beginning to happen.
My way of drawing was very ‘set’ before I started the course; I used to go with the first idea that would come to mind and focus on drawing my subject matter in monochrome. Nowadays my approach is more open minded and explorative and I would like to think there is a bit more character coming through too.
Research
Context, reflective thinking, critical thinking, analysis
In the notes section of your learning log/blog it is clearly evidenced that you are thinking more clearly and thoughtfully about the work of other artists and how they may relate or shift possibilities for your own practice.
It is good to see that these have included your own research, suggested references and seeing current exhibitions.
This has meant there is a better grounding of why you are working and creating imagery the way that you are.
I have thoroughly enjoyed researching other artists and going to exhibitions because they have enabled me to look at art from an objective as well as subjective point of view. I have gained better understanding of critiquing other art and see how it relates to my own practice.
The research around colour has seemed useful and grounded the thinking around your choices for pushing the work that way
That was very useful research especially as I have been working with colour a lot lately. I wanted to better understand the theory behind it, see how other artists have been using it in different ways and to what effect and to help me evaluate its uses within my artistic practice.
Learning Logs or Blogs/Critical essays
Context, reflective thinking, critical thinking, analysis
Your statement starts to set out our thinking for your submission and why certain decisions have been made, I would consider before assessment submission that you extend your statement in term of the following quote from your blog “My way of working with colour is intuitive as I tend to ‘feel’ my way through my drawings.’
It is important to think about what you mean when you say ‘feel’ your way through the drawings. Whilst we may understand this but remember that you have started to make a particular set of decisions with the work you make, and these have developed through the experiences on the drawing course.
I will look into this and make amendments in the relevant blog post; I can see the importance of further elaborating on this point.
You have discussed a potential narrative forming and have chosen elements to draw to try and explore these ideas (wings/mask)
Can you expand your reflection on the final image?
My initial chosen composition for development had been of just me holding the mask. However, the background seemed a bit too plain. Having played with mirror ideas in my earlier sketches, (as a follow on from assignment four), I drew some curved lines behind me which I thought resembled oval mirrors, (my other half insisted they looked like wings!).
I thought of the mask as a symbol for identity, (it is thought that African masks have spiritual significance). The fact that I was holding it symbolized that I had finally reached the destination of finding my artistic voice. In my mind, I interpreted the mask as the newly found, more confident me in terms of voicing my ideas and expressing my artistic preferences.
Mirrors are seen as symbols of reflection. They show us our reflected image but can also be used symbolically to help us look deeper within ourselves, on a spiritual level. In my drawing the mirrors’ edges appear to be fluid, radiating energy, waiting to be consulted but my back is turned on them as a way of signifying that I have found what I was looking for, which the mask that represents me.
I guess the finished piece represents my journey within this course, the constant looking into the ‘mirror’ and searching for myself, my style and my artistic voice. The mask on the other hand represents that I have made a connection with my artistic self and have found a way of expressing it.
I realize that the image can be interpreted differently by others depending on their views and individual experiences.
Suggested reading/viewing
Context
I have added some references here that look at the ideas of playing with distortion whether through scale/water/colour. Whilst you may not have time to research these before your assessment submission they may be useful going forward.
Michael Andrews.
‘Melanie and Me Swimming’ (1978-9) by Michael Andrews at Tate Britain
Dan coombs http://www.dancoombs.co.uk/
Daniel Coombs. Nude, 2014. Oil on canvas, 60 x 45 cm. © the artist.
I will not have the time to research the above mentioned artists before my final assessment but thank you for the suggestions! I will look into these artists’ work see how they use distortion and to what effect.
Pointers for assessment
Reflect on this feedback in your learning log.
Remember to think about the work that represents your journey and that it is all clearly labelled in order and referenced and evaluated on the blog/learning log.
Remember to think carefully how you have evidenced your process and ability through reflecting on the assessment criteria.
Well done Kathy.
Many thanks for your continuous support and invaluable feedback!
Strengths Areas for development A deeper understanding of your personal voice through the work has emerged Keep working on what you want the work to communicate and how it does this through choice in method, and approach. A greater connection with how the contextual research has impacted and informed the work This can develop further now by understanding how you can apply what you have gained through the research as the practice develops. A step forward with the drawings that means you have considered your connection with the work more than in earlier stages of the course. The drawings are beginning to develop differently and with more confidence. There needs to be careful attention on how they are made and all aspects of the images need to equally be considered as a whole image. A more defined critical position that anchors the development of the next stages of the work, Now you state that you have an awareness of voice, narrative, colour that is emergent – you can discuss how you critically understand the work. Continue to think where you need to develop so the approaches you choose are seen as conscious decisions beyond technical ability.
Tutor name redacted Date 23rd May 2018
Assignment five-Tutor feedback and reflection. Formative feedback Student name Kathy Jones Student number 516021 Course/Unit Drawing skills Drawing 1 Assignment number 5 Type of tutorial (eg video/audio/written) Video tutorial…
0 notes
Text
Dramatic Dark Hues Wedding Styling at Brympton House
I have something rather special for you today with these dramatic dark hues wedding styling ideas. As one of the most spectacular and unusual wedding venues in the English countryside, the magical Brympton House was the perfect setting for this edgy shoot.
This styling concept shows how to create magical, romantic wedding styling but with an industrial twist. The dramatic dark hues and grey are daringly bold and look fabulous together, and the overall look is breathtakingly beautiful. The team also very cleverly added pops of this year’s Pantone statement colour, ultra violet, in the styling.
For me, one of the stand-out aspects of these wedding styling ideas are the flowers – WOW! As a purveyor of weddings I see a lot (and I mean a lot!) of wedding flowers, so it’s always lovely to see something a little different and quirky. Emily of Stems of Somerset has really worked her magic with these blooms. There is a whole spectrum of purple hues going on, from rich deep purple, vibrant pops of purple and palest lilac, plus the contrast of orange berries and yellow leaves, all finished with beautiful green foliage.
The tablescape is something very special and unique too. Place settings of art deco gold edged glassware, gold chargers, and gold cutlery sit atop dark grey linen along with grey candles in gold candlestick holders and incredible floral arrangements. The whole look is elegant and romantic with the dramatic vibe.
There are two bridal looks, and both work so well with the styling concept and the grandeur of the venue. For the first look the bride wears ‘Locklin’ by Watters, which exemplifies bridal elegance. I love the sheer straps with the delicate beaded detail that then cascades over the bodice with an embroidered motif. The soft flowing netting of the skirt makes this bridal look so elegant and almost fairytale-esque. For this look the bride wears her hair in a loose half up style with a pretty hair vine running through.
The second bridal look has a more contemporary feel, and here the bride wears ‘Druida’ by Pronovias. This is a spectacular mermaid design with sweetheart neckline and incredible gemstone appliqués that adorn the entire dress.
Everything about this wedding styling is dramatic and elegant. I hope that you fall for these images, captured by Emma Barrow Photography, as much as I have.
Grey and Dark Tones
“Brympton House has so many areas and options for photographs, so we were spoilt for choice! With so many different areas to choose from, we decided the main styling concept behind the shoot should go away from the obvious and expected!
“Our fantastic house florist, Emily Jewsbury, carefully selected a range of unique and unusual flowers which were key to creating the look we wanted. Grey and dark tones added a nod to the industrial style trending in the general interior design world right now.
“We wanted to blend colours that may seem uninspiring and bring them to life by contrasting them with deep shades of purple, orange and yellows, along with a variety of fabric textures including linen, silk and velvet.”
Art Deco Elegance
“The beautiful engraved glassware introduced a hint of art deco and gave an elegant look to the table. The gold-plated cutlery and charger plates added a touch of glamour to the tablescape and blended well with the rest of the table dressing.
“The addition of hand dyed silk ribbon ties – in a popping purple colour to bring the guest setting to life – added a further touch of opulence to the tables.
“Some of our favourite shots were the cake display. With its own special room for the cake, the cake display at Brympton had to be something special. The table display has an almost rustic nature. We draped a beautiful grey linen cloth over the wooden table making it perfectly untidy, and added a vintage touch with old books. Jennifer finalised the look with the most stunning wedding cake, topped with a small floral urn display.
“A floral floor runner defined the beautiful Altar in Castle House. This gorgeous building dates back to the 13th century, so the concept for styling and flowers was to keep it elegant yet natural, in keeping with the natural stone and wood. We added in collections of vintage brass candlesticks for a touch of romance.” – Style by Design, Brympton Styling
A Nod to Autumn
“The thinking behind the flowers was to keep them as seasonal as possible. Lot’s of the foliage was foraged and I combined it with grasses and lichen covered branches to add lot’s of texture.
“I kept the palette quite neutral (greens, browns, rusts, nudes) as a nod to autumn, but added pops of colour with brighter violet which was then highlighted in the trailing silk and velvet ribbons from the bouquet and the silk ribbon on the place settings.
“Texture was important to me in the flowers. I used lot’s of seed heads, berries, grasses, twigs etc, alongside the soft petals of the roses and the fragile anemones.” – Emily Jewsbury of Stems of Somerset
Photography: Emma Barrow
Shoot Location: Brympton House, Brympton D’Evercy, Somerset
Styling: Daniella Kempf and Ellie Sloane of Style by Design, Brympton Styling
Florist: Emily Jewsbury of Stems of Somerset
Wedding Dresses: Druida by Pronovias and Locklin by Watters, from The Wedding Company
Accessories: Kelly Spence
Hair Stylist: Janine Marino
Make-Up Artist: Molly Barrett
Cake: Edible Essence
Stationery: Anon Design
Ribbon: Little Acorn Silks
Model: Heather-Louise Hughes
The post Dramatic Dark Hues Wedding Styling at Brympton House appeared first on The Wedding Community Blog.
0 notes
Photo


Visual Exercise 3: Re-creating Images Ana Luisa Pinto I came across Ana Luisa Pinto whilst researching conceptual photography. I was intrigued by her images as they expressed unique and creative ideas, therefore I decided to attempt to reinterpret one of these. Ana Luisa is mainly recognized for her portraiture photography; however, she also takes interest in wedding, fine art/conceptual, business/lifestyle and travel photography. She works with a digital camera, although many of her images appear to have been taken on film, due to post-production. To edit her images, she uses Lightroom 5, photoshop and sometimes on her phone, VSCO Cam and Afterlight. The editing Ana Luisa does on her photographs enhances the atmosphere/mood created in her images, which I plan to do to mine as well. The Lady with the Butterflies After reading more about the photographer and this image in particular, the photograph inspired me as I discovered that it actually had a lot of meaning to the photographer. Ana Luisa admits that she went through a ‘horrible period of her life’ and had a bit of a breakdown after working so hard on several projects at once. She explained that, due to this, she stopped focusing on photography for about a month and took a break. The Lady with the Butterflies was the first idea she had after this period and got her back on her feet with her photography career. I feel the explanation behind the image makes the photograph itself quite inspirational. It is a close-up self-portrait of Ana Luisa, however instead of capturing the detail in her face, it is covered by orange butterflies. Butterflies symbolize transformation and resurrection which, in this context, represents change in Ana Luisa’s life. The vibrant orange colours present in the butterflies also create a warm and happy mood within the image. The overall message of the photograph suggests Ana Luisa was feeling hopeful about changing her life for the better. I tried to recreate this image by using a model and several packs of 3D orange paper butterflies. I wanted the images to look as similar as possible, so I made sure the person in my images was wearing an orange colored top, a thin gold chain necklace and that their hair was styled similarly. I experimented with slightly settings and decided it looked most effective with a smaller aperture and fast shutter speed. Because Ana Luisa does a lot of post-production with her images, I also edited my final image in a way similar to her style of work. I began by cropping the image to a square, then adjusted the brightness, saturation and colours to appear more similar to Ana Luisa’s photo. I then used different effects with a low opacity to fill the background and add texture. The frame was created by using a painting tool and was made to look sort of abstract as they were not perfect, straight lines as frames would usually be. Overall I feel that this image was successful as it looks quite like the original and was created in a similar way. Midas Touch I found this image visually aesthetic due to the composition and further use of the butterfly. Looking closer into this image, it is noticeable that the fingers of the person in the photo are gold. The title of the image, Midas, highlights this, and refers to the well-known tale of King Midas, in which he made a wish that everything he touched would turn to gold. The tale refers to greed, with the general moral of the story being a lesson teaching the reader not to be greedy, and not to crave materialistic things. Unlike the story, however, Ana Luisa’s image has a warm feel to it. The butterfly being held remains in it’s natural colour, rather than being turned to gold. The fact that the person is holding a butterfly suggests they are at one with nature, creating a calm atmosphere. As the tale of Midas and the image Midas Touch seem to have very different meanings, it suggests that Ana Luisa ironically titled this piece of work to compare and contrast the two. For this image I used one of the same paper butterflies that I used for The Lady with the Butterflies re-creation. A main feature of the original photo is that the fingers are gold. I tried to recreate this and bought some glittery gold spray, however when I got round to taking the photoshoot, the gold barely showed up in real life, let alone on camera. To try and fix this I increased the saturation of the image significantly over the fingers and played with colour. Despite this, I don’t feel that it looked very realistic and made this final image the least successful of them all. James Ellis James Ellis is a Canadian urban photographer who expresses a wide variation of different styles of photography within his work. He often works with unusual compositions, and sometimes takes images which appear to have been taken in the moment and unposed. James Ellis, whose work more often goes by ‘Mr. Ellis’, was featured on Complex: The 50 Greatest Street Photographers Right Now, alongside Joel Meyerowitz and Andre Baumecke. Untitled One image by Mr. Ellis featured what appeared to be a large sheet of coloured paper or card covering most of the foreground. The only break in this perfect colour was in the centre where there was a rip in the paper, with a face visible through this. The reason I wanted to recreate this was because I found it interesting and the composition was very unusual and unique. Overall, I feel that my recreation was successful. The original image was relatively simple; all I needed was some coloured card and a model. I ripped a hole in the card and had my model hold it in front of their face, just like Mr. Ellis’s photo. To choose my final image, I decided on the one that I felt best represented the original. To edit this, I decreased the saturation and played around with shadows, highlights and exposure until the tone of the sheet of card looked the same. I then added a grain effect as Ellis’s image had this too. Smoke I saw this image a long time ago when I was researching photographers in school, but I had never had the chance to recreate it. I found this image visually appealing as I felt it was quite different and I felt that the effects and editing used on this made it look very effective. Although the photographer has not made it clear, I feel that there may be a meaning or symbolism behind this image. It features a man blowing smoke over his face and the overall photograph is slightly grainy and out of focus. This may make the viewer question the meaning: what is he smoking and why, why has it been edited in this way etc. I lIke this as it makes the viewer think for them self. Although the backdrop for my image was not identical to the original, I feel that this was a successful shoot. The model that appears in my photo is wearing similar clothes and the overall composition is nearly the same. I edited this in a similar way by changing the colour settings slightly and adding a grain and out of focus effect. Evan Sharboneau Evan Sharboneau considers himself to be a ‘photo extremist’ who gives unique tutorials and images to photographers, artists and photo manipulators. He publishes his work in the form of electronic books, and videos on YouTube. Although Sharboneau is not as well known as a photographer, he has some very interesting work and a unique take on photography. Hands Over Face Portrait I felt that this image was extremely effective due to the unique concept and composition of the photograph. I wanted to recreate this to be able to try it myself and make something equally as successful. I think my recreation of the image was effective, but not as successful as I had hoped for. I took several images of a model with a blank backdrop: some were just a headshot of an unposed face, and the others were taken in the same position with the model holding his hands over his eyes. I then overlapped these images in photoshop and experimented with the harshness of the opacity of each one. After this, I put the image in black and white and darkened it in areas to appear similar to the original photo. This was successful but one flaw that I found in my image was the way the fingers had been cut out and blended with the original photograph. I feel that the fingers are too faded around the edges and would look more effective if they were as sharp as Ellis’s photo.
0 notes
Text
five Guidelines for Selecting the Proper Polo Shirt for Your Logo
tričko s vlkem
Did you know that the garment we get in touch with a polo shirt, sport shirt, or golfing shirt essentially originated on the tennis court? In 1929, French tennis champ René Lacoste designed a quick-sleeved piqué knit collared shirt with a buttoned placket. Before long, he extra an embroidered crocodile - a image of his tenacity on the court docket - to the left upper body place. The shirt caught on amongst polo gamers, and by 1950, "polo shirt" was the garment's approved name. The embroidery custom has lived on as very well. Given that polo shirts are well known on the golfing study course, in the board room, and around town, a lot of corporations put their logo on the shirts and give them to workers and clientele.
Picking a polo shirt for your firm symbol can be variety of overwhelming, specially if you are not especially style-aware. Listed here are the top rated five features to spend awareness to when building your selection.
one. Material kind and texture
The authentic polo shirts were a hundred% cotton, and that material is however extremely common - specifically premium cottons like Tangüis and Pima. These are certain types of cotton pointed out for their top quality, softness, and durability. Cotton/poly blends are also well known, due to the fact the material is wrinkle-resistant and less probably to shrink. Some go for 100% polyester, mainly because of the sturdiness of the fabric when washed above and more than once more, and due to the fact of dampness-wicking homes that make it excellent in sweaty circumstances. Finally, you may well desire an exotic or unusual fabric like bamboo or eco-pleasant options like recycled polyester and natural cotton.
Fabric content material is just 50 % the equation, nonetheless. The texture of the fabric determines its seem and feel. Jersey is a relaxed, affordable alternative. The exact same type of cloth utilized for T-shirts, it is good for display screen printing or embroidery. Related to jersey, interlock cloth is double-knit, generating it thicker and smoother. Piqué is the original polo shirt material if you seem at it closely, you may see that it has a waffle-weave texture. Fascinating tonal results can be achieved with jacquard fabric, which looks and feels deluxe. Ultimately, mesh fabric is well-known for athletic options, because the area involving the fibers permits the garment to breathe.
2. Effectiveness Features
The term "overall performance cloth" refers to a material that has been made to offer functional rewards to the wearer. They make the practical experience of donning the garment a lot more pleasant and practical. Moisture-wicking or moisture-administration polo shirts pull sweat away from the physique and market evaporation. They retain the wearer amazing and dry, and are hugely preferred by golfers and hard-performing employees. In which you will find sweat, there might be odor, so anti-microbial features are significant to curb the growth of smelly microbes. Stain-resistant cloth is a must if the polo shirt will be worn in a restaurant or hospital. Teflon and Scotchgard are common fabric remedy techniques that make spills much easier to cleanse. Snag-resistant fabrics enable keep the activity shirt wanting new for a extended time, and are proposed for any heavy-duty use.
3. Model
It truly is possible to put your brand on a polo shirt with a recognizable brand identify like Adidas, Winner, Nike, and so on. The people you give a model-title polo to will see the model and know they've gotten a high-top quality garment. There is a single doable downside to a brand-name sport shirt, nonetheless: the manufacturer's brand, like the Adidas stripes or Nike swoosh, might show up prominently on the shirt and could get attention absent from your logo. The other option is personal label polo shirts. These garments are created particularly for embroidery and other symbol decoration. You may possibly not know the names from retail retailers, but the high quality and benefit could be superb.
four. Color
Most of the time, polo shirts are a single colour from leading to bottom - in other text, they are strong shade activity shirts. Another option, which is favored in athletic settings, is the colour block polo shirt. This garment combines distinct colours in various locations of the shirt. For case in point, the front and back of the shirt could be gray, and the aspect panels could be black. There could be elegant color panels on the sleeves or chest. Universities love coloration-block polos simply because they can pick a shirt that combines their college hues. A different colour thought is tipping. A tipped polo includes slender borders on the collar and sleeve hems. Piping is equivalent, but it highlights the seams of the garment.
five. Decoration
Past but certainly not the very least, look at the decoration approach employed to implement your symbol to the polo shirt. Embroidery on the left-upper body place is the regular solution, heading all the way back again to Lacoste's initial crocodile. The benefits of embroidery include things like sturdiness and a polished, elegant glance. If you are heading for a a lot less conventional glance, other spots for your emblem include the upper back or the sleeve. Of system, embroidery is not the only way. You could choose for display screen printing if the polo's fabric is smooth, like jersey or interlock. New activity shirt decorating trends incorporate laser etching, which primarily "burns" the surface of the cloth to create a tone-on-tone style and design, and heat seals.
0 notes
Last Seen Blogs

fantasticmoonchaos-blog
Moon Child

nur-aain
N U R A I N

get-jinxed-suckers
GET JINXED

lehetetlen-elfelejteni-ot
Sose fogom tudni elengedni

violaeliquirizia
violaeliquiriza