#Change Password on NETGEAR Router
Text
How to change the admin password on my NETGEAR router?
To embark on the process with respect to change password on NETGEAR router, all you need to do is launch a web browser; type in the web address in the address bar; and enter the username & password in the fields of the login window. After that, select ADVANCED>Administration>Set password. For more information related to changing passwords, contact us!
0 notes
Text
How To Change Your Netgear Router Password?
To change the Netgear router password, access the router's web configuration page, log in, locate the password change section, enter a new password, save changes, and log out. Reconnect devices with the new password. Connect with our expert team right away if you are unable to change your Netgear router’s login password.

0 notes
Text
Guide on Mywifiext | www.mywifiext.net Login / Setup
By asking you questions, Guided Assistance assists you in resolving the problem you are experiencing with your NETGEAR equipment.
You can log into your netgear WiFi range extender after installation to examine and modify the settings.
Visit NETGEAR Support and obtain the quick start guide for your model if you haven't installed and connected your WiFi range extender to your current WiFi network before continuing.
Check to see whether your model is listed under "This article pertains to:" If you own a Nighthawk Mesh or Mesh WiFi Extender, check How can I access my Nighthawk Mesh Extender or WiFi Mesh Extender?
To access your WiFi extender, log in as follows:
From a computer or mobile device linked to your extender's network, open a web browser.
It's possible that the names of your router and extender's WiFi networks differ (SSIDs). Check to see if you are linked to the network of your extension.
In the URL bar of your web browser, write www.mywifiext.net if your extender and router have distinct WiFi network names (SSIDs).
Enter http://extender's IP address> (for instance, http://192.168.1.3) into your browser's address bar if your extender and router share the same WiFi network name (SSID).
See How can I find the IP address of a device connected to my router? for additional details.
Hit the Enter key or press.
A login screen appears.
Enter your admin password and user name.
Note: An email address could be part of your user name.
Click the Username & Password Help link if you can't remember your user name or password.
To change your login information, see How can I reset my NETGEAR range extender to factory settings?
Tap or click LOG IN.
It shows the Status page.
Click or press the Menu symbol if your browser displays it.
A menu for the extender appears.
To view and modify the extender's settings, select Settings.
1 note
·
View note
Text
How to Change Nighthawk Router Password
However, to change the Change Nighthawk Router Password, log into your Netgear account first using the Nighthawk app. For that, update or download the Nighthawk app on your smartphone. Then, log into your account and go to WiFi Settings. Then, enter a new password in the Network Key field following the on-screen instructions. For more assistance, connect with us!

0 notes
Text
Netgear EAX12 Setup | AX1600

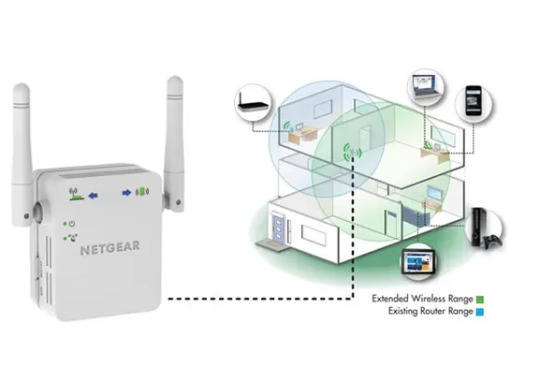
The Netgear EAX12 AX1600 extender is a small, high-performance device that improves Wi-Fi coverage in your house. It simply extends your current network, removing dead zones and providing a strong, stable connection across your space thanks to its simple Netgear EAX12 setup and compatibility with a majority of routers. With the Netgear EAX12 extender, you can enjoy free browsing, gaming, and streaming. It’s an easy way to increase the strength of your Wi-Fi signal and enhance network performance in general.
How should my Netgear EAX12 extender be configured?
To manually configure your Netgear EAX12 extender, follow these steps:
Turn on your EAX12 by plugging it in.
Put the router and your AX1600 in the same room.
Open any web browser and go to www.mywifiext.net.
You are looking at the Netgear installation assistant on your screen.
To finish the setup procedure, follow the guidelines.
When the solid green LEDs on your EAX12 turn on, it suggests the setup procedure was successful.
Your AX1600 can now be disconnected and replugged wherever you’ve decided.
You can manually configure the Netgear EAX12 in this manner. Please don’t worry if you are unable to manually configure your booster. We will instruct you on how to set up your booster in about two minutes.
Note: If you need any assistance regarding your MyWifiext setup, get in touch with us via the chat button you see on the bottom right corner of this page.
How do I use WPS on my Netgear EAX12 extender setup?
Power On the EAX12: Plug in and power on the Netgear EAX12 extender.
Press WPS Button: Locate the WPS button on your EAX12 extender and press it.
Press the WPS button on your primary router and it will become active in two minutes. This initiates the WPS connection process.
Wait for Connection: Allow some time for the EAX12 extender to establish a secure connection with your router using WPS. The LED lights will indicate a successful connection.
Verify Connection: Confirm that the LED lights on the extender show a stable connection. If successful, your extender is now synchronized with your router.
Optimal Placement: Place the extender in an optimal location to extend Wi-Fi coverage. Enjoy improved connectivity in areas with previously weak signals.
Netgear EAX12 extender login procedure
Connect to Extender Network: Use a Wi-Fi-enabled device to connect to the default Wi-Fi network broadcasted by the Netgear EAX12 extender.
Open Web Browser: Launch a web browser on your connected device.
Enter Login Address: In the address bar, type “http://mywifiext.net/” and press Enter.
Enter Credentials: You’ll be prompted to enter the login credentials. Use the default username and password (usually “password”) unless you’ve changed them.
Access Dashboard: Once logged in, you’ll have access to the Netgear EAX12 extender dashboard. Here, you can manage settings, configure options, and check the extender’s status.
Logout: For security, always log out after making any changes or configurations. Look for a “Logout” or “Sign Out” option in the dashboard.
Firmware update for Netgear EAX12?
Open a web browser and log in to the Netgear EAX12 extender dashboard using mywifiext.net.
Locate the firmware version in the extender dashboard. Note this information for comparison.
Go to the Netgear support website and navigate to the EAX12 product page.
Find and download the latest firmware version for the EAX12 extender.
In the extender dashboard, look for the “Firmware Update” or similar option. Upload the downloaded firmware file.
Allow the extender to update its firmware. This may take a few minutes, and the device may restart during the process.
After the update, check the extender dashboard to confirm that the firmware version matches the latest one. Your Netgear EAX12 extender is now running the most up-to-date firmware.
How do I reset my Netgear Eax12 Range extender?
Here’s a procedure to reset your Netgear EAX12 range extender:
Locate the reset button on the EAX12 (usually a small, recessed button).
A paperclip or other similar item can be used to press and hold the reset button.
Hold the button for about 10-15 seconds.
Release the reset button.
Wait for the EAX12 to reboot, and it will be reset to factory settings.
Remember to check your specific user manual for any model-specific details.
#mywifiext_net_login#mywifiext_net_setup#netgear_ex6110_setup#netgear_wifi_extender_setup#netgear_nighthawk_wifi_extender_setup#mywifiext_setup#mywifiext.net setup#netgear_extender_setup#mywifiext setup#netgear extender setup#Netgear Eax12 Setup
0 notes
Text
https://routeraccess.co.uk/
Netgear Routers | Netgear Router WiFi Networking Support
For an easy Netgear Router login process, open the web browser and type the routerlogin.net web address in the browser bar. Now, enter the default admin details on the login window. Here, you will reach the smart home dashboard and configure the basic settings like SSID name and password change. To know more information regarding the same, visit us!
0 notes
Text
How do I access my Netgear router login page?
Accessing the Netgear router login page is a simple process that allows you to control network settings, update firmware, and troubleshoot problems. To begin, ensure that your computer or device is connected to the Netgear router's network, either through a physical Ethernet connection or via WiFi. Open a web browser and type "http://routerlogin.net" or "http://192.168.1.1" in the address bar. Both URLs bring you to the Netgear router login page. If the default IP address does not work, consult your router's manual or the sticker on the router itself to get the right IP address. When you reach the login screen, you will be required to enter your username and password. The default login credentials are normally "admin" for the username and "password" for the password, but if you've modified them before, enter your custom credentials. After logging in, you'll have access to the router's administrative interface, where you can change settings like network security, Wi-Fi configuration, and more. If you have any problems accessing the Netgear router login page, make sure your router is turned on and correctly connected, and that you are using the correct URL and IP address. Additionally, emptying your browser's cache or using a different browser will often alleviate access issues. By following these instructions, you will be able to manage your Netgear router more efficiently while also keeping your network reliable and safe. For additional help or advanced troubleshooting, visit our website and contact with our technical support experts team.
1 note
·
View note
Text
Netgear router login | routerlogin.net | login to netgear router
To access the Netgear Router Login page, open the web browser and type the routerlogin.net web address in the browser bar. Now, enter the default admin details on the login window. Hereon, you will reach the smart home dashboard and configure the basic settings like SSID name and password change. For more info, get in touch with us!
1 note
·
View note
Text
How to change mywifiext.net login password?
To secure your network, use the mywifiext.net login password change method. For this, open the web address, type mywifiext.net web address in the browser bar, and enter the admin credentials. You land on the smart Home dashboard of the router, visit the WiFi/Wireless Settings, edit the Passphrase Key/Password field, and follow instructions or visit us!
#mywifiext.net login password change#Netgear extender refused to connect#mywifiext.net not working#www.mywifiext.net#mywifiext.net login
0 notes
Text
Mastering Orbi Router Login: Your Gateway to Seamless Network Management
These easy steps will get you to the Orbi login page so you may setup or manage your Netgear Orbi router. This is a comprehensive how-to:
Verify that your device is connected to the Orbi router's network either through WiFi or an Ethernet connection.
On the linked device launch any web browser.
In the bar type "http://orbilogin.com" or "http://orbilogin.net" and press Enter. You can also use the default IP address "192.168.1.1" as an option.
You will be redirected to the Orbi login page. Enter the default username and password. For most models "password" is the default password and "admin" is the default username. If you have changed these login credentials use your special login details.
After successfully logging in the Orbi router's web interface will be displayed to you.
This is where you may adjust a number of settings including the network name (SSID) password guest network parental controls and firmware upgrades.
Make the necessary changes by navigating through the menu options. Remember to save the settings after making any changes.
For security purposes change the router's default login credentials if you haven't already. Additionally you ought to regularly upgrade the firmware to protect against vulnerabilities.
If you continue to have issues check that your device is properly connected to the Orbi network and try utilizing a different browser or clearing the cache on your present one. Resetting the router to its factory settings can also resolve persistent problems.
By following these steps you can easily log in and modify your Orbi router settings to ensure optimal network security and performance.
To find out more about Orbi router login visit our website.
0 notes
Text
does my netgear r9000 offer a vpn client mode
🔒🌍✨ Get 3 Months FREE VPN - Secure & Private Internet Access Worldwide! Click Here ✨🌍🔒
does my netgear r9000 offer a vpn client mode
Netgear R9000 VPN client mode
The Netgear Nighthawk X10 R9000 is a powerful router that supports advanced networking features, including a VPN client mode. The VPN client mode on the Netgear R9000 allows users to connect the router to a VPN (Virtual Private Network) service, providing enhanced privacy and security for all devices connected to the network.
By setting up the Netgear R9000 in VPN client mode, users can route all internet traffic through the VPN service, encrypting data and hiding IP addresses. This is particularly useful for individuals looking to secure their online activities, access geo-restricted content, or ensure anonymity while browsing the web.
Setting up the VPN client mode on the Netgear R9000 is a relatively straightforward process. Users can configure the router to connect to their preferred VPN service by entering the VPN server details provided by the service provider. Once configured, all devices connected to the router will benefit from the VPN's security and privacy features.
It is important to note that not all VPN services are compatible with the Netgear R9000, so users should ensure that their chosen VPN service supports router connections. Additionally, using a VPN may impact internet speed due to the encryption process, so users should be aware of potential performance limitations.
In conclusion, the VPN client mode on the Netgear R9000 offers a convenient and effective way to enhance online security and privacy for all devices on the network. By taking advantage of this feature, users can enjoy a safer and more secure internet browsing experience.
VPN setup on Netgear R9000
Setting up a VPN (Virtual Private Network) on your Netgear R9000 router can be a prudent step to enhance your online privacy and security. By encrypting your internet connection and masking your IP address, a VPN adds an extra layer of protection, particularly when accessing public Wi-Fi networks or browsing sensitive information.
Here's a step-by-step guide to setting up a VPN on your Netgear R9000 router:
Choose a VPN Service: Before proceeding, select a reputable VPN service provider that supports router configurations. Ensure the VPN service offers detailed instructions or dedicated support for setting up on routers.
Access Router Settings: Open a web browser on a device connected to your Netgear R9000 router and enter the router's IP address (usually 192.168.1.1) in the address bar. Log in with your router's admin credentials.
Navigate to VPN Settings: Once logged in, locate the VPN settings section. This may be found under "Advanced" or "Security" settings, depending on your router's firmware version.
Enter VPN Configuration Details: Input the VPN configuration details provided by your VPN service provider. This typically includes the VPN server address, username, password, and encryption protocol (such as OpenVPN or IKEv2).
Apply Settings and Restart Router: After entering the VPN configuration details, save the settings and restart your Netgear R9000 router to apply the changes.
Test VPN Connection: Once the router has restarted, test the VPN connection by accessing the internet from a device connected to your router. Ensure your IP address reflects the VPN server location and verify that your internet traffic is encrypted.
Configure Additional Settings (Optional): Depending on your VPN service and personal preferences, you may have options to configure additional settings such as split tunneling, DNS settings, or firewall rules.
By following these steps, you can successfully set up a VPN on your Netgear R9000 router, safeguarding your online activities and data privacy. Remember to periodically update your VPN configuration and router firmware for optimal security.
Netgear R9000 VPN compatibility
The Netgear R9000 is a powerful and advanced router that offers high-speed internet connectivity and a range of features to enhance the user experience. One of the key features that many users look for in a router is VPN compatibility, which allows them to protect their online privacy and security by encrypting their internet connection.
The good news is that the Netgear R9000 is VPN compatible, meaning users can easily set up a VPN connection on their router to secure their online activities. By using a VPN with the Netgear R9000, users can encrypt their internet traffic, hide their IP address, and access geo-blocked content from anywhere in the world.
Another benefit of using a VPN with the Netgear R9000 is that it can help users bypass internet censorship and restrictions imposed by their ISP. This is especially useful for users who want to access websites and services that may be blocked in their region.
Setting up a VPN on the Netgear R9000 is relatively easy, and many VPN providers offer step-by-step guides to help users configure their router. Users can choose from a wide range of VPN services available on the market, depending on their specific needs and preferences.
In conclusion, the Netgear R9000 is a VPN-compatible router that offers users the flexibility and security they need to protect their online activities. By setting up a VPN on the Netgear R9000, users can ensure their internet connection is encrypted and secure, keeping their online privacy intact.
Configuring VPN on Netgear R9000
Configuring a VPN on your Netgear R9000 router can enhance your online privacy and security. A VPN (Virtual Private Network) creates a secure connection between your device and the internet by encrypting your data and routing it through a remote server. This is particularly important when using public Wi-Fi networks or when you want to access geo-restricted content.
To configure a VPN on your Netgear R9000 router, follow these steps:
Choose a VPN Provider: First, select a VPN provider that supports router configurations. Look for providers that offer easy-to-follow setup guides and reliable customer support.
Subscribe to the VPN Service: Sign up for a subscription plan with your chosen VPN provider. Make sure to choose a plan that allows for router connections and provides the necessary configuration details.
Access Your Router Settings: Open a web browser on a device connected to your R9000 router and enter the router's IP address in the address bar. Log in with your router's username and password.
Navigate to VPN Settings: Once logged in, locate the VPN settings in your router's administration panel. This may vary depending on the router's firmware version, but it's typically found under the "Advanced" or "VPN" section.
Enter VPN Configuration Details: Follow the instructions provided by your VPN provider to enter the necessary configuration details, including the VPN server address, username, password, and any other required settings.
Apply Settings and Test Connection: After entering the VPN configuration details, apply the settings and restart your router if necessary. Test the VPN connection on a device connected to your network to ensure it's working correctly.
Optional: Configure VPN Client Devices: If desired, you can also configure individual devices to connect to the VPN directly. This can be done using the VPN provider's app or by manually entering the VPN settings on each device.
By configuring a VPN on your Netgear R9000 router, you can enjoy increased privacy and security for all devices connected to your network, whether at home or on the go.
Netgear R9000 VPN features
When it comes to ensuring online privacy and security, using a reliable VPN (Virtual Private Network) is crucial. The Netgear R9000 router offers advanced VPN features that make it a popular choice for users looking to secure their internet connection.
One of the key features of the Netgear R9000 router is its VPN client support. This means you can easily set up a VPN connection directly on the router, allowing all devices connected to the network to benefit from the encrypted tunnel provided by the VPN service.
Additionally, the Netgear R9000 supports OpenVPN, which is known for its strong encryption and overall security. OpenVPN is an open-source protocol that provides a high level of security and flexibility, making it a preferred choice for many VPN users.
Furthermore, the Netgear R9000 router offers high-speed performance, making it ideal for streaming, gaming, and other bandwidth-intensive activities while using a VPN. This ensures that you can enjoy a secure connection without sacrificing internet speed.
In terms of compatibility, the Netgear R9000 supports a wide range of VPN services, giving users the flexibility to choose the VPN provider that best suits their needs.
Overall, the Netgear R9000 router's VPN features make it a reliable and secure option for users who prioritize online privacy and security. By utilizing its advanced VPN capabilities, users can protect their data and ensure anonymous browsing across all connected devices.
0 notes
Text
can't connect to netgear router through vpn
🔒🌍✨ Get 3 Months FREE VPN - Secure & Private Internet Access Worldwide! Click Here ✨🌍🔒
can't connect to netgear router through vpn
Netgear router VPN setup
Setting up a VPN (Virtual Private Network) on your Netgear router can enhance your online privacy and security by encrypting your internet connection. This allows you to browse the web anonymously and securely, especially when using public Wi-Fi networks. By setting up a VPN on your Netgear router, you can protect your sensitive data from potential cyber threats and unauthorized access.
To begin the setup process, you will first need to choose a VPN service provider that is compatible with Netgear routers. Once you have selected a VPN service, you will need to log in to your Netgear router's admin panel using a web browser. Navigate to the VPN section in the router settings and enter the configuration details provided by your VPN service provider.
Next, you will need to configure the VPN settings on your Netgear router, including choosing the VPN protocol (such as OpenVPN or PPTP) and entering the server address and login credentials. Once you have entered all the necessary information, save the settings and restart your router to apply the changes.
After the setup is complete, you can connect your devices to the VPN-enabled Netgear router to secure your internet connection and enjoy private browsing. Keep in mind that setting up a VPN on your router may slightly impact your internet speed due to the encryption process, but the added security and privacy benefits are well worth it.
Overall, setting up a VPN on your Netgear router is a straightforward process that can significantly enhance your online security and privacy. By following these steps, you can browse the web with peace of mind knowing that your data is protected.
Troubleshoot VPN connection to Netgear router
Having trouble with your VPN connection to your Netgear router? Don't worry, you're not alone. VPN (Virtual Private Network) issues can be frustrating, but with a bit of troubleshooting, you can often resolve them without too much hassle.
Firstly, ensure that your Netgear router's firmware is up to date. Manufacturers often release updates to address compatibility issues and enhance performance, so checking for and installing any available updates could resolve your VPN problem.
Next, double-check your VPN settings. Make sure you've entered the correct server address, username, and password. Even a small typo can prevent your VPN from connecting properly.
If you're still having trouble, try restarting both your router and your device. Sometimes, a simple reboot can fix connectivity issues by refreshing the network settings.
Additionally, check if your VPN service is experiencing any outages or server issues. Visit their website or contact their support team for assistance.
If you're using a third-party VPN client, try connecting directly through your device's built-in VPN settings instead. This can help determine if the issue lies with the VPN client or the router.
If none of the above steps resolve your VPN connection problem, it may be worth resetting your router to its factory defaults and reconfiguring it from scratch. However, be sure to back up your settings beforehand, as this will erase all custom configurations.
In some cases, certain router models may have specific VPN compatibility issues that require advanced troubleshooting. In such instances, reaching out to Netgear's support team or consulting online forums for assistance from experienced users may be necessary.
By following these troubleshooting steps, you can hopefully resolve your VPN connection issues and enjoy secure internet browsing through your Netgear router once again.
VPN configuration for Netgear router
A VPN (Virtual Private Network) configuration for your Netgear router can provide an added layer of security and privacy when browsing the internet. Setting up a VPN on your router ensures that all devices connected to your home network are protected, without the need for individual installations on each device.
To configure a VPN on your Netgear router, you will first need a VPN service provider and the necessary login credentials. Access your router's settings by typing its IP address into a web browser and logging in with your admin username and password. Locate the VPN section in your router settings, where you can input the details provided by your VPN service.
Choose the VPN protocol recommended by your service provider, such as PPTP, L2TP, or OpenVPN. Input the server address, username, and password in the designated fields. You may also need to configure additional settings like encryption and authentication methods.
Once you have entered all the required information, save your settings and restart your router to apply the changes. You can now connect any device to your home network and enjoy the benefits of a secure and private internet connection.
Remember to regularly update your VPN configuration and keep your router's firmware up to date to ensure optimal performance and security. By following these steps, you can enhance your online privacy and protect your personal data while using your Netgear router.
Unable to connect to Netgear router via VPN
If you're experiencing difficulties connecting to your Netgear router via VPN, don't worry, you're not alone. This issue can be frustrating, but with some troubleshooting steps, you can often resolve it on your own.
Firstly, ensure that your Netgear router supports VPN connections. Not all routers have this capability, so check the specifications of your model to confirm.
Next, verify that you have configured your VPN settings correctly. Double-check the VPN server address, username, password, and any other relevant details. Even a small mistake in the configuration can prevent a successful connection.
If you're using a third-party VPN service, make sure it's compatible with your Netgear router. Some routers have limitations on the types of VPN protocols they support, so ensure that your VPN service aligns with these requirements.
Check your router's firmware and ensure it's up to date. Sometimes, outdated firmware can cause compatibility issues with VPN connections. Visit Netgear's official website to download and install the latest firmware version for your router model.
Additionally, check if there are any firewall or security settings on your router that might be blocking VPN connections. Temporarily disable these settings to see if it resolves the issue, but remember to re-enable them afterwards for security purposes.
If you're still unable to connect to your Netgear router via VPN after trying these steps, consider reaching out to Netgear customer support for further assistance. They may be able to provide specific troubleshooting steps tailored to your router model and configuration.
Netgear router VPN connectivity issues
Title: Troubleshooting Netgear Router VPN Connectivity Issues
Netgear routers are renowned for their reliability and performance, but like any technology, they can encounter issues from time to time. One common problem users face is difficulty connecting to a Virtual Private Network (VPN) through their Netgear router. VPN connectivity issues can be frustrating, but there are several troubleshooting steps you can take to resolve them.
Firstly, ensure that your Netgear router's firmware is up to date. Manufacturers often release firmware updates to address known issues and improve performance, including VPN connectivity issues. You can typically update the firmware through the router's web interface or Netgear's official website.
Next, double-check your VPN settings. Ensure that you have entered the correct server address, username, and password. Sometimes, a simple typo can prevent a successful connection. Additionally, verify that your VPN subscription is active and that you are not exceeding any connection limits imposed by your VPN provider.
If you're still experiencing issues, try restarting both your router and the device you're trying to connect to the VPN. This can often resolve temporary glitches or conflicts that may be preventing a successful connection.
Another troubleshooting step is to check for any firewall or security settings on your Netgear router that may be blocking VPN traffic. Temporarily disabling these settings can help determine if they are the source of the problem.
If none of the above steps resolve the issue, consider contacting Netgear support or your VPN provider for further assistance. They may be able to provide additional guidance or troubleshoot the problem remotely.
In conclusion, VPN connectivity issues with Netgear routers can be frustrating, but by following these troubleshooting steps, you can often resolve them and enjoy a secure and private internet connection once again.
0 notes
Text
does netgear wndr3700 support vpn
🔒🌍✨ Get 3 Months FREE VPN - Secure & Private Internet Access Worldwide! Click Here ✨🌍🔒
does netgear wndr3700 support vpn
Netgear wndr3700 VPN compatibility
Title: Exploring VPN Compatibility with Netgear WNDR3700: What You Need to Know
In today's interconnected world, safeguarding your online privacy and security has become paramount. Virtual Private Networks (VPNs) offer a powerful solution by encrypting your internet connection and masking your IP address. If you're a proud owner of the Netgear WNDR3700 router, you might be wondering about its compatibility with VPN services.
The Netgear WNDR3700 is a popular choice among users seeking high-performance and reliable wireless networking. Known for its robust features and advanced capabilities, it's natural to inquire about its compatibility with VPNs.
Fortunately, the Netgear WNDR3700 supports VPN passthrough, which means it can effectively transmit VPN traffic without hindrance. This feature allows VPN connections initiated by devices within your network to pass through the router seamlessly. Whether you're using a VPN for enhanced privacy, accessing geo-blocked content, or securing your online activities on public Wi-Fi, the WNDR3700 can accommodate your needs.
However, it's essential to note that while the router supports VPN passthrough, it doesn't offer native VPN client or server functionality. This means you'll need to configure the VPN connection directly on your devices, such as computers, smartphones, or tablets. Fortunately, most VPN providers offer easy-to-follow setup guides for various platforms, ensuring a smooth installation process.
When selecting a VPN provider, ensure compatibility with your devices and operating systems. Look for providers offering robust encryption, a wide server network, and reliable performance to enjoy a seamless browsing experience while maintaining your privacy.
In conclusion, if you own a Netgear WNDR3700 router and are considering using a VPN, rest assured that it supports VPN passthrough, allowing for secure and uninterrupted VPN connections. By following the setup instructions provided by your chosen VPN provider, you can enhance your online security and privacy without compromising on performance.
VPN setup on Netgear wndr3700
Setting up a Virtual Private Network (VPN) on your Netgear wndr3700 router can enhance your online security and privacy by encrypting your internet connection. To ensure a seamless VPN setup process, follow the steps outlined below.
Firstly, access the router's administration panel by typing the default gateway IP address (usually 192.168.1.1) into your web browser. Enter your login credentials, which are often 'admin' for both the username and password unless you have previously changed them.
Next, navigate to the VPN section within the router settings. Locate the VPN client options and select the VPN service provider you are subscribed to. Enter your VPN account details such as the username, password, and any other required information provided by your VPN service.
Choose the appropriate VPN protocol based on the recommendations of your VPN provider. Common protocols include OpenVPN, L2TP, and PPTP. Ensure you configure the VPN settings correctly to establish a secure connection.
After configuring the VPN settings, save your changes and reboot the router to apply the new configuration. Once the router restarts, test the VPN connection to verify that it is working correctly.
It is essential to regularly update your router's firmware to ensure optimal performance and security. Additionally, consider enabling features like a kill switch or DNS leak protection for an added layer of security while using the VPN.
By following these steps, you can successfully set up a VPN on your Netgear wndr3700 router and enjoy a safer and more private internet browsing experience.
Netgear wndr3700 VPN support
The NETGEAR WNDR3700 is a popular wireless router known for its reliable performance and advanced features. With the increasing concern for online privacy and security, many users are looking to set up a VPN connection on their routers to encrypt their internet traffic and protect their data from prying eyes.
The good news is that the NETGEAR WNDR3700 supports VPN connections, allowing users to secure their internet connection and browse the web anonymously. By setting up a VPN on the WNDR3700, users can ensure that their online activities are private and protected from potential threats like hackers, snoopers, and government surveillance.
To set up a VPN on the NETGEAR WNDR3700, users typically need to access the router's admin panel and configure the VPN settings provided by their VPN service provider. Most VPN services offer detailed instructions on how to set up a VPN connection on various routers, including the WNDR3700.
Using a VPN on the NETGEAR WNDR3700 is especially useful for users who want to access geo-restricted content, secure their online banking transactions, or simply browse the internet without being tracked. With the VPN support on the WNDR3700, users can enjoy a safer and more private online experience.
In conclusion, the NETGEAR WNDR3700's VPN support is a valuable feature for users who prioritize online privacy and security. By setting up a VPN connection on the WNDR3700, users can encrypt their internet traffic and enjoy a more secure browsing experience.
VPN options for Netgear wndr3700
When it comes to securing your internet connection and protecting your online privacy, using a VPN (Virtual Private Network) is a smart choice. If you own a Netgear wndr3700 router, you have several options for setting up a VPN connection to safeguard your browsing activities and data.
One option is to use the built-in VPN functionality of the Netgear wndr3700 router itself. This router supports VPN passthrough, which allows VPN traffic to pass through the router to the VPN server without being blocked. However, it's essential to note that the wndr3700 does not have a built-in VPN server, so you'll need to subscribe to a third-party VPN service and configure it on your devices individually.
Another option is to install third-party firmware like DD-WRT or OpenWRT on your Netgear wndr3700 router. These custom firmware options offer advanced features, including VPN support, allowing you to set up a VPN server directly on your router. With DD-WRT or OpenWRT, you can choose from various VPN protocols such as OpenVPN, PPTP, or L2TP, depending on your preferences and security needs.
Setting up a VPN on your Netgear wndr3700 router can provide several benefits, including encrypting your internet traffic, bypassing geo-restrictions, and hiding your IP address from prying eyes. Whether you opt for the router's built-in VPN passthrough feature or install custom firmware for more advanced VPN capabilities, securing your online activities with a VPN is a proactive step towards enhancing your digital privacy and security.
Netgear wndr3700 VPN configuration
The Netgear WNDR3700 router is a popular choice for many users looking to set up a Virtual Private Network (VPN) connection at home or in their small business. Configuring a VPN on your Netgear WNDR3700 router can provide a secure way to connect to your network remotely and ensure your data remains encrypted and private.
To configure a VPN on your Netgear WNDR3700 router, you first need to access the router's web interface. You can do this by typing the router's IP address into your web browser and entering the login credentials. Once logged in, navigate to the VPN section on the router's settings page.
Next, you will need to choose the type of VPN connection you want to set up. The Netgear WNDR3700 router supports various VPN protocols, including PPTP, L2TP, and OpenVPN. Select the protocol that best fits your needs and follow the on-screen instructions to set up the VPN connection.
After configuring the VPN settings, you will need to create user accounts with login credentials for accessing the VPN. This step is crucial for ensuring only authorized users can connect to the VPN and access your network.
Finally, test the VPN connection to ensure it is working correctly. You can do this by trying to connect to the VPN from a remote location using the provided login credentials. If successful, you can now enjoy a secure and encrypted connection to your network through the Netgear WNDR3700 router.
0 notes
Text
Netgear WAX630 Setup
A Netgear WAX630 Setup networking device called an access point serves as a bridge between your wired and wireless devices. It converts wired signals from a device that uses a cable into wireless signals so that your WiFi devices can connect to the internet. Netgear manufactures one such access point, which is known as the Netgear WAX630 access point setup.
How to Install Netgear WAX630 Access Point?
Before using any networking device, it must be installed and configured. There are three installation methods for WAX630 because it is cloud managed. The first two involve using the Insight app, which was created especially for mobile devices, and the Insight Cloud portal. In order to create a Netgear access point in standalone mode, you should utilize the third approach. Examine the provided details to set up your AP via the app and cloud portal:
Using the Insight Cloud Portal
Use the power cable or PoE connection, turn on the AP.
Verify that the wireless AP is linked to the internet.
Open your internet browser on a machine that is linked to the WAX630 network.
After entering your Netgear account information, click Sign In.
Select the network's location.
Choose Add Device and provide the MAC and serial number.
Press the Play button.
You can alter your AP's name and other details when the Insight site verifies your product.
After updating the firmware, your access point will reboot.
The Power light on your AP will become a solid blue.
The Netgear WAX630 configuration is finished.
Using Insight App
Give your Netgear WAX630 access point power.
After connecting the AP to your router, link your smartphone to the AP's WiFi.
Open the Insight app right now.
Input your account's email address and password.
Choose the spot where you want to use the wireless access point.
If your AP is identified automatically, select Add Device. If not, scan the code and provide some information.
You will be prompted to name the access point on the next screen.
Your Netgear WAX630 will now receive the most recent firmware version update via the app.
This will resume your AP.
If the electrical LED was green before, it will now firmly change to blue.
Now, you are able to adjust the network settings.
Note: Receive professional setup assistance for your Netgear devices, exclusively provided by mywifiext.net setup.
How to Login to Netgear WAX630 Access Point?
The method you use to access the AP determines the Netgear access point login process. If the AP is configured in standalone mode, perform the following steps:
Link the computer to the WiFi network of the access point and open aplogin.net.
Enter the password and username that you provided to AP during setup when the login page appears.
Click on Log In.
The Day Zero Simple Setup page will appear.
Apply any changes you see fit to the AP settings.
Navigate to Management > Configuration > System > Advanced > User Accounts > Password to modify the password.
Netgear WAX630 Firmware Update Steps
The following instructions can be used to update the access point's firmware. The situation where you advise the AP to search for updates and install the most recent one is covered by these instructions. It's similar to updating the firmware on a Netgear extender using the mywifiext.net configuration address:
Use the IP that the access point's host gateway assigned to you to log in.
It will display your WAX630 dashboard page.
To tell the AP to see whether a new firmware version is available, click Check for Upgrade.
Click Upgrade Now if there is a detected update.
Follow the prompts and dialog boxes to complete the process.
How to Reset Netgear WAX630?
You can resolve a number of AP-related difficulties by resetting the device. Use these instructions to successfully reset the WiFi access point that Netgear installed:
Use these instructions to successfully reset the WiFi access point that Netgear installed:
Verify that the AP is connected to a consistent power source.
Find the Reset button, which is put back on the bottom panel of the access point.
Now, use a straightened pin to push and hold the reset button.
Pressing this button takes ten seconds.
The factory reset will be finished when the button is released.
The AP will finally reboot after the procedure, which should take two minutes.
You must complete the Netgear WAX630 setup process again as soon as the AP resets by logging into the Cloud Management site or using the Insight app.
#mywifiext_net_login#mywifiext_net_setup#mywifiext_setup#netgear_extender_setup#netgear_ex6110_setup#netgear_wifi_extender_setup#netgear_nighthawk_wifi_extender_setup#mywifiext setup#netgear extender setup#mywifiext.net setup#Netgear WAX630 Setup
0 notes
Text
To access the Netgear Routers login page, open the web browser and type the routerlogin.net web address in the browser bar. Now, enter the default admin credentials on the login window. Hereon, you will reach the home dashboard of the router and configure the basic settings like SSID name and password change. For more information, get in touch with us!
0 notes
Text
does my netgear router have a vpn setup wizard
🔒🌍✨ Get 3 Months FREE VPN - Secure & Private Internet Access Worldwide! Click Here ✨🌍🔒
does my netgear router have a vpn setup wizard
Netgear router VPN setup
Setting up a VPN (Virtual Private Network) on your Netgear router is a practical way to enhance your online security and privacy. By encrypting your internet connection, a VPN ensures that your data remains protected from potential cyber threats or prying eyes.
To begin the Netgear router VPN setup process, you first need to select a reliable VPN service provider. Once you have subscribed to a VPN service, you can proceed with configuring the VPN on your Netgear router. Access the router's admin interface by typing the default IP address in your web browser. Next, log in with your credentials to access the router settings.
Locate the VPN section in the router settings and enter the details provided by your VPN service provider. This typically includes the VPN server address, username, and password. After entering the necessary information, save the settings and establish the VPN connection. You can verify the VPN connection status in the router settings to ensure that it is active.
Once the VPN connection is successfully established on your Netgear router, all the devices connected to the network will benefit from the added security and privacy features provided by the VPN. Whether you are browsing the web, streaming content, or accessing sensitive information, the VPN will safeguard your online activities from potential threats.
In conclusion, setting up a VPN on your Netgear router is a straightforward process that offers enhanced security and privacy for all your internet-connected devices. Take the necessary steps to configure a VPN on your router and enjoy a safer online experience.
VPN setup wizard Netgear
Setting up a VPN on your Netgear router can enhance your online security and privacy by encrypting your internet connection and masking your IP address. Netgear routers often come equipped with built-in VPN capabilities, making the setup process straightforward with the help of a VPN setup wizard.
To begin the process, ensure that your Netgear router supports VPN functionality. You can typically find this information in the router's specifications or user manual. Once confirmed, follow these steps to set up a VPN using the wizard:
Access your router's web interface by typing its IP address into your web browser's address bar. This address is usually "192.168.1.1" or "192.168.0.1", but you can verify it in the router's manual.
Log in to the router using your username and password. If you haven't changed these credentials, the default username is often "admin," and the default password is "password."
Locate the VPN setup wizard in the router's settings menu. This may be labeled differently depending on your router model, but it's typically found under the "Advanced" or "VPN" section.
Follow the on-screen instructions provided by the wizard. You'll likely be prompted to select the type of VPN connection you want to create (e.g., PPTP, L2TP, or OpenVPN) and enter the necessary configuration details provided by your VPN service provider.
Once you've entered all the required information, save your settings and reboot your router to apply the changes.
After the router restarts, your VPN should be up and running. You can test the connection by accessing the internet from a device connected to your Netgear router and verifying that your IP address is masked and your connection is encrypted.
By following these steps and using the VPN setup wizard on your Netgear router, you can establish a secure VPN connection to protect your online activities from prying eyes.
Netgear router VPN configuration
To configure a VPN on your Netgear router, you'll need to follow a few simple steps to ensure a secure and private internet connection. A VPN, or Virtual Private Network, encrypts your online activities and masks your IP address by routing your internet traffic through a secure server. This added layer of security is especially important when accessing sensitive information or when using public Wi-Fi networks.
To set up a VPN on your Netgear router, start by accessing the router's settings through a web browser. Log in using your administrator credentials and navigate to the VPN section. Here, you'll need to enter the specifics provided by your VPN service provider, such as the server address, username, and password.
Once you've entered the VPN configuration details, save the settings and test the connection to ensure everything is working properly. You can then connect your devices to the VPN-enabled Netgear router to enjoy a private and secure internet browsing experience.
It's important to note that not all Netgear router models support VPN configurations, so be sure to check your router's compatibility before attempting to set up a VPN. Additionally, using a VPN may slightly reduce your internet speed due to the encryption process, but the added security and privacy benefits far outweigh this potential drawback.
By configuring a VPN on your Netgear router, you can ensure that your online activities remain private and secure, protecting your sensitive information from potential threats and prying eyes.
Netgear router VPN setup guide
Setting up a VPN (Virtual Private Network) on your Netgear router can provide enhanced online security and privacy. By encrypting your internet traffic, a VPN helps protect your data from potential cyber threats and keeps your online activities private from prying eyes. Here is a step-by-step guide to help you set up a VPN on your Netgear router:
Choose a VPN service provider: First, you need to select a reliable VPN service provider that is compatible with Netgear routers. Popular VPN services like NordVPN, ExpressVPN, or CyberGhost offer easy-to-follow setup instructions for Netgear routers.
Access your router settings: To begin the setup process, log in to your Netgear router's web interface using a web browser. Enter the router's IP address (usually 192.168.1.1 or 192.168.0.1) in the address bar and enter your login credentials (username and password).
Set up the VPN on your router: Locate the VPN section in your Netgear router settings. Enter the VPN configuration details provided by your VPN service provider, including the server address, username, and password.
Save the settings: Once you have entered the VPN configuration details, save the settings and apply the changes. Your Netgear router should now be configured to use the VPN service.
Test the VPN connection: To ensure that the VPN is working correctly, connect a device to your Netgear router's network and verify that your internet traffic is securely encrypted.
Setting up a VPN on your Netgear router is a simple yet effective way to enhance your online security and privacy. By following these step-by-step instructions, you can enjoy a more secure and private internet browsing experience.
Netgear VPN setup step by step
Setting up a VPN on a Netgear router can enhance security and privacy by encrypting all internet traffic passing through the network. Here is a step-by-step guide to help you with the Netgear VPN setup process:
Access the Netgear router interface by typing the router's IP address into a web browser. Log in with your username and password.
Navigate to the VPN settings tab or section on the Netgear router interface. This can usually be found under the "Advanced" or "Security" settings.
Select the VPN type you want to set up, such as PPTP, L2TP, or OpenVPN, depending on the VPN service you use.
Enter the VPN server details provided by your VPN service provider, including the server IP address, username, password, and any other required settings.
Configure the VPN connection settings according to your preferences, such as enabling encryption or adjusting connection protocols.
Save the settings and apply the changes. Reboot the router if necessary to establish the VPN connection.
Test the VPN connection by connecting a device to the network and accessing the internet to ensure that all traffic is encrypted through the VPN.
By following these steps, you can successfully set up a VPN on your Netgear router to protect your online activities and safeguard your data from potential security threats. Remember to keep your VPN settings secure and updated for optimal performance.
0 notes
Last Seen Blogs

malani-jewelers
Malani Jewelers

moviemagistrate
The Movie Magistrate

makomakay
Sans titre

remersgf
♀

makifaydin
MEHMET AKİF AYDIN