#ClassNotFoundException
Explore tagged Tumblr posts
Visit Tumblr Blog
Explore Tumblr blogs with no restrictions, modern design and the best experience.
Last Seen Tumblr Blogs


Fun Fact
Post activity is at the highest at 4:00 pm EDT; notes peak at 10:00 pm EDT.
Text
Provide insights into securing Java web and desktop applications.

Securing Java web and desktop applications requires a combination of best practices, security libraries, and frameworks to prevent vulnerabilities like SQL injection, XSS, CSRF, and unauthorized access. Here’s a deep dive into key security measures:
1. Secure Authentication and Authorization
Use Strong Authentication Mechanisms
Implement OAuth 2.0, OpenID Connect, or SAML for authentication.
Use Spring Security for web applications.
Enforce multi-factor authentication (MFA) for added security.
Example (Spring Security Basic Authentication in Java Web App)java@Configuration @EnableWebSecurity public class SecurityConfig { @Bean public SecurityFilterChain securityFilterChain(HttpSecurity http) throws Exception { http .authorizeHttpRequests(auth -> auth .requestMatchers("/admin/**").hasRole("ADMIN") .anyRequest().authenticated()) .httpBasic(); return http.build(); } }Implement Role-Based Access Control (RBAC)
Define roles and permissions for users.
Use JWT (JSON Web Tokens) for securing APIs.
Example (Securing API using JWT in Spring Boot)javapublic class JwtUtil { private static final String SECRET_KEY = "secureKey"; public String generateToken(String username) { return Jwts.builder() .setSubject(username) .setIssuedAt(new Date()) .setExpiration(new Date(System.currentTimeMillis() + 1000 * 60 * 60)) .signWith(SignatureAlgorithm.HS256, SECRET_KEY) .compact(); } }
2. Secure Data Storage and Transmission
Use Secure Communication (HTTPS & TLS)
Use TLS 1.2+ for encrypting data in transit.
Enforce HSTS (HTTP Strict Transport Security).
Encrypt Sensitive Data
Store passwords using bcrypt, PBKDF2, or Argon2.
Use AES-256 for encrypting sensitive data.
Example (Hashing Passwords in Java)javaimport org.mindrot.jbcrypt.BCrypt;public class PasswordSecurity { public static String hashPassword(String password) { return BCrypt.hashpw(password, BCrypt.gensalt(12)); } public static boolean verifyPassword(String password, String hashedPassword) { return BCrypt.checkpw(password, hashedPassword); } }
Use Secure Database Connections
Use parameterized queries to prevent SQL injection.
Disable database user permissions that are not required.
Example (Using Prepared Statements in JDBC)javaPreparedStatement stmt = connection.prepareStatement("SELECT * FROM users WHERE username = ?"); stmt.setString(1, username); ResultSet rs = stmt.executeQuery();
3. Protect Against Common Web Vulnerabilities
Prevent SQL Injection
Always use ORM frameworks (Hibernate, JPA) to manage queries securely.
Mitigate Cross-Site Scripting (XSS)
Escape user input in web views using OWASP Java Encoder.
Use Content Security Policy (CSP) headers.
Prevent Cross-Site Request Forgery (CSRF)
Use CSRF tokens in forms.
Enable CSRF protection in Spring Security.
Example (Enabling CSRF Protection in Spring Security)javahttp.csrf().csrfTokenRepository(CookieCsrfTokenRepository.withHttpOnlyFalse());
4. Secure File Uploads and Deserialization
Validate File Uploads
Restrict allowed file types (e.g., only images, PDFs).
Use virus scanning (e.g., ClamAV).
Example (Checking File Type in Java)javaif (!file.getContentType().equals("application/pdf")) { throw new SecurityException("Invalid file type"); }
Avoid Untrusted Deserialization
Use whitelisting for allowed classes.
Prefer JSON over Java serialization.
Example (Disable Unsafe Object Deserialization in Java)javaObjectInputStream ois = new ObjectInputStream(inputStream) { @Override protected Class<?> resolveClass(ObjectStreamClass desc) throws IOException, ClassNotFoundException { throw new InvalidClassException("Deserialization is not allowed"); } };
5. Secure Desktop Java Applications
Use Code Signing
Sign JAR files using Java Keytool to prevent tampering.
shjarsigner -keystore mykeystore.jks -signedjar SecureApp.jar MyApp.jar myaliasRestrict JavaFX/Swing Application Permissions
Use Java Security Manager (deprecated but useful for legacy apps).
Restrict access to file system, network, and system properties.
Encrypt Local Data Storage
Use AES encryption for storing local files.
Example (Encrypting Files with AES in Java)javaCipher cipher = Cipher.getInstance("AES"); cipher.init(Cipher.ENCRYPT_MODE, new SecretKeySpec(key, "AES")); byte[] encrypted = cipher.doFinal(data);
6. Logging and Monitoring for Security
Use Secure Logging Frameworks
Use logback or SLF4J.
Avoid logging sensitive data like passwords.
Monitor for Anomalies
Implement Intrusion Detection Systems (IDS).
Use audit trails and security alerts.
7. Best Practices for Securing Java Applications
✅ Keep dependencies up to date (Use OWASP Dependency Check). ✅ Run security scans (SAST, DAST) using SonarQube, Checkmarx. ✅ Apply the principle of least privilege for database and API access. ✅ Enforce strong password policies (min length, special characters). ✅ Use API Gateway and rate limiting for public-facing APIs.
Conclusion
Securing Java web and desktop applications requires multi-layered security across authentication, data protection, and vulnerability mitigation. By following best practices like strong encryption, secure coding techniques, and continuous monitoring, developers can protect applications against cyber threats.
WEBSITE: https://www.ficusoft.in/core-java-training-in-chennai/
0 notes
Text
One of the interesting interview question in Java
0 notes
Text
Understanding Serialization in Java: A Comprehensive Guide
Serialization in Java is a fundamental concept that allows objects to be converted into a byte stream, enabling them to be easily stored, transmitted, or reconstructed later. This mechanism plays a crucial role in various scenarios such as network communication, persistence of object state, and distributed computing. In this article, we'll explore what serialization is, how it works in Java, its advantages, and some best practices to follow.
What is Serialization?
Serialization is the process of converting an object into a stream of bytes, which can then be stored in a file or sent over a network. This serialized form contains the object's data along with information about its type and structure. Deserialization is the reverse process where the byte stream is converted back into an object. Java provides built-in mechanisms for both serialization and deserialization through the java.io.Serializable interface.
How Serialization Works in Java
To enable serialization for a class in Java, it must implement the Serializable interface. This interface acts as a marker, indicating to the Java runtime that instances of the class can be serialized. Here's a basic example:
javaCopy code
import java.io.Serializable; class MyClass implements Serializable { // class members and methods }
Once a class implements Serializable, instances of that class can be serialized and deserialized using Java's serialization API. The core classes involved in serialization are ObjectOutputStream for writing objects to a byte stream and ObjectInputStream for reading objects from a byte stream.
javaCopy code
import java.io.*; public class SerializationExample { public static void main(String[] args) { try { // Serialization MyClass obj = new MyClass(); FileOutputStream fileOut = new FileOutputStream("object.ser"); ObjectOutputStream out = new ObjectOutputStream(fileOut); out.writeObject(obj); out.close(); fileOut.close(); // Deserialization FileInputStream fileIn = new FileInputStream("object.ser"); ObjectInputStream in = new ObjectInputStream(fileIn); MyClass newObj = (MyClass) in.readObject(); in.close(); fileIn.close(); } catch (IOException | ClassNotFoundException e) { e.printStackTrace(); } } }
Advantages of Serialization
Persistence: Serialized objects can be stored in files or databases, allowing data to persist beyond the lifetime of the Java application.
Interoperability: Serialized objects can be easily transmitted over a network and reconstructed by applications written in different languages or running on different platforms.
Object Cloning: Serialization can be used to create deep copies of objects by serializing them and then deserializing the byte stream.
Best Practices for Serialization
Versioning: When serializing classes, it's important to consider versioning to maintain compatibility between different versions of the class. This can be achieved by defining a serialVersionUID field or using externalizable interfaces.
Security: Be cautious when serializing sensitive data. Implement proper security measures such as encryption or using custom serialization mechanisms if necessary.
Transient Fields: Fields marked as transient are not serialized, which can be useful for excluding sensitive or unnecessary data from the serialized form.
Externalization: For more control over the serialization process, consider implementing the Externalizable interface instead of Serializable. This allows you to define custom serialization logic for your class.
Conclusion
Serialization is a powerful mechanism in Java that allows objects to be converted into byte streams for storage, transmission, or other purposes. By implementing the Serializable interface and using Java's built-in serialization API, developers can easily serialize and deserialize objects. Understanding the principles of serialization, its advantages, and best practices is essential for building robust and efficient Java applications.
for more please visit analyticsjobs.in
0 notes
Photo

ClassNotFoundException and NoClassDefFoundError seem the same. But they share a few differences that all Java developers must know. Here are the core differences between them.
0 notes
Text
Case Study: Exception Handling In PHP

What is an Exception?
An exception is an unwanted event in the program that interrupts the normal flow of the instructions. It is the unexpected outcome of the program. The major difference between the error and exception is that the exception can be handled by the program, unlike error.
Exception Handling in PHP
Exception handling is the process of handling the exception (run time errors) to induce the normal flow of the code execution. This is the set of actions we take to handle the unwanted behavior of the code. The main goal is to execute the program without any unexpected behavior and outcome of the code.
When an exception occurs in the program, It proceeds generally using these steps:
The current code state is saved.
The code implementation will switch to a custom exception handler function
Then the handler resumes the execution from the saved code state, terminates the script execution / continues the execution from a different location in the code.
Need of Exception Handling in PHP
PHP provides different functionalities in exception handling. It can handle various runtime errors such as IOException, SQLException, ClassNotFoundException, and arithmetic exceptions.
The following keywords are used when we use exception handling in PHP- Try, catch, throw, finally.
Try: It is the block of code in which an exception is present. This piece of code raises the exception. Try block should have a catch or finally block. It contains more than one catch block too.
Throw: The throw keyword is used to symbolize the occurrence of a PHP exception Then we try to find a catch statement to handle this exception.
Catch: This is the block of code that is executed when the try block throws an exception. It is responsible for handling the exception in the try block. It is always used with the try block.
Finally: The PHP 5.5 version introduced the “finally” statement in PHP. The “finally” block can be used after a catch block or in place of catch blocks. “Finally “ term means that it will be executed no matter the exception is thrown or not. It generally executes the necessary parts of the program. We use it for many purposes like closing the files, closing the open databases connections, etc.
The Basic syntax which we use when handle the exceptions using try and catch is given below.

Multiple Exceptions– Multiple exceptions use multiple try-catch blocks for the implementation and execution of the code. It is used when you want to show the customized message or you wanted to perform some unique operation when the exception is thrown.
In the single program, multiple exceptions can be there like arithmetic exceptions, IO exceptions. We will help you to understand the concept of Multiple exceptions firstly by flowchart representation and then by executing the program.
Flowchart to Describe the working of Multiple Exceptions

Now here is an example for the multiple exceptions using the program.
We will implement the code that divides a number by the number in the denominator.
We have the chance to get the two types of exceptions by dividing the number by zero or by dividing the number by a negative number.
We can work with the multiple cases of exceptions
The code below shows the implementation.
Here we are writing the code when we divide a number by the denominator there are two chances of exceptions one is by dividing it to zero or by a negative number. In the program, we are using multiple catches to solve the exceptions.
Using multiple try-catch with multiple exception types
PHP supports the use of more than one nested catch block to handle their thrown exceptions. This provides us the permission to alter our code based on the type of exception thrown. This is useful for customizing how you display an error message. We can handle different types of exceptions using the catch blocks.
The syntax is given below:

Use of try-catch-finally
Introduced in PHP version 5.5, Sometimes we can also use a “finally” section. Finally is useful in many cases it is not just limited to exception handling, it is used to perform the necessary tasks, and in the cases where the execution is independent of exceptions.
The “finally” block is always used when the try-catch block exits. It ensures that finally block is executed in any situation.
Example for using try-catch-finally:

Flowchart to tell you how this program works.

Explanation of the working of flowchart
Firstly we check If the exception occurs or not and if occurs it will be handled by the catch block. There are two chances-
The exception will be handled
The exception will not be handled.
If the exception is handled by the catch block then the “finally’’ block will be executed too.
If the exception is not handled, then also the “finally” block will be executed itself.
Conclusion of Exception Handling in PHP
The concept of exception is almost similar in all the languages. Exception Handling ensures the normal execution of the programs and we can handle it using try, catch, throw, and finally keywords in PHP.
For More Details And Blogs : Aelum Consulting Blogs
If you want to increase the quality and efficiency of your ServiceNow workflows, Try out our ServiceNow Microassesment.
For ServiceNow Implementations and ServiceNow Consulting Visit our website: https://aelumconsulting.com/servicenow/
0 notes
Text
常见Error以及Exception
常见Error以及Exception
RuntimeException
NullPointerException - 空指针引用异常
ClassCastException - 类型强制转换异常
IllegalArgumentException - 传递非法参数异常
IndexOutOfBoundsException - 下标越界异常
NumberFormatException - 数字格式异常::试图将String转换为数字类型,但是字符串不满足数字格式要求的时候。
非RuntimeException
ClassNotFoundException - 找不到指定class的异常
IOException - IO操作异常
Error
NoClassDefFoundError - 找不到class定义的异常::成因1.类依赖的class或者jar不存在2.类文件存在,但是存在不同的域中(对应的class在javaclasspath中不可用,或者有多个不同类加载器重复加载了同一个class)3.大小写问题,javac编译的时候是无视大小写的,很有可能编译出来的class文件就与想要的不一致。
StackOverflowError - 深递归导致栈被耗尽而抛出的异常
OutOfMemoryError - 内存溢出异常
0 notes
Text
Dcatalina

Tomcat Setup
Catalina Direct
Catalina Wine Mixer
Catalina Yachts
Table of Contents
ASF Bugzilla – Bug 48543 Patch More flexibility in specifying -Dcatalina.config Last modified: 2017-06-01 19:45:55 UTC. Get directions, maps, and traffic for Catalina, AZ. Check flight prices and hotel availability for your visit. AMD/ATI Radeon HD 5xxx and 6xxx series graphics acceleration: Currently, it is not possible to achieve full graphics acceleration under Catalina on any machines that use a Radeon HD 5xxx or 6xxx series GPU. If you have a machine with one of these GPUs installed, I'd advise upgrading it if possible (can be done in 2010/2011 iMacs, iMac11,x-12,x), disabling the dedicated GPU if using a 2011 15. This line would install the service. The argument //IS// installs the service without starting it. Probably the service wouldn't start anyway: A lot of configuration data needs to be stored into the registry first. Looking for adventure? Or maybe a relaxing day at the beach with friends? Perhaps you're planning your first visit to the island. No matter what your interests are, Catalina offers something for you. Before you start planning your Catalina getaway, please take a.
Introduction
There are several ways to set up Tomcat for running on different platforms. The main documentation for this is a file called RUNNING.txt. We encourage you to refer to that file if the information below does not answer some of your questions.
Windows
Installing Tomcat on Windows can be done easily using the Windows installer. Its interface and functionality is similar to other wizard based installers, with only a few items of interest.
Installation as a service: Tomcat will be installed as a Windows service no matter what setting is selected. Using the checkbox on the component page sets the service as 'auto' startup, so that Tomcat is automatically started when Windows starts. For optimal security, the service should be run as a separate user, with reduced permissions (see the Windows Services administration tool and its documentation).
Java location: The installer will provide a default JRE to use to run the service. The installer uses the registry to determine the base path of a Java 7 or later JRE, including the JRE installed as part of the full JDK. When running on a 64-bit operating system, the installer will first look for a 64-bit JRE and only look for a 32-bit JRE if a 64-bit JRE is not found. It is not mandatory to use the default JRE detected by the installer. Any installed Java 7 or later JRE (32-bit or 64-bit) may be used.
Tray icon: When Tomcat is run as a service, there will not be any tray icon present when Tomcat is running. Note that when choosing to run Tomcat at the end of installation, the tray icon will be used even if Tomcat was installed as a service.
Defaults: The defaults used by the installer may be overridden by use of the /C=<config file> command line argument. The configuration file uses the format name=value with each pair on a separate line. The names of the available configuration options are:
JavaHome
TomcatPortShutdown
TomcatPortHttp
TomcatPortAjp
TomcatMenuEntriesEnable
TomcatShortcutAllUsers
TomcatServiceDefaultName
TomcatServiceName
TomcatServiceFileName
TomcatServiceManagerFileName
TomcatAdminEnable
TomcatAdminUsername
TomcatAdminPassword
TomcatAdminRoles
By using /C=.. along with /S and /D= it is possible to perform fully configured unattended installs of Apache Tomact.
Refer to the Windows Service HOW-TO for information on how to manage Tomcat as a Windows service.
The installer will create shortcuts allowing starting and configuring Tomcat. It is important to note that the Tomcat administration web application can only be used when Tomcat is running.
Unix daemon
Tomcat can be run as a daemon using the jsvc tool from the commons-daemon project. Valorant logo maker game. Source tarballs for jsvc are included with the Tomcat binaries, and need to be compiled. Building jsvc requires a C ANSI compiler (such as GCC), GNU Autoconf, and a JDK.
Before running the script, the JAVA_HOME environment variable should be set to the base path of the JDK. Alternately, when calling the ./configure script, the path of the JDK may be specified using the --with-java parameter, such as ./configure --with-java=/usr/java.
Using the following commands should result in a compiled jsvc binary, located in the $CATALINA_HOME/bin folder. This assumes that GNU TAR is used, and that CATALINA_HOME is an environment variable pointing to the base path of the Tomcat installation.
Please note that you should use the GNU make (gmake) instead of the native BSD make on FreeBSD systems.
Guy beahm dr disrespect. The latest tweets from @guybeahm.
Tomcat can then be run as a daemon using the following commands.
Amazon chime android. When runnong on Java 9 you will need to additionally specify the following when starting jsvc to avoid warnings on shutdown.
You may also need to specify -jvm server if the JVM defaults to using a server VM rather than a client VM. This has been observed on OSX.
SongBook manages your song collections with lyrics and chords. Tap or click on a chord to see it's definitions Automatic formatting for current screen size, auto-zoom auto-scroll. SongbookPro Manger is included with the app free of charge, unlike some other solutions. Songbook free. SongBook, free and safe download. SongBook latest version: Store your song collection complete with lyrics and chords. MySongBook is a library of tabs written by professional musicians. What you will find in it are new, previously unreleased arrangements for stringed instruments (guitar, ukulele, bass, and banjo), as well as full scores that include the complete transcriptions of every track in the original pieces.
Catalina Direct
jsvc has other useful parameters, such as -user which causes it to switch to another user after the daemon initialization is complete. This allows, for example, running Tomcat as a non privileged user while still being able to use privileged ports. Note that if you use this option and start Tomcat as root, you'll need to disable the org.apache.catalina.security.SecurityListener check that prevents Tomcat starting when running as root.
Catalina Wine Mixer
jsvc --help will return the full jsvc usage information. In particular, the -debug option is useful to debug issues running jsvc.
The file $CATALINA_HOME/bin/daemon.sh can be used as a template for starting Tomcat automatically at boot time from /etc/init.d with jsvc.
Note that the Commons-Daemon JAR file must be on your runtime classpath to run Tomcat in this manner. The Commons-Daemon JAR file is in the Class-Path entry of the bootstrap.jar manifest, but if you get a ClassNotFoundException or a NoClassDefFoundError for a Commons-Daemon class, add the Commons-Daemon JAR to the -cp argument when launching jsvc.
Catalina Yachts
Notice: This comments section collects your suggestions on improving documentation for Apache Tomcat. If you have trouble and need help, read Find Help page and ask your question on the tomcat-users mailing list. Do not ask such questions here. This is not a Q&A section. The Apache Comments System is explained here. Comments may be removed by our moderators if they are either implemented or considered invalid/off-topic.
0 notes
Photo

java.lang.ClassNotFoundException: com.mysql.jdbc.Driver https://byarab.com/%d8%aa%d8%b9%d9%84%d9%85-%d8%a7%d9%84%d8%a8%d8%b1%d9%85%d8%ac%d8%a9/%d8%a7%d9%84%d8%ac%d8%a7%d9%81%d8%a7/java-lang-classnotfoundexception-com-mysql-jdbc-driver/?feed_id=33235&_unique_id=5ee5e934e2ef9
0 notes
Text
Android AVD Emulator Hangs on Google Play Games SignIn
ActivityManager: START u0 {act=com.google.android.gms.auth.GOOGLE_SIGN_IN pkg=com.google.android.gms cmp=com.google.android.gms/.auth.api.signin.ui.SignInActivity (has extras)} from uid 10100 on display 0
02-07 04:38:47.372 9367 9367 I AppCompatDelegate: Failed to instantiate custom view inflater android.support.v7.app.AppCompatViewInflater. Falling back to default.
Also I got Saved Games data conflicts that never end; server-side timestamp is always ahead of my local copy. Turns out it’s just the emulator having incorrect automatic time zone; I changed it to a manual correct time zone and things go correct now. Silent sign-in works, and the interactive sign-in activity does not hang on a dimmed blank screen on me. No ApiException nor ClassNotFoundException on multidex application whatsoever. Woot???
Perhaps it just resolves itself after some time, but thank God I can keep my remaining hairs on my head now.
0 notes
Link
If you occurred ClassNotFoundException on running RobolectricTestRunner, you shuld execute "Invalidate and Restart".
0 notes
Text
Problem in executing Query of resultset Object for JDBC Connectivity
I am facing the GRAND PROBLEM in executing query from resultset object for mu JDBC work…. please help
problem appears in this statement resultset = statement.executeQuery(query);
this gives this error
net.ucanaccess.jdbc.UcanaccessSQLException: UCAExc:::4.0.4 unexpected end of statement: required: ( at net.ucanaccess.jdbc.UcanaccessStatement.executeQuery(UcanaccessStatement.java:218) at DB.AuthorsManager.viewAuthor(AuthorsManager.java:26) at UI.Client.main(Client.java:268) Caused by: java.sql.SQLSyntaxErrorException: unexpected end of statement: required: ( at org.hsqldb.jdbc.JDBCUtil.sqlException(Unknown Source) at org.hsqldb.jdbc.JDBCUtil.sqlException(Unknown Source) at org.hsqldb.jdbc.JDBCStatement.fetchResult(Unknown Source) at org.hsqldb.jdbc.JDBCStatement.executeQuery(Unknown Source) at net.ucanaccess.jdbc.UcanaccessStatement.executeQuery(UcanaccessStatement.java:216) ... 2 more Caused by: org.hsqldb.HsqlException: unexpected end of statement: required: ( at org.hsqldb.error.Error.parseError(Unknown Source) at org.hsqldb.ParserBase.unexpectedTokenRequire(Unknown Source) at org.hsqldb.ParserBase.readThis(Unknown Source) at org.hsqldb.ParserDQL.XreadTableFunctionDerivedTable(Unknown Source) at org.hsqldb.ParserDQL.readTableOrSubquery(Unknown Source) at org.hsqldb.ParserDQL.XreadTableReference(Unknown Source) at org.hsqldb.ParserDQL.XreadFromClause(Unknown Source) at org.hsqldb.ParserDQL.XreadTableExpression(Unknown Source) at org.hsqldb.ParserDQL.XreadQuerySpecification(Unknown Source) at org.hsqldb.ParserDQL.XreadSimpleTable(Unknown Source) at org.hsqldb.ParserDQL.XreadQueryPrimary(Unknown Source) at org.hsqldb.ParserDQL.XreadQueryTerm(Unknown Source) at org.hsqldb.ParserDQL.XreadQueryExpressionBody(Unknown Source) at org.hsqldb.ParserDQL.XreadQueryExpression(Unknown Source) at org.hsqldb.ParserDQL.compileCursorSpecification(Unknown Source) at org.hsqldb.ParserCommand.compilePart(Unknown Source) at org.hsqldb.ParserCommand.compileStatements(Unknown Source) at org.hsqldb.Session.executeDirectStatement(Unknown Source) at org.hsqldb.Session.execute(Unknown Source) ... 5 more
This is Authors Manager Class whose method viewAuthor is facing error
import java.sql.ResultSet; import java.sql.SQLException; import java.sql.Statement; public class AuthorsManager { public static void viewAuthor(){ int col1 = 0; String col2=null; DBConnect dbconnect = new DBConnect(); dbconnect.getConnection("this.accdb"); Statement statement = dbconnect.getStatement(); String query = "SELECT * from Table"; try { ResultSet resultset=null; resultset = statement.executeQuery(query); col1 = resultset.getInt("id"); } catch (SQLException e) { // TODO Auto-generated catch block e.printStackTrace(); } finally { DBConnect.disconnect(); } } }
and this is DBConnect Class which is Connecting and giving statement object to AuthorsManager class
DBConnect Class
import java.sql.Connection; import java.sql.DriverManager; import java.sql.SQLException; import java.sql.Statement; public class DBConnect { private static Connection connection = null; private static Statement statement = null; public static void getConnection(String path) { try { Class.forName("net.ucanaccess.jdbc.UcanaccessDriver"); connection = DriverManager.getConnection("jdbc:ucanaccess://" + path); statement = connection.createStatement(); } catch (ClassNotFoundException e) { // TODO Auto-generated catch block e.printStackTrace(); } catch (SQLException e) { // TODO Auto-generated catch block e.printStackTrace(); } } public static Statement getStatement() { // TODO Auto-generated method stub return statement; } public static void disconnect() { try { connection.close(); } catch (SQLException e) { // TODO Auto-generated catch block e.printStackTrace(); } } }
Archive from: https://stackoverflow.com/questions/59064088/problem-in-executing-query-of-resultset-object-for-jdbc-connectivity
from https://knowledgewiki.org/problem-in-executing-query-of-resultset-object-for-jdbc-connectivity/
0 notes
Link
0 notes
Text
Top 3 Libraries Java Developer should know
One of the features of a good and experienced Java developer is the extensive knowledge of API, including JDK and third-party libraries. I spent a lot of time learning API, especially after reading Effective Java 3rd Edition, where Joshua Bloch recommended using existing API for development instead of writing new code pieces for common things. This advises me to make sense because of the test exposure that these 2nd party libraries get. In this article I will share some of the most useful and important libraries and API a Java developer should be familiar with. By the way, I do not include frameworks, eg Spring and Hibernate, because they are quite well known and have specific functions.
I add generally useful libraries for everyday things, such as logging libraries such as Log4j, JSON-parsing-libraries such as Jackson and unit-Test API, e.g. JUnit and Mockito. If you need to use them in your project, you can either include JARs of these libraries in your project's class path to use them, or you can use Maven for dependency management.
If you use Maven for dependency management, these libraries are automatically downloaded, including the libraries that make them dependent.
For example, if you download Spring Framework, then it will also download all other glasses on which Spring is dependent, eg Log4j etc.
You might not realize, but with the right version of the dependent glasses is a great headache. If you have the wrong versions of the JAR, you will get ClassNotFoundException orNoClassDefFoundError or unsupported class version error.
Btw, If you suggest a beginner or an advanced Java programmer, I am also The Full Java MasterClass course on Udemy to fill in the gaps in your knowledge. It is one of the most recent courses in Java and has recently been updated for Java 7, 8, 9, 10 and 11.
1. Logging-Libraries
Logging libraries are very common, because you need them in every project. They are the most important thing for the server-side application, because logs are only placed where you can see what is happening on your application. Although the JDK comes with its own logging library, there are many better alternatives, such as Log4j, SLF4j and LogBack.
2. What do you mean? Analyzing JSON libraries
In today's world of web services and the Internet of Things (IOT), JSON has become the go-to protocol to carry information from client to server. You have replaced the XML as the preferred type of platform-independent transfer of information. Unfortunately, JDK does not yet have a JSON library, but fortunately there are many good third-party libraries that allow you to analyze and create JSON messages, such as Jackson and Gson.
3. Unit-test libraries
Unit testing is the most important thing that separates an average developer from a good developer. Programmers often get excuses for not writing unit tests, but the most common excuse for avoiding unit Tests is the lack of experience and knowledge about popular unit Test libraries such as JUnit, Mockito, and PowerMock.
Install Yandex.Translate on your mobile phone
Mobile versionDevelopersUser AgreementHelp
About Exltech:
ExlTech Solution is top most training firm for IT training and placements in Pune which provides 100% job guarantee. It is a best choice for the candidates who are willing to be a part of these ever-changing technology revolutions. We are committed to provide quality training to the candidates to enhance their career with latest technology and Knowledge.
ExlTech’s Java Training Course
ExlTech is a center for career guidance for JAVA training. We provide practical training for Basic to Advance level Java with live projects. Our Syllabus for Java training course is been designed by the qualified industry experts as per the layman industry needs. Trainers of ExlTech are immensely knowledgeable in technical concepts, committed to convey the best in that particular subject.
ExlTech promises you to deliver best Java Training and with all the interview preparation and placement guarantee and soft skills training. Our faculties are very supportive, they provides technical support even after placement of candidate for their career growth. This is the best training Institute in Pune to start your career in JAVA where you will get best practical oriented Java Training with 100% Placement Assistance.
To know more about java course visit us:
https://www.exltech.in/
0 notes
Text
Original Post from Security Affairs Author: Pierluigi Paganini
Malware researchers at Cybaze-Yoroi ZLAB team dissected a new sample of Qrypter malware that revealed an interesting evolution of the threat.
Introduction
During the last weeks, Yoroi’s monitoring operation intercepted some malicious emails required further attention: they were sent to a very few organizations and the content was specifically tailored for Italian speaking targets. This messages warned the users about imminent summons against them, inviting them to read the attached lawsuit, a not so innocent looking file named “Avviso del tribunale.jar”.
This attachment has been dissected by Cybaze-Yoroi ZLAB team, revealing an interesting evolution of the Qrypter malware threat.
Technical Analysis
Sha256 4ede0d4787f2e5bc471de3490e5c9327b459985530e42def9cf5d94ea4c2cb2b Threat Qrypter-encrypted jRAT Brief Description Jar file contains jRAT Ssdeep 12288:vimJ+fjGuiwDBA19F7/8fDFsJTVjODmYae:vimkiwDB6z8fZsN3Yae
The JAR file seems to be corrupted due to the absence of some classes. In fact, when it is started, the Java Virtual Machine launches a ClassNotFoundException related to a suspicious class named “qua.qrypter.Runner”.
Figure 1. Malware stacktrace
Qrypter is a Malware-as-a-Service, especially popular for its usage in combination with AdWind/jRAT malware, as described in older analysis too. However, this new sample seems to exhibit different protection techniques with respect to the previously documented ones.
Figure 2. JAR internal structure
Opening the JAR file through an archive manager it is possible to see its internal structure: most files are encrypted and only one of them, the “p14603/p14604/p14605.class”, represents an runnable Java Class.
Figure 3. Encrypted file content
So, the “p14605.class” file contains a Java Main which is responsible for decrypting and launching the actual payload. Reversing this class, the Qrypter capabilities emerge.
The decryption routine takes advantage of Java reflection to make the analysis harder: every single object used by the malware is loaded at runtime in a similar manner as shown in Figure 4, where the malware assigns the object System.out to a local variable called “f11131465014074101”.
Figure 4. Example of reflection usage
The “main” static method, initial entry point of the malware, is composed by few code lines setting up the right initial parameters for the actual decryption routine.
Figure 5. Malware’s main
Interestingly, the decryption routine implements a finite state machine (FSA) using the switch approach, a classical formal computational method commonly adopted by Information Engineers and Computer Scientists. The initial state is set to “24”.
Figure 6. Switch structure used as state-machine core
The switch instruction repeatedly checks the value of the “currentState” variable, indicating the last machine’ state, and then it jumps in the right case statement depending on its value. Each “case” contains a decryption routine step and an instruction used to move from the current to the next state. Figure 7 shows one of the instructions belonging to the decryption phase. Using different reflection layers, the malware tries to load the class “qua.qrypter.Runner”, whose name is contained into “f11131464987745335” variable; this is the point where the class launches the exception due to the missing class.
Figure 7. ClassLoader invocation through reflection
However, statically analyzing the decryption routine it was possible to reconstruct the malware behavior uncovering the details of the payload protection mechanism, enabling us to write a custom decipher to extract the next stage of the sample.
Inspecting the code we noticed the encryption key is stored in a particular variable among the huge number of reflective invocations:
Figure 8. Encryption key used to decrypt all the other files
With this information, we managed to decrypt all the protected files contained into the initial JAR archive mimicking the Qrypter behaviour. In detail, a “SecretKeySpec” has been created and then passed to a AES initialized “Cipher” object, but this first result is not plain-text yet, it actually is a GZIP compressed stream, so it has been forwarded into an additional “GZIPInputStream” object.
Figure 9. Encryption key used to decrypt all the other files
One of the decrypted files is a serialized “LinkedHashMap” object filled with a series of key-value entries representing the mapping between original file names and the fake/encrypted names. This object is fundamental to reconstruct the actual payload structure.
Figure 10. LinkedHashMap’s content indicating the relation between the ciphered files and their original name
In fact, inspecting the hashmap’s entries, many class names emerge. Their names confirm the presence of AdWind/jRAT as final payload: the “drop.box”, “sky.drive” and “mega.download” files are well-known artifacts (Figure 10), containing malware private keys and configurations. Decrypting them, it was possible to recognize the AdWind/jRAT configuration schema, similar to the one previously analyzed in our report (The Story of Manuel’s Java RAT).
Figure 11. Classic jRAT configuration file
Conclusion
Even if the final payload is a well-known malware, like jRAT, the Qrypter crypter made it invisible for several antivirus engines. Moreover, this version of Qrypter seems to be different than the older ones: the intensive use of reflection techniques and the state-machine approach have never been mentioned in the previous analysis. Qrypter was popular for its MaaS model, but at this moment the web service is unreachable, so it is not clear how the malicious author used Qrypter to weaponize its AdWind/jRAT payload.
Additional technical details, including Indicators of Compromise and Yara rules are reported in the analysis published on the Yoroi blog.
https://blog.yoroi.company/research/decrypting-the-qrypter-payload/
window._mNHandle = window._mNHandle || {}; window._mNHandle.queue = window._mNHandle.queue || []; medianet_versionId = "3121199";
try { window._mNHandle.queue.push(function () { window._mNDetails.loadTag("762221962", "300x250", "762221962"); }); } catch (error) {}
Pierluigi Paganini
(SecurityAffairs – Qrypter, malware)
The post Malware researchers decrypted the Qrypter Payload appeared first on Security Affairs.
#gallery-0-6 { margin: auto; } #gallery-0-6 .gallery-item { float: left; margin-top: 10px; text-align: center; width: 33%; } #gallery-0-6 img { border: 2px solid #cfcfcf; } #gallery-0-6 .gallery-caption { margin-left: 0; } /* see gallery_shortcode() in wp-includes/media.php */
Go to Source Author: Pierluigi Paganini Malware researchers decrypted the Qrypter Payload Original Post from Security Affairs Author: Pierluigi Paganini Malware researchers at Cybaze-Yoroi ZLAB team dissected a new sample of Qrypter malware that revealed an interesting evolution of the threat.
0 notes
Text
Erstellen eines JavaServerFaces 2.2 Projektes mit Eclipse & Apache Maven

In diesem Beitrag möchte ich erläutern wie man ein JavaServerFaces 2.2 Projekt mit Apache Maven und Eclipse einrichtet. Ihr benötigt folgende Tools: Oracle Java 8 JDK Eclipse IDE for Java EE Developers Apache Maven Apache Tomcat 7.0 Wie man Apache Maven einrichtet, habe ich bereits im Tutorial Maven: Einrichten von Apache Maven erläutert. Wichtig ist das die Umgebungsvariable "JAVA_HOME" zu einem Oracle Java JDK verweist.
Einrichten von Eclipse
Nachdem Eclipse heruntergeladen und in einen beliebigen Ordner entpackt wurde, kann das Programm über "eclipse.exe" gestartet werden. Troubleshooting Sollte beim starten die Fehlermeldung mit dem Fehlercode 13 erscheinen so muss in der Datei "eclipse.ini" der Pfad zur javaw.exe gesetzt werden.

Eclipse Fehlercode 13 Die Datei "eclipse.ini" liegt im selben Ordner wie die Datei "eclipse.exe" und wird mit einem beliebigen Texteditor geöffnet. Es muss nun nach der Wert "-startup" folgende Zeile eingefügt werden: -vm C:/Program Files/Java/jdk1.8.0_152/bin/javaw.exe Auf meinem System ist Oracle Java unter dem oben genannten Pfad installiert sollte dieses bei euch anders sein muss dieser Pfad natürlich angepasst werden. Erstellen eines Workspaces Eclipse arbeitet mit Workspaces, in diese Verzeichnisse werden die Einstellungen sowie die Projekte abgelegt. Man kann beliebig viele Workspaces anlegen.

Eclipse - erstellen eines Workspaces
Einrichten von Apache Maven (in Eclipse)
Als ersten Schritt wollen wir Apache Maven einrichten. Ich setze voraus das Apache Maven, entpackt und die Umgebungsvariable JAVA_HOME auf ein JDK zeigt. Navigieren wir also über das Hauptmenü "Window" > "Preferences" zu den Einstellungen. Dort öffnen wir im Baum den Pfad "Maven" (1) > "Installations" (2). Es sollte hier die Vorauswahl "EMBEDDED" markiert sein (der Haken ist gesetzt).

Einrichten von Apache Maven Wählen wir also nun die Schaltfläche "Add" (3). Und im neuen Dialog "Directory..."

Einrichten Apache Maven in Eclipse Nun navigiert man zu dem entpackten Apache Maven und wählt dort den Ordner aus, der Dialog wird mit der Schaltfläche "Ordner auswählen" bestätigt. Und der Dialog "New Maven Runtime" mit der Schaltfläche "Finish" verlassen. Es muss im letzten Schritt noch der Haken bei der neu hinzugefügten Maven Version gesetzt werden und dann die Einstellungen mit "Apply and Close" übernommen und geschlossen.
Erstellen eines Web-Projektes mit Apache Maven
Wollen wir nun unser Web-Projekt mit Apache Maven erstellen, dazu navigieren wir über "File" > "New" > "Maven Project". In diesem Dialog setzen wir den Haken bei "Create a simple project ..." (1) und wählen die Schaltfläche "Next >" (2).

Erstellen eines Apache Maven Projektes (Schritt 1) Im nächsten Dialog werden die Metadaten zu dem neuen Maven Projekt gesetzt. die "Group Id" ist eine Id für das Projekt und folgt den Regeln für die Beschreibung von Packages, die "Artifact Id" wird für die Benennung des Projektes verwendet, des Weiteren wird dieser Bezeichner für das erstellen eines JAR's bzw. unserer WAR Datei verwendet, aus der Auswahlliste "Packaging" wird der Eintrag "war" ausgewählt als "Name" wird der gleiche Wert gewählt wie auch die "Artifact Id"

setzen der Metadaten zum neuen Apache Maven Projekt Die gesetzten Werte werden mit der Schaltfläche "Finish" bestätigt und Eclipse wird das Projekt erstellen und bauen. Nachdem das Projekt erstellt und gebaut wurde, wird ein Fehler und einige Warnungen angezeigt.

Eclipse - Fehler und Warnungen nach dem ersten Bauen Als erstes kümmern wir uns um den Fehler. Um diesen Fehler zu beheben, muss man in den "Project Facets" einige Einstellungen setzen. Dabei ist die Reihenfolge sehr wichtig. Als erstes wird der Haken bei "Dynamic Web Module" entfernt und die Schaltfläche "Apply" betätigt, danach wird nun der Haken wieder gesetzt und erneut die Schaltfläche "Apply" betätigt". Es wurde nun der Ordner "WebContent" erzeugt. In diesen neuen Ordner wird, wie der Name es erahnen lässt die Dateien für die Webansicht abgelegt. Nun werden noch die Einstellungen für JavaServerFaces 2.2 gesetzt, dazu wird aus der Auswahlliste für die "Configuration" der Eintrag "JavaServer Faces v2.2 Project".

Auswahl der Konfiguration für ein JSF 2.2 Projekt Es werden nun automatisch die Einstellungen für ein JSF 2.2 Projektes gesetzt. Für ein JSF Projekt wird die Datei "faces-config.xml" benötigt diese können wir anlegen lassen in dem wir die Hinweismeldung im unteren Bereich des Dialoges bestätigen.

Hinweismeldung zur Konfiguration von JSF Nach einem klick auf diesen Link wird der Dialog "Modify Faceted Project" geöffnet. Als "Type" wählen wir "Disable Library Configuration" (1) und bestätigen diese Auswahl mit der Schaltfläche "OK" (2).

Dialog "Modify Project Facets" Des Weiteren muss nun noch die Java Version auf 1.8 gesetzt werden.

Project Facets setzen der Java Version auf 1.8 Zum Abschluss wird die Auswahl mit "Apply and Close" bestätigt und die Warnungen und Fehler sollten nicht mehr sichtbar sein. Einrichten der JavaServerFaces Resourcen Wir haben im Schritt zuvor die Auswahl einer JavaServerFaces implementation abgelehnt, daher muss nun manuell eine hinzugefügt werden. Da das Projekt mit Apache Maven gebaut wird, werden wir diese als Abhängigkeiten zu diesem Projekt hinzufügen. Um diese Bibliotheken als Abhängigkeiten hinzuzufügen muss die Datei "pom.xml" wiefolgt erweitert werden: com.sun.faces jsf-api 2.2.18 com.sun.faces jsf-impl 2.2.18 javax.servlet jstl 1.2 javax.servlet servlet-api 2.5 org.glassfish.web el-impl 2.2 Bevor man jedoch das Projekt neu bauen kann und somit die Abhängigkeiten aus dem Internet geladen und lokal abgelegt werden, muss ein Plugin hinzugefügt werden. Dieses Plugin dient zum bauen der WAR Datei. org.apache.maven.plugins maven-war-plugin WebContent\WEB-INF\web.xml Es muss hier der Pfad zur Datei "web.xml" eingerichtet werden, Apache Maven erwartet diese Datei eigentlich unter dem Pfad "src" > "main" > "webapp" > "WEB-INF". Setzen der Startseite In der Datei web.xml wird die Startseite des Web-Projektes benannt. Hier können beliebig viele Dateien benannt werden (was wenig sinn ergibt aber möglich ist). index.xhtml Zusätzlich müssen wir ein Servlet-Mapping erstellen damit der Server "weiß" mit welchen Dateien dieser im JSF Kontext arbeiten soll. Faces Servlet *.jsf Faces Servlet *.faces Faces Servlet *.xhtml Hier könnte man sich eine beliebige Dateiendung ausdenken und verwenden. Erstellen der Datei index.xhtml Damit das Web-Projekt aufgerufen werden kann muss es eine Startseite geben. Diese Datei wird zumeist mit "index" Bezeichnet und trägt für dieses JSF Projekt das Suffix ".xhtml". Es wird nun eine leere Datei in dem Ordner "WebContent" erstellt und mit index.xhtml benannt.

erstellen einer neuen Datei im Ordner WebContent Als erstes wollen wir eine "normale" HTML Datei erstellen mit einem einfachen Grundgerüst.
Hello World!
Einrichten von Apache Tomcat Damit wir unserer Web-Projekt "HelloWorld" ausführen können, benötigen wir einen Applicationserver. Der wohl bekannteste Vertreter ist Apache Tomcat. Und kann kostenfrei unter https://tomcat.apache.org/download-70.cgi heruntergeladen werden. Nachdem Download und dem entpacken des Zip Archives wird der Server in Eclipse eingerichtet. Als erstes öffnet man den Reiter "Servers".

Eclipse Reiter "Servers" Sollte dieser Reiter nicht sichtbar sein, so kann dieser über "Window" > "Show View" > "Servers" eingeblendet werden.

Eclipse Reiter "Server" einblenden Um nun einen neuen Server einzurichten muss auf den Hyperlink "No servers are available...." geklickt werden. Es wird nun der Dialog "New Server" angezeigt. Aus diesem Dialog kann man einen Server wählen und ggf. herunterladen und installieren. Es muss nun aus dem Baum der Knoten "Apache" geöffnet werden (1) und den Eintrag "Tomcat v7.0 Server" (2) auswählen, diese Auswahl wird mit der Schaltfläche "Next >" (3) bestätigt.

Eclipse Apache Tomcat als Server einrichten (Schritt 1) Im nächsten Schritt muss nun die zuvor heruntergeladene Installation von Apache Tomcat über die Schaltfläche "Browse" (1) ausgewählt werden, diese Auswahl wird mit der Schaltfläche "Finish" (2) bestätigt.

Eclipse - Tomcat Server installation wählen Alternativ kann man hier auch einen Apache Tomcat herunterladen und installieren (blau markierte Schaltfläche). Starten von Apache Tomcat aus Eclipse Nachdem nun das Web-Projekt und der Applicationserver Tomcat eingerichtet wurde können wir diesen erstmalig starten. Dazu klicken wir im Kontextmenü des Projektes auf "Run As" > "Run on Server" und wählen dort einen Applicationserver aus.

Eclipse - Web-Projekt starten

Eclipse Web-Projekt starten, Server auswahl Troubleshooting Sollte beim starten des Web-Projektes der Fehler "ClassNotFoundException: javax.faces.webapp.FacesServlet" in der Console erscheint, so muss in den "Deployment Assembly" Einstellungen zu dem Projekt das lokale Maven Repository hinzugefügt werden. Als erstes wird nun im Menübaum der Eintrag "Deployment Assembly" ausgewählt (1) danach die Schaltfläche "Add..." (2) betätigt.

Eclipse - Deployment Assembly Im neuen Dialog wählen wir den Eintrag "Java Build Path Entries" (1) und bestätigen diese Auswahl mit der Schaltfläche "Next >" (2).

Eclipse - neuen Java Build Path Eintrag hinzufügen In nächsten Dialog wird nun der Eintrag "Maven Dependencies" (1) ausgewählt und die Auswahl mit der Schaltfläche "Finish" (2) bestätigt. Danach muss diese neue Einstellung mit der Schaltfläche "Apply and Close" übernommen werden (der Dialog wird zusätzlich geschlossen). Nun muss der Server gestoppt und neu gestartet werden. Ansicht des Web-Projektes im Browser Wenn das Web-Projekt ohne Fehler im Apache Tomcat deployt wurde, so kann dieses Projekt über die Adresse http://localhost:8080/HelloWorld aufgerufen werden.

Web-Projekt "HelloWorld" im Browser Bisher haben wir jedoch keine JSF Funktionalität implementiert. Dieses wollen wir nun ändern.
JSF Namespace einrichten
Nachdem das Web-Projekt eingerichtet und erfolgreich gestartet wurde, wollen wir die JSF Funktionalität implementieren. Als erstes stellen wir das HTML Grundgerüst auf JSF um, dieses wird später benötigt damit wir Java Beans benutzen können. Insert title here
Hello World!
Es gibt neben den HTML Komponenten auch Funktionen (Schleifen, Bedingte Anweisungen usw.) welche man in dieser Datei verwenden kann. Hierzu muss man zusätzlich die JSTL (Java Standard Tag Library) implementieren. xmlns:c="http://java.sun.com/jsp/jstl/core" Mit den JSTL Funktionen können wir nun unseren Text "Hello World!" mehrfach ausgeben:
Hello World!
Eine Java Bean erstellen
Nun wollen wir eine Java Bean erstellen aus welcher wir eine einfache Begrüßung erzeugen möchten. Eine Java Bean ist eine "normale" Klasse jedoch mit einer zusätzlichen Annotation "@ManagedBean". Diese Annotation sorgt dafür das unsere Bean über den JSF Kontext verwaltet wird. package de.draegerit.helloworld; import javax.faces.bean.ManagedBean; import javax.faces.bean.RequestScoped; @ManagedBean @RequestScoped public class HelloBean { private String greeting; public String getGreeting() { return greeting; } public void setGreeting(String greeting) { this.greeting = greeting; } } Es ist wichtig auf den Java Beans konvention zu achten, d.h. es müssen zu dem Feld getter & setter bestehen. Diese Methoden können in Eclipse fast automatisch erstellt werden. Nun können wir in der XHTML Datei dieses Feld befüllen und auslesen. Setzen der Begrüßung Wir haben nun eine JavaBean "HelloBean" erzeugt und dort das Feld "greeting" mit gettern & settern. Nun können wir in der Datei index.xhtml ein Eingabefeld erzeugen und eine "Verbindung" von der Bean zu diesem herstellen. Es gibt den HTML Tag "input" diesem kann man als Typ den Wert "text" übergeben, und erhält dann ein Eingabefeld für Text. In JSF gibt es die Komponenten auch, jedoch werden diese über den zuvor definierten Namespace deklariert. Der Wert in dem Eingabefeld wird dann per Value Expression über die getter & setter Methoden aufgerufen. Ein solcher Aufruf startet immer mit einer Raute "#" gefolgt von einer geschweiften Klammer "{" und wird mit einer geschweiften Klammer beendet. Gibt man keinen Namen bei der Annotation @ManagedBean ein so wird der Name der Klasse verwendet, jedoch wird der erste Buchstabe klein geschrieben. Man kann jedoch einen beliebigen Namen vergeben, hierzu muss der Annotation nur ein Parameter "Name" übergeben werden. @ManagedBean(name="irgendeinNameBean") Aus HTML kennen wir bereits den Tag "form" damit lassen sich Formulardaten übersenden und eine Aktion auf dem Server aufrufen. Damit wir im folgenden einen Seitenwechsel erzeugen können benötigen wir zusätzlich einen Button Das Attribut "action" trägt den Namen der Seite zu welcher gewechselt werden soll. Wollen wir nun eine neue Seite "greeting.xhtml" erzeugen um den Text / Namen aus der Seite "index.html" dort anzeigen zu lassen. Insert title here
Hallo #{helloBean.greeting}
Das Ergebnis ist nun das auf der neuen Seite das Wort "Hallo" und zusätzlich unser Text aus der vorherigen Seite steht.
Fazit & Ausblick
Wir haben nun einen Applicationserver eingerichtet und unsere erste sehr kleine JSF Anwendung geschrieben. Als nächstes wollen wir nun eine kleine Businessanwendung schreiben in der wir eine Timeline mit Beiträgen (ähnlich wie Twitter) anzeigen lassen können. Read the full article
1 note
·
View note
Text
Jira Service Desk 3.14.0 Release Notes
We're excited to bring you Jira Service Desk 3.14.
Highlights
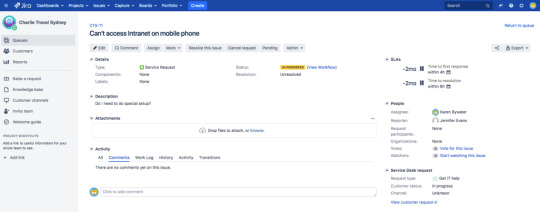
Jira Service Desk has a new look
Project archiving for Data Center
IPv6 support
Going Dutch
New columns for Projects
Resolved issues
Credit, where credit's due
Get the latest version
Read the upgrade notes for important info about this release and see the full list of issues resolved.
Interested in trying a shiny new version? Don't forget to renew your active software maintenance. Renew now!
Jira Service Desk has a new look – and it's beautiful
We're bringing a refreshed look and feel to our Server and Data Center products and... drum roll please... it's Jira Service Desk's turn. This work is based on the new Atlassian design and includes updated colors, typography, avatars and icons. Let's take a look...
Queues, glorious queues

Captivating agent views
We wanted to dazzle your users without distracting them, so we haven't made changes to the navigation – your favorite features will be right where you left them.
Project archiving for Data Center
Jira Service Desk admins rely on projects to connect the right teams to the right pieces of work. If your team has completed a project and moved on, that inactive project is taking up space, slowing you down and adding to the mass of information you have to comb through. So we're thrilled to announce that you can now archive projects in Jira Service Desk Data Center.

Although no longer visible in the usual places, your projects are safe and can be restored anytime you need them. Learn more at Archiving a project.
IPv6 support
You can now choose to run Jira Service Desk in an IPv6 environment. Head to the upgrade notes for all the details.
Going Dutch
We've gone Dutch at Jira Service Desk by adding this great language to a growing list of languages available, out of the box.

You can provide translations and regional messages to your Dutch customers, or choose it as the default language throughout your Jira site.
New columns for projects
We’ve added two columns to the Projects page to help you determine the importance of a project. You can now see the number of issues in a project and when the last issue was updated. Check it out in Administration (cogwheel) > Projects.

Issues in Release
Fixed: Irrelevant request types in the Portal search result list
Fixed: JIRA does not prevent setting Reporter to a Request Participant
Fixed: Having the same user as reporter and request participants leaves the issue not transitionable through customer portal
Fixed: JSD bundled plugins appear in User Installed Add-Ons Request Participant Missing from Create issue Screen
Fixed: Label fields does not show correctly in Chrome and Internet Explorer
Fixed: Switching workflow scheme on a project takes forever or breaks if there are too many issue types
Fixed: Update Known Limitations section of Jira issue collector documentation
Fixed: Workflow REST API causes Internal Error on a non-existent workflow parameter
Fixed: com.atlassian.jira.index.summary.DefaultIndexSummarizer#getCountOfIssuesInIndex closes issueSearcher
Fixed: REST api index/summary throws java.io.IOException exception
Fixed: DVCS Connector initializes Data Center with wrong class loader and breaks cache replication
Fixed: JIRA incorrectly uses fieldconfigscheme ID instead of fieldconfiguration ID to look up Custom Field Options
Fixed: Plugin caches in Data Center throw ClassNotFoundException on invalidation if custom classes are used as keys
Fixed: Upgrade to Apache Tomcat 9.0.0.M19 or later due to vulnerabilities
Fixed: Upgrade Tomcat to the latest available version 8.5.12
Fixed: JIM throws ClassNotFoundException in JIRA Datacenter
Fixed: Project Import blocked due to missing Custom Field Select Option values
Fixed: Filters affected by JRA-62386 are breaking Pie Charts
Fixed: JIRA changes project name/key to database ID on a saved filter
Suggestion: Prompt user before clearing changed values when ESC key is pressed during inline edit
Fixed: JQL filter for Webhooks doesn’t work correctly when “Comment” and “Worklog” related events are fired
Fixed: Update project avatar REST api documentation incomplete
Fixed: Filter JQL is showing Project IDs instead of Project Keys
Suggestion: Make ESC key behavior consistent across description and comment edit operations
Fixed: JIRA should prevent corruption of remote user directory configuration
Suggestion: IPv6 Support for JIRA
Fixed: RFC-2396: The pipe character “|” is not accepted
Suggestion: Removing a Custom Field Context should require confirmation
Source
0 notes