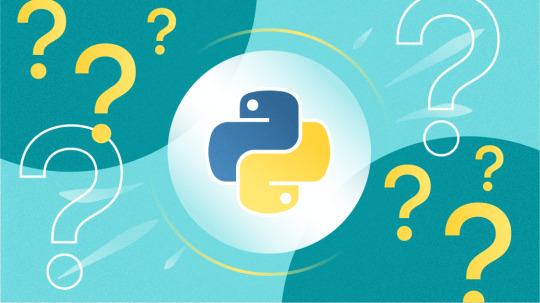
#Download opencv python for mac
Explore tagged Tumblr posts
Visit Tumblr Blog
Explore Tumblr blogs with no restrictions, modern design and the best experience.
Last Seen Tumblr Blogs


Fun Fact
Tumblr was named as a finalist in Lead411’s New York City Hot 125 in Aug 2010.
Text
Download opencv python for mac

DOWNLOAD OPENCV PYTHON FOR MAC HOW TO
DOWNLOAD OPENCV PYTHON FOR MAC INSTALL
DOWNLOAD OPENCV PYTHON FOR MAC CODE
DOWNLOAD OPENCV PYTHON FOR MAC INSTALL
Installing OpenCV on M1 MacBook Open Terminal on mac and run the following commands: Apple command line tools conda install -y python3.8.6.
DOWNLOAD OPENCV PYTHON FOR MAC CODE
OpenCV 3.2 + Python 3.6.1: imshow() not worked even with waitKey(0) #8885 I can confirm all my previously working C++ code now only shows macOS cocoa window autosize could not access image dimensions #8916. How can I solve this problem? OpenCV Version: 3.0.0 Pycharm Version: Conmunity Edition 2016.2.3 OS Problems installing opencv on mac with python. python3 virtualenv opencv dlib tensorflow keras.Īnd can use opencv normally. Setting up deep learning environment the easy way on macOS High Sierra I had to look around and experiment to install all the packages I was enjoying on Ubuntu. Learn about macOS Big Sur and any updates that are available for Login window may not display properly after restarting Mac mini (M1, macOS Big Sur 11.2 improves Bluetooth reliability and fixes the following issues.��re you running into problems install OpenCV via Homebrew? To help you and other PyImageSearch readers get OpenCV installed faster (and with Figure 4: Importing the cv2 library into a Python 2.7 and Python 3 shell.
DOWNLOAD OPENCV PYTHON FOR MAC HOW TO
Vivek-ram changed the title how to install Pandas, opencv2 in M1 how to When I install open-cv with pip3 install opencv-python I run into following Python 3.9.5 is the newest major release of the Python programming Some of the new major new features and changes in Python 3.9 are: You can find a more comprehensive list in this release's "What's New" document. How to use OpenCV imshow() in a Jupyter Notebook - Quick Tip The problem is that the image box is using the same Python process as the Therefore it is not happy to wait for the window, and you lose control of the Python process. Why am I having issues running a file in P圜harm? Why are IDE's important when you can just use text editors and the built in terminal on a Mac? Homebrew prints out this export command for you after installing opencv, so you can just. For P圜harm pip install -no-binary opencv-python opencv-python. Mac OS Big I got cv2.imshow to show the image in a window when running Python in the terminal. markwimpory opened def show_image(image): destroyAllWindows(). IMShow No Window - 4.4.0.46 MacOS Big Sur #423. You will learn how to install OpenCV 4 on Raspbian Buster via both: To learn more about installing OpenCV 4 on the Raspberry Pi 4 and Raspbian for some projects (including many educational projects on and in macOS, and Linux (no dev environment configuration required!) The window should show a 512*512 black image, but it does show a In a different environment I think opencv-python is doing something wrong macOS Catalina 10.5.6 Anaconda July 2020 edition notebook 6.2.3. If you don't have homebrew on your system you can download and install it After installing Homebrew check if you have XCode Command Line Java Application project or open your existing application in IntelliJ Idea.Īfter executing imshow() and the opened window is displayed, loading does not stop. The quickest and easiest way to install OpenCV on your mac is to use Homebrew.
1 note
·
View note
Text
Instal python for mac

#Instal python for mac how to#
#Instal python for mac full version#
#Instal python for mac install#
#Instal python for mac upgrade#
#Instal python for mac android#
dmg file appropriate for your version of OS X and double-click it to run the standard installer.Īfter installation, open gedit (it should be in your Applications folder). We are going to use a very good, no-frills text editor called gedit ĭownload the.
#Instal python for mac install#
Your command prompt will now look slightly different: the command line will be preceded by ow we have set up a virtual environment, which is where any Python libraries we decide to install will be stored. Now that we have installed virtualenv, we can create a Virtual Environment - run this in your command prompt: Save it to your home folder (/Users/your_name). For installing the packages, you have to choose the environment whether it’s global or virtual or conda. To install virtualenv on the Mac, download this file: Since the Deadsnakes PPA has almost every version of Python in its database, you can install older versions of Python as well. Download the latest version of Python from the added PPA: sudo apt install python3. Update your systems package list: sudo apt update. Type "help", "copyright", "credits" or "license" for more information.įor the purposes of this workshop, we will install virtualenv, a useful tool for creating isolated development environments (which makes it easier to experiment with various versions of Python code libraries and modules). sudo add-apt-repository ppa:deadsnakes/ppa.
You should see something like the following:.
Test your install by typing this into the command prompt: python.
Open the Terminal application (under Applications > Utilities) and type into the command prompt: hash -r.
dmg file by double-clicking and follow the onscreen instructions to install Python on your computer.
Download the latest version of Python 2.7 for the Mac from /download/releases/2.7.3.
#Instal python for mac full version#
This from XCode (Macs came bundled with the XCode Developer Tools DVD you can also download a full version from ) or the smaller
Before we begin, make sure you have GCC installed to compile Python.
However, using the pre-installed version of Python for this workshop can pose some problems, so we will be installing the "real" version, straight from.
PYTHON3_NUMPY_INCLUDE_DIRS = /usr/lib/python/dist-packages/numpy/core/include/ Note To specify Python2 versions, you can replace PYTHON3_ with PYTHON2_ in the above parameters.īuild.Macs come pre-installed with a special version of Python. Install the latest version of Python Go to and press the yellow Download Python-button.
PYTHON3_INCLUDE_DIR = /usr/include/python.
Double-click the downloaded file to extract the archived contents. First, you need to download Visual Studio Code for macOS from its official website at 2.
set BUILD_EXAMPLES=ON to build all examples In this part of the tutorial, we’re going to install Visual Studio Code for Python development on macOS.
set BUILD_DOCS=ON for building documents (doxygen is required).
to build with modules from opencv_contrib set OPENCV_EXTRA_MODULES_PATH to /modules.
build type: CMAKE_BUILD_TYPE=Release (or Debug).
set the binary build path to your CMake build directory, e.g.
#Instal python for mac upgrade#
Step 3: Upgrade your pip with the latest version to avoid errors during the installation. Step 2: Now check if pip3 and python3 are successfully installed in your system. Follow the below steps to install the PyQt package on macOS using pip: Step 1: Install the latest version of Python3 in macOS.
set the OpenCV source code path to, e.g. Method 1: Using pip to install PyQt Package.
Install folder will be /usr/bin/ by default, submit it by choosing Install command line links.Ĭmake -DCMAKE_BUILD_TYPE=Release -DBUILD_EXAMPLES=ON.
Then, follow the instructions from the pop-up there.
#Instal python for mac how to#
From the CMake app window, choose menu Tools –> How to Install For Command Line Use.
#Instal python for mac android#
Develop apps and games for iOS, Android and using.
Install the dmg package and launch it from Applications. Create and deploy scalable, performant apps using.
Find the version for your system and download CMake from their release's page.
If you XCode and XCode Command Line-Tools installed, you already have git installed on your machine. Note OSX comes with Python 2.7 by default, you will need to install Python 3.8 if you want to use it specifically. This tutorial will assume you have Python, Numpy and Git installed on your machine.
Python 2.7 or later and Numpy 1.5 or later.
The following steps have been tested for MacOSX (Mavericks) but should work with other versions as well. Next Tutorial: Cross compilation for ARM based Linux systems Prev Tutorial: Use OpenCL in Android camera preview based CV application
0 notes
Text
Rapidminer studio tutorial

#RAPIDMINER STUDIO TUTORIAL HOW TO#
#RAPIDMINER STUDIO TUTORIAL 64 BIT#
#RAPIDMINER STUDIO TUTORIAL ANDROID#
#RAPIDMINER STUDIO TUTORIAL LICENSE#
#RAPIDMINER STUDIO TUTORIAL DOWNLOAD#
#RAPIDMINER STUDIO TUTORIAL LICENSE#
Step 7: The next screen will be of License Agreement, click on I Agree. Step 6: After this Setup screen will appear, click on Next. Step 5: It will prompt confirmation to make changes to your system. Step 4: Now check for the executable file in downloads in your system and run it.
#RAPIDMINER STUDIO TUTORIAL DOWNLOAD#
It is a big 273 MB file that will take some time depending on download speed.
#RAPIDMINER STUDIO TUTORIAL 64 BIT#
Step 3: New webpage will open, which will contain RapidMiner installation files for the different operating systems, let’s take a 64 bit Windows installer file, click on it, downloading the executable file will start shortly. Click on the Downloads button which is adjacent to My Account, no need to create an account. Step 2: Clicking on the DOWNLOAD button will redirect to another webpage. Step 1: Visit the official website of RapidMiner using URL on any web browser.
#RAPIDMINER STUDIO TUTORIAL HOW TO#
How to Remove the Password from a Zip File?įollow the below steps to install RapidMiner on Windows:.Authentication Bypass using SQL Injection on Login Page.How to Set Java Path in Windows and Linux?.How to Recover a Deleted File in Linux?.
#RAPIDMINER STUDIO TUTORIAL ANDROID#
How to Install and Set up Android Studio on Windows?.
How to Install and Use Metamask on Google Chrome?.
How to Change the Theme of Netbeans 12.0 to Dark Mode?.
How to install requests in Python - For windows, linux, mac.
How to Install and Run Apache Kafka on Windows?.
How to integrate Git Bash with Visual Studio Code?.
How to Connect Two Computers with an Ethernet Cable?.
How to filter object array based on attributes?.
How to setup Anaconda path to environment variable ?.
How to set up Command Prompt for Python in Windows10 ?.
How to set fixed width for in a table ?.
How to Check Incognito History and Delete it in Google Chrome?.
Different Ways to Connect One Computer to Another Computer.
How to Install OpenCV for Python on Windows?.
How to install Jupyter Notebook on Windows?.
How to Find the Wi-Fi Password Using CMD in Windows?.
ISRO CS Syllabus for Scientist/Engineer Exam.
ISRO CS Original Papers and Official Keys.
GATE CS Original Papers and Official Keys.
By aggregating listings from multiple websites, Rent By Owner offers an immense amount of choice of the best RBO properties in Fawn Creek. How many RentByOwner vacation rentals are available in Fawn Creek?Ĭurrently, the total number of properties listed by Rent By Owner in 2022 is over 230 in the Fawn Creek area, and still counting.
Private room in Independence with Parking.
Evolve 1-Acre Home by Lake with RV Hookup and Hot Tub.
If you are looking for a family-friendly vacation home in Fawn Creek, check out one of the following properties as all are highly-rated places to stay with excellent review for families or groups staying in Fawn Creek: Which vacation homes in Fawn Creek are best for families?
Hampton Inn & Suites Pittsburg Kansas Crossing.
Holiday Inn Express Hotel & Suites Bartlesville, an IHG Hotel.
Holiday Inn Express & Suites - Coffeyville, an IHG Hotel.
Top-rated RBO homes that have access to a swimming pool include: There are 28 vacation rentals with private pools near Fawn Creek. How many vacation rentals have private pools in Fawn Creek?
Lakefront Cedar Vale Lodge with Private Boat Dock!.
Pet-Friendly Grand Lake House with Dock and Kayaks!.
Pastoral Log Cabin with Trails about 1Mi to Grand Lake.
If you plan on staying in the Fawn Creek area, consider making a reservation for a few nights at one of these properties as these have been rated the Top Vacation Rentals in Fawn Creek: There are a lot of options in Fawn Creek. Just search for your destination and secure your reservation today.įrequently Asked Questions About Fawn Creek What are the top vacation rentals in Fawn Creek? RentByOwner makes it easy and safe to find and compare vacation rentals in Fawn Creek with prices often at a 30-40% discount versus the price of a hotel. Popular Airbnb-style properties in Fawn Creek. Huge master suite bedrooms and have large screen televisions? You can find vacation rentals by owner (RBOs), and other Looking for an RBO with the best swimming pools, hot tubs, allows pets, or even those with Homes? With RentByOwner Fawn Creek, you have the flexibility of comparing different options of variousĭeals with a single click. Looking for last-minute deals, or finding the best deals available for cottages, condos, private villas, and large vacation Get more value and more room when you stay at an RBO property in Fawn Creek. These rentals, including vacation rentals, Rent By Owner Homes (RBOs) and other short-term private accommodations, have top-notch amenities with the best value, providing you with comfort and luxury at the same time. There are more than 230 vacation rentals that are available in Fawn Creek.
0 notes
Text
Importerror Unable To Find Zbar Shared Library Mac
Im trying to use pyzbar 0.1.4 on a Flask Server in Docker The image was created by us, based in python 2.7 taken from alpine. Install ZBar by apk update apk add zbar Im getting the following er.
飞奔的猫的博客 记录下: centos7使用pyzbar报错:ImportError: Unable to find zbar shared library 解决办法: centos7 安装方式 yum install zbar-devel pip install pyzbar python wand安装python wand.image无法识别.
Connect and share knowledge within a single location that is structured and easy to search. Learn more ImportError: Unable to find zbar shared library.
Latest version
Released:
Read one-dimensional barcodes and QR codes from Python 2 and 3.
Project description
Read one-dimensional barcodes and QR codes from Python 2 and 3 using thezbar library.
Pure python
Works with PIL / Pillow images, OpenCV / numpy ndarrays, and raw bytes
Decodes locations of barcodes
No dependencies, other than the zbar library itself
Tested on Python 2.7, and Python 3.4 to 3.6
The older zbarpackage is stuck in Python 2.x-land.The zbarlight package does notprovide support for Windows and depends upon Pillow.
Installation
The zbarDLLs are included with the Windows Python wheels.On other operating systems, you will need to install the zbar sharedlibrary.
Mac OS X:
Linux:
Install this Python wrapper; use the second form to install dependencies of thecommand-line scripts:
Example usage
The decode function accepts instances of PIL.Image.
It also accepts instances of numpy.ndarray, which might come from loadingimages using OpenCV.
You can also provide a tuple (pixels, width, height), where the image datais eight bits-per-pixel.
The default behaviour is to decode all symbol types. You can look for just yoursymbol types
Bounding boxes and polygons
The blue and pink boxes show rect and polygon, respectively, forbarcodes in pyzbar/tests/qrcode.png (seebounding_box_and_polygon.py).
Windows error message
If you see an ugly ImportError when importing pyzbar on Windowsyou will most likely need the Visual C++ Redistributable Packages for VisualStudio 2013.Install vcredist_x64.exe if using 64-bit Python, vcredist_x86.exe ifusing 32-bit Python.
Contributors
Alex (@globophobe) - first implementation of barcode locations
License
pyzbar is distributed under the MIT license (see LICENCE.txt).The zbar shared library is distributed under the GNU Lesser GeneralPublic License, version 2.1 (see zbar-LICENCE.txt).
Release historyRelease notifications | RSS feed
0.1.8
0.1.7
0.1.5
0.1.4
0.1.3
Importerror Unable To Find Zbar Shared Library Macos
0.1.2

0.1.1
0.1.0
Download files
Download the file for your platform. If you're not sure which to choose, learn more about installing packages.
Files for pyzbar, version 0.1.8Filename, sizeFile typePython versionUpload dateHashesFilename, size pyzbar-0.1.8-py2.py3-none-any.whl (28.7 kB) File type Wheel Python version py2.py3 Upload dateHashesFilename, size pyzbar-0.1.8-py2.py3-none-win32.whl (806.7 kB) File type Wheel Python version py2.py3 Upload dateHashesFilename, size pyzbar-0.1.8-py2.py3-none-win_amd64.whl (813.5 kB) File type Wheel Python version py2.py3 Upload dateHashes
Close
Hashes for pyzbar-0.1.8-py2.py3-none-any.whl
Hashes for pyzbar-0.1.8-py2.py3-none-any.whlAlgorithmHash digestSHA2560e204b904e093e5e75aa85e0203bb0e02888105732a509b51f31cff400f34265MD54cee06c1e2dbfeab163c5d1f4ebc5503BLAKE2-256467ed2ad702facc47c0b3106a494f5dfbc3f296aab7a07dac05d1f30bdad0fab
Close
Hashes for pyzbar-0.1.8-py2.py3-none-win32.whl
Hashes for pyzbar-0.1.8-py2.py3-none-win32.whlAlgorithmHash digestSHA2567d6c01d2c0a352fa994aa91b5540d1caeaeaac466656eb41468ca5df33be9f2eMD5b8526e37f3ade7ef762aefd237dce4ddBLAKE2-25615f490033b4ecca7c2f2815b410b953fad6499ca3861af420b1de5bf111ccdd2
Close
Hashes for pyzbar-0.1.8-py2.py3-none-win_amd64.whl
Hashes for pyzbar-0.1.8-py2.py3-none-win_amd64.whlAlgorithmHash digestSHA256496249b546be70ec98c0ff0ad9151e73daaffff129266df86150a15dcd8dac4cMD55952a5a156f4572bf2da88fb24dcbb63BLAKE2-2563d1497bf8e36fb58965415e3c7d8f95cfd6375cb0b5464ae9dbc0a48f7f9ab19
Latest version
Released:
Small utility to prepare scanned documents. Supports separating PDF files by separator pages and removing blank pages.
Importerror Unable To Find Zbar Shared Library Macbook
Project description
Small utility to prepare scanned documents. Supports separating PDF files by separator pages and removing blank pages.
Scanprep can be used to prepare scanned documents for further processing with existing tools (like the great OCRmyPDF) or directly for archival. It allows splitting multiple documents that were scanned in a single batch into multiple files. In addition, it can also remove blank pages from the output (this is especially helpful if using a duplex scanner).
For document separation, separator pages need to be inserted between the different documents before scanning. These pages tell the program where to split. You can either use the included separator page or create your own. The separator page simply needs to have a barcode that encodes the text SCANPREP_SEP (you can use any barcode type supported by zbar).
Installation
Via Snap
You can install scanprep from the Snap Store:
Via PyPI
You can install scanprep using pip (consider doing that in a venv):
From source
To install scanprep from source, clone this repository and install the dependencies:
Usage
Most simply, you can run scanprep via scanprep <filename.pdf>. This will process the input file and output the results into your current working directory. To specify a different output directory, use scanprep <filename.pdf> <output_directory>. The output files will be called 0-<filename.pdf>, 1-<filename.pdf>, and so on.
By default, both page separation and blank page removal will be performed. To turn them off, use --no-page-separation or --no-blank-removal, respectively.
Use scanprep -h to show the help:
License
Scanprep is licensed under the MIT license, see the LICENSE file for details. Issues and pull requests are welcome!
Release historyRelease notifications | RSS feed
1.0.2
1.0.1
Download files
Download the file for your platform. If you're not sure which to choose, learn more about installing packages.
Files for scanprep, version 1.0.2Filename, sizeFile typePython versionUpload dateHashesFilename, size scanprep-1.0.2-py3-none-any.whl (5.5 kB) File type Wheel Python version py3 Upload dateHashesFilename, size scanprep-1.0.2.tar.gz (4.5 kB) File type Source Python version None Upload dateHashes
Close
Hashes for scanprep-1.0.2-py3-none-any.whl
Importerror Unable To Find Zbar Shared Library Mac Os
Hashes for scanprep-1.0.2-py3-none-any.whlAlgorithmHash digestSHA25647fe24b372a13d74045ea2b2ff34681552fe7f3540f3fab3bd70d7b5bb023699MD53df1b7f3387a7ffe3f346a4062cde89aBLAKE2-2561730c404e3b60c883019022b6538ed8ee09be8cb7b7680b062a0e765dc8155f8
Close
Importerror Unable To Find Zbar Shared Library Machine
Hashes for scanprep-1.0.2.tar.gz
Importerror Unable To Find Zbar Shared Library Mac Download
Hashes for scanprep-1.0.2.tar.gzAlgorithmHash digestSHA256f1e492380d6979d74abc5ea509891f635daa5cb36b12d5699b62b525f1c7d547MD55d173c852bd44ee4e0c719582192d052BLAKE2-256b68e1a198c72f2f122a10d5744b98b2704a9888441b50e526ef78c16123ba897
0 notes
Text
Python For Mac Anaconda

You don’t need to install Python if you installed Anaconda. You may want to set your path for python and conda if you are on a windows. You can learn more about it. Anaconda is an open-source software that contains Jupyter, spyder, etc that are used for large data processing, data analytics, heavy scientific computing. Anaconda works for R and python programming language. Spyder(sub-application of Anaconda) is used for python. Opencv for python will work in spyder. Additionally, when invoking python from the terminal, it uses the version downloaded with Anaconda. Now, there are quite a few python modules/packages that Anaconda doesn't support. So, I'd like to set the default version of python to the original version that came with the Mac. How would I go about accomplishing that? Conda install -c anaconda spyder Description Spyder is a powerful scientific environment written in Python, for Python, and designed by and for scientists, engineers and data analysts. MacOS graphical install¶. Download the graphical macOS installer for your version of Python. RECOMMENDED: Verify data integrity with SHA-256.For more information on hashes, see What about cryptographic hash verification? Double-click the downloaded file and click continue to.
Step one: Download and install Anaconda

Gurobi supports Python 2.7 and 3.7 for Mac. Choose the version of Anaconda you wish to download:
Once the download has completed, double click on the downloaded .pkg file and follow the installation instructions. Once the install is complete, and once you close your current terminal and open a new one, typing python in your terminal window should invoke the Anaconda Python interpreter:
Type quit() in Python to return to the terminal.
Download Adobe Acrobat Reader DC for Mac 2020.006.20042 for Mac. Fast downloads of the latest free software! Installing Adobe Acrobat Reader DC is a two-step process. First you download the installation package, and then you install Acrobat Reader DC from that package file. Download acrobat for free mac. Adobe Reader for Mac is an essential application for reading, printing, marking up, and commenting on PDF files. Good functionality: With Adobe Reader for Mac, you can do more than just view. Download free Adobe Acrobat Reader DC software for your Windows, Mac OS and Android devices to view, print, and comment on PDF documents. Download free Acrobat Reader DC software, the only PDF viewer that lets you read, search, print, and interact with virtually any type of PDF file.
Step two: Install Gurobi into Anaconda
The next step is to install the Gurobi package into Anaconda. You do this by first adding the Gurobi channel into your Anaconda platform and then installing the gurobi package from this channel. From an Anaconda terminal issue the following command to add the Gurobi channel to your default search list:
Now issue the following command to install the Gurobi package:
You can remove the Gurobi package at any time by issuing the command:
TextMate is a versatile plain text editor for mac with unique and innovative features. The tool offers support for many programming languages, writing prose in structured formats such as blogging, running SQL queries, writing screenplays, etc. The Best Programming Text Editor for Mac. There is no shortage of options for text editors geared towards developers on the Mac, but TextMate is our top pick. It wins out thanks to its massive. If you are a Mac user, you can use a Sublime Text editor. Note: Sublime text editor is available for Linux, Windows, and Mac. If you purchase the pro version, you need a single license to run it on any of the systems you own. Even, you can use the free version which is more than sufficient in your learning phase. Programming text editor for mac.
Step three: Install a Gurobi License
What Is Anaconda
The third step is to install a Gurobi license (if you haven’t already done so). You are now ready to use Gurobi from within Anaconda. Your next step is to launch either the Spyder IDE or Jupyter Notebook.
0 notes
Text
Macos Support For Python 2.7

Macos Python Default
Macos Support For Python 2.7 Pdf
Apple Macos Support
Download macOS 64-bit installer; Python 2.7.15rc1 - April 15, 2018. Download macOS 64-bit/32-bit installer; Download macOS 64-bit installer; Python 3.6.5rc1 - March. Nov 28, 2016 In order to compile OpenCV 3 with Python 2.7 support for macOS we need to first set up the build. This simply amounts to changing directories into opencv and creating a build directory: $ cd /opencv $ mkdir build $ cd build OpenCV 3 + Python 2.7 CMake template for macOS. Apr 21, 2020 Python 2.7 support was meant to end in 2015 but was extended five years until 2020, six years after Python's creator, Guido van Rossum, announced Python 3 and implored users to 'move on to Python.
Macos Python Default
Mac OS X specific services¶. This chapter describes modules that are only available on the Mac OS X platform. See the chapters MacPython OSA Modules and Undocumented Mac OS modules for more modules, and the HOWTO Using Python on a Macintosh for a general introduction to Mac-specific Python. Nov 17, 2018 Certain tools used by the OS depend on that version, so Apple includes the bare minimum install of Python 2.7 for it's own use. You shouldn't rely on that version for.

The real issue is not that Apple has not updated Python, but rather that about 4 years ago Apple depreciated OpenSSL. So the OpenSSL library included on MacOS has not seen a major update since then (only back-ported fixes). The article does an o.k. job of explaining this in note 2, but fails to mention that this has been a known problem for over 4 years, and little has been done in the mean time. Only now that there is a looming deadline does there seem to be any motion on it, and it is obvious that they are going to miss the deadline.
Macos Support For Python 2.7 Pdf
I do think that they are missing a fairly simple solution for the majority of use cases: move things like `urllib2` to use `libcurl` underneath rather than OpenSSL. The CURL project has already solved this problem by being portable to things like Apple's CommonCrypto library and Window's security libraries.
Apple Macos Support
I should also note that the article's suggested workarounds are less then ideal as both use versions of OpenSSL that do not consult the system keychain for root certificates, and so create strange problems that most people will not understand.
0 notes
Link
Learn Python 3 with more than 100 Practical Exercises and 20 Hands-on Practical Projects
What you’ll learn
DIVE INTO PYTHON WORLD WITH PYTHON FUNDAMENTALS:
Variables and data types & Comparison operators
Logical Operators & Conditional statements (If-else)
For and while loops & Functions
Lists and list comprehensions
Dictionaries and dictionaries comprehensions
Lambdas and built-in functions & Modules & Maps and Filters
Processing csv files & Methods & Matplotlib
Pandas & Numpy & Seaborn
Use OpenCV applied on Video Stream to Draw Yourself
Requirements
Access to a computer with an internet connection.
Computer. Mac OS, Windows or Linux.
No previous experience with Python or coding is required.
Description
We are on a mission to create the most complete Python programming guide in the World.
From Python basics to techniques used by pros, this masterclass provides you with everything you need to start building and applying Python.
“Python Beginner to Pro Masterclass” is our flagship Python course that delivers unique learning with 3 immersive courses packed into 1 easy-to-learn package:
First, prepare yourself by learning the basics and perfect your knowledge of the language with a beginner to pro Python programming course.
Next, build on your knowledge with a practical, applied and hands-on Python course with over 20 real-world applications problems and 100 coding exercises to help you learn in a practical, easy and fun way. These will be invaluable projects to showcase during future job interviews!
Finally, push your boundaries with a data science and machine-learning course covering practical machine learning applications using Python. Dive into real-life situations and solve real-world challenges.
So, why is Python the golden programming language these days? And what makes it the best language to learn today?
Python ranks as the number one programming language in 2018 for five simple reasons that are bound to change the shape of your life and career:
(1) Easy to learn: Python is the easiest programming language to learn. In fact, at the end of this single course, you’ll be able to master Python and its applications regardless of your previous experience with programming.
(2) High Salary: Did you know that the average Python programmer in the U.S. makes approximately $116 thousand dollars a year? With “Python 3 Beginning to Pro Masterclass” you’re setting yourself for up for increased earning potential that can only rise from here.
(3) Scalability: It’s true, Python is easy to learn. But it’s also an extremely powerful language that can help you create top-tier apps. In fact, Google, Instagram, YouTube, and Spotify are all built using Python.
(4) Versatility: What’s more, Python is by far the most versatile programming language in the world today! From web development to data science, machine learning, computer vision, data analysis and visualization, scripting, gaming, and more, Python has the potential to deliver growth to any industry.
(5) Future-proof Career: The high demand and low supply of Python developers make it the ideal programming language to learn today. Whether you’re eyeing a career in machine learning or artificial intelligence, learning Python is an invaluable investment in your career.
Who this course is for:
Anyone who wants to learn Python.
Beginners who have just started to learn Python
Professionals who want to learn Python through Real World Applications
Professionals who want to obtain particular skill, such as Web Scraping, Working With Databases, Build Websites, etc
Created by Dr. Ryan Ahmed, Ph.D., MBA, Kirill Eremenko, Hadelin de Ponteves, Mitchell Bouchard, SuperDataScience Team Last updated 2/2019 English English [Auto-generated]
Size: 13.42 GB
Download Now
https://ift.tt/2qH1xlA.
The post Python 3 Programming: Beginner to Pro Masterclass appeared first on Free Course Lab.
0 notes
Text
OpenCV Computer Vision With Python

OpenCV Computer Vision with Python: Learn to capture videos, manipulate images, and track objects with Python using the OpenCV Library Download Introduction What this book covers Chapter 1, Setting up OpenCV, lets us examine the steps to setting up Python, OpenCV, and related libraries on windows, mac and ubuntu. We also discuss OpenCV community, documentation, and official code samples Chapter 2, Handling Files, Cameras, and GUIs, helps us discuss OpenCV's I/O functionality. Then, using an object-oriented design, we write an application that displays a live camera feed, handles keyboard input, and writes video and still image files Chapter 3, Filtering Images, helps us to write image filters using OpenCV, NumPy, and SciPy. The filter effects include linear color manipulations, curve color manipulations blurring, sharpening, and outlining edges. We modify our application to apply some of these filters to the live camera feed Chapter 4, Tracking Faces with Haar Cascades, allows us to write a hierarchical face tracker that use OpenCV to locate faces, eyes, noses, and mouths in an image. We also write functions for copying and resizing regions of an image. We modify our our application so that it finds and manipulates faces in the camera feed Chapter 5, Detecting Foreground/Background Regions and Depth, helps us learn about the types of data that OpenCV can capture from depth cameras( with the support of OpenNI and SensorKinect). Then, we write functions that use such data to limit an effect to a foreground region. We incorporate this functionality in our application so that we can further refine the face regions before manipulating them Appendix A, Integrating with Pygame, lets us modify our application to use Pygame instead of OpenCV for handling certain I/O events (Pygame offers more diverse event handling functionality) Appendix B, Generating Haar Cascades for Custom Targets, allows us to examine a set of OpenCV tools that enable us to build tracker for any type of object or pattern, not necessarily faces Via TimoBook
0 notes
Text
DeepLearningによる画像認識で麻雀の牌を識別する(SSD編)
(YOLOv2編も書きましたので、よろしければこちらもどうぞ。)
目指すところは、スマホで手牌を撮影→牌を認識→自動で点数計算。 まずは画像から牌を認識させる部分をDeepLearningを使って実装してみる。 今回は Single Shot MultiBox Detector(SSD) という学習モデルを使う。
先駆者と同じことやってるだけなのにものすごく悪戦苦闘しました。 自分の紆余曲折した過程をまとめておきます。 皆様のご参考になれば。
自分の環境
OSX ElCapitan 10.11.6 python 3.5.2 anaconda3-4.2.0 ruby 2.4.1p111
必要なツールのインストール
OpenCV, ImageMagick, TensorFlow, Kerasをインストールする。 ImageMagick7はRMagick非対応のため、ImageMagick6をインストールする。 Kerasは後述の理由により旧バージョン(1.2.2)をインストールする。
$ brew install imagemagick@6 $ conda config --add channels conda-forge $ conda install opencv $ conda install -c conda-forge tensorflow $ conda install -c conda-forge keras=1.2.2
学習させるための画像ファイルを用意する
学習データは画像ファイルとxmlファイルのペアの形式になっており、 そのペアを大量に用意する必要がある。 手牌を撮影して牌が写っている座標を調べてxmlファイルを作って��を人力で行うのは骨が折れる。 そのため、手牌っぽい画像のジェネレータを作る。
まず、手持ちの牌を撮影して、牌の素材を用意する。

一牌一牌切り出す。


...
Macのプレビューで画像開く→牌を範囲選択→ ⌘+C → ⌘+N → ⌘+S … と無心で切り出した。 ファイル名は、 1m.png … 9p.png, (萬子) 1p.png … 9p.png, (筒子) 1s.png … 9s.png, (索子) east.png, south.png, west.png, north.png, (東南西北) haku.png, hatsu,png, chun.png, (白發中) backside.png(牌裏面)とした。 自分の場合、サイズは50 x 60pxくらい。
また、麻雀マットっぽい色で、背景用の画像を作った。 サイズは512 × 512px で作った。

手牌っぽい画像ジェネレータはrubyで書いた。
generator.rb
# coding: utf-8 require 'rmagick' require 'date' ###パラメータ設定ここから #牌画像があるディレクトリ pieimagepatharr=[ "/Users/suzuki/Documents/workspace/mahjonglearning/images/pie1", "/Users/suzuki/Documents/workspace/mahjonglearning/images/pie2", "/Users/suzuki/Documents/workspace/mahjonglearning/images/pie3", ] #背景画像パス boardimagepath="/Users/suzuki/Documents/workspace/mahjonglearning/images/board.png" #画像出力先パス outputimagepath="/Users/suzuki/Documents/workspace/mahjonglearning/images/outputimage" #xml出力先パス outputxmlpath="/Users/suzuki/Documents/workspace/mahjonglearning/images/outputxml" #作成画像枚数 repeattimes=100 ###パラメータ設定ここまで #牌の画像ファイル名一覧 pieimagearr=[] pieimagepatharr.each do |pieimagepath| filearr=Dir::entries(pieimagepath) filearr.delete(".") filearr.delete("..") filearr.delete(".DS_Store") filearr.each do |file| pieimagearr <name>#{piekindname}</name><pose>Unspecified</pose><truncated>0</truncated><difficult>1</difficult><bndbox><xmin>#{nowx}</xmin><ymin>#{nowy}</ymin><xmax>#{nowx+pieimage.columns}</xmax><ymax>#{nowy+pieimage.rows}</ymax></bndbox> EOS #x座標更新 nowx += pieimage.columns+1 end outputbasename="#{time}_#{i}" annotationxml = <folder>XXX</folder><filename>#{outputbasename}.jpg</filename><source><database>XXX</database><annotation>XXX</annotation><image>XXX</image><flickrid>XXX</flickrid></source><owner><flickrid>XXX</flickrid><name>?</name></owner><size><width>#{generatedimage.columns}</width><height>#{generatedimage.rows}</height><depth>3</depth></size><segmented>0</segmented> #{objectxml} EOS File.open("#{outputxmlpath}/#{outputbasename}.xml", "w") do |f| f.puts(annotationxml) end generatedimage.write("#{outputimagepath}/#{outputbasename}.jpg") puts "#{i}/#{repeattimes}" end puts "Done!"
プログラム冒頭の5パラメータをお好みで変更する。 pie1フォルダの中に切り出した牌画像ファイルを置く。 学習データを増やす場合を考え、牌画像ファイルのフォルダは複数指定できるようにした。 物体のクラス名は牌画像ファイル名から取っているため、牌画像ファイル名は必ず固定のものにする(例えば1萬の画像は全て"1m.png"にする)。 出力先のフォルダは事前に作成しておく。
$ bundle init $ echo "gem 'rmagick'" >> Gemfile $ PKG_CONFIG_PATH=$(find /usr/local/Cellar -name MagickCore.pc|sed -e s/MagickCore.pc//g) $ bundle install --path vendor/bundle $ bundle exec ruby generator.rb
“Done!"と表示され処理が完了すると、次のような画像とxmlファイルが出来上がる。

<annotation><folder>XXX</folder><filename>2017-10-18-22-16-18_4.jpg</filename><source><database>XXX</database><annotation>XXX</annotation><image>XXX</image><flickrid>XXX</flickrid></source><owner><flickrid>XXX</flickrid><name>?</name></owner><size><width>512</width><height>512</height><depth>3</depth></size><segmented>0</segmented><object> <name>7p</name><pose>Unspecified</pose><truncated>0</truncated><difficult>1</difficult><bndbox><xmin>59</xmin><ymin>212</ymin><xmax>112</xmax><ymax>280</ymax></bndbox></object> ...
画像データを学習させる準備
kerasでSSDを行うためのライブラリをダウンロードする。
$ git clone https://github.com/rykov8/ssd_keras.git $ cd ssd_keras/PASCAL_VOC $ emacs get_data_from_XML.py
get_data_from_XML.pyは、学習に必要なpklファイルを生成する。 pklファイルには、画像ファイル名、物体の座標、クラス名がひとかたまりになって記載されている。
get_data_from_XML.py
import numpy as np import os from xml.etree import ElementTree class XML_preprocessor(object): def __init__(self, data_path): self.path_prefix = data_path self.num_classes = 35 #クラス数を指定 self.data = dict() self._preprocess_XML() def _preprocess_XML(self): filenames = os.listdir(self.path_prefix) for filename in filenames: if filename=='.DS_Store': continue tree = ElementTree.parse(self.path_prefix + filename) root = tree.getroot() bounding_boxes = [] one_hot_classes = [] size_tree = root.find('size') width = float(size_tree.find('width').text) height = float(size_tree.find('height').text) for object_tree in root.findall('object'): for bounding_box in object_tree.iter('bndbox'): xmin = float(bounding_box.find('xmin').text)/width ymin = float(bounding_box.find('ymin').text)/height xmax = float(bounding_box.find('xmax').text)/width ymax = float(bounding_box.find('ymax').text)/height bounding_box = [xmin,ymin,xmax,ymax] bounding_boxes.append(bounding_box) class_name = object_tree.find('name').text one_hot_class = self._to_one_hot(class_name) one_hot_classes.append(one_hot_class) image_name = root.find('filename').text bounding_boxes = np.asarray(bounding_boxes) one_hot_classes = np.asarray(one_hot_classes) image_data = np.hstack((bounding_boxes, one_hot_classes)) self.data[image_name] = image_data def _to_one_hot(self,name): one_hot_vector = [0] * self.num_classes if name == '1m': one_hot_vector[0] = 1 elif name == '2m': one_hot_vector[1] = 1 elif name == '3m': one_hot_vector[2] = 1 elif name == '4m': one_hot_vector[3] = 1 elif name == '5m': one_hot_vector[4] = 1 elif name == '6m': one_hot_vector[5] = 1 elif name == '7m': one_hot_vector[6] = 1 elif name == '8m': one_hot_vector[7] = 1 elif name == '9m': one_hot_vector[8] = 1 elif name == '1p': one_hot_vector[9] = 1 elif name == '2p': one_hot_vector[10] = 1 elif name == '3p': one_hot_vector[11] = 1 elif name == '4p': one_hot_vector[12] = 1 elif name == '5p': one_hot_vector[13] = 1 elif name == '6p': one_hot_vector[14] = 1 elif name == '7p': one_hot_vector[15] = 1 elif name == '8p': one_hot_vector[16] = 1 elif name == '9p': one_hot_vector[17] = 1 elif name == '1s': one_hot_vector[18] = 1 elif name == '2s': one_hot_vector[19] = 1 elif name == '3s': one_hot_vector[20] = 1 elif name == '4s': one_hot_vector[21] = 1 elif name == '5s': one_hot_vector[22] = 1 elif name == '6s': one_hot_vector[23] = 1 elif name == '7s': one_hot_vector[24] = 1 elif name == '8s': one_hot_vector[25] = 1 elif name == '9s': one_hot_vector[26] = 1 elif name == 'east': one_hot_vector[27] = 1 elif name == 'south': one_hot_vector[28] = 1 elif name == 'west': one_hot_vector[29] = 1 elif name == 'north': one_hot_vector[30] = 1 elif name == 'haku': one_hot_vector[31] = 1 elif name == 'hatsu': one_hot_vector[32] = 1 elif name == 'chun': one_hot_vector[33] = 1 elif name == 'backside': one_hot_vector[34] = 1 else: print('unknown label: %s' %name) return one_hot_vector import pickle data = XML_preprocessor('Annotations/').data pickle.dump(data,open('mahjongpie.pkl','wb'))
JPEGImagesフォルダ、Annotationsフォルダを作成しておく。 JPEGImagesフォルダの中にgenerator.rbで生成した画像ファイル、 Annotationsフォルダの中に同じく生成したxmlファイルを置く。
9行目:self.num_classes = 35 で分類分けしたいクラス数を指定する。 麻雀牌34種類+牌裏面1種類で、35と指定した。 Macの場合、自動で作成される.DS_Storeが原因でエラーになってしまうので、continueする部分を追加した。
$ python get_data_from_XML.py
処理が完了すると、mahjongpie.pklファイルが出来上がる。
ちなみに、元プログラムの89行目のコメント
# data = XML_preprocessor('VOC2007/Annotations/').data
に書かれている学習データ:VOC2007等 は下記ページでダウンロードできる。 (The VOC20xx Challenge → Development Kit → Download the training/validation data) http://host.robots.ox.ac.uk/pascal/VOC/
画像データを学習させる
$ cd ../ $ emacs train.py
git cloneしたssd_kerasフォルダにtrain.pyを新規作成する。 train.pyで画像ファイルから学習を行わせる。
train.py
import cv2 import keras from keras.applications.imagenet_utils import preprocess_input from keras.backend.tensorflow_backend import set_session from keras.models import Model from keras.preprocessing import image import matplotlib.pyplot as plt import numpy as np import pickle from random import shuffle from scipy.misc import imread from scipy.misc import imresize import tensorflow as tf from ssd import SSD300 from ssd_training import MultiboxLoss from ssd_utils import BBoxUtility plt.rcParams['figure.figsize'] = (8, 8) plt.rcParams['image.interpolation'] = 'nearest' np.set_printoptions(suppress=True) ### NUM_CLASSES = 36 #識別したいクラス数+1(対象外クラスの分)を指定 nb_epoch = 10 #epoch数を指定 pkl_filepath='./PASCAL_VOC/mahjongpie.pkl' #先程作ったpklファイルを指定 path_prefix = './PASCAL_VOC/JPEGImages/' #画像データのパスを指定 ### input_shape = (300, 300, 3) priors = pickle.load(open('prior_boxes_ssd300.pkl', 'rb')) bbox_util = BBoxUtility(NUM_CLASSES, priors) # gt = pickle.load(open('gt_pascal.pkl', 'rb')) gt = pickle.load(open(pkl_filepath, 'rb')) keys = sorted(gt.keys()) num_train = int(round(0.8 * len(keys))) train_keys = keys[:num_train] val_keys = keys[num_train:] num_val = len(val_keys) class Generator(object): def __init__(self, gt, bbox_util, batch_size, path_prefix, train_keys, val_keys, image_size, saturation_var=0.5, brightness_var=0.5, contrast_var=0.5, lighting_std=0.5, hflip_prob=0.5, vflip_prob=0.5, do_crop=True, crop_area_range=[0.75, 1.0], aspect_ratio_range=[3./4., 4./3.]): self.gt = gt self.bbox_util = bbox_util self.batch_size = batch_size self.path_prefix = path_prefix self.train_keys = train_keys self.val_keys = val_keys self.train_batches = len(train_keys) self.val_batches = len(val_keys) self.image_size = image_size self.color_jitter = [] if saturation_var: self.saturation_var = saturation_var self.color_jitter.append(self.saturation) if brightness_var: self.brightness_var = brightness_var self.color_jitter.append(self.brightness) if contrast_var: self.contrast_var = contrast_var self.color_jitter.append(self.contrast) self.lighting_std = lighting_std self.hflip_prob = hflip_prob self.vflip_prob = vflip_prob self.do_crop = do_crop self.crop_area_range = crop_area_range self.aspect_ratio_range = aspect_ratio_range def grayscale(self, rgb): return rgb.dot([0.299, 0.587, 0.114]) def saturation(self, rgb): gs = self.grayscale(rgb) alpha = 2 * np.random.random() * self.saturation_var alpha += 1 - self.saturation_var rgb = rgb * alpha + (1 - alpha) * gs[:, :, None] return np.clip(rgb, 0, 255) def brightness(self, rgb): alpha = 2 * np.random.random() * self.brightness_var alpha += 1 - self.saturation_var rgb = rgb * alpha return np.clip(rgb, 0, 255) def contrast(self, rgb): gs = self.grayscale(rgb).mean() * np.ones_like(rgb) alpha = 2 * np.random.random() * self.contrast_var alpha += 1 - self.contrast_var rgb = rgb * alpha + (1 - alpha) * gs return np.clip(rgb, 0, 255) def lighting(self, img): cov = np.cov(img.reshape(-1, 3) / 255.0, rowvar=False) eigval, eigvec = np.linalg.eigh(cov) noise = np.random.randn(3) * self.lighting_std noise = eigvec.dot(eigval * noise) * 255 img += noise return np.clip(img, 0, 255) def horizontal_flip(self, img, y): if np.random.random() 0: img, y = self.horizontal_flip(img, y) if self.vflip_prob > 0: img, y = self.vertical_flip(img, y) # 訓練データ生成時にbbox_utilを使っているのはここだけらしい #print(y) y = self.bbox_util.assign_boxes(y) #print(y) inputs.append(img) targets.append(y) if len(targets) == self.batch_size: tmp_inp = np.array(inputs) tmp_targets = np.array(targets) inputs = [] targets = [] yield preprocess_input(tmp_inp), tmp_targets gen = Generator(gt, bbox_util, 4, path_prefix, train_keys, val_keys, (input_shape[0], input_shape[1]), do_crop=False) model = SSD300(input_shape, num_classes=NUM_CLASSES) model.load_weights('weights_SSD300.hdf5', by_name=True) freeze = ['input_1', 'conv1_1', 'conv1_2', 'pool1', 'conv2_1', 'conv2_2', 'pool2', 'conv3_1', 'conv3_2', 'conv3_3', 'pool3']#, # 'conv4_1', 'conv4_2', 'conv4_3', 'pool4'] for L in model.layers: if L.name in freeze: L.trainable = False def schedule(epoch, decay=0.9): return base_lr * decay**(epoch) callbacks = [keras.callbacks.ModelCheckpoint('./checkpoints/weights.{epoch:02d}-{val_loss:.2f}.hdf5', verbose=1, save_weights_only=True), keras.callbacks.LearningRateScheduler(schedule)] base_lr = 3e-4 optim = keras.optimizers.Adam(lr=base_lr) model.compile(optimizer=optim, loss=MultiboxLoss(NUM_CLASSES, neg_pos_ratio=2.0).compute_loss) history = model.fit_generator(gen.generate(True), gen.train_batches, nb_epoch, verbose=1, callbacks=callbacks, validation_data=gen.generate(False), nb_val_samples=gen.val_batches, nb_worker=1) inputs = [] images = [] img_path = path_prefix + sorted(val_keys)[0] img = image.load_img(img_path, target_size=(300, 300)) img = image.img_to_array(img) images.append(imread(img_path)) inputs.append(img.copy()) inputs = preprocess_input(np.array(inputs)) preds = model.predict(inputs, batch_size=1, verbose=1) results = bbox_util.detection_out(preds) for i, img in enumerate(images): # Parse the outputs. det_label = results[i][:, 0] det_conf = results[i][:, 1] det_xmin = results[i][:, 2] det_ymin = results[i][:, 3] det_xmax = results[i][:, 4] det_ymax = results[i][:, 5] # Get detections with confidence higher than 0.6. top_indices = [i for i, conf in enumerate(det_conf) if conf >= 0.6] top_conf = det_conf[top_indices] top_label_indices = det_label[top_indices].tolist() top_xmin = det_xmin[top_indices] top_ymin = det_ymin[top_indices] top_xmax = det_xmax[top_indices] top_ymax = det_ymax[top_indices] colors = plt.cm.hsv(np.linspace(0, 1, NUM_CLASSES)).tolist() plt.imshow(img / 255.) currentAxis = plt.gca() for i in range(top_conf.shape[0]): xmin = int(round(top_xmin[i] * img.shape[1])) ymin = int(round(top_ymin[i] * img.shape[0])) xmax = int(round(top_xmax[i] * img.shape[1])) ymax = int(round(top_ymax[i] * img.shape[0])) score = top_conf[i] label = int(top_label_indices[i]) # label_name = voc_classes[label - 1] display_txt = '{:0.2f}, {}'.format(score, label) coords = (xmin, ymin), xmax-xmin+1, ymax-ymin+1 color = colors[label] currentAxis.add_patch(plt.Rectangle(*coords, fill=False, edgecolor=color, linewidth=2)) currentAxis.text(xmin, ymin, display_txt, bbox={'facecolor':color, 'alpha':0.5}) plt.show()
weights_SSD300.hdf5が必要になるので、下記ページからダウンロードして、keras_ssdフォルダへ置く。 https://mega.nz/#F!7RowVLCL!q3cEVRK9jyOSB9el3SssIA
25-28行目のパラメータを適切に設定する。 また、checkpointsフォルダを予め作成しておく。 checkpointsフォルダには学習済みのモデルパラメータが保存される。
実行して学習開始。結構時間がかかる。
$ python train.py Using TensorFlow backend. Epoch 1/10 4/400 [..............................] - ETA: 1193s - loss: 9.1543
CPU=Intel Xeon E5462 @ 2.80 GHz x 2基、epoch=10で処理時間が3-4時間だった。 各epoch終了時にcheckpointsフォルダへhdf5ファイルが生成されるため、 Ctrl+Cで途中で打ち切ってしまっても問題ない。
学習済みモデルを使って画像認識させる
認識させたい画像をpicsフォルダへ置く。 jupyterを使って認識結果を表示させる。
$ jupyter notebook
Webページが表示されるので、SSD5.ipynb をクリックする。 エディタが表示されるので、いくつか修正する。
In [2]: クラス名を麻雀牌の種類へ変更する。
voc_classes = ['1m', '2m', '3m', '4m', '5m', '6m', '7m', '8m', '9m', '1p', '2p', '3p', '4p', '5p', '6p', '7p', '8p', '9p', '1s', '2s', '3s', '4s', '5s', '6s', '7s', '8s', '9s', 'east', 'south', 'west', 'north', 'haku', 'hatsu', 'chun', 'backside']
In [3]: 3行目でcheckpointsフォルダにあるhdf5ファイルを指定する。
input_shape=(300, 300, 3) model = SSD300(input_shape, num_classes=NUM_CLASSES) model.load_weights('./checkpoints/weights.29-0.32.hdf5', by_name=True) bbox_util = BBoxUtility(NUM_CLASSES)
In [4]: 認識させたい画像ファイルを指定する。
inputs = [] images = [] img_path = './pics/test1.jpg' img = image.load_img(img_path, target_size=(300, 300)) img = image.img_to_array(img) images.append(imread(img_path)) inputs.append(img.copy()) img_path = './pics/test2.jpg' img = image.load_img(img_path, target_size=(300, 300)) img = image.img_to_array(img) images.append(imread(img_path)) inputs.append(img.copy()) img_path = './pics/test3.jpg' img = image.load_img(img_path, target_size=(300, 300)) img = image.img_to_array(img) images.append(imread(img_path)) inputs.append(img.copy()) img_path = './pics/test4.jpg' img = image.load_img(img_path, target_size=(300, 300)) img = image.img_to_array(img) images.append(imread(img_path)) inputs.append(img.copy()) img_path = './pics/test5.jpg' img = image.load_img(img_path, target_size=(300, 300)) img = image.img_to_array(img) images.append(imread(img_path)) inputs.append(img.copy()) inputs = preprocess_input(np.array(inputs))
In [8]: クラス数のマジックナンバーを修正。
for i, img in enumerate(images): # Parse the outputs. det_label = results[i][:, 0] det_conf = results[i][:, 1] det_xmin = results[i][:, 2] det_ymin = results[i][:, 3] det_xmax = results[i][:, 4] det_ymax = results[i][:, 5] # Get detections with confidence higher than 0.6. top_indices = [i for i, conf in enumerate(det_conf) if conf >= 0.6] top_conf = det_conf[top_indices] top_label_indices = det_label[top_indices].tolist() top_xmin = det_xmin[top_indices] top_ymin = det_ymin[top_indices] top_xmax = det_xmax[top_indices] top_ymax = det_ymax[top_indices] colors = plt.cm.hsv(np.linspace(0, 1, NUM_CLASSES)).tolist() #マジックナンバー消した plt.imshow(img / 255.) currentAxis = plt.gca() for i in range(top_conf.shape[0]): xmin = int(round(top_xmin[i] * img.shape[1])) ymin = int(round(top_ymin[i] * img.shape[0])) xmax = int(round(top_xmax[i] * img.shape[1])) ymax = int(round(top_ymax[i] * img.shape[0])) score = top_conf[i] label = int(top_label_indices[i]) label_name = voc_classes[label - 1] display_txt = '{:0.2f}, {}'.format(score, label_name) coords = (xmin, ymin), xmax-xmin+1, ymax-ymin+1 color = colors[label] currentAxis.add_patch(plt.Rectangle(*coords, fill=False, edgecolor=color, linewidth=2)) currentAxis.text(xmin, ymin, display_txt, bbox={'facecolor':color, 'alpha':0.5}) plt.show()
保存は赤枠のフロッピーボタンをクリック(自動保存されるが念のため)。 実行は青枠のCell → Run Allをクリック。

しばらくすると、ページ下部に認識結果が表示される。

結構認識できててすごい!
[参考]
RMagick: https://qiita.com/kaorumori/items/861db8979490236240f http://d.hatena.ne.jp/shokai/20090828/1251475279 https://qiita.com/KTakata/items/f4a632207af0a8078c06
SSD: http://blog.brainpad.co.jp/entry/2017/11/07/140000 https://qiita.com/slowsingle/items/64cc927bb29a49a7af14 http://ai-coordinator.jp/ssd-keras-train http://app.road.jp.net/?p=1959 https://qiita.com/slowsingle/items/9006383145a650c84cb0 http://host.robots.ox.ac.uk/pascal/VOC/
Jupyter: https://qiita.com/taka4sato/items/2c3397ff34c440044978
0 notes
Text
Technical References

General - Network
Setting WiFi up via the command line https://www.raspberrypi.org/documentation/configuration/wireless/wireless-cli.md
Static IP Address https://www.modmypi.com/blog/how-to-give-your-raspberry-pi-a-static-ip-address-update
Monitor Specs https://www.cnet.com/products/dell-ultrasharp-2209wa-lcd-monitor-22-series/specs/
P1 - Interactive Piece
Video wall
OMX Player - Install Wrapper
Raspberry Pi
How to shut down or restart your Raspberry Pi properly
Installing Pi
How to display your Raspberry Pi’s desktop on a Mac
Format Pi - SD formater
Media Player
Split GPU memory
Install Openframeworks in Raspberry Pi
Include startup button
Raspberry Pi: Launch Python Script on Startup
OSC Pi5
Download library OSC pi5
OSC and Network Communication, Processing - Postage Stamp Networked
Touch OSC Mac editor
Raspberry Pi and OSC: Part 1
pyOSC
Python
Video Wrapper for using it in Python
Server on computer to view on local - python -m SimpleHTTPServer
Images
Batch Resize Images Quickly in the OS X Terminal
Instagram scrapper
Tidy by size images in folder
Mac OS X Finder filter image by orientation
Changing file extensions for all files in a directory OSX
Processing Shaders
P2 - Infographic Ergo Sum
D3
D3.js is a JavaScript library for manipulating documents based on data.
A Simple d3 Network Graph
Force Layout with Mouseover Labels
Force-Directed Graph
Multi-dimensional D3 force simulation
D3 Tutorial
Include texts in d3
SVG Window resize
JSON
SheetAsJSON - Google Spreadsheet Data as JSON
Exporting a Google Spreadsheet as JSON https://gist.github.com/pamelafox/1878143
Export gs (google script) into Python
Three.js
HTML - CSS
Mix-blend-mode
Basic CSS Blend Modes
Background size
P3 - Transparent Printouts
Gene Kogan’s work and guides. Github
Mosaic Used in early experiments not displayed in the exhibition
Openframeworks
ofxCcv
ofxTSNE
Python
Install Pillow library - pip install pillow
numPy (vector) multidimensional arrays to save images (tsne)
Face Detection using Haar Cascades - Face Detection OPenCV
Object Detection: Face Detection using Haar Cascade Classfiers
Face Detection on Your Photo Collection in Python
AdaBoost, short for "Adaptive Boosting"
0 notes
Text
92% off #Introduction to Computer Vision | Master OpenCV in Python – $10
Build 12 Python apps: such as Augmented Reality Face Filters (Snapchat/MSQRD), Face Recognition & car/people detection!
All Levels, – 6.5 hours, 65 lectures
Average rating 4.5/5 (4.5 (102 ratings) Instead of using a simple lifetime average, Udemy calculates a course’s star rating by considering a number of different factors such as the number of ratings, the age of ratings, and the likelihood of fraudulent ratings.)
Course requirements:
Basic Python is a plus, but no programming knowledge is needed! I’ll be showing you everything you need to know. You will need a computer running Microsoft Windows, or Linux, or a Mac running OS X. All the software needed in this course is free and opensource! I provide all images, models and classifiers used in this course! A webcam to implement some of the mini projects
Course description:
======================================================
What previous students have said:
“Extremely well taught and informative Computer Vision course! I’ve trawled the web looking for Opencv python tutorials resources but this course was by far the best amalgamation of relevant lessons and projects. Loved some of the projects and had lots of fun tinkering them.”
“Awesome instructor and course. The explanations are really easy to understand and the materials are very easy to follow. Definitely a really good introduction to image processing.”
“I am extremely impressed by this course!! I think this is by far the best Computer Vision course on Udemy. I’m a college student who had previously taken a Computer Vision course in undergrad. This 6.5 hour course blows away my college class by miles!!”
“Rajeev did a great job on this course. I had no idea how computer vision worked and now have a good foundation of concepts and knowledge of practical applications. Rajeev is clear and concise which helps make a complicated subject easy to comprehend for anyone wanting to start building applications.”
======================================================
Computer vision applications and technology are exploding right now! With several apps and industries making amazing use of the technology, from billion dollar apps such as Pokémon GO, Snapchat and up and coming apps like MSQRD and PRISMA.
Even Facebook, Google, Microsoft, Apple, Amazon, and Tesla are all heavily utilizing computer vision for face & object recognition, image searching and especially in Self-Driving Cars!
As a result, the demand for computer vision expertise is growing exponentially!
However, learning computer vision is hard! Existing online tutorials, textbooks, and free MOOCs are often outdated, using older an incompatible libraries or are too theoretical, making it difficult to understand.
This was my problem when learning Computer Vision and it became incredibly frustrating. Even simply running example code I found online proved difficult as libraries and functions were often outdated.
I created this course to teach you all the key concepts without the heavily mathematical theory while using the most up to date methods.
I take a very practical approach, using almost 50 Code Examples.
At the end of the course, you will be able to build 12 Awesome Computer Vision Apps using OpenCV in Python.
I use OpenCV which is the most well supported open source computer vision library that exists today! Using it in Python is just fantastic as Python allows us to focus on the problem at hand without being bogged down by complex code.
If you’re an academic or college student I still point you in the right direction if you wish to learn more by linking the research papers of techniques we use.
So if you want to get an excellent foundation in Computer Vision, look no further.
This is the course for you!
In this course, you will discover the power of OpenCV in Python, and obtain skills to dramatically increase your career prospects as a Computer Vision developer.
======================================================
You will learn:
The key concepts of computer Vision & OpenCV. To perform image manipulations such as transformations, cropping, blurring, thresholding, edge detection and cropping. To segment images by understanding contours, circle, and line detection. You’ll even learn how to approximate contours, do contour filtering and ordering as well as approximations. Use feature detection (SIFT, SURF, FAST, BRIEF & ORB) to do object detection. Implement Object Detection for faces, people & cars. Extract facial landmarks for face analysis, applying filters and face swaps. Implement Machine Learning in Computer Vision for handwritten digit recognition. Implement Facial Recognition. Implement and understand Motion Analysis & Object Tracking. Use basic computational photography techniques for Photo Restoration
Reviews:
“This video was unclear to me. It takes me time to apply it. More specifically: 1. The video doesn’t explain how to install both versions of anaconda and python. Not clear which one to use first. 2. No explanation of what is Jupyter and why do we need it. 3. No explanation of how to direct Jupyter to use the example files (the downloaded file) in a custom directory that is not within the users folder.” (Ey)
“Great course : computer vision is a very interesting topic with a lot of applications. The course covers the basics, from images manipulations, face detection/recognition, motion tracking, machine learning. Python + numpy knowledge is required. Each section ends with a very fun ‘project/app’ and there are many references/links to research/papers for people (I am) about the theory. Thanks Rajeev for the awesome course, I learned a lot.” (Jonathan Bouchet)
“Easy language and very nice introduction to OpenCV” (Fabio Miyauchi)
About Instructor:
Rajeev Ratan
Hi I’m Rajeev and I love Data Science and Computer Vision. I have a BSc in Computer & Electrical Engineering and MSc in Artificial Intelligence from the University of Edinburgh where I gained extensive knowledge machine learning, computer vision and intelligent robotics. I have published research on using data-driven methods for probabilistic stochastic modeling and even was part of a group that won a robotic competition at the University of Edinburgh. I’ve attempted my own computer vision startup that was based around deep learning. I’ve been contributing to 2 more startups in computer vision domains. Previously, I worked at two of the Caribbean’s largest telecommunication operators where he gained experience in managing technical staff and deploying complex telecommunications projects.
Instructor Other Courses:
…………………………………………………………… Rajeev Ratan coupons Development course coupon Udemy Development course coupon Programming Languages course coupon Udemy Programming Languages course coupon Introduction to Computer Vision | Master OpenCV in Python Introduction to Computer Vision | Master OpenCV in Python course coupon Introduction to Computer Vision | Master OpenCV in Python coupon coupons
The post 92% off #Introduction to Computer Vision | Master OpenCV in Python – $10 appeared first on Udemy Cupón/ Udemy Coupon/.
from Udemy Cupón/ Udemy Coupon/ http://coursetag.com/udemy/coupon/92-off-introduction-to-computer-vision-master-opencv-in-python-10/ from Course Tag https://coursetagcom.tumblr.com/post/155665977783
0 notes
Text
95% off #The Python Mega Course: Build 10 Real World Applications – $10
The only Python course covering web, databases, web scraping, data science, web visualizations, image processing & more!
All Levels, – 21.5 hours, 174 lectures
Average rating 4.5/5 (4.5 (844 ratings) Instead of using a simple lifetime average, Udemy calculates a course’s star rating by considering a number of different factors such as the number of ratings, the age of ratings, and the likelihood of fraudulent ratings.)
Course requirements:
A working computer (Windows, Mac, or Linux). No prior knowledge of Python is required.
Course description:
This is not just another Python tutorial that shows how to write Python code. This is a carefully designed course that will train you to develop real life applications with Python.
Through a combination of videos, real world code examples, quizzes, exercises, and a final project, this course makes sure you are able to think Python, and design and build real world applications by the end of it. After you buy the course, you will have lifetime access to it and to the course cheat sheet ebook containing all the code consumed throughout the course. You can use that book for quick look-up of Python commands.
The course is designed for all student levels. The first 5% of the course teaches Python basics for beginners and can serve as a refresher crash course for post-beginner students. After completing the first 5%, you will be guided in building 10 real world applications in a wide range of areas that include:
Web applications Desktop applications Database applications Web scraping Web mapping Data analysis Interactive web visualization Computer vision for image and video processing Object Oriented Programming
By the end of the course you will have built 10 useful applications in the above areas.
The applications you are going to build are as follows:
A name generator A website URL timed blocker A web map generator A portfolio website with Flask A GUI-based desktop application A webcam motion detector A web scraper of property An interactive web-based financial chart A data collector web application A geocoding web service.
Full details Become a Python professional able to independently develop complex applications on Python 3. Build 10 real world Python applications in a wide range of areas. Use Python for building web applications with Flask. Use Python for building desktop applications with Tkinter. Use Python for database applications. Use Python for scientific computing with Numpy. Use Python for data analysis and interactive data visualizations with Pandas and Bokeh. Use Python for building interactive web maps with Folium. Use Python for scraping data from websites with Beautiful Soup. Use Python for computer vision with OpenCV. Use Python for sending automated emails with Smtplib. Use Python to download data from various data service APIs. Use Python to analyze and visualize stock market data. Use Python for batch geocoding of addresses with Geopy. Use Python to schedule programs based on computer events. Use and fully understand object-oriented design.
Full details All student levels – the course starts from zero and progresses to advanced level.
Reviews:
“Covers a wide array of topics that other Python courses do not. The projects are fun and well designed from an educational point of view. This course really opened my eyes to what can be accomplished with Python.” (Andrew Boho)
“The topics covered in this course are good and extensive. But the depth to understand all of that seems lacking. Everything is alright till file handling and random text generator because we can relate to these things. But as soon as things go into pandas, geocode and numpy things start getting complicated, and the exercises do not help in understanding the topics totally. The choice is either stay on, do some research on the google(time consuming) or move on to next topic. Hopefully exercises down the line will be more extensive and I may have to change the ratings as I proceed further.” (Crazzy Pundits)
“I really enjoyed the practical nature of the course. It was interesting to see not only how real applications can be written, but how they can be deployed in an on premise fashion or in the cloud.” (Mike Prepelica)
About Instructor:
Ardit Sulce
Ardit received his master’s degree in Geospatial Technologies from the Institute of Geoinformatics at University of Muenster, Germany. He also holds a Bachelor’s degree in Geodetic Engineering. Ardit offers his expertise in Python development on Upwork where he has worked with companies such as the Swiss in-Terra, Center for Conservation Geography, and Rapid Intelligence. He is the founder of PythonHow where he authors written tutorials about the Python programming language.
Instructor Other Courses:
Interactive Data Visualization with Python & Bokeh Ardit Sulce, Python and GIS Expert, Founder of PythonHow.com (52) $10 $95 Python for Beginners with Examples Data Analysis with Python & Pandas …………………………………………………………… Ardit Sulce coupons Development course coupon Udemy Development course coupon Programming Languages course coupon Udemy Programming Languages course coupon The Python Mega Course: Build 10 Real World Applications The Python Mega Course: Build 10 Real World Applications course coupon The Python Mega Course: Build 10 Real World Applications coupon coupons
The post 95% off #The Python Mega Course: Build 10 Real World Applications – $10 appeared first on Udemy Cupón/ Udemy Coupon/.
from Udemy Cupón/ Udemy Coupon/ http://coursetag.com/udemy/coupon/95-off-the-python-mega-course-build-10-real-world-applications-10/ from Course Tag https://coursetagcom.tumblr.com/post/155398839428
0 notes