#Envato Elements File Free
Explore tagged Tumblr posts
Visit Tumblr Blog
Explore Tumblr blogs with no restrictions, modern design and the best experience.
Last Seen Tumblr Blogs


Fun Fact
When “GIF” was named word of the year in 2012, Oxford Dictionaries U.S.A. credited Tumblr for pushing the word.
Text
How to Animate Your Wedding Invitation Box with After Effects: A Free Template Tutorial
A wedding invitation sets the tone for your special day, and a 3D wedding invitation box can make it even more memorable. Using After Effects, you can animate your invitation to give it a dynamic, modern feel. This step-by-step tutorial will show you how to animate a wedding invitation box using a free After Effects template.
By the end, you’ll be able to create a beautiful and personalized animated wedding invitation that stands out.

Why Choose a 3D Wedding Invitation Box?
Eye-Catching Design
A 3D wedding invitation box creates an interactive and engaging experience for your guests. The movement and depth of the 3D elements can leave a lasting impression.
Customization Options
After Effects allows you to fully customize templates, from text to colors and animations. This gives you the freedom to create a design that perfectly matches your wedding theme.
Time and Cost Efficient
Using a free After Effects template saves you time and money. You don't need to design the invitation from scratch, and templates make the process simple for even beginners.
How to Get Started with After Effects
Before you begin animating your 3D wedding invitation box, make sure you have the latest version of After Effects installed. After downloading and installing the software, you can proceed with customizing a free template.
Step 1: Download a Free 3D Wedding Invitation Box Template
The first step is to find a suitable free template for your wedding invitation. Websites like Motion Array, Videezy, and Envato Elements offer free templates that you can download and use in After Effects. Look for a template that fits your wedding theme, whether you prefer elegant, vintage, or modern styles.
Step 2: Import the Template into After Effects
Once you’ve downloaded your chosen 3D wedding invitation box template, open After Effects. Import the template by going to File > Import > File and selecting the template you downloaded. The template will appear in your project panel, ready for customization.
Step 3: Review the Template Structure
Before jumping into the animation, take some time to understand the structure of the template. Templates often come with pre-designed elements such as 3D boxes, background animations, and text layers. Familiarize yourself with these elements to ensure a smooth workflow.
Customizing Your 3D Wedding Invitation Box Template
After reviewing the template, it’s time to customize it for your wedding.
Step 4: Replace Placeholder Text
Templates typically come with placeholder text for wedding details. Click on the text layers in the timeline, and replace the placeholders with your own wedding information, such as:
Names of the couple
Wedding date
Venue location
Special messages or quotes
Ensure the text size and font align with your wedding style. After Effects allows you to change fonts, colors, and spacing to suit your theme.
Step 5: Customize the Colors
You can adjust the color scheme of the 3D wedding invitation box to match your wedding colors. To change colors, select the layers you want to modify, and then use the Color Picker tool to select your desired hues. Customizing the colors makes the invitation more personalized and cohesive with your wedding theme.
Step 6: Adjust Background Elements
Most templates come with background elements such as patterns, textures, or imagery. You can replace these with your own images or graphics. For a more personal touch, consider adding your wedding logo, photos, or even custom illustrations. Simply import your assets into After Effects and drag them into the appropriate layers.
Animating Your 3D Wedding Invitation Box
Now that you’ve customized the design, it’s time to animate the 3D wedding invitation box. This is where After Effects truly shines, offering dynamic animation tools that bring your invitation to life.
Step 7: Animate the 3D Box Opening
A key element of a 3D wedding invitation box is the animation of the box opening. Most templates include pre-animated transitions for this, but you can adjust the timing and speed of the animation.
To adjust the animation:
Select the 3D box layer in the timeline.
Use the Position and Rotation keyframes to fine-tune the movement.
Play with the Ease In/Ease Out settings to control the animation speed, ensuring smooth transitions.
Step 8: Add Motion to the Text
To make the text appear more dynamic, consider animating the text layers. You can use simple fade-ins or more complex text animations like sliding or zooming. After Effects provides several text animation presets that are easy to apply.
To apply an animation:
Select the text layer.
Right-click and choose Animate > Position (or another property).
Use the Timeline to adjust the keyframes and make the text appear at the right moment.
Step 9: Incorporate Additional Animations
Depending on your template, there may be additional elements that you can animate, such as flowers, ribbons, or other decorative pieces. These elements can be animated using the same process described above. You can create more intricate effects by adjusting their opacity, scale, or rotation.
Step 10: Preview the Animation
After setting up the animations, preview the entire invitation by pressing the Spacebar. Watch how the box opens, how the text appears, and how the background elements move. Make any necessary adjustments to timing and transitions to ensure everything flows smoothly.
Finalizing and Exporting Your 3D Wedding Invitation Box
Once you’re satisfied with the animation, it's time to render and export your 3D wedding invitation box.
Step 11: Render the Animation
To render your project, go to Composition > Add to Render Queue. In the Render Queue panel, adjust the settings to your preferred output format (e.g., MP4 or MOV). Make sure to choose high-quality settings for the best result.
Step 12: Export the Final Product
After rendering, your invitation will be ready to share. You can send it via email, upload it to a wedding website, or share it on social media. The rendered video is sure to impress your guests with its unique and personalized animation.
Conclusion
Animating a 3D wedding invitation box with After Effects is a creative and fun way to invite your loved ones to your wedding. By following this tutorial, you can easily create a beautiful, dynamic invitation that’s tailored to your wedding style. With the help of a free After Effects template, you can bring your vision to life and create an unforgettable experience for your guests. So, download a template, customize it, and start animating your perfect 3D wedding invitation box today!
0 notes
Text
Where to Find Premium MacBook Mockups Online
MacBook mockups are essential tools for designers looking to present their work in a realistic and polished way. Whether you're designing a website, app, or branding concept, showcasing your designs on a MacBook screen can elevate your presentation. Luckily, there are many places online where you can find premium MacBook mockups, which allow you to display your designs in the most professional light.
Top Platforms for Premium MacBook Mockups
When searching for premium MacBook mockups, it's important to find platforms that offer high-quality files with customization options. A few standout websites provide a range of mockups suitable for various design projects.
Mockey.ai Mockey is one of the best places to find free and premium MacBook mockups. The platform offers a diverse range of MacBook templates, from minimalist designs to more sophisticated, high-tech setups. Whether you're designing a website or showcasing a logo, Mockey allows you to easily upload your design, adjust it to fit the screen, and export a high-quality image.
Placeit Placeit is a widely used platform for mockups, offering numerous premium MacBook templates. Placeit offers mockups that feature clean backgrounds, workspace settings, and other professional environments, making it easier for you to find the right backdrop for your design. They also allow users to customize the mockups with a drag-and-drop editor, making it perfect for beginners and professionals alike.
Envato Elements Envato Elements is another great option for premium MacBook mockups. Their vast library includes thousands of mockups across different categories, including MacBook mockups. You’ll find everything from sleek desk setups to more intricate scene mockups, all available for download with a subscription. The platform’s premium resources are perfect for high-end presentations.
Pixeden Pixeden is a go-to site for high-quality, professional mockups, and their MacBook mockup collection is no exception. The website offers both free and premium mockups in various resolutions. Pixeden also features mockups with different angles and settings, which is perfect if you need variety for your design presentations.
MacBook Mockup Generator Tools
If you're looking for more control over your MacBook mockups, a MacBook mockup generator can be an excellent option. These online tools provide templates that you can customize to suit your design’s needs. You can upload your artwork, change the background, adjust the lighting, and modify the device angle, all in a matter of minutes. Most mockup generators offer a free version, but premium versions typically unlock additional customization features and higher-quality results.
Renderforest Renderforest is known for its user-friendly design tools, including mockup generators for MacBooks. With a variety of templates available, this platform lets you easily insert your designs and adjust the mockup to your liking. Whether you're working on a digital portfolio or a marketing campaign, Renderforest can help create stunning visuals in just a few clicks.
Mockdrop Mockdrop is a simple tool that allows you to drag and drop your MacBook designs into their templates. The website offers a wide range of free and premium mockups that are customizable to fit your project. The platform is easy to use, with options for quick editing and exporting high-quality images.
Conclusion
Finding premium MacBook mockups online doesn’t have to be a challenge. With platforms like Mockey, Placeit, Envato Elements, and Pixeden, designers can access high-quality resources for their projects. Whether you choose to use a MacBook mockup generator or select a template directly, these tools will help you present your work in the most impressive way possible. By using these resources, you can ensure your designs are showcased with a professional touch.
0 notes
Text
Car Magazine Cover | 20+ Best Automotive Magazine Templates

This car magazine layout is a professionally designed layout ideal for automotive enthusiasts and businesses from GraphyPix LLC. Perfect for car magazines, racing booklets, or driving magazines, it comes in both Illustrator AI and Vector EPS formats. With a stylish format, this template is easy to customize for a variety of projects.
Whether you’re a car dealership, a racing event organizer, or a motor magazine editor, this car magazine layout will drive your content to the finish line. Its clean layout and vector graphics make it suitable for both print and digital use. Supports comparative features like Envato , Behance, and Graphicriver. Fuel your passion for automobiles with versatile best car magazines.
This is a DIGITAL DOWNLOAD, which means it is an affordable way to personalize your home or office, saving you shipping costs and delivery time.
Get Advanced Tips & Tricks while You Design! Read the blog
Buy some of our DIY-trending products:
1. https://graphypix.com/downloads/fitness-magazine-layout-1425/
2. https://graphypix.com/downloads/landscape-portfolio-magazine-template-1401/
3. https://graphypix.com/downloads/portfolio-magazine-template-1399/
4. https://graphypix.com/downloads/fashion-magazine-template-1398/
5. https://graphypix.com/downloads/fashion-magazine-template-1397/
Product Features of Car Magazine Layout:
WHAT YOU WILL RECEIVE IN CAR MAGAZINE COVER TEMPLATES
4 ready-to-print high-res 300DPI JPG files printable in the following aspect ratios
2:3 ASPECT (Printable at 24x36in, 20x30in, 16x24in, 12x18in, 8x12in, and 4x6in.)
3:4 ASPECT (Printable at 18x24in, 15x20in, 12x16in, 9x12in, and 6x8in.)
4:5 ASPECT (Printable at 16x20in, 12x15in, 8x10in, and 4x5in.)
A-SIZE (Printable at A1, A2, A3, A4, and A5.)
car magazine layout contains 20 pages
Photo-rich spreads in car magazine online
Instant access to the car design illustration after purchase.
A PDF guide for car magazine layout
The car magazine template includes
Illustrator Ai, Vector EPS car magazine template illustrator download
InDesign Indd, Vector Idml car magazine template InDesign
Final printed size: A4, US Letter
Color space: CMYK for car magazine layout
Canva template file (optional)
Get free & premium graphic design templates on GraphyPix LLC. Buy Now
WHAT CAN BE EDITED IN CAR MAGAZINE DESIGN
You can edit text, font, font size, and colors in the car magazine layout and placement or delete them completely.
Edit your photos (cut, resize, etc.) in Adobe; no additional subscription is required.
Insert your actual design elements.
Insert and customise as many photos as you want.
Create and personalize additional pages.
How to work on your car magazine layout
Download your files, print at your local print shop, print at home, or upload the files to your nearby printing service, frame, and hang!
After checkout, you will get an on-screen confirmation and an email from GraphyPix that your car magazine layout order is ready for download.
Make a copy of your design and start editing car magazine covers.
You will have unlimited access to these downloads after purchase in case you accidentally delete or lose them.
Please note that the colors may vary from monitor to monitor as well as from printer to printer.
Feeling CHILL-Seasoned? Try our trending designs. Shop GraphyPix
Printing your car magazine layout
At Home:
We recommend using heavy paper like cardstock or art paper for the best results
Local Printer:
For example, when printing at home, make sure to provide your local printer with the proper aspect ratio. You can print your artwork both online and in stores such as Staples, Walmart, or Walgreens. Make sure to get heavyweight paper no matter what type of printer you choose.
#car magazine#cars#vintage cars#japanese car#japanese art#japanese magazine#template design#print template#graphypix#template#layout#design
0 notes
Text
Spooky Cricut Halloween Designs for Party
Planning for a Halloween party? It’s fun, right? But, when the festival comes up, you have many things to do. But what if you can do things with less effort? Yes, the Cricut machine is a machine that offers you several benefits, from designing to cutting and drawing. So, are you ready to see all the crazy Cricut Halloween designs? This guide will not disappoint you in bringing you interesting things.
To get started, you need materials and SVG files, including the images you want to create your project with. This Halloween, show your spirit with the haunted decorations and scariest stuff. If you’re a DIYer, you will prepare everything in the shortest amount of time. It’s time to learn about the best Cricut Halloween projects you can make with your Cricut machine. So, without due, let’s jump into it.
1. Pumpkin Faces

These are the most common types of Cricut Halloween designs. You can get an actual pumpkin from the market or make it with cardstock. Then, you can use vinyl to make a face on that pumpkin, and you can also make a cap for that spooky pumpkin.
2. Halloween Bunting

It’s an easy way to decorate your home or the place you are going to celebrate Halloween. Therefore, you need to use Envato Elements to get the appropriate font for your project. You can search in the search bar and choose from the available fonts. Then, you can use your Design Space to adjust the scary text into any shape, like coffins. Well, this is Halloween, so you have to be as creative as possible.
3. Flying Ghosts and Bats
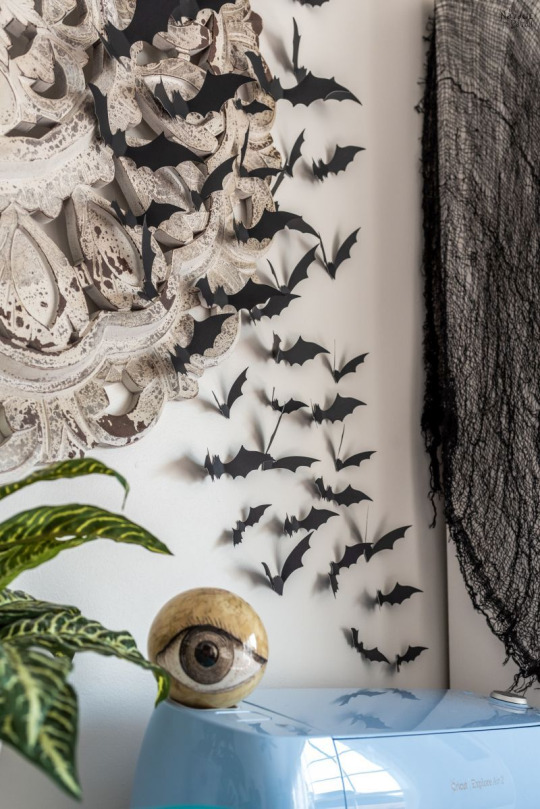
Halloween is incomplete without ghosts and bats. They add a little fun to the festival and make your place look haunted. So, why miss it? Just like you did bunting with text, you can use the images of bats and ghosts by cutting them with your Cricut. You can take the image from anywhere and upload it into the Design Space. Then, cut the image and make a string of it to hang it in your place.
4. Halloween Candy Jars
We are buying candy jars for Halloween anyway, so why not do something with them? The easiest way is to prepare labels for your jars. You can use labels from the list of Halloween illustrations. Moreover, you can use the Print then Cut feature to print the label instead. Yes, that’s simple and interesting.
If you have a printer, that’s cool. There are many free sites to get Halloween illustrations, like Envato Elements. So, try using it and creating something with it to decorate your candy jars.
5. Red Vinyl as a Blood Splatter

To make things more scary, you can use red vinyl as blood splatter and use it on windows, walls, and many other places. However, you should prefer the removable vinyl to avoid ruining the walls and windows. You can choose from the various available splatters and combine them to get a nice-looking splatter.
6. Red Hand on Your Wall

This is among the best Cricut Halloween designs. Well, nothing is scarier than a red hand, isn’t it? So, you can use one on your wall to scare everyone who comes around. In this project, you can easily add a graphic to your Design Space and cut from the removable vinyl.
To make this project, you need to upload different splatters into your Design Space and weld them together to make a wild project out of it. You should use a little bit of Weld and Slice features to design your own unique Cricut design projects.
7. Mat Tombstone

Well, this is something to decorate your mat. You can use anything we’ve covered in this blog. Keep the size not more than your mat’s size. So, you can directly upload the tombstones on your Design Space in any file format like SVG, PNG, etc., and duplicate the design multiple times to replicate the design more on your mat. This option can give your Halloween party a scariest look.
Conclusion
We have seen the best Cricut Halloween designs for your party. Make your Halloween party awesome this time by using your Cricut machine the right way. The Design Space offers you several options for Halloween designs, and many other sites are pretty good to get those design ideas. Therefore, you are all set to make your Halloween awesome. Hopefully, this blog will be helpful for you, and you will get some crazy ideas from here.
FAQs
What are Some Fabulous Cricut Halloween Ideas?
There are a lot of things that will look fabulous with the Cricut machine. For instance, the painted pumpkins, Halloween games, spooky T-shirts, greeting and invitation cards. If you want to add some more creativity to the Cricut design projects, you can also opt for bunting and making labels for your candy jars or wine. If you want to design your home, you can use scary images or flying bats and many more things to hang on the walls.
What are Some Popular Halloween Items for Decoration?
There are so many Cricut Halloween designs you can try for decorating your home or office. The list is huge and includes a skeleton, flying bats and ghosts, tombstones, spiders, witches, scary pumpkins, the red hand with splatter, and even red splatter to freak out guests and neighbors. Besides this, you can also make a black cat and big ghosts to decorate your walls.
What Do I Give to Someone on Halloween Prepared by Cricut?
Cricut is amazing at creating fun projects and preparing gifts for special days. As Halloween approaches, your anxiety may be too high for doing something on this day. Our recommendation would be nice greeting cards or invitation cards made by Cricut. You can create mind-blowing spooky items, too, like a Halloween T-shirt, which would be a nice choice.
Visit- Cricut.com/setup
Install cricut design space app
Cricut Halloween Designs
Cricut Design Space
#7 Spooky Cricut Halloween Designs#Cricut Halloween Designs#7 Spooky CriHalloween Party#Halloween Designs#Halloween 31 October 2023
0 notes
Text
Filmora 12 MORPHING EFFECT step-by-step Tutorial | FunwithFilmora.co.uk
Filmora 12 MORPHING EFFECT step-by-step Tutorial | FunwithFilmora.co.uk https://funwithfilmora.wordpress.com/2023/09/17/filmora-12-morphing-effect-step-by-step-tutorial-funwithfilmora-co-uk/ Transform your videos into works of art with Filmora 12’s morphing effect. We delve into Filmora 12’s morphing effect, guiding you through every step to create captivating visual transitions for your videos. This tutorial offers real-world examples using Filmora 12’s morphing effects to help you add a touch of magic to your video projects. Are you ready to take your video editing skills to the next level? Explore the wonders of Filmora 12’s morphing effect with us. TITLE: Filmora 12 MORPHING EFFECT step-by-step Tutorial | FunwithFilmora.co.uk DOWNLOAD LINK TO THE 2 IMAGE FILES: https://funwithfilmora.co.uk/public-downloads/ Subscribe To The Channel Fun with Filmora To Create Amazing Videos With Wondershare Filmora Video Editing Software: https://www.youtube.com/@funwithfilmora Important Links To Follow: Wondershare sign-up link: https://bit.ly/400qDal – Get a FREE 30 Day Trial with a TubeBuddy Paid Plan to optimise and grow your channel https://www.tubebuddy.com/freetrial?a=FunWithFilmora – Looking for unlimited downloads of stock videos, royalty-free music, photos, graphics, graphic templates & more then why not get a paid subscription to Envato Elements https://1.envato.market/0JaNME Stay Connected With Me. Website: https://funwithfilmora.co.uk/ Instagram: https://www.instagram.com/funwithfilmora/ Facebook: https://web.facebook.com/funwithfilmora1/?_rdc=1&_rdr Twitter: https://twitter.com/FilmoraFun TikTok: https://www.tiktok.com/@funwithfilmora?lang=en For Business Inquiries: [email protected] ============================= Recommended Playlists: Shorts: https://www.youtube.com/@funwithfilmora/shorts Tutorials: Other Videos You Might Be Interested In Watching: How to clone in Filmora 12 video editing software A Guide To Create Stunning Videos With Keyframes In Wondershare Filmora Master 3D Animated Titles & Text In Wondershare Filmora 12: Easy Tutorial Filmora 12 Tutorial – How to create a sketch effect in Filmora 12 Filmora 12 Tutorial: Creating YouTube Shorts From Widescreen Video Made Easy ============================= About Fun with Filmora. Fun with Filmora is about creating videos with the easy-to-use yet powerful Wondershare Filmora video editing software and having fun at the same time. I will show creative videos edited with Filmora and tutorials on how to use this amazing piece of software. For Collaboration and Business inquiries, please use the contact information below: Email: [email protected] Subscribe To The Channel Fun with Filmora To Create Amazing Videos With Wondershare Filmora Video Editing Software: https://www.youtube.com/@funwithfilmora ================================= #Filmora12 #FilmoraCertifiedCreative #madewithFilmora #WondershareFilmora #Filmora Disclaimer: We do not accept any liability for any loss or damage which is incurred by you acting or not acting as a result of listening to any of our publications. For all videos on my channel: This information is for general & educational purposes only. Always consult with an attorney, CPA, or financial professional for advice based on your specific situation Copyright Disclaimer: Under Section 107 of the Copyright Act 1976, allowance is made for “fair use” for purposes such as criticism, comment, news reporting, teaching, scholarship, and research. Fair use is a use permitted by copyright statute that might otherwise be infringing. Non-profit, educational, or personal use tips the balance in favour of fair use Affiliate Links: This page contains affiliate links. If you choose to purchase after clicking a link, I may receive a commission at no extra cost to you. © Fun with Filmora. from Fun with Filmora https://www.youtube.com/watch?v=se-90nj25U4 via Fun With Filmora https://funwithfilmora.wordpress.com September 17, 2023 at 06:12PM
#SchoolDirector#ExecutiveProducer#PorthouseTheatre#AssociateProfessor#TheatreandDance#movement#musicaltheatre#acting#YorkMusical#TheatreShowcase
0 notes
Text
0 notes
Text
How to Print Your T-shirt in a Few Minutes ( for Beginners) in 2022

We all want to print our shirts and other clothes, but it seems that it takes too long to do so. With a few clicks and a few minutes,
you can print your t-shirts however you like. It's a quick and simple process that only requires printing and some paper.
A lot of people don't know that there are many different ways to print your t-shirt. Place.it.com will help you to print your t-shirts in a few minutes
in this beginner’s guide, we will show you the most important steps and the best ones to print your t-shirt in a few minutes.
Click here to get a free Card gift
let��s start.
Here is what you’ll learn in this guide.
Choose t-shirt design
Choose a template or create your own
Upload your design
Add text or graphic
Preview and printing
Choose a t-shirt design:
There are so many different T-shirt designs out there that it can be hard to decide which one to buy. Luckily, there are a few things you can do to help you choose the right one.
First, think about what message you want your T-shirt to communicate. Are you looking for a funny T-shirt that will make people laugh, or are you looking for a more serious design that will reflect your political beliefs?
Click here to get a free Card gift
Additionally, think about what type of T-shirt you want. Do you want a T-shirt that is plain and simple, or do you want one that is flashy and designed to stand out?
Choose a template or create your own:
When it comes to designing your own t-shirt, there are a few things to keep in mind. First and foremost, make sure that the design is original and catchy. Secondly, consider the size and shape of the shirt. And finally, choose a template that's easy to use.
choose a template from here
If you want to create your own t-shirt, there are a few different templates that you can use. Popular templates include GIMP and Inkscape. Both of these programs are free to use, and both offer a wide range of helpful tools.
Click here to get a free Card gift
Upload your design:
upload your design t-shirt and make some fashion statements with your own personalized shirt! There are many different ways to create a design for your t-shirt, including using graphics software or online design tools.
Upload your design from here
You can also create your own designs using different colors, fonts, and patterns. Once you have your design complete, you can print it out or use an online t-shirt printing service to have it made into a shirt.
Whether you are looking to show your support for a favorite team or just want to look stylish, a design t-shirt is a great way to get your message out there.
Click here to get a free Card gift
Add text or graphic :
Adding text or graphics to your t-shirt can add a personal touch and make your shirt unique. There are a few different ways to add text or graphics to your shirt. You can use a printer, a desktop publishing program, or a photo editing program.
To print text or graphics, use a printer. To print text or graphics from a computer, use a desktop publishing program. To print text or graphics from a photo editing program, use the "Print" option from the "File" menu.
Add graphic from here
To add text or graphics to a shirt using a desktop publishing program, you will need a T-shirt printer and a T-shirt printer paper.
Preview and printing :
review and the print T-shirt printing is a great way to get your T-shirt printed quickly and cheaply. You can choose to have your T-shirt printed directly to your specifications, or have a shirt printing company print it for you and then do the final printing and finishing yourself.
Print Now From Here
There are a few things to keep in mind when printing your own T-shirt. First, make sure that the print quality is good enough that you're happy with it.
Second, make sure that the shirt printing company you choose is experienced in printing T-shirts. Finally, make sure that you get a good deal on printing.
Click here to get a free Card gift
Envato Elements
Constant Contact
Place It
#printmaking#design#t shirt#online tutoring#3d printing#t shitrt#3d modeling#graphic design#fashion#on demand
3 notes
·
View notes
Text
Audio Visualizer Crack Fcpx

Fcpx Audio Visualizer Crack
Audio Visualizer For Mac
3d Audio Visualizer
Audio Visualizer Premiere Pro
Download All 62 “spectrum” video templates unlimited times with a single Envato Elements subscription. All from independent designers. Download over 1411 free Audio visualizer templates! Browse over thousands of templates that are compatible with After Effects, Premiere Pro, Photoshop, Sony Vegas, Cinema 4D, Blender, Final Cut Pro, Filmora, Panzoid, Avee Player, Kinemaster, No software. The best audio visualizer for Corsair RGB devices. GETTING STARTED Tutorial Video. GALLERY App Screenshots. HELP & SUPPORT Tech Support. Live-Chat Support. For quickest response times, we have a Discord server where you can receive live-chat based support. Join Discord Server. Audio Visualizer Templates for Final Cut Pro. 3 Free Final Cut Pro Templates for Audio Visualizer.It's never been easier to make your podcast stand out. Using one of our Final Cut Pro Audio Visualizer templates you can pair your podcast to video effects with ease.
If you own an Apple computer, Final Cut Pro is one of the best solutions for editing and creating videos. The software has powerful tools that allow you to remove unwanted parts of your video, combine several videos into one, and adjust color, sound, and other properties of the final video or movie.
You can use Final Cut Pro for movie production as well as for business purposes, whether you’re creating videos for your Youtube channel or for an online course.
As powerful as Final Cut Pro is, there is no denying it that editing a video is a long process. But with the right preset, you can save a lot of time and cut your video editing time significantly.
We’ve rounded up the best free presets and templates for Final Cut Pro that you can download and use in your projects. Check them out below and add them to your resource library today.
Quick Jump:Animated Elements, Title Templates, Transitions, Special Effects, Sound Effects, Gradient, Color & Light Effects, Lower Thirds & Openers Templates.
How To Install Final Cut Pro Presets
Before we dive into the presets, here are the steps to follow to install these presets once you’ve downloaded them.
Start by unzipping the downloaded preset folder. Simply double-click it and the folder will be unzipped.
Now you need to select all the presets in the folder and then copy them by pressing Command+ C.
Open up your Finder and hold down the Option key. Then, go to Go > Library. Once inside the Library folder, go to Application Support > ProApps > Effects Presets.
You can now paste the preset files into the Effects Presets folder by clicking Command+V.
The last step is to restart Final Cut Pro so you can see and access your newly installed presets.
You might also like our collections of free presets for After Effects, free Premiere Pro templates, or free Apple Motion templates.
Free Final Cut Pro Animated Elements
50 Animated Gradient Backgrounds for Final Cut Pro
This preset pack boasts 50 wonderfully created color gradients that you can use for any of your Final Cut Pro video editing software. They will be perfect for use as backgrounds, layouts, film burns, or even light leaks.
Brightly Animations Explainer Toolkit for Final Cut Pro X on Envato Elements
Save yourself a lot of time and energy on your next animated project with this tool kit for Final Cut Pro X and Apple Motion. Easily put together, customize, and animate characters to create explainer videos, educational videos, or enhance any video you use them in.
50 Animated Icons for Final Cut Pro X
This kit of 50 awesome and animated icons is perfect for any of your Final Cut Pro and Final Cut Pro X videos. Each icon is fully customizable and super easy to use, ensuring your projects have a high quality professional look and feel to them.
Timecode for Final Cut Pro X
This plugin gives you a timecode that is fully customizable and can be moved beyond just the borders of your Final Cut Pro. This allows you to show everyone involved where on the timeline the video is, from anyone watching a second screen to the video being edited.
Splash Animated Elements for Final Cut Pro X on Envato Elements
Save yourself time, money and energy by using these hand drawn, animated splashes in your next video. Quickly customize their colors, add a glowing effect, decide on pixelating them, or even do both for your next Final Cut Pro video.
Instagram Stories Template for FCPX
With this plugin, you will be able to quickly and easily edit your Instagram Stories. You can change the duration, color, position, and adjust fonts and font sizes. This plugin also has a built in in-out animation and is available in all the popular resolutions.
YouTube Channel Bar Branding Template
Prompt your YouTube viewers to like, comment and subscribe with an easy to customize YouTube channel bar template. Download for free and add to your next YouTube video with no attribution required from mixkit.co.
Text Message Template for FCPX
Quickly and easily add some flavor to your next Final Cut Pro or Final Cut Pro X video with this plugin. Built to emulate popular social media platforms, this will make your videos come to life showcasing text messages, comments, notifications and more.
Free Final Cut Pro Titles
Wedding Titles for Final Cut Pro X
This resource gives you four beautifully crafted wedding themed title panels that you can use for any of your Final Cut Pro or Final Cut Pro X videos. They are fully customizable and are available in all the popular resolutions.
Minimal Titles for Final Cut Pro X
With this resource you will be able to choose from several title cards that are completely customizable for use in your next Final Cut Pro and Final Cut Pro X projects.
Modern Big Titles on Envato Elements
Save yourself time and money by using this resource full of 30 different title screens to use with your Final Cut Pro or Apple Motion 5 editing software. Quickly use, customize, and produce your videos with any resolution.
Watch in HD FCPX Template
Thanks to this template, you can easily tell your viewers that they are watching videos that are in high definition. These pops are designed to invite viewers to watch in HD, state that the videos are in HD, and even denotes that your videos are in 4K resolution.
7 Final Cut Pro X Titles
Quickly get through titles and lower with this resource pack for your Final Cut Pro X video editing software. With 7 different animated titles to choose from, you will be able to find the perfect version for you next video project.
Creative Titles for FCPX on Envato Elements
Save time and money with this resource pack of title cards. Fully customizable and great for your video campaigns on social media or inhouse use. No plugins required and these titles are great for upto 4K resolution viewing.
Template Pop FCPX Title Templates
This resource is perfect for any of your Final Cut Pro X video projects. With 24 high quality title cards to choose from, you will find them easy to customize and even better to watch in action!
Manifesto Titles for Final Cut Pro
This resource makes adding and customizing text a breeze. Quickly add high quality text scrolling for your endings and stills as lower thirds or block text to your next Final Cut Pro or Adobe Premiere Pro project.
Manifesto Titles free final cut pro fcpx preset template” height=”450″ width=”850″/>
Lyric Titles for FCPX on Envato Elements
Thanks to these titles, you will be able to easily create a lyric-style title for your videos. This is perfect for any music videos or if you want to spice up the look of your logo opener. These titles are available as part of your Envato Elements subscription.
Movie Pop Titles for Final Cut Pro X
Easily generate titles that look like your cinematic favorites like from the Star Wars series, Harry Potter’s Fantastic Beasts, or even from the Assassin’s Creed series. This plugin makes it so easy to make impactful titles that will captivate your audience!
Free Final Cut Pro Transitions
Ink Transitions
Create your own special transition with this resource. Learn a valuable technique and then be able to add this and other transitions to any of your Final Cut Pro video projects.
Horizontal & Vertical Close Transition
This resource a horizontal and vertical blur effect transition to put in between your clips. Using these transitions adds a professional touch to every Final Cut Pro video project. Get yours today.
Toolkit and Transitions on Envato Elements
Save time and money on your next Final Cut Pro or Final Cut Pro X with this resource that gives you all the power you need to create wonderful videos with ease.
8 FCPX Transitions
This resource has 8 wonderfully crafted transitions for Final Cut Pro. Add a touch of panache and pizzazz to your next Final Cut Pro video project with these transitions.
Vertical Reveal Transition
This resource gives you complete control over your vertical moving transitions. With the ability to customize the speed, control the blur speed, and flip it for up and down movements; this is a powerful resource for Final Cut Pro.
FCPX Zoom Transitions on Envato Elements

Save yourself a lot of time and money by using this resource with 50 fully customizable transitions for Final Cut Pro X. It’s easy to use with its drag and drop method, is ready for all resolutions, and combines well with your titles.
Flashback Transition
Use this resource to easily incorporate a flashback effect like you see in the old Scooby Doo cartoons. Using this creative touch in your Final Cut Pro video projects will give it a nice dash of flair.
Diagonal Slide Transition
This resource gives you 4 ways to have a diagonal transition in any of your Final Cut Pro videos. These transitions are easy to use and add a professional touch to your final video version.
Glitch Transitions on Envato Elements
Using a glitch transition in your video editing has never been easier. The pack includes 50 glitch transitions in 4k resolution. These glitches are easy to use, customizable, and available with your Envato Elements subscription.
Channel Switch Transition
Need to give a video an analog feel? Then this is the perfect resource for you. You will be able to give your videos the feel of flipping through your old analog television set.
10 Clean FCPX Transitions
This resource gives you 10 clean, powerful, and easy to use transitions for your Final Cut Pro video projects. These transitions are customizable and available in all major resolutions.
RGB Blur Zoom Transition
This resource gives you control over all your zoom styled transitions. Adjust the colors to fit your needs, adjust durations, and render videos in all available resolutions quickly and easily.
10 Flat Transitions
This resource pack of transitions will add a colorful and modern look to your Final Cut Pro videos. The transitions are smooth, vibrant, and trendy; with the ability to change durations and are available in all major resolutions.
Warp Roll Transition
This resource gives you a fully customizable warping effect for your transitions. The transition is a combined warp zoom and a roll effect to give you a high quality and professional look.
13 Final Cut Pro Transitions
Here’s 13 different transitions that you can use with your Final Cut Pro video projects. Each transition is customizable and can be used in both personal and commercial video projects.
Free Final Cut Pro Special Effects
Final Cut Pro Censor Effect
The built in standard censor effect is not very user friendly in Final Cut Pro. This resource aims to change that by giving you complete control over it. It also expands the ability of the standard censor effect.
Pan and Zoom Effect
This resource gives you a powerful way to execute pan and zooms in your Final Cut Pro and Adobe Premiere Pro. Key features include support for all popular formats, and animation syncing.
Slice Transitions on Envato Elements
This resource is perfect when you need to save time, money, and energy with your Final Cut Pro transitions. This resource gives you professional looking sliced transitions, sound effects and a specialized slice animation for your logos!
Ghosting Effect Plugin
This plugin is great when you want to add some special effects to your Final Cut Pro video projects. Easily give your text a ghostlike effect and add a sense of thrill to your videos.
Feature Overlay Effects
This plugin adds an overlay to your Final Cut Pro projects that works best in collaboration for feature length films. This plugin adds a header, label, and two different kinds of timers for ease of use.
Space Wipes Final Cut Pro Effect
This wonderful resource is perfect for every fan of Star Wars. You will have complete control of these transitions. Use the circular or side transition and make your videos one with the force.
Dolly Zoom Final Cut Pro Effect
This resource will polish up your dull footage in a snap. Quickly add a zoom and rotation to your Final Cut Pro or Final Cut Pro X project and bring your footage to life!
mVertigo Dolly Zoom Effect
This resource for Final Cut Pro X gives you the power to give a forced vertigo perception. With four customizable ways to induce this perception, you will find it easy to give your projects a polished look and feel.
Binocular & Scope Final Cut Pro Effect
This resource gives you look and feel of looking through various binoculars and firearm scopes. From getting close ups to nightvision, this resource will give your Final Cut Pro videos a feature film feel.
Fade In & Fade Out Final Cut Pro Effect
Fcpx Audio Visualizer Crack
This plugin changes how the normal fade in and fade out transitions are applied. Instead of bulky blocks denoting transitions, this streamlines and customizes the transition as a dropped in effect.
Timecode Effects
This plugin helps those who are working in a collaborative fashion. This gives you the perfect way to mark videos as a time stamp, and as a foot and frame counter. Customise the frame rates, start and stop frames, and the color and size of the counter.
Free Final Cut Pro Sound Effects
10 Pro Audio Final Cut Pro Presets
This resource gives you 10 powerful audio effects for Final Cut Pro X. Give your video project exactly the right kind of audio effect right when it’s needed to create powerful features.
Sound Effects Pack for Final Cut Pro
This simple resource gives you ten high quality sound effects like camera shutter, electric strike, and wind chimes for Final Cut Pro. Add any of these high quality and crystal clear sounds to any of your projects today.
Free Final Cut Pro Gradient, Color & Light Effects
Andy’s Gradient Filter for Final Cut Pro
Ditch the expensive on camera filters to get the color look you need with this resource. The filter works with Final Cut Pro x, Apple Motion 5, and Adobe Premiere Pro, and makes it easy to get a high quality look on all your projects.
Light Leak Transitions for Final Cut Pro X
Light leaks are caused by inferior cameras but they add a lovely quality to all their photos. Use a similar effect by integrating this resource in your Final Cut Pro X projects.
mLooks Grade Presets for Final Cut Pro X
Get the most out of your Final Cut Pro X project with this simple color correction preset. Just drag and drop the effect onto your timeline and adjust the parameters to fit your vision in moments.
Free Final Cut Pro Lower Thirds & Openers
Clean Lower Third Final Cut Pro X Template
Try this template if you want easy to use and customizable lower thirds in 1080p for Final Cut Pro X. You can set the animations, and change the durations for each lower thirds as you need them.
Cinematic Opener for Final Cut on Envato Elements
With the help of this template, you will be able to have the most modern and colorful way to open all of your transitions. Perfect for the opening title sequences in your feature films, this resource is quick and easy to use.
Rhythmic Final Cut Pro X Opener Template
The rhythmic opener is a wonderful addition to all your Final Cut Pro X templates. Quickly and easily change text, color, position , and font for your images and videos. Compatible in either 720p or 1080p resolutions.
FCPX Minimal Lower Thirds Pack on Envato Elements
If you’re looking for minimalist, lower thirds, don’t miss this collection of 25 of the best minimalist lower thirds from Envato Elements. The best part is that they are completely customizable for every one of your Final Cut Pro X video projects.
Painter Style Lower Third Template
Add a simple brushstroke of color with handwritten style text to your next video. Customize the colors and text to suit your project or brand. Download for free with no attribution required from mixkit.co.
Simple Lower Thirds Template for FCPX
This template gives you a simple lower third that is quick and easy to use and customize. Adjust the durations, give it an animation, and use with upto 4k resolution projects for Final Cut Pro X.
Final Cut Pro makes it easy to create and edit your videos as well as add special effects and transitions to all your video projects. Check out the presets in this collection and be sure to add them to your video editing library so you can use them in all your future projects.
Related Posts
FEATURES
FULL HD Resolution
4 Resolutions Included
13 Different Scenes Included
60 Audio Services platform labels included
You can customize slide to your faver
You can Use Photos & Videos
100% AE project. Don’t need any therdparty plugins
Works with After Effect CS6 and above
Easy to use even for a begginer
AUDIO
Audio Not included
But you can Download
V.3 UPDATE
>Audio Vizualizer Pack 3.0 – 2020-03-26
+ Add 05 New Scenes
Audio Visualizer For Mac
+ Add 30 New Lable set (Mobile Friendly )
+ Fixed some minor bugs
V.2 UPDATE
>Audio Vizualizer Pack 2.0 – 2019-10-26
+ Add 3 New Scenes.
+ Add new 03 Audio badges(Anchor,beatport,deezer)
3d Audio Visualizer
+ Add new 02 end screen
Audio Visualizer Premiere Pro
+ Fixed some minor bugs
1 note
·
View note
Text
Get Paid To Take Pictures With Your Phone – 20 Ways That Work(Previous)
This is an article quoting a blogger.For more high-quality content, please go to the subscription blog: https://italiangoat.com/

In the past, high-quality cameras were expensive, fragile devices used primarily by professional photographers. And while you can still spend a pretty penny on a top-of-the-line model, most modern smartphone cameras are more than capable of taking amazing pictures — even if all you know how to do is point and click.
And whether you’re a full-time photographer or an amateur in search of a good side hustle, there are dozens of ways to sell the images from your phone.
All you need is a smartphone with a camera and a good platform on which to sell your photos.
In this post, we’ll run down some of the best ways to get paid to take pictures with your phone, and we’ll answer a few of the most commonly asked questions about the process.
Getting Started
Starting a photography side hustle is not as easy as whipping out your phone to catch a pretty sunset, then selling the image online.
Before you can get started making money from your iPhone or Android photos, you’ll need some equipment, software and basic know-how. You don’t need to be an expert — just cover these basics and you’ll be ready to get started.
Smartphone with a high-quality camera: With technology constantly advancing, a good smartphone camera is essential if you want your images to sell. Even if your images are properly framed and well-lit, they’ll be tough to sell if they’re shot with an outdated lens or in low resolution. Here’s a post that outlines some good quality smartphone cameras that will serve you well.
Photo editing software: You can do basic edits on your phone, but if you’re optimizing photos for print (think wall art and merch), you’re better off editing your images on a computer. Adobe Photoshop and Lightroom have been the industry leaders in photo editing software for decades, but if the price tag is too steep, GIMP (desktop) and A Color Story (mobile) are cheaper alternatives for editing your photos.
#1. EyeEm
EyeEm has some exclusive technological advantages over other stock photo sites. The app’s algorithm analyzes your photos for aesthetic value and relevance and automatically tags their visual elements.
EyeEm also partners with Getty Images, a major stock photo website, which increases the exposure (and potential sale) of your images.
Completing photography “missions” (requests or contests from EyeEm clients) can get your photo licensed by big name brands, get your image shared on EyeEm’s social media channels, or earn you swag.
EyeEm pays a 50% royalty rate for sold images, and you retain all the copyrights to the photo.
#2. Foap
The Foap app offers clear guidelines on acceptance criteria for photos. You can also connect with other Foap photographers and get constructive feedback on your photos.
Foap offers 50% profit sharing on sold images. Payments are sent via PayPal.
Foap’s marketing is not as strong as some other big name stock image companies and apps. This has resulted in some users complaining about a lot of work for minimal pay. However, if you’re a new photographer looking to develop your skills and gain exposure, Foap can be a solid option.
#3. Snapwire
Snapwire has a fairly generous payout structure: you keep up to 100% on client requests and challenges, and you earn 50% on downloads from subscribers.
This app is much more based on client requests than others. Requesters can award points to photos that exemplify the look they’re going for. At the end of the contest, requesting companies buy the photos they want from the winner(s).
Photographers can “level up” with successful images and projects, gaining advantages with each level that helps them gain more exposure and sell more photos.
#4. AGORA Images
Based in Spain, the AGORA app is more like a social media platform than a stock photo website. They offer cash prizes for their weekly photo challenges, with winners determined by app users’ votes.
Payouts range from $1,000 to $25,000, along with the chance to be published in some of the leading newspapers and magazines around the world. Because they focus on a worldwide audience, competition is diverse but also steep.
AGORA is a great way to gain exposure. That said, while you may get lucky and win one of the contests, other apps may be a better fit if money is your primary goal.
Stock Photography Websites
When you see breathtaking landscapes and portraits with personality on stock photo websites, you may think they’re all shot by expert photographers with years of experience. But that’s not necessarily true. Many of these stock photography websites accept and sell images from shutterbugs of all types and experience levels.
#5. Adobe Stock
Formerly called Fotolia, Adobe Stock is woven into the Adobe suite of products. You can upload your photos directly from Lightroom or Bridge. If you’re new to tagging your photos, Adobe Stock’s AI will prompt you with relevant tags. Adobe stock pays 33% royalties to contributors via PayPal or Skrill.
#6. Shutterstock
Shutterstock is one of the most popular stock photo sites on the web. It offers a mobile app to help track sales, submit photos and get notifications of what customers want. Their payout structure is tiered, so the more lifetime earnings you have the greater the percentage of royalties you keep. Earnings top out at 30%.
#7. IStock By Getty Images
A great option for the experienced photographer, iStock by Getty Images requires you to get accepted to be a contributor. This is one of the most well-known stock photo websites, and while royalties start at only 15% (more for exclusive contributors), the high traffic makes it an option that’s well worth your time.
#8. 500XPrime
500X Prime offers high royalties for contributing photographers — 30% for non-exclusive and 60% with exclusive content. Each photo is reviewed prior to licensing for technical quality, originality, aesthetic value, and other requirements.Plus, their proprietary “Pulse” algorithm is designed to surface the submissions of new photographers so they can gain feedback and increase their exposure.
#9. Twenty20
Twenty20 is a part of the Envato ecosystem, which is an array of marketplaces for creative producers that offers everything from website templates to visual assets for use in video games.
If your photo gallery makes the Curated Collections, you’ll gain increased exposure on Twenty20’s website. Check out the Sold Feed to see what photos are selling in real time to help guide you on what to shoot.
Twenty20’s Subscriber Share is a more complicated payout structure than most, but it rewards photographers who have devoted, niche followings.
#10. DepositPhotos
Like Getty Images, DepositPhotos requires photographers to pass a short test and submit sample photos before they start uploading. Their compensation structure is generous: contributors earn 34% to 42% royalties from on-demand photos and $0.30 to $0.35 from subscription files. You can also level up your pay grade based on your overall amount of downloads. The more downloads your photos get, the greater your royalties on all your photos.
#11. Dreamstime
Dreamstime has been selling photographers’ stock photos since 2000. With a worldwide audience, the site supports multiple currencies and languages. It doesn’t require prior approval or testing to upload, but it does vet images to meet standards of commercial and creative appeal. Payouts range from 25% royalties for newbies to 60% for exclusive contributors.
Photos On Merchandise
You can create additional value by turning your photos into items for sale — especially if you have graphic design skills to create fresh, new images. From t-shirts to coffee mugs to wall hangings, there are online markets for all sorts of widgets to sell with your decorative photos.
#12. Etsy
On Etsy, you can sell prints, canvases, framed photos or digital image files — it’s all up to you. Opening your shop on their website is easy and free, and listing each item costs only 20 cents. Etsy handles the transaction while you do all the printing, packaging and shipping.
#13. Merch By Amazon
You can turn your art into t-shirts with Merch by Amazon. Amazon takes care of the business side of t-shirt production (printing, shipping and handling, and payment). Plus, they produce t-shirts as they’re ordered, so you don’t pay anything upfront (and you’re not stuck with boxes of t-shirts you can’t sell cluttering up your garage). Royalties are $1 to $10 per shirt.
#14. MiPic
If you want to go a step beyond t-shirts, MiPic can turn your photos into leggings, swimsuits, towels and more. Open your own customized print store and earn up to 20% commission on the sale of your items. There are no setup fees, and MiPic takes care of all of the manufacturing, sales and distribution aspects of the business.
#15. Society6
Society6 is more than just an online marketplace for selling items with your photos on them; it’s also a community of artists to engage with and inspire you. The website is very artist-focused, which is why they offer 10% commission on referred sales in addition to the 10% you make on your own items.
#16. Redbubble
Redbubble gives you a lot more leeway on setting your own prices than other photo sites. Rather than the website setting the price, then paying you a commission, Redbubble sets the base price, then you choose the markup on your items for sale. They offer a wide range of products to display your images, from scarves to coasters to journals.
#17. Instaprints
Instaprints has several unique marketing tools to increase your sales and exposure. You can sell on Facebook, through retail stores, and even license your art for the walls of TV show sets! The Instaprints mobile app lets customers see how your image will look on their wall before they buy.
Most features come with a free account, but premium members can access additional options like building your own website and sending promotional emails.
I will regularly share the high-quality content of the blog in order to help more people.
#make money online#make money at home#quick cash#money making blog#make money 2021#investment advice#Investment and financial management#virtual currency#make money on instagram#Hackers make money
2 notes
·
View notes
Text
Envato Elements Group Buy- Is Envato Elements Worth It?
Is Envato Elements Worth It?
The asset catalogs of computerized resource of Envato Elements Group Buy on offering various items exclusively. The resource creator is really the person who sets the costs, yet Envato charges the permitting expense for the creator to help selling on their foundation.
In this way, the cost of a thing for buy on Envato is profoundly unique, for example, you may wind up paying $60 for a subject offered on ThemeForest or $25 for a module from WordPress on CodeCanyon. GraphicRiver offers something similar for $35 and for $5 on PhotoDune for a similar photo.
In the event that you are a normal purchaser of advanced resources, you can discover piling up your costs exceptionally quick.
Thus, as opposed to paying for every one of the things individually, Envato Elements gives you an opportunity to get an enormous file of advanced resources to the detriment of just $16.50 each month. Indeed, Envato Elements is great!
This document includes various stock photographs, music, text styles, illustrations, modules and subjects. Interestingly, the individuals from Envato Elements can download these things a few times with no limitation.
Presently go to the investment funds that you can anticipate from Envato Elements. Consider the way that the assistance is filling quick regarding prevalence.
What do you get from Envato Elements?
Guests (non-individuals) can uninhibitedly look and peruse around the site of Envato Elements to discover the best offer. All things considered, we prescribe to you a sing up as Envato distributes an inventory of free advanced documents which are refreshed day by day. These documents are effectively open from the landing page.
Sign in with your Envato account. You ought to clearly have a record in the event that you at any point purchased anything from the Envato commercial center, like ThemeForest.
Nonetheless, it's simply a question of a couple of moments on the off chance that you haven't.
You will become more acquainted with the degree of its file after you begin perusing Envato Elements with your record.
Right now, there are about 1.6 million computerized resources accessible at Envato commercial center for downloading. Be that as it may, the file is consistently developing. Consistently, more than 22,000 new things are added.
The landing page likewise manages you for new things that are added to the chronicle alongside the free documents. Additionally, a curated rundown of top-quality resources is likewise shown.
You can have an admittance to in excess of 460,000 movement designs, 46,000 logos, 22000 symbols, 1,800 presets and activities, 880,000 photographs, 110,000 sound records, 15,000 video layouts, 22,000 vectors, and 5,900 text styles.
Infographics, picture foundations, and email formats are likewise accessible for the individuals. What's more, the in addition to choice for the individuals is that they can get to courses and instructional exercises on TutsPlus.
Presently on the off chance that you have a WordPress site, we firmly suggest you introduce Envato Elements module for WordPress. Along these lines, you will actually want to look for the file while utilizing your WordPress administrator region and add media into the pages and posts straightforwardly.
In excess of 1,400 page layouts and 80 format packs are likewise noticeable inside WordPress module in Envato Elements. It is simple for you to utilize these formats for your site with Beaver Builder or Elementor. Both these page manufacturers use intuitive device and are free for downloading.
Participation of Envato Elements offers something for nearly everybody.
You can have a simple admittance to stock pictures for your blog, on the off chance that you are a blogger. You can embed these pictures to your substance.
Video layouts are a gigantic fascination for YouTubers, movement illustrations and sound documents which are accessible for Website plans and can utilize a huge number of logos, symbols, vectors, textual styles and so on Clearly, the nature of things matters a ton and if the nature of 1.6 million components is poor, than they are of no utilization.
Be that as it may, it isn't the situation with Envato Elements. It has observed a severe principle to remember quality things for the chronicle. We were unable to discover any thing that is incorporated to only lift the index regarding number for showcasing.
Likewise note that numerous components offered by Envato at the commercial center are not free considerably under the Elements membership. It implies that a membership doesn't permit you to download a document from the commercial center.
Here is the means by which you can track down an extraordinary thing for your site structure the Envato Elements.
How to find an item of your need in Envato Elements
Tracking down the privilege advanced resource structure a particularly enormous library is troublesome. You should figure out the things and search explicitly for the necessary thing on the off chance that you need to track down the correct things of your advantage.
Envato made it simple since it permits to look through the classifications with channels. This is to ensure that the consequences of your pursuit would be more explicit and pertinent.
On the off chance that you know about what you really need, you will utilize the pursuit bar which is available at the highest point of each page. In this manner, confining the inquiry to a particular classification will assist you with getting and the most important outcomes.
Snap the "peruse" alternative at the page top will lead you to look for the thing on the "all things" tab.
Here, you will discover a rundown of classes showing at the top. Under this rundown is a determination sheet for the things for every one of the classifications. It will give an incredible encounter to the clients to shop.
This menu is valuable as then your clients can access with Envato Elements from any page.
Channel is another significant and viable method of getting an ideal advanced resource.
As you select a class, you will discover a rundown of channels showing towards the left half of the page. This rundown permits you to improve your pursuit by showing limited things of the chose and explicit sub-classification with the most applicable labels.
For example, the things can be limited in the event that you select Adobe Photoshop.
Usefulness to great hunt is likewise significant for a computerized library which includes a large number of things.
On the off chance that the correct watchwords are utilized, the pursuit bar may help track down the most applicable things in a matter of few moments. By the by, you can additionally refine your inquiry by every now and again choosing the classes and narrowing down the watchwords with channels.
The primary portrayal region consistently follows the things which are identified with the things showed under the connected things.
Group Buy Seo Tools India- Best Seo Group Buy Service 2021
Group Buy Seo Tools India a lot of web sites are available on the web , which offers Group Buy SEO tools India, but the sole selected provide the simplest service. Many websites go down, and you face a lousy experience. So here are some selected best SEO tools which supply a budget ‘group buy SEO tools, ‘ which provides you the simplest service during this industry.
1 note
·
View note
Text
The 16 best tools to easily create social media videos
Magisto shows what is already possible with AI today. You can add your own logo and text here. link It would be great if, instead of subscription, you could also buy individual films of different quality and Execution could pay.
Video tools to find stock footage -
The company that sold you Filmstock also comes with an easy-to-use, web-based video editor - Filmora. Similar to Envato Elements, Filmstock contains stock footage videos, animations, templates for After Effects and audio files. Here are a few great libraries that offer thousands of high quality stock materials with just one click.
Even more functions on the web h2> For a free program, Shotcut offers users a proud range of options for editing videos and editing sound and images. In addition, plugins for creating effects can be installed free of charge. Do you want to create animated videos faster and easier? Magisto uses artificial intelligence to analyze your video material, select the most interesting places and automatically edit them so that they become videos that you like to share. And it doesn't matter whether you use a web browser or a smartphone. Image via Magisto At Magisto you can upload video material, choose a style or mood and the tool does the rest. You get a high quality video without having to do a lot yourself. The whole thing is not in vain, but with prices of 8 - 34 euros per month (with annual payment) the financial expenditure is limited. Animated videos are ideal for presenting products and services and for explaining complicated things simply and clearly. Animaker makes creating animated videos easy.
For more information on our cookies, please click here.
Animated videos are ideal for presenting products and services and for explaining complicated issues in a simple and clear manner.
Sign up for the newsletter now and get the latest news about social media management.
Most companies buy this app suite and Premiere combines the strengths of everyone.
Never, no matter how good the result.
VidIQ is free for one channel and includes tracking for three competitors and basic video analysis. The paid services Pro ($ 7.50 / month) and Boost ($ 39 / month) offer more channels and additional functions. You can even use your own music collection. The video editing app Magisto is one of the applications currently advertised by Apple in the App Store. Google Analytics is an indispensable tool to monitor the success of your website. That is why it is important to research and validate your topics. Videos are playing an increasingly important role in social media. This also increases the importance of tools for cutting, editing and publishing clips in social media marketing. But which video tool is right for your own needs? After all, the spectrum ranges from the intuitive starter tool to the professional editing program and from the mobile app to cloud software to desktop programs for downloading. And the costs are also very different. Prepare for great emails in your inbox. This is just the tip of the iceberg in terms of video tools, but it's a good choice and gives you an overview of the sources that are out there.

It works similar to search engine optimization (SEO) for websites, only for YouTube videos. Users receive specific suggestions for optimizing their videos, can implement them directly in the software and monitor the results.
1 note
·
View note
Photo
ADning Advertising: Create Adverts For Your WordPress Site
Advertising is one of the main ways that websites generate revenue.
Perhaps you created a blog specifically to drive people towards your website’s Store page, and want to give visitors that extra little push? Maybe you run several websites, and want to promote your biggest-earner across your entire portfolio? Or maybe you don’t have anything to promote, but wouldn’t mind generating some cash by selling advertising space to third parties?
Despite the money-making potential, WordPress doesn’t support advertisements out-of-the-box. Most WordPress themes don’t even have space where you can display ads!
Best WordPress Advertising Plugins of 2019
Creating a successful advertising campaign is a must in today's crowded eCommerce world. Once you have your website and products in place, you must have the...
Daniel Strongin
04 Apr 2019
WordPress Plugins
10 Best WordPress Slider & Carousel Plugins of 2019
Whether you want to show off customer testimonials, your latest blog posts, your best images, or just celebrate the members of your team, there is a...
Nona Blackman
19 Mar 2019
WordPress
8 Best WordPress Booking and Reservation Plugins
In the digital age, users are online 24/7. Everyone prefers to check availability and make appointments, reservations, or bookings online. They want to do...
Lorca Lokassa Sa
12 Apr 2019
WordPress
Best Affiliate WooCommerce Plugins Compared
WooCommerce is an excellent platform for selling digital and physical products. Adding an affiliate system is an excellent way to increase your reach around...
Lorca Lokassa Sa
26 Jun 2019
WordPress
If you dream of turning your website into an additional source of revenue, then you have two options: dig into your theme’s files and modify its code to support adverts,or let a plugin do all the hard work for you!
In this article, I’ll show you how to create a range of adverts and display them across your website, using the popular ADning Advertising plugin. To help ensure your ads generate as many click-throughs as possible, we’ll be using ADning to display customized ads based on factors such as the visitor’s geographical location, and the time of day. Finally, I’ll show how to monetize your website even if you don’t have anything to promote, by selling advertising space to third parties.
Getting Started With the ADning Advertising Plugin
The first step, is installing the ADning Advertising plugin:
If you haven’t already registered, create your free Envato Market account.
Head over to the CodeCanyon website, click the little Sign In button in the upper-right corner, and then enter your Envato account details.
Once you’re logged into your account, head over to the ADning Advertising listing, click Buy Now and then follow the onscreen instructions to complete your purchase.
When prompted, download the ADning plugin.
Unzip the downloaded file; the subsequent folder should contain several folders and files, including angwp.zip, which you’ll need to upload to WordPress.
Adding a Third Party Plugin to WordPress
Once you’ve downloaded the ADning Advertising plugin, you’ll need to upload it to your WordPress account:
Log into WordPress, if you haven’t already.
Select Plugins from WordPress’ left-hand menu, followed by Add New.
Select the Upload Plugin button.
Now scroll to the If you have a plugin in a .zip format section, and select Choose file.
Select your angwp.zip file and click Install Now.
ADning will now be uploaded to your WordPress account. After a few moments, a new ADning item should appear in WordPress’ left-hand menu.
Activating the ADning Advertising Plugin
Next, you’ll need to active ADning, by entering your license key:
Head over to the CodeCanyon website and log into your account.
Select your username in the upper-right corner, followed by Downloads.
Find the ADning Advertising item, and select its accompanying Download button.
Choose License certificate & purchase code from the dropdown menu.
Once your license has downloaded, open it and find your Item purchase code. You'll need to copy this information then, in your WordPress account, select ADning from the left-hand menu. Select the Product License tab and paste your purchase code into the Add your license key here field.
Finally, click Activate ADning. After a few moments, you should see a Plugin activated successfully message. Your plugin is now ready to use!
Placing Adverts on Your Website
In this section, we’ll be placing four different styles of adverts on our WordPress website:
A banner ad that’ll run along the top of the page.
An embedded banner that’ll be displayed inside the page’s content.
A popup ad.
An “injected” advert that’ll be displayed on a line specified by you.
To create these ads, I’ll be using a graphic that promotes Envato Elements, but you can use any graphic you want.
Creating Your First ADning Ad
To display an advert, we need to create:
A banner, which is essentially the graphic that we want to use.
A campaign, which sets a start and an end date for your advert.
An Ad Zone, which defines where your banner will appear on the page, and the kind of advert that’ll be displayed to the visitor, such as a popup or a vertical banner.
We then need to link these three components together, and insert the finished advert into our website using either shortcode or a widget.
While this may seem like a lot of setup just to display a single ad, you can re-use these elements multiple times, for example you may decide to run multiple adverts as part of the same campaign, or use the same Ad Zone for all your banners.
Turn Any Image Into a Banner
Let’s start by creating a banner, using a graphic of your choice. Note that depending on the dimensions of your chosen graphic, you may need to play around with the common advertisement settings in order to create an advert that looks good and functions correctly.
Select Banner from WordPress’ left-hand menu and click Add New Banner.
Under Title give this banner a descriptive name; I’m using Elements banner.
In Add a banner link, enter the URL that your banner should link to; I’m using the Elements website.
Now open Target and specify the window where the destination URL should load, for example in a new tab or inside the current advertising frame. If you’re linking to an external website, then you’ll typically load the URL in a new tab or window, because you don't want to encourage visitors to navigate away from your website.
Find the Select one of the common banner sizes section and open its accompanying dropdown. Here, you’ll find some of the most commonly used advertising styles and sizes, such as vertical banner, pop under and full banner. Select the banner style and sizing that best represents the advertisement you want to create, or select Custom and then specify an exact size in pixels. Note that this step may require some trial and error!
Select Click here or Drag file to upload and then choose the graphic that you want to use.
Find the Auto Positioning section and specify where your banner should appear on the page. Since I want to display this banner along the top of the screen, I’m selecting Above content.
Scroll to Alignment and then choose from left, right or center alignment; I’m using Center.
When you’re happy with the information you’ve entered, select Save Banner.
Create Your First Advertising Campaign
Next, we need to create a campaign. This campaign will dictate the date and time when the advertisement will first appear on your website, and when it’ll disappear:
Select Campaigns from WordPress’ left-hand menu, then select Add New Campaign.
Give this campaign a descriptive Title; I’m using Elements campaign.
In the Start Date section, enter the month, day, year and time when this campaign should start. To make it easier to test your advert, you should choose either the current date and time, or backdate the advert so it’ll appear on your website immediately.
Click to expand the End date section, and then choose the date and time when this campaign should end, at which point the associated advert(s) will disappear from your website.
When you’re happy with your changes, select Save Campaign.
Make Space for Your Advert: Creating an AD Zone
Finally, we need to create an AD Zone, which is the region of the page where we’ll display our advert. Once we’ve created an AD Zone, you can re-use that zone for subsequent adverts:
Select AD Zones from WordPress’ left-hand menu and click Add New AD Zone.
Give the AD Zone a descriptive Title; I’m using Elements AD Zone.
Find the Select one of the common banner sizes section, and open its accompanying dropdown. Here, you’ll find some common advertisement sizes, such as vertical banner, pop under and full banner. Select the option that best represents the banner you’re placing within this AD Zone. Alternatively, you can select Custom and then specify the exact dimensions.
Now, open the Linked banners dropdown and select the banner we created in the previous step.
Open the Campaign dropdown and select the campaign.
Scroll to the Alignment section and choose how you want to position this AD Zone onscreen; I’m selecting Center.
Once you’re happy with the information you’ve entered, select Save AD Zone.
Connect Your Components
Now we've created all three components, we just need to link our banner to our campaign and AD Zone:
Select Banners from WordPress’ left-hand menu.
Find the banner that you previously created and click its accompanying Edit link.
Open the Campaigns dropdown and select your campaign.
Open Adzones and select the AD Zone you created in the previous step.
Select Save banner.
Displaying Your Advert
Now we have all three of our components, we’re ready to place the advert on our website using either an ADning widget or shortcode. Let’s explore both options:
1. Use a Widget
One option, is to place a widget on your website and then assign it an appropriate AD Zone and banner:
In WordPress’ left-hand menu, select Appearance > Widgets.
Click to expand the ADning ADS section and select Add widget.
Open the Select a banner dropdown and choose the banner that you want to display.
Open Select an Adzone and then select the AD Zone that we created earlier.
Click Save.
Now, load any WordPress page or post, and your banner should appear at the top of the screen.
Give this banner a click to make sure it links through to your chosen URL in either a new tab, window or within the current advertisement frame, depending on how you’ve configured your banner.
Note that at this point you may need to spend some time tweaking your banner style and sizing, depending on your original graphic, how you chose to position that graphic, and your website’s theme.
2. Copy and Paste the Shortcode
Alternatively, you can display the finished advert using shortcode. I'll use a shortcode to display the advert in a widget.
Select AD Zones from WordPress’ left-hand menu. Then find your AD Zone and click its accompanying Edit link.
Scroll to the Export section; this should contain a block of shortcode. Copy all of this code.
In WordPress’ left-hand menu, select Appearance > Widgets.
Click to expand the ADning ADS section.
Select Add widget.
Paste your shortcode into the Or add the adzone shortcode section.
When you're done, click Save.
Once again, load any page or post that makes up your website, and your banner should appear onscreen.
What Other Ad Styles Can I Use?
ADning Advertising supports a wide range of different advertising styles. In this section we’ll be exploring a few simple ways that you can modify our existing banner to create a completely different style of ad.
Creating Embedded Ads
Let’s start by moving our banner from the top of the page and embedding it within our webpage’s content.
Every time you create an embedded ad, you have the option to repeat this advertisement at regular intervals, for example once every five paragraphs.
If your website contains large amounts of text, then an occasional embedded advert can be more appealing than a solid wall of words—just don’t get carried away! Remember that some visitors may be viewing your website on the smaller screen of a smartphone or tablet, where each advert could potentially take up their entire screen, forcing them to scroll to find the content they’re actually interested in.
To turn our banner into an embedded ad:
Select ADning > Banners from WordPress’ left-hand menu.
Find the banner that you want to edit and select its accompanying Edit link.
Scroll to the Auto Positioning section and select the Inside content thumbnail, which will give you access to a new Custom Placement Settings section.
Specify where your advert should appear, using the After x paragraphs field.
Optionally, you can turn this advert into a repeating advert by clicking the Repeat slider so that it changes from No to Yes. If you select Yes, then your advert will repeat at the interval defined in the After x paragraphs field.
When you’re happy with your changes, click Save Banner.
Custom Classnames: Control Exactly Where You Ad Appears
Would you like more control over where each advert appears? Perhaps you want to position an advert next to a relevant paragraph, or maybe pick-and-choose which advert appears on each webpage?
You can control the page, paragraph, and even the line where your advert appears, by creating one or more custom classnames, and then assigning each classname to an advert. Then, you just need to insert the correct custom classname into your website’s HTML, and the associated advert will appear in that exact spot.
Using the Widget Options Plugin
You can create custom classnames quickly and easily using a dedicated plugin; I’m opting to use the free Widget Options plugin.
You can install this plugin from the WordPress plugin directory. To setup it up, just select Plugins > Add New from WordPress’ left-hand menu.
Search for Widget Options.
When the correct plugin appears, select Install Now.
Once the plugin has been installed, click Activate.
Creating Custom Classnames
Next, we need to create a custom classname. Depending on your setup, you might decide to create a single classname for a specific advert, a different classname for each advert, or a single classname that you’ll use across all of your adverts.
To help keep things simple, we’ll be creating a single classname:
In WordPress’ left-hand menu, select Settings > Widget Options.
Find the Classes & ID section and select Configure settings.
Select the Enable ID Field checkbox.
You can now use the Predefined Classes field to create a list of all the custom classnames that you want to use. Type each classname into the field and then press the + button.
When you’re happy with the information you’ve entered, click Save Settings.
Next, select Appearance > Widgets from WordPress’ left-hand menu.
Click to expand the Adning ADS section.
Select the little cog icon, which opens the Settings tab.
Select the Class & ID tab.
The Class & ID tab should contain a list of all the custom classnames that you can use with ADning; select the classname that you just created and click Save.
Assigning Custom Classnames
Next, we need to assign this custom classname to our advert:
Select ADning > Banners from WordPress’ left-hand menu.
Find our advert, and then select its accompanying Edit link.
Scroll to the Default AD placements section and select Inject before/after class.
In the Custom Placement Settings section, open the Where dropdown and specify whether your advert should be placed Before or After the point where you insert the classname into your HTML. Note that it may not be immediately clear which option will work best for your particular website, but you can always return to this page and modify the Before/After setting later.
In the Element field, type the classname that you want to associate with this advertisement and when you're done you can click Save Banner.
Editing Your Website's HTML
Now, we can place this advert anywhere on our website, by inserting the custom classname into our HTML:
Find the page or post where you want to display your advert, and open that item for editing.
Click to select the block where you want to place your ad; a little floating toolbar should appear.
Select the three-dotted icon, followed by Edit as HTML.
You can now add your custom classname to any of the page or post’s HTML tags. For example, imagine I’d created an elementsAd custom class and wanted to place my advert before the following block:
<p>Lorem ipsum dolor sit amet, consectetur adipiscing elit. Duis id tincidunt turpis. Pellentesque neque magna, egestas quis orci a, luctus pretium tellus. Donec egestas enim massa, sed pellentesque massa tempus in.</p>
In this scenario, I’d add class="elementsAd" to the opening <p> tag:
<p class="elementsAd">Lorem ipsum dolor sit amet, consectetur adipiscing elit. Duis id tincidunt turpis. Pellentesque neque magna, egestas quis orci a, luctus pretium tellus. Donec egestas enim massa, sed pellentesque massa tempus in.</p>
Insert the custom classname in your chosen location, then save your changes and navigate to the page or post in question. Your advert should have appeared, at the point where you inserted the custom classname.
Create a Popup Ad
ADning Advertising also supports popup advertisements, which by default appear every time a visitor navigates to a new page.
To convert our banner ad into a popup:
Select ADning > Banners from WordPress’ left-hand menu.
Find the banner that you want to modify and click its accompanying Edit link.
Scroll to the Auto positioning section, and then select Popup/Sticky.
In the Custom Placement Settings section, use the thumbnails to select where this popup should appear onscreen; I’m using Bottom/Center.
Click Save Banner.
Now, whenever you navigate to a new webpage, a popup advertisement will appear.
Immediately, this poses a problem: no-one wants to be confronted by a popup every single time they navigate to a new page! Conveniently, this leads us onto our next topic.
Control Where Your Ads Appear
If a visitor encounters the exact same ad on every single post and page across your site, then in the best case scenario that advert is quickly going to become invisible to them.
In the worst case scenario, the visitor will get so frustrated that they’ll navigate away from your website, especially if you’re using intrusive adverts such as popups.
Often, you’ll want to set some restrictions about where each advert can appear, and ADning gives you several options:
Select ADning > Banners from WordPress’ left-hand menu.
Find the banner ad that you want to edit, and then click its accompanying Edit link.
From here, you can set the following restrictions.
Ban This Advert From Your Home Page
Your home page is often a visitor’s first impression of your website, and a page full of adverts isn’t exactly a great first impression!
To prevent this advert from appearing on your home page, find the Home page section and click its accompanying Show/Hide button, so that it displays Hide.
Don’t Display This Ad on Smartphones or Tablets
The smaller screen of a smartphone or tablet can make a webpage feel much more ad-heavy than it actually is. Since mobile users typically have a much lower tolerance for ads, you may want to reduce the number of adverts that appear on mobile devices.
You can block this advert from smartphones or tablets, or both, using the Show/Hide toggles in the Device Filters section.
For example, if you wanted to prevent this advert from appearing on smartphones, then you’d find the Mobile section and toggle its accompanying button to read Hide.
Block This Ad From Specific Pages and Posts
You may want to ensure that a few webpages remain completely ad-free, for example if there’s a page where an ad would be inappropriate, or you simply want to give your visitors a break!
You can use ADning to name specific pages and posts where this advert should never appear:
Scroll to the For page section.
Click the Show/Hide button so that it reads Hide.
In the accompanying field, start typing the name of the page or post in question, and then select it from the dropdown menu when it appears.
Display This Ad on the Named Page Only
If you only want to display this advert on a small number of pages and posts, then it may be easier to simply name the webpages where this advert should appear:
In the For page section, click the Show/Hide button so that it reads Show.
Enter the name of the page or post where this advert should appear, and then select it from the dropdown menu.
You can repeat the final step, until you’ve named all the webpages where this ad should make an appearance.
Drive User Engagement With Customized Ads
You can encourage visitors to interact with your ads by delivering customized content. ADning gives you the option to tailor your ads based on the visitor’s geographical location, and the date and time when they’re viewing the advert.
Filter Content by Country
There’s lots of reasons why you might display different adverts, depending on the visitor’s location.
You may be able to encourage visitors to engage with your ads, by targeting their location, for example displaying ads that relate to national holidays such as Canada Day, Chinese New Year or St. Patrick’s Day. Since your website has the potential to reach a global audience, you should also consider that some of your ads may be deemed inappropriate, or even offensive in certain parts of the world.
To display ads based on the visitor’s location:
Select ADning > Banners from WordPress’ left-hand menu.
Find the banner that you want to edit, and then click its accompanying Edit link.
Scroll to the Country filters section.
From here, you can block this advert for specific countries:
Press the Show/Hide button so that it changes to Hide.
In the accompanying text field, enter the country, or countries where your advert shouldn’t be displayed.
Alternatively, if this ad is only relevant for a small number of countries, then it may be easier to simply name these locations:
Toggle the Show/Hide button so that it reads Show.
Specify every country where you want to display this ad.
Display Ads Based on Date and Time
Your visitors may be more likely to interact with an advert at a certain date or time. For example, you may have more success displaying entertainment-focused ads on a Friday afternoon, and job adverts on a Monday morning.
If you’re an organized person, then you could even schedule ads to go live months in advance, for example creating a campaign that’ll kick in at midnight on Black Friday.
To control the date and time when an advert is visible on your website, you’ll need to edit the campaign associated with that ad:
Select ADning > Campaigns from WordPress’ left-hand menu.
Find the campaign that you want to edit, and then click its accompanying Edit button.
Click to expand the Advanced date options.
In this expanded panel, you’ll have access to a range of different date and time settings, including the ability to display this advert on a specific day of the week, during the weekend only, or at a certain time.
How to Sell Ad Space to Third Parties
Just because you don’t have anything to advertise, doesn’t mean you can’t generate money from advertisements! Once you’ve created some advertising space on your website, you can use ADning to sell this space to third parties, who will then run their ads on your website.
If you’ve already setup the popular WooCommerce eCommerce plugin, then you can sell this space and receive payments via your existing WooCommerce checkout.
To take advantage of ADning’s WooCommerce integration, you’ll need to setup the ADning WooCommerce plugin, which is included as part of your ADning license.
To setup ADning WooCommerce, select ADning from WordPress’ left-hand menu.
Select the Add-ons tab. Adning WooCommerce will be listed under Included Add-Ons. Give this plugin a click, and it should be installed automatically.
Now select ADning > General Settings from WordPress’ left-hand menu and choose the Sell tab.
Click to expand the WooCommerce Settings section. Find the Create Adning Ads WooCommerce Product and give it a click. To start accepting payments via your WooCommerce checkout, select the Activate toggle so that it turns from No to Yes.
Click Save changes.
You should now be able to setup and manage all of your third party ads, via ADning’s Frontend AD Manager:
Navigate to the Sell screen, if you haven’t already (ADning > General Settings > Sell.)
Click to expand the Frontend AD Manager Settings section.
Click the Frontend AD Manager link, and the AD Manager should open in a new tab, ready for you to configure your third party ads.
Conclusion
In this article, I showed you how to setup and use the popular ADning Advertising plugin. If you’ve been following along, then you’ll have created a selection of ads, and then customized these ads in several different ways, including displaying different ads based on the visitor’s location, and the time of day. Finally, I showed how you to start selling advertising space to third parties, using the ADning WooCommerce plugin and AD Manager.
You can learn more about creating, displaying and managing WordPress ads, over at the official ADning website, or by taking a look at the plugin’s documentation.
WordPress Plugins
Best WordPress Advertising Plugins of 2019
Daniel Strongin
WordPress
10 Best WordPress Slider & Carousel Plugins of 2019
Nona Blackman
WordPress
8 Best WordPress Booking and Reservation Plugins
Lorca Lokassa Sa
by Jessica Thornsby via Envato Tuts+ Code https://ift.tt/2WFZWZr
1 note
·
View note
Text
Envato Elements: Unlimited Access to High-Quality Digital Assets
In the fast-paced world of digital content creation, having access to a vast array of high-quality resources can make all the difference. This is where Envato Elements comes into play. Envato Elements is a subscription-based service that offers a treasure trove of digital assets, providing designers, developers, and content creators with an abundance of tools to enhance their projects. Let's explore the benefits that make Envato Elements a valuable resource for creative endeavors.
Benefits
- Unlimited Downloads: With an Envato Elements subscription, you gain unlimited access to a vast and diverse library of digital assets. From stunning stock photos and eye-catching graphics to website themes, fonts, audio files, and video templates, the possibilities are virtually endless. Whether you're working on a single project or multiple endeavors, you can download as many items as you need without any restrictions. - Commercial Use: One of the most significant advantages of Envato Elements is the ability to use the downloaded assets for commercial purposes. This means you can confidently incorporate the resources into your client projects, marketing materials, or any other endeavor that involves generating revenue. Envato Elements saves you the hassle of navigating complex licensing agreements, granting you the freedom to focus on unleashing your creativity. - Easy to Use: Envato Elements is designed with user-friendliness in mind. Its intuitive interface allows you to browse and search for the resources you need effortlessly. The assets are well-organized into categories and subcategories, making it easy to discover relevant items for your projects. Additionally, Envato Elements provides clear licensing information and comprehensive documentation, ensuring a smooth and hassle-free experience for users. - Regular Updates: Envato Elements is continually expanding its library, regularly adding fresh and exciting content to keep up with the ever-evolving creative landscape. This ensures that you have access to the latest trends, styles, and designs, enabling you to stay ahead of the curve and create visually captivating and engaging content.
Do you wanna be creative using Envato Elements?
Ready to supercharge your creative projects? Join the vibrant community of designers, developers, and content creators who benefit from Envato Elements. Sign up today through our affiliate link and unlock a world of unlimited downloads, commercial-use resources, and user-friendly features. With Envato Elements, you'll have the tools you need to bring your vision to life and captivate your audience. In conclusion, Envato Elements offers an exceptional value proposition for creative professionals seeking convenience, flexibility, and quality in their work. By providing unlimited downloads, commercial-use rights, ease of use, and regular content updates, Envato Elements empowers users to elevate their projects to new heights. Don't miss out on the benefits that Envato Elements has to offer—start your subscription today through our affiliate link here and unlock a world of creative possibilities. With Envato Elements by your side, your creative journey will be enriched, inspiring you to reach new levels of success. Read the full article
#audiofiles#commercialuse#creativeprojects#creativeprojects.#designresources#digitalassets#EnvatoElements#fonts#graphics#stockphotos#subscription-basedservice#templates#unlimiteddownloads#user-friendly#videotemplates#videotemplates.#websitethemes
0 notes
Text
Printable newlsetter templates for ms word

PRINTABLE NEWLSETTER TEMPLATES FOR MS WORD SOFTWARE
PRINTABLE NEWLSETTER TEMPLATES FOR MS WORD LICENSE
PRINTABLE NEWLSETTER TEMPLATES FOR MS WORD PROFESSIONAL
5 Best Premium Microsoft Word Newsletter Templates from GraphicRiverīut maybe you're not necessarily looking for a collection of downloads. It's completely editable in Microsoft Word. It's a great fit for newsletters where you've got a lot of content to share. It highlights key parts of this issue too. This newsletter design has a lot of emphasis on photography. Microsoft Word Newsletter Template Business This newsletter layout design has so many possibilities. How about a newsletter cover with a key color? Maybe you'd prefer red or green-it's easy to make those changes. Add your content, make adjustments, and make this design your own. Download it today and easily make edits in Microsoft Word. This A4 sized template is a perfect fit for a wide variety of projects.
PRINTABLE NEWLSETTER TEMPLATES FOR MS WORD SOFTWARE
What kind of aesthetic would be best for your newsletter design project? This is another template that's got files for more than one software platform: Microsoft Word, Adobe InDesign, and Adobe Photoshop too. This newsletter design takes an entirely different approach. Download it today and easily edit it in Microsoft Word or Adobe InDesign. This stylish newsletter template has a traditional, newspaper feel. Sit back and enjoy the design inspiration or consider picking one up today: 1.
PRINTABLE NEWLSETTER TEMPLATES FOR MS WORD PROFESSIONAL
Let's look at some of the premium professional newsletter format in Word templates, over on Envato Elements. 5 Best Premium Microsoft Word Newsletter Templates from Envato Elements Download a premium professional Microsoft Word newsletter template today. Not only that, Envato Elements keeps your downloads sorted for you, by project, so you can keep your files organized. It's as simple as searching for your looking for and clicking download. There's one low fee for unlimited downloads. So, download as much content as you like! Find your next premium Microsoft Word newsletter and bulletin template design on Envato Elements. Don't waste time worrying about extra costs or licenses. If you're looking for a premium option with a lot of bang for your buck, check out Envato Elements.Įlements has one, low fee, and then you get access to a huge collection of assets-Microsoft Word documents, photos, graphics, fonts, and much more! And yes, that's all included with that one fee.įreely download and test out as many newsletter and bulletin templates as you like. There are so many premium Microsoft Word newsletter templates on Envato Elements to check out.
PRINTABLE NEWLSETTER TEMPLATES FOR MS WORD LICENSE
When you go premium the searches tend to be faster, and the license tends to cover most usage. You need to find the right newsletter template for Word and in make sure it's got the right license for your project. Premium templates often offer extras that make them worth the price, such as help files, extended options, and higher quality.įinding the right free project can involve a lot of research. We all, of course, love freebies-free is arguably the perfect price. First, let's look at some inspiring, premium designs. We're also going to look at a list of awesome, free templates that you can download for Microsoft Word. Templates can often be repurposed, remixed, and reused for a host of projects. With the right template, you'll find a completed Microsoft Word letter template design to help showcase your content and a foundation to make advanced edits. Working with a premium professionally designed template can have some benefits. This professionally designed premium Microsoft Word newsletter template is available on Envato Elements.
0 notes
Text
Premiere rush templates

Premiere rush templates pro#
Premiere rush templates software#
editing apps including Premiere Pro, Premiere Rush, Premiere Elements. Share Your Craft on the Envato Forumsįinally, if you put one of these Rush templates to use, please do let us know on the Envato forums. These motion graphics templates let you drop images or videos Flexible Motion. It was originally published on Novemand later updated by Maria Villanueva, a staff writer with Envato Tuts+. You can read more about how we select items at How We Pick Templates to Feature on Envato Tuts+.
Premiere rush templates software#
We looked at projects and considered all kinds of variables, including organization, complexity, experience required and overall difficulty, minimum hardware specifications, included versions and options, formats, resolution, file size, dependencies and required plug-ins (if any), language options, software versions supported, style, design, and cost. And g ive your brand's channel a boost with our comprehensive guide for video marketing content creators. Reshot has free photos, icons, and graphics. PlaceIt lets you make high quality motion graphics in your browser, no software needed. Keep learning about video with these free tutorials for Rush:Įnvato has lots of resources to try. This kit of Adobe Rush templates is perfect if you need minimal lower thirds. This pack gives you ultimate creative flexibility, especially for anyone more than one channel to promote Use the social media video template lower third titles or full-screen animations. Adobe Social Media Pack brings the logos of all your favorite social media platforms to your videos.
Premiere rush templates pro#
It's unobtrusive but stylish, informative without being dull. freeload Motion Graphics templates (.MOGRT), free Adobe Premiere Pro templates & presets from our AI-driven marketplace with over 3 million. Social Media Lower Third - All in One lets you overlay your social media presence on any video in just a few clicks.Text Messages Package MOGRT Templates includes text messages, vertical and horizontal photo messages, location messages, voice messages and more.Adobe Social Media Pack Toolkit has 56 animations, including adjustable in and out animations.Instagram Pack MOGRT Templates will give help build a uniform and professional look. Motion Graphics Templates for Rush inspirational stock assets Adobe Stock Motion Graphics Templates for Rush Transform your videos. Modern Instagram Story Templates is another great option with cool animations. Three Instagram packs: Urban Typo Instagram Story Templates is perfect if you're fan of kinetic typography.Here are a few more social video templates packs for Rush. With unlimited downloads from Envato Elements you can try as many templates as you want. More Social Media Video Templates on Envato Elements
0 notes
Text
Directshow filters for tridef 3d

Currently it's changed to a DirectShow Filter (.ax) to view all Your movies realtime with many effects.
dsve (originally named RePix 2005) was started to create an image & movie 3D (anaglyph) creator program.
Are you looking for a fun trick or a neat treasure hunt obstacle? What about secret message that can be read using the red-cyan anaglyph glasses.
Any of these will work to view the 3D effect, but for viewing full color anaglyphs, the Red/Cyan combination is best Anaglyph Filter Photo Effect by pixelbuddha_graphic on All you need is a Red filter over your left eye and a Blue, or Green, or Cyan filter over the right eye. Viewing an anaglyph 3D stereo image is easy. Example of a regular 2D photo without changes and stereoscopic 3D picture, made from this photo: On this site still. All other settings already installed by default. Select a picture on your computer or phone and then click OK button, wait a couple of seconds and download the result. Make a stereoscopic 3D picture from a normal photo online. only disadvantage is that you loose colors and it gets a bit yellow tint or. compared to a rift setup you only need a very light and cheap (often free) 3d glasses and have the full hd resultion of your monitor. With good anaglyph glasses (where the filter colors match good enough) the 3d depth effect in ED is quite good and enhances immersion. They have to be worn the way that your left eye match the red lens, and your right eye behind the blue one
ConvertImage is the easiest site to create a 3D stereo image directly online, without Photoshop ® nor Gimp, nothing! You can watch a stereoscopic image with a pair of two-tone glasses for sale all over the internet for less than $2.
Please be patient images may take up to 10 seconds to process.

The images must be of the same format and be the same size, they musn't be more than 1024 pixels in height or width. One to be viewed by the left eye and one to be viewed by the right eye.
To create an anaglyph (3D image to be viewed with red and cyan glasses) upload two images.
It uses a depth map with Photoshop's Displace filter to shift the second image out of place and thus creates the 3D effect. This technique requires additional work in Photoshop, but it allows for more control over the final effect.
It is still possible to create Anaglyphs with just one image.
It allows you to watch (with 3d glasses like the blue/red type) non 3d type videos in 3d

Using 3d anaglyph directshow filter with kmplayer Hi, Here is a 3d ( anaglyph) directshow filter which can be used in kmplayer with almost all video sources like local video files, most video streams, vcd, dvd, and most tv tuner cards.
Extended Licence Included: for personal & commercial projects Professional Support It only takes one glitch effect to set the atmosphere of a techno party in your current viewed project! How. In: Effects Pack Add To Cart $5($7) Reg Price: $7 Deal Price: $5 Save: 29%. Try the latest version of Chrome, Firefox, Edge or Safari Subscribe and Download now! Our site is great except that we don't support your browser. Subscribe to Envato Elements for unlimited Add-ons downloads for a single monthly fee.
Download Anaglyph Filter Photo Effect Add-ons by pixelbuddha_graphic.
When viewed through the color-coded anaglyph glasses, each of the two images reaches the eye it's intended for, revealing an.

Anaglyph 3D is the stereoscopic 3D effect achieved by means of encoding each eye's image using filters of different (usually chromatically opposite) colors, typically red and cyan.Anaglyph 3D images contain two differently filtered colored images, one for each eye.
Home Anaglyph filter Anaglyph 3D - Wikipedi
0 notes