#Fix WordPress Admin Dashboard
Explore tagged Tumblr posts
Visit Tumblr Blog
Explore Tumblr blogs with no restrictions, modern design and the best experience.
Last Seen Tumblr Blogs


Fun Fact
Hackers stole 65M passwords from Tumblr in 2013.
Text
How to Protect Your WordPress Site from Malware or Hackers?
WordPress is used by millions of websites for blogs, businesses, and online stores. However, because it’s so popular, it’s often a target for hackers and malware. If you have a WordPress site, it’s important to take steps to keep it secure. Here’s a simple guide to help you protect your site from hackers and malware.
How to Protect WordPress Site from Malware or Hackers?
Follow this step list given below to protect WordPress site from malware or hackers
1. Always Keep WordPress Updated
WordPress regularly releases updates to fix bugs and improve security. Hackers often look for websites running old versions of WordPress or outdated plugins, so keeping everything updated helps keep them out.
How to Update:
Check for updates in your WordPress dashboard regularly.
Go to the Dashboard > Updates section and install any available updates for WordPress core, themes, or plugins.
By staying updated, you’re less likely to have security holes in your site that hackers can use.
2. Use Strong Passwords and Change Them Often
Hackers can easily guess weak passwords like "123456" or "admin." To keep your site safe, use strong, unique passwords and change them every few months.
Tips for Strong Passwords:
Use a mix of uppercase and lowercase letters, numbers, and symbols.
Don’t use simple information like your name or "admin."
Consider using a password manager to create and store complex passwords securely.
Strong passwords are one of the simplest ways to add security to your website.
3. Limit Login Attempts
Hackers often try to break into websites by guessing the login password over and over. You can protect your site by limiting the number of login attempts a person (or bot) can make.
How to Limit Login Attempts:
Use plugins like Limit Login Attempts Reloaded or WP Limit Login Attempts.
These plugins lock out users after a certain number of failed login attempts.
This makes it much harder for hackers to keep guessing passwords.
4. Enable Two-Factor Authentication (2FA)
Two-factor authentication adds another layer of security. In addition to entering your password, you’ll also need to input a code sent to your phone or email. Even if someone knows your password, they won’t be able to log in without this extra code.
How to Set Up 2FA:
Install a plugin like Google Authenticator or Two-Factor.
Set it up by scanning a QR code and linking your account to an app like Google Authenticator or Authy.
This ensures that only you can access your site, even if someone steals your password.
5. Use a Security Plugin
A security plugin can protect your WordPress site from different types of attacks, like malware or brute force attempts. These plugins act as your site’s security guard, offering tools like firewalls and malware scanning.
Recommended Security Plugins:
Wordfence Security: Includes a firewall and real-time monitoring.
Sucuri Security: Provides malware removal and a website firewall.
iThemes Security: Offers brute force protection, backups, and two-factor authentication.
Using a security plugin adds strong layers of protection against hackers.
Also Read - What Is Domain Status? What does this mean, & Why should I know?
6. Back Up Your Website Regularly
Even with good security, things can sometimes go wrong. That’s why it’s important to back up your site regularly. If your site gets hacked, a backup will let you restore everything quickly without losing important data.
How to Back Up Your Website:
Use backup plugins like UpdraftPlus or BackupBuddy.
Store your backups in safe places like Google Drive, Dropbox, or a remote server.
Schedule backups daily or weekly, depending on how often you update your site.
Regular backups help ensure you won’t lose everything if something goes wrong.
7. Choose a Secure Hosting Provider
Your web hosting service plays an important role in your website’s security. Some hosts offer strong security features that help protect your site. Make sure to choose a hosting provider that values security.
What to Look for in a Hosting Provider:
Regular backups
Malware scanning and removal
Firewalls
SSL certificates
DDoS protection
Popular and secure WordPress hosting services include SiteGround, Bluehost, and WP Engine.
8. Use HTTPS and SSL Certificates
SSL (Secure Socket Layer) encrypts the data between your website and your visitors. This protects sensitive information, like passwords or credit card numbers. Websites with SSL certificates also have a secure URL that starts with "https://."
How to Install an SSL Certificate:
Most hosting providers offer free SSL certificates with Let’s Encrypt.
You can use plugins like Really Simple SSL to set it up quickly.
SSL certificates keep sensitive data safe and make your site more trustworthy.
9. Remove Unused Themes and Plugins
Unused plugins and themes can create security risks, especially if they aren’t updated. Even if they’re deactivated, they can still be a weak point. It’s best to delete any plugins or themes you don’t use.
How to Delete Unused Themes/Plugins:
Go to your Dashboard > Plugins or Appearance > Themes.
Deactivate and delete anything you no longer need.
This reduces the number of places where hackers might try to get in.
10. Monitor Your Site for Suspicious Activity
It’s important to keep an eye on your site for any unusual behavior. This could include sudden spikes in traffic, unknown files appearing on your server, or unauthorized users trying to log in.
How to Monitor Your Site:
Use a security plugin to track things like failed login attempts and changes to important files.
Regularly check your hosting account for unusual activity.
Review your website users to make sure no unauthorized accounts have been added.
By staying alert, you can catch potential threats before they do any serious damage.
Conclusion
Protecting your WordPress site doesn’t have to be difficult. By following these simple steps—keeping WordPress updated, using strong passwords, installing security plugins, and making regular backups—you can greatly reduce the risk of your site being hacked or infected with malware.
#OZOHosting#lowest price hosting in india#Cheap web hosting jaipur#cheap shared web hosting india#free web hosting india#affordable linux web hosting india
2 notes
·
View notes
Text
Enhance Your WordPress Dashboard with Admin Menu Search

Navigating through WordPress's extensive admin panel can be a tedious task, especially when managing multiple plugins and settings. This is where Admin Menu Search for WordPress proves to be a game-changer. It introduces a search bar within the admin panel, allowing you to easily find the settings or features you need in seconds. To understand the advantages of Admin Menu Search for WordPress, let’s dive into its functionality and how it improves the overall WordPress experience.
How do I search the admin panel in WordPress?
Many users ask, "How do I search the admin panel in WordPress?" Without a search function, finding a specific setting or plugin can take time. The Admin Menu Search plugin fixes this by providing a quick search bar that helps you locate any feature instantly, improving your productivity.
How to get admin menu in WordPress?
The WordPress admin menu can sometimes be cluttered, making it difficult to navigate. If you’re asking, "How to get admin menu in WordPress?," installing Admin Menu Search simplifies the process. It allows you to bypass the standard navigation and search for any menu item directly, ensuring a smoother workflow.
How do I find my WordPress admin?
Finding your WordPress admin dashboard is simple—just go to yoursite.com/wp-admin. However, once inside, it can be overwhelming. Wondering, "How do I find my WordPress admin?" The Admin Menu Search plugin makes navigating the admin dashboard much more efficient, giving you quick access to any section with a simple keyword search.
How important is an Admin Menu Search Plugin?
For website administrators, efficiency is crucial. "How important is an Admin Menu Search Plugin?" It’s highly important! It saves significant time, especially when managing a site with multiple plugins and settings. This tool enhances your admin experience by offering immediate access to everything you need.
How does Admin Menu Search work?
Curious about "How does Admin Menu Search work?" The plugin indexes all available options in your WordPress dashboard. When you type a keyword, it instantly shows relevant results, allowing you to navigate directly to the feature or setting you’re searching for.
How does an Admin Menu Search Plugin help a user?
An Admin Menu Search Plugin makes life easier for anyone managing a WordPress site. So, "How does an Admin Menu Search Plugin help a user?" It eliminates unnecessary scrolling and searching, saving you time and making your WordPress dashboard far more user-friendly.
Which Admin Menu Search Plugin is the Best for WordPress?
When considering, "Which Admin Menu Search Plugin is the best for WordPress?," Swisstoolkit is a standout option. It not only offers a powerful admin search feature but also includes performance optimizations and security tools, making it an all-around essential plugin.
Why would you use Swisstoolkit for WordPress?
If you’re seeking more than just a search function, "Why would you use Swisstoolkit for WordPress?" It offers a range of features, including admin menu search, performance boosts, and security enhancements, making it an indispensable plugin for WordPress users looking to streamline their workflow.
With Admin Menu Search, navigating your WordPress dashboard becomes effortless. You’ll save time, reduce frustration, and keep your focus on managing your site, rather than searching for settings.
#wordpress#wordpress theme#wordpress plugin#wordpress development#wordpress developers#plugin#developer
2 notes
·
View notes
Text
How Secure Is Your WordPress Website?
With over 40% of the web powered by WordPress, it’s no surprise that it's also a prime target for hackers and bots. While WordPress is a secure platform at its core, many websites become vulnerable due to poor practices, outdated plugins, or weak hosting setups. So, how secure is your WordPress website — really? Let’s dive into the key factors that affect WordPress security and how you can protect your site.
1. Are You Using Strong Login Credentials?
The easiest way for hackers to get in is through weak usernames and passwords. Avoid “admin” as a username and use a complex, unique password. Consider enabling two-factor authentication for an extra layer of protection.
2. Is Your WordPress Core Updated?
WordPress regularly releases updates that fix bugs and security vulnerabilities. If you're not updating your WordPress core, you're leaving the door open for attacks.
3. What About Plugins and Themes?
Outdated or poorly coded plugins are among the top reasons for WordPress site breaches. Always use plugins from trusted sources, update them regularly, and remove any that you’re not actively using.
4. Have You Installed a Security Plugin?
Tools like Wordfence, Sucuri, or iThemes Security can detect malware, block malicious IPs, and notify you of suspicious activity in real-time. These act as the first line of defense against threats.
5. Do You Have Regular Backups?
Backups won’t prevent attacks, but they can save your website in case one happens. Use plugins like UpdraftPlus or Jetpack Backup to schedule automated backups.
6. Is Your Hosting Provider Secure?
Not all hosting environments are equal. Choose a provider that offers SSL, firewall protection, malware scanning, and regular server updates.
7. Are You Using HTTPS?
If your website isn’t using an SSL certificate (HTTPS), both users and Google will flag it as untrustworthy. Most hosting providers now offer free SSL certificates — make sure yours is enabled.
8. File Permissions and Database Security
Set correct file permissions and secure your wp-config.php file. Also, regularly monitor your database and consider changing the default WordPress table prefix to make SQL injections harder.
9. Monitor User Activity
If multiple users access your dashboard, use a plugin to monitor and log activity. This helps you catch suspicious behavior before it becomes a serious issue.
10. Avoid Nulled Themes and Plugins
Tempted to download a premium plugin for free? Don’t. Nulled software often contains hidden malware that compromises your entire website.
Final Thoughts
Securing your WordPress website isn’t just about installing a few plugins — it’s about adopting a proactive, layered approach to safety. If you’re unsure whether your site is truly secure or need professional help hardening it, a WordPress Development Company in Udaipur can perform a full security audit and implement best practices tailored to your needs.
0 notes
Text
How to Update PHP in WordPress: A Complete Guide for a Faster, More Secure Site Updating PHP in WordPress may not sound like that newsworthy topic, but absolutely must be done. PHP is a language that runs your WordPress site: older versions can slow you down while keeping security vulnerabilities open and create incompatibilities with other plugins and themes. This guide will cover everything you need to consider when working on PHP in WordPress from start to finish in a safe and effective way.

What is PHP, and Why Should One Update It? Let's first look at some basics before moving to the steps:
PHP is a programming language through which WordPress is built. All those themes, plugins, and core files, basically, run on PHP.
By virtue of being newly released, PHP versions are better and are fast and supported.
Time and again, an outdated PHP leads to slow load times, errors on your site, and the like: security vulnerabilities. Updating PHP doesn't update your tangible WordPress content; it just upgrades the software that makes it all work more efficiently. Check Your Current PHP Version First thing first, make sure you identify which PHP version your site is running currently. How to check:
Through WordPress Dashboard: From WordPress, go to the admin panel, Tools > Site Health > Info, and under the Server section, you will see your PHP version.
Via Hosting Control Panel: Most hosting providers usually display their version of PHP directly in their dashboard (cPanel, Plesk, or other custom panels). Why Updating PHP Is Vital for Your WordPress Site Still wondering why you should care? Here is what updating PHP will do for you: Better Performance:
Newer versions of PHP, such as PHP 8.2 onwards, are considerably faster. What this means is fastidious speed in loading your pages, better SEO, and happier visitors. Improved Security: Each new release fixes security holes found in older versions. Therefore, if one is running an old version, he is basically leaving his site open to known exploits. Plugin and Theme Compatibility: Since many plugin and theme developers support only the newer versions of PHP, by not upgrading, you may find some features aren't working properly. Future-Proofing: In the best experience possible, WordPress recommends using the most recent PHP version supported by your hosting provider. Back Up Your Site Before doing anything, make sure to back up your website. Sometimes, updating PHP can cause incompatibility issues with older plugins or themes, so it is wise to have a full backup so you can restore your site just in case. How to Back Up:
Do a backup using a plugin like UpdraftPlus or Duplicator, for both your files and the database.
Or, check your host service for backup options-Most hosts offer daily backups you can restore from. Test PHP Compatibility You now need to check for compatibility between your current setup—plugins, theme, custom codes—and the newer PHP version. Tools for Testing:
PHP Compatibility Checker: Plugins capacity like "PHP Compatibility Checker" from WP Engine scan your site for all potential issues really going to arise prior to your update of php.
Staging Environment: If your host does provide a staging environment, give the site a try with the new PHP version in that environment. Update PHP Version via Hosting Panel
Now, the main event: updating PHP itself. How you do this update depends on your hosting provider, but most will follow a similar process. For cPanel Users:
Log in to your cPanel dashboard.
Look for "Select PHP Version" or "MultiPHP Manager".
Select a domain you want to update.
Choose the latest PHP version available (say, PHP 8.2).
Save or apply the change. For Managed WordPress Websites: Managed hosts such as Kinsta, WP Engine, SiteGround, or Bluehost typically offer a PHP update option with a single click in their hosting dashboard. Please, refer to your hosting documentation for more information. Test Your Website Thoroughly After completing a PHP update, go ahead and check your website thoroughly:
Frontend Pages: See that everything looks as intended and loads fine.
Admin Dashboard: Go through menus, publish a post, update plugins, etc., with the system, and watch out for any errors.
Contact forms, eCommerce pages, and more: Check if vital functions still work correctly. If anything appears wrong, do not worry! Most errors after updating PHP usually arise because of outdated plugins or themes. Fixing Common Problems Here are a few simple steps in case you find yourself with a problem: White Screen of Death/500 Error:
Revert from a backup, or downgrade your PHP from the hosting panel.
Find out which plugin/theme is causing the conflict. Plugin or Theme Issues:
Ensure all plugins and themes are up-to-date.
If issues remain, then replace outdated plugins with counterparts that are currently being maintained. Keywords for Smooth PHP Update Update Everything First: Before you go on upgrading from a version, it pays to have your WordPress core, themes, and plugins updated. Use Staging: One big reason to test in a staging environment is to root out anything that might break before you push the changes to production. Reach Out to Your Host: There are times when you might not want to upgrade PHP yourself; many hosting providers will assist you with this. Reasons to Keep Your PHP Updated: By now, you realize that upgrading PHP is not simply a tick-box action but rather an enormous improvement of performance and security. Let's do a brief recap:
Speed: These are important criteria involving loading time and should result in the increasing of SEO ranking and user experience.
Security: Known security disclosures are patched so your site remains secure.
Compatibility: Ensures that your plugins and themes, If any, keep functioning well.
Peace of Mind: Having an up-to-date PHP version guarantees that your site is fundamentally sound. Take Charge of Your Site's Health! Upgrading PHP in WordPress is one of those things that might sound overly intimidating for some but is really one of the most simple changes with weighty impacts on the security and performance of your website. Ideally, performing compatibility testing on the codebase of your website, backing up the website, testing it, and updating through the hosting control panel are setting the website up for success in the long run.

This really is the ideal time. Back up the website, do the compatibility testing, and update our PHP. Would you ever get stuck or are unsure, please ask for support from the hosting provider support team! Ready to take your website to the next level? Partner with a trusted Digital Marketing Company in Chandigarh to boost your WordPress site’s reach and drive real results!
0 notes
Text
How To Fix the 500 Internal Server Error in WordPress (Full Guide)
Introduction
If you own or manage a WordPress website, you might have faced the dreaded 500 Internal Server Error at least once. This error is frustrating because it stops your website from loading, and it often does not tell you exactly what went wrong. You might just see a blank white page or a simple message like:
"500 Internal Server Error"
or
"The server encountered an unexpected condition that prevented it from fulfilling the request."
This error means something on your website’s server is broken, but it doesn’t say what. The good news is, this error is very common and usually easy to fix if you follow the right steps.
This guide will explain everything in simple language and help you fix this error step-by-step — whether you are new to WordPress or an experienced user. Let’s get started!
What Is the 500 Internal Server Error?
The 500 Internal Server Error is a generic server error message. It happens when your web server can’t complete your website’s request because something is wrong on the server or with your website files.
What does this error look like?
A blank white screen (sometimes called the “White Screen of Death”)
A message on the page that says "500 Internal Server Error"
A message that says “HTTP Error 500”
Your website homepage and dashboard are inaccessible
Because it is a general error, it can be caused by many different problems. This makes it hard to diagnose at first. But by checking common causes, you can find and fix the issue.
Common Causes of the 500 Internal Server Error in WordPress
Here are some of the most common reasons you might see the 500 error on your WordPress site:
Plugin or Theme Conflicts Sometimes, a WordPress plugin or theme is faulty, outdated, or incompatible with your WordPress version. This can cause server errors.
Corrupted .htaccess File The .htaccess file controls important settings for your website. If it’s broken or corrupted, it can cause the server to throw a 500 error.
Exceeding PHP Memory Limit Your website might need more server memory than allowed by default. If the PHP memory limit is too low, WordPress may crash with a 500 error.
Corrupt WordPress Core Files Sometimes, WordPress files become corrupted during updates or file transfers. This can cause errors.
Server Configuration Problems Hosting server issues or misconfigured server settings can trigger the error.
Caching Issues Problems with WordPress caching plugins or server caches may cause the site to fail loading correctly.
Incompatible Code or Customizations Custom code added to your theme or plugins might conflict and break the site.
How to Fix the 500 Internal Server Error in WordPress — Step by Step
Step 1: Backup Your Website First
Important: Before making any changes, back up your entire website. This includes your files and your database. If you have access to your WordPress dashboard, use a backup plugin like UpdraftPlus or BackupBuddy. If your dashboard is down, back up using an FTP client or your hosting file manager.
Backing up protects your data if something goes wrong during troubleshooting.
Step 2: Check for a Corrupt .htaccess File
The .htaccess file is a hidden file in your WordPress root folder. If it’s corrupted, you’ll get the 500 error.
How to fix it:
Connect to your website using an FTP client (like FileZilla) or your hosting file manager.
Locate the .htaccess file in your WordPress root folder (where wp-content and wp-admin are).
Rename it to .htaccess_backup (this disables it).
Now reload your website in your browser.
If your site loads normally, the .htaccess file was the problem.
Next:
Log into your WordPress dashboard.
Go to Settings > Permalinks.
Click Save Changes (you don’t have to change anything). This will create a fresh, new .htaccess file.
Step 3: Increase the PHP Memory Limit
If your website is running out of memory, it can crash and show a 500 error.
How to increase PHP memory:
Connect to your site with FTP.
Open the wp-config.php file in the root WordPress folder.
Add this line just before the comment that says “That’s all, stop editing!”:
phpCopy
Edit
define('WP_MEMORY_LIMIT', '256M');
Save the file and upload it back.
Reload your site. If it works now, you fixed the issue! Your site needed more memory.
Step 4: Deactivate All WordPress Plugins
Sometimes a plugin causes the error.
How to check:
Connect with FTP.
Go to /wp-content/.
Rename the plugins folder to plugins_backup. This disables all plugins at once.
Now try loading your website.
If it works, a plugin was the cause.
Rename the folder back to plugins.
Go to your WordPress admin and reactivate plugins one by one.
After activating each plugin, reload the site to find the one causing the problem.
Delete or replace the faulty plugin.
Step 5: Switch to a Default WordPress Theme
If your theme is broken or incompatible, the 500 error can appear.
How to test this:
Go to /wp-content/themes/ using FTP.
Rename your active theme’s folder (for example, add _old to the name).
WordPress will automatically use a default theme like Twenty Twenty-Four.
Reload your website.
If it works, the theme was causing the error.
Consider updating, fixing, or changing the theme.
Step 6: Re-upload Core WordPress Files
If your WordPress core files are corrupted, you can fix them by uploading fresh copies.
How to do this:
Download the latest WordPress version from wordpress.org.
Extract the zip on your computer.
Connect to your site via FTP.
Upload the /wp-admin/ and /wp-includes/ folders from the new WordPress download.
Overwrite the existing folders.
This will replace corrupted files without affecting your content or plugins.
Step 7: Check Your Server Error Logs
Server logs can help identify exactly what causes the 500 error.
Ask your hosting provider how to access error logs.
Or check logs in cPanel or your hosting control panel.
Look for lines mentioning “500 Internal Server Error” or plugin/theme errors.
If you find specific errors, it can point you to the cause.
Step 8: Contact Your Hosting Provider
If none of these steps work, the problem might be with the server.
Tell your hosting support about the issue and ask them to:
Check server error logs.
Review server settings and permissions.
Check PHP memory and limits.
Fix any server misconfigurations.
Good hosting providers will help resolve these issues quickly.
Final Tips to Prevent the 500 Internal Server Error
Keep your WordPress core, plugins, and themes updated regularly.
Avoid using poorly coded or outdated plugins/themes.
Regularly clear your WordPress cache (if using caching plugins).
Use a reliable web host with good server configuration and support.
Monitor your site’s error logs occasionally.
Backup your site regularly to avoid data loss.
Summary
The 500 Internal Server Error is one of the most common WordPress problems but also one of the easiest to fix once you know what to do.
To fix it:
Check and reset your .htaccess file.
Increase your PHP memory limit.
Disable all plugins and reactivate them one by one.
Switch to a default WordPress theme.
Re-upload fresh WordPress core files.
Review server error logs.
Contact your web host if needed.
Once fixed, stay updated and back up your site regularly to avoid future issues.
0 notes
Text
Fixing WordPress Update Issues Made Easy: A Beginner’s Guide to Smooth Website Maintenance

Keeping your WordPress website updated is one of the smartest things you can do for better security, performance, and features. But what happens when those updates don’t go as planned?
If you’ve ever seen your website freeze, crash, or show strange errors after clicking "Update," don’t worry—you’re not alone, and you don’t need to be a developer to fix it.
In this guide, we’ll explain why WordPress updates fail and share simple, beginner-friendly solutions to get your website back on track—quickly and safely.
⚠️ Common Reasons Why WordPress Updates Fail
WordPress is built on multiple moving parts—your core WordPress files, themes, and plugins. An update may fail if just one part doesn’t play nicely with the others.
Here are the top reasons why updates might not go through:
🌐 Weak or unstable internet connection
🔌 Plugin conflicts that interfere with the update
🎨 Themes that aren’t compatible with the latest WordPress version
🧠 Low server memory or execution time limits
🔒 Incorrect folder or file permissions
📁 Corrupted or incomplete update downloads
🛠️ Simple Fixes for WordPress Update Problems
✅ Step 1: Always Back Up Your Website
Before making any changes, install a backup plugin like UpdraftPlus or BackupBuddy and save a complete version of your site. This ensures that if something goes wrong, you can restore your site in minutes.
✅ Step 2: Clear Your Cache
Sometimes, the issue isn’t with the update—it’s with what your browser is showing.
Clear your browser cache (Ctrl+Shift+R or Command+Shift+R)
If you use a caching plugin (like WP Super Cache or W3 Total Cache), clear your site’s cache from the plugin dashboard
Then, try the update again.
✅ Step 3: Troubleshoot Plugin Conflicts
If an update causes your site to break, the issue might be a plugin.
Here’s how to find out:
Install the Health Check & Troubleshooting plugin.
Enable “Troubleshooting Mode”—this temporarily disables all plugins for you only.
Try running the update again.
If the update works now, reactivate your plugins one at a time. The one that breaks the update is your troublemaker.
✅ Step 4: Check Hosting Limits
Your hosting environment might be too limited for updates to complete properly.
Ask your hosting provider these questions:
Is my PHP memory limit at least 256MB?
Is my maximum execution time at least 300 seconds?
Can these settings be increased if needed?
If not, consider upgrading to a better hosting plan for smoother WordPress performance.
✅ Step 5: Perform a Manual WordPress Update
When automatic updates fail, a manual update is a reliable workaround:
Download the latest WordPress version from WordPress.org
Unzip the files on your computer
Use FTP software (like FileZilla) to access your site files
Replace the wp-admin and wp-includes folders with the new versions
Leave the wp-content folder as-is (it holds your themes and plugins)
Open your site and follow any update prompts for the database
This process ensures a clean, fresh installation—without losing content or settings.
✅ Step 6: Fix File Permissions
Improper file permissions can block updates.
Use a plugin like WP File Manager or ask your host to set:
All folders to 755
All files to 644
These settings help WordPress update safely without risking your site’s security.
✅ Step 7: Remove Stuck Maintenance Mode
If you see the message:
“Briefly unavailable for scheduled maintenance. Check back in a minute.” …your site update was interrupted and left in maintenance mode.
Here’s how to fix it:
Access your site files through FTP or your hosting file manager (like cPanel)
Go to your website’s root folder
Delete the file called .maintenance
Refresh your site—it should be back to normal
This takes less than a minute and often solves the issue instantly.
💡 When to Call in the Pros
If these solutions don’t work—or if you feel unsure about any step—don’t hesitate to get help from professionals.
Here are your options:
Contact your web hosting support
Hire a trusted WordPress expert
Reach out to a reputable company like Websenor for quick, affordable help
🎯 Final Word: Let Websenor Handle Your WordPress Maintenance
WordPress update problems are common—but they don’t have to be stressful. With some basic know-how and a methodical approach, you can often fix these issues yourself.
But if you'd rather skip the hassle, Websenor is here to help. Our team specializes in:
WordPress core and plugin updates
Website backups and security
Speed optimization and error fixes
We'll keep your website running smoothly, so you can focus on your business, not your backend.
👉 Ready to stop worrying about WordPress updates? Contact Websenor today and let us take care of everything behind the scenes.
0 notes
Text
Product Add-Ons nulled plugin 7.8.1

Enhance Your WooCommerce Store with Product Add-Ons Nulled Plugin Looking to elevate your WooCommerce store with flexible customization options? The Product Add-Ons nulled plugin is your gateway to creating unique, feature-rich product pages that boost customer satisfaction and increase conversions. Whether you're selling physical items, digital downloads, or service-based products, this powerful plugin gives your users the ability to personalize their orders like never before. What is Product Add-Ons Nulled Plugin? The Product Add-Ons nulled plugin is a premium WooCommerce extension that allows you to add customizable options to your products. From checkboxes and radio buttons to text inputs, dropdowns, and file uploads, the possibilities are virtually endless. This plugin gives merchants the ability to offer tailored shopping experiences, all without the need to write a single line of code. Best of all, you can download the Product Add-Ons for free from our site, making advanced WooCommerce features accessible to all types of users, including small businesses and freelance developers. Technical Specifications Plugin Name: Product Add-Ons Nulled Compatibility: WooCommerce 5.0+ / WordPress 5.8+ File Format: .zip License: GPL (General Public License) Last Updated: Regularly maintained Support: Community-based with extensive documentation Top Features and Benefits Easy Customization: Add extra product fields with drag-and-drop simplicity. Multiple Field Types: Use text boxes, dropdowns, checkboxes, and file uploads. Conditional Logic: Show or hide fields based on user selection. Flexible Pricing Options: Add fixed or percentage-based fees for customizations. Seamless Integration: Works flawlessly with most WooCommerce-compatible themes and plugins. Use Cases of Product Add-Ons Nulled Plugin This plugin is ideal for a variety of WooCommerce stores, including: Print-on-Demand Shops: Let customers upload images or type custom text for personalized products. Food Delivery Services: Offer extra ingredients, special instructions, or package selections. Subscription Services: Provide add-on features or upgrade options at checkout. Online Booking Platforms: Include date/time selectors and extra services for appointments. Installation Guide Installing the Product Add-Ons nulled plugin is straightforward. Follow these steps to get started: Download the plugin ZIP file from our website. Go to your WordPress admin dashboard. Navigate to Plugins > Add New > Upload Plugin. Choose the ZIP file and click Install Now. Once installed, activate the plugin and start customizing your product pages! Frequently Asked Questions Is the Product Add-Ons nulled plugin safe to use? Yes, the version available on our site is thoroughly tested and safe for use on production websites. We ensure every release is malware-free and optimized for stability. Can I use this plugin on multiple sites? Absolutely! Since it is GPL-licensed, you can install and activate it on unlimited domains without restrictions. Will this plugin work with my theme? The Product Add-Ons nulled plugin is compatible with nearly all modern WooCommerce themes, ensuring seamless integration and consistent performance. Are updates available for the nulled version? Yes, we regularly provide updated versions, so you always have access to the latest features and security patches. Download Product Add-Ons Nulled Plugin for Free Why pay more when you can unlock premium eCommerce features at no cost? Download the Product Add-Ons plugin today and begin customizing your WooCommerce store like a pro. Our nulled Club pro community offers a wide selection of high-quality WordPress tools to supercharge your website. Looking for a feature-rich WordPress theme as well? Don’t miss the avada nulled theme, the perfect companion to the Product Add-Ons plugin for a stunning and functional store design. Conclusion The Product Add-Ons gives your WooCommerce store the competitive edge it needs in today’s crowded marketplace.
With its comprehensive feature set, user-friendly interface, and free availability, it’s an excellent tool for developers and entrepreneurs alike. Don’t miss out—download it now and transform your product pages into interactive, revenue-generating machines.
0 notes
Text
WooCommerce Dynamic Shipping Cost Calculator
Introduction
Running a WooCommerce store means dealing with various challenges, and one of the most significant ones is calculating accurate shipping costs. Customers expect transparency and fair pricing, which makes a WooCommerce Dynamic Shipping Cost Calculator an essential tool for your store.
With plugins like Calculate Prices Based on Distance for WooCommerce, you can automate the process and offer dynamic shipping rates based on location, distance, weight, and other variables.
In this guide, we will explore how a WooCommerce Dynamic Shipping Cost Calculator can improve your store’s efficiency, increase conversions, and enhance customer satisfaction.
What is a WooCommerce Dynamic Shipping Cost Calculator?
A WooCommerce Dynamic Shipping Cost Calculator is a tool that automatically determines shipping fees based on predefined rules. Unlike flat-rate shipping, which applies a fixed charge, dynamic shipping considers factors like:
Distance from the warehouse or supplier
Product weight and dimensions
Delivery speed and service type
By integrating a dynamic shipping cost calculator, you ensure that customers get the most accurate shipping rates, preventing overcharging or undercharging.
Why Use a WooCommerce Dynamic Shipping Cost Calculator?
Here are some key benefits of using a WooCommerce Dynamic Shipping Cost Calculator:
1. More Accurate Shipping Costs
Instead of flat rates, the system calculates real-time shipping costs, ensuring customers pay exactly what they should.
2. Improved Customer Experience
Unexpected shipping costs are a major reason for cart abandonment. Dynamic calculations provide transparency, reducing unpleasant surprises at checkout.
3. Increased Sales and Conversions
Customers appreciate fair pricing. Providing precise shipping rates makes them more likely to complete their purchase.
4. Supports Different Shipping Models
Whether you offer local delivery, same-day shipping, or international shipping, a WooCommerce Dynamic Shipping Cost Calculator can adapt accordingly.
5. Saves Time and Reduces Errors
Manually calculating shipping costs can be tedious and prone to mistakes. Automating this process improves efficiency and accuracy.
How to Set Up a WooCommerce Dynamic Shipping Cost Calculator
Setting up a WooCommerce Dynamic Shipping Cost Calculator requires installing a dedicated plugin. One of the best plugins for this purpose is Calculate Prices Based on Distance for WooCommerce.
Follow these steps to set it up:
Step 1: Install and Activate the Plugin
Log in to your WordPress admin panel.
Navigate to Plugins > Add New.
Search for "Calculate Prices Based on Distance for WooCommerce".
Click Install Now, then Activate.
Step 2: Configure the Settings
Once activated, go to WooCommerce > Settings > Shipping and find the new dynamic shipping cost settings. Configure:
Base shipping rates
Distance-based pricing rules
Weight and dimension considerations
Carrier options (if integrating with shipping services)
Step 3: Test Your Shipping CalculatorTo avoid incorrect charges, test different addresses and product variations before making it live.
Best WooCommerce Plugins for Dynamic Shipping Calculation
Apart from Calculate Prices Based on Distance for WooCommerce, here are some other excellent plugins:
1. Table Rate Shipping for WooCommerce
Allows you to set flexible shipping rules based on weight, destination, and cart value.
2. WooCommerce Advanced Shipping
Provides a powerful way to create customized shipping rules and conditions.
3. WooCommerce Distance Rate Shipping
Calculates shipping based on customer location, ideal for local deliveries.
4. FedEx, UPS, USPS Shipping Plugin
Offers real-time carrier rates and label printing directly from your WooCommerce dashboard.
Optimizing Your WooCommerce Store with Dynamic Shipping
To get the most out of your WooCommerce Dynamic Shipping Cost Calculator, consider these optimization tips:
1. Offer Free or Discounted Shipping Based on Distance
Encourage local customers to shop by providing free shipping within a certain radius.
2. Use Live Carrier Rates for Accuracy
If you use services like FedEx, UPS, or USPS, integrate real-time shipping rates to ensure precision.
3. Combine Shipping Discounts with Promotions
Promote offers such as “Spend $100 and get free shipping within 50 miles” to boost sales.
4. Optimize Checkout for Transparency
Ensure customers see shipping costs before checkout to prevent cart abandonment.
Common Issues and How to Fix Them
1. Incorrect Shipping Cost Calculation
Check if your distance rates and weight/dimension rules are set up correctly.
2. Slow Loading Checkout Page
Optimize your website speed and ensure the plugin isn't conflicting with other WooCommerce extensions.
3. Customers See Higher Shipping Rates Than Expected
Review your pricing rules and compare with real-world carrier costs.
4. Plugin Compatibility Issues
Ensure your WooCommerce and WordPress versions are up to date and compatible with the plugin.
Conclusion
A WooCommerce Dynamic Shipping Cost Calculator is a game-changer for any online store looking to offer fair, accurate, and transparent shipping rates. By integrating a plugin like Calculate Prices Based on Distance for WooCommerce, you can automate shipping calculations, improve customer satisfaction, and boost conversions.
Start using a WooCommerce Dynamic Shipping Cost Calculator today and watch your store’s efficiency and sales grow!
#woocommerce price calculation by delivery distance#woocommerce per km delivery charge setup#woocommerce real-time distance-based shipping cost#woocommerce dynamic shipping cost calculator#distance-based delivery fee woocommerce#woocommerce per kilometer shipping rate
0 notes
Text
How to Move Your WordPress Site from Localhost to a Live Server
Developing a WordPress site on localhost is a great way to build and test your website in a controlled environment. However, the real challenge arises when it's time to move the site from your local server to a live hosting environment. If not done correctly, you could encounter broken links, missing images, or even database errors.
In this blog, we'll guide you through a step-by-step process to successfully move your WordPress site from localhost to a live server.

Step 1: Choose the Right Hosting Provider
Your first step is to select a reliable web hosting provider that meets your website’s needs. Look for:
Server Speed: Fast servers for better performance.
Uptime Guarantee: At least 99.9% uptime to ensure availability.
Ease of Use: User-friendly dashboards and tools.
WordPress Support: Hosting optimized for WordPress websites.
Popular options include Bluehost, SiteGround, and WP Engine.
Step 2: Export Your Local WordPress Database
The database is the backbone of your WordPress site. To export it:
Open phpMyAdmin on your local server (e.g., XAMPP or WAMP).
Select your WordPress database.
Click on the Export tab and choose the Quick Export method.
Save the .sql file to your computer.
Step 3: Upload Your WordPress Files to the Live Server
To move your files:
Compress Your WordPress Folder: Zip your local WordPress installation folder.
Access Your Hosting Account: Use a file manager or an FTP client like FileZilla.
Upload the Files: Transfer the zipped folder to your hosting server's root directory (usually public_html).
Unzip the Folder: Extract the files once uploaded.
Step 4: Create a Database on the Live Server
Now, set up a new database on your live hosting server:
Log in to your hosting control panel (e.g., cPanel).
Navigate to the MySQL Databases section.
Create a new database, database user, and password.
Assign the user to the database with full privileges.
Step 5: Import the Database to the Live Server
Open phpMyAdmin in your hosting control panel.
Select the new database you created.
Click the Import tab.
Choose the .sql file you exported from your localhost.
Click Go to import the database.
Step 6: Update the wp-config.php File
To connect your site to the live database:
Locate the wp-config.php file in your WordPress installation.
Open the file in a text editor.
Update the following lines: define('DB_NAME', 'your_live_database_name'); define('DB_USER', 'your_live_database_user'); define('DB_PASSWORD', 'your_live_database_password'); define('DB_HOST', 'localhost'); // Keep this unless your host specifies otherwise.
Save the file and upload it to your server via FTP.
Step 7: Update URLs in the Database
Your localhost URLs need to be replaced with your live site URLs.
Use a tool like Search Replace DB or run SQL queries in phpMyAdmin.
In phpMyAdmin, run the following query: UPDATE wp_options SET option_value = 'http://your-live-site.com' WHERE option_name = 'siteurl'; UPDATE wp_options SET option_value = 'http://your-live-site.com' WHERE option_name = 'home';
Step 8: Test Your Live Website
Once everything is uploaded and configured, check your website by entering its URL in a browser. Test for:
Broken Links: Fix them using plugins like Broken Link Checker.
Missing Images: Ensure media files were uploaded correctly.
Functionality: Verify forms, buttons, and features work as expected.
Step 9: Set Up Permalinks
To ensure proper URL structure:
Log in to your WordPress admin dashboard on the live site.
Go to Settings > Permalinks.
Choose your preferred permalink structure and click Save Changes.
Step 10: Secure Your Live Website
After migrating, secure your site to prevent vulnerabilities:
Install an SSL Certificate: Most hosting providers offer free SSL certificates.
Update Plugins and Themes: Ensure everything is up to date.
Set Up Backups: Use plugins like UpdraftPlus for regular backups.
Conclusion
Moving your WordPress site from localhost to a live server may seem daunting, but by following these steps, you can ensure a smooth and error-free migration. A successful move allows you to showcase your site to the world, engage your audience, and achieve your goals.
Start today and take your WordPress project live with confidence!
0 notes
Text
WordPress Version 6.6.2
WordPress Version 6.6.2 - Installation/Update Information To get this version, update automatically from the Dashboard > Updates menu in your site’s admin area or visit https://wordpress.org/download/release-archive/. For step-by-step instructions on installing and updating WordPress: Updating WordPress If you are new to WordPress, we recommend that you begin with the following: New To WordPress – Where to Start First Steps With WordPress or Upgrading WordPress Extended Summary This release was led by Tonya Mork and Vicente Canales, with Aaron Jorbin. WordPress 6.6.2 is a short-cycle maintenance release that features 15 bug fixes in Core and 11 bug fixes for the Block Editor, including fixes related to CSS Specificity producing unexpected changes with some themes. You can review a summary of the maintenance updates in this release by reading the Release Candidate announcement. For more information, browse the full list of changes on Trac.
0 notes
Text
Building Your First WordPress Plugin: A Step-by-Step Guide
Want to extend WordPress's functionality? Creating a plugin is your answer. Let's break down the process into simple steps.
1. Plan Your Plugin
Define the purpose: What problem does your plugin solve?
Identify core features: What functionalities will it offer?
Choose a name: Pick a descriptive and unique name.
2. Set Up the Structure
Create a new folder: In your wp-content/plugins directory, create a folder with your plugin's name.
Create the main file: Inside this folder, create a PHP file with the same name as the folder.
3. Add Plugin Header
Essential information: At the top of your PHP file, add a header comment with details like plugin name, description, author, and version. This is crucial for WordPress to recognize your plugin.
4. Write Your Code
Basic functionality: Start with simple functions. For example, you could create a custom shortcode or add a new menu item to the admin panel.
Leverage WordPress actions and filters: To integrate seamlessly with WordPress, use hooks like add_action and add_filter.
Test thoroughly: Use a staging site to test your plugin before activating it on a live site.
5. Activate and Test
Activate: Go to the "Plugins" section in your WordPress admin dashboard and activate your plugin.
Test features: Ensure everything works as expected.
Debug and refine: If you encounter issues, use debugging tools to identify and fix problems.
Additional Tips
Use clear and concise code: Write clean code for better maintainability.
Document your code: Add comments to explain your code's logic.
Consider security: Protect your plugin from vulnerabilities.
Leverage WordPress APIs: Explore the vast array of functions and classes available.
Remember: Building a plugin takes time and practice. Start small, iterate, and learn from your experiences. With dedication, you can create valuable tools for the WordPress community. Embarking on WordPress plugin development is a rewarding journey that allows you to contribute to the world's most popular CMS.
0 notes
Text
Ultimate Floating Widgets v2.9 Release
Ultimate floating widgets v2.9 is now available. This is a maintenance release that includes a number of enhancements and bug fixes. It is now available for both free and PRO versions.
Please find the changelog below. You can also follow us on Twitter for latest updates @aakashweb
✨ Changelog
New: Option to set image as icon for the close button.
Fix: Auto close on timer does not work on page load.
Fix: Updated fontawesome version.
Fix: Fontawesome icon search URL link in the admin page.
Fix: Adjustments to button icon and text padding.
PRO: Option to reveal button after a set duration.
PRO: User permission check for location rules ajax call.
PRO: Handle headers already sent warning when setting cookie.
Getting the update
You can update the plugin directly from your WordPress administration page by navigating to Dashboard > Updates. This applies to both free and PRO versions of the plugin.
You can also download the free version of the plugin from WordPress.org and upload it manually. For the PRO version you can follow the documentation. If you haven’t got the PRO version yet, you can get it here.
-----
This article was originally posted on Aakash Web
0 notes
Text
Request a Quote for WooCommerce nulled plugin 2.7.2

Request a Quote for WooCommerce Nulled Plugin – Unlock Seamless B2B Sales If you’re running an online store and catering to wholesale buyers or businesses, the Request a Quote for WooCommerce nulled plugin is an essential tool to add flexibility and personalization to your pricing model. With this powerful plugin, you can empower customers to request custom quotes for your products, enhancing the shopping experience and boosting your conversion rates. Why Choose the Request a Quote for WooCommerce Nulled Plugin? The eCommerce landscape is evolving, and customer expectations are at an all-time high. Modern buyers, especially B2B clients, often seek tailor-made pricing rather than fixed costs. The Request a Quote for WooCommerce nulled plugin enables you to meet this demand efficiently. By integrating this plugin into your WooCommerce store, you provide visitors the option to request customized quotes instead of proceeding directly to checkout. This creates a more dynamic and customer-friendly experience, particularly for bulk or high-value purchases. Product Highlights and Capabilities This plugin is packed with robust features designed to streamline the quoting process for both store owners and customers. Here’s what you get when you download the Request a Quote for WooCommerce nulled plugin from our site for free: Seamless integration with existing WooCommerce functionality Option to hide prices and add-to-cart buttons Customizable quote request forms Email notifications for both admin and users Support for simple and variable products Manage quotes directly from the admin dashboard Technical Specifications Plugin Version: Latest Nulled Version (Fully Updated) Compatibility: WordPress 5.8+ and WooCommerce 6.0+ File Format: .zip License: GPL (General Public License) Top Features & Benefits By using the Request a Quote for WooCommerce nulled plugin, you unlock a host of features that go far beyond standard WooCommerce functionality: Custom Quote Forms Design quote request forms tailored to your business needs. Add custom fields, messages, and even allow file uploads from users for more detailed inquiries. Enhanced B2B Capabilities Perfect for wholesale or B2B businesses, this plugin enables private pricing negotiations, helping build trust and long-term relationships with clients. Complete Quote Management Track, manage, and respond to all quote requests right from your WooCommerce admin panel. You can convert requests to orders with just a few clicks. Boost Conversion Rates Many users abandon their carts due to inflexible pricing. By offering a quote system, you reduce drop-off rates and increase engagement from serious buyers. Where Can You Use This Plugin? The Request a Quote for WooCommerce nulled plugin is ideal for businesses in industries such as: Wholesale and bulk product sales Custom manufacturing or made-to-order items Service-based digital products Retailers offering tiered or negotiated pricing How to Install and Use the Plugin Installing the plugin is simple and takes just a few steps: Download the Request a Quote for WooCommerce nulled plugin from our website. Go to your WordPress dashboard and navigate to Plugins > Add New. Click “Upload Plugin” and select the .zip file. Click “Install Now” and activate the plugin once installed. Configure the plugin settings under WooCommerce > Quote Settings. You’re now ready to receive and manage quote requests from your customers. Frequently Asked Questions (FAQs) Is the nulled version safe to use? Yes, the nulled version available on our platform is thoroughly tested and clean. We ensure there are no malicious codes so you can use it with confidence. Does this plugin support product variations? Absolutely! It works seamlessly with variable products, allowing customers to request quotes for specific combinations of attributes. Can I customize the quote request form? Yes, the plugin provides easy customization options to tailor the form according to your business needs.
Do I need coding skills to use this plugin? No coding is required. The plugin comes with a user-friendly interface and detailed settings panel for easy configuration. Download the Plugin for Free Why pay for features you can get for free? Download the Request a Quote for WooCommerce nulled plugin from our platform and unlock premium functionality without spending a dime. Enjoy the freedom to grow your store with intelligent pricing options. Looking for more tools to boost your store? Explore our extensive collection of nulled WordPress themes to give your site a professional and polished look. Want powerful form-building capabilities? Check out the wpforms nulled plugin for advanced form creation options.
0 notes
Text
How to Update WordPress plugins
WordPress plugins are software extensions that add new functionality to your WordPress website. They are like apps for your website, allowing you to customize and enhance its features without having to write any code. With over 55,000 plugins available in the official WordPress Plugin Directory, there’s a plugin for practically every need.
Why is it Important to Update WordPress Plugins?
Keeping your WordPress plugins up to date is crucial for several reasons. First and foremost, updates often contain bug fixes and security patches that address vulnerabilities discovered in previous versions. By updating your plugins, you ensure that your website remains protected against potential attacks.
Additionally, updates can introduce new features, improve performance, and enhance compatibility with the latest version of WordPress. By regularly updating your plugins, you can take advantage of these improvements and ensure that your website runs smoothly.
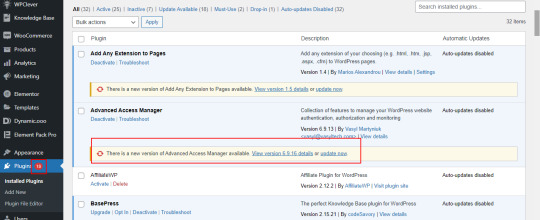
How to Check for Plugin Updates
Before we dive into the update process, it’s important to know how to check for plugin updates. Fortunately, WordPress makes it easy. Here’s how:
1. Login to your WordPress dashboard: Visit your website’s admin area and enter your login credentials.
2. Navigate to the Plugins page: From the sidebar, click on “Plugins” to access the list of installed plugins.

3. Check for updates: On the Plugins page, you’ll see a notification if any updates are available. Look for the number in a red circle next to “Plugins”.
4. Update individual plugins: To update a specific plugin, click on the “Update Now” link beneath its name. The latest version will be downloaded and installed by WordPress automatically.
5. Update all plugins: If you prefer to update all plugins at once, click on the “Update Available” link at the top of the page. WordPress will update all plugins that have pending updates.
Manual Update Process for WordPress Plugins
While updating plugins manually is not the most convenient option, it still provides you with greater control over the process. Here’s how to manually update WordPress plugins:
Secure your website: Before implementing any updates, it’s advisable to generate a backup of your website. This precautionary step ensures that should any issues arise during the update process, you can effortlessly revert your website to its previous state.
Download the latest version: Visit the plugin’s website or the official WordPress Plugin Directory to download the latest version of the plugin you want to update.
Deactivate the old version: In your WordPress dashboard, navigate to the Plugins page and deactivate the plugin you wish to update.
Delete the old version: Once the plugin is deactivated, click on the “Delete” link beneath its name to remove the old version from your website.
Upload and activate the new version: On the Plugins page, click on the “Add New” button at the top. Choose the downloaded plugin file from your computer and click “Install Now”. Finally, click on “Activate” to enable the updated plugin.
Pros and Cons of Manually Updating Plugins
While manual updates give you more control, they also come with their own set of pros and cons.
Pros:
Greater control over the update process.
Ability to thoroughly test the updated plugin before activating it.
No reliance on automatic updates, which can sometimes cause compatibility issues.
Cons:
Requires manual effort and time investment.
Higher risk of human error during the update process.
It might pose a greater challenge for users who are not familiar with technical concepts.
How to Update WordPress Plugins Automatically
If you prefer a more hands-off approach, you can enable automatic updates for your WordPress plugins. Automatic updates ensure that your plugins are always up to date without requiring any manual intervention. Here’s how to enable automatic plugin updates:
Install a plugin for automatic updates: There are several plugins available that can handle automatic updates for you. A well-liked choice is the “Easy Updates Manager” plugin, which can be installed and activated directly from the WordPress Plugin Directory.
Configure automatic updates: Once the plugin is activated, navigate to its settings page. Here, you can specify which plugins you want to update automatically and choose the update frequency.
Save your settings: After configuring the automatic update settings, make sure to save your changes.
Benefits of Using Automatic Plugin Updates
Automatic plugin updates can offer several advantages for website owners:
Improved security: With automatic updates, you can ensure that your plugins are always up to date with the latest security patches, minimizing the risk of potential vulnerabilities.
Time-saving: Automatic updates eliminate the need for manual intervention, saving you time and effort that can be better spent on other website management tasks.
Enhanced performance: By regularly updating your plugins, you can take advantage of performance improvements and bug fixes, ensuring your website runs smoothly.
Compatibility: Automatic updates help ensure that your plugins remain compatible with the latest version of WordPress, preventing any compatibility issues that may arise from using outdated plugins.
Best Practices for Updating WordPress Plugins
To ensure a smooth update process and maintain the security and functionality of your website, follow these best practices:
Backup your website: Before updating any plugins, always create a backup of your website. This allows you to restore your website in case anything goes wrong during the update process.
Update one plugin at a time: To minimize the risk of conflicts or compatibility issues, update one plugin at a time and thoroughly test your website after each update.
Keep track of plugin updates: Regularly check for plugin updates and stay informed about any new features, bug fixes, or security patches. This helps you make informed decisions about which plugins to update.
Read release notes and changelogs: Before updating a plugin, read the release notes or changelogs provided by the plugin developer. This gives you valuable insights into what changes are included in the update and any potential impact on your website.
Test after updating: After updating a plugin, thoroughly test your website to ensure that everything is functioning correctly. Pay special attention to any areas or features that are directly affected by the updated plugin.
Common Issues and Troubleshooting Tips When Updating Plugins
While updating WordPress plugins usually goes smoothly, occasionally, issues may arise. Below, you’ll find a list of common issues along with troubleshooting tips:
White screen of death: If your website displays a blank white screen after updating a plugin, it may indicate a compatibility issue. Try deactivating the recently updated plugin and see if the issue resolves. If it does, contact the plugin developer for further assistance.
Plugin conflicts: Sometimes, updating a plugin can cause conflicts with other plugins or themes. If you notice any unexpected behavior after an update, deactivate other plugins one by one to identify the conflicting plugin. Once identified, contact the plugin developer for a possible solution.
Missing or broken features: If a plugin update results in missing or broken features, ensure that you have followed the update process correctly. If the issue persists, reach out to the plugin developer for guidance, or consider rolling back to the previous version of the plugin.
Slow website performance: Occasionally, a plugin update may negatively impact your website’s performance. To address this, check if the updated plugin has any new settings that could affect performance. If necessary, revert to the previous version or consider alternative plugins.
Importance of Keeping Plugins Updated for Website Security
Keeping your WordPress plugins updated is crucial for maintaining the security of your website. Outdated plugins can become a prime target for hackers looking to exploit vulnerabilities and gain unauthorized access to your website.
By regularly updating your plugins, you ensure that any security vulnerabilities discovered in previous versions are patched. This significantly reduces the risk of your website being compromised.
Additionally, outdated plugins can also pose compatibility issues, leading to website malfunctions or conflicts with other plugins or themes. By keeping your plugins up to date, you minimize the chances of these compatibility issues and ensure a smooth user experience.
Conclusion
Updating your WordPress plugins is a vital part of website maintenance. It not only improves security but also enhances performance and compatibility. Whether you choose to update your plugins manually or enable automatic updates, following best practices and staying vigilant ensures that your website remains secure and up to date.
By regularly checking for updates, testing after each update, and addressing any issues promptly, you can keep your website running smoothly and provide a seamless experience for your visitors.
Don’t neglect the importance of updating your WordPress plugins. By staying proactive, you can safeguard your website and leverage the latest features and improvements offered by plugin developers.
Remember, your website’s security and functionality depend on regular plugin updates. Stay informed, stay updated, and keep your website in top shape.
Stay ahead of the curve. Update your WordPress plugins today!
#wordpress#wordpress plugins#wordpress tutorial#cms#website development#plugins#blog post#import#wordpresswebsite#csvimporter#Wordpressplugindata
0 notes
Text
WordPress Website Hacked? 7 Tips to Fix
Is your WordPress website showing signs of a hack? Don't panic! In this blog, we'll walk you through seven essential tips to help you recover your hacked website and get it back to its secure and functional state.
Tip 1: Identify the Hack
The first step in addressing a hacked WordPress website is identifying the hack. Common signs include unusual pop-ups, defaced content, unexpected redirects, or a sudden drop in website performance. Regularly monitoring your website for these signs can help you catch a hack early on.
Tip 2: Check with your Hosting Company
Contact your hosting company as soon as you suspect a hack. They can provide valuable insights and support in dealing with the issue. Hosting providers often have security measures and can guide you on the following steps.
Tip 3: Restore from Backup
One of the most effective ways to recover a hacked website is to restore it from a clean backup. Regularly backing up your website ensures you have a recent, secure version to revert to in case of an attack. If you don't have a backup, it's crucial to start creating regular backups now to prevent future headaches.
Leave It to the Professionals: Remove Malware from WordPress Website in Just $50
While DIY restoration is an option, sometimes it's best to leave it to the experts. Trust the pros at Reliqus Consulting to ensure a thorough cleanup. Our professional malware removal services can ensure that all traces of the hack are eradicated, preventing future attacks. For as little as $50, you can have peace of mind knowing your website is secure.
But hold on, we're not done yet! Here are more expert tips to help you reclaim your hacked WordPress website and stay fortress-strong against future threats.
Tip 4: Malware Scanning and Removal
Utilize specialized malware scanning and removal tools or plugins to scan your website thoroughly. These tools can help identify and remove malicious code or files that may have infiltrated your site. Regular scans are crucial to maintaining website security.
Tip 5: Check User Permissions
Review and update user permissions on your WordPress site. Make sure that only authorized users have access to sensitive areas. Revoke access for suspicious or unnecessary accounts and update passwords for all users.
Tip 6: Change Your Secret Keys
WordPress uses secret keys to enhance the security of data stored in cookies. Changing these keys regularly adds an extra layer of protection against hackers. You can update your private keys via your WordPress dashboard or edit your wp-config.php file.
Tip 7: Change Your Passwords AGAIN
Never underestimate the importance of strong, unique passwords. Change your admin and user passwords to complex combinations of letters, numbers, and symbols. Consider using a password manager to generate and store secure passwords.
Conclusion
Recovering from a hacked WordPress website can be a stressful experience, but with the right approach, you can restore your site's security and functionality. Remember to monitor your site for potential hacks and regularly back up your website to ensure you always have a clean version to revert to.
If the technical aspects of fixing a hacked site seem daunting, don't hesitate to seek professional help. For as little as $50, experts can efficiently remove malware and ensure your website is secure again.
By following these seven tips and staying proactive about your website's security, you can minimize the risk of future hacks and keep your WordPress site safe for you and your visitors.
Read Complete Article: https://reliqus.com/7-tips-to-fix-hacked-wordpress-website/
0 notes
Text
Future of WordPress - What it Brings to the Digital World | Liveblack
Constant evolution is the key to building a solid base for the present and making each thing more resourceful for the future. WordPress, as an open-source platform constantly evolving to fulfill its customer's needs. It has the largest market share and a global community that loves to blog out its thoughts, ideas, and concepts through WordPress.
First launched in 2003, it changed a lot in the last 20 years. With each year passing by, the changes and modifications made this platform the major attraction. The future of WordPress is vast to build the trust of its clients and customers, and it quickly offers modifying and a great variety of themes, in-built plugins, easy updates, fast adding content, etc. These advantages draw the attention of people who like to use WordPress.
WordPress is changing a lot concerning how technologies are changing and becoming better. Generally, WordPress has been connected with PHP. However, in recent years it shifted to JavaScript. WordPress has Gutenberg - it was introduced in WordPress 5 and is a code name for a new block-based editor; for improved performance, Gutenberg is there. JavaScript can create fast, performant and responsive interfaces to reload anything or everything.
With the change in everything, as the change is constant, WordPress future scope is pretty extensive.
Here are some crucial points that will ensure WordPress has a strong future.
1 - Collaboration for Multiple Authors -
When WordPress came up with Gutenberg, the block editor had a four-phased plan to make content management more effortless. The two phases are already released - easy editing with the block editor and full sight editing customization.
As expected to start by early 2023, the third phase is multi-author collaboration. It allows multiple users to edit the content in real-time. This way, the editors will proofread the blogs to publish your content. Fantastic features include real-time commenting, suggestions, content that multiple people can edit simultaneously, etc.
2 - Gutenberg with Better UX -
In 2018, Gutenberg was launched in the market by WordPress. This new version of the block editor is perfect, as anyone can add content to your website. WordPress will extend this feature further with template clean markup, colours, straightforward typography, etc., and these new features will make it easy to choose the best such as proper templates, different categories of fonts, and much more.
The changing and updating Gutenberg block editor will let you be advanced at every step with its upgradation to create beautiful websites.
3 - High Security -
WordPress always manages to secure its websites and form a strong wall between your site and cyber attacks, which has higher security. As you all know, countless sites are built on WordPress; the more famous and successful a site is, the more it risks cyber attacks.
WordPress has countless anti-spam plugins to protect your website from spam and attacks. This security feature will make it harder for hackers to hack the site and take advantage.
It has a feature called multifactor authentication that adds extra security to your website. WordPress lets you take advantage of every upgraded security feature so your site can always be safe.
4 - WordPress 6.0 -
Adopting WordPress 6.0, which was released in May 2022, comes with a lot of excellent improvements. It has several bugs fixed by hundreds of contributors. WordPress 6.0 has improved performance, offers design tools, makes the content creation process more accessible, strengthens accessibility, etc.
A lot more changes and updates came with the new version of WordPress.
5 - Better UI -
Take a look at the admin dashboard UI of WordPress in 2023, as there has been a profound change since it was created. WordPress developed itself so much better over the years. It is a blessing to all non-coders without writing a single line of code.
A much better interface came over time that made WordPress easy to use. We cannot say what WordPress will bring to the table in future, but we hope the best is yet to come from it.
People ask some questions to know what WordPress can do or what it will bring to the future.
Does WordPress have a future?
WordPress powers the world's millions of websites, and some of them are on top as well. There's no chance for the downfall of WordPress as it contributes so much to the digital world by providing brilliant services. WordPress's future is bright with its million users, plus it designs the best version for itself with every latest update.
However, which version of WordPress is best?
Whatever app or website or anything you use, the latest version of the app or website makes your life easier. Using the latest versions helps get your tasks done in no time without any hassle. The improved performance of the current version compared to the previous version solves issues. WordPress 6.2 is the latest version of WordPress you need to use to advance features and security updates.
Get ready for the mind-blowing future of WordPress, as it has so much to offer in the future that will help you build brilliant websites for your brand, business, and yourself. With the advanced features, user demands, and necessitated modern technology, it will allow people to access the web quickly and progressively.
Liveblack is the best digital marketing agency for any web development need. We give quality services in website development. We create the concepts that help your business set a high standard in the market and let you stand out from the crowd. We bring the best when you sign the deal with us.
0 notes