#Git project tutorial
Explore tagged Tumblr posts
Visit Tumblr Blog
Explore Tumblr blogs with no restrictions, modern design and the best experience.
Last Seen Tumblr Blogs


Fun Fact
Tumblr is available in 18 languages.
Text
Ok. I am going to let you in on a secret about how to make programming projects.
You know how people write really good code? Easy to read, easy to work with, easy to understand and very efficient?
By refactoring.
The idea that you write glorious nice code straight is an insane myth that comes from thinking tutorials is how people actually code.
That is because programming is just writing. Nothing more. Same as all other writing.
The hobbit is ~95000 words.
Do you think Tolkien created the Hobbit by writing 95 thousand words?
Of course not! He wrote many many times that. Storylines that ended up scrapped or integrated in other ways, sections that got rewritten, dialog written again and again as the rest of the story happened. Background details filled in after the story had settled down
Writing. Is. Rewriting.
Coding. Is. Refactoring.
Step 1 in programming is proof of concept. Start with the most dangerous part of your project ( danger = how little experience you have with it * how critical it is for your project to work )
Get it to do... anything.
Make proof of concept code for all the most dangerous parts of the project. Ideally there is only 1 of these. If there is more than 3 then your project is too big. ( yes, this means your projects needs to be TINY )
Then write and refactor code to get a minimum viable pruduct. It should do JUUUUUST the most important critical things.
Now you have a proper codebase. Now everytime you need to expand or fix things, also refactor the code you touch in order to do this. Make it a little bit nicer and better. Write unit tests for it. The works.
After a while, the code that works perfectly and never needs to be touched is hard to read. Which does not matter because you will never read it
And the code that you need to change often is the nicest code in the codebase.
TRYING TO GUESS AHEAD OF TIME WHAT PARTS OF THE CODE WILL BE CHANGED OFTEN IS A FOOLS ERRAND.
( also, use git. Dear god use git and commit no more than 10 lines at once and write telling descriptions for each. GIT shows WHAT you did. YOU write WHY you did it )
Is this how to make your hobby project?
Yes. And also how all good software everywhere is made.
#codeblr#software#developer#software development#software developer#programmer#programming#coding#softeware
373 notes
·
View notes
Text
GIT Font and PNG Generator

This post by @pichikui was the spark of inspiration for this whole project.
I'm super excited to share this project (though it's in beta stage) The first part is a font family based off of the glitch in time ghost speak codex.
The second part is PNG Image Generator that can copy the GIT font to the system clipboard as PNG, download it as PNG, and copy an HTML template to paste into AO3. If you are unsure how to embed images into AO3, please consult this tutorial on the topic.
As I previously stated, this project is still in beta, so if you guys find any bugs or issues, feel free to reach out. I'm also open to collab as well.

535 notes
·
View notes
Text
I forgot to post the last few paintings! I have also been experimenting with watercolors, because I've never been a person to git gud at a single craft when I could be mediocre at ten million 😂 (stay tuned for my impending adventures in straw marquetry and lampshade covering) (neither of those are jokes).
For watercolor, like with acrylics, I dove in pretty big, with the aim of having things for my parents' new house by mother's day. So I was very much aiming for foolproof projects! I had two very tall, very skinny frames (12x36) that i got from the clearance section, thinking I would buy 36 inch watercolor paper, only to learn that no such thing was in the stores near me. So for that, i went abstract and layered, using spacers from the papercrafts i never followed through on to give it some dimensionality that doesn't photograph well. And then i looked up tutorial videos for loose watercolor flowers. Very much a learning process, and I was painting right up until noon of mother's day, but I had fun and mom was delighted! Now it's time to back down and do real studies and learn the fundamentals, haha


#crafts#watercolor#painting#the bottom three watercolors are all uhhh 22x30 or whatever the big size is#me @ dad: 'when i volunteered to help with art i don't think she understood the full scope of what i intended to achieve'#dad: 'idk she's known you your whole life i think she has a good grasp of how overboard you go'#(she did not realize)#5 watercolor items#3 texture + acrylic#11 acrylic
28 notes
·
View notes
Text
A free image hosting solution for AO3 and elsewhere - A Tutorial (mobile-friendly!)
See the demo site made from this template IN ACTION: https://hotlink-archive-template.pages.dev/
This guide is for an easy, mobile-friendly way to host files for hotlinking on AO3 or elsewhere, using github and cloudflare pages.
I've encountered far too many dead links in fanfics and forums simply because a hosting service decided to dump older files, or they decided to change their TOS to no longer allow hotlinking or certain kinds of content (nsfw, fictional graphic content). See Optional Steps for even more options.
This is an easy, barebones way to permanently host images that you don't want deleted unexpectedly or that you can't host elsewhere. (Emphasis on barebones. This will not be a nice portfolio style site. Unless you decide to code that yourself!) You can follow the link above for an example of this type of site.
It is also EASY to upload and use on mobile devices after initial setup!
Tools you will need:
Cloudflare Pages/Workers is a free to use static site hosting service. This will publish your files and make them available online. This will publish your files and make them available online. There is a limit to the amount of data you can upload for free, but you can pay for proper hosting if you want to exceed it.
Github is a code sharing/storage platform. Your files will go here first before being published on Pages. You can edit and upload files through your browser at github.com, or through Github Desktop, a program you install on your computer. There are limits to Github repositories, but they are also generous (suggested 1GB to 5GB per repo).
Basic Setup
1. Create a github account
2. Copy this template repository hotlink-archive-template
Your website will be contained in a repository, a place where all the files and the revision history for your project are stored.
This template repository uses an "Action" (using python) to automatically create a "home" page with an Index of all the files in your repository every time it is updated.
NOTE: I recommend you set your repository to Private. Github's history feature is extensive, so if you have sensitive content or think you might want to delete something later, it will be hard to get rid of it completely once it's been committed and publicly available.
3. Enable Action permissions
In order for the Action script to work, you need to give Actions permission to read and write in your repository.
Within your repository, go to the tab Settings > Actions > General > Workflow Permissions

4. Create a Cloudflare account
5. Create a Pages (or Workers) project and link it to your Github repository
Your Pages project will create the front end of the site where the images will be displayed. You will be able to link those images to other platforms like AO3.
You can create either a Workers or Pages project by going to Add > Pages (or Workers). Name your project WISELY! This name will be your site's URL.
Workers vs. Pages
Workers is subsuming Pages on Cloudflare and now has all the same static hosting capabilities, in addition to its original server-side processing services. If you'd like to, read more about this.
While Workers has similar capabilities, I recommend Pages for this project. Pages has the added bonus of a cleaner URL if you do not have your own domain: “MySite.pages.dev” in Pages vs Workers' “MySite.username.workers.dev”
You will be prompted to import an existing Git repository. You will need to give it access to your Github to do this.

Select the repository on your Github you made for your project, then hit "Begin Setup".
Name your project WISELY! This name will be your site's URL.
You do not need to change any settings on the next page, so hit "Save and Deploy". Your image hosting site will now be live!
The URL will be "https://ProjectName.pages.dev". It may take a few minutes to become accessible.
Now you're done with the basic setup!
How to Add files
You can add any files you want to link to on AO3/elsewhere through mobile, desktop browser, or the Github desktop program!
Here is how to do it on Github.com:
Open up the repository that you made (it can be found at github.com/username/repositoryname). You will see a list of folders and files that are in that repository.
Click into the folder "fan-stuff".
In the top right, go Add file > Upload files and drag in the images you want added. You will need to name the images BEFORE you upload them, as there is not an easy renaming feature within Github's browser interface.
In the Commit changes box, choose a title for what action you are doing. This will help you backtrack uploads if needed.
For example, it could be "Uploaded Batman Art". Make sure it's set to "commit directly to the main branch", then commit those changes. This will upload the files.
Now, if you visit your site, you will see your uploaded image under the "fan-stuff" folder!
To embed/link your image, navigate to your file on your Pages site and copy the URL in the address bar. This URL is what you will use to embed your photo (using HTML or "add image as URL" tools some sites have).
Continue onto More Setup to customize your site and implement more advanced settings. See Tips/Troubleshooting if you're running into problems.
More Setup
Perform site customization/advanced setup with Github Desktop on your PC
Github’s web UI is great, but it has major limitations. I highly recommend that you use Github Desktop during the initial setup, as well as when you want to make major organizational changes to your files/site. Once you have everything set, though, you can use Github in your browser to upload whatever files you want to hotlink at the moment.
Download Github Desktop and “clone” (download a copy of) the repository you made.
This is the best time to rename/rearrange folders + files, etc.
There are other methods in the Troubleshooting section if you need, but Github Desktop is by far the easiest way
see Adding/Renaming Folders for important info on how to properly rename/add folders
see About the Index Page for how to customize your Index pages
Once you’re done editing, “push” (upload) all the changes you made to your online Github repository.
Having some sort of text editor like Notepad++ is useful for editing any code, the automatic color-coding is very helpful. You can edit in plain old Notepad as well, it just won’t look as nice.
About the Index Page
The template repository uses a python Action to automatically create an HTML "home" page with an Index of ALL the files in the folder every time it is updated.
This is particularly convenient for mobile use, as you can upload a file, and the python action automatically updates the Index page.
If you don’t want this, just disable the “create-index” Action and delete the .py files. You can just type in the file locations to get to each file, or you can manually maintain an home/Index page yourself, which isn't hard if you know some basic HTML and can remember to do it consistently.
Also note that if you wish to change any of the content on your Index pages, you must edit the "index.py" file, not the "index.html" file. The "index.html" file gets re-written every time the "create-index" Action is run in order to keep the file index up to date.
Adding/Renaming/Deleting Folders
Disclaimer: This is a bit convoluted because I am extremely unqualified to be working with python OR HTML. There’s probably an easy way to do this, but I don’t have the skill to do it, and most of the stuff here is copied from stuff I found around. If you know a better way to do things, please let me know, it’d make my life easier too!
Adding or renaming folders involves some extra steps.
1. The "index.py" file inside the folder needs to be edited to match the parent folder name.
The place you need to do this is found near the top of the file (highlighted below)

2. Then the outer-most "create-index.py" file needs to be updated to match the new name as well. If you’ve added a new folder, duplicate and adjust the code to match.
The place you need to do this is found at the bottom (highlighted below)

If you don’t need any folders at all, great! Just delete them and their contents! No need to edit any files. (Don’t delete “index.html” or “create-index.py” or “.github/workflows”!)
If you would like to have these folders for later use, leave them as-is and simply edit the index files.
The relevant lines of code at the bottom of "create-index.py" like in the previous step for renaming folders. You may delete this code, or comment it out (using # at the beginning of a line will make it “invisible” to the computer)
Then, add the folder’s name to the “exclusions” list at the top of the "create-index.py" file so that it doesn’t show up on your Index page (highlighted below)

You can also use this same concept to create "invisible" files/folders. Any files/folders included in the "exclusions" list in "(create-)index.py" will not be listed on the Index page, however they can still be found through the direct URL to the file.
On the flipside, this means simply hiding the file/folder from the Index page does not get rid of the file from your site. Anyone who has the URL will be able to find that file unless you remove it, or move its location to change the URL
Tips/Troubleshooting
(Re)name your files before uploading
It’s not possible to rename image/media files on Github’s web UI (it is possible with the local Git program). The "create-index" Action lists out the names of your files exactly, so you will end up with ugly strings of numbers and letters on your Index page if you don't rename them, which is terrible to look at and also plain old CONFUSING to navigate.
So if you're uploading on mobile or through Github on browser, name your files with easy to remember and distinctive filenames before you go ahead and upload them. This makes everything much easier, and it makes your Index page look nice :)
My website isn’t updating when I edit my Github repository!
Check to see if your Pages is retrieving from the correct branch, and if it has automatic deployments enabled.

Can’t see your Github repository when trying to link it on Cloudflare?
Check your Github applications Repository Access settings. Go to your ACCOUNT Settings > Integrations - Applications > Cloudflare > Repository Access

Index action is failing!
Go back to step 3 in Basic Setup and check if you’ve given Actions permission to read and write. If that’s not the issue, check to see if you’ve set up your "index.py" files correctly. The folder names should correspond to the parent folders, and the "create-index.py" file in the outer-most folder should have the correct folder names at the VERY BOTTOM.
How do I rename a folder (or move a file) in Github’s web UI?
It isn’t possible to directly rename a folder in Github’s web UI, doing it using Git on your computer is the most foolproof way to do it. But there is a way (except for media files).
Go into the folder you want to rename and select a file such as “index.html” and enter the “edit” mode.
Go to the file name and backspace until you can edit the parent folder name as well. This will create a new folder with the new name.
You’ll have to do this to every file in the folder until they’re all in the new folder.
Unfortunately, you can’t do this with media files like png/jpg/etc, because entering the “edit” mode on a photo “breaks” it somehow, and bye-bye image :’) (Don’t worry if this happens, just don’t commit the change or roll it back in your history).
Optional Steps
Make deployment (semi-)Manual
You can play with cloudflare and github to make deployment of your site a manual step you have to trigger, instead of automatic with each commit (default setting). This is a safeguard in case you accidentally make a change or delete something from your github, it won't affect your website.
Deploy w/ Branches
You could do a semi-automatic deployment with a "Production" branch on your github that is separate from the branch you edit. This creates an extra step before anything is published on Cloudflare. A safeguard against accidental changes/deletion of sorts :)

Go to Settings > Build tab > Branch Control
Choose your Production Branch (MAIN or CLOUDFLARE) and enable (or disable) automatic deployments
If you choose MAIN, every change you commit to MAIN will be published to Pages
If you choose CLOUDFLARE, any changes you make to MAIN will not show up on your Pages site until you Pull from MAIN to CLOUDFLARE
To Pull changes from MAIN to CLOUDFLARE, go to your github repository
Above your files on the Left, you will see a toggle to choose which branch you are on.
Choose Cloudflare. There will be a message like "This branch is 7 commits ahead of, 2 commits behind main." Click "2 commits behind"
Click "Create a Pull Request". Then click "Merge Pull Request". If everything is correct, this should trigger a build on your Cloudflare
Deploy w/ Github Actions
Or you can create a manual command that you have to enter on github to trigger a deployment on cloudflare. If you're paranoid about anything happening to your site due to a mishap on the Github side, this is a safe choice. Unless you manually trigger the command, your Pages site will be completely untouched no matter if something happens to your repo.
This can be done in many ways, I think the most straightforward is with Deploy Hooks (maybe in conjunction with Actions if you want to make it mobile-friendly), and might be a bit complicated, but not too hard to figure out with some Google-fu.
Here’s some links I think will be useful (note: I don’t use this method, so these haven’t been tested)
Manual trigger action tutorial
How to configure Github webooks
Storing Locally instead of on Github
Although this guide is written with Cloudflare's Github integration in mind, particularly for easy online/mobile access, you can also keep your files locally on your PC and directly upload your assets onto your Pages project. This gives you full control over what happens to your files. (Keeping backups is a good idea. You can still use Github Desktop to do this, just keep your repository on your PC.)
Simply clone/download the repository as it is, customize it as you like, and create a NEW Pages project on Cloudflare, using "Direct Upload" to upload your files
Once you have connected a Pages project with Github, there is no way to change the deployment method to Direct Upload or vice versa. Direct Upload is also not available for Workers.
One thing that will NOT work the same is the "create-index" Action that only works on Github.
I have made a "create-index.exe" that will execute the "create-index.py" files in the exact same way as they would work with the Action. You do not have to install python for this to work (if I did everything right). Simply run "create-index.exe" whenever you make a change and want to update the "index.html" files
Remember, this is EXACTLY THE SAME as the "create-index" Action, meaning you have to edit each "index.py" file when you rename folders, add a folder, want to exclude a file from the Index page, etc. (See Adding/Renaming Folders for how to do this)
Find me on Bluesky. Or if you have a problem, open an Issue on this project :)
I'll try to answer your questions as best I can! But really, I am the most amateur of amateurs and figured this all out using Google, so I might not be of much help ^^;
I also recommend Squidge Images (an offshoot of Squidge.org) as a fairly trustworthy alternative. However, Squidge Images does have some additional rules that Squidge does not, and what crosses the line is at their discretion.
I also posted this over on AO3!
5 notes
·
View notes
Text
Infrastructure for Teamwork, a.k.a. Version Control
Working together on a game is quite difficult. How do you make sure everyone is on the same page?
You could send zips with assets and code between people, but that is slow, cumbersome, and very error-prone.
This is why Source Control software was invented. With Source Control, you can store the project files on a server, and everyone who wants to work on the project files, can download the project from the server. Once they're done with their changes, they send them back to the server. Then the other people can get those changes from the server again.
There are many different Source Control softwares. Probably the best-known one is git. (Source Control, Version Control, Revision Control all mean essentially the same thing.) Git is very good for working on projects that are all just plain-text code. However, it kind of falls flat when it needs to deal with binary assets, like textures, models, and sounds. Unreal Engine Scenes and Blueprints are also binary files. So if you don't use C++, but only Blueprints, basically your entire project is binary files.
This is why I went looking for a different Version Control Software that can handle this better. At my internship, I used Subversion, which is said to work better with binary assets, but in my experience then, it still wasn't exactly great. Though that might also have been due to the fact that they barely used any of its fancier features there.
Unreal Engine itself recommends using Perforce Helix Core. (Perforce is the company, Helix Core is the VCS, but the term "Perforce" is usually used to refer to the VCS itself, due to historical reasons. Source) So I looked into it, and indeed, it seemed very suitable!
So we requested a computer from the XR Lab to use as server for this project, and I installed the Helix Core Server on it.


It was surprisingly easy to install!
I then downloaded the Helix Core Client application on my laptop, and connected to the server. The setup there took a while, because there was a lot to learn. But in the end, I did it!
Sadly, Perforce is not free, so we are forced to use the free version, which is limited to a maximum of five users. We are with ten people, so we had to choose a few "representatives" who would actually put the things everyone made into the project. We requested an educational licence from Saxion, but got told to wait. Now that the project is over, we still don't have it. We also requested an educational licence from Perforce itself, directly, but we have still not got a response. But we made do with the limitations we got.
I wrote a guide for my teammates on how to set up a workspace for the project with Perforce, and improved it multiple times based on user testing and feedback. (I sat next to my teammates while they were following the guide and tried my best to now say anything; to let the guide speak for itself. I would then take note of what went wrong and improved that section of the guide for the next user test.)
Over the months of this project, we all used P4V and Perforce to work together on the project. Due to Perforce's locking system, we never had any merge conflicts! Most of the team actually really enjoyed working with Perforce. Personally, I do miss git, but I acknowledge that for an Unreal Engine project, Perforce is a lot better. And I also found it pretty nice to work with. The documentation was pretty good, and they have a lot of tutorials, guide, and demonstration videos, which have been very helpful during the setup. It's very useful to be able to follow along every single click.
3 notes
·
View notes
Text
New Streaming Schedule (and New Update)

We're back with a Kickstarter update and a new streaming schedule! This December, we're going to git serious: we'll be streaming every week, twice a week (Monday and Thursday) for 2 hours at 3PM PST!
About the Streams
In addition to two new hangout editions of our “Let’s Build our Website” series where we'll finish all that we have pending and add more content to the website, we’ve added a couple new types of stream:
A tutorial write-along, where our project lead will explain how to use PayPal/Stripe links to easily add a tip jar on your Astro website (and compile that information in a blog post).
A learn-together session (possibly more than one), where you can follow an experienced software developer as she tries to learn the intricacies of accepting payments on the web, using the actual Stripe and PayPal APIs.
In addition to these, we’ll look at adding more characters into RobinBoob by scraping AO3 with AO3.js, and we’ll start a new series where we’ll rebuild the RobinBoob's functionality from scratch! After all, like many of our “April 1st projects”, RobinBoob was built in a feverish last-minute rush, and we cannot add some of the requested features without a serious rewrite!
Where to Find Them
We’ll see you this Monday, December 4th at 3PM (see converted time on the schedule) on Twitch, and all throughout December!
First Beta Feedback
And since Tumblr generously allows us to write as much as we want, here's a small sample of the feedback to the first draft of our first issue! You can read more about it under the cut, or get the full details on Kickstarter.
“Unlike other code guides, it's engaging and not dry. [I] wish some of the coding books i read in the past were like the fujoguide cause like. i would have been more into it”
“The guide was really easy to use for the most part, with cute examples and just... really fun!”
“I'm enjoying this, it's approachable and I really like the various ways information is presented; it looks like a legit textbook, like it seems like I could've picked this up from a shelf in Barnes & Noble.”
“I'm really happy at how many cool things are packed here. I have so many friends I will throw this guide at once complete!”
Looking forward to sharing our guide with you all!
30 notes
·
View notes
Text
DevOps Training in Marathahalli Bangalore – Build a Future-Proof Tech Career

Are you looking to transition into a high-growth IT role or strengthen your skills in modern software development practices? If you're in Bangalore, particularly near Marathahalli, you're in one of the best places to do that. eMexo Technologies offers a detailed and industry-ready DevOps Training in Marathahalli Bangalore designed for beginners, professionals, and career changers alike.
Explore DevOps Course in Marathahalli Bangalore – Key Skills You’ll Gain
This DevOps Course in Marathahalli Bangalore is structured to give you both theoretical knowledge and hands-on experience. Here’s what the curriculum typically covers:
Core Modules:
Step into the world of DevOps Training Center in Marathahalli Bangalore, where you'll discover how this powerful approach bridges the gap between development and operations to streamline processes and boost efficiency in today’s tech-driven environment.
✅ Linux Basics: Learn command-line fundamentals essential for DevOps engineers.
✅ Version Control with Git & GitHub: Master source code management.
✅ Automate your software build and deployment: workflows seamlessly using Jenkins as a powerful Continuous Integration tool.
✅ Configuration Management with Ansible: Manage infrastructure more efficiently.
✅ Containerization using Docker: Package apps with all their dependencies.
✅ Orchestration with Kubernetes: Manage containers at scale.
✅ Cloud Computing with AWS: Get started with DevOps in cloud environments.
✅ Monitoring & Logging with Prometheus, Grafana: Gain insights into application performance.
✅ CI/CD Pipeline Implementation: Build end-to-end automation flows.
✅ Everything is taught with real-time: examples, project work, and lab exercises.
Get Recognized with a DevOps Certification Course in Marathahalli Bangalore – Boost Your Industry Credibility
Upon completing the course, you'll be awarded a DevOps Certification Course in Marathahalli Bangalore issued by eMexo Technologies, validating your expertise in the field. This certification is designed to validate your expertise and improve your credibility with hiring managers. It’s especially useful for roles like:
✅ DevOps Engineer
✅ Site Reliability Engineer (SRE)
✅ Build & Release Engineer
✅ Automation Engineer
✅ System Administrator with DevOps skills
Top-Rated Best DevOps Training in Marathahalli Bangalore – Why eMexo Technologies Stands Out from the Rest
When it comes to finding the Best DevOps Training in Marathahalli Bangalore, eMexo Technologies ticks all the boxes:
✅ Up-to-Date Curriculum: Constantly refreshed to include the latest industry tools and practices.
✅ Experienced Trainers: Learn from industry professionals with 8–15 years of real-world experience.
✅ Real Projects: Work on case studies and scenarios inspired by actual DevOps environments.
✅ Flexible Timings: Choose from weekday, weekend, and online batches.
✅ Affordable Pricing: With the current 40% discount, this course is great value for money.
✅ Lifetime Access to Materials: Revise and revisit anytime.
DevOps Training Institute in Marathahalli Bangalore – Why Location Matters
Located in one of Bangalore’s biggest IT hubs, eMexo Technologies is a top-rated DevOps Training Institute in Marathahalli Bangalore. Proximity to major tech parks and MNCs means better networking opportunities and access to local job openings right after your course.
DevOps Training Center in Marathahalli Bangalore – Hands-On, Tech-Ready Lab Environment
At the DevOps Training Center in Marathahalli Bangalore, students don’t just watch tutorials—they do the work. You’ll have access to a fully equipped lab environment where you’ll implement DevOps pipelines, configure cloud environments, and monitor system performance.
DevOps Training and Placement in Marathahalli Bangalore – Start Working Faster
Job support is one of the biggest advantages here. The DevOps Training and Placement in Marathahalli Bangalore equips you with everything you need to launch a successful career in DevOps, including:
✅ 1:1 career counseling
✅ Resume building support
✅ Mock interviews with real-time feedback
✅ Interview scheduling and referrals through their hiring partners
✅ Post-course job alerts and updates
Many past students have successfully secured roles at top companies like Infosys, Wipro, TCS, Mindtree, and Accenture.
youtube
Don’t Miss This Opportunity!
If you're serious about breaking into tech or advancing in your current role, now is the perfect time to act. With expert-led training, hands-on labs, and full placement support, eMexo Technologies' DevOps Training in Marathahalli Bangalore has everything you need to succeed.
👉 Enroll now and grab an exclusive 30% discount on our DevOps training – limited seats available!
🔗 Click here to view course details and enroll
#DevOps#DevOpsTraining#DevOpsCourse#LearnDevOps#DevOpsEngineer#DevOpsSkills#DevOpsCulture#Git#Jenkins#Docker#Kubernetes#Ansible#Terraform#Prometheus#Grafana#CI/CD#Automation#ITTraining#CloudComputing#SoftwareDevelopment#CareerGrowth#DevOpsTrainingcenterinBangalore#DevOpsTrainingInMarathahalliBangalore#DevOpsCourseInMarathahalliBangalore#DevOpsTrainingInstitutesInMarathahalliBangalore#DevOpsClassesInMarathahalliBangalore#BestDevOpsTrainingInMarathahalliBangalore#DevOpsTrainingandPlacementinMarathahalliBangalore#Youtube
1 note
·
View note
Text
Mastering Web Development: A Comprehensive Guide for Beginners
In the vast landscape of technology, web development stands as a crucial cornerstone. It encompasses the art and science of building websites, ranging from simple static pages to complex web applications. Whether you're aiming to pursue a career in software development or seeking to enhance your digital presence, understanding web development is essential.
In this comprehensive guide, we'll take you through the fundamental concepts and practical skills needed to master web development from scratch. Let's dive in!
1. Understanding HTML (Hypertext Markup Language)
HTML serves as the backbone of every web page, providing the structure and content. It uses tags to define different elements such as headings, paragraphs, images, and links. By mastering HTML, you'll be able to create well-structured and semantically meaningful web documents.
2. Exploring CSS (Cascading Style Sheets)
CSS is the language used to style HTML elements, enhancing their appearance and layout. With CSS, you can customize colors, fonts, spacing, and more, giving your website a polished and professional look. Understanding CSS selectors and properties is essential for effective styling.
3. Introduction to JavaScript
JavaScript is a versatile programming language that adds interactivity and dynamic behavior to web pages. From simple animations to complex web applications, JavaScript powers a wide range of functionalities. Learning JavaScript fundamentals such as variables, functions, and events is crucial for web development.
4. Building Responsive Websites
In today's mobile-centric world, it's essential to create websites that adapt seamlessly to various screen sizes and devices. Responsive web design achieves this by using fluid grids, flexible images, and media queries. Mastering responsive design principles ensures that your websites look great on desktops, tablets, and smartphones.
5. Introduction to Version Control with Git
Git is a powerful tool for tracking changes in your codebase and collaborating with other developers. By learning Git basics such as branching, merging, and committing, you can streamline your development workflow and effectively manage project versions.
6. Introduction to Front-End Frameworks
Front-end frameworks like Bootstrap, Foundation, and Materialise provide pre-designed components and stylesheets to expedite web development. By leveraging these frameworks, you can create responsive and visually appealing websites with less effort and code.
7. Introduction to Back-End Development
While front-end development focuses on the user interface, back-end development deals with server-side logic and database management. Learning back-end languages such as Node.js, Python, or PHP enables you to build dynamic web applications and handle user interactions efficiently.
8. Deploying Your Website
Once you've developed your website, it's time to make it accessible to the world. Deploying a website involves selecting a web hosting provider, uploading your files, and configuring domain settings. Understanding the deployment process ensures that your website goes live smoothly.
9. Conclusion and Next Steps
Congratulations on completing this comprehensive guide to mastering web development! By now, you've gained a solid understanding of HTML, CSS, JavaScript, version control, frameworks, and deployment. As you continue your journey in web development, remember to stay curious, practice regularly, and explore advanced topics to further refine your skills.
Resources for Further Learning:
Online tutorials and documentation
Interactive coding platforms
Community forums and discussion groups
Next Steps:
Explore advanced topics such as web performance optimization, server-side rendering, and progressive web apps.
Build real-world projects to apply your skills and showcase your portfolio.
Stay updated with the latest trends and technologies in web development through blogs, podcasts, and conferences.
With dedication and perseverance, you'll continue to evolve as a proficient web developer, creating innovative solutions and contributing to the ever-changing digital landscape . Happy coding!
4 notes
·
View notes
Text
Navigating the DevOps Landscape: A Beginner's Comprehensive
Roadmap In the dynamic realm of software development, the DevOps methodology stands out as a transformative force, fostering collaboration, automation, and continuous enhancement. For newcomers eager to immerse themselves in this revolutionary culture, this all-encompassing guide presents the essential steps to initiate your DevOps expedition.

Grasping the Essence of DevOps Culture: DevOps transcends mere tool usage; it embodies a cultural transformation that prioritizes collaboration and communication between development and operations teams. Begin by comprehending the fundamental principles of collaboration, automation, and continuous improvement.
Immerse Yourself in DevOps Literature: Kickstart your journey by delving into indispensable DevOps literature. "The Phoenix Project" by Gene Kim, Jez Humble, and Kevin Behr, along with "The DevOps Handbook," provides invaluable insights into the theoretical underpinnings and practical implementations of DevOps.
Online Courses and Tutorials: Harness the educational potential of online platforms like Coursera, edX, and Udacity. Seek courses covering pivotal DevOps tools such as Git, Jenkins, Docker, and Kubernetes. These courses will furnish you with a robust comprehension of the tools and processes integral to the DevOps terrain.
Practical Application: While theory is crucial, hands-on experience is paramount. Establish your own development environment and embark on practical projects. Implement version control, construct CI/CD pipelines, and deploy applications to acquire firsthand experience in applying DevOps principles.

Explore the Realm of Configuration Management: Configuration management is a pivotal facet of DevOps. Familiarize yourself with tools like Ansible, Puppet, or Chef, which automate infrastructure provisioning and configuration, ensuring uniformity across diverse environments.
Containerization and Orchestration: Delve into the universe of containerization with Docker and orchestration with Kubernetes. Containers provide uniformity across diverse environments, while orchestration tools automate the deployment, scaling, and management of containerized applications.
Continuous Integration and Continuous Deployment (CI/CD): Integral to DevOps is CI/CD. Gain proficiency in Jenkins, Travis CI, or GitLab CI to automate code change testing and deployment. These tools enhance the speed and reliability of the release cycle, a central objective in DevOps methodologies.
Grasp Networking and Security Fundamentals: Expand your knowledge to encompass networking and security basics relevant to DevOps. Comprehend how security integrates into the DevOps pipeline, embracing the principles of DevSecOps. Gain insights into infrastructure security and secure coding practices to ensure robust DevOps implementations.
Embarking on a DevOps expedition demands a comprehensive strategy that amalgamates theoretical understanding with hands-on experience. By grasping the cultural shift, exploring key literature, and mastering essential tools, you are well-positioned to evolve into a proficient DevOps practitioner, contributing to the triumph of contemporary software development.
2 notes
·
View notes
Text
Strategic Learning on a Shoestring: DevOps Certification on a Budget
Embarking on the path to becoming a certified DevOps engineer need not be accompanied by a hefty price tag. In a digital realm overflowing with resources, you can effectively traverse this journey without breaking the bank. Let's unravel a comprehensive guide in 500 words, charting the steps to attain DevOps certification without a substantial financial investment.

1. Establishing a Solid Foundation: Grasping DevOps Principles Commence your journey with a robust understanding of DevOps principles and practices. Immerse yourself in the realm of free online resources, including blogs, articles, and introductory courses. Platforms such as Dev.to and Medium host insightful articles, while MOOCs on Coursera deliver structured introductory courses to set the stage.
2. Leveraging Online Learning Platforms: Accessing Cost-Free Courses Esteemed online learning platforms like Coursera, edX, and LinkedIn Learning provide an array of free DevOps courses. Collaborating with universities and industry experts, these platforms offer quality content. Explore courses from institutions like the University of California, Google Cloud, or Microsoft to gain a well-rounded understanding of DevOps practices.
3. YouTube Tutorials: A Wealth of Free Knowledge YouTube stands as a treasure trove of tutorials spanning various DevOps tools and practices. Channels like "The Net Ninja," "edureka!," and "Techsith" furnish free, in-depth tutorials. From version control to containerization and CI/CD pipelines, leverage these resources to absorb concepts visually and at your own pace.
4. Mastering Version Control: Git and GitHub Proficiency Proficiency in version control systems, particularly Git, is indispensable for a DevOps engineer. Platforms like GitHub offer free accounts for personal projects, providing the space to practice version control, collaborate, and showcase your prowess. Immerse yourself in repositories, contribute to open source projects, and build a tangible portfolio.
5. Hands-On Practice: Virtual Labs for Practical Expertise Solidify theoretical knowledge through hands-on practice in virtual labs using tools like VirtualBox or Vagrant. These environments provide a sandbox for experimenting with various DevOps tools and workflows. Practical experience is the linchpin for translating theory into applied skills.

6. Contributing to Open Source: Collaborating in Real-World Projects Actively engage in open source projects on platforms like GitHub. This avenue offers opportunities for collaboration, exposure to real-world scenarios, and a chance to exhibit your skills. Your contributions serve as tangible proof of your practical abilities and commitment to the DevOps community.
7. Free Certification Courses: Accessible Learning Paths While certain certifications may come with a price tag, numerous organizations offer free DevOps-related certification courses. Platforms such as Google Cloud, Microsoft Learn, and the Linux Foundation provide accessible courses. While the certification itself may involve a cost, the learning resources leading up to it often come without a financial burden.
In conclusion, achieving DevOps certification without a substantial financial commitment is not only plausible but also attainable with a strategic approach. By amalgamating self-paced learning, practical application, and community involvement, you can cultivate a robust skill set and confidently pursue DevOps certification without incurring significant expenses. Dedication, proactive learning, and a commitment to continuous improvement will serve as your guiding lights on this budget-friendly DevOps journey. Best of luck!
2 notes
·
View notes
Text
A Step-By-Step Guide To Starting Your Developer’s Journey
Giks Canada
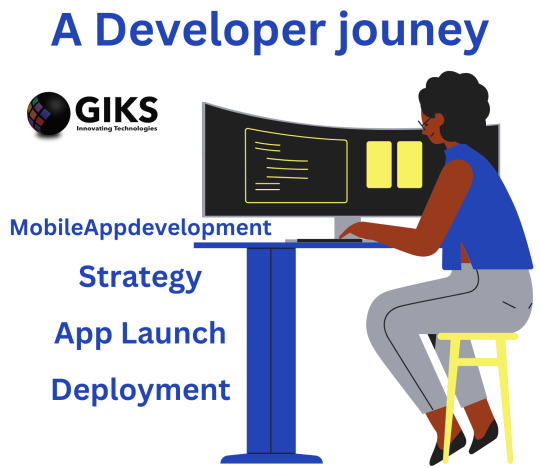
Embarking on Your Developer's Journey: A Step-By-Step Guide
The world of software development is a realm of endless creativity, innovation, and problem-solving. Whether you're just starting out or looking to transition into a tech career, embarking on your developer's journey is an exciting endeavor. From learning the fundamentals to mastering advanced concepts, this step-by-step guide will help you navigate the path to becoming a skilled developer.
Step 1: Define Your Path
Begin by clarifying your goals. Are you interested in frontend or backend development? Mobile apps or web applications? Defining your focus will guide your learning journey.
Step 2: Choose a Programming Language
Select a programming language aligned with your chosen path. For web development, consider languages like HTML, CSS, and JavaScript. For backend development, explore options like Python, Ruby, or Java.
Step 3: Learn the Basics
Start with the basics. Online platforms, coding bootcamps, and tutorials offer beginner-friendly resources to help you grasp programming concepts, syntax, and logic.
Step 4: Build Small Projects
Apply what you've learned by building small projects. These could be simple websites, calculators, or basic apps. Practice is key to solidify your understanding.
Step 5: Explore Frameworks
Frameworks simplify development. For web development, explore frontend frameworks like React or backend frameworks like Django and Ruby on Rails.
Step 6: Version Control with Git
Git is essential for collaboration and version control. Learn the basics of Git and platforms like GitHub to manage your projects effectively.
Step 7: Dive Deeper
As you gain confidence, delve into more advanced topics. Learn about databases, APIs, authentication, and other crucial concepts relevant to your chosen path.
Step 8: Solve Real-world Problems
Challenge yourself with real-world problems. Platforms like LeetCode and HackerRank offer coding challenges that enhance your problem-solving skills.
Step 9: Collaborate and Network
Join coding communities, forums, and meetups. Networking helps you learn from others, get feedback, and stay updated on industry trends.
Step 10: Build a Portfolio
Create a portfolio showcasing your projects. A strong portfolio demonstrates your skills and makes you stand out to potential employers.
Step 11: Seek Internships or Freelance Work
Apply your skills in real-world scenarios through internships or freelance work. Practical experience is invaluable for your growth as a developer.
Step 12: Keep Learning
Technology evolves rapidly. Stay curious and continue learning about new languages, tools, and trends to remain relevant in the field.
Step 13: Specialize
As you gain experience, consider specializing in a niche area like mobile app development, machine learning, or cybersecurity.
Step 14: Contribute to Open Source
Contributing to open-source projects enhances your skills, connects you with the community, and boosts your resume.
Step 15: Stay Adaptable
Adaptability is key in tech. Embrace change, continuously update your skills, and be open to learning new technologies.
In Conclusion
Embarking on your developer's journey requires dedication, perseverance, and a thirst for learning. Remember, every coder started as a beginner. By following this step-by-step guide, you'll lay a strong foundation for your growth as a developer. Stay curious, build, collaborate, and continuously improve – your journey has just begun.
For more information go to my blog website.
2 notes
·
View notes
Text
Unlock Your DevOps Potential with the Complete Jenkins CI/CD Pipeline Guide

If you're serious about becoming a DevOps engineer or just starting your journey in the world of software automation, mastering Jenkins is your golden ticket. Jenkins isn't just another buzzword—it’s the backbone of continuous integration and continuous delivery (CI/CD) in modern software teams. Whether you're working solo or part of a fast-paced agile team, knowing how to set up and manage Jenkins pipelines can save you time, cut down on errors, and launch your productivity to the next level.
In this blog, we’ll walk you through why Jenkins is still one of the most powerful CI/CD tools out there, and how the Complete Jenkins DevOps CI/CD Pipeline course can be your fast-track route to mastering it—all without getting stuck in confusing documentation or endless YouTube tutorials.
Why Jenkins is a Must-Know Tool in DevOps
Let’s face it—software delivery isn’t what it used to be. Gone are the days when code changes were deployed once every few weeks or months. Today, top-performing teams deploy multiple times a day. That kind of agility needs serious automation behind the scenes.
Jenkins offers exactly that. It’s an open-source automation server with hundreds of plugins to support building, deploying, and automating any project. And it’s been battle-tested by some of the biggest tech companies in the world.
Here’s what Jenkins brings to the table:
Automation at every stage: From pulling code to testing, building, and deploying, Jenkins takes care of everything.
Custom pipeline scripting: With Jenkinsfile, you can describe every stage of your pipeline in simple, version-controlled scripts.
Huge plugin ecosystem: There’s a plugin for practically every tool—Docker, GitHub, Slack, Kubernetes, you name it.
Scalability: Jenkins can run on a single machine or scale out to thousands of nodes in enterprise environments.
But here’s the thing—setting up Jenkins and actually making it work for your projects isn’t always easy. That’s where a step-by-step, hands-on learning experience becomes crucial.
What You’ll Learn in the Complete Jenkins DevOps CI/CD Pipeline Course
If you're wondering whether this course is beginner-friendly or packed with real-world projects—the answer is yes to both. The Complete Jenkins DevOps CI/CD Pipeline course has been designed to teach you everything from scratch, without assuming any prior DevOps experience.
Here’s a glimpse into what’s covered:
Jenkins installation and setup: You’ll learn how to install Jenkins on different platforms and set up your first jobs and pipelines.
CI/CD workflow design: From building and testing your code to deploying it on live servers, you’ll understand the full flow.
Pipeline as Code: Using Jenkinsfile, you’ll write and manage your pipelines like a pro.
Integration with popular tools: Jenkins doesn’t work in isolation. You'll connect it with Git, Maven, Docker, and even cloud platforms like AWS.
Advanced topics: Learn how to trigger jobs automatically, manage credentials securely, and scale Jenkins using master-agent architecture.
And all of this is taught in a way that’s simple, practical, and interactive. No long lectures. Just real skills, real projects, and real confidence.
Who is this Jenkins DevOps Course For?
You don’t have to be a DevOps wizard to start this course. In fact, it’s perfect for:
Developers who want to automate builds and deployments
QA engineers who need faster testing pipelines
System administrators interested in automation tools
IT students looking to boost their resumes
Freelancers & startups aiming to ship faster with less hassle
Even if you’ve never touched Jenkins before, you’ll be up and running in no time. And if you already have some experience, this course will take your skills to the next level.
Real Projects That Make a Real Difference
The biggest difference between theory and practice? Application.
That’s why the Complete Jenkins DevOps CI/CD Pipeline course includes hands-on projects that reflect real-world scenarios. You won’t just learn how Jenkins works—you’ll actually build pipelines that deploy applications, run automated tests, and send notifications when things go wrong (or right).
By the time you finish, you’ll have actual project experience you can showcase in your portfolio or job interviews.
Why Choose This Jenkins Course?
There are a lot of Jenkins tutorials out there. So what makes this one different?
✅ Beginner-friendly, expert-approved: Every lesson is structured to teach beginners while offering depth for experienced users.
✅ Up-to-date content: It reflects the current best practices in CI/CD and Jenkins configuration.
✅ Lifetime access: You can revisit any module whenever you want, no matter how your needs grow.
✅ Certificate of Completion: Perfect for job seekers or adding to your LinkedIn profile.
How Jenkins Skills Boost Your Career
Whether you're looking for a new job, a promotion, or planning to start your own tech project, Jenkins expertise is in high demand.
According to recent reports:
Companies using CI/CD are 5x more likely to deliver faster software.
Jenkins is mentioned in thousands of DevOps job listings.
Jenkins users often command higher salaries in tech roles.
In short, learning Jenkins isn’t just about adding another tool to your belt—it’s about becoming a go-to problem solver in any modern development team.
Final Thoughts: Learn Jenkins the Smart Way
Trying to learn Jenkins by piecing together free videos and blog posts can leave you confused and frustrated. But with the Complete Jenkins DevOps CI/CD Pipeline course, you get a clear path—from zero to fully automated deployment pipelines.
No fluff, no unnecessary complexity. Just real-world skills that help you save time, reduce errors, and deliver better software.
So if you're ready to level up your DevOps journey and build pipelines like the pros, this is your sign.
0 notes
Text
Web Designing and Development Course: Learn the Skills to Build Stunning, High-Performing Websites
The Web Designing and Development Course is a professionally curated academic program that aims to equip students with the theoretical knowledge and practical expertise necessary for designing, building, and maintaining responsive, accessible, and dynamic websites and web applications. This course is structured to provide a balanced integration of visual design principles, front-end and back-end development techniques, and industry-relevant tools and technologies, thereby preparing students for a successful career in the digital design and development sector.
Course Objectives
The primary objective of this program is to cultivate a deep understanding of the core concepts involved in both web design and web development. Students will be introduced to modern HTML, CSS, and JavaScript frameworks, user experience (UX) and user interface (UI) design strategies, responsive web design, content management systems (CMS), and full-stack development methodologies. Through a blend of lectures, hands-on projects, workshops, and case studies, learners will develop critical thinking, problem-solving, and coding skills essential for today’s digital landscape.
Curriculum Structure
The course curriculum is meticulously segmented into multiple modules, each focusing on a distinct domain within the field of web technologies:
Foundations of Web Design: This module introduces the basic principles of design theory, typography, color theory, and layout techniques. Students gain familiarity with tools such as Adobe XD, Figma, and Sketch for creating wireframes and prototypes.
HTML & CSS Mastery: A comprehensive examination of HTML5 and CSS3, including semantic markup, styling techniques, and layout frameworks like Flexbox and Grid. The emphasis is placed on standards-compliant coding and accessibility best practices.
JavaScript and Front-End Frameworks: Students explore the dynamics of client-side scripting using JavaScript, along with contemporary libraries and frameworks such as React, Angular, or Vue.js. Key topics include DOM manipulation, asynchronous programming, and modular coding practices.
Responsive and Mobile-First Design: This segment focuses on creating websites that function seamlessly across a variety of devices and screen sizes. Techniques for adaptive design and mobile-first development are thoroughly covered.
Back-End Development: Students are introduced to server-side programming languages like PHP, Python, or Node.js, along with database integration using MySQL or MongoDB. The module emphasizes RESTful API design, data handling, and secure user authentication.
Version Control and Deployment: Training in version control systems such as Git and platforms like GitHub is provided. Students also learn how to deploy websites and applications using hosting platforms and continuous integration tools.
Content Management Systems (CMS): This component covers the development and customization of CMS platforms, with a particular focus on WordPress and Drupal, enabling students to efficiently manage dynamic website content.
Capstone Project and Portfolio Development: In the final phase, students apply their accumulated knowledge to develop a full-scale web project that demonstrates their proficiency. They also curate a professional portfolio to showcase their work to potential employers or clients.
Teaching Methodology
The program employs a blended learning approach that combines theoretical instruction with project-based application. Experienced instructors guide students through live coding sessions, interactive tutorials, peer reviews, and collaborative problem-solving exercises. Regular assessments and feedback sessions are conducted to track progress and identify areas for improvement.
Learning Outcomes
Upon successful completion of the course, participants will be able to:
Design aesthetically pleasing and user-centric website interfaces.
Develop fully functional websites and web applications using both front-end and back-end technologies.
Implement responsive and mobile-friendly design practices.
Utilize version control and deployment tools for collaborative development.
Apply principles of usability, accessibility, and web standards.
Create and manage content through CMS platforms.
Construct a professional portfolio that reflects their technical and design competencies.
Career Prospects
Graduates of the Web Designing and Development Course are well-positioned for a variety of career paths in the digital technology industry. Potential roles include, but are not limited to, Front-End Developer, Back-End Developer, Full-Stack Web Developer, UI/UX Designer, Web Designer, CMS Developer, and Freelance Web Consultant. With the continuous evolution of digital technologies, the demand for skilled web professionals remains robust across industries such as IT services, e-commerce, education, media, and corporate enterprise.
Admission Criteria
The course is open to individuals with a foundational understanding of computer usage and internet technologies. While no prior programming experience is required, familiarity with basic coding concepts is advantageous. The program is suitable for recent graduates, working professionals seeking career transitions, and entrepreneurs aiming to build digital products or services.
Conclusion
In an increasingly digital world, the ability to design and develop user-friendly, efficient, and scalable websites is a valuable and sought-after skill. This Web Designing and Development Course provides an academically rigorous and industry-aligned pathway for learners to become proficient digital creators. Through a well-rounded curriculum, expert mentorship, and practical learning experiences, students are empowered to become innovative contributors to the web development field.
0 notes
Link
Discover the difference between lightweight and annotated tags in Git and learn how to create and use them effectively. Git Lightweight vs Annotated Tags Git tags are used to mark specific points in your project’s history, like releases. There are two main types: lightweight and annotated. This tutorial explains the differences between them and shows how to create each one with practical examples. What is a Lightweight Tag? A lightweight tag is like a bookmark to a specific commit. It does not store additional metadata such as the tagger’s name, date, or a message. It is quick to create and is often used for local or temporary purposes. git tag v1.0 What is an Annotated Tag? An annotated tag is stored as a full object in Git, including the tagger’s information, date, and a message. It is signed with GPG if configured and is preferred for release versions. git tag -a v1.0 -m \\"Version 1.0 release\\" Viewing Tags You can list all tags in your repository using: git tag Sharing Tags To push your tags to a remote repository, use: git push origin --tags Summary Lightweight tags are simple pointers to commits, while annotated tags are rich objects used for releases. Use annotated tags when you need metadata or to sign releases. Subscribe to Our YouTube for More Download as PDF
0 notes
Text
How to choose the right iT course for you (Beginner-Friendly Guide)
So, you’ve decided to jump into the world of IT , but now you’re staring at a long list of courses: Python, Full Stack, Digital Marketing, Cybersecurity, AI, and more. Feeling confused? You're not alone. 😅
Whether you’re a student, a job seeker, or someone thinking of a career switch, this guide will help you choose the right IT course step by step.
Step 1: Know Where You’re Starting From
First, take a deep breath and ask yourself:
Am I a complete beginner?
Do I have some experience in tech or coding?
Am I switching from a non-tech background?
✅ If you're totally new, don’t worry! Many IT courses are designed for beginners even if you don’t have a tech degree.
Step 2: Define Your Career Goal (Don’t Skip This!)
You don’t need to know everything today but having a goal helps. Ask yourself:
Do I want to build websites or apps? → Look into Web Development
Do I enjoy solving puzzles or logic problems? → Try Programming (like Python or Java)
Do I like visuals and creativity? → Explore UI/UX Design.
Am I interested in hacking and online safety? → Go for Cybersecurity.
Do I want to understand how AI tools like ChatGPT work? → Learn Artificial Intelligence or Machine Learning.
Pro Tip: It’s okay if your goals change later. The idea is just to have a direction.
Step 3: Test the Waters (Without Spending a Lot)
Before committing to a 6-month course, try:
Free YouTube tutorials
Free coding platforms like W3Schools, Sololearn, or FreeCodeCamp
Demo classes offered by local IT institutes in Jaipur.
Many institutes (including ours in Jaipur) offer 1-day trial classes. It’s a great way to know if you actually enjoy the subject.
Step 4: Choose a course That balances theory + practice
Don’t fall for buzzwords alone. A good IT course should offer:
Real-world projects
Doubt sessions with mentors
Placement assistance
Updated syllabus with trending tools (like Git, React, AI APIs, etc.)
👉 Ask for the course curriculum before joining. If it's only theory and not practical, walk away.
Step 5: Find a good training institute (Preferably Local)
Since you're in Jaipur (or nearby), choose a local institute that provides:
Offline + online flexibility
Peer learning or community groups
Certification + placement support
Real reviews from students
Bonus Tip: Visit the center, talk to current students, and ask about their experience.
Step 6: Budget smartly (But Don’t Go Too Cheap)
Yes, budget matters. But choosing the cheapest course can sometimes cost you more especially if:
There’s no real support or mentor
You don’t get help with job placement
The syllabus is outdated
Instead, look for value. Some good IT institutes in Jaipur offer EMI options, scholarships, or discounts for students.
Step 7: Think beyond the course— what’s next?
After your course, what support do you get?
Internship opportunities?
Mock interviews or resume help?
Freelancing guidance?
Ask these questions before enrolling.
Real-Life Story: "How I Found My Path with Python"
Rohit, a B.Com graduate from Jaipur, felt stuck working at a BPO. He always loved solving puzzles but didn’t think he could learn programming. He joined a 3-month Python course, built 2 mini projects, and landed a remote internship in data analysis—all within 6 months.
Moral? It’s not about your degree. It’s about taking the first step.
✅ Final Checklist Before You Pick a Course
I know my basic career interests (web dev, AI, design, etc.)
I’ve tried a free tutorial or demo class.
I checked the syllabus and projects included.
The institute offers real mentorship and support.
I’m clear about what comes after the course.
Still Confused? We’re Here to Help
If you're still unsure, don’t worry. Book a free counseling session with our team in Jaipur—we'll listen to your goals and help you find the right course .
Remember: You don’t need to know everything right now. You just need to start. The right course will open doors you didn’t even know existed.
#AI-ml COurse#Jaipur#Best it Course inn Jaipur#Skill BABU - It course in Jaipur#Choose IT Course in Jaipur
0 notes