#Github jupyterlab
Explore tagged Tumblr posts
Visit Tumblr Blog
Explore Tumblr blogs with no restrictions, modern design and the best experience.
Last Seen Tumblr Blogs


Fun Fact
Tumblr Inc. is using 66 technologies for its website.
Text
Data Science Tutorial for 2025: Tools, Trends, and Techniques
Data science continues to be one of the most dynamic and high-impact fields in technology, with new tools and methodologies evolving rapidly. As we enter 2025, data science is more than just crunching numbers—it's about building intelligent systems, automating decision-making, and unlocking insights from complex data at scale.
Whether you're a beginner or a working professional looking to sharpen your skills, this tutorial will guide you through the essential tools, the latest trends, and the most effective techniques shaping data science in 2025.
What is Data Science?
At its core, data science is the interdisciplinary field that combines statistics, computer science, and domain expertise to extract meaningful insights from structured and unstructured data. It involves collecting data, cleaning and processing it, analyzing patterns, and building predictive or explanatory models.
Data scientists are problem-solvers, storytellers, and innovators. Their work influences business strategies, public policy, healthcare solutions, and even climate models.

Essential Tools for Data Science in 2025
The data science toolkit has matured significantly, with tools becoming more powerful, user-friendly, and integrated with AI. Here are the must-know tools for 2025:
1. Python 3.12+
Python remains the most widely used language in data science due to its simplicity and vast ecosystem. In 2025, the latest Python versions offer faster performance and better support for concurrency—making large-scale data operations smoother.
Popular Libraries:
Pandas: For data manipulation
NumPy: For numerical computing
Matplotlib / Seaborn / Plotly: For data visualization
Scikit-learn: For traditional machine learning
XGBoost / LightGBM: For gradient boosting models
2. JupyterLab
The evolution of the classic Jupyter Notebook, JupyterLab, is now the default environment for exploratory data analysis, allowing a modular, tabbed interface with support for terminals, text editors, and rich output.
3. Apache Spark with PySpark
Handling massive datasets? PySpark—Python’s interface to Apache Spark—is ideal for distributed data processing across clusters, now deeply integrated with cloud platforms like Databricks and Snowflake.
4. Cloud Platforms (AWS, Azure, Google Cloud)
In 2025, most data science workloads run on the cloud. Services like Amazon SageMaker, Azure Machine Learning, and Google Vertex AI simplify model training, deployment, and monitoring.
5. AutoML & No-Code Tools
Tools like DataRobot, Google AutoML, and H2O.ai now offer drag-and-drop model building and optimization. These are powerful for non-coders and help accelerate workflows for pros.
Top Data Science Trends in 2025
1. Generative AI for Data Science
With the rise of large language models (LLMs), generative AI now assists data scientists in code generation, data exploration, and feature engineering. Tools like OpenAI's ChatGPT for Code and GitHub Copilot help automate repetitive tasks.
2. Data-Centric AI
Rather than obsessing over model architecture, 2025’s best practices focus on improving the quality of data—through labeling, augmentation, and domain understanding. Clean data beats complex models.
3. MLOps Maturity
MLOps—machine learning operations—is no longer optional. In 2025, companies treat ML models like software, with versioning, monitoring, CI/CD pipelines, and reproducibility built-in from the start.
4. Explainable AI (XAI)
As AI impacts sensitive areas like finance and healthcare, transparency is crucial. Tools like SHAP, LIME, and InterpretML help data scientists explain model predictions to stakeholders and regulators.
5. Edge Data Science
With IoT devices and on-device AI becoming the norm, edge computing allows models to run in real-time on smartphones, sensors, and drones—opening new use cases from agriculture to autonomous vehicles.
Core Techniques Every Data Scientist Should Know in 2025
Whether you’re starting out or upskilling, mastering these foundational techniques is critical:
1. Data Wrangling
Before any analysis begins, data must be cleaned and reshaped. Techniques include:
Handling missing values
Normalization and standardization
Encoding categorical variables
Time series transformation
2. Exploratory Data Analysis (EDA)
EDA is about understanding your dataset through visualization and summary statistics. Use histograms, scatter plots, correlation heatmaps, and boxplots to uncover trends and outliers.
3. Machine Learning Basics
Classification (e.g., predicting if a customer will churn)
Regression (e.g., predicting house prices)
Clustering (e.g., customer segmentation)
Dimensionality Reduction (e.g., PCA, t-SNE for visualization)
4. Deep Learning (Optional but Useful)
If you're working with images, text, or audio, deep learning with TensorFlow, PyTorch, or Keras can be invaluable. Hugging Face’s transformers make it easier than ever to work with large models.
5. Model Evaluation
Learn how to assess model performance with:
Accuracy, Precision, Recall, F1 Score
ROC-AUC Curve
Cross-validation
Confusion Matrix
Final Thoughts
As we move deeper into 2025, data science tutorial continues to be an exciting blend of math, coding, and real-world impact. Whether you're analyzing customer behavior, improving healthcare diagnostics, or predicting financial markets, your toolkit and mindset will be your most valuable assets.
Start by learning the fundamentals, keep experimenting with new tools, and stay updated with emerging trends. The best data scientists aren’t just great with code—they’re lifelong learners who turn data into decisions.
0 notes
Text
SandboxAQ News: Improve Drug Discovery With Cloud-Scale AI

SandboxAQ News
Conventional drug discovery involves huge costs, long timelines, and a shocking failure rate. A novel medication may take decades to develop from earliest research to regulatory clearance. Many intriguing pharmaceutical candidates fail due to safety or efficacy difficulties. Few applications pass regulatory and clinical testing.
SandboxAQ helps scientists forecast biological occurrences, explore broad chemical areas, and understand molecular relationships. It reduces drug discovery and development time by employing cutting-edge computational methods including active learning, absolute free energy perturbation solution (AQFEP), generative AI, structural analysis, and predictive data analytics. All of this is cloud-native.
The Design-Make-Test cycle creates, synthesises, and tests molecules for drug design. Many clients use SandboxAQ during design when their computational methods fail. SandboxAQ speeds up this cycle to assist pharmaceutical scientists introduce strong novel compounds. SandboxAQ increased chemical space from 250,000 to 5.6 million molecules in a neurodegenerative illness project, increasing hit rate and candidate drug identification 30-fold.
Scientific understanding through cloud-native development
SandboxAQ uses Google Cloud resources and infrastructure to improve flexibility and scale for large-scale computing.
Large-scale virtual screening initiatives demand cost-effective and flexible solutions. In particular, SandboxAQ developers must quickly duplicate scientific code, execute it at scale economically, and store and organise all created data.
SandboxAQ improved scalability and efficiency with Google Cloud infrastructure. They increased computational throughput by 100X and employed tens of thousands of VMs in parallel. By 90% reducing idle time, they boosted utilisation. SandboxAQ combined development and deployment on Google Cloud to expedite large-scale batch processing, machine-learning model training, code development, and testing.
What's SandboxAQ?
Cloud-based SandboxAQ is built and implemented. A cloud-based platform enables scientists and engineers self-service virtual machines (VMs) with standardised and centrally controlled environments and tools for development, while code and data live in cloud services. This matters because scientific programming requires powerful computers. Researchers can utilise GPUs or 96-core CPUs. They may also construct new computers with multiple CPU types or configurations for low-friction testing and development across heterogeneous resources, as seen below.
The bench client lets SanboxAQ scientists and developers operate and access their Bench equipment. They can use JupyterLab for a familiar notebook development flow, a browser-based VNC service for rapid remote desktops, or SSH to access to PCs.
Once the code is ready for larger scale, researchers may utilise an internal tool powered by Batch, a fully managed service to plan, queue, and execute batch tasks on Google infrastructure, to send SandboxAQ parameterised calculations as jobs. With development and batch execution environments synchronised, scaled changes may be made quickly. After posting to GitHub, bench machine code can be batch executed immediately.
SandboxAQ scientists' bench computers automatically receive new tools as they are vetted and merged into the monorepo. These scientists may run parallel processes processing millions of molecules on any Google Cloud virtual machine resource in any geographic zone using on-demand or Spot VMs.
Globally resolved transitive dependency trees in SandboxAQ facilitate package and dependency management. Google Batch can simply integrate with engineer-created tools to train multiple model instances using this method.
Due to its heavy use of machine learning, SandoxAQ needs easy data access. SandboxAQ's Drug Discovery team provides services to clients with sensitive data. Bench and batch workloads read and write data from a single IAM-controlled interface, providing the firm granular control over data sources to secure client data.
Tools to monitor these workloads, surface logs to SandboxAQ scientists, and sift huge output data with Google Cloud services are trivial to construct. When new features are tried or faults are found, updates are done instantaneously without infrastructure work by the scientific team. The code may be centralised and uniformly integrated into production apps on Google Cloud after stabilising.
SandboxAQ has less trouble building and scaling new workloads thanks to Google Cloud's unified development, batch processing, and production environment. SandboxAQ's shared environments for scientific workload research and engineering enable customers to swiftly go from experimental to production, achieving desired outcomes.
Real-world SandboxAQ solution
SandboxAQ is already affecting drug development for difficult-to-treat diseases. There are innovative relationships with Riboscience, Sanofi, the Michael J. Fox Foundation, and UCSF Professor Stanley Pruisner's group. This method, based on Google Cloud SandboxAQ, outperforms high-throughput screening, demonstrating SandboxAQ's revolutionary potential in drug research and patient care.
#SandboxAQNews#DrugDiscovery#generativeAI#SandboxAQ#virtualmachines#GoogleCloud#GitHub#machinelearnin#SanboxAQscientists#govindhtech
0 notes
Text
Exploring Jupyter Notebooks: The Perfect Tool for Data Science

Exploring Jupyter Notebooks: The Perfect Tool for Data Science Jupyter Notebooks have become an essential tool for data scientists and analysts, offering a robust and flexible platform for interactive computing.
Let’s explore what makes Jupyter Notebooks an indispensable part of the data science ecosystem.
What Are Jupyter Notebooks?
Jupyter Notebooks are an open-source, web-based application that allows users to create and share documents containing live code, equations, visualizations, and narrative text.
They support multiple programming languages, including Python, R, and Julia, making them versatile for a variety of data science tasks.
Key Features of Jupyter Notebooks Interactive Coding Jupyter’s cell-based structure lets users write and execute code in small chunks, enabling immediate feedback and interactive debugging.
This iterative approach is ideal for data exploration and model development.
Rich Text and Visualizations Beyond code, Jupyter supports Markdown and LaTeX for documentation, enabling clear explanations of your workflow.
It also integrates seamlessly with libraries like Matplotlib, Seaborn, and Plotly to create interactive and static visualizations.
Language Flexibility With Jupyter’s support for over 40 programming languages, users can switch kernels to leverage the best tools for their specific task.
Python, being the most popular choice, often integrates well with other libraries like Pandas, NumPy, and Scikit-learn.
Extensibility Through Extensions Jupyter’s ecosystem includes numerous extensions, such as JupyterLab, nbconvert, and nbextensions, which add functionality like exporting notebooks to different formats or improving UI capabilities.
Collaborative Potential Jupyter Notebooks are easily shareable via GitHub, cloud platforms, or even as static HTML files, making them an excellent choice for team collaboration and presentations.
Why Are Jupyter Notebooks Perfect for Data Science? Data Exploration and Cleaning Jupyter is ideal for exploring datasets interactively.
You can clean, preprocess, and visualize data step-by-step, ensuring a transparent and repeatable workflow.
Machine Learning Its integration with machine learning libraries like TensorFlow, PyTorch, and XGBoost makes it a go-to platform for building and testing predictive models.
Reproducible Research The combination of narrative text, code, and results in one document enhances reproducibility and transparency, critical in scientific research.
Ease of Learning and Use The intuitive interface and immediate feedback make Jupyter a favorite among beginners and experienced professionals alike.
Challenges and Limitations While Jupyter Notebooks are powerful, they come with some challenges:
Version Control Complexity:
Tracking changes in notebooks can be tricky compared to plain-text scripts.
Code Modularity:
Managing large projects in a notebook can lead to clutter.
Execution Order Issues:
Out-of-order execution can cause confusion, especially for newcomers.
Conclusion
Jupyter Notebooks revolutionize how data scientists interact with data, offering a seamless blend of code, visualization, and narrative.
Whether you’re prototyping a machine learning model, teaching a class, or presenting findings to stakeholders, Jupyter Notebooks provide a dynamic and interactive platform that fosters creativity and productivity.

1 note
·
View note
Text
Supercharge Your Python Development Journey: Essential Tools for Enhanced Productivity
Python, renowned for its versatility and power, has gained widespread popularity among developers and data scientists. Its simplicity, readability, and extensive ecosystem make it a top choice for a diverse range of applications. To maximize productivity and elevate your Python development experience, harnessing the right tools is key. In this blog post, we'll explore a selection of indispensable tools available for Python development.
With this thorough Learn Python Course in Pune, you can unleash your potential and reach new heights in your skill set by mastering the foundations.

Integrated Development Environments (IDEs): Streamline your coding, debugging, and testing workflows with feature-rich IDEs. PyCharm by JetBrains offers a comprehensive suite of tools, including code completion, debugging support, version control integration, and web development framework assistance. Visual Studio Code, complemented by Python extensions, provides a versatile and customizable IDE. For scientific computing and data analysis, specialized IDEs like Anaconda and Spyder offer tailored features and libraries.
Text Editors: Optimize your Python coding experience with lightweight yet powerful text editors. Sublime Text, prized for its speed and versatility, boasts an array of plugins catering to Python development. Atom, a highly customizable text editor, offers a wealth of community-driven packages to enhance your Python workflow. Notepad++, a user-friendly choice favored by Windows users, provides an intuitive interface and extensive plugin support. Vim, a revered command-line text editor, offers unparalleled efficiency and extensibility.
Jupyter Notebooks: Unleash your data analysis and exploration potential with interactive Jupyter Notebooks. Seamlessly blending code, visualizations, and explanatory text, Jupyter Notebooks are invaluable tools. Jupyter Notebook, the original implementation, facilitates code execution in a notebook format. JupyterLab, a more recent iteration, provides a modular and flexible interface with advanced features such as multiple tabs, terminal access, and customizable layouts.
Package Managers: Simplify library and dependency management with Python's package managers. The default package manager, pip, empowers you to effortlessly install, upgrade, and uninstall packages. It integrates smoothly with virtual environments, enabling isolated Python environments for different projects. Anaconda, a prominent distribution in the data science realm, offers the conda package manager, which extends functionality to manage non-Python dependencies and create reproducible environments.
Linters and Code Formatters: Ensure code quality and consistency with linters and code formatters. Linters such as pylint perform static code analysis, detecting errors and enforcing coding conventions. flake8 combines the capabilities of multiple tools to provide comprehensive code analysis. Black, a favored code formatter, automates code formatting to maintain a consistent style and enhance readability.
Version Control Systems: Efficiently collaborate, track code changes, and revert when needed with version control systems. Git, a widely adopted distributed version control system, seamlessly integrates with Python development. Platforms like GitHub, GitLab, and Bitbucket offer hosting and collaboration features, simplifying project management and sharing. Take this Python Online Course to improve your Python programming skills can help people understand Python complexities and realize its full potential.

Testing Frameworks: Automate testing processes and ensure code reliability with Python's testing frameworks. The built-in unittest module provides a robust framework for writing and executing tests. pytest simplifies test discovery and offers powerful features such as fixture support and test parametrization. nose extends unittest with additional functionalities, enabling concise and expressive tests.
Data Analysis and Scientific Computing: Leverage Python's extensive ecosystem for data analysis and scientific computing. NumPy, a fundamental library for numerical computing, offers powerful data structures and mathematical functions. pandas provides flexible data structures and analysis tools for working with structured data. Matplotlib facilitates the creation of high-quality visualizations, while SciPy provides a broad range of scientific computing capabilities.
Web Development: Python frameworks like Django and Flask are go-to choices for web development. Django, a comprehensive framework, offers a batteries-included approach for building robust and scalable web applications. Flask, a lightweight and flexible framework, provides a solid foundation for creating web services and APIs. These frameworks simplify common web development tasks and benefit from extensive documentation and community support.
Machine Learning and Data Science: Python has emerged as a dominant language for machine learning and data science projects. Libraries such as scikit-learn, TensorFlow, PyTorch, and Keras provide cutting-edge tools for developing and deploying machine learning models. These libraries offer a range of functionalities, including data preprocessing, model training, evaluation, and deployment.
Python's popularity is not only due to its simplicity and versatility but also its vast ecosystem of tools. By leveraging IDEs, text editors, Jupyter Notebooks, package managers, linters, version control systems, testing frameworks, data analysis libraries, and frameworks for web development and machine learning, you can significantly enhance your Python development experience.
These tools streamline coding, debugging, testing, collaboration, and analysis processes, resulting in increased productivity and efficiency. Whether you are a beginner or an experienced Python developer, harnessing these tools will unlock the full potential of Python and empower you to excel in your projects.
0 notes
Text
[ad_1] NVIDIA espera abrir nuevas puertas para el desarrollo de modelos de inteligencia artificial generativa (IA) con AI Workbench. El kit de herramientas empresarial tiene como objetivo hacer que el desarrollo de IA sea más ágil, eficiente y accesible. Sus capacidades informadas van desde escalar modelos en cualquier infraestructura, incluidas PC, estaciones de trabajo, centros de datos y nubes públicas, hasta colaboración e implementación sin inconvenientes. Las complejidades involucradas en el ajuste, escalado e implementación de modelos de IA pueden aliviarse con una plataforma unificada, lo que permite a los desarrolladores aprovechar todo el potencial de la IA para casos de uso específicos. Las demostraciones en un evento reciente mostraron la generación de imágenes personalizadas con Stable Diffusion XL y un Llama 2 perfeccionado para el razonamiento médico desarrollado con AI Workbench. Desafíos en el desarrollo de IA empresarial El desarrollo de modelos generativos de IA implica múltiples etapas, cada una con desafíos y demandas. Al seleccionar un modelo previamente entrenado, como un modelo de lenguaje grande (LLM), los desarrolladores a menudo desean ajustar el modelo para aplicaciones específicas. Este proceso requiere una infraestructura que pueda manejar diversas demandas informáticas e integrarse sin problemas con herramientas como GitHub, Hugging Face, NVIDIA NGC y servidores autohospedados. El viaje exige experiencia en aprendizaje automático, técnicas de manipulación de datos, Python y marcos como TensorFlow. A eso se suma la complejidad de administrar credenciales, acceso a datos y dependencias entre componentes. Con la proliferación de datos confidenciales, la seguridad es primordial y exige medidas sólidas para garantizar la confidencialidad y la integridad. Además de todo, la gestión de flujos de trabajo en diferentes máquinas y plataformas aumenta la complejidad. Características del banco de trabajo con IA AI Workbench tiene como objetivo simplificar el proceso de desarrollo al abordar estos desafíos con: Una plataforma de desarrollo fácil de usar con herramientas como JupyterLab, VS Code y servicios como GitHub. Un enfoque en la transparencia y la reproducibilidad para fomentar una mejor colaboración entre los equipos. Implementación cliente-servidor para cambiar entre recursos locales y remotos, lo que facilita el proceso de escalado. Personalización en flujos de trabajo de texto e imágenes Para las empresas que buscan explorar el poderoso mundo de la IA generativa, puede ser un paso crucial para acelerar la adopción y la integración. El futuro del desarrollo de IA empresarial NVIDIA AI Workbench es particularmente importante para las empresas, ya que ofrece optimizar el proceso de desarrollo con nuevas vías de personalización, escalabilidad y soluciones rentables. Al abordar los desafíos de la experiencia técnica, la seguridad de los datos y la gestión del flujo de trabajo, el conjunto de herramientas de NVIDIA podría cambiar las reglas del juego para las empresas que aprovechan la IA para diversas aplicaciones. Imagen destacada: JHVEPhoto/Shutterstock window.addEventListener( 'load2', function() if( !window.ss_u ) !function(f,b,e,v,n,t,s) if(f.fbq)return;n=f.fbq=function()n.callMethod? n.callMethod.apply(n,arguments):n.queue.push(arguments); if(!f._fbq)f._fbq=n;n.push=n;n.loaded=!0;n.version='2.0'; n.queue=[];t=b.createElement(e);t.async=!0; t.src=v;s=b.getElementsByTagName(e)[0]; s.parentNode.insertBefore(t,s)(window, document,'script', 'https://connect.facebook.net/en_US/fbevents.js'); if( typeof window.sopp != "undefined" && window.sopp === 'yes' ) fbq('dataProcessingOptions', ['LDU'], 1, 1000); console.log('load_px'); fbq('init', '1321385257908563'); fbq('track', 'PageView'); fbq('trackSingle', '1321385257908563', 'ViewContent', content_name: 'nvidia-announces-ai-workbench-for-enterprise-generative-ai-models', content_category: 'generative-ai machine-learning news digital-marketing-tools' ); );
0 notes
Text
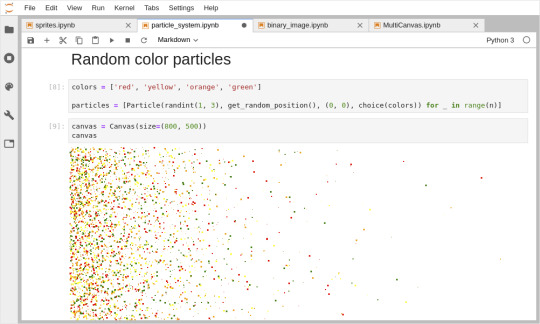
Github jupyterlab

#Github jupyterlab install
Optionally, if you have more than one key managed by your ssh agent: Create a config file for the ssh-agent.Register the public part of it to your Git server:.Here are the steps to follow to set up SSH authentication (skip any that is already accomplished for your project): This is a new feature since v0.37.0 SSH protocol You can set a longer cache timeout see Server Settings. To use the caching, you will need toĬheck the option Save my login temporarily in the dialog asking your credentials. The extension can cache temporarily (by default for an hour) credentials. In order to connect to a remote host, it is recommended to use SSH. It will automatically set up a credential manager.
#Github jupyterlab install
But not for other SSH connections.įor Windows users, it is recommended to install git for windows. This extension tries to handle credentials for HTTP(S) connections (if you don't have set up a credential manager). Or with conda: conda install -c conda-forge jupyterlab jupyterlab-gitįor JupyterLab on the console which is running the JupyterLab server, you probably need to set up a credentials store for your local Git repository. To install perform the following steps, with pip: pip install -upgrade jupyterlab jupyterlab-git Open the Git extension from the Git tab on the left panel.JupyterLab >= 3.0 ( older version available for 2.x).To see the extension in action, open the example notebook included in the Binder demo. A JupyterLab extension for version control using Git
0 notes
Text
Running AlphaFold on VertexAI
At Google Cloud, we believe the products we bring to market should be strongly informed by our research efforts across Alphabet. For example, Vertex AI was ideated, incubated and developed based on the pioneering research from Google’s research entities. Features like Vertex AI Forecast, Explainable AI, Vertex AI Neural Architecture Search (NAS) and Vertex AI Matching Engine were born out of discoveries by Google’s researchers, internally tested and deployed, and shared with data scientists across the globe as an enterprise-ready solution, each within a matter of a few short years.
Today, we’re proud to announce another deep integration between Google Cloud and Alphabet’s AI research organizations: the ability in Vertex AI to run DeepMind’s groundbreaking protein structure prediction system, AlphaFold.
We expect this capability to be a boon for data scientists and organizations of all types in the bio-pharma space, from those developing treatments for diseases to those creating new synthetic biomaterials. We’re thrilled to see Alphabet AI research continue to shape products and contribute to platforms on which Google Cloud customers can build.
This guide provides a way to easily predict the structure of a protein (or multiple proteins) using a simplified version of AlphaFold running in a Vertex AI. For most targets, this method obtains predictions that are near-identical in accuracy compared to the full version. To learn more about how to correctly interpret these predictions, take a look at the "Using the AlphaFold predictions" section of this blog post below.
Please refer to the Supplementary Information for a detailed description of the method.
Solution Overview
Vertex AI lets you develop the entire data science/machine learning workflow in a single development environment, helping you deploy models faster, with fewer lines of code and fewer distractions.
For running AlphaFold, we choose Vertex AI Workbench user-managed notebooks, which uses Jupyter notebooks and offers both various preinstalled suites of deep learning packages and full control over the environment. We also use Google Cloud Storage and Google Cloud Artifact Registry, as shown in the architecture diagram below.
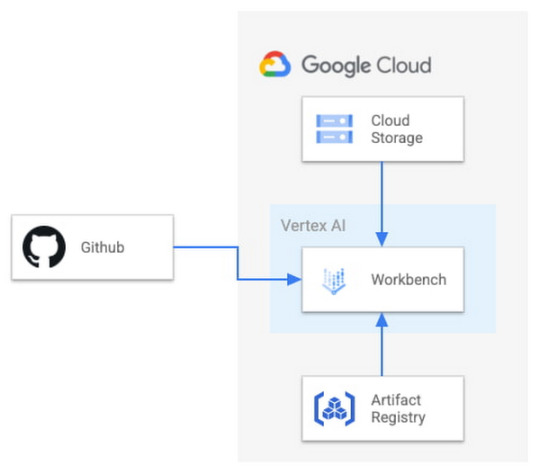
Figure 1. Solution Overview
We provide a customized Docker image in Artifact Registry, with preinstalled packages for launching a notebook instance in Vertex AI Workbench and prerequisites for running AlphaFold. For users who want to further customize the docker image for the notebook instance, we also provide the Dockerfile and a build script you can build upon. You can find the notebook, the Dockerfile and the build script in the Vertex AI community content.
Getting Started
Vertex AI Workbench offers an end-to-end notebook-based production environment that can be preconfigured with the runtime dependencies necessary to run AlphaFold. With user-managed notebooks, you can configure a GPU accelerator to run AlphaFold using JAX, without having to install and manage drivers or JupyterLab instances. The following is a step-by-step walkthrough for launching a demonstration notebook that can predict the structure of a protein using a slightly simplified version of AlphaFold that does not use homologous protein structures or the full-sized BFD sequence database.
1. If you are new to Google Cloud, we suggest familiarizing yourself with the materials on the Getting Started page, and creating a first project to host the VM Instance that will manage the tutorial notebook. Once you have created a project, proceed to step 2 below.
2. Navigate to the tutorial notebook, hosted in the vertex-ai-samples repository on GitHub.
3. Launch the notebook on Vertex Workbench via the “Launch this Notebook in Vertex AI Workbench” link. This will redirect to the Google Cloud Platform Console and open Vertex AI Workbench using the last project that you used.

4. If needed, select your project using the blue header at the top of the screen, on the left.
If you have multiple Google Cloud user accounts, make sure you select the appropriate account using the icon on the right.
First-time users will be prompted to take a tutorial titled “Deploy a notebook on AI Platform,” with the start button appearing on the bottom-right corner of the screen.
This tutorial is necessary for first-time users; it will help orient you to the Workbench, as well as configure billing and enable the Notebooks API (both required).
A full billing account is required for GPU acceleration, and is strongly recommended. Learn more here.

5. Enter a name for the notebook but don’t click “Create” just yet; you still need to configure some “Advanced Options.'' If you have used Vertex AI Workbench before, you may first need to select “Create a new notebook.”

6. GPU acceleration is strongly recommended for this tutorial. When using GPU acceleration, you should ensure that you have sufficient accelerator quota for your project.
Total GPU quota: “GPUs (all regions)”
Quota for your specific GPU type: “NVIDIA V100 GPUs per region”
Enter the Quota into the “filter” box and ensure Limit > 0. If needed, you can spin up small quota increases in only a few minutes by selecting the checkbox, and the “Edit Quotas.”

7. Next, select “Advanced Options,” on the left, which will give you the remaining menus to configure:
Under Environment, configure “Custom container” (first in the drop-down menu)
In the “Docker container image” text box, enter (without clicking “select”): us-west1-docker.pkg.dev/cloud-devrel-public-resources/alphafold/alphafold-on-gcp:latest
Suggested VM configuration:
Machine type: n1-standard-8 (8 CPUs, 30 GB RAM)
GPU type: NVIDIA Tesla V100 GPU accelerator (recommended).
Longer proteins may require a powerful GPU; check your quota configuration for your specific configuration, and request a quota increase if necessary (as in Step 6).
If you don’t see the GPU that you want, you might need to change your Region / Zone settings from Step 5. Learn more here.
Number of GPUs: 1
Make sure the check box “Install NVIDIA GPU driver automatically for me” is checked.
The defaults work for the rest of the menu items. Press Create!

8. After several minutes, a virtual machine will be created and you will be redirected to a JupyterLab instance. When launching, you may need to confirm the connection to the Jupyter server running on the VM; click Confirm:

9. The notebook is ready to run! From the menu, select Run > Run all Cells to evaluate the notebook top-to-bottom, or run each cell by individually highlighting and clicking <shift>-return. The notebook has detailed instructions for every step, such as where to add the sequence(s) of a protein you want to fold.
10. Congratulations, you've just folded a protein using AlphaFold on the Vertex AI Workbench!

11. When you are done with the tutorial, you should stop the host VM instance in the “Vertex AI” > ”Workbench” menu to avoid any unnecessary billing.
Using the AlphaFold predictions
The protein structure that you just predicted has automatically been saved as ‘selected_prediction.pdb’ to the ‘prediction’ folder of your instance. To download it, use the File Browser on the left side to navigate to the ‘prediction’ folder, then right click on the ‘selected_prediction.pdb’ file and select ‘Download’. You can then use this file in your own viewers and pipelines.
You can also explore your prediction directly in the notebook by looking at it in the 3D viewer. While many predictions are highly accurate, it should be noted that a small proportion will likely be of lower accuracy. To help you interpret the prediction, take a look at the model confidence (the color of the 3D structure) as well as the Predicted LDDT and Predicted Aligned Error figures in the notebook. You can find out more about these metrics and how to interpret AlphaFold structures on this page and in this FAQ.
If you use AlphaFold (e.g. in publications, services or products), please cite the AlphaFold paper and, if applicable, the AlphaFold-Multimer paper.
Looking toward innovation in biology and medicine
In this guide, we covered how to get started with AlphaFold using Vertex AI, enabling a secure, scalable, and configurable environment for research in the Cloud. If you would like to learn more about AlphaFold, the scientific paper and source code are both openly accessible. We hope that insights you and others in the scientific community make will unlock many exciting future advances in our understanding of biology and medicine.
Posted in
AI & Machine Learning
Google Cloud
0 notes
Text
All you need to know about Online Data Science Courses and Certifications

Data scientists who can analyse data and communicate their findings to help guide data-driven decisions are in high demand. If you want to work in machine learning or data science, a professional certificate can help you gain job-relevant knowledge and skills.
It is a common misconception that you must have a PhD to work as a data scientist. This Professional Certificate programme is open to anyone with a desire to learn; no prior knowledge of computer science or software platforms is required. Participants will gain the tools, skills, and portfolio necessary for entry-level and advanced data scientist jobs.
The curriculum includes nine online courses that teach you how to use open-source tools and libraries, Python, databases, SQL, data visualisation, data analysis, statistical analysis, predictive modelling, and machine learning techniques, among other things. By experimenting with real-world data sets and tools, you will learn data science.
Project for Applied Learning
The emphasis on applied learning is strong in this Professional Certificate. All other programmes, with the exception of the first, require students to complete a series of hands-on labs that teach you actual qualifications, such as:
Jupyter / JupyterLab, GitHub, R Studio, and Watson Studio are a few examples of tools.
Python libraries such as Pandas, NumPy, Matplotlib, Seaborn, Folium, python-SQL, Scikit-learn, ScipPy, and others are available.
We've worked on a variety of projects, including random album generation, house price prediction, best classifier model, successful rocket landing prediction, dashboards, and dynamic maps.
What exactly is a Professional Certificate, and what does it entail?
Find out what skills you'll need to get a job
Coursera Professionals Certificates can assist you in preparing for a new job or changing jobs, whether you want to start a new career or switch jobs. You can practise whenever and wherever you want, at your own pace. Enroll today and you'll get a 7-day free trial to try out a new career path. You can pause or discontinue your studies at any time.
Obtain Professional Certification
When you finish all of the program's courses, you will receive a Certificate that will allow you to communicate with your professional network and gain access to career assistance tools to help you get started in your new job. Most Professional Certificates are accepted by employers, and others can assist you in studying for a data science certification exam. Where applicable, additional information can be found on the Professional Certificate websites.
Methodology of Data Science
Given recent advances in processor power and storage capacity, data access has frequently been lost or underutilised over the last several decades due to a lack of thorough knowledge of the questions asked and how to effectively integrate the data to the situation at hand.
This course will present a data science technique for ensuring that the data used in problem solving is relevant and processed correctly to answer the question.
As a result, in this course, you will learn about the following topics:
The key steps in resolving a data science problem.
These are critical phases in data science, from defining a specific business or research challenge to gathering and analysing data, building a model, and interpreting feedback after model deployment.
Python programming language that is widely used in data science, artificial intelligence, and software development.
This beginner Python course will get you started with Python for data science and general programming. Python is one of the world's most popular programming languages, and experts who can apply Python fundamentals to drive business solutions across industries are in high demand.
This course will teach you from the ground up how to write in Python in just a few hours—no prior programming experience is required! Throughout the course modules, you will learn Python fundamentals such as data types and data analysis, as well as complete hands-on activities. Finally, you'll design a capstone project to showcase your new abilities.
After completing this course, you will be able to write simple Python programmes, manipulate data, and solve real-world problems. You will lay the groundwork for future research in the field while also learning skills that will help you advance in your career.
What can I expect from these new Data Science courses?
You will receive IBM certificates for the IBM courses and Simplilearn data science certification for all courses in the learning path after completing this best data science certification online course. These credentials will attest to your abilities and demonstrate your knowledge of Data Science. As part of this programme, you may also take advantage of the following benefits:
Experts instruct IBM masterclasses.
IBM executives host "Ask Me Anything" sessions.
IBM organises exclusive hackathons.
Simplilearn provides an industry-recognized Master's degree in Data Analyst.
Conclusion
Develop your Data Science certification career by delving into the complexities of data interpretation, learning about technologies such as Machine Learning, and honing your programming skills. They will become data analysis experts due to their learning style. This best data science certification online course, created in collaboration with IBM, will prepare students for the top data analyst jobs on the market.
#data science certification#data science training#data science expert#data science online#global tech council
0 notes
Link
The Evolution of the Jupyter Notebook
Project Jupyter exists to develop open-source software, open standards, and services for interactive and reproducible computing.
Since 2011, the Jupyter Notebook has been our flagship project for creating reproducible computational narratives. The Jupyter Notebook enables users to create and share documents that combine live code with narrative text, mathematical equations, visualizations, interactive controls, and other rich output. It also provides building blocks for interactive computing with data: a file browser, terminals, and a text editor.
The Jupyter Notebook has become ubiquitous with the rapid growth of data science and machine learning and the rising popularity of open-source software in industry and academia:
Today there are millions of users of the Jupyter Notebook in many domains, from data science and machine learning to music and education. Our international community comes from almost every country on earth.¹ The Jupyter Notebook now supports over 100 programming languages, most of which have been developed by the community. There are over 1.7 million public Jupyter notebooks hosted on GitHub. Authors are publishing Jupyter notebooks in conjunction with scientific research, academic journals, data journalism, educational courses, and books. At the same time, the community has faced challenges in using various software workflows with the notebook alone, such as running code from text files interactively. The classic Jupyter Notebook, built on web technologies from 2011, is also difficult to customize and extend.
JupyterLab: Ready for Users
JupyterLab is an interactive development environment for working with notebooks, code and data. Most importantly, JupyterLab has full support for Jupyter notebooks. Additionally, JupyterLab enables you to use text editors, terminals, data file viewers, and other custom components side by side with notebooks in a tabbed work area.
JupyterLab enables you to arrange your work area with notebooks, text files, terminals, and notebook outputs. JupyterLab provides a high level of integration between notebooks, documents, and activities:
Drag-and-drop to reorder notebook cells and copy them between notebooks.
Run code blocks interactively from text files (.py, .R, .md, .tex, etc.).
Link a code console to a notebook kernel to explore code interactively without cluttering up the notebook with temporary scratch work.
Edit popular file formats with live preview, such as Markdown, JSON, CSV, Vega, VegaLite, and more.
JupyterLab has been over three years in the making, with over 11,000 commits and 2,000 releases of npm and Python packages. Over 100 contributors from the broader community have helped build JupyterLab in addition to our core JupyterLab developers.
To get started, see the JupyterLab documentation for installation instructions and a walk-through, or try JupyterLab with Binder. You can also set up JupyterHub to use JupyterLab.
Customize Your JupyterLab Experience
JupyterLab is built on top of an extension system that enables you to customize and enhance JupyterLab by installing additional extensions. In fact, the builtin functionality of JupyterLab itself (notebooks, terminals, file browser, menu system, etc.) is provided by a set of core extensions.
JupyterLab extensions enable you to work with diverse data formats such as GeoJSON, JSON and CSV.��
Among other things, extensions can:
Provide new themes, file editors and viewers, or renderers for rich outputs in notebooks;
Add menu items, keyboard shortcuts, or advanced settings options;
Provide an API for other extensions to use.
Community-developed extensions on GitHub are tagged with the jupyterlab-extension topic, and currently include file viewers (GeoJSON, FASTA, etc.), Google Drive integration, GitHub browsing, and ipywidgets support.
Develop JupyterLab Extensions
While many JupyterLab users will install additional JupyterLab extensions, some of you will want to develop your own. The extension development API is evolving during the beta release series and will stabilize in JupyterLab 1.0. To start developing a JupyterLab extension, see the JupyterLab Extension Developer Guide and the TypeScript or JavaScript extension templates.
JupyterLab itself is co-developed on top of PhosphorJS, a new Javascript library for building extensible, high-performance, desktop-style web applications. We use modern JavaScript technologies such as TypeScript, React, Lerna, Yarn, and webpack. Unit tests, documentation, consistent coding standards, and user experience research help us maintain a high-quality application.
JupyterLab 1.0 and Beyond
We plan to release JupyterLab 1.0 later in 2018. The beta releases leading up to 1.0 will focus on stabilizing the extension development API, user interface improvements, and additional core features. All releases in the beta series will be stable enough for daily usage.
JupyterLab 1.0 will eventually replace the classic Jupyter Notebook. Throughout this transition, the same notebook document format will be supported by both the classic Notebook and JupyterLab.
9 notes
·
View notes
Link
via blog.jupyter.org
As you may already know, the Jupyter Notebook and JupyterLab are Browser-based applications. Browsers are incredibly powerful, they allow you to swap rich and interactive graphical interfaces containing buttons, sliders, maps, 2D and 3D plots and even video games in your webpages!
All this power is readily made available to the Python ecosystem by Jupyter interactive widgets libraries. Whether you want to create simple controls using ipywidgets, display interactive data on a 2D map with ipyleaflet, plot 2D data using bqplot or plot volumic data with ipyvolume, all of this is made possible thanks to the open-source community.
One powerful tool in the Browser is the HTML5 Canvas element, it allows you to draw 2D or 3D graphics on the webpage. There are two available APIs for the Canvas, the Canvas API which focuses on 2D graphics, and the WebGL API which uses hardware acceleration for 3D graphics.
After some discussions with my work colleague Wolf Vollprecht, we came to the conclusion that it would be a great idea to directly expose the Canvas API to IPython, without making any modification to it. And that’s how we came up with ipycanvas!
ipycanvas: Exposing the Canvas API to IPython

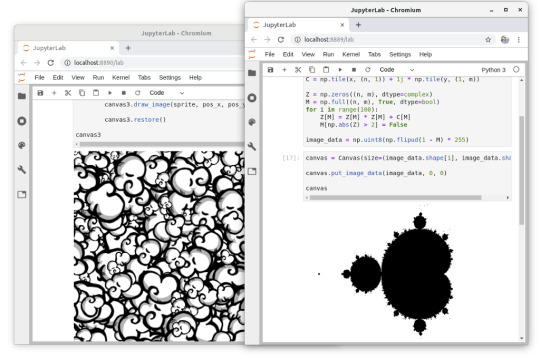
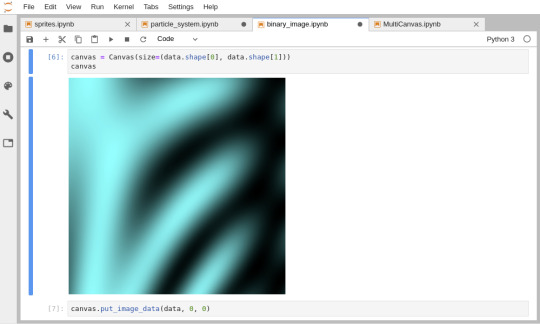
ipycanvas exposes the Canvas API to IPython, making it possible to draw anything you want on a Jupyter Notebook directly in Python! Anything is possible, you can draw custom heatmaps from NumPy arrays, you can implement your own 2D video-game, or you can create yet another IPython plotting library!
ipycanvas provides a low-level API that allows you to draw simple primitives like lines, polygons, arcs, text, images… Once you’re familiar with the API, you’re only limited by your own imagination!
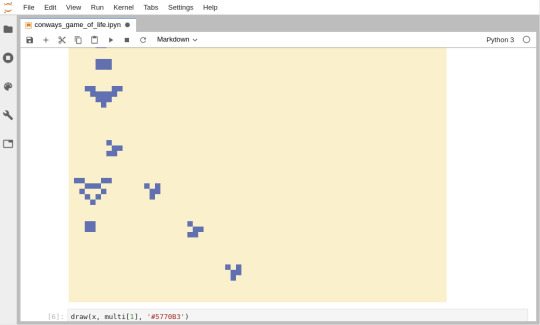
Draw image from NumPy array (left), implementation of the Game Of Life (right)
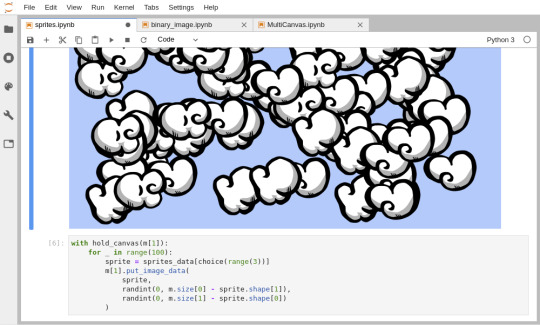
Draw millions of particles (left), draw custom sprites (right)

Make your own plotting library for Jupyter fully in Python!
Using Matt Craig’s ipyevents library, you can add mouse and key events to the Canvas and react to user interactions.
If you have a GamePad around, you can also use the built-in Controller widget and make your own video-game in a Jupyter Notebook!
Documentation
Check-out the ipycanvas documentation for more information: ipycanvas.readthedocs.io
Github repository
Give it a star on Github if you like it! github.com/martinRenou/ipycanvas
Try it online!
You can try it without the need of installing anything on your computer just by clicking on the image below:

Installation
Note that you first need to have Jupyter installed on your computer. You can install ipycanvas using pip:
pip install ipycanvas
Or using conda:
conda install -c conda-forge ipycanvas
If you use JupyterLab, you would need to install the JupyterLab extension for ipycanvas (this requires nodejs to be installed):
jupyter labextension install ipycanvas
About the author

My name is Martin Renou, I am a Scientific Software Engineer at QuantStack. Before joining QuantStack, I studied at the aerospace engineering school SUPAERO in Toulouse, France. I also worked at Logilab in Paris and Enthought in Cambridge, UK. As an open-source developer at QuantStack, I worked on a variety of projects, from xtensor and xeus-python in C++ to ipyleaflet and ipywebrtc in Python and Javascript.
ipycanvas: A Python Canvas for Jupyter was originally published in Jupyter Blog on Medium, where people are continuing the conversation by highlighting and responding to this story.
0 notes
Text
Announcing .NET Jupyter Notebooks
Jupyter Notebooks has been the significant player in the interactive development space for many years, and Notebooks have played a vital role in the continued popularity of languages like Python, R, Julia, and Scala. Interactive experiences like this give users with a lightweight tool (I like to say "interactive paper") for learning, iterative development, and data science and data manipulation.
The F# community has enjoyed F# in Juypter Notebooks from years with the pioneering functional work of Rick Minerich, Colin Gravill and many other contributors!
As Try .NET has grown to support more interactive C# and F# experiences across the web with runnable code snippets, and an interactive documentation generator for .NET Core with the dotnet try global tool, we're happy to take that same codebase to the next level, by announcing C# and F# in Jupyter notebooks.
.NET in Jupyter Notebooks
Even better you can start playing with it today, locally or in the cloud!
.NET in Anaconda locally
.NET Core 3.0 SDK and 2.1 as currently the dotnet try global tool targets 2.1.
Jupyter : JupyterLab can be installed using Anaconda or conda or pip.
For more details on how to do this please checkout the offical Jupyter installation guide.
Install the .NET Kernel
Open Anaconda Prompt (Installed with Anaconda
Install the dotnet try global tool
dotnet tool install --global dotnet-try
Please note: If you have the dotnet try global tool already installed, you will need to uninstall the older version and get the latest before grabbing the Jupyter kernel-enabled version of the dotnet try global tool.
Check to see if Jupyter is installed
jupyter kernelspec list
Install the .NET kernel!
dotnet try jupyter install
Test installation
jupyter kernelspec list
You should see the .net-csharp and .net-fsharp listed.
To start a new notebook, you can either type jupyter lab Anaconda prompt or launch a notebook using the Anaconda Navigator.
Once Jupyter Lab has launched in your preferred browser, you have the option to create a C# or a F# notebook
Now you can write .NET and and prose side by side, and just hit Shift-Enter to run each cell.
For more information on our APIs via C# and F#, please check out our documentation on the binder side or in the dotnet/try repo in the NotebookExamples folder.
Features
To explore some of the features that .NET notebooks ships with, I put together dashboard for the Nightscout GitHub repo.
HTML output : By default .NET notebooks ship with several helper methods for writing HTML. From basic helpers that enable users to write out a string as HTML or output Javascript to more complex HTML with PocketView. Below I'm using the display() helper method.
Importing packages : You can load NuGet packages using the following syntax. If you've used Rosyln-powered scripting this #r for a reference syntax will be familiar.
#r "nuget:<package name>,<package version>"
For Example
#r "nuget:Octokit, 0.32.0" #r "nuget:NodaTime, 2.4.6" using Octokit; using NodaTime; using NodaTime.Extensions; using XPlot.Plotly;
Do note that when you run a cell like this with a #r reference that you'll want to wait as that NuGet package is installed, as seen below with the ... detailed output.
Object formatters : By default, the .NET notebook experience enables users to display useful information about an object in table format.
The code snippet below will display all opened issues in the nightscout/cgm-remote-monitor repo.
display(openSoFar.Select(i => new {i.CreatedAt, i.Title, State = i.State.StringValue, i.Number}).OrderByDescending(d => d.CreatedAt));
With the object formatter feature, the information will be displayed in a easy to read table format.
Plotting
Visualization is powerful storytelling tool and,a key feature of the Jupyter notebook experience. As soon as you import the wonderful XPlot.Plotly F# Visualization Package into your notebooks(using Xplot.Ploty;) you can begin creating rich data visualizations in .NET.
The graphs are interactive too! Hover over the different data points to see the values.
Learn, Create and Share
To learn, create and share .NET notebooks please check out the following resources:
Learn: To learn online checkout the dotnet/try binder image for a zero install experience.
Create: To get started on your machine check out the dotnet/try repo. Select the option highlighted option
Share: If you want to share notebooks you have made using the .NET Jupyter kernel, the easiest way is to generate a Binder image that anyone can run on the web. For more information on how to do this please check out the .NET Jupyter documentation.
Checkout the online .NET Jupyter Notebook I created for to explore the NightScout GitHub project using C# and the Octokit APIs.
The source is here https://github.com/shanselman/NightscoutDashboard
but you can run the notebook live just by going to mybinder https://mybinder.org/v2/gh/shanselman/NightScoutDashboard/master?urlpath=lab
We hope you enjoy this new .NET Interactive experience and that you're pleasantly surprised by this evolution of the .NET Try interactive kernel.
Sponsor: Octopus Deploy wanted me to let you know that Octopus Server is now free for small teams, without time limits. Give your team a single place to release, deploy and operate your software.
© 2019 Scott Hanselman. All rights reserved.


Announcing .NET Jupyter Notebooks published first on https://deskbysnafu.tumblr.com/
0 notes
Text
Announcing .NET Jupyter Notebooks
Jupyter Notebooks has been the significant player in the interactive development space for many years, and Notebooks have played a vital role in the continued popularity of languages like Python, R, Julia, and Scala. Interactive experiences like this give users with a lightweight tool (I like to say "interactive paper") for learning, iterative development, and data science and data manipulation.
The F# community has enjoyed F# in Juypter Notebooks from years with the pioneering functional work of Rick Minerich, Colin Gravill and many other contributors!
As Try .NET has grown to support more interactive C# and F# experiences across the web with runnable code snippets, and an interactive documentation generator for .NET Core with the dotnet try global tool, we're happy to take that same codebase to the next level, by announcing C# and F# in Jupyter notebooks.
.NET in Jupyter Notebooks
Even better you can start playing with it today, locally or in the cloud!
.NET in Anaconda locally
.NET Core 3.0 SDK and 2.1 as currently the dotnet try global tool targets 2.1.
Jupyter : JupyterLab can be installed using Anaconda or conda or pip.
For more details on how to do this please checkout the offical Jupyter installation guide.
Install the .NET Kernel
Open Anaconda Prompt (Installed with Anaconda
Install the dotnet try global tool
dotnet tool install --global dotnet-try
Please note: If you have the dotnet try global tool already installed, you will need to uninstall the older version and get the latest before grabbing the Jupyter kernel-enabled version of the dotnet try global tool.
Check to see if Jupyter is installed
jupyter kernelspec list
Install the .NET kernel!
dotnet try jupyter install
Test installation
jupyter kernelspec list
You should see the .net-csharp and .net-fsharp listed.
To start a new notebook, you can either type jupyter lab Anaconda prompt or launch a notebook using the Anaconda Navigator.
Once Jupyter Lab has launched in your preferred browser, you have the option to create a C# or a F# notebook
Now you can write .NET and and prose side by side, and just hit Shift-Enter to run each cell.
For more information on our APIs via C# and F#, please check out our documentation on the binder side or in the dotnet/try repo in the NotebookExamples folder.
Features
To explore some of the features that .NET notebooks ships with, I put together dashboard for the Nightscout GitHub repo.
HTML output : By default .NET notebooks ship with several helper methods for writing HTML. From basic helpers that enable users to write out a string as HTML or output Javascript to more complex HTML with PocketView. Below I'm using the display() helper method.
Importing packages : You can load NuGet packages using the following syntax. If you've used Rosyln-powered scripting this #r for a reference syntax will be familiar.
#r "nuget:<package name>,<package version>"
For Example
#r "nuget:Octokit, 0.32.0" #r "nuget:NodaTime, 2.4.6" using Octokit; using NodaTime; using NodaTime.Extensions; using XPlot.Plotly;
Do note that when you run a cell like this with a #r reference that you'll want to wait as that NuGet package is installed, as seen below with the ... detailed output.
Object formatters : By default, the .NET notebook experience enables users to display useful information about an object in table format.
The code snippet below will display all opened issues in the nightscout/cgm-remote-monitor repo.
display(openSoFar.Select(i => new {i.CreatedAt, i.Title, State = i.State.StringValue, i.Number}).OrderByDescending(d => d.CreatedAt));
With the object formatter feature, the information will be displayed in a easy to read table format.
Plotting
Visualization is powerful storytelling tool and,a key feature of the Jupyter notebook experience. As soon as you import the wonderful XPlot.Plotly F# Visualization Package into your notebooks(using Xplot.Ploty;) you can begin creating rich data visualizations in .NET.
The graphs are interactive too! Hover over the different data points to see the values.
Learn, Create and Share
To learn, create and share .NET notebooks please check out the following resources:
Learn: To learn online checkout the dotnet/try binder image for a zero install experience.
Create: To get started on your machine check out the dotnet/try repo. Select the option highlighted option
Share: If you want to share notebooks you have made using the .NET Jupyter kernel, the easiest way is to generate a Binder image that anyone can run on the web. For more information on how to do this please check out the .NET Jupyter documentation.
Checkout the online .NET Jupyter Notebook I created for to explore the NightScout GitHub project using C# and the Octokit APIs.
The source is here https://github.com/shanselman/NightscoutDashboard
but you can run the notebook live just by going to mybinder https://mybinder.org/v2/gh/shanselman/NightScoutDashboard/master?urlpath=lab
We hope you enjoy this new .NET Interactive experience and that you're pleasantly surprised by this evolution of the .NET Try interactive kernel.
Sponsor: Octopus Deploy wanted me to let you know that Octopus Server is now free for small teams, without time limits. Give your team a single place to release, deploy and operate your software.
© 2019 Scott Hanselman. All rights reserved.


Announcing .NET Jupyter Notebooks published first on http://7elementswd.tumblr.com/
0 notes
Text
Ipython Notebook Markdown

Ipython Notebook Download
Ipython Markdown Syntax
Sometimes, you want to present code output in a way that is more appealing to the eye than just unstructured output. In ipython, there are markdown cells available but you cannot execute any code there. So what if you want to show the markdown output generated by a code cell in ipython notebook?
Knowing that in jupyter (ipython) notebook markdown cells the title level is identified by the number of # (# for top level headings or h1, ## for h2.), I use the following combination of HTML and markdown: # Your centered level h1 title ## Your centered level h2 title. Jupyter (formerly IPython Notebook) is an open-source project that lets you easily combine Markdown text and executable Python source code on one canvas called a notebook. Visual Studio Code supports working with Jupyter Notebooks natively, as well as through Python code files. Markdown IPython Notebook. Contribute to mli/notedown development by creating an account on GitHub. In ipython, there are markdown cells available but you cannot execute any code there. So what if you want to show the markdown output generated by a code cell in ipython notebook? It would look like this: The only problem: the ipython magic “asmarkdown” (as shown in the screenshot) does not exist.
It would look like this:
Ipython Notebook Download
The only problem: the ipython magic “asmarkdown” (as shown in the screenshot) does not exist. Here is the code that you need for this to work — if you put it into your profile, you don’t have to copy it from notebook to notebook.
After putting this in your notebook, you have two options if you use a code cell: if you prepend “%%asmarkup” in a single line before any python code, the output of the python code will be interpreted as markdown and shown accordingly. If you don’t prepend the magic, you will get the regular output.
Jupyter Tutorial
IPython
Jupyter
QtConsole
JupyterLab
Jupyter Resources
Selected Reading
Markdown cell displays text which can be formatted using markdown language. In order to enter a text which should not be treated as code by Notebook server, it must be first converted as markdown cell either from cell menu or by using keyboard shortcut M while in command mode. The In() prompt before cell disappears.
Header cell
A markdown cell can display header text of 6 sizes, similar to HTML headers. Start the text in markdown cell by # symbol. Use as many # symbols corresponding to level of header you want. It means single # will render biggest header line, and six # symbols renders header of smallest font size. The rendering will take place when you run the cell either from cell menu or run button of toolbar.
Following screenshot shows markdown cells in edit mode with headers of three different levels.
Ipython Markdown Syntax


When cells are run, the output is as follows −
Note that Jupyter notebook markdown doesn’t support WYSWYG feature. The effect of formatting will be rendered only after the markdown cell is run.
Ordered Lists
To render a numbered list as is done by <ol> tag of HTML, the First item in the list should be numbered as 1. Subsequent items may be given any number. It will be rendered serially when the markdown cell is run. To show an indented list, press tab key and start first item in each sublist with 1.
If you give the following data for markdown −
It will display the following list −
Bullet lists
Each item in the list will display a solid circle if it starts with – symbol where as solid square symbol will be displayed if list starts with * symbol. The following example explains this feature −
The rendered markdown shows up as below −
Hyperlinks
Markdown text starting with http or https automatically renders hyperlink. To attach link to text, place text in square brackets () and link in parentheses () optionally including hovering text. Following screenshot will explain this.
The rendered markdown appears as shown below −
Bold and Italics
To show a text in bold face, put it in between double underscores or two asterisks. To show in italics, put it between single underscores or single asterisks.
The result is as shown below −
Images
To display image in a markdown cell, choose ‘Insert image’ option from Edit menu and browse to desired image file. The markdown cell shows its syntax as follows −
Image will be rendered on the notebook as shown below −
Table
In a markdown cell, a table can be constructed using | (pipe symbol) and – (dash) to mark columns and rows. Note that the symbols need not be exactly aligned while typing. It should only take respective place of column borders and row border. Notebook will automatically resize according to content. A table is constructed as shown below −
The output table will be rendered as shown below −
1 note
·
View note
Text
Python3 matplotlibの日本語文字化けの対処方法について
Python3 matplotlibの日本語文字化けの対処方法について #Python #matplotlib #日本語文字化け #豆腐化
論文作成にあたり、データ解析は必要十分条件です。私が勤務する大学ではIBMのSPSSが大学内ネットワークで使用できます。
しかしながら、出先のカフェや自宅でデータ解析を行いたい場合が多々あります。
そこで、SAS University EditionやPythonを用いたデータ解析の最適解を探している最中です。
今回の記事は、Jupyterlabを使用した場合に発生するmatplotlibの日本語文字化け、いわゆる豆腐化の対処方法の解説をコードを用いて行います。
Pythonとは
Pythonとはプログラミング言語の1つです。C言語などと比較して分かりやすい文法が特徴です。
非常に広く使われているため学習するためのサイトや本も充実しています。2020年現在、最新のGitHubの調査(2019年)では世界2位の人気を記録しています。
Matplot…
View On WordPress
0 notes
Quote
A Table of Contents extension for JupyterLab. This auto-generates a table of contents in the left area when you have a notebook or markdown document open. The entries are clickable, and scroll the document to the heading in question.
GitHub - jupyterlab/jupyterlab-toc: Table of Contents extension for JupyterLab
0 notes
Link
Hi HN - the founders of kyso here.
Kyso (https://kyso.io) is a blogging platform for data science. We render your jupyter notebooks, including all code, interactive visualisations and rich markdown, as awesome data blogs.
Upload existing notebooks, import your repos from Github and start brand new Jupyterlab environments in the cloud, all for free.
And then publish and share your blogs with the community!
Have a look here for a few example posts on our platform: https://kyso.io/jamesle/fifa18 https://kyso.io/vanaurum/algorithmic-portfolio-optimization https://kyso.io/Don/a-journey-to-the-tip-of-neural-networks https://kyso.io/waldohiding/twitter
Happy to hear any and all feedback!
0 notes