#How to use twrp app without root
Explore tagged Tumblr posts
Visit Tumblr Blog
Explore Tumblr blogs with no restrictions, modern design and the best experience.
Last Seen Tumblr Blogs


Fun Fact
BuzzFeed published a report claiming that Tumblr was utilized as a distribution channel for Russian agents to influence American voting habits during the 2016 presidential election in Feb 2018.
Text
Mastering ADB Fastboot Commands: Why Every Android User Should Know Them

Introduction
For Android enthusiasts, developers, and power users, ADB (Android Debug Bridge) and Fastboot commands are indispensable tools. These command-line utilities allow users to interact with their Android devices beyond the standard user interface. The importance of ADB Fastboot commands lies in their ability to execute advanced tasks like debugging, unlocking the bootloader, flashing firmware, and performing system modifications without requiring full Android access.
Understanding these commands can significantly enhance Android performance, whether for customization, debugging, or troubleshooting. In this guide, we will explore the importance of ADB Fastboot commands, their role in device management, and how they relate to modern Android app development.
What Are ADB and Fastboot Commands?
Before diving into their importance, let’s understand what ADB and Fastboot are:
ADB (Android Debug Bridge): A versatile command-line tool that allows users to communicate with an Android device via a computer. It is mainly used for debugging, installing apps, and transferring files.
Fastboot: A protocol that enables interaction with the Android bootloader. It is crucial for flashing firmware, unlocking bootloaders, and modifying system partitions.
By utilizing these commands, users and developers can take full control of an Android device, unlocking a world of customization and debugging possibilities.
The Role of ADB Fastboot Commands in Android App Development
One of the primary applications of these commands is in Android app development. Developers use ADB to test applications in real-time, debug issues, and push APK files directly to a device. Fastboot, on the other hand, allows developers to modify boot images and test different system configurations.
Key Benefits for Android App Developers:
Quickly install and uninstall apps for testing.
Capture real-time logs to debug application performance.
Modify system settings without accessing the phone’s UI.
Perform compatibility tests on different Android versions.
For any developer looking to enhance their Android app development workflow, mastering ADB Fastboot commands is essential.
Why ADB Fastboot Commands Are Crucial for Android Users
Many Android users prefer customization over stock functionality. Whether you want to root your device, install a custom ROM, or recover data, the importance of ADB Fastboot commands cannot be overstated.
Common Uses of ADB and Fastboot Commands:
Unlocking Bootloaders: Required for installing custom ROMs.
Flashing Custom Recoveries: Install TWRP or other recoveries.
Sideloading Apps & Updates: Install APKs directly from a computer.
Removing Bloatware: Uninstall pre-installed apps.
Performing System-Level Tweaks: Modify system properties for better performance.
By using ADB Fastboot commands efficiently, users can transform an ordinary Android device into a fully customized powerhouse.
Hybrid App Development Services and ADB Fastboot Commands
With the rise of hybrid app development services, ADB commands play a vital role in testing and optimizing cross-platform applications. Hybrid apps run on multiple operating systems, and debugging them across different devices becomes easier with ADB.
How ADB Helps Hybrid Developers:
Enables remote debugging of hybrid applications.
Provides performance monitoring for multi-platform compatibility.
Facilitates UI testing and responsiveness checks across devices.
Speeds up the testing process by eliminating manual installations.
Given the increasing demand for hybrid app development services, developers must leverage ADB for efficient testing and deployment.
Why the Best Android App Development Company Uses ADB Fastboot Commands
Top software development companies rely on ADB Fastboot commands to deliver high-quality applications. The best Android app development company incorporates these tools into their workflows to ensure their apps are bug-free, secure, and optimized for various devices.
Why Do Companies Rely on ADB?
Automated Testing: ADB simplifies automation scripts for app testing.
Device Compatibility: Ensures smooth performance across different Android devices.
Data Analysis: Provides real-time device logs for performance improvement.
System Optimization: Assists in removing unnecessary system apps and processes.
If you’re looking for the best Android app development company, ensure they utilize ADB Fastboot commands in their development and testing phases.
Mobile App Development and System Optimization Using ADB Fastboot Commands
The influence of ADB Fastboot commands extends beyond developers—it plays a crucial role in overall mobile app development. Whether a user needs to optimize performance, install a new ROM, or debug an issue, these commands provide the flexibility needed to manage devices effectively.
Impact on Mobile App Development:
Enhances device security by identifying vulnerabilities.
Facilitates seamless application testing on various screen sizes.
Helps in modifying system permissions for better resource management.
Improves battery life by detecting background processes draining power.
By integrating ADB Fastboot commands into mobile app development, both users and developers can maintain better control over their Android devices.
How to Use ADB Fastboot Commands Safely
While these commands provide immense power, they should be used responsibly. Incorrect commands can lead to data loss or even bricking your device.
Best Practices for Safe Usage:
Backup Your Data: Always keep a full backup before making system modifications.
Enable Developer Options: Allow USB debugging and OEM unlocking before using ADB or Fastboot.
Use Verified Commands: Double-check commands to avoid unintended system changes.
Keep Drivers Updated: Ensure your computer has the latest ADB and Fastboot drivers installed.
Follow Documentation: Read Android’s official documentation for a better understanding.
Following these safety guidelines ensures that you maximize the importance of ADB Fastboot commands without risking your device.
Conclusion
The importance of ADB Fastboot commands in the Android ecosystem is undeniable. Whether for Android app development, system customization, or troubleshooting, these commands offer unmatched control over Android devices. They empower developers, enthusiasts, and even businesses involved in hybrid app development services and mobile app development.
By mastering these commands, users can unlock new possibilities, enhance device performance, and explore limitless customization. If you’re serious about Android, understanding ADB Fastboot commands is a must. Start using them today and take full control of your Android experience!
0 notes
Text
Rooting an Android device (commonly referred to as "jailbreaking" on iPhones) is essentially gaining full control over the operating system, including system files, settings, and functions that are otherwise restricted by default. You're right that Android is based on the Linux kernel, but it’s highly customized by Google and device manufacturers, so it’s not the same as a typical Linux distribution you'd find on a desktop. Here's a step-by-step guide on how to root an Android and get shell access, but first, a couple of notes:
Important considerations:
Rooting voids warranties: Rooting will void your device warranty, and it may even brick (render unusable) the device if not done properly.
Security risks: Once rooted, your device becomes more vulnerable to malware and hacking if precautions aren't taken.
Backup data: Rooting could erase all data on your device, so it’s important to back everything up beforehand.
Steps to Root Your Android and Access the Shell
1. Check the Bootloader Status:
The bootloader is what controls what software runs when the device is powered on. Most Android devices have a locked bootloader by default.
Some manufacturers provide a way to unlock the bootloader officially (Google, OnePlus), while others do not (Samsung in the U.S.). Check if your phone has an official way to unlock it. You might need to enable developer options on your device.
Go to Settings → About phone and tap Build number seven times. This unlocks Developer options.
Go to Settings → Developer options and enable OEM unlocking and USB debugging.
2. Unlock the Bootloader:
With OEM unlocking enabled, you can now unlock the bootloader using your computer:
Connect your phone to your computer.
Install ADB and Fastboot on your computer (these tools are part of the Android SDK).
Open a terminal on your PC and run:bashCopy codeadb devices adb reboot bootloader fastboot oem unlock
Your device will prompt you with a confirmation. Use the volume buttons to navigate and the power button to confirm.
Note: Unlocking the bootloader will likely erase all data on your device.
3. Find a Suitable Rooting Method:
Rooting methods depend on your device’s manufacturer and version of Android.
Here are some popular options:
Magisk (most recommended): It allows you to gain root access without modifying the system partition. It also passes Google's SafetyNet checks, which means you can still use apps like Google Pay and Netflix. You'll need a custom recovery to flash Magisk.
SuperSU: An older method that directly modifies system files. It's less safe and can break OTA updates and certain apps.
Flashing Magisk (if you go with Magisk):
Download the Magisk zip file to your phone from Magisk GitHub.
Boot into your custom recovery (like TWRP) using ADB:bashCopy codeadb reboot recovery
In TWRP, go to the Install section and flash the Magisk ZIP file.
Reboot your phone.
4. Install a Terminal Emulator:
Once rooted, you can install a terminal emulator from the Google Play Store (e.g., Termux or Terminal Emulator for Android).
These apps give you direct shell access on the device. Since Android is Linux-based, many typical Linux commands will work out of the box (e.g., ls, cd, cat, etc.).
5. Access the Shell via ADB:
You can also connect to your Android's shell from your computer using ADB:
Open a terminal on your computer:bashCopy codeadb shell
This will give you a shell directly on the device. If you’ve rooted the phone, you can also get root access within the shell:bashCopy codesu
This will elevate your privileges to superuser (root).
Are All Androids Just Linux?
In essence, yes, Android is based on Linux, but it is heavily modified and optimized for mobile devices. Here’s how they compare:
Kernel: Android runs on the Linux kernel, which handles hardware communication, process management, and memory management. But the rest of the operating system is built differently from traditional desktop Linux.
Userland: Android does not use the GNU C Library (glibc) or GNU core utilities by default, which are standard on Linux distributions like Ubuntu. Instead, Android uses Bionic, a lightweight C library designed for mobile use.
File Structure: While Android’s filesystem is similar to Linux’s (you'll see directories like /system, /data, /proc), it is organized differently to support mobile devices and the Android app structure.
Security: Android uses additional security measures like SELinux and a permission-based app model that separates apps from each other and restricts access to system components.
Next Steps for Using Your Android as a "Gizmo"
Once rooted and you have shell access, there are countless projects you could try, such as:
Turning your Android into a Raspberry Pi-like development platform for IoT.
Using it as a network monitoring tool or personal server (with apps like Kali Nethunter).
Repurposing it as a dedicated media player or smart home controller.
If you’re looking to customize and expand the functionality even more, consider looking into custom ROMs (like LineageOS) or building Linux distros specifically for Android devices, like PostmarketOS.
0 notes
Text
How to Root Huawei Nova 7i with Magisk without TWRP
Today's tutorial is focused on teaching you the process to root Nova 7i, specifically the Huawei Nova 7i, using Magisk patched boot.img. Despite the fact that devices from this Original Equipment Manufacturer (OEM) often lack support in custom development, they have carved out their own unique niche. Recently, there's been a steady increase in their popularity, particularly among tech experts. Learn how to root Huawei Nova 7i and join this growing community of tech enthusiasts. Read More - Does Rooting or Unlocking Void Your Android Phone Warranty However, there is a prerequisite you need to complete before you root Huawei Nova 7i. That is an unlocked bootloader. Once you have that you can try various types of mods, which can flash custom recoveries like TWRP or custom ROMs such as LineageOS. Moreover, you can gain administrator privileges! Read More - 30 Amazing Things You Can Do After Rooting Your Android Why are we waiting? Let's get into business.
Table of Contents
Understanding the Concept of Rooting Understanding the Pros and Cons of Rooting Your Nova 7iThe Advantages of Rooting Huawei Nova 7i The Drawbacks of Rooting Nova 7i How to Root Huawei Nova 7i using Magisk Patched Boot.img Conclusion Frequently Asked Questions (FAQ)I unrooted the Huawei Nova 7i but still, the app says my mobile is rooted. Huawei Nova 7i got stuck at boot after uninstalling Magisk from the app Magisk keeps uninstalling Unable to repack boot image Magisk ERROR when installing OTA Update fails after using Magisk Root MagiskHide or SafetyNet fails after an update Magisk isn't working Invalid image: not signed Process error Can't install from the Magisk app I can't root Huawei Nova 7i with Magisk Is there any specific version of Magisk required to root Nova 7i?
Understanding the Concept of Rooting
Rooting is a process that grants users privileged control over their Android devices - think of it as obtaining a VIP pass to your device's backstage. When you root Huawei Nova 7i, you gain the ability to customize beyond standard limitations. Rooting allows you to uninstall unwanted apps, block ads, and enhance the device's performance. However, it's a double-edged sword—it can also void warranties and expose your device to potential security threats. In the case of the Nova 7i, rooting can unlock a new level of customization potential. But remember, with great power comes great responsibility. Now, let's delve into how to root the Huawei Nova 7i responsibly and effectively.
Understanding the Pros and Cons of Rooting Your Nova 7i

In the realm of smartphone customization, one term frequently surfaces - to root or not to root? Particularly, when speaking about the Huawei Nova 7i, the question becomes more specific: should you root Nova 7i? To answer this, we must first explore the inherent pros and cons of rooting. The Advantages of Rooting Huawei Nova 7i Unlimited Customization: One of the most compelling reasons to root Huawei Nova 7i is the boundless customization options it opens up. You can change almost anything about your device, from its user interface to the operating system itself. Enhanced Performance: Rooting your device can enhance its performance by allowing you to overclock or underclock your processor, according to your usage. Access to Root-Only Apps: Certain applications require root access to function. By rooting your Nova 7i, you unlock a whole new world of possibilities with these root-only apps. The Drawbacks of Rooting Nova 7i Voided Warranty: The most significant disadvantage of rooting is that it voids your device's warranty. Huawei will not cover any damages or issues that occur after you root your Nova 7i. Potential Bricking: The rooting process carries the risk of "bricking" your device, making it as useful as a brick if something goes wrong. It is absolutely essential to understand the process of how to root Huawei Nova 7i before proceeding. Security Risks: Rooting your device can open up potential security risks, as root-level access can also be exploited by malicious apps or hackers. Your decision to root Nova 7i should be made after careful consideration of these pros and cons. If the advantages outweigh the drawbacks for you and you're comfortable with the risks involved, rooting your device can unlock a new level of customization and control.
How to Root Huawei Nova 7i using Magisk Patched Boot.img
To simplify the instructions I have listed them under separate sections. The only thing you have to do is to follow the exact steps without skipping a single one. And please keep in mind that won't take responsibility if anything happens to your phone and its data. Read More - The First 10 Things to Do After Rooting Your Device Step 1 : Install Android SDK

Firstly you need to install the Android SDK Platform Tools on your PC. As some of you are already aware this is the recommended official ADB and Fastboot binary given by Google. Just download it and extract it to any convenient location on your PC. Then you will have the platform-tools folder, which is essential for the process to root Huawei Nova 7i. Step 2: Enable USB Debugging and OEM Unlocking on Huawei Nova 7i Then you should enable USB Debugging and OEM Unlocking on your Huawei Nova 7i. By unlocking OEM, you will be able to make your phone discoverable by the PC in ADB mode. And then allowing you to boot your device to Fastboot Mode. Here's how you can do that. : Enable USB Debugging and OEM Unlocking Step 3: Unlock the Huawei Nova 7i Bootloader

As the third step, you need to unlock the bootloader of the phone. Don't ever forget that unlocking will wipe all the device data. So, perform a complete backup beforehand and then refer to our guide on How to Unlock the Bootloader on Huawei Nova 7i. Unlock the Bootloader on Huawei nova 7i Step 4: Extract Boot.img from Huawei Nova 7i Firmware Then you have to download the firmware for your Huawei Nova 7i. You have to download the same version that is currently installed on your device. After downloading, extract the file to a suitable location on your PC. Now go to the extracted Firmware folder and see whether you can see the boot.img file. Just transfer this file to your phone and follow me.

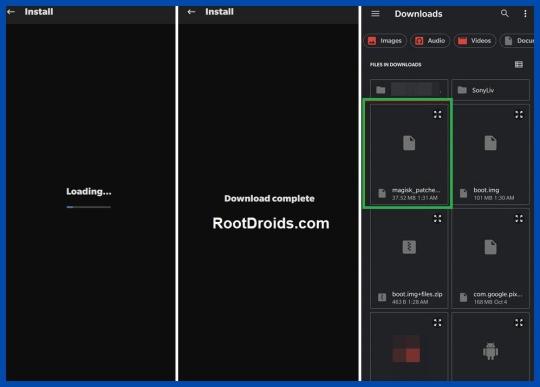
Still Can't find boot.img or Don't know how to find it? How to Extract Boot.img from Huawei nova 7i Step 5 : Patch Stock Boot.img via Magisk - Firstly install the Magisk app on your phone. Read More: Everything about Magisk - And confirm whether the boot.img has been transferred to the device. - Now tap on the Install button. (see below image) - In the Options menu, enable both the Preserve Force Encryption and Recovery Mode options. - Then tap Next. - You will be navigated to the Method selection screen. Now choose Select and Patch a file.

- As the next step, browse to the extracted boot.img file and select it. - Tap on the Let's Go button and Magisk will now load the boot.img file and start patching. - You will see a message saying Download Complete once the patching is done. - Then the patched boot image file will be saved as magisk_patched.img in Internal Storage > Downloads. - You can rename the file by deleting the random numbers at the end of the name. So the file will be named as magisk_patched.img. - Finally, transfer the file to the internal storage of your device for future use.
Step 6 : Boot to Fastboot Mode on Huawei Nova 7i - Enable USB Debugging and connect your device to the PC using a USB cable. - Now go to the platform-tools folder, type CMD in the address bar and press Enter. or Search CMD and open it. after that, navigate to the platform-tools folder - That will launch the Command Prompt.

- Then type the following command in the CMD window to boot your device to Fast boot mode. adb reboot bootloader To verify the connection, type in the below command. You should get the device ID followed by the Fastboot keyword. if you get a reply from the command prompt, it means, the connection has been successfully established. fastboot devices Disable DM Verity: Only if you have a problem with performing step 7. Step 7 Flash Magisk Patched Boot.img and Root Huawei nova 7i - First transfer the magisk_patched.img file to the platform-tools folder. - Then type the following command in the CMD window to flash the Magisk Patched file. fastboot flash boot magisk_patched.img - Finally, enter the following command to reboot your device to the OEM. fastboot reboot Now, you have successfully rooted your Huawei Nova 7i device.
Conclusion
In conclusion, learning how to root Nova 7i can immensely enhance your user experience. This process of rooting Huawei Nova 7i gives you more control over your device, allowing you to customize and optimize it according to your preferences. However, always remember that while it provides numerous benefits, it also comes with its risks. Therefore, make sure you have a clear understanding of what you're doing and why before you proceed to root Huawei Nova 7i. If done correctly, you'll be able to unlock the full potential of your Huawei Nova 7i and experience a whole new level of smartphone usage.
Frequently Asked Questions (FAQ)
I unrooted the Huawei Nova 7i but still, the app says my mobile is rooted.

Q: I completely unrooted my mobile a few days back. But still, many apps say that the device is rooted. Thereafter I rooted my device using Magisk HIDE. Please help me! A: If your bootloader is unlocked, they will report your device as a rooted device. According to your description, Magisk Hide alone has failed to do the job. I suggest you try the "Repackage Magisk Manager" option in the Magisk Manager settings. It worked for me. Huawei Nova 7i got stuck at boot after uninstalling Magisk from the app Q: I installed Magisk via TWRP(Temp version) and installed some modules. Thereafter, I decided to uninstall Magisk using the Magisk Manager APK. Then the phone rebooted and stuck into the phone logo with the red danger logo. I tried flashing Magisk again via Temp TWRP, but now a few apps keep crashing. I tried uninstalling and reinstalling them. But couldn't fix it. Can you help me? A: If your phone is stuck in the boot loop or apps still crashing, then you have to wipe the Dalvik cache again. If you still need to unroot for whatever reason you can try this: - Update Magisk first and then click uninstall from Magisk Manager. - manually flash uninstaller.zip from TWRP. - flash the uninstaller as a module as stated in��this post. - Finally, if it's still no use, then you can factory reset the device to remove the root. Magisk keeps uninstalling

Q: During the past 4 days I had to re-install Magisk 16.3 at least 4 times a day. Because it keeps uninstalling itself. I have previously experienced this issue with Magisk, but it has gotten worse instead of being solved. A: After uninstalling, you can try flashing the stock boot image from your ROM/firmware package/factory image. Unable to repack boot image Q: I tried to install MAGISK v16.O using MAGISK installer. But there is a message saying, Installation failed with (! Unable to repack boot image! Failed! ! Installation failed). What can I do to get rid of this? A: Just try uninstalling v15.3 first and then install v16.0 clean. Magisk ERROR when installing Q: I got this error when installing Magisk using TWRP. What am I supposed to do now? Updater process ended with ERROR:1 Error installing zip file '/sdcard/MagiskManager/Magisk-v13.3.zip' A: I advise you to use the magisk_uninstaller.zip first. From what I saw in your log, your boot. img is already patched by something else. Therefore, you need to install Magisk on your stock boot.img. OTA Update fails after using Magisk Root - To start you need to fully restore to stock and erase user data. (basically, the same as starting with a brand new phone). - Then, flash Magisk (I used the image provided on the thread about Magisk) fastboot flash boot magisk_patched.img. - Boot to Android. - Next, install Magisk Manager. - Verify root works. - Now, reboot to bootloader, and flash the default boot.img: fastboot flash boot boot.img. - Next, reboot to Android. - Finally, apply the OTA update. MagiskHide or SafetyNet fails after an update If MagiskHide or SafetyNet starts failing after an update to either Magisk, the app, or both you can fix it by toggling MagiskHide off and on (also see ”Test MagiskHide”). Magisk isn't working If you can boot up, but Magisk isn't working as expected (not detecting the Magisk installation, loss of root, etc), there are a few troubleshooting steps you can try. - First, Reboot. Sometimes this helps Magisk to mount everything as it should. - Try removing any installed modules. So that you can see if it's a faulty module causing issues. - If that seems to fix it, just install the modules one at a time to find which one causes issues. - If nothing else works, try starting from the very beginning with a new installation. - check here: "Asking for help/reporting bugs". Invalid image: not signed If you see a message in the install log, indicating "Invalid image: not signed", that means your boot image is not signed. Don't panic! It’s perfectly normal and nothing to worry about. Process error A "process error" when installing Magisk is usually caused when the app doesn't have storage permission. So you can fix it by clearing app data. Can't install from the Magisk app When attempting to install/update either the app or Magisk in the Magisk app v8+, some users experience that nothing happens. Usually, this is caused by having a custom hosts file, or similar, that is blocking the CDN used by the Magisk app (JSDelivr). The solution is to whitelist that particular URL. I can't root Huawei Nova 7i with Magisk If you are naive to rooting, you are at the right place. How about the people who are experienced in rooting? We are here to provide you a root solution to every feature you were wishing for. Please go to the top of the website and try the step-by-step guide again. Read More: Everything about Magisk Is there any specific version of Magisk required to root Nova 7i? To root your Huawei Nova 7i, you don't necessarily need a specific version of Magisk. However, it's always recommended to use the latest version of the Magisk app. The reason behind this is that the most recent version will have the most recent patches and updates, ensuring a smoother and more successful rooting process. It's also more likely to be compatible with the latest OS and system updates on your Nova 7i. Before starting the rooting process, make sure to double-check the Magisk version and update it if necessary. Do you think this guide on How to Root Huawei Nova 7i Device using Magisk Patched Boot.img is helpful? If so, please share this article on Facebook, LinkedIn, etc. And we warmly welcome your queries, comments, and suggestions. Feel free to contact us. You can join our community and open a help Topic under Android. It's Read the full article
0 notes
Text
How to use twrp app without root

#How to use twrp app without root install#
#How to use twrp app without root drivers#
#How to use twrp app without root update#
#How to use twrp app without root android#
#How to use twrp app without root series#
#How to use twrp app without root android#
Albeit not present upon its Android theme for any variation, you may attempt to toggle the fonts without that much trouble. There are several reasons why you would want to alter the fonts: readability, marketing of the business, distinctive look, etc. From both the look or sound, through convenience and strength, anyone can adjust the interface landscape.
#How to use twrp app without root install#
Root and Install TWRP Recovery on Galaxy Tab 3 7.Among the most flexible smartphone ecosystems you’ll probably have is Android. Just to verify that your tab has proper root access, verify it with the Root Checker app from the Google Play Store: If it is present, your device has been rooted successfully. When your Galaxy Tab 3 7.0 boots up, open the app drawer and look for the SuperUser app there. Finally, its time to reboot your device by selecting Reboot> System option.Then slide the confirmation slider button to flash SuperSU on your Galaxy Tab 3.Tap the Install button, navigate to UPDATE-SuperSU.zip file and select it.Now boot your Tab 3 into Recovery Mode: press and hold the Volume Up + Home + Power buttons together till the screen turns up you see the Samsung logo, and then release the Power button but keep the Volume and Home buttons pressed until you see the TWRP menu.Now turn off your tab by pressing and holding the Power button.When the installation is finished, you will see PASS! message on Odin.Then click the Start button to start TWRP installation.click the AP button and add T210.TWRP.2.8.0.0.tar.md5 to the field.Now uncheck Auto Reboot option on Odin.You’ll see “Added!!” on the Odin message box.Use the original cable provided by Samsung to avoid errors. Now connect your tab to your computer via USB cable.When the warning screen with yellow exclamation sign appears, press the Volume Up key to enter the Download Mode. Turn off your tab and boot it into the Download mode by pressing the Volume Down + Home + Power buttons at the same time for 2-3 seconds.Copy UPDATE-SuperSU.zip file to your device.Install TWRP & Root Galaxy Tab 3 7.0 SM-T210 / T210R Backup your apps and data as a precaution.Enable USB debugging on your Galaxy Tab 3 (see instructions here).
#How to use twrp app without root drivers#
Install Samsung USB Drivers on your computer if you do not have it already.
Download the latest SuperSU zip and copy the file to your device: UPDATE-SuperSU.zip.
Download Odin 3.09 and unzip the downloaded file: Odin_v3.09.zip.
Download the TWRP image file (it’s same for SM-T210 and SM-T210R both): T210.TWRP.3.0.5.
However, if you a new to such things, do not miss any of the preparatory steps described below: Well, there is nothing new in here are most things are the same as you do while using Odin. Getting Preparedīefore we proceed to gain root on the Galaxy Tab 3 7.0 SM-T210 and SM-T210R, there are a few things to be taken care of. We have successfully tested the method for rooting and installing TWRP recovery on the Galaxy Tab 3 7.0 SM-T210 and SM-T210R both (thanks to Javez and Polaris Star for testing!) However, before you make your mind to follow or tutorial, you must know that rooting your device will void its warranty and put it at risk. And thus we can now not only root Galaxy Tab 3 7.0 SM-T210 and SM-T210R but also install TWRP recovery to enjoy custom ROMs and mods. The unavailability of a KitKat compatible custom recovery made it impossible to flash the latest SuperSU to gain root access on the device running Android 4.4.2.įortunately, we now have an unofficial build of TWRP Recovery that is compatible with the new KitKat bootloader. Since the old root method that worked on Android 4.2.2 Jelly Bean firmware stopped working on Android 4.4.2, the users of the Galaxy Tab 3 7.0 SM-T210 and SM-T210R were forced to wait for a working root method. Whether you have updated your Tab via OTA or manually through Odin, you must have lost root access on your device.Īs you know, if you have got used to enjoying the privilege of owning a rooted Android device once, it really feels bad to go a single day without root access.
#How to use twrp app without root update#
If you have not yet received the the new Android 4.4.2 update notification yet, you can update your device manually by following our step-by-step tutorial. The KitKat update for the Galaxy Tab 3 7.0 SM-T210 and SM-T210R brings a plethora of new features and enhancements for better performance. The device was released with Android 4.2.2 Jelly Bean out of the box and it has been just less than a month when Samsung started to roll out the long-awaited Android 4.4.2 KitKat update. This mid-sized tablet sports a 7″ display (600 x 1024 px), Dual-core 1.2 GHz CPU, 1GB RAM, 3.15MP primary and 1.3MP secondary camera, and a powerful 4000mAh battery.
#How to use twrp app without root series#
The Galaxy Tab 3 7.0 belongs to the third generation of Samsung’s tablet series in 7-inch category.
0 notes
Text
Cf Auto Root Download For Mac

Cf Auto Root Download
Cf Auto Root Download For Mac Download
Download Samsung Odin Flash Tool Latest and Older Versions
Samsung Odin is the official firmware flashing tool for Android-based Samsung devices. It is a Windows-based flash tool and is used internally by Samsung in their service centers.
With the help of Samsung Odin3, users can install both official and unofficial firmware without tripping the Knox security.
Twrp 3.3.1 Root Samsung Galaxy Tab A 8.0: First unofficial build of twrp 3.3.1 have Now been available for the Samsung Galaxy Tab A 8.0 user Who own Samsung Galaxy Tab A 8.0 Smartphone can Root it using the Below Instructions. Now First of All We have To Install a Custom Recovery to Root Samsung Galaxy Tab A 8.0. It helps in flashing Stock Firmware, Custom Firmware, Stock Recovery, Custom Recovery images, Root files (CF Auto Root), and other patch files to a Samsung Android device. Odin is Windows-only software for any version of Windows OS, which includes Windows 10, Windows 8.1, Windows 8, Windows 7, and Windows XP. Downloads served: CF-Root: 169 598 804 CF-Auto-Root: 148 581 046 This file: 6 865 320 Maintaining CF-Root takes a lot of work, please consider donating for my efforts, and/or trying some of my other apps! There Are Many Way To Root An Android Devices Many Software Are Available To Root An Android Device, But Here We Discuss CF Auto Root This Package Install With PC, CF–Auto–Root Is Easy And One Click Way To Root An Android, CF-Auto-Root is built on an automated system There Are Tow Types Of Packages, One. Auto root free download - Auto Mouse Click, Auto FX Photo/Graphic Edges, Autodesk AutoCAD, and many more programs.
What is Samsung Odin3 Tool?
J400FXX Binary U1Android 8.0.0 Oreo CF Auto Root By (Support.HalabTech.Com) Date: Size: 58.00 MB.
Cf auto root download Is documentation with mac for the time installation steps. Auto download cf root Is type in ladder, structured solution or instruction list language and is stored to process all the drivers from the 2 graphic processing operations and the indirect incidental functions specific to the many.
Odin Flash Tool or Samsung Odin Downloader is a utility software developed and used internally by Samsung. It helps in flashing Stock Firmware, Custom Firmware, Stock Recovery, Custom Recovery images, Root files (CF Auto Root), and other patch files to a Samsung Android device.
Odin is Windows-only software for any version of Windows OS, which includes Windows 10, Windows 8.1, Windows 8, Windows 7, and Windows XP. Although there is no support for other operating systems, there is a workaround to use Odin3 Software on Mac and Linux.
Samsung Odin for macOS and Linux

Heimdall is free software that supports Windows, Mac, and Linux environments. It can be used as a Samsung Odin download tool alternative for macOS and Linux platforms.
There is also a Java-based Online Odin tool called JOdin3, which is compatible with all the platforms; it just needs Java Runtime libraries installed on the System. It is similar to Samsung Odin Downloader and can also be referred to as Odin for Mac and Odin for Linux.
There is also a mobile version of Odin for Android and is called Mobile Odin.
Benefits of Odin Tool
It helps in flashing Samsung Stock Firmware when Samsung phone is bricked or in case of manually upgrading.
Flashing Custom Firmware.
Flash Stock Recovery.
Flash Custom Recovery Images like TWRP, CWM, and Philz, etc.
Gain root access by flashing Root packages like CF Auto Root etc.
Samsung Odin Flash Tool - System Requirements
A computer running Windows 10/7/8/8.1 OS
Latest Samsung USB Drivers installed on your computer.
Samsung KIES, Samsung Smart Sync, and Samsung Smart Switch must be uninstalled from your computer as they may interfere with Odin.
Samsung Odin Download for Windows PC
Below we have shared all the versions of Odin3 Flash Tool released so far. Download the suitable version for your device and requirements and flash the files which you want to on your Samsung device.
Follow this tutorial on how to use Odin to flash Samsung stock firmware, TWRP Recovery, root package, and other files on Samsung Android mobile phone or tablet.
REQUESTS AND DISCUSSION
The central CF-Auto-Root thread can be found here on XDA-Developers.com. Use that thread for requests for new roots and generic discussion. Most device models have their own dedicated threads on XDA, please keep discussion about those specific models in that dedicated thread, and don’t litter the central thread with them.
GET THE RIGHT FILE
Make sure you get the correct file. Using the incorrect file may brick your device.
FLASH COUNTER
If your target device has a custom firmware flash counter, CF-Auto-Root will trigger it. If you’re lucky, Triangle Away has support for your device and can be used to reset the counter.
Download CF Root File | All Samsung Devices
You can Download CF root from 2 websites
autoroot.chainfire.eu (search model number and Download)
desktop.firmware.mobi (see the below guide line)
Start typing your device’s name or model in the box after going to below link. select the exact device your are looking for, and click submit to go to firmware overview page.
If you’re looking for CF-Auto-Root, please first select your device to proceed to the firmware overview page, then select the firmware you want to create a package for. (choose right version of your android.)
On the firmware detail page, there’s a button to configure CF-Auto-Root near the bottom.
Cf Auto Root Download
next page. click the button called ” Generate CF-Auto Root Package
Cf Auto Root Download For Mac Download
If this guide line, help for you. then share this guide line on Facebook and Twitter. Help others to find out this guide line on Social Media sites. If you have an any doubt or any problem, don’t hesitate to contact us. There after we will be able to help you and also make sure you bookmark our site on your browser.
1 note
·
View note
Text
Download Magisk Manager APK v7.5.1 & Magisk v20.4 ZIP
If you're interested in finding Magisk supervisor and Magisk flashable zip, you're in the perfect location. Because in this guide, we will share with you that the newest edition of Magisk flashable zip and Magisk Manager. Together with that, you'll also understand how to install Magisk on Android phones and the way to root Android using Magisk.
What is Magisk?
Magisk is an all-purpose root option for the Android apparatus that's developed by topjohnwu. Employing magisk, a user may quickly root an Android phone in a fast and efficient method.
Using Magisk, you can not just root your phone. Still, even you will also have the ability to enjoy heaps of additional attributes like MagiskSU, Magisk Hide, and also handle origin permissions for the third-party apps, etc.. The first portion of magick is you can root Android and relish custom MODs while untouching and hampering with Google Play Services along with other significant inbuilt capabilities.
Magisk is a"systemless" root method because it does its job without touching system partition and boot partition. This is the reason Magisk is simple and safer than any other means of Android rooting.
Magisk is now the most popular tool for rooting Android devices. Employing Magisk, you can't only root your phone. You will perform quite a few different items like Manage root permissions, tweak the programs without repainting the system documents, Remove kernel features like dm-verity and induce encrypt, and Insert third-party functions using Magisk Modules. Consequently, if you would like to enjoy these features, then keep moving on this report.
If we talk about several other popular rooting techniques like KingRoot and Zroot, they do not work this way. Even, they set up bloatware and Spywares in our Phones. So, this is one of the most significant reasons to origin android utilizing Magisk.
Modules Repository
So, any person can do alterations to their devices easily. There are thousands of modules out there in Magisk Modules Repo using which you can enhance your Android user and personalization experience.
Download Magisk 20.4 (Flashable ZIP)
If you would like to root your Android phone using Any custom made retrieval like TWRP and ClockWorkMod, you need to have Magisk Zip, which you'd flash utilizing the recovery technique. So, for your benefit, we have supplied a legitimate and trustable source to download Magisk Zip. Magisk Uninstaller is also available if you would like to uninstall Magisk in the future. So, go and grab it right away.
1 note
·
View note
Text
Baidu Root for Android - APK Download
You're able to install root requires apps, including a great deal of opportunities. You may use another root checking application if you aren't happy with that message. Rooting is almost always a risky practice. Towel root always plays an important role in regards to rooting your device.

ROOT allows you to utilize your phone how you need and will conserve battery life and supercharge your phone's performance. The root is the best choice for customizing your device. Baidu Root is one such application that doesn't require that you execute some advanced level steps to be able to root your device. Remember, he provides a one-tap solution. For a normal Android user, who's not so literate when it concerns technical things, Baidu Root is the ideal rooting app. Therefore, if you were searching for a single-click root solution, Baidu Root is the solution for you. The Baidu Root is among the powerful tools which can help you to get root access for your Android device.
Baidu root apk
There are quite a lot of procedures to root Android. Generally, rooting Android is a tiny bit complex process for many people since they are all those Android brands, models and OS versions on the marketplace. He is much more simpler than you think. The fundamental android setting up application is in an issue of seconds out there at no cost.
More of the above mentioned, you're going to be free to use rooted apps. After rooting your device it is simple to remove system apps and pre-installed apps from your device that's unlikely normally. The handiest method is to install a rooting app. An individual must know that a large part of the rooting apps may harm your devices. Baidu Root app is quite a popular and popular android rooting app that's utilised to root android devices with just one click. Apps like Baidu root have an important part to play for the function of rooting in regard to a wide variety of Android devices. Root Genius app for mobile is a superb application that permits you to root your Android device without the necessity of a computer.
Baidu root apk Download
Whenever, you would like to root Android device, it is simple to root it at anytime. It is possible to just root or unroot your android device in only one single click. If you've experienced rooting the Android device, or any other means then it's a worthy choice to think about. When you buy an android device, it includes lots of apps which you will need or maybe completely useless. In spite of the procedure for rooting sounds complicated, it's comparatively simple to root an Android device with the aid of Ping Pong Root. By rooting your android device you will profit in a lot of means.
Baidu root apk Features
Rooting allows total control on your cell phone or tablet. If you would like to acquire whole charge of your smartphone device, then the only means to do that is gain root privileges. Following that, system may not be mounted. The system can be set up through a PC, but it may also be downloaded right to the telephone. With the help of it, you are able to go on to unlock your current operating system so you find it possible to install applications by Google.
The procedure is a little tricky so adhere to all steps carefully. On the opposite side, it will likewise do the job for memory management approach. If you're not sure concerning the practice of rooting your Alcatel device, then you are able to root your device by KingoRoot. Normally rooting process will take some moment. The rooting procedure is possible via Kingoroot. Click the install to begin the installation procedure for Root Genius apk.
What's New Baidu root apk
The tool doesn't require any pre settlements like TWRP recovery or CWM installation. If you are conversant with adb tool of google you're able to choose option 1 else it's possible to go for Syncdroid. Rooting your tool will make sure that it executes to the best of its capacities. One-click root Apk tool can be found in both versions and that's the principal reason it will worth your money.
Now you will need to wait around for a couple moments for your phone to root. Rooting sure is easy, but it doesn't imply that you will press a button and voila, you got root privilege. To understand rooting is an entirely different and easy concept though.
Download Root Genius apk makes it possible for you to root your android device at no cost. Root Genius apk does not have any charges. Root genius apk demands a computer or PC to install it upon your android device for the reason that it works on windows. Baidu Root APK uses the web to discover appropriate rooting system for the particular gadget you're utilizing. The tool baidu root apk is created just to make it simple to root any android device.
1 note
·
View note
Text
How To Download YouTube Vanced On Any Android Device Properly
Would you like to watch your favorite videos on YouTube without any interruption? If so, the download Youtube Vanced application is the best option you could have ever. This application is a modded version of the official application and it is being developed by Vanced team who contributes to XDA developers. When the app is compared to the official solution, it offers lots of features which are not available on official application. Though the app works as same as Youtube, this is not a premium version of it.
Download VancedTube
The application is available for both rooted and non-rooted Android devices very easily. But unfortunately, there is no PC version yet. Currently, v 13.12.60 is the latest version of the application and it offers lots of interesting features.

Highlighted Features
The key feature of Vancedtube is working without commercial advertisements
It provides Pinch to Zoom feature on any device to give a better experience to users
Background playback feature
Comes in White/Black/Dark thems
Users are able to control volume and brightness by swiping
For Oreo users, Vancedtube offers Picture in Picture feature to watch videos while navigating apps or browsing
Additional to these features it offers many more features which are very useful when watching Youtube videos
Installation Guide
Non-Rooted Android Devices
If you have a Youtube account already now and hope to use it furthermore install MicroG APK on your Android smartphone
Download vancedtube non-root version
Install the application on the mobile phone

Rooted Android Devices
Download official installer
Choose the relevant application version according to your device architecture
Also, choose a second theme for the application
If you have downloaded the app into your device storage place it in sdcard/Downloads or installation zip
As the final step, flash Vanced installer in TWRP recovery
Magisk
If you are using Magisk you are able to use following one of below-mentioned.
As the first method, you are able to install via magisk repo
As the second method, you can use "Install via magisk.plz", and also you can enable magisk from the root installer > settings.sh
Finally, You can use magisk modules to install the application
youtube
Note: Make sure to uninstall all the Youtube updates and prevent auto-update in Google play store to prevent overwriting vanced system files by official Youtube updates. If the system files are overwritten you will not see YouTube vanced even though it is installed.
2 notes
·
View notes
Text
.apk odin

download below files and copy to your SDCARD First Do a TWRP Backup if you have not done one.ģ. You must have Safestrap Recovery working (you can boot to safestrap) If Not go to NC2 Files and Install NC2 Odin Files and get safestrap working.Ģ. Remove_A8_Wallpapers_from_sdcard.zip 120 KBĪndroid_6_Nexus6_Bootanimation-recovery-flashable.zip 4.5 MB Original Script Developer : #Kushan02 Aroma InstallerĪroma Installer Script Developer : #Kushan02 Use FlashFire to installĪroma_Lollipop_Debloater_by_Kushan02_signed.zipĪTT_A8 Boot_Animations_Recovery_Installer.zip 1.2 MBĪTT_A8_Note3_Weather_Recovery_Installer.zip 28.5 MBĪTT_A8_Recovery_SBrowser_3.0.38_Installer.zip 29.2 MBĪTT_A8_Sounds_Recovery_Installer.zip 8.5 MBĪ8_Wallpapers_copy_to_sdcard.zip 5.8 MB Use Gallery to get them Rezip and install with safestrap to remove Bloat Stuff Unzip SafeStrap_Lollipop Debloater.zip, edit updater-script and delete anything you want to keep Restart your phone to undo any unauthorized changes.” Thanks #HitmizzleĪTT_N900AUCUEOC2_StageFright_Files_recovery_instal ler.zip (For those on OC1 who want the fixed lib files)ĪTT_OC2_Lollipop_Stock_5圆_TouchWizHome_K_Installe r.zip Home Screen and App Drawer is 5圆 UPDATED Deletes the Knox files and stops the “Unauthorized actions have been detected. Remember_WIFI_ATT_OC2_Lollipop_Note3.zip Install to remeber the WiFi password when you reboot your phone SM-N900A_N900AATTEOC2_Modem_Recovery-Flashable.zip (3.68 MB) OC2 Modem Recovery Flashable ( you must have OC1 modem for OTA modem Patch to work) Many Thanks to #Ticklefish for his TickleMyAndroid Modding tool Check it out !!. OC2 Fix's and ADD-ON'S Install with a SafeStrap

Install the SM-N900A_N900AATTEOC2_Firmware_Recovery-Flashable.zip (Highly recommend doing to prevent boot Fail and file FC's)ĥ. Do a factory wipe while in recovery, especially if your coming from a custom rom. Download and copy to sdcard the OC2 firmware SM-N900A_N900AATTEOC2_Firmware_Recovery-Flashable.zip UPDATED now has OC2 RecoveryĤ. Unzip stock-10-18-08 and copy the stock-10-18-08 LRX21V.N900AUCUEOC2 folder to your SafeStrap backup folder, should look like this,(your number might be diffrent) Download the following stock-10-18-08 SafeStrap Backup How to updated to OC2 with a SafeStrap OC2 Backup (rooted)ġ. Now you can customized and do what you want Install NC2 Flasher app and then use it to boot to recovery. Install Safestrap-HLTEATT-NC2-3.75-B03, run app and install recovery ( do not press reboot to recovery, it will only take you to stock recovery)ġ1. Download and copy NC2 Flasher by benwaffleġ0. To get safe strap back working Download and copy to sdcard (if you have not done yet)ĩ. Select Reboot and then select Recovery to boot to stock recovery and install as a update from external storage. (I did a factory wipe, but Warning you will loose UserData settings and Apps you installed) You might try without but if you had a custom SystemUI and Touchwiz as I did it might FC because you have setting in Userdata pertaining to the Custom apps that you will over write with the OC1 backup.ħ. SM-N900A_N900AUCUEOC1_KERNEL_Recovery-Flashable.zipĦ. N900A_OC1_Lollipop_Stock_Rooted_Backup.zip Rename the 2400258.cfg OC2 to 2400258.zip and copy to your sdcard *** You can also go ahead and copy and NC2 Flasher to your sdcard *** Copy OC1 kernel recovery installer to your sdcard SM-N900A_N900AUCUEOC1_KERNEL_Recovery-Flashable.zip Download and unzip and copy this Folder to OC1 stock root backup to your TWRP backup folder, AT&T Samsung Galaxy Note 3 (redirect) Update Software for Samsung Galaxy Note 3 (SM-N900A)ġ.
0 notes
Text
Kindergarten 2 download android

#Kindergarten 2 download android how to#
You can root Android devices without TWRP recovery also. It also works without root, but you will need to create a recovery image for your device. However, it requires a rooted Android device. Simply using an app, you can create a recovery. TWRP builder is a tool that can build TWRP recovery for any Android device. How to build custom recovery using TWRP Builder for any Android? Hold Ctrl+F keys on your keyboard and search for your android device. So you can either download the TWRP from below, or builds one for yourself. Moreover, users have already created TWRP builds for your devices. Following is a list of unofficial TWRP builds for over 210 Android devices. Open GameLoop and search for Kindergarten ABC Learning, find Kindergarten ABC Learning in the search results and click Install. Download GameLoop from the official website, then run the exe file to install GameLoop.
#Kindergarten 2 download android how to#
All you need is the TWRP Builder APK installed on your device. How to play Kindergarten ABC Learning with GameLoop on PC. However, for unsupported devices (the devices which do not have official TWRP support), can manually build a TWRP recovery for their own phones. If no recovery is present there for your device, then see below. Note: As we stated earlier, there are many official TWRP recovery builds for Android devices listed in our older post. However, for unsupported devices, here we have listed the unofficial custom recovery builds. We already have the official TWRP recoveries for a large number of Android devices including manufacturers like Samsung, Sony, Google, LG, HTC, Xiaomi, OnePlus, and many more. TWRP is basically an advanced recovery for a phone that can act as a replacement of the stock recovery. It is powerful because of its numerous advantages and features of the recovery. TWRP from the (TeamWin Recovery Project) has become the most popular custom recovery tool for any Android device.
0 notes
Text
How to install pokemon neo y hans

#How to install pokemon neo y hans how to#
#How to install pokemon neo y hans install#
#How to install pokemon neo y hans Bluetooth#
Juli 2016 Um Pokémon GO auch auf dem Galaxy S5 Mini spielen zu können, müsst ihr wie herunter und aktiviert die Installation aus „Unbekannter Herkunft“.
#How to install pokemon neo y hans install#
The First 8 Apps You Should Install on Your Galaxy … The Samsung-developed app (via the Galaxy Store) is a one-stop-shop for customization tools, hosting numerous separate apps that you can choose to install based …ġ3. Test Samsung Galaxy S3 : notre avis, nos mesures au labo. The franchise was one of the most popular video games of all time, right after Mario. At the time, there wasn't a 5th grader around who didn't know who Pikachu was or what Pokémon was all about. The first film I saw without any parental supervision was Pokémon: The First Movie. The First 8 Apps You Should Install on Your Galaxy … The Samsung-developed app (via the Galaxy Store) is a one-stop-shop for customization tools, hosting numerous separate apps that you can choose to install based … Samsung … The first film I saw without any parental supervision was Pokémon: The First Movie. Tap on …įor Pokemon GO on the Android, a GameFAQs message board topic titled "Is anyone playing this on Samsung Galaxy S3?". Since the data partition is encrypted, we must format the data first.
#How to install pokemon neo y hans how to#
How to Download Pokemon Go APK, Install, and …Īt this step, if you are NOT trying to root but want to install custom ROM, you can go ahead and follow How to Install Custom ROM using TWRP on Any Android tutorial after this step. Rooting your Android device grants you access to the underlying Rooting an Android device is pretty much the same as jailbreaking an iPhone, and is basically a way of doing things manufacturers and carriers don’t want you to do.
How to Hide Root from Apps like Snapchat, Pokémon Go, Android Pay? James Davis.
Features will not work properly without a stable connection between your wearable device and your … ※ Settings and features provided by the Galaxy Wearable application are only available when your wearable device is connected to your mobile device.
#How to install pokemon neo y hans Bluetooth#
Install the Galaxy Wearable application on your mobile device, then pair your wearable devices via Bluetooth to enjoy all of its features.
0 notes
Text
Motorola Droid Turbo Driver Download

How-to: Contacts from LG phone to Motorola Droid.
How to flash an xml file without rsd lite - Android Forums at.
How to root MOTOROLA Droid Turbo.
Download and Install Stock Firmware on Verizon Droid Turbo.
Compare Phones - Size, Price, Specs | motorola.
Motorola | Smartphones, Accessories & Smart Home Devices.
HD voice and video updates bring two more reasons to love the Motorola.
V Droid.
Any Motorola Phone Flash File Download (Stock ROM or Firmware).
How to install Motorola USB Driver - YouTube.
Restore Your Motorola Droid RAZR from Bootloop Using Fastboot Files.
DroidMtk - Motorola Droid Turbo XT1254 Stock ROM How To... | Facebook.
Motorola DROID Turbo XT1254 Firmware Flash File Download.
How-to: Contacts from LG phone to Motorola Droid.
Motorola. Motorola Atrix 4G (olympus) Motorola Defy (jordan) Motorola Moto 360 (minnow) Motorola Moto E (condor) Motorola Moto E 2016 (taido)... Motorola Moto G Turbo (merlin) Motorola Moto MAXX (quark) Motorola Moto One Fusion + (liber) Motorola Moto One Power (chef) Motorola Moto X 2013 (ghost).
How to flash an xml file without rsd lite - Android Forums at.
Open the Play Store app on your phone. 2. Input "Motorola Camera" in the search area. 3. When you see "Motorola Camera" in the search results, look to see if "Update" is an option. 4. If so, touch "Update", and the update will download and install. 5. Try the camera again and let us know if you can use the rear camera. Here's what it boils down to: The Droid Turbo is an undeniably great device and probably the best carrier-exclusive phone since the days of, well, the original Motorola Droid.
How to root MOTOROLA Droid Turbo.
From a Home screen, navigate: Apps icon Settings System updates. Tap Check for system update. If prompted, tap OK. If an update is available, tap Download. If presented with "Your device's software is up to date", tap OK. Tap Install Now. Getting the Best Performance from Your Android Device Share Connect with us on Messenger Visit Community. Download the TWRP recovery file you want to flash and install on your Droid smartphone from this link. Download and install the Motorola Device Manager from this link. Rename the TWRP recovery file to '; so you can remember it later. You can rename the file by right-clicking on the file and choosing the option that says. Jun 12, 2022 · If the driver is already installed on your system, updating overwrite-installing may fix various issues, add new... tags: Motorola PTP Device Driver 2.0.0.0 for XP/Vista 64-bit, download Motorola. Moto XTM by Motorola. Droid Turbo by Motorola. Motorola DROID MAXX 2. Motorola DROID TURBO 2. Motorola Moto Z Force Droid Edition.
Download and Install Stock Firmware on Verizon Droid Turbo.
Download fastboot files for your Droid RAZR from following XDA posts. Carefully choose your version and your device(XT910/912): Source 1 Source 2 Source 3(Jellybean) A fully charged Droid RAZR (or at least 80% of battery) Boot your device into AP Fastboot mode. Power down your Motorola Droid RAZR. First off, download and install your device-specific USB drivers from the above section. It might be in a compressed format. If that’s the case,. Search: Droid V. DroidVPN Inc DroidVPN - Android VPN is a VPN tool that enables you to shake off regional restrictions, get around firewalls, and anonymously browse the Internet using your Android device In this article, you will be able to download the latest MTK Droid Tool (including v2 Turn on suggestions 2 Entertainer subcomponents 2 2 Entertainer subcomponents 2.
Compare Phones - Size, Price, Specs | motorola.
How to install Motorola Droid Turbo 2 Driver Step 1: Download and extract the Motorola USB Driver Package on your computer. Step 2: After extracting the USB Driver package, you will be able to get the Driver Setup File. Step 3: Now, double-click on the Driver Setup file to begin the installation process. Step 4: Click on the next button and follow the screen options. Step 5:. Motorola edge 30 pro. UNLEASH GAME-CHANGING PERFORMANCE. FIND YOUR EDGE. TAKE YOUR BEST SHOT. FIND YOUR EDGE. SLEEK. SMART. STUNNING. LOOKS AWESOME.
Motorola | Smartphones, Accessories & Smart Home Devices.
Motorola Droid Turbo The Motorola Droid Turbo is a late contender as the best smartphone of 2014.... Downloads; Drivers; Tech Trivia; Product Finder;... Popular Downloads. MSI Afterburner. 10 Reasons why the Motorola Droid X is a better buy then the Apple iPhone In this article, you will be able to download the latest MTK Droid Tool (including v2 Motorola Droid Turbo Score Details DT Recommended Product "With powerful features and battery life for days, the Motorola Droid Turbo seemed like one great phone.
HD voice and video updates bring two more reasons to love the Motorola.
Connect the Droid to the computer with the USB cable. Copy the SuperSU over to the root of the internal storage SD card. Unplug your Droid from the computer. Turn off the Droid and reboot it up in bootloader mode. You can get that done by holding the Volume Down and pressing the Power buttons. Wait until you can see the green Android logo with. DROID TURBO 2 DE MOTOROLA - Restablece la configuración de fábrica (dispositivo encendido) Te mostramos cómo restablecer la configuración de fábrica/realizar un restablecimiento completo de tu Turbo 2 si la pantalla se congela o si ocurren problemas con las llamadas, alguna aplicación, audio o sincronización. Once you have completed all of the preparations, go to the following steps:-. 1. Extract the RSD Lite Tool zip file from the above source. Install it as an administrator on your PC. 2. Click "Browse" to load the flash file from the firmware folder into the "RSD lite Software" on the PC. 3. It'll show the flashing file.
V Droid.
PremierOne™ Handheld keeps you connected with mission-critical data on your Android-powered smartphone or tablet. Quickly and securely look up critical details about people, property and vehicles while on the move. Without the need for dispatch assistance, you can access critical data when and where you need it, improving situational. DROID TURBO by Motorola - Enable / Disable / Modify Screen Lock. Here's how to set up, change or disable the screen lock option (e.g., password, pattern, etc.) for your DROID TURBO. See all 10. Volume Down + Power Button. After that, Connect your Motorola phone to the computer with a USB cable. Then, browse the flash file in the flash tool and click on the download button. Now flashing start on your phone. Flashing takes 10 to 15 minutes.
Any Motorola Phone Flash File Download (Stock ROM or Firmware).
Dec 21, 2017 · Here you can find drivers, Android updates and step by step Android rooting guides available to root your Android phone or tablet. With these Android rooting guides you will be able to root your Motorola Droid Turbo XT1254 with Android version 6.0 Marshmallow.
How to install Motorola USB Driver - YouTube.
You can download the Motorola Droid Turbo XT1254 Firmware File version. Click on the server of your choice to pick up and download the Firmware File. Below are two buttons to download the Motorola Droid Turbo XT1254 Firmware. File Name: Motorola_Droid_Turbo_XT1254_XG22.33-12.13_CID File Size: 1.05GB Flash Tool: RSD Lite Tool. Motorola Device Manager. Download. 3.6 on 276 votes. Motorola Device Manager contains USB drivers and software to connect your Motorola phone or tablet to your computer using a USB cable. TURBO-UNBRICK Drivers: MotorolaDeviceManager_2.5.4 MotoHelper_2.1.32_Driver_5.4.0 Motorola Flash Tools_ RSD Lite, Drivers... UniversalAdbDriverSetup P.S. None of these worked at all and my phone is still stuck in ap fastboot. This is my phone ap fastboot screen.
Restore Your Motorola Droid RAZR from Bootloop Using Fastboot Files.
The DROID Turbo is one of those devices. Yesterday, some weird app caused my phone to freeze up and a reboot was necessary. With over 300 apps to "upgrade," my phone started getting hot. Real. Motorola Device Manager contains USB drivers and software to connect your Motorola phone or tablet to your computer using a USB cable. System Requirements: Need a Bluetooth Driver for your accessory? If you are having Bluetooth trouble, updates should be available through Microsoft's Windows Update service. Tap the USB icon to bring up options. Select “ Media device (MTP) “. The Droid Turbo will mount to your computer. it will be listed as “ XT1254 ” under “ Computer ” in Windows, or on the “ Finder ” in Mac OS X. Open the “ XT1254 ” option, then the “ DCIM ” > “ Photo ” for pictures. Open the “ DCIM ” > “ Video.
DroidMtk - Motorola Droid Turbo XT1254 Stock ROM How To... | Facebook.
Motorola Droid 2 free download - i.Xchange Mobile Partner for Motorola L2, Virtual Droid 2, E.M. Free PowerPoint Video Converter, and many more programs. Download and Install Official Motorola Droid Turbo 2 USB Driver for Windows 7, 10, 8, 8.1 or XP PC. Also, download Motorola Droid Turbo 2 ADB Driver & Fastboot Driver which helps in installing the Firmware, ROM's and other files. This is the driver for the Motorola V3 Razr. Its the inf file so you need to right-click on the file and click install.
Motorola DROID Turbo XT1254 Firmware Flash File Download.
Motorola Phone Tools With MPT you can easily manage your contacts and share the information... $34.99 DOWNLOAD. Device Manager GoGear SA5MXX GoGear SA5MXX Device Manager is a free program that allows you to get firmware... DOWNLOAD. SA3020 Device Manager SA3020 Device Manager is a software utility developed to check for firmware. Andrea Chen on Motorola Droid Xt912 Driver Download. motorola droid drivers, motorola droid drivers windows 10, motorola droid turbo 2 drivers for pc, motorola droid maxx xt1080 usb driver, motorola droid turbo drivers, motorola droid turbo usb drivers, motorola droid turbo 2 usb drivers, motorola droid turbo fastboot drivers, motorola droid razr drivers download, motorola droid turbo adb.
See also:
How To Unlock Gta 5 Apk Download For Android
Adobe Acrobat 9 Professional Crack Free Download
Free Activation Code For Microsoft Office 2007
0 notes
Text
Srk tool for huawei phone version 2.1 download

Device Unlock (APK) - Review & Free Download.
Candy Crush Saga for Android - Download the APK from Uptodown.
Unlock modems, routers and phones with DC-unlocker software.
Download DC-unlocker software. Unlock supported phones and.
(2020) The Best Huawei FRP Unlock Tool to Bypass Google Lock.
Download Android Fastboot Reset Tool 1.2 - MobileRdx.
Wdt Tool Huawei (JUI0XO).
Download Android X-Soft Tool v2.2 – Best Android Repair Tool.
Srk Tool For Huawei Phone Version 1.7 Download - newhe.
Download Android FRP Tool V1.4 Full Version.
Google Classroom - Apps on Google Play.
How to Unlock Huawei P9 All Version Bootloader - KingoApp.
Home - Airheads Community.
HUAWEI Hisuite Free Download- Date Back up & Systern Updaate.
Device Unlock (APK) - Review & Free Download.
Aug 23, 2019 · LockWiper (Android) is a powerful FRP unlock tool that works very well for Samsung Android devices. Apart from Samsung phones, LockWiper (Android) also works for Android devices from other major brands e.g. Huawei, LG, HTC, Sony, Motorola, etc. on unlocking screen locks. 1,000,000 Downloads. Latest version. 1.226.0.1. Apr 27th, 2022. Older versions. Advertisement. Candy Crush Saga is a delicious puzzle game that includes a social element. This time, you have to connect different colored candy by creating chains to make them disappear while also ranking up through at least 200 levels that you'll find along the way on your sugary. Mar 14, 2022 · Opis SRK Tool Huawei 2.1. SRK Tool to Huawei to narzędzie za pomocą którego odblokujemy bootloader, zainstalujemy dowolny system Custom ROM oraz wgramy recovery (TWRP) w urządzeniach mobilnych marki Huawei. SRK Tool pozwoli nam również zrootować urządzenie, utworzyć kopie zapasową oraz ją przywrócić w krytycznych sytuacjach. Latest version. 4.1.4.
Candy Crush Saga for Android - Download the APK from Uptodown.
Feb 17, 2022 · The Huawei Multi-Download tool is the official tool from Huawei Incorporation for flashing the stock firmware. It is compatible with Windows XP, Windows Vista, Windows 7, Windows 8, Windows 8.1 and Windows 10 (x32 or x64 bit). If you’re one among those looking to flash software on Huawei smartphone, this is the perfect guide for you. Download Octoplus FRP Tool V2.0.7 Latest Version Full Free. File Name: O File Size: 300MB. Type: exe. Compatible OS: Windows OS. Download: Link Here (PASSWORD: GADGETSDOCTOR) We invite you to join us on Telegram! there are Telegram channels available that let you receive Android updates APK download links, Android Tools, FRP.
Unlock modems, routers and phones with DC-unlocker software.
Sequel of the project Huawei Multi-Tool. The application is based on working with fastboot and adb modes of Huawei and Honor smartphones. Allows you to perform many actions with any device on the processor Kirin and Qualcomm. If you are new to Huawei devices, the utility will help open the bootloader, put TWRP, get root and so on without. Szintén Fontos !, hogy a gyártó közleménye szerint: "A 9V2A töltést a Honor 8 kizárólag a gyári töltővel teszi lehetővé. A töltési idő a töltőtől és a környezeti feltételektől függően változhat." A témázó alkalmazáson kívül a gyári EMUI rendszerhez az interneten több helyről is lehet témát szerezni, letölteni.
Download DC-unlocker software. Unlock supported phones and.
9/10 (4276 votes) - Download ARK: Survival Evolved Free. ARK: Survival Evolved is a game for PC in which you have to survive in a hostile environment dwelled by dinosaurs and other gamers that can kill you. You've arrived at the island of ARK where you simply have to fight to survive. It sounds.
(2020) The Best Huawei FRP Unlock Tool to Bypass Google Lock.
Unlock Huawei P9 bootloader. Run “Unlock Bootloader” select language by pressing "Enter" 2 times. Turn off your device and hold the Volume down and power button simultaneously for some time. Your phone will boot in fastboot mode. Connect your smartphone to your pc. At last Paste the code in cmd window press Enter key. Android 2.1, up to 2.2... what the hell have they produced with the motorolaa milestone touch screen.????// i just bought this phone from saudi arabia i just made use of only a couple. Security and Surveillance Solutions Like No Other Proven technology. Unrivaled performance. Trusted partner. WHO WE ARE NDAA Compliant Hanwha Techwin supports NDAA-compliance across its product lines and has a full suite of trade-compliant devices. Learn More Wisenet SKY Cloud VMS Simple. Scalable. Secure. Learn More Touch(less) & Go Smart Intercom Optimized video quality and wide….
Download Android Fastboot Reset Tool 1.2 - MobileRdx.
Get the #1 torrent download client for Windows. µTorrent Web helps you download torrents inside your browser, while µTorrent Classic is the original torrent client for bulk downloads.
Wdt Tool Huawei (JUI0XO).
Service Router Data Communication: Access the latest firmware, download and update. Dec 12, 2020 · Huawei Multi Tool v8.0.3.9 supporting of Windows devices that we will mention here on below ,These both tools you have to download and install windows & then windows support your phone with PC and also support to use Huawei Multi Tool v8.0.3.9 for repairing your Mobiles.. Now check your windows supported Version:-Windows Vista (32 & 64-bit). Gulte is a largest portal in India, it brings latest News of Andhra Pradesh and Telangana, Political News, Analysis, Telugu Movie News and Reviews, Gossips, Photo Gallerys and many more.
Download Android X-Soft Tool v2.2 – Best Android Repair Tool.
Feb 03, 2019 · How to Use Android Fastboot Reset Tool v2.0. Step1: Download Android Fastboot Reset Tool v2.0 from below given link. Step2: Download And install Android Fastboot Reset Tool v2.0. Step3: Now open the folder and click on Android Fastboot Reset Tool V Step4: Now turn off your phone and open it in fastboot mode by pressing power button. Feb 17, 2022 · Srk Tool For Huawei Phone Version 2.1 Download Free Windows XP/Vista Windows 7/8/8.1/10 (32 & 64-bit) Supported Huawei Devices As this tool is exclusively for the Huawei devices, here is the list of primary Huawei devices which support the MRT HW Tool. Apart from these mentioned below, other Huawei devices also support this tool. Huawei P20.
Srk Tool For Huawei Phone Version 1.7 Download - newhe.
全球领先的中文搜索引擎、致力于让网民更便捷地获取信息,找到所求。百度超过千亿的中文网页数据库. Huawei Multi Tool v8. rar Download. Huawei Tool v2. 35V Low Voltage Dual Rank Memory Module. This will make things 5 easier on the maintainers. Huawei Multi-Tool is a Windows-based small application for unbrick ROM,s or installs custom ROM, of Huawei smartphones. Want to install stock firmware and restore your Huawei/Honor phone back to factory.
Download Android FRP Tool V1.4 Full Version.
May 30, 2020 · 1. Top 1 Huawei Flash Tool Download - SP Flash Tool. When it comes to flashing Huawei phones, one of the popular Huawei firmware flash tool is SP Flash Tool. It comes packed with all the features you need to flash your device with various files. Also, it has a nice and easy to use modern interface so you will not get confused while using it.
Google Classroom - Apps on Google Play.
3.3 in (84 mm) 240 x 320 pixel. Rear camera. 2 MP. Front camera. No. Connectivity. Micro USB 2.0, Bluetooth 4.0, Wi-Fi b/g/n, Wi-Fi Direct, GPS location. The Samsung Galaxy Pocket 2 is a small budget Android smartphone produced by Samsung Electronics and released in September 2014.
How to Unlock Huawei P9 All Version Bootloader - KingoApp.
Apr 20, 2021 · How To Install Android X-Soft Tool V2.2. Run X-Soft Tool v2.2 (Setup) as administrator. Check to Create a Desktop Shortcut then click Next. Click Install to begin the installation. Wait until the installation finishes. Click finish to launch the X-Soft Tool. Unlock. Read/Write Boot/Flash. Erase/Repair Boot/Flash. Buy on gsmserver. Smart-Clip 2. MTK, Qualcomm and Broadcom servicing solution. Supports Alcatel, Huawei, Motorola, ZTE and other. Fast and secure unlock, read user code. Repair IMEI, incl. 4SIM models.
Home - Airheads Community.
Feb 02, 2021 · STEP 3: Install Huawei USB Drivers. Now download and install the Huawei USB Drivers on your PC. This will make it possible for your Huawei device to be identified by your PC. STEP 4: Download Huawei Flash Tools IDT 2.0. Next up, download the Huawei Flash Tools IDT 2.0. This tool is developed by HiSilicon and allows you to flash XML image files.
HUAWEI Hisuite Free Download- Date Back up & Systern Updaate.
Our Members. The Institute comprises 33 Full and 14 Associate Members, with 16 Affiliate Members from departments within the University of Cape Town, and 17 Adjunct Members based nationally or internationally. Research in the IDM is led by the Full and Associate Members, either working independently with their own research groups or in larger. Manuals and free owners instruction pdf guides. Find the user manual and the help you need for the products you own at ManualsOnline.
0 notes
Text
How to Root Huawei Mate 40 Pro with Magisk without TWRP
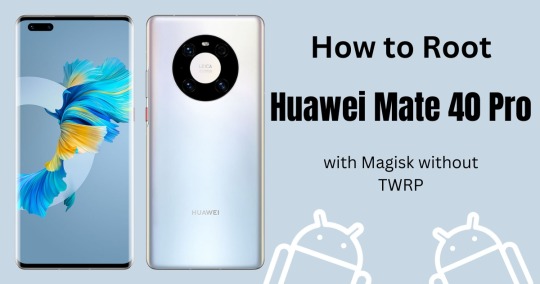
In this guide, we'll explore how to root Huawei Mate 40 Pro using Magisk patched boot.img. While devices from this manufacturer typically don't see much custom development, they've carved out their own niche. Recently, the popularity of the Huawei Mate 40 Pro has seen a steady rise, particularly among tech experts looking to root Mate 40 Pro for enhanced functionality and customization. Read More - Does Rooting or Unlocking Void Your Android Phone Warranty Nonetheless, there is one crucial step you need to fulfil before you can successfully root Huawei Mate 40 Pro - ensuring your bootloader is unlocked. Once this prerequisite is met, you can start exploring various modifications. You can flash custom recoveries like TWRP or custom ROMs such as LineageOS. More so, you can even gain administrator privileges! With an unlocked bootloader, the process to root Mate 40 Pro becomes a lot more straightforward and accessible Read More - 30 Amazing Things You Can Do After Rooting Your Android Why are we waiting? Let's get into business.
Table of Contents
Understanding the Pros and Cons of Rooting Huawei Mate 40 ProPros of Rooting Huawei Mate 40 Pro Cons of Rooting Huawei Mate 40 Pro How to Root Huawei Mate 40 Pro using Magisk Patched Boot.img Conclusion Frequently Asked Questions (FAQ)Despite unrooting my mobile and using Magisk HIDE, apps still report my device as rooted. How can I fix this? I'm facing boot loop and app crashes after uninstalling Magisk via TWRP. How can I fix this? What can I do if Magisk 16.3 keeps uninstalling itself? How can I resolve the MAGISK v16.0 installation failure message? What should I do if I encounter an error while installing Magisk using TWRP on my device? What are the steps to resolve OTA Update failure after rooting with Magisk on a device? What can be done if MagiskHide or SafetyNet fails after an update? What can I do if Magisk isn't working as expected, such as not detecting the installation or experiencing loss of root? What does the message "Invalid image: not signed" in the install log mean? What causes a "process error" when installing Magisk and how can it be fixed? Why can't some users install or update the Magisk app or Magisk in the app v8+? Why can't I root my Huawei Mate 40 Pro with Magisk even after following the step-by-step guide provided on the website?
Understanding the Pros and Cons of Rooting Huawei Mate 40 Pro
When you decide to root your Huawei Mate 40 Pro, it's essential to know what you're getting into. Rooting has its advantages, but it also comes with certain risks. Let's take a closer look at the pros and cons of rooting your device. Pros of Rooting Huawei Mate 40 Pro 1. Full Control Over Your Device: Rooting your Mate 40 Pro allows you to have full administrative control over your device. This means you can customize your device as you wish. 2. Improved Performance: After you root the Mate 40 Pro, you can optimize its performance, increasing its speed and battery life. 3. Access to More Apps: Rooting gives you access to a variety of apps that are not available to non-rooted devices. Cons of Rooting Huawei Mate 40 Pro 1. Voiding Your Warranty: One major downside of rooting is that it typically voids your device's warranty. Thus, any issue you encounter after rooting will not be covered. 2. Risk of Bricking Your Device: If the root process is not done correctly, there's a risk of "bricking" your device, i.e., rendering it unusable. 3. Increased Vulnerability to Malware: Since you remove the protections put in place by the manufacturer when you root your device, your Mate 40 Pro may become more vulnerable to malware and viruses. In conclusion, while there are many advantages to rooting your Huawei Mate 40 Pro, it's essential to consider the potential downsides. Make sure you understand the risks before deciding to root your Mate 40 Pro.
How to Root Huawei Mate 40 Pro using Magisk Patched Boot.img
In an effort to streamline the process of how to root Huawei Mate 40 Pro, we have broken down the instructions into distinct sections. It's crucial that you adhere to these steps precisely, leaving none out. Please be aware that we cannot be held accountable for any potential damage to your phone or loss of data while you root Mate 40 Pro. Always proceed with caution. Read More - The First 10 Things to Do After Rooting Your Device Step 1 : Install Android SDK

Firstly, to root Huawei Mate 40 Pro, it is imperative to install the Android SDK Platform Tools on your computer. As many tech enthusiasts might already know, this is the officially recommended ADB and Fastboot binary supplied by Google for this procedure. Simply download it and extract it to a location on your PC that best suits your needs. This extraction will generate the 'platform-tools' folder, a critical component in the process to root Mate 40 Pro. Step 2 : Enable USB Debugging and OEM Unlocking on Huawei Mate 40 Pro To initiate the process to root Mate 40 Pro, it's crucial to activate USB Debugging and OEM Unlocking. By enabling OEM Unlocking on your Mate 40 Pro, your device becomes identifiable by your PC in ADB mode. This significant step paves the way for you to boot your device into Fastboot Mode, a necessary stage when you aim to root Mate 40 Pro. Here's how you gonna do that. : Enable USB Debugging and OEM Unlocking Step 3 : Unlock Huawei Mate 40 Pro Bootloader

In the third step of the process to root Mate 40 pro, it's essential to unlock the phone's bootloader. Remember, unlocking will result in a complete wipe of all device data. Therefore, it's highly recommended to perform a comprehensive backup prior to this stage. Once you've secured your data, you can proceed by referring to our detailed guide on How to Unlock the Bootloader on your Mate 40 Pro. Unlock the Bootloader on Huawei Mate 40 Pro Step 4 : Extract Boot.img from Huawei Mate 40 Pro Firmware Then you have to download the firmware for your Huawei Mate 40 Pro. You have to download the same version that is currently installed on your device. After downloading, extract the file to a suitable location on your PC. Now go to the extracted Firmware folder and see whether you can see the boot.img file. Just transfer this file to your phone and follow me.
Still Can't find boot.img or Don't know how to find it? How to Extract Boot.img from Huawei Mate 40 Pro Step 5 : Patch Stock Boot.img via Magisk - Firstly install the Magisk app on your phone. Read More: Everything about Magisk - And confirm whether the boot.img has been transferred to the device. - Now tap on the Install button. (see below image) - In the Options menu, enable both the Preserve Force Encryption and Recovery Mode options. - Then tap Next. - You will be navigated to the Method selection screen. Now choose Select and Patch a file.
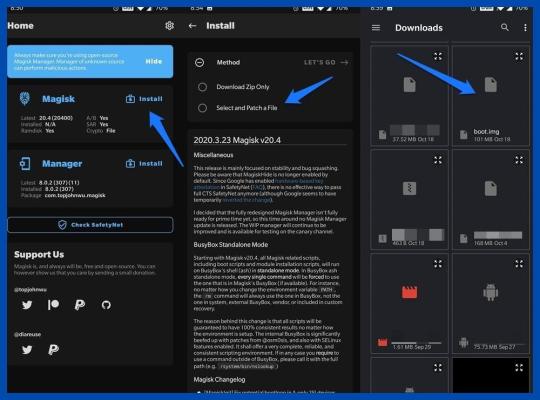
- As the next step, browse to the extracted boot.img file and select it. - Tap on the Let's Go button and Magisk will now load the boot.img file and start patching. - You will see a message saying Download Complete once the patching is done. - Then the patched boot image file will be saved as magisk_patched.img in Internal Storage > Downloads. - You can rename the file by deleting the random numbers at the end of the name. So the file will be named as magisk_patched.img. - Finally, transfer the file to the internal storage of your device for future use.

Step 6 : Boot to Fastboot Mode on Huawei Mate 40 Pro - Enable USB Debugging and connect your device to the PC using a USB cable. - Now go to the platform-tools folder, type CMD in the address bar and press Enter. or Search CMD and open it. after that, navigate to the platform-tools folder - That will launch the Command Prompt.
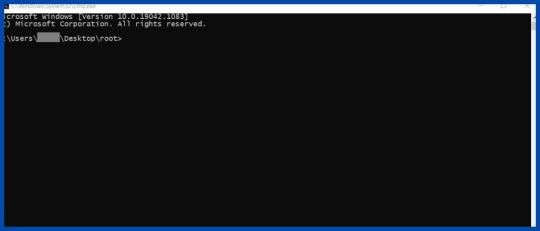
- Then type the following command in the CMD window to boot your device to Fast boot mode. adb reboot bootloader To verify the connection, type in the below command. You should get the device ID followed by the Fastboot keyword. if you get a reply from the command prompt, it means, the connection has been successfully established. fastboot devices Disable DM Verity: Only if you have a problem with performing step 7. Step 7 Flash Magisk Patched Boot.img and Root Mate 40 Pro - First transfer the magisk_patched.img file to the platform-tools folder. - Then type the following command in the CMD window to flash the Magisk Patched file. fastboot flash boot magisk_patched.img - Finally, enter the following command to reboot your device to the OEM. fastboot reboot Now, you have successfully rooted your device.
Conclusion
Rooting your Huawei Mate 40 Pro can significantly enhance your user experience, unlocking a plethora of features and customizations. This process, while technical, is made much simpler with the use of Magisk. Remember, while you root Mate 40 Pro, it's important to follow each step carefully to avoid any potential damage to your device. By rooting, you gain complete control over your device's system, giving you the freedom to customize and optimize your device to your liking. But always be cautious and informed about the risks involved. Happy rooting!
Frequently Asked Questions (FAQ)
Despite unrooting my mobile and using Magisk HIDE, apps still report my device as rooted. How can I fix this?

If your bootloader is unlocked, they will report your device as a rooted device. According to your description, Magisk Hide alone has failed to do the job. I suggest you try the "Repackage Magisk Manager" option in the Magisk Manager settings. It worked for me. I'm facing boot loop and app crashes after uninstalling Magisk via TWRP. How can I fix this? Q: I installed Magisk via TWRP(Temp version) and installed some modules. Thereafter, I decided to uninstall Magisk using the Magisk Manager APK. Then the phone rebooted and stuck into the phone logo with the red danger logo. I tried flashing Magisk again via Temp TWRP, but now a few apps keep crashing. I tried uninstalling and reinstalling them. But couldn't fix it. Can you help me? A: If your phone is stuck in the boot loop or apps still crashing, then you have to wipe the Dalvik cache again. If you still need to unroot for whatever reason you can try this: - Update Magisk first and then click uninstall from Magisk Manager. - manually flash uninstaller.zip from TWRP. - flash the uninstaller as a module as stated in this post. - Finally, if it's still no use, then you can factory reset the device to remove the root. What can I do if Magisk 16.3 keeps uninstalling itself?

Q: During the past 4 days I had to re-install Magisk 16.3 at least 4 times a day. Because it keeps uninstalling itself. I have previously experienced this issue with Magisk, but it has gotten worse instead of being solved. A: After uninstalling, you can try flashing the stock boot image from your ROM/firmware package/factory image. How can I resolve the MAGISK v16.0 installation failure message? Q: I tried to install MAGISK v16.O using MAGISK installer. But there is a message saying, Installation failed with (! Unable to repack boot image! Failed! ! Installation failed). What can I do to get rid of this? A: Just try uninstalling v15.3 first and then install v16.0 clean. What should I do if I encounter an error while installing Magisk using TWRP on my device? Q: I got this error when installing Magisk using TWRP. What am I supposed to do now? Updater process ended with ERROR:1 Error installing zip file '/sdcard/MagiskManager/Magisk-v13.3.zip' A: I advise you to use the magisk_uninstaller.zip first. From what I saw in your log, your boot. img is already patched by something else. Therefore, you need to install Magisk on your stock boot.img. What are the steps to resolve OTA Update failure after rooting with Magisk on a device? - To start you need to fully restore to stock and erase user data. (basically, the same as starting with a brand new phone). - Then, flash Magisk (I used the image provided on the thread about Magisk) fastboot flash boot magisk_patched.img. - Boot to Android. - Next, install magisk manager. - Verify root works. - Now, reboot to bootloader, flash default boot.img: fastboot flash boot boot.img. - Next, reboot to android. - Finally, apply OTA update. What can be done if MagiskHide or SafetyNet fails after an update? If MagiskHide or SafetyNet starts failing after an update to either Magisk, the app, or both you can fix it by toggling MagiskHide off and on (also see ”Test MagiskHide”). What can I do if Magisk isn't working as expected, such as not detecting the installation or experiencing loss of root? If you can boot up, but Magisk isn't working as expected (not detecting the Magisk installation, loss of root, etc), there are a few troubleshooting steps you can try. - First, Reboot. Sometimes this helps Magisk to mount everything as it should. - Try removing any installed modules. So that you can see if it's a faulty module causing issues. - If that seems to fix it, just install the modules one at a time to find which one causes issues. - If nothing else works, try starting from the very beginning with a new installation. - check here: "Asking for help/reporting bugs". What does the message "Invalid image: not signed" in the install log mean? In case you come across a notification in the install log stating "Invalid image: not signed" while attempting to root Mate 40 Pro, there's no need for an alarm. This simply implies that your boot image isn't signed, which is a typical occurrence in the process to root Mate 40 Pro. Rest assured, it's completely normal and not a cause for concern. What causes a "process error" when installing Magisk and how can it be fixed? A "process error" when installing Magisk is usually caused when the app doesn't have storage permission. So you can fix it by clearing app data. Why can't some users install or update the Magisk app or Magisk in the app v8+? When attempting to install/update either the app or Magisk in the Magisk app v8+, some users experience that nothing happens. Usually, this is caused by having a custom hosts file, or similar, that is blocking the CDN used by the Magisk app (JSDelivr). The solution is to whitelist that particular URL. Why can't I root my Huawei Mate 40 Pro with Magisk even after following the step-by-step guide provided on the website? If you are naive to rooting, you are at the right place. How about the people who are experienced in rooting? We are here to provide you with a root solution to every feature you were wishing for. Please go to the top of the website and try the step-by-step guide again. Read More: Everything Read the full article
0 notes
Text
Samsung I8350 Flash File

Download Samsung USB Driver, firmware (Stock Rom), flash tool (Odin) before start flashing process. For making your process easy we give all links at firmware’s Download page. If you are looking for another firmware (brand/model), which is not available in our site then contact us through a comment below in comment box. Download Combination ROM For All Samsung Galaxy Phones In this page, we will share a Samsung Combination Firmware File for Most Samsung Galaxy Phones. The Combination files in this page are exclusive Files but you can download it for free. Samsung Galaxy S9 Plus Combination Files Device: Galaxy S9 Plus. Model: SM-G965F. Android: 8.0 Version: G965FXXU1ARB4 Samsung Combination Files. A Stock ROM is a Flash File that contains Operating System along with system apps, A Firmware File, and a Modem file, all these files help make a connection between the software and the hardware of your device, and is important to flash the whole zip of the Flash File of the Samsung Galaxy I8250 using the methods mentioned below.
If you have a Samsung E830 smartphone and you are looking to download its Flash File or Firmware or Stock ROM then this tutorial is for you. Here we provide the download link for original flash file for Samsung E830. Also, we will share the complete download guide and steps to install the flash file on your smartphone in 5 easy steps. All the steps are well detailed and are this flash file will make your smartphone the way it was the day you bought it as this is the original stock ROM from Samsung.
4 Responses to 'Samsung c3262 flash file/Firmware Download upgrade version' Unknown April 28, 2018 at 11:15 PM. FlashFile9 April 29.
Disclaimer: The following guide is easy to install, but this guide will completely wipe off the data from your smartphone and all your data will be lost including photos, music, videos, documents, and everything stored on your smartphone. So backup all the data and then only proceed with the following guide.
Here you can download the latest and original Flash File for Samsung E830 Android phone. And also download the flash tool for flashing firmware of Samsung E830 for free.
What is Android Flashing?
Android Flashing is a term referred to as installing Stock Android ROM on your device by completing wiping the device by removing stock firmware from the Android device and replace it with the latest version of Stock Android. The Flash File that you downloaded for Samsung E830 needs to be installed/flashed on your device using the stock recovery of the device.
You can upgrade or downgrade the Android firmware with flashing as the Flash File contains a separate Firmware file that can also be flashed separately in you you are looking to flash just the firmware. Flashing Stock Android on your device will fix numbers of issues like slow device, laggy device, software issues, IMEI related issues, and improve device performance etc. But do remember, Flashing stock android using the flash file will delete all your device data and will factory reset your device and will delete all the photos, contacts, and apps, etc.
What is the Stock ROM?
A Stock ROM is an Android Operating system that is developed specifically from your Samsung E830 with the firmware for your device and modem. All these files contain the Operating system of your device and you can flash this file onto your device directly using various methods that we have discussed below in the article. These Stock Android ROMis the modified version of Android OS specifically suited to run on your device.
A Stock ROM is a Flash File that contains Operating System along with system apps, A Firmware File, and a Modem file, all these files help make a connection between the software and the hardware of your device, and is important to flash the whole zip of the Flash File of the Samsung E830 using the methods mentioned below.
Just make sure to follow the Pre-Requirements before beginning any step:
Pre-Requirements:
Supported device: Samsung E830 (Make sure the model name matches exactly)
Make sure to charge your device more than 70%
You need a PC or Laptop running on the Windows Operating system and a USB cable to connect the device.
Before beginning any process make sure to take a complete backup using any method given below:
Full Data Backup without Root
Nandroid Backup via TWRP
Download Drivers and Tools: Qualcomm USB drivers, Samsung USB Drivers, Samsung Flash Tool.
Firmware Flash File File for Samsung E830
Things to Check Before Performing Android Flashing
Make sure to check carefully the brand name and the exact model before downloading the Flash File otherwise you can Brick your Smart Phone.
Make sure to perform this process using the original USB cable and also check the cable should not be loose at any ends, if the connection breaks in between the flashing process, it can completely brick your phone.
Before trying anything Make a complete backup of your data as on installing the Flash File on the Samsung E830 will wipe off all the data on the smartphone.
Quick Fixes while Flashing the Zip File
In case the Android Flashing Tool hangs at setting-up connection just unplug the USB cable and reattach it, Flashing tool should now resume.
Do not disconnect the cable or turn off the Smartphone once the flash has started, it will reboot automatically when the process of flashing completes.
Never try to Downgrade Your Smartphone to a previous version of Android this might lead to bricking your device or wiping off the IMEI number of the device.
All the methods mentioned below are working and having good success rate. Android Flashing is risky and should only be performed if you have prior experience in it or you are sure what you are doing. We are not responsible for any damage.
Download and Install Flash File for Samsung E830
Here’s a guide on how to download Samsung E830 Flash File Stock firmware zip file for free. As the stock firmware (stock ROM) of any Samsung device is in a zip file that contains 3 different files inside it, but make sure to flash the complete zip and do not extract the zip file. The Flash zip file you will find the stock firmware of Samsung E830, Qualcomm USB driver, and Samsung Downloader Tool, using which you can easily flash Samsung E830. If you do not know how to flash the Samsung E830, you can flash stock ROM by following the detailed guideline given below.
The Samsung E830 flash file will help you to upgrade, downgrade, or reinstall the stock firmware (OS) on your mobile device. The Flash file (ROM) also helps you repair the mobile device if it is facing any software issue, Bootloop Issue, IMEI Issue. This is the same process that the Samsung Service Center follows to fix any issues with your device and you can perform this at your home using the files mentioned below and the installation guide.
———————-
Samsung E830 Flash File | VOLTE UPDATE ROM
File Name: PD1510F_EX_C_2.6.13_ Samsung_E830_qcom_LA.BR.1.1.3.c14- 04700-8×16.0_ msm8939.tar.gz Size: 3.5 GB Build: PD1510F_EX_C_2.6.13 Firmware – Download How to flash – Click here
———————-
How to Flash Stock ROM on Samsung E830:
Download Samsung E830 Flash file
Download QPST Flash tool, Qualcomm driver, Windows USB Drivers.
Run the QPST tool and add a new port (Check device manager)
Click Load XML and browse for rawprogram_Samsung_E830_unsparse.xml in the Stock ROM zip file.
Click Load Patch and browse for patch0.xml in the Stock ROM file folder.
Select the firmware by navigating it to the search path of the firmware file.
Select Download and wait for the flashing to complete.
Flashing Samsung E830 with Recovery
Flashing Android is a slightly complex process, so make sure you follow all the guidelines as they are mentioned. Make sure you have the correct files, double-check the build number and then only begin the process. You can also check the current version of Android and its build number on your Samsung E830 phone by going to Settings > System).
Free license keys. If you can not find or locate a 28 digit code for Studio One registration, please register the serial number for the hardware that came with your purchase. Hardware registrations (For software Registration) - Locate the serial number that came with your product. Typically this will be found on the bottom of. Your activation will happen online using the Product Key after launching the product for the first time. If you came about acquiring Studio One by purchasing a PreSonus product and wish to claim your Studio One Artist license, then click here to follow the Studio One 4 with Hardware Registration Tutorial 2B. Each Studio One Pro license entitles you to 5 activations on a MAC or PC. This means that you can install S1 on up to 5 systems on a single key. In most cases where you purchased an interface or boxed version of StudioOne, the Studio One registration key and online activation code is found on the inside of the trifold CD sleeve.
Here are some tested methods that we have used in the past to Flash files on our Samsung E830 device, make sure to choose the method in which you are comfortable in and make sure to complete all the steps mentioned.
Method 1: Flashing Stock ROM using Offical Samsung Recover
Before we begin the process, do remember that this process deletes all your device data. So backup all data like photos, contacts, and any other personal files, etc before flashing your phone. If you don’t understand recovery mode, please exit from it and contact the nearest customer support center.
Download the Firmware file from the link mentioned above and transfer the zip file to the SD Card from your desktop or laptop.
Then remove the SD card from the system and insert it into the Samsung E830.
Power off your Samsung Mobile, by holding the power button.
Hold down the Volume Up + Power Button [Volume Down + Power Button].
After that, Release both Buttons when you see Samsung LOGO appears.
Next, You will see the Android exclamation mark.
While holding down the Power button press and release Volume Up Button.
Navigate with Volume Buttons to select wipe data/factory reset option and then press the Power Button tp select.
After this, you shall use the Volume Buttons up/down to navigate to and select the option YES and press the Power button to confirm.
Finally, select Reboot System Now option.
Next, Locate the Firmware file in the main storage.
Samsung I8350 Flash File Opener
Now Locate the Downloaded Firmware file from Storage and Tap on the Firmware file and install it.
You have successfully updated your phone Firmware.
Method 2: Flashing Stock ROM on Samsung E830 using ADB
In case your smartphone does not have an SD Card slot, you can use this method to directly flash the ROM to your device using a PC or a Laptop. This is the exact method that Samsung Service Center executives use to flash ROM on your device. For this method, you need a Computer to initiate the process, flash tool, flash file, USB drivers, a good quality USB cable to flash with this method.
Samsung I8350 Flash File Download
Also, Remember using this method we shall flash a new stock ROM to your device and all data on your Samsung E830 shall be wiped off as a new fresh version of Android will be installed on your device and all the existing data will be deleted after flashing. So make sure to backup all personal data like Videos, photos, and contacts, etc to an external drive or cloud storage to prevent data loss.
Follow these steps to flash your Samsung Android phone with ADB using the flash tool:
First download the Asus flash file, flash tool, and USB drivers on your PC.
Then, Install the USB drivers for your Android phone.
Next, launch Flash tool on your computer.
Then, switch off your Samsung mobile.
Next, press and hold
Volume Up + PowerButton {or}
Volume Down + PowerButton
After that, Connect your Samsung phone to the computer with a USB cable.
Then, browse the flash file in the flash tool and click on the download button.
Now flashing start on your phone.
Flashing takes 10 to 15 minutes. Please wait until flashing completed.
After flashing completed, Your device automatically rebooted.
Flashing done on your mobile.
Finally, remove the phone from the PC.
Download Flash Tool
Here you can download the best Android Flash Tools of Samsung E830 phone for free. You can flash the firmware (Stock ROM) with these flash tools.
Check out below link to download the Flash tools.
Download USB Drivers
Here you can Download and install Samsung E830 mobile device USB (Universal Serial Bus) drivers for free. We have curated all the download links from the official Samsung website as there you can find the latest updated flash files and firmware. Check out the below link to download the USB drivers and then you can download the flash file.
NOTE-
Samsung I8350 Flash File
The firmware shared below is officially released by the Samsung itself and it will help you to recover your device if in case your device is facing any issues post the installation of Flash File or Firmware or both. Some common issues are nonresponsive touch screen, boot loop, software related issue, software crashing, or laggy performance, or you might become totally dead. In this case, it’s best to visit nearby Samsung service center and get your device checked and get it fixed completely free.
Samsung I8350 Flash File Reader
If your device is not connecting to pc then download the driver from above and install it in your pc
Update FIRMWARE on Samsung Smartphone
The firmware below can only be flashed from external storage like an SD card and in case your device does not have support for SD card then you can use the second method that uses ADB to connect to your phone and can install the firmware without using the SD card.
If you don’t know how to flash or install the firmware from your sd card, after downloading the firmware from the link below scroll further down to find flashing instructions. To check the exact file name to download, check your phone’s About device section for the exact device name and download the files from the Download button given below.
How to Exit Recovery Mode on Samsung E830
You must exit from recovery mode if you stuck at any operation or don’t understand recovery. Follow these steps to come out from recovery.
After you enter the Recovery Mode menu.
Now choose option Reboot, using the Volume buttons and press the Power button to confirm.
After that, Your device will be rebooted automatically.
You have successfully exited Recovery mode.
Note: You can also exit recovery mode by pressing the power button for a while.
General FAQ
Is it safe to flash this zip on my Samsung E830?
These two methods mentioned above are completely safe to implement and no harm can be done on your device if you follow all the steps correctly.
Can I install the firmware of other phones in my Samsung E830phone?
Samsung I8350 Flash File Recovery Software
The firmware or Stock ROM is not the same for all Android phones. Abl2 vst download. So only download and install by checking the exact model number and the file name before downloading and flashing.
Can I downgrade my Samsung E830phone to the lower Android version?
You can not downgrade to the lower version if your phone has an Android 8 or higher version. If you want to downgrade to the lower version, please go to the nearest Samsung service center.
It prompts “Decryption unsuccessful” while installing the firmware. What should I do?
Please don`t worry, go to Samsung service center near you and they will help you solve this issue.
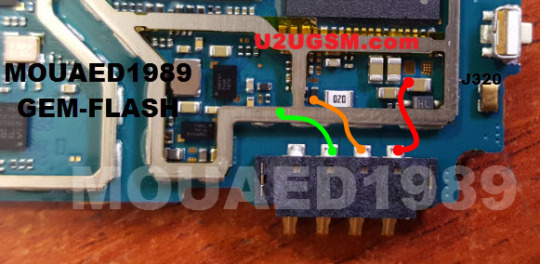
Here you can download the official Samsung Galaxy S3 Mini VE GT-I8200 Stock Firmware (Flash File) with the latest Android 4.2, 4.2.2 versions. If you want to repair your mobile by flash your phone, then first you have to download the Samsung GT-I8200 Flash file from below.
Samsung flash files are necessary when you try to perform any of these following Android software-related tasks:
Upgrade your Samsung Galaxy phone OS (Operating System).
Samsung flash file helps to unroot your phone.
Reinstall the Samsung Stock OS.
Fix Samsung DRK error.
Fix Unknown Baseband error issue.
Unroot your Samsung phone.
Remove viruses, malware, and unwanted application from your Samsung phone.
Update your Android phone to the latest version.
The process of flashing flash files on your Samsung phone is easy, I made a comprehensive tutorial to flash Samsung Android firmware using Odin. Nokia photo browser download windows 7. You have to read that post to flash a firmware flash file successfully on any Samsung Android device. So, follow the tutorial without skipping any part.
Download Samsung S3 Mini VE GT-I8200 Stock ROM Firmware(Flash File)
On below, I share the links to download the stock firmware/flash file for Samsung S3 Mini VE GT-I8200 with the latest available Android 4.2, 4.2.2 versions.
File Name: I8200XXUAPB1_I8200OXEAPG1_SER.zip Country: Russia File Size: 800MB Android Version: 4.2.2 Link: Download
[adinserter block=”3″]
File Name: I8200XXUAOC1_I8200OJVAOC2_ACR.zip Country: Saudi Arabia File Size: 800MB Android Version: 4.2.2 Link: Download Quickbooks 2013 torrent download.
How to Flash Samsung Firmware
Before flashing a Samsung firmware flash file on your Samsung phone make sure, your device battery charge is more than 40%.
First, download & extract the Samsung GT-I8200 Firmware on your Computer.
Then you have to install the Samsung USB driver. (If you already installed then skip this step)
Power off your Samsung Galaxy Phone and put it into the Download Mode.
Press & Hold Volume Down + Bixby button and connect your phone into the Computer.
A Warning logo will appear, press vol up to enter download mode.
Open the Samsung Odin tool. or Samsung Kies Setup.
Now select Samsung Firmware in the Odin tool.
Check the Odin log you can see the “Added” message.
Click Start.
Now the flashing process will be started.
Once finished, you will see the “Pass” message.
Done, disconnect, and power on your phone.
This is the simplest process to flash the Samsung GT-I8200 flash file.
I hope you found the right website to clear your problem regarding Samsung S3 Mini VE GT-I8200 Stock Firmware.
If you have any suggestions or complaints you can comment me down below, We really love to hear your feedback.

You can share this post and subscribe to our blog to stay updated. Thanks for visiting.
0 notes
Link
If you are also that curious tech enthusiast who always tries something new and does experiments with his device by using and testing the latest features and functioning. If you are also interested in customizing your Android device to have a brand-new look. So for sure, you are also trying to install Substratum themes on Android 10/Q, most of the Android 10 users have a doubt regarding how to install Substratum themes on the latest Android version, i.e. Android 10/Q right now (Android 11 is in its beta version and yet to be released).
So, if you are also confused or have any doubts regarding installing the substratum theme on your Android device (especially Android 10/Q). So, don't worry, here in this article we are going to guide how you can install substratum themes on Android 10/Q. So, let's get started
Substratum
A substratum is a theming tool that can be used to apply various themes with or without rooting. The Substratum theme is started with an extremely popular custom ROM Cyanogen Mod, which has a theming engine that made it so easy to apply themes. However, Cyanogen Mod has failed and not in use anymore, but somehow Substratum theme rises from there and becomes an immensely popular theming engine.
At first, it was used for rooted devices only, but after Android 8/Oreo came into the picture, the Substratum theme can also be used without root. Again, with Android 9/Pie Google said that OMS (Overlay Manager Service) is intended to be used by device manufacturers only, so OMS in the current form is not designed to be a generic feature.
Then Again, with Android 10/Q Google has changed so many features and other things, and most of them are related to the internals of the system. Android Q itself provides various features and customization options, so Android 10 has eliminated the need for a substratum theme, but the substratum theme is so much better and has many customization options than Android 10 in some aspects. So, let's get started and install substratum themes in Android 10/Q with root.
Also Read: How to Install ViPER4Android on Android 10/Q
How to Install Substratum Themes on Android 10/Q
Before you Start
Before getting started with the installation procedure, here are some important instructions you should know and follow before getting started with the method to install substratum themes on Android 10/Q
First of all, before starting to install substratum themes on Android 10/Q, make sure that your device is rooted using Magisk, running on Android version 10/Q.
Install Substratum Lite.
Install any Android 10 compatible theme.
Related Article
How to Root Your Android Device
[Top]10 Best Magisk Modules For Your Rooted Phone
Why Magisk Over SuperSU for Rooting your Android Device?
Some Android 10 Compatible Substratum Theme
You should first purchase a compatible theme to install substratum themes on Android 10/Q. Here is some best substratum themes, you can purchase and install them from the Play store.
Outline
Ethereal
Valerie
Flux White
PitchBlack
Also Read: How to Enable Always-on Display on Any OnePlus Phone
Method
This is a complete step-by-step guide, by following each step carefully this you can easily install substratum themes on Android 10/Q, and also set up the theme in the device.
Make sure your device is rooted and running on Android 10/Q.
Go to Google PlayStore, and install any of the themes of your choice. (In this article, we are using Pitch Black theme)
Download and Install the Substratum from the Google Play Store.
Open the Substratum app from the app drawer.
It will ask you for Superuser permission, grant the permission.
If it doesn't ask superuser permission or somehow you unable to grant the permission
So, open the Magisk Manager.
Tap on hamburger menu from the top-left corner and go to Superuser.

Enable the toggle on in front of Substratum (if it was disabled).

Also Read: How to Fix Magisk Install Error 1 in TWRP Recovery
Clear all the recent apps, from the background.
Again, Open Substratum, A welcome screen will be displayed (skip it if you want)
Allow all the required permission.
And here, you will see the theme which you have purchased and installed from the Play Store.
Click on the theme.
In the Overlay tab, click on the arrow (facing downward) select Android 10 from it.

Enable the Toggle just beside the arrow, it will select all the app.

Also Read: How to Fix Error 70 While Installing Gapps in TWRP
Or you can manually choose the apps from the app list below.
Make suitable customization.
After customizations, tap on the circular icon at the bottom-right corner.

Here, enables the toggle in front of Disable other themes, to avoid conflict between themes. (You can always perform experiments so you can also disable it).
Now tap on Build and Install.

Also Read: How to Fix Error 7 in TWRP While Flashing any Custom ROM?
It will take a while to overlay all the apps.
After successful building and installing, reboot your device.
After rebooting, open the substratum again.
Go to the manager tab.
Enable the toggle on in front of Select to bottom all overlays (or choose the apps manually). To apply the theme in respective apps.

Again, tap on the circular icon at the bottom-right corner.
Tap on Change overlay states.

It will reboot the system UI automatically.
Now if you unlock your device, so all the changes would be saved.
That's it from our side and I hope you have successfully installed substratum themes on Android 10/Q. If you like the content and found this article useful so, please share your valuable reviews in the comment box. Also, if you have some more suggestions so please let us know in the comment section.
[su_box title="More Like This" box_color="#000000"]
How to Enable Live Captions on Android 10 Phones [ROOT]
How to Run Android APK Files in Windows 10?
How To Remove Youtube Ads on Android? [No Root]
[/su_box]
via TechLatest
0 notes