#I decorate her urn now for the holidays
Text
How do I explain I’m kind of really fixated on dog skeletons after my dog passing away without it coming off like I’m losing it
#it’s just nice thinking about how she’s at peace now#I miss her a lot and it’s painful I want to hold her again I want to tell her how much I love her again but it’s okay now#I’m glad she got to see me get better I just wish she could see me get even healthier and better#I decorate her urn now for the holidays#she has Halloween snoopy stickers and an orange flower on her right now#I still cry over her tomorrow is a month without he but it feels like it’s been five years#but it’s funny her passing away right before Halloween bc she hated being dressed up#it rained the night after she passed too and she hated the rain so it’s kinda funny she died right before her least favorite weather#my other dog still looks for her around the house and outside#she still waits for her#sometimes I think I hear her barking outside#she was doing so well until she wasn’t and that’s what sucks so much
3 notes
·
View notes
Text
🎄𝚄𝚗𝚍𝚎𝚛𝚗𝚎𝚊𝚝𝚑 𝚃𝚑𝚎 𝚃𝚛𝚎𝚎 · 𝐤. 𝐛𝐚𝐤𝐮𝐠𝐨
cw: fluff, soft bakugo, swearing, if I missed anything let me know
Note: HAPPY HOLIDAYS TO ALL!!
Pairing: fem!reader x k. bakugo

[Y/n] has spent the last few Christmases on her own since the loss of her parents; only buying gifts for herself, and decorating the shelf with her parents’ urns all Christmas like. This year is her first Christmas with her boyfriend, Katsuki Bakugo; also known as the No. 2 Pro Hero Dynamight.
It’s currently the night before Christmas, and she’s rearranging her parents’ shelf. The sudden knock on her door makes her jump, causing her to drop her mother’s stocking. “One sec!” she shouts, picking up the stocking and placing it on the hanger under her mother’s urn.
She steps back and sadly admires her work, going to answer the door afterward.
After unlocking the multiple locks that her Pro Hero boyfriend suggested she install, she opens the door to reveal said boyfriend.
“Katsuki?” She questions, shocked. “What are you doing here? I thought you were spending Christmas with your parents?”
“I am, and so are you. All my stuff is in my car, so I’m here to help you pack. Can i come in?” he steps past her without letting her speak a word.
He stops in the middle of her living room, looking around with furrowed brows. He had never been to her apartment. They’ve always had their movie nights at his place, and he’s never been on the other side of the front door when dropping her off.
“You decorate nicely,” he says as she closes the front door, locking the multiple locks.
“Thank you,” she smiles, sitting down on the couch as he wandering around her living room with his hands in his pockets.
“Who’s urns?” he questions, looking at the shelf above the fake fire place.
“Why am I going with you?” She avoids his question.
“‘Cos my parents want to meet you. I’m surprised yours haven’t said anything about me.” he says, running his fingers along the Christmas train on the shelf below her parents.
“They kind of can’t,” she mumbles, her eyes stinging with tears.
“How come?” he turns around to look at her. “Are you all right?” he quickly makes his way over, sitting down next to her.
“Those urns…they’re my mom and dad’s.” she sniffles, trying to blink away her tears.
“Oh, shit. I’m so sorry, [Y/n].” he takes her hands in his.
“It’s fine. I didn’t tell you. They died when I was in Hero School at UA.” she sighs. “When they died, I was pulled out of the Hero Course by my new foster parents. I was in class B, but never made it to the Sports Festival. So we never got to meet in High School.”
“I went from foster home to foster him until I was of legal age, and the final home kicked me out with only my parents urns—which I brought to every foster home. I was on the streets for a while, until someone from high school recognized me and let me stay with them until I was back on my feet. But once I was back on my feet, they kicked me out and ghosted me.”
“So here I am now. I spend every Christmas by myself,” she lets out a small sob.
“C’mere,” he pulls her into his lap, holding her close.
“You have me now. And I’m never leaving. I’m sorry you had to go through all that so young,” he wipes away her tears, holding her face in his hands. “I love you,” he says.
“You do?” she questions softly.
“Of course I do, dumbass,” he smiles.
“I love you,” she says, taking his face in her hands and kissing him.
“OK, now let’s get you packed, so we can get to my parents’ house in time for our Christmas Eve gift.” he chuckles.
She stand up and leads him to her bedroom, grabbing out her duffle, and packing.
“What the fuck is this?” He laughs, pulling a hoodie out of her closet.
She looks over, quickly taking it from him, mortified. “Hawks was my favorite pro when I was younger,” she whines, placing the hoodie in her duffle.
“Who’s your favorite pro now?” He pulls her into him by her waist.
“Hmm…lemme think…You might know him,” she taps her chin. His face contorts into confusion. “It’s this guy named Dynamight,” she smiles.
“Good,” he kisses her.
End Story
Copyright ©️ 2022 by shotos-angelic-whore
51 notes
·
View notes
Text
Annual Christmas House Tour 2022
After writing yesterday/s post, I started thinking about why I let the holiday preparations make me so crazy! After all, I don’t HAVE to decorate as much as I do or cook everyone’s favorite foods, or make sure I buy the special gifts. I do it all because I want to…it’s my choice!
I watch my daughters each year as they create traditions in their families and I know they do this because it’s important to them that their children have these special memories as they grow up, just as it has always been important to me that they had special memories. I also want to create those magical memories in our home for our grandsons…the anticipation of opening their presents, hot chocolate, cookies and new Christmas pj’s on Christmas Eve, croissants and grits casserole for Christmas breakfast! As they are growing up, they will see that I put time into things because they are special to me!
So…I will most likely always continue to let my crazy take over, trying to make e everything just right, but I will remember that I’m doing it for all the right reasons! The greatest pictures of the whole season are the ones where the living room is covered in wrapping paper and everything is a mess! The adults are relaxing and watching the kids play with their toys and we all feel so happy to be together! The cleanup can wait…it’s Christmas morning!
Amos gets just as excited about Christmas as we do! He knows there will be new bones and treats under the table! He’s part of the family!
It’s a rare moment when I get to put my feet up, but I’m doing it in style with these cute red shoes!
The holiday goodies will come out on Christmas Eve after we’ve had dinner. The girls and their husbands are all pitching in this year and helping with the cooking so I won’t have to do quite as much! I always make artichoke dip and chocolate pie!
The table never looks the same from year to year! This year, I kept it simple because I really love my milk glass urns and new candlesticks and didn’t want to take them off the table! The large bowl in the middle is filled with two huge mercury glass acorns that I’ve had forever! I do like the simplicity of it! The Christmas poppers have become a tradition and the ones I found at Anthropologie this year fit my decor so well!
A cozy spot in front of the fire with one of my favorite decor books! I’ll look forward to enjoying this spot in January!
This chair is a new addition to the living room! It finally came in October after being ordered in April! The round pillow is made of faux fur and looks fabulous in the chair!
I think the green velvet sofa looks like Christmas all year long!
I found one roll of this gorgeous hot pink velvet ribbon this year and went crazy for it! I’ve already ordered several more rolls for next year because I want it all over the house! We are doing some much needed renovations in 2023 and I’m planning some over-the-top holiday decorations!
We call this room “the parlor” because we have no idea what else to call it! I completely redid the room this year with different paint and the fabulous fabric on the chairs! Pink and orange are among my favorite color combinations and I’m finding that I am more drawn to pink now than ever before!
The Santa’s and Christmas trees here have been collected over the years! Some were purchased on a trip to Germany long ago, and the two small wooden ones were carved by my father!
The stockings were hung! Next year when our daughter Sarah, who lives in Germany is home with her family, we may have to get a bigger mantle so that we can hang all the stockings! The more the merrier on Christmas!
As luck would have it, I’m a little under the weather and trying to rest! I still have a few things left on my list, but Baldy is stepping up to help me! I hope you’ve enjoyed my Christmas Home Tour! We made a video but it’s not quite ready but will be on YouTube soon and I’ll post here on Crazy Blonde Life! Enjoy these last few days until Christmas…even if they’re busy!
What are your favorite holiday traditions? Leave a comment and let me know!
0 notes
Text
Ep 15: Feels more Legacy.
Scoring Sheet and Family Tree
Goals
Get Bella closer to Kiyoshi Ito (Bella is Aro so I cannot do romance from her perspective, so I will need her to ask Kiyoshi to move in with her and once I play him I will have him do romance stuff)
Job promotions and Aspiration promotions
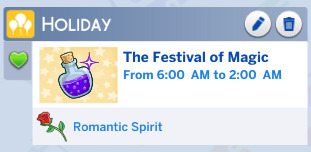
The first thing I did when I started up was adding the two legacy holidays. Anna just died on Summer 18th, so the first Holiday, which I named is on that day. I started my game in Winter, so the second holiday, Festival of Magic, is on Winter 1. The tradition to represent Anna is Romantic Spirit as one of her traits was Romantic. Also, you decorate for the day with spooky decor. Because it's fun. I play on 28 day seasons so it won't be tomorrow but it will come eventually. I like that I will have one holiday in the winter and one in the summer.

After holidays were added, I started to play. Everyone was sad, as is expected, but progress must continue. Everyone began working on whatever needs they had. I don't think I will be moving Bella into the Master bedroom until she ages up. Also, as Benjamin is now a 1-star celeb (something I think I forgot to mention after his last gig) he had room for a quirk and because he was so sad because, y'know, his mother died, he developed the emotional bomb quirk. This will be fun.

I also gave him the Noticeable perk. Benjamin was also not sad very quickly and I think that's due to the quick. In addition, part of the food category has "Purchase the most expensive fridge and stove and fully upgrade both of them". I put both the Schmapple fridge and stove in Benjamin's apartment (fit the Aesthetic) and am having Brielle work on upgrading them. Emory gained the close-knit lifestyle.
Bella is now an A student. Gatsby maxed movement and potty. And Benjamin went to work. Gold medal, obviously.

Bella trained Ceder to sit and became best friends with Kiyoshi Ito.

I soon moved Kiyoshi Ito in, after having Benjamin befriend him. I assigned him to Brielle's old bed until he and Bella are ready to move into the master bedroom and share a bed. Kiyoshi had also already aged up to YA but Bella is still a teen for another week. Kiyoshi did not have a job so I got him the Salaryperson Job, as he is from Snoy Escape.
I also took Kiyoshi to Mt Komorebi to work on his aspiration, and since it was Festival of Snow I also got the Fesitval Outfit.

When Kiyoshi got home, he gave Bella some unopened simmi capsules and Gatsby aged up. Ain't he cute?


Emory also aged up. Bella got the Single and Lovin' it Lifestyle and Kiyoshi learned piano. Also, I realized I had 10 sections in the crypt but only the first 8 gens will die, so I decided to turn the last two into an area to honour dead family members who are not the heir or spouse. In each unit will be a photo of the deceased (often a selfie because we just need a photo) and on the bottom the urn. The top unit will be the child of Zilver (Like Brielle or Benjamin) and the unit(s) under is their partner and children. Is that morbid? Maybe.

Last but not least, Benjamin went to work again. I just love taking pictures of him looking cool. Gold medal, a promotion and back to one star celeb (didn't even realise he lost it.)

2 notes
·
View notes
Text
First Holidays without Mom
Today marks 10 months since my mother passed away, and the holidays are around the corner. Her favorite holiday is Christmas. I grew up with the house being blanketed in decorations and several Christmas trees. We collected Hallmark ornaments together every year for 40 years, thus the 7 trees. I won’t see her decorating ever again. That feels strange, but last year she wasn’t up to leaving her hospital bed, either. I almost feel like last Christmas was her way of us attempting to celebrate without her. She stayed in her bed, asleep, through Christmas morning. She tried her best to get in a wheelchair and eat breakfast, but she was too exhausted to try. The following day, we called the ambulance after attempting to put her in the car with the crane, but it was too painful for her. I didn’t see her awake ever again. I’m so glad I fed her before she left me. I stroked her head, fed her Ensure and coconut water, and spoke with her. I told her everything will be better now that she’s going to the hospital. She was in such pain, wriggling out of her clothes and moaning in pain. It was the right call. I remember being a bit frustrated that Christmas wasn’t happy or filled with her laughter and opening gifts. Since we missed the year before as well, I was hoping for a good one in 2020 with Mom. Expectation versus reality were stark. I still don’t regret having a strange Christmas and hugging and kissing her that day. I remember telling Dad we needed to call the ambulance that afternoon, but he didn’t want to. Something broke him overnight, because the 26th he was fine taking her in. Here we are, approaching our first Christmas without her, and I have no clue how to navigate it. My heart still leaps with joy that the holidays are here. I love Thanksgiving and Christmas! I feel the holiday spirit but I’m also wondering how we will feel the day of without her. I’m still shocked that humans, despite people dying throughout my existence, simply cease to be, like Mom. I mean to say, she’s no longer present. Her voice, her breath, her scent, her footsteps...they are absolutely gone. I think, in the back of my head, I was preparing myself for her absence. I could see how tired she was, but I told myself that it was her dementia or the cancer. I was so sure, so filled with hope that she would be here 2 or 3 more years. I was confident that her hospitalizations were just a part of her cancer journey and, like each stay, she would check out and be home again. Still, I started video chats with the family on her birthday in 2020, and for some reason, I kept it up. I encouraged it the last months of her life, and I’m sure it was my subconscious pushing it because I knew deep within that she wasn’t going to be here much longer. So how...how am I supposed to do the holidays without her, without video chats, presents under the tree, or hugging her Christmas morning? They say the first year is the hardest after losing someone because it’s the first year to figure everything out. Do we bring her urn down every birthday and holiday? Do we continue decorating the house, making holidays meals, or go the complete opposite? I’m still navigating that. Whatever route we take, I want to do something slightly different from the way we celebrated when Mom was alive. I don’t think my heart can take tradition this year, because tradition requires Mom, in my mind. I won’t skip the holidays, ever, but I will figure out version 2.0.
1 note
·
View note
Text
Sending ma off
7.5.20
Today we held a zoom memorial service for ma. It felt like a good ending to three weeks of preparing and processing her death. It was a big group effort, with everyone contributing in different ways. Bah prepared and organized all the moving parts, his own speech, slide shows, organizing all the people, coordinating the call, figuring out all the small details. Juen made the video, handled and set up the room and lighting and all the tech details. San prepared his speech, handled tech details during the call. Lisa coordinated the mortuary details and people managed and made sure everyone was on task. Sue took care of taeyang and played with him and kept in entertained and happy during all these gatherings when everyone was distracted and running around doing various tasks.
Afterwards, I think everyone felt some type of closure after what felt like a very long period of preparing and planning. Figuring out what to do the day she died. Figuring out scheduling and days off and coordinating with Dave and Katie who had to fly and take more vacation than the rest of us to come. Figuring out whether to cremate or bury, whether to scatter at sea, whether to go with the prescheduled boat or do our own boat, whether to do a cremation viewing or not, everyone preparing and choosing a favorite verse, preparing a short thing to say at the viewing. Going to the viewing. Seeing her decaying flesh 10 days after she died. Crying hard during that, seeing her like that. Waiting a few days to get her remains. Asking about how the cremation went. Seeing the cremated remains. Figuring out how to open the urn with the sliding panel at the top. Looking at the bag of white ashes labeled with her May 30 birthday, and asking if they got that right, and bah confirming they got it right because that is her official birthday even though her real birthday is March 18. Going on the boat, spreading her ashes near the golden gate bridge. On the day of, finessing the room decorations to make sure it wasnt too busy, putting up sheets to cover the back, rearranging all the furniture in the room, figuring out how to put up the four-photo collage my dad printed on 6 8.5x11 pieces of paper, how to arrange the 20+ flower sets we received from people all over, figuring out the microphone sound settings, testing the sound, making sure the english translation was correct, making sure people knew how to dial in to the english translation number which was audio only but also the main channel that had the video and chinese audio. planning a week ahead to make sure that taeyang’s nap was right before the scheduled memorial service at 4pm PT. Checking how high of a setting we could put the fans to make sure we would not all melt while suited up, how to sit and arrange ourselves without looking too tacky. is the camera straight? Where do we put the laptop? We should put it up high above the webcam we ordered so we are all looking at the general direction of the camera while looking at the computer screen. Figuring out how to stack up chairs and fasten them together, along with a cardboard box, to place the laptop on, making sure it’s secure. Securing the microphone to a chair with a long metal rod so the mic is close enough to the speaker’s face. worrying if the various videos and slideshows we prepared would play properly. Ordering faster internet so we could have faster upload speeds. Do we have the right numbers for people in korea and taiwan to call in?
And it all went smoothly. My mom impacted a lot of people. It was comforting to hear all the various people from various parts of her life speak about her, remember her, uplift her, reinforce what we collectively remember about her.
at the very end, we got to talk very briefly to san san shu shu, mei mei, and shen shen. he told us to take care of our dad. we promised we would.
afterwards, everyone felt relief. we all went for a walk, even bah came, where he refused every time the week before. jon was talkative and telling lisa to stop cleaning, where before the memorial he was the one fussing with all the small details.
my own speech, which i shed some tears while drafting, but thankfully was able to hold together while giving it:
We are here today to celebrate the life of my mom, Emma Sun, or who I know her as: mah or mommie. For anybody that doesn’t know me, my name is Nathan, and I am my mom’s eldest son. My two younger brothers, Jon and Dave, are also here, as well as my wife Sue, my son Taeyang, Jon’s wife Lisa, and David’s wife Katie.
My mom’s life was about sacrifice. She sacrificed everything for her family, and for her kids. She often told me the story that when she was studying for her chemistry PhD at Stony Brook in New York, she was pregnant with me and studied with a heavy textbook resting on her growing belly. When I was born, she was just one semester into her PhD. My mom and dad went to see the university’s daycare program, but she decided to quit her PhD and take care of me full time instead.
There were times in my life where I did not fully appreciate her sacrifices or dedication to us. I remember one time in high school I told her, why didn’t you just send us to daycare? We would have been more socialized. Look at my friend—his parents sent him to daycare and he is way more sociable and popular than I am. See, you didn’t have to sacrifice and give up your life for us. But now, as a parent myself, I understand how hurtful those words must have been to her. Now I understand just a bit more the reason she gave up her career for us.
She ensured that her kids had the best and received as much resources as she could provide. Every Sunday she would dress all three of us in matching outfits. Every holiday party we were in matching bowties and vests that she sewed herself. Our school lunches were hand-packed with healthy fruits and vegetables and sandwiches. And she made sure we ate our vitamins every night, which some of us did not always follow. One time when we were in elementary school and we were moving to a different house, we moved Jon’s mattress. Underneath we found a giant stash of fluoride pills that Jon had secretly spit out every night after the lights were turned out. My mom loved to tell that story to show how mischievous Jon was.
She diligently researched the best books for us to read, and encouraged us to read biographies of great people so we could have role models to shape our own lives. She made sure we had piano lessons, violin lessons, drum lessons, bass guitar lessons, soccer during the fall, basketball in the winter, baseball in the spring, summer camps to go every year, Chinese school after church on Sunday, and even the dreaded Kumon.
When we were in high school, she encouraged us to study hard, but she also emphasized and demonstrated the importance of generosity and hospitality. We never had any hesitation to invite large gatherings over to our place, because we knew that our mom would prepare plenty of food and snacks for all who came over. We would invite the entire church youth group over to our house after church to hang out in the summer, watch movies in our basement, while my mom constantly prepared plates of snacks for people to pass around. Then we would head to the back porch where my mom and dad would prepare dinner for twenty hungry teenagers.
In college as well, my mom welcomed many of my international friends over during the longer breaks, as they often had no place to go to during the holidays. One thanksgiving break in college, I invited my then girlfriend Sue to my house, along with two other friends. Even before my mom knew that we were dating, she treated Sue like her own daughter the very first time they met. Sue remembers that her guest room was always prepared with love and care. Every Christmas break since then, my mom would prepare a gift for Sue as well. This past Christmas, my mom handed down her own nativity set and Christmas tree so that Sue can continue the tradition of having a warm and generous holiday spirit.
As we got older and moved away to college and jobs, my mom regularly checked on each one of us, gave us personally tailored advice, and made sure we were eating healthily, sleeping enough, living a balanced lifestyle, and most importantly, that we were keeping up and growing closer to God. She initiated family gatherings every year to make sure that we all spent time together at least once a year.
My mom taught me that the most important things in life are first and foremost my relationship with God, and second, my family. She made sure that I didn’t get too focused on my job at the cost of my family and my health. My mom taught me that by being generous with your time and energy, you will gain much more than you give. And my mom taught me to always strive to be better, to seek excellence, but to do it all honestly and without ever forgetting that money is not the most important thing in life, that character, and the way you carry yourself, is much more important.
Often times my mom may have thought her words fell on deaf ears, on her unappreciative and often-times stubborn kids. And although it may have taken some time for me to fully understand the sacrifices you have made and the wisdom you constantly tried to impart to us, now I at least understand and appreciate you more. I will strive to remember your words and the lessons you have taught us.
In your last days, we saw your tenacity for life and your strength, your will to live, and your ability to endure great suffering. At all times, you clung onto God and urged us to as well. Even your last words to us, you made us promise to read the Bible, pick a favorite verse to help guide our footsteps. You wanted to ensure that all of us would promise to pursue and grow closer to God. And I promise here again that I will do that.
Thank you ma. May you rest in peace.
--
Chanyoung sent a note: Nate, your tribute was deeply touching. (I cried...) As one of the "international students" who found home away home thanks to Mrs. Sun's hospitality, I am grateful and indebted. Until now I didn't know about the ailments she had to endure for the past three years--may she rest in peace, finally at home with God after her sojourn on earth. Praying that God's peace, and knowledge that she's in God's care, comfort and strengthen your family in this difficult time. Speak to you soon.
0 notes
Text
Sights of Vilnius - 11 most interesting places
New Post has been published on https://tripsterguru.com/sights-of-vilnius-11-most-interesting-places/
Sights of Vilnius - 11 most interesting places
Vilnius is the capital of Lithuania and one of the oldest European cities. It attracts tourists with its history, architecture and free museums. Vilnius is beautiful and comfortable. It is a city with a pleasant atmosphere, friendly people and beautiful buildings. You can talk about the capital of Lithuania for hours. The sights of Vilnius will not leave anyone indifferent.
Aushros Gate
Translated into English, the name sounds like “The Gates of Dawn”. This building is one of the oldest in the city. They were built along with the Vilnius city wall. Aushros Gate is one of the symbols of the capital of Lithuania. They are part of the defense wall. Passing through the gate, you immediately find yourself in the Old Town. The construction is a large building of 3 floors. Its facade is decorated with griffins, which are a symbol of the state power of Lithuania.
A chapel rises above the Gate of Dawn. In it you can see the icon of the Mother of God framed by gold. She is very famous far beyond the borders of Lithuania. The icon was given the name “Vilnius Madonna”. They say that she works miracles. A large flow of tourists and faithful Catholics from around the world annually check this. Vilnius honors and respects religion with great respect. Celebrating Mother’s Day is a very beautiful and great celebration. It is celebrated throughout the city.
Photographing in the chapel is possible, but rather inconvenient. A large number of people and praying believers complicate the process. I would like to leave this holy place, and not disturb the peace of people who believe in healing. You can get to the Aushros Gate by buses No. 13, 31, 34, 74, 88. The chapel is open for visitors every day from 6 to 19 hours. The entrance is free.
Cathedral
The most beautiful and oldest Vilnius Cathedral was built in the 14th century at the place of prayer of the Gentiles. For all the centuries of its existence, the temple has experienced fires, floods, restoration, reconstruction and reconstruction. The holy building is called the Basilica. Now the cathedral attracts tourists with its stunning beauty and rich history. The temple is similar to ancient Greek buildings. Above the facade of the building are sculptures of saints: Stanislav, Casimir and Elena. Near the cathedral is an old bell tower.
The decoration of the temple is luxurious. Here are paintings, murals and other works of art. The figures of the Lithuanian and Polish princes, marble walls, amazing bas-reliefs – all this can be considered for a very long time. In the cathedral there is an urn with the heart of King Vladislav Vaza. On the top floor of the temple there is a museum with ancient pagan exhibits. There are 11 chapels in the cathedral, the most beautiful of them is the chapel of St. Casimir. Here is the sarcophagus with its relics. And the walls are decorated with magnificent frescoes.
The cathedral can be visited even at the altar, which is very surprising. You can take pictures too. The temple is bright, clean and huge. All this beauty during the holiday is accompanied by majestic organ music. You can get to the cathedral by buses No. 2, 3, 4, 5, 14, 17, 88 to the stop Karaliaus Mindaugo. It works daily from 7 to 19 hours. Admission is free during the Mass.
Uhupis
Uzupis is a unique place of Vilnius. This is the poorest area of the city from which they created a local attraction. When the Vilnius infrastructure developed, Uzupis remained dilapidated. Local creative people decided that the district needed their help. Lithuanian artists and writers began to decorate the neglected part of the city with their works. Street graffiti, drawings and sculptures appeared in a matter of time on the territory of the poorest district.
Tourists were drawn to Uzupis, but there were few of them. Then the district decided to declare an Independent Republic. This did not affect integrity from Lithuania. However, thousands of tourists are now going to admire the newly-made Republic in Vilnius. Now Uzupis is trying to develop infrastructure. At the entrance to the Republic is the mermaid Undina, who lives under a bridge. A sculpture of a bronze angel flaunts in the central square of the Republic. It symbolizes rebirth and freedom. In Uzupis, houses of wealthy people began to appear. And the dilapidated buildings, on the contrary, are demolished.
Independent Republic is a favorite place for informals and youth. Despite its history, the area is calm and interesting. It is worth a visit to those who are open to the new and the extraordinary. The republic is located near the center of Vilnius. Landmark – Gediminas Tower. You can get to Uzupis by buses No. 10, 33 or 88 to the stop Dailės akademija. Or route 11 to Vilnios station.
Vilnius TV Tower
The tower can rightly be called the tallest building in Vilnius. Its height reaches more than 326 meters. The tower is a television center and broadcasting. The main highlight of the Vilnius TV tower is the Milky Way restaurant. An institution with an amazing idea. The restaurant is built in the shape of a circle around an axis – a tower. Its viewing platform is moving. It rotates slowly so that tourists can see all the beauty of Vilnius, and at the same time have lunch.
The view from the TV tower is amazing. From here you can see the city, in full view. Vilnius residents claim that in good weather you can even see Belarus here. On the 1st floor of the museum is an exhibition of photographs. Her theme is Vilnius tragedy of 1991. Here, during an attempted coup, 14 people died. The Milky Way is located at an altitude of 165 meters. When you visit it may begin to feel dizzy. Therefore, people who are afraid of heights or with poor health should abandon such an excursion.
Lithuanians are proud of their unusual tower. For the New Year, it is decorated with multi-colored garlands. And in 2006, when the World Cup was held in Lithuania, the famous building was miraculously transformed into a basketball ring. Taking pictures in the restaurant is prohibited. You can get to the TV tower by bus number 2G or trolley bus number 16. You can take a tour of the TV tower every day from 11 to 21 hours. Visit the “Milky Way” is possible from 11 to 23 hours. The ticket price is about 6 euros for adults. For a child – about 3 euros. Free admission for children under 5 years old.
State Art Museum
Art Museum is another attraction of Vilnius. The large structure contains paintings of not only Lithuanian, but also foreign artists. The museum consists of 5 branches: Vilnius Picture Gallery, Museum of Applied Arts, Clock Museum, Museum of Miniature Arts and Pranas Domšaitis Gallery.
The Art Gallery presents works that sanctify the life of Lithuania for many centuries. You can trace it in graphics, painting and sculpture. The paintings of artists of our time are also exhibited here. The museum hosts events and concerts. The Museum of Applied Arts puts up a collection of objects from the interior of the Palace of Rulers for a tour of tourists. Here you can see part of the ancient pavement or a piece of the city wall. Household items, clothing, furniture, jewelry and even tombs. The clock museum exhibits exhibits of the 16-19th century. The works of craftsmen from England and Germany in a variety of styles and forms adorn the branch.
The main pride of the museum is a watch made of silver. They are made in the form of a building and a tower dated to the 16th century. There is a sundial in the park, next to the museum. And in the summer, “flower” time meters flourish in the territory. It is especially interesting here in the summer. In the Museum of Miniatures, old medals, handmade fans, beautiful caskets and luxurious wallets are open for viewing.
In the Gallery of the Lithuanian expressionist painter Pranas Domsaitis, about five hundred works are exhibited. This exposition is the largest in the world.
Learn how to get compensation of up to € 600 for a delayed, canceled or overbooked flight.
Opening hours from Tuesday to Saturday:
Picture Gallery, P. Domšaitis Gallery from 12 to 18 hours, Sunday from 12 to 17 hours.
Museum of Applied Arts from 11 a.m. to 5 p.m., Sunday from 12 a.m. to 4 p.m.
Clock Museum, March-October from 12 to 18 hours, November-February from 11 to 17 hours.
Museum of Miniature Arts from 11 a.m. to 6 p.m., Sunday from 11 a.m. to 4 p.m.
The ticket price is about 2 euros for an adult, about 1 for children. A child under 7 years old is free.
Church of the Holy Spirit
The temple is located in the old city of Vilnius. This is a small, rather modest structure, made in the shape of a cross. However, this does not prevent him from being an architectural monument. The church was erected more than once; it survived fires and reconstruction. The very first church construction was made of wood in the 14th century. Later, a Dominican monastery was built near the temple.
The interior of the church is excellent. Here 16 altars were erected for various saints. Chic arches, wonderful frescoes, ancient portraits – all this is incredibly combined with each other. The sun’s rays falling from small windows bring some incomprehensible peace. Taking pictures here is not prohibited, but the clergy are not very positive about this. In general, the temple causes a lot of positive emotions. Despite the crowds, it is pleasant and cozy.
In 9 cellars of the church there is a mysterious labyrinth. Around him there are a lot of rumors and stories. Locals say basements with 2 levels, and in fact, a lot more people are buried there than the story goes. Unfortunately, this will not be possible to verify; excursions to the labyrinth are not conducted now. You can get to your destination by bus number 88 to the stop Vokieciu st. You can visit the church for free from 10 to 15 hours every day. In winter, visiting the temple is possible from 12 to 15 hours, in the summer from 9 to 17 hours.
Museum of Customs
The museum was created in 1994. At first, only students of the Customs School visited him. Later, the institution opened its doors to all comers. The structure is small but interesting. Tours are conducted in three languages: Russian, Lithuanian and English. Of your choice. In the walls of the museum you can see collections of smuggled products and technical equipment. The facility is equipped with excellent projectors and audiovisual equipment. This attracts visitors to Vilnius. Museum visitors are given the opportunity to trace the entire history of customs services. It begins from the 11th century and lasts to the present day.
Tourists are most often interested in exposure to smuggling. Alcohol with snakes, skins of rare animals, insects that were brought for someone else’s collections. Not without gifts in the museum. The customs services of Uzbekistan presented the institution with unique robes, which were decorated manually with gold and stones. There is an exhibition in the museum dedicated to the dangerous profession of customs officers. It consists of photographs with difficult workdays of workers. Some of them died protecting their country from dangerous goods. The museum is located in the northern part of the city, far from the center. You can get to it by bus or taxi for about 7 euros. Opening hours from 8.30 to 16 hours from Monday to Thursday. On Saturday, the museum stops working at 15 o’clock. Entrance to the institution is absolutely free.
Amber Museum
Amber is called “Lithuanian gold.” This is the only expensive natural resource mined in Lithuania. Baltic amber is very much appreciated in the world. He is considered one of the best. Vilnius Museum is not the only one in the country, but the largest and most famous. It was opened not so long ago, about 20 years ago. The building, which has become the “home” for the museum is quite middle-aged. Built around 6 centuries.
The museum presents marvelous amber stones of bizarre shapes and different sizes and shades. There are natural resources with insects, plants and lizards remaining in them. Magnificent jewelry made of amber – delight the eyes of the fairer sex. A souvenir shop is located on site. In it you can also buy incomparable creations of Lithuanian amber masters. You will even be given a special certificate for jewelry confirming that it is not a fake.
The pride of the museum is a collection of amber, obtained during archaeological excavations. This exposition is one of the oldest and largest in the world. The largest stone from this exhibition weighs about 4 kg. You can get to the museum by bus number 8, to the stop Sv. Mykolo gatve. Admission is free for all comers. Opening hours from 10 to 19 hours every day.
Central Police Museum
This is an interesting and informative museum about one of the most difficult and dangerous professions. Expositions here introduce visitors to the activities of the police until 1940. Here you can learn from the inside what it means to work in the police. The museum displays such exhibits as badges, uniforms, and hats of police officers from different countries. As well as models of police cars. The museum pleases with high quality training. Art and design specialists worked on its creation.
Facility exhibitions are always held at the highest level using the latest new technologies.
The expositions presented in the museum, the organizers tried to make as close as possible to the eras of that time. Artists and designers helped them a lot. Masters of their craft make sure that every little thing is in place. In the museum you can find stories of the most interesting crimes uncovered. There is an exhibition of the achievements of police officers. The museum is located in Vilnius. Entrance to it is absolutely free. Opening hours are from 8 to 17 hours from Monday to Friday.
Church of Saints Francis and Bernard
The church is located in the Old Town of Vilnius. The church is a huge building made of red brick in the Gothic style. She is one of the largest in the country. The Church of Saints Francis and Bernard is located next to the Church of St. Anne. Together they form a single complex. The temple was built as a defensive structure. Therefore, in appearance it is quite modest. However, the church inside is simply amazing. Here you can admire 3 magnificent stone altars, as well as 11 wooden ones. Each of them is unique and beautiful in its own way.
Amazing vaults of the church are made of crystal, the walls are decorated with beautiful paintings and sculptures. Here is the most famous sculptural crucifix in Lithuania and abroad. The church has a large organ and ancient icons. In the church building you can see a collection of photographs that will show the history of the temple over many centuries. On the territory of the complex is a branch of the Museum of Arts of Vilnius, as well as a huge library. It was collected by the monks of the monastery adjacent to the church for a very long time. The library contains ancient manuscripts, pacts and statutes of Lithuania.
The church is open from 7 to 18 hours on Monday, Tuesday and Thursday. On Wednesdays and Saturdays, you can visit it from 10 to 19 hours. Free admission. You can get to the church by bus number 88.
National Museum of Lithuania
The National Museum of Lithuania is located in Vilnius. He is the biggest guardian of Lithuanian culture and history in the country. His main exhibitions are held in Vilnius Castle. The museum annually attracts thousands of tourists from all over the world to Lithuania. It can be traced to the entire centuries-old history of the country’s development. See the traditions and customs of local people from different times. It is not possible to name the exact number of objects exhibited in the museum. It is constantly supplemented by new exhibits. Household items and labor, ancient clothing, ancient coins, paintings and icons – all this can be seen here.
The museum is divided into several rooms: ethnic culture, iconography, numismatics and archeology. Exhibition items are beautiful and amazing. Here are collections of items from bronze, weapons, emblems. Egyptian figurines, portraits of great people, very old fabrics of various peoples of the world. In addition to the main exhibitions, here you can see temporary exhibitions. Also on site is a restoration hall. In Lithuania, an annual archaeological excavation takes place today. And in order to study the culture and life of Lithuanians, scientific expeditions are conducted.
The museum welcomes guests from Tuesday to Sunday from 10 to 17 hours from May to October. From October to April, the weekend is two days: Monday, Tuesday.
You can visit the museum for 2 euros. With a guide, the cost of the service ranges from 8 to 15 euros. With an audio guide, you can save and pay 3 euros for the tour. You can get to the museum by trolleybus number 2, 3, 4, 10, 17, 20 to the Karaliaus Mindaugo tiltas station. Or take buses number 10, 11, 88, 33 to the Bernardinu sodas stop.
Vilnius is one of the most beautiful cities in Lithuania. He disposes to himself, from the city he breathes comfort and tranquility. Many buildings of Vilnius are old and beautiful. Its architecture can compete with many cities. The presence of beautiful buildings, churches, museums and memorable places will make the trip to the Lithuanian city unforgettable.
#Amber Museum#Aushros Gate#Cathedral#Central Police Museum#Church of Saints Francis and Bernard#Church of the Holy Spirit#Museum of Customs#National Museum of Lithuania#State Art Museum#Uhupis#Vilnius TV Tower
0 notes
Text
2018 Christmas Decorating Ideas
Hello, my friends! How are you today? I am so happy to be able to share our annual “Christmas Decorating Ideas” post featuring many homeowners that were featured on my “Beautiful Homes of Instagram” series. They are really creative and when it comes to Christmas decor, they do not waste any time! Their homes are filled with the Christmas magic and I am sure that they will leave you inspired and wanting to add more of this magic right to your home.
Make sure to follow them on Instagram, pin your favorite 2018 Christmas ideas and get ready to celebrate this beautiful season with your loved ones. This is the main reason we work hard on this… to make sure we create beautiful memories in our homes with the people that matters the most to us.
Now, let this Holiday Season begin!
2018 Christmas Decorating Ideas
@CesHome6:
I wanted to keep a more traditional look for my Christmas decor outside the house this year. I feel that it matched the style of the home the best. I took wreaths from Michaels and added an outdoor red bow from Walmart and hung them on the windows and doors with command hooks. I put a pre-lit garland from Walmart on the upstairs balcony and added a couple of swags from Michaels as you walk up to the home and that was it for the outside.
Follow @CesHome6 on Instagram.
Christmas Decor
For my indoor Christmas decor I love to add a lot of red and plaid. My home is so neutral year round so I go crazy with color this time of year. I add red or plaid bows to my wreaths I already have up and change out my pillows and blankets for more red and plaid. I found these red pillows at At Home for only $5 each and the black and white plaid blanket from Walmart for only $3. I love a bargain. My chairs are from Nebraska Furniture Mart in their Ashely Home Store line and they are the most comfortable little chairs.
@CesHome6
Dining Table
My dining table decor was very simple to create by just adding 4 Target trees, a few wooden deer from Hobby Lobby, some Dollar Store candles and a few picks that look like garland from Hobby Lobby.
@CesHome6
Christmas Kitchen Island Decor
I created the Merry Christmas garland above my oven with sticker letters on wood slices strung on twine. I like to make my own bows for my wreaths too. My tiered tray is one of my favorite purchases because I can easily change out the decor to match any season. Pine cones and berry stems can be put anywhere in the house to add the Christmas season to any space.
@CesHome6
Counter Decor
I like to keep certain decor out year round because it’s just easier that way. For fall I added apples and pears to this greenery and for Christmas I added some snow covered pine cones and berry picks.
@CesHome6
Details
My favorite place to shop for Christmas decor is Target. I’m sure you can agree that Target has it all. I made this cute, simple little vignette in my kitchen with items from Target and Michaels.
@CesHome6
Console Table Decor
I kept all my main decor pieces in this space and just added some red ornaments from the Dollar Tree, NOEL letters I painted red from Hobby Lobby, some cotton stems to make it look more wintery, and a plaid bow I made with leftover ribbon from my tree.
@CesHome6
Christmas
Reindeer printable is from Etsy at NMinetstore.
@CesHome6
Plaid Christmas Tree
My Christmas tree is 9 feet from At Home and it’s been going strong for 3 years. I’ve never had to replace a bulb. I found my ornaments at Target, At Home, and Hobby Lobby. My tree skirt, garland, white houses and comfortable fuzzy blanket are all from Target too. The beautiful pillow is from my favorite IG pillow shop @linenandivory. I stuff the adorable Santa bags I found at Michaels with packing paper to make them look like they’re filled with gifts. With having 4 kids I like my decor to still be fun for them.
@CesHome6
Close-up
I add plaid ribbon from Michaels weaved in and out of the tree because it adds so much to the tree.
@CesHome6
Fire
Since I don’t have a fireplace I have to make do with Netflix Christmas Fireplace. 🙂
@CesHome6
See @CesHome6 on Beautiful Homes of Instagram.
@Cindimc.IvoryHomeDesign:
It’s a beautiful Mississippi night! Have you started Christmas decorating? I hope you’re having a wonderful holiday season friends!
Follow @cindimc.ivoryhomedesign on Instagram.
Front Door Christmas Decor
@cindimc.ivoryhomedesign
Porch Swing
@cindimc.ivoryhomedesign
Dining Room
I’m so thankful today for God’s love and Mercy! Gratitude works miracles, try it! It shifts your mood in seconds! Think positive thoughts today and have a blessed day!

@cindimc.ivoryhomedesign
The Magic of Christmas
I had plenty of good help today decorating this 12 ft Fraser Fir Christmas tree!

@cindimc.ivoryhomedesign
Oh, Christmas Tree!
Special memories!
Make someone smile today, and it will make you happier! Enjoy your day!
@cindimc.ivoryhomedesign
Nesting
Love this picture of Beau. He’s enjoying the fire!
@cindimc.ivoryhomedesign
Outdoor Fireplace
@cindimc.ivoryhomedesign
Porch Swing
Cindi’s porch swing is one of the most pinned on the net and it’s easy to see why, right?! 🙂
@cindimc.ivoryhomedesign
Christmas
@cindimc.ivoryhomedesign
See @cindimc.ivoryhomedesign on Beautiful Homes of Instagram.
@HouseOnPrairieLane
Christmas is my absolute FAVORITE season of the year to decorate! There’s something about the twinkling lights and the smell of a fresh cut Christmas tree that makes our home feel truly magical. I love to start with a neutral color scheme of white, gold and silver, but then incorporate a few pops of color. Navy and blush pink are my current favorite looks for the holiday season, and there is nothing like adding fresh greenery to the mix! I love to have a cohesive look throughout our home, especially since we have an open concept layout. I just love how it all flows together.. including my matching wrapping paper! We are so excited for the Holiday Season and look forward to the wonderful memories we create each year. I wish you all a very Merry Christmas, from House on Prairie Lane Xo!
Follow @houseonprairielane on Instagram.
Photography: Andrew Standaert.
Kitchen Pendants
Pendants: Pottery Barn.
Bar Stools: West Elm.
@houseonprairielane
Photography: Andrew Standaert.
Dining Room
Chandelier: Feiss
@houseonprairielane
Photography: Andrew Standaert.
Table Decor
Candle Holders: West Elm.
@houseonprairielane
Photography: Andrew Standaert.
Shiplap Paint Color
Shiplap Wall: Sherwin Williams Cyberspace.
Lighting: Birch Lane.
Metal Wall Art: Target.
@houseonprairielane
Photography: Andrew Standaert.
Ornaments
Ornaments: West Elm.
@houseonprairielane
Photography: Andrew Standaert.
Ballerina
Erica Barratt Ballerina: West Elm.
@houseonprairielane
Photography: Andrew Standaert.
Wrapping Paper
Wrapping Paper: Sugar Paper at Target.
@houseonprairielane
Photography: Andrew Standaert.
Living Room
Sofas: Pottery Barn.
Coffee Table: Pottery Barn.
Lanterns (by fireplace): West Elm.
@houseonprairielane
Photography: Andrew Standaert.
Stockings
Rug: Pottery Barn.
Ceramic Houses: Target.
Knit Stockings: West Elm.
Stocking Holders: West Elm.
@houseonprairielane
Photography: Andrew Standaert.
Trees
Accordion Paper Trees: West Elm (similar) – the ones above are also from West Elm, but no longer available.
@houseonprairielane
Photography: Andrew Standaert.
Gold Garland
Gold Garland: West Elm
@houseonprairielane
Photography: Andrew Standaert.
See @houseonprairielane on Beautiful Homes of Instagram.
@SweetThreadsco:
‘Tis the season! For our front porch I swagged greenery over and across our front doors and hung boxwood wreaths with black and white striped ribbon for a clean, classic look.
Little extra details include, black ribbon tied to the lanterns and a black and white striped rug under the welcome mat to greet our guests in a big way!
Follow @sweetthreadsco on Instagram.
Planter
I filled a black container from the Hearth & Hand line by Magnolia for Target with live greenery and red berries.
@sweetthreadsco
Bench Decor Inspo
@sweetthreadsco
Family Room
In our family room, I used live cedar garland across our mantle and added accents such as a white flocked trees and an antler pillow from a local shop.
Sweet Threads Design.
See @sweetthreadsco on Beautiful Homes of Instagram.
@Pamela.Saumure:
Hello and Happy Holidays! It’s the most wonderful time of the year again! It seems that I just put my Christmas totes away two or three months ago.
Thank you to Luciane once again for all of her hard work she puts in to every blog post and special series’ that she writes. I am so honoured and humbled to be featured in her Beautiful Homes of Instagram Series along with so many other very talented home decor accounts that I adore. I hope your enjoy the tour.
Decorating my home for Christmas is my favourite season to decorate. Although I start strong with good intentions, sometimes I find it hard to stay motivated and keep decorating until it’s finished. Maybe I put too much pressure on myself. Whatever the reason, I certainly find scrolling my favourite Instagram accounts helpful to find inspiration and keep up the momentum.
I am very much a less-is-more kind of person (except for decorating a Christmas tree, which in my opinion, can never have too many decorations) as you can tell by the decor on my front porch. I enjoy arranging the urns myself and adding special touches and items from nature but snow and time came too soon this year. I purchased these pretty, ready-made planters this year at a local nursery. I like the festive touch the pops of red from the berries give. I love lanterns in any colour or style, and like to group them together and either add a candle to the inside, or different colours of Christmas balls to them and add a bow and ribbon the the handle.
Follow @pamela.saumure on Instagram.
Christmas Tree
As I mentioned, Christmas tree decor is where more is more!!! I love ribbons, bows, sparkles, flowers, just about anything, as long as it all compliments each other. My tree decor changes every few years or so but I am careful to ensure it matches my interior decor.
Joy
I love this tree from Balsam Hill in the living room. Its branches are full and life-like and made of such great quality and it assembles quickly. It is not prelit. As convenient and beautiful as they are, I prefer adding my own strands of lights.
Mantel
I tried adding this mantle sign to the sunroom mantle but I feel its home is above this fireplace. A few years ago, I decided I wanted to try my hand at sign making, as I look back, I wonder why I didn’t start with a smaller sign. To me, this sign is significant in meaning, and I don’t require much more decor on the mantle than what is there now.
Pinecones
I’ve always been drawn to gold for Christmas. It adds a pretty, timeless elegance to anything and it compliments so many other colours.
Sunroom
Is there anything more cozy than a warm crackling fire and the soft golden glow of Christmas lights? Both create a warm and homey ambiance.
Liberty
My sweet girl Liberty keeps her eyes on me while I tweak decor pieces and move them from one room to another, many times over, until I find just the right spot for it.
Sharing
Along with a collection of Christmas trees, I also have an abundance of pretty bags, boxes and tissue paper that sit underneath the tree, or I use them to add sparkle and glam to any space.
Lit White Houses
These cute little white houses were purchased at Target Dollar Spot.
Sunroom Christmas Tree
This 9 foot tall tree is the perfect height for the sunroom. This year, I found a large roll of pretty peacock ribbon at Costco and knew the shades of blue were perfect for the sunroom tree. I was able to wrap the whole tree and still have a substantial amount of ribbon left! I added blue balls from Canadian Tire and Michales and added gold filler, of course.
Dining Room
My dining tablescape decor will likely change a few times before we actually enjoy Christmas brunch and dinner around it. I’ll add a long fresh flower centrepiece and add silver or gold candles (or both) and keep it simple and elegant.
You must see her kitchen on Pamela’s Beautiful Homes of Instagram feature!!!
Stair Garland
I like to layer garland with different tones and species of greenery, like cedar, pine and of course, eucalyptus.
Mudroom
Keeping with the less is more theme, my mudroom has a tiny flocked gold and silver decorated tree that I found at HomeSense Canada a few years ago.
Merry & Bright
I must admit, I have a rather large collection of assorted Christmas trees and signs. You will find a tree or two in every room.
See @pamela.saumure on Beautiful Homes of Instagram.
@PlankandPillow:
This year we took a more traditional approach with our Christmas Decor. We achieved this feel by using lots of greenery and reds. We also added in some gold accents to bring out a more modern feel.
Follow @plankandpillow on Instagram.
Kitchen Hood Decor
You can see more detail on this kitchen hood here.
@plankandpillow
Naturally Beautiful
@plankandpillow
Paint Color
Wall Color: Sherwin Williams Creamy.
@plankandpillow
Christmas Tree
@plankandpillow
See @plankandpillow on Beautiful Homes of Instagram.
@Cynthia_Weber_Design:
I am so excited to be a part of this amazing Holiday feature on Homebunch! My name is Cynthia and I run a custom interiors studio from our historic stone home BannockBurn 1878 located in the rolling countryside of south western Ontario, Canada.
I often hear people say that they don’t know where to begin when creating the mood for Holiday Dinner parties… It can all seem a bit overwhelming! I was thrilled to collaborate recently with Bradshaws, a fantastic local shop for a Holiday Style shoot at our home. We had a wonderful time and I hope these photos give you some ideas for setting your table this festive season!!
Follow @cynthia_weber_design on Instagram.
Creative
Creating a beautiful Holiday tablescape sets the mood for the festivities… smiling faces and laughter mixing with beautiful holiday music enticing those that sit to linger and make memories. For this look we started with a classic white tablecloth topped with the unexpected addition of a jaunty stripped table runner. Round woven placemats in silver and gorgeous Le Creuset dinnerware bring texture and interest. Some whimsy comes to the party with these fun tree ornaments tied around the napkins with twine… A gift for each guest to take home as a memory of the evening.
@cynthia_weber_design.
Details
Mixing fresh greens with crystal candlesticks, white candles and these wonderful mercury glass trees brings the perfect mix to this centrepiece. I can just imaging the dance of soft light when the candles are lit playing off the metallic of the trees… sigh.
@cynthia_weber_design.
Serving
If you are anything like me you are always looking for serving areas. I designed these collapsible tray tables based on a vintage baggage stand concept. We have them throughout the house and quite frankly, I can’t image not having them… I use them in so many ways. Here one makes the perfect place to showcase desert. Not only does this leave the host or hostess free to do less hopping between courses but it also provides another place for a holiday vignette.
@cynthia_weber_design.
Cake
We work so hard creating beautiful deserts for Holiday gatherings… it seems fitting to give them centre stage as long as possible! This absolutely adorable cake dressed with rosemary tip trees and a banbiesque doe deserve to be seen and fawned over… yes, I did say “fawned” over Ha Ha Ha… or is it Ho Ho Ho?
@cynthia_weber_design.
Cabinet
Sometimes high impact can be achieved through simplicity… a wreath hung with wide black ribbon is all that was needed to dress my china cabinet.
@cynthia_weber_design.
Chair
Fresh greens are always my go to when styling for the Holidays… yes, they can be more work and yes, they do drop as the season winds up but for me… there is no substitute! Here a small posy of cedar, seeded eucalyptus and a magnolia tip are tied with ribbon on the chair backs.
Well that is my take on creating a festive dining room for the Holidays. I hope you enjoyed the photos and if you are curious to see more of our home and my work please follow along with me on Instagram at @cynthia_weber_design. I would love to get to know you!!
@cynthia_weber_design.
See @cynthia_weber_design on Beautiful Homes of Instagram.
@CarolineOnDesign:
Follow @carolineondesign on Instagram.
Staircase Decor
@carolineondesign.
Dining Room To Foyer
@carolineondesign.
Dining Area
@carolineondesign.
Centerpiece
@carolineondesign.
Frosted
@carolineondesign.
Kitchen Paint Color
Kitchen cabinet paint color is “Benjamin Moore OC-17 White Dove”.
@carolineondesign.
Countertop
Counters are LG Viatera Quartz, Everest.
@carolineondesign.
Family Room Decor
@carolineondesign.
Christmas Tree
@carolineondesign.
Window-seat
@carolineondesign.
Christmas Bedroom Decor
@carolineondesign.
See @carolineondesign on Beautiful Homes of Instagram.
@SimplySouthernCottage:
Everything seen here is crafted from greens found in nature. From my gas lanterns hang magnolia swags infused with apples, cedar, holly and pine (and you might even catch a hint of cloves). Then, I made a gorgeous magnolia wreath to match and it graces my bright yellow door. On the front steps, you’ll find parcels wrapped in brown paper nestled amongst small, fresh cedar trees.
Door Color: Lemon Twist by Sherwin Williams.
Follow @simplysoutherncottage on Instagram.
Callie Jo Photography.
Kitchen & Dining Room
In keeping with my simple living and decor philosophy, every piece of Christmas greenery I use is natural and real, beautiful, cost effective and extremely fragrant! I envision back in 1926 (the year my cottage was built), families traipsed through the woods, axe in tow, to select the perfect Christmas tree. And I’m sure the lady of the house would also have gathered cedar, pine, holly and boxwood along the way to adorn her lovely home. So this is exactly how my cottage is decorated for Christmas!
@simplysoutherncottage
Callie Jo Photography.
Kitchen
My kitchen area is full of cedar and apples! Apples in the window sills. Apples dotting the runner on my dining room table. And a dough bowl full of apples on my kitchen island! All natural, boxwood wreaths grace the triplet windows above my kitchen sink.
@simplysoutherncottage.
Callie Jo Photography.
Window
@simplysoutherncottage.
Callie Jo Photography.
Home-Sweet-Home
Hardwood floors are refinished originals.
@simplysoutherncottage.
Callie Jo Photography.
Chandelier
@simplysoutherncottage.
Callie Jo Photography.
Natural Decor
@simplysoutherncottage.
Callie Jo Photography.
Dining Room
@simplysoutherncottage.
Callie Jo Photography.
Christmas Tree
While I didn’t traipse through the woods, I did visit a local tree farm and selected the perfect tree. I strung white lights all throughout tree. Next I crafted a beautiful rag garland by tearing strips of white fabrics (garnered from sheets, bedskirts, clothing, tablecloths, curtains, towels and more all found at Goodwill, garage sales or other thrift stores). I tied the fabric onto rope in an alternating fashion by both texture and shade of white. Then, you might be surprised to hear, I don’t have Christmas ornaments! My ornaments are dried hydrangeas I deadheaded from a friend’s garden! Lastly, I stuck a few sticks in the top to spray outward, and that is my tree. Very simple. Very plain. But oh so beautiful!
@simplysoutherncottage.
Callie Jo Photography.
Fireplace
My mantel is definitely the focal point of my Christmas cottage. My mom used her amazing creative talent and created a massive magnolia and pine cone garland that drapes over the front. Striped black and white stockings (purchased locally) hang from the mantel drawing the eye into the space. Smaller Christmas trees and tiny Rosemary trees flank each end. They are separated by wooden candlesticks (marked with $105 price tags but purchased from a garage sale in Texas for only $5). For the center of my mantel, I used the website PicMonkey and created a chalkboard graphic that says “O come let us adore Him.” After sending the graphic to Office Depot for printing, I framed it in a frame someone gifted me! Then, I topped it with plexiglass cut from our local glass shop. My mantel is a statement piece and I love that it was created on a dime with extremely thought out and purposeful, natural décor.
@simplysoutherncottage.
Home Office Chandelier Decor
@simplysoutherncottage.
Callie Jo Photography.
Christmas Bedroom Decor
@simplysoutherncottage.
Callie Jo Photography.
Bedroom Tree
In order to find the perfect greenery and trees for the rest of the cottage, I did traipse through the woods and cut an abundance of cedar, pine and boxwood. Every light fixture in the cottage is laced with cedar. Simple “Charlie Brown” trees are located in each bedroom—some have lights, some do not. All my trees rest in galvanized tubs or buckets, because again, I pondered what families in the 1920s might have utilized to hold water for their trees and figure these were a logical option.
@simplysoutherncottage
Callie Jo Photography.
Bathroom Decor
@simplysoutherncottage.
Callie Jo Photography.
Tin
@simplysoutherncottage
Callie Jo Photography.
Mudroom
To wrap all of this up and tie it with a bow, I constantly burn candles and play Christmas music during the season. My choice of candles (for any time during the year) are scents that smell like delicious desserts! So if you happen to step foot in my cottage during late November and anytime in December, rest assured you will be transported to a Charles Dickens’ like experience complete with all the sights, sounds and smells of the holidays!
@simplysoutherncottage
Meet the Homeowner
@simplysoutherncottage
Callie Jo Photography.
See @simplysoutherncottage on Beautiful Homes of Instagram.
@SweetShadyLane:
Nothing says Christmas to me like a warm welcome and I’m obsessed with my preserved boxwood garland that I bought on sale at Ballard Design (similar here) a few years ago. The ribbon is from a garden store and the ornament balls are from various HomeGoods stores. I change the ribbon color every year, but this was one of my favorites! Stair runner is by Stanton.
Follow @SweetShadyLane on Instagram.
Foyer
Wood floors are by Duchâteau—walnut with an oil stain. Pretty spindle bench purchased through The Sitting Room. Sconces are antique…We love having a mix of new and old lighting throughout the house. Enamel is Simply White by, Benjamin Moore. Plaid pillow is from Gray Home.
@SweetShadyLane
Living Room
This was the first year I ever did a faux tree… Ours is a Balsam Hill (Fraser Fir Flip Tree.) Rug is a Couristan carpet, table is an antique Baker that I found on Etsy. Chairs and stools are from The Sitting Room. Trio of wreaths are Ballard Design and pretty Jingle Bell art is from John Derrian in NYC.
@SweetShadyLane
Christmas Mantel
Vintage art above tray table is The Atelier Collection. Stockings are vintage—embroidered with my kids names— they have an elegant and whimsical charm to them and I tear up every time I pull them out. Blue and white has been collected over time and the red photo album says, “Christmas Thru The Years…” A treasure of precious memories.
@SweetShadyLane
Paint Color
Pine table is an antique, pretty blue plaid cubes are from Etsy…They came in a simple white and I recovered them with this beautiful English plaid…I also have slipcovers for them when the seasons change.
Paint color is Simply White by Benjamin Moore.
@SweetShadyLane
Roses
I love using my blue and white Juliska soup tureen for a centerpiece and red roses and fresh greens are always a classic. Bamboo chairs are a consignment find.
@SweetShadyLane
Kitchen
These faux berries are the easiest and perfect way to bring Christmas into the kitchen. Stove is Ilve, runner and clipper ship tray are antiques. Monogrammed French cloth is Jan de luz Linnens.
@SweetShadyLane
Dresser
Front entry welcoming. Vintage art by The Atelier Collection. Pine dresser, brass lamp and books are antiques. Brass hurricane was a score at HomeGoods.
@SweetShadyLane
Vintage Fireplace
We call this room, The Nook. A cozy space to sit by the fire.
@SweetShadyLane
Christmas Vignette
My very own The Vignette Box—Christmas Edition. It is now sold out, but it was one of my favorites.
@SweetShadyLane
Christmas Tree
Darling wrapping paper by the very talented, Abbey Holden Studio. Abbey is also the designer for all of my Vignette Box art.
@SweetShadyLane
Art
Close up of my John Derrian find….Vintage Christmas art that makes my heart sing.
Family
Merry Christmas everyone! xoxo
@SweetShadyLane
See @SweetShadyLane on Beautiful Homes of Instagram.
@CarcabaRoad:
Decorating for the holidays in our new home this year was both exciting and challenging. I always love to mix old and new when styling a space.
Although my home is full of neutrals I love to keep holiday tradition and incorporate classic pops of red. Our flocked tree is from Hobby Lobby and I used a $4 white cotton ribbon and stuck with the three classic colors of white red and green to dress it. Again I pulled in vintage crocks and an antique sleigh and chair to add some charm.
Follow @CarcabaRoad on Instagram.
North Pole
To keep it extra magical and fun for the kids I added this new North Pole sign from @wildelmdesignco and of course Santa! The 25 pillow by @livingwithamanda is another new favorite this year, perfect pop of red with a vintage vibe.
@CarcabaRoad
Kitchen
@CarcabaRoad
Kitchen Sink
@CarcabaRoad
Sitting Room
Our sitting room is the perfect rustic modern mix full of neutrals. The shelves are simply styled with old books, an antique scale and wood and white decor.
The faux trees shown are from @hobbylobby. The fresh farm tree sign is designed by Rebecca @wildelmdesignco. Adding some holiday pillows by @livingwithamanda and a cozy blanket completed the looked!
Paint is Sherwin-Williams Pure White.
@CarcabaRoad
Mantel
The antique log roller, crocks and vintage style stockings from @thevintagebucket softened the space and the wrapped gifts were the perfect touch. All the greenery used on the mantle can be found @pier1 and the little white houses @target.
@CarcabaRoad
Barn Door
@CarcabaRoad
Gift Wrapping Station
I have spent half my life wrapping gifts on the floor and I thought it would be fun to create a gift wrapping station in our second floor living area.
@CarcabaRoad
Details
Mostly all the gift wrap and accessories and the tree are from Target. The buffalo check bench is from Aranda @dixiecottage , pillow from @livingwithamanda.
@CarcabaRoad
Paint Color
Wall paint color is Sherwin-Williams Agreeable Gray.
@CarcabaRoad
Front Porch
@CarcabaRoad
See @CarcabaRoad on Home Bunch.
Many thanks to all homeowners for sharing the details above.
!function(d,s,id){var e, p = /^http:/.test(d.location) ? 'http' : 'https';if(!d.getElementById(id)) {e = d.createElement(s);e.id = id;e.src = p + '://' + 'widgets.rewardstyle.com' + '/js/shopthepost.js';d.body.appendChild(e);}if(typeof window.__stp === 'object') if(d.readyState === 'complete') {window.__stp.init();}}(document, 'script', 'shopthepost-script');

JavaScript is currently disabled in this browser. Reactivate it to view this content.
Bring the Holidays Home!
Online Holiday Shopping = More Options & Less Crowds! 🙂
Exciting Holiday Sales!
Thank you for shopping through Home Bunch. I would be happy to assist you if you have any questions or are looking for something in particular. Feel free to contact me and always make sure to check dimensions before ordering. Happy shopping!
Serena & Lily: Shop everything 25% off with code BIGDAY – Ends 11/27!
Wayfair: Cyber Monday Sale Up to 80% OFF!!! Huge Sales on Decor, Furniture & Rugs!!!
Joss & Main: Cyber Monday – Extra 25% Off Plus Free Shipping. Use Code EXTRA25
Pottery Barn: Up to 75% Off Cyber Monday – Today ONLY!!!
One Kings Lane: 30% Off of entire site!
West Elm: Black Friday EUp to 70% Off Cyber Monday – Across Entire Family of Brands
Build: Save Up to Cyber Monday Deals – Up to 80% OFF on Kitchen, Bathroom, Hardware & Lighting!
Neiman Marcus: Today Only: Up to 50% Off – Take 25% off selected sale Items!
Pier 1: Christmas Decor Sales + Free Shipping!
Williams & Sonoma: Buy More, Save More!
Anthropologie: 30% Off Everything + Free Shipping on orders $100+
Posts of the Week:
Cyber Monday Best Sellers.
Modern Farmhouse House Tour.
2018 Home Decor Black Friday Sales!
How to Decorate your Porch for Christmas.
Small Lot Modern Farmhouse.
Family-friendly Home Design.
Newlyweds Home Design.
City Lot Modern Farmhouse.
Beautiful Homes of Instagram: New England Home.
Family Home Renovation with Casual Interiors.
2018 Norton Children’s Hospital Raffle Home.
Transitional Custom Home Design.
Southern Farmhouse.
Beautiful Homes of Instagram: Canada.
Beautiful Homes of Instagram.
Southern Beach House with Modern Interiors.
Florida Vacation Home Style.
Beautiful Homes of Instagram: Lake House.
Black and White Interior Design Ideas.
Interior Design Ideas: Colorful Interiors.
Custom Home with Artisan Craftsmanship Interiors.
Traditional Kitchen Reno Ideas.
You can follow my pins here: Pinterest/HomeBunch
See more Inspiring Interior Design Ideas in my Archives.
“Dear God,
If I am wrong, right me. If I am lost, guide me. If I start to give-up, keep me going.
Lead me in Light and Love”.
Have a wonderful day, my friends and we’ll talk again tomorrow.”
with Love,
Luciane from HomeBunch.com
Come Follow me on
Come Follow me on
Get Home Bunch Posts Via Email
Contact Luciane
“For your shopping convenience, this post might contain links to retailers where you can purchase the products (or similar) featured. I make a small commission if you use these links to make your purchase so thank you for your support!”
from Home http://www.homebunch.com/2018-christmas-decorating-ideas/
via http://www.rssmix.com/
0 notes
Text
Get The Royal Feel Visiting The City Palace Museum in Jaipur
One of the grandest destinations in India, Jaipur is such a place that is always vibrating with joyous occasions and festivities. And one fabulous place, in particular, is the City Palace in Jaipur where you’ll be compelled to go back in time after seeing all the treasures of the bygone days. Despite Rajasthani and Mughal architecture, you’ll also see the influences of Hindu Temples in the Mubarak Mahal, one of the royal dwellings of the City Palace. Here, you can stroll along the corridors of Chandra Mahal and observe the intricate design of different royal courtyards. And if this is not enough, you can check out the Pritam Niwas Chowk and its attractive four seasonal doors, it is pretty impressive. But wait there’s more which we will discuss as you scroll down.
[ Grab Best Deals on Jaipur Tour Packages ]
Everything you need to know about the ‘City Palace Museum of Jaipur’
The City Palace now turned into a Museum is one of the best places to spend a day in Jaipur and what’s awesome is that the other half of the palace, Chandra Mahal is still the resident of Jaipur Royal Family. The entire complex contains various sections of royal residences like the Mubarak Mahal, Pritam Niwas Chowk, Chandra Mahal, Diwan-I-Khas, Diwan-i-Aam, Baaghi Khana, Maharani Palace and more. My intention is not to bore you by describing a detailed history of each royal residencies in the City Palace of Jaipur but perhaps a brief knowledge won’t hurt.
A 19th century-built Mubarak Mahal has several architectural influences of Islamic, Rajput, and European styles. It was built as a reception centre now turned into a Textile Museum. The ground floor of Chandra Mahal on the west end is open to the public that has been converted into Art Museum. It contains old photographs, paintings and mirror work. It is a seven-storey building that also is an official resident of the former royal family. The inner courtyard Pritam Niwas Chowk is famed for its four seasonal gates namely, the Lotus (Summer) Gate, Green (Spring) Gate, Rose (Winter) Gate and one of the four displays 3D like images of the peacock at the Mor (Peacock) Gate.
These may be some of the dwellings to adore but out in the courtyard, Diwan-i-Aam treasures two artefacts that stands 1.6 metres tall as the Silver Urns. These silver vessels that weigh 340 kilograms have made their ways to be the world’s largest silver vessels recognized by the Guinness Book of World Records. Another major attraction that is a must visit is the Diwan-E-Khas located in the courtyard of Mubarak Mahal. Nonetheless, the City Palace also has other worth visiting places like the Maharani palace that treasures a unique scissor-action dagger and Baggi Khana that features old carriages and chariots.
Also Read: Best Places to Explore on Your Jaipur Holiday Trip
The Palace Museums: It’s all about the precious treasures of yesteryears
By all means, the City Palace is a famous attraction every traveller must visit during their trip to India. And inside the palace features royal artefacts like the collection of the ornaments, dresses, paintings and weapons. Basically, there are three sections of museums that reside under the roofs of mahals adorned with fresco walls and ceilings.
Textile Museum
The Textile Museum located in Mubarak Mahal is all about the garments and ornaments worn by the royal family of Jaipur. And one fascinating fact I came across is that the dresses of the Queens and Princess were so heavy that they required a couple of maids to help. Besides, a noteworthy garment to see is the one worn by Sawai Raja Madho Singh II. It is said that, this 4 foot wide garment contained 190-metre long cloth. Another must-see attraction is the polo uniform worn by Sawai Raja Man Singh II. The variety of textiles you get to see here are the silk saris, sanganeri block prints, Kashmiri Pashminas and embroidered shawls. There is also a handicraft museum that is installed with all the royal wares.
Arms Museum
The Arms Museum is another best place in the City Palace to explore the ancient arms and weapons. This museum is located in the Maharani palace that displays a collection of arms like the pistols with two, three and four barrels and also daggers. But these are just some noble mentions. A 15th-century weapon, the scissor-action dagger, used during war campaigns by the Royals is also displayed followed by a particular weapon which is infamous for disemboweling a victim when it is withdrawn from his/her body. Here, one specific attraction that captivates all visitors is the sword gifted by Queen Victoria to Maharaja Sawai Ram Singh during 1835–80. Throughout the museum, guns that also serve as walking sticks, small canon, shields are beautifully decorated that highlights the beauty of the museum.
Art Museum
The Art Museum is amongst the most visited site in the palace to witness the 3D painting of Sawai Ram Singh, India’s first photographer. It is said that no matter which side you stand, you’ll notice his eyes staring right at you, creepy yet interesting. The Art Museum features many old and rare photographs clicked by him and also a series of paintings of Sawai Ishwar Singh completely finished using his fingers. Apart from miniature paintings, this museum also installs ancient texts, Kashmiri shawls, embroidered rugs and carpets. To see what else you can find here, visit Diwan-E-Khas the next time you visit the City Palace.
Also Read: Royal Tourist Getaways in Rajasthan for Luxurious Holiday
In Addition
Baaghi Khana
Baaghi Khana is another must visit place if you love automobiles, here, you’ll find a series of vintage cars, European cabs, old carriages and palanquins. The most interesting attraction here is the mahadol, which is a traditional chariot used to carry the idols of Hindu Gods. Ideally, these mahadols are also used to carry queens and brides during Indian weddings. Baaghi Khana also treasures the Victoria Baggi that was gifted to the Maharaja in 1876 by the Prince of Wales.
Govind Dev Ji Temple
Located in the palace complex itself is the ancient temple dedicated to Lord Krishna. This 18th-century structure is located in the midst of the palace garden. The temple has beautiful Indian paintings and dangling chandeliers clinging above the golden ceiling. Aartis are still conducted every day here and is considered one of the pilgrimage places to the Jaipur royals to conduct rituals.
Also Read: Popular Pilgrimage Tourist Spots in Rajasthan to Seek Solace
Where can you eat and shop after witnessing the palace’s attractions?
Food: Of course, in between sightseeing, you’re going to get hungry, but you can’t exit the premises and return again. So, to make things better for the visitors, there is an in-house restaurant at the City Palace named ‘Baradari’ that offers delicious meals to the visitors.
Shop: This place also features ‘Palace Atelier’ which is a perfect place to shop for heritage crafts and clothing. The products you’ll find here are all handcrafted and the money from the items bought will help in supporting the Princess Diya Kumari Foundation. It helps build the livelihood of the rural communities in India especially women.
Also Read: Heritage Sightseeing Destinations in Rajasthan
The timings and ticket prices of the ‘City Palace Museum of Jaipur’
Except on Indian national holidays, this beautiful Jaipur City Palace Museum opens every day from 9:30 to 17:00 and 17:30 to 22:30. The Jaipur City Palace Museum also features Light and Sound show that displays the intricately designed buildings all lit up in dramatic colours of red, blue, yellow, pink. It gives such a visual treat to the eyes that you’ll probably soliloquy, ‘yes it was worth buying the tickets for the night tour of the City Palace.’ Below are the different prices of the palace, the museum, the night tours and exclusiive access to the palace rooms.
Tickets for Indian travellers visiting City Palace Museum
Information Source: https://goo.gl/myzRW8
Tickets for International travellers visiting City Palace Museum
Also Read: Most Popular Tourist Getaways in Rajasthan, India
How to reach Jaipur and get to the City Palace Museum?
Jaipur, where the majestic forts and palaces dwell surrounding the Aravalli hills is conveniently accessible by three major means of transport. The Rajasthan State Road Transport Corporation (RSRTC) buses are available from all the major cities in India. Jaipur has a railway junction and an international airport that is well connected from all the metropolitan cities.
Railway Station: Jaipur Junction (JP)
Airport: Jaipur International Airport
Since the City Palace Muarms`seum is conveniently located in the city centre and adjacent to another renowned tourist site in Jaipur, Jantar Mantar, you can simply cross the road to see this place. Jaipur has many taxi services, if not that then their three-wheeled rickshaws (cycle or motor) are always preferred to swiftly pass the hectic city traffic.
Note: The City Palace Museum has three gates, two for the public (Virendra Pol, Udai Pol) and one for the royal family (Tripolia Gate). Amongst the first two, the most preferred gate is Virendra Pol which leads directly to the Mubarak Mahal.
[ Get Upto 40% Discount on Rajasthan Holiday Packages ]
There is just so much to see and do in the City Palace, you have to sort out an entire day from your to-do-list. And I am pretty sure, after reading the attractions, night shows, sneaking into the royal rooms, you’re probably convinced to get on a trip to Jaipur and witness the City Palace Museum for yourself. So come with me on a museum tour to Jaipur’s best and mind-boggling sites by taking a Jaipur tour package from TMI. Interested? If its a YASSS, call us at +91-9212553106 or e-mail us at [email protected] to book affordable travel package or more information.
The post Get The Royal Feel Visiting The City Palace Museum in Jaipur appeared first on Tour My India.
from Tour My India
0 notes
Text
Traditional Christmas Front Door
This traditional Christmas front door look was styled by Leslie Davis of Deeply Southern Home for this year’s Holiday Style Challenge. We sent Leslie a beautiful 17-ft. garland decorated with mixed pines and burgundy poinsettias and let her do the rest.
Read on to see how Leslie created two DIY planters for her Christmas trees!
Traditional Christmas Front Door
This is my favorite time of year to bring a festive look to the entry!
This year, I decided to flank each side of our Christmas front door with large outdoor trees. These trees come in traditional urns. I wanted to give them a bit more of a festive presence with these clean-lined DIY planters. They also add an extra bit of protection from wind.
DIY Festive Planter Tutorial
I painted the planters a deep red, Glidden California Claret, that coordinated with the oversized garland adorning the arch. The paint color can be customized to your own exterior style and colors.
The DIY planters are super simple builds, except for the addition of a few angle cuts. The good news is I’ve done my best to simplify the build. Even a math adverse person like myself can easily complete this project.
Materials
1 2 x 4 Pressure Treated Lumber
4 4 x 6 x 6 Premium Treated Picket Fence
Box of Spax #10 3 in. Screws
Fence Brackets to be used as feet ( FB24Z optional)
Potted Christmas Tree
Tools
Drill/Driver
Miter Saw
Table Saw (Optional)
Brad Nail Gun
Step 1: Cut the Boards
Cut the fence boards to fit around the base of the tree planter. Above is a sketch of the finished sizes. Double check to make sure your tree base will fit inside these measurements.
Don’t worry, it’s much easier than it seems. The shapes are basic trapezoids.
Each piece is cut at a 5° angle on a miter saw.
If you have to modify the size of the planter, cut the top of the top board and the bottom of the bottom board so that the difference when subtracted is 3¼ in.
For ease and accuracy, I also kind of cheated for the measurement of the middle.
Once the top and bottom pieces were cut, I set a board in between them with one side cut at the 5° and then used a yardstick to find the other measurement. Easy peasy!
Repeat this for both the back and the two side pieces which are smaller.
Cutting the Boards to Size, Continued
To be sure all of my corresponding pieces are exactly the same size, I cut all of them at the same time. Here’s how I do it.
The board on the top is my first one, another board is lined up perfectly on the far edge. I pull the blade down (not powered) and line the top board with the blade. Once the lower board is secure against the fence and lined, I pull back the top board and cut. Then you end up with boards that are exactly the same.
Cut 2 x 4’s to 16 in. with 5-degree ends. I added the optional fence caps to these 2 x 4’s for extra weatherproofing. The caps elevate the fence boards off the ground so that they can dry faster and not sit on cold damp concrete.
Now that you have six front/backs and six sides and the support 2 x 4’s you are ready to assemble.
Step 2: Side Assembly
Clamp the three smaller side panel fence boards together. Using 3 in. screws, attach the 2 x 4 to panel.
Repeat on the opposite side so that you have two “legs.” It is handy to use an extra 2 x 4 to make sure everything is aligned properly.
Again, repeat these steps for the second side panel. Set aside.
Step 3: Build the Planter
Clamp the larger, front panels together.
Stand the panels up against the side that is on the ground and against the 2 x 4.
For ease of construction, it is helpful to use a brad nailer to hold the panels in place.
Repeat this for what will become the back.
Now you are ready to add the last side.
Nail it in place. With everything initially held in place with the nails, rotate the planter and reinforce with screws.
Add screws to both the front and back. It is helpful to use a ruler to check your spacing from the edge.
Step 4: Sand and finish
Sand each planter for a smoother surface. After painting, I decided to add trim to cover the screws. I had initially thought I might like the more “industrial look.” If that is the style that works for your decor, feel free to skip the trim.
Just like the “legs,” the trim will need to be cut at the 5° angle.
I used scrap fence boards for the trim by cutting them down on a table saw. If you don’t have a table saw you can purchase 1 x 2 material to use for the trim.
Step 5: Add the Tree
Now you are ready to add your tree!
Finish the Look for Your Christmas Front Door
The trees are the perfect accompaniment to the 17-ft. of garland that follows the brick arch of the entry.
The pair of lit wreaths continue the symmetry for a perfectly balanced, welcoming traditional Christmas front door.
For more DIY holiday ideas, see other articles in our Holiday Style Challenge series. Follow our Holiday Style Challenge board on Pinterest.
Visit The Home Depot’s online Holiday Decor Department for more beautiful Christmas front door decorations.
The post Traditional Christmas Front Door appeared first on The Home Depot Blog.
from garage2 http://ift.tt/2hBD3WY via great info
0 notes
Text
Traditional Christmas Front Door
This traditional Christmas front door look was styled by Leslie Davis of Deeply Southern Home for this year’s Holiday Style Challenge. We sent Leslie a beautiful 17-ft. garland decorated with mixed pines and burgundy poinsettias and let her do the rest.
Read on to see how Leslie created two DIY planters for her Christmas trees!
Traditional Christmas Front Door
This is my favorite time of year to bring a festive look to the entry!
This year, I decided to flank each side of our Christmas front door with large outdoor trees. These trees come in traditional urns. I wanted to give them a bit more of a festive presence with these clean-lined DIY planters. They also add an extra bit of protection from wind.
DIY Festive Planter Tutorial
I painted the planters a deep red, Glidden California Claret, that coordinated with the oversized garland adorning the arch. The paint color can be customized to your own exterior style and colors.
The DIY planters are super simple builds, except for the addition of a few angle cuts. The good news is I’ve done my best to simplify the build. Even a math adverse person like myself can easily complete this project.
Materials
1 2 x 4 Pressure Treated Lumber
4 4 x 6 x 6 Premium Treated Picket Fence
Box of Spax #10 3 in. Screws
Fence Brackets to be used as feet ( FB24Z optional)
Potted Christmas Tree
Tools
Drill/Driver
Miter Saw
Table Saw (Optional)
Brad Nail Gun
Step 1: Cut the Boards
Cut the fence boards to fit around the base of the tree planter. Above is a sketch of the finished sizes. Double check to make sure your tree base will fit inside these measurements.
Don’t worry, it’s much easier than it seems. The shapes are basic trapezoids.
Each piece is cut at a 5° angle on a miter saw.
If you have to modify the size of the planter, cut the top of the top board and the bottom of the bottom board so that the difference when subtracted is 3¼ in.
For ease and accuracy, I also kind of cheated for the measurement of the middle.
Once the top and bottom pieces were cut, I set a board in between them with one side cut at the 5° and then used a yardstick to find the other measurement. Easy peasy!
Repeat this for both the back and the two side pieces which are smaller.
Cutting the Boards to Size, Continued
To be sure all of my corresponding pieces are exactly the same size, I cut all of them at the same time. Here’s how I do it.
The board on the top is my first one, another board is lined up perfectly on the far edge. I pull the blade down (not powered) and line the top board with the blade. Once the lower board is secure against the fence and lined, I pull back the top board and cut. Then you end up with boards that are exactly the same.
Cut 2 x 4’s to 16 in. with 5-degree ends. I added the optional fence caps to these 2 x 4’s for extra weatherproofing. The caps elevate the fence boards off the ground so that they can dry faster and not sit on cold damp concrete.
Now that you have six front/backs and six sides and the support 2 x 4’s you are ready to assemble.
Step 2: Side Assembly
Clamp the three smaller side panel fence boards together. Using 3 in. screws, attach the 2 x 4 to panel.
Repeat on the opposite side so that you have two “legs.” It is handy to use an extra 2 x 4 to make sure everything is aligned properly.
Again, repeat these steps for the second side panel. Set aside.
Step 3: Build the Planter
Clamp the larger, front panels together.
Stand the panels up against the side that is on the ground and against the 2 x 4.
For ease of construction, it is helpful to use a brad nailer to hold the panels in place.
Repeat this for what will become the back.
Now you are ready to add the last side.
Nail it in place. With everything initially held in place with the nails, rotate the planter and reinforce with screws.
Add screws to both the front and back. It is helpful to use a ruler to check your spacing from the edge.
Step 4: Sand and finish
Sand each planter for a smoother surface. After painting, I decided to add trim to cover the screws. I had initially thought I might like the more “industrial look.” If that is the style that works for your decor, feel free to skip the trim.
Just like the “legs,” the trim will need to be cut at the 5° angle.
I used scrap fence boards for the trim by cutting them down on a table saw. If you don’t have a table saw you can purchase 1 x 2 material to use for the trim.
Step 5: Add the Tree
Now you are ready to add your tree!
Finish the Look for Your Christmas Front Door
The trees are the perfect accompaniment to the 17-ft. of garland that follows the brick arch of the entry.
The pair of lit wreaths continue the symmetry for a perfectly balanced, welcoming traditional Christmas front door.
For more DIY holiday ideas, see other articles in our Holiday Style Challenge series. Follow our Holiday Style Challenge board on Pinterest.
Visit The Home Depot’s online Holiday Decor Department for more beautiful Christmas front door decorations.
The post Traditional Christmas Front Door appeared first on The Home Depot Blog.
from together1 http://ift.tt/2hBD3WY via recommended
0 notes
Text
How To Add Christmas Cheer To Your Front Door
Laura Tusken of Inspiration for Moms loves decorating her home for Christmas, especially the outside, because it’s the first thing guests see. Lauren shares simple steps to help create lasting impressions when it comes to Christmas cheer and outdoor holiday decor.
How To Add Christmas Cheer to Your Front Door
When it comes to Christmas decorating, just call me Clark Griswold. Every year I can’t wait to get the Christmas decor up! Maybe my eagerness comes from the fact as a child, my parents never decorated the outside of our home. I would ask (or actually beg) and it never happened. So as soon as I bought a home of my own, I was already planning my outside Christmas decor! I do try to limit myself and not decorate so crazy that the electric company stops by for a visit.
So when The Home Depot reached out to me and asked if I would like to be one of the bloggers in the 2018 Holiday Style Challenge, I couldn’t respond fast enough! I like to start decorating with the front door of our home because it’s the place all the guests will see first, and I want it to be perfect.
If you are looking for ideas on how to decorate your front door for the holidays, I have a ton of tips to walk you through the whole process step-by-step.
Add a Fun Welcome
One of my favorite ways to welcome my guests is with a pretty layered rug/mat combination. I started with this gray indoor/outdoor rug as my base. This rug is so soft and I love it’s stylish pattern. It looks great here on the front porch, but I’m also super excited to place it inside as well. I topped the rug with this fun coir holiday jingle door mat. The pop of red this mat adds to the front door is perfect!
Dress Up the Step
Once the rug and door mat were in place, it was time to add some pretty details to the step. I decided to use my black urns for flanking the sides of the step. To give them some holiday cheer, I filled them with these decorative sprays. The added detail on these sprays is so pretty. They’re trimmed with pine cones, red berries and about 35 warm white lights.
For a little extra pop of red and texture, I added a few ornaments. Can I let you in on a little secret? Green floral wire is your best friend when it comes to outdoor holiday decorating. I used this wire to attach ornaments to the branches of each spray. No matter what winter storm the winds bring in, my ornaments are staying put!
Express a Little Holiday Joy
There’s a little side area to the left of our front door that needed some Christmas cheer too. A super elegant Christmas wreath and a couple of over-sized large letters were the perfect combo for this space. I arranged them down the side of the door wall to spell out the word JOY.
I had a lovely neighbor stop by on her walk when she saw me photographing the front door. As she approached the house, she kept commenting on how nicely I decorate. As she got closer, she let out a little shriek! ‘Oh! It says JOY! I didn’t notice from the street. But now that I’m closer I can see it. That’s such a lovely surprise!’ Nailed it!
Complete the Look
The final touch I wanted to add to the front door was some beautiful fir garland around the front porch door opening. To keep with my red theme, I included a pretty red Denver plaid ribbon (seems fitting since I am in Colorado!). I simply wove it in and out of the garland. I then used the remainder of the ribbon to make a large bow for the center.
After the ribbon was in place, I added three-ornament clusters for an additional pop of color and texture. The clusters were created by threading the ornaments onto green floral wire. I then cut the wire with some wire cutters and twisted the wire to secure them together. Then I attached the clusters to the branches of the garland. Once again, that green floral wire is going to save the day. I attached some to the garland and wrapped it around the porch pillars and twisted to secure. That garland isn’t coming down until I say it’s time!
Each strand of garland comes with 300 warm white lights. And at night, it’s such a pretty sight to see all light up! I am pretty sure, it’s going to help get the whole neighborhood into the holiday mood.
I especially love the look of the JOY sign. It’s such a fun way to add Christmas cheer and a sweet holiday message to the front door.
I set all of the lights on a timer so as soon as dusk arrives, my lights are on. Who doesn’t want to enjoy this holiday display to the fullest?!
Hopefully no matter what your Christmas decor style, you found some helpful tips to decorating your home. Remember, the decor doesn’t have to be complicated or over the top for everyone to enjoy the joy of the season.
For more decorating inspiration and Christmas cheer, check out the Holiday Style Challenge series on the blog. Find holiday decorations at The Home Depot.
The post How To Add Christmas Cheer To Your Front Door appeared first on The Home Depot Blog.
from Home https://blog.homedepot.com/add-christmas-cheer-front-door/
via http://www.rssmix.com/
0 notes
Photo

How To Add Christmas Cheer To Your Front Door https://ift.tt/2DnPq1j
Lauren Tusken of Inspiration for Moms loves decorating her home for Christmas, especially the outside, because it’s the first thing guests see. Lauren shares simple steps to help create lasting impressions when it comes to Christmas cheer and outdoor holiday decor.
How To Add Christmas Cheer to Your Front Door
When it comes to Christmas decorating, just call me Clark Griswold. Every year I can’t wait to get the Christmas decor up! Maybe my eagerness comes from the fact as a child, my parents never decorated the outside of our home. I would ask (or actually beg) and it never happened. So as soon as I bought a home of my own, I was already planning my outside Christmas decor! I do try to limit myself and not decorate so crazy that the electric company stops by for a visit.
So when The Home Depot reached out to me and asked if I would like to be one of the bloggers in the 2018 Holiday Style Challenge, I couldn’t respond fast enough! I like to start decorating with the front door of our home because it’s the place all the guests will see first, and I want it to be perfect.
If you are looking for ideas on how to decorate your front door for the holidays, I have a ton of tips to walk you through the whole process step-by-step.
Add a Fun Welcome
One of my favorite ways to welcome my guests is with a pretty layered rug/mat combination. I started with this gray indoor/outdoor rug as my base. This rug is so soft and I love it’s stylish pattern. It looks great here on the front porch, but I’m also super excited to place it inside as well. I topped the rug with this fun coir holiday jingle door mat. The pop of red this mat adds to the front door is perfect!
Dress Up the Step
Once the rug and door mat were in place, it was time to add some pretty details to the step. I decided to use my black urns for flanking the sides of the step. To give them some holiday cheer, I filled them with these decorative sprays. The added detail on these sprays is so pretty. They’re trimmed with pine cones, red berries and about 35 warm white lights.
For a little extra pop of red and texture, I added a few ornaments. Can I let you in on a little secret? Green floral wire is your best friend when it comes to outdoor holiday decorating. I used this wire to attach ornaments to the branches of each spray. No matter what winter storm the winds bring in, my ornaments are staying put!
Express a Little Holiday Joy
There’s a little side area to the left of our front door that needed some Christmas cheer too. A super elegant Christmas wreath and a couple of over-sized large letters were the perfect combo for this space. I arranged them down the side of the door wall to spell out the word JOY.
I had a lovely neighbor stop by on her walk when she saw me photographing the front door. As she approached the house, she kept commenting on how nicely I decorate. As she got closer, she let out a little shriek! ‘Oh! It says JOY! I didn’t notice from the street. But now that I’m closer I can see it. That’s such a lovely surprise!’ Nailed it!
Complete the Look
The final touch I wanted to add to the front door was some beautiful fir garland around the front porch door opening. To keep with my red theme, I included a pretty red Denver plaid ribbon (seems fitting since I am in Colorado!). I simply wove it in and out of the garland. I then used the remainder of the ribbon to make a large bow for the center.
After the ribbon was in place, I added three-ornament clusters for an additional pop of color and texture. The clusters were created by threading the ornaments onto green floral wire. I then cut the wire with some wire cutters and twisted the wire to secure them together. Then I attached the clusters to the branches of the garland. Once again, that green floral wire is going to save the day. I attached some to the garland and wrapped it around the porch pillars and twisted to secure. That garland isn’t coming down until I say it’s time!
Each strand of garland comes with 300 warm white lights. And at night, it’s such a pretty sight to see all light up! I am pretty sure, it’s going to help get the whole neighborhood into the holiday mood.
I especially love the look of the JOY sign. It’s such a fun way to add Christmas cheer and a sweet holiday message to the front door.
I set all of the lights on a timer so as soon as dusk arrives, my lights are on. Who doesn’t want to enjoy this holiday display to the fullest?!
Hopefully no matter what your Christmas decor style, you found some helpful tips to decorating your home. Remember, the decor doesn’t have to be complicated or over the top for everyone to enjoy the joy of the season.
For more decorating inspiration and Christmas cheer, check out the Holiday Style Challenge series on the blog. Find holiday decorations at The Home Depot.
The post How To Add Christmas Cheer To Your Front Door appeared first on The Home Depot Blog.
Laura Tusken
0 notes
Text
Traditional Christmas Front Door
This traditional Christmas front door look was styled by Leslie Davis of Deeply Southern Home for this year’s Holiday Style Challenge. We sent Leslie a beautiful 17-ft. garland decorated with mixed pines and burgundy poinsettias and let her do the rest.
Read on to see how Leslie created two DIY planters for her Christmas trees!
Traditional Christmas Front Door
This is my favorite time of year to bring a festive look to the entry!
This year, I decided to flank each side of our Christmas front door with large outdoor trees. These trees come in traditional urns. I wanted to give them a bit more of a festive presence with these clean-lined DIY planters. They also add an extra bit of protection from wind.
DIY Festive Planter Tutorial
I painted the planters a deep red, Glidden California Claret, that coordinated with the oversized garland adorning the arch. The paint color can be customized to your own exterior style and colors.
The DIY planters are super simple builds, except for the addition of a few angle cuts. The good news is I’ve done my best to simplify the build. Even a math adverse person like myself can easily complete this project.
Materials
1 2 x 4 Pressure Treated Lumber
4 4 x 6 x 6 Premium Treated Picket Fence
Box of Spax #10 3 in. Screws
Fence Brackets to be used as feet ( FB24Z optional)
Potted Christmas Tree
Tools
Drill/Driver
Miter Saw
Table Saw (Optional)
Brad Nail Gun
Step 1: Cut the Boards
Cut the fence boards to fit around the base of the tree planter. Above is a sketch of the finished sizes. Double check to make sure your tree base will fit inside these measurements.
Don’t worry, it’s much easier than it seems. The shapes are basic trapezoids.
Each piece is cut at a 5° angle on a miter saw.
If you have to modify the size of the planter, cut the top of the top board and the bottom of the bottom board so that the difference when subtracted is 3¼ in.
For ease and accuracy, I also kind of cheated for the measurement of the middle.
Once the top and bottom pieces were cut, I set a board in between them with one side cut at the 5° and then used a yardstick to find the other measurement. Easy peasy!
Repeat this for both the back and the two side pieces which are smaller.
Cutting the Boards to Size, Continued
To be sure all of my corresponding pieces are exactly the same size, I cut all of them at the same time. Here’s how I do it.
The board on the top is my first one, another board is lined up perfectly on the far edge. I pull the blade down (not powered) and line the top board with the blade. Once the lower board is secure against the fence and lined, I pull back the top board and cut. Then you end up with boards that are exactly the same.
Cut 2 x 4’s to 16 in. with 5-degree ends. I added the optional fence caps to these 2 x 4’s for extra weatherproofing. The caps elevate the fence boards off the ground so that they can dry faster and not sit on cold damp concrete.
Now that you have six front/backs and six sides and the support 2 x 4’s you are ready to assemble.
Step 2: Side Assembly
Clamp the three smaller side panel fence boards together. Using 3 in. screws, attach the 2 x 4 to panel.
Repeat on the opposite side so that you have two “legs.” It is handy to use an extra 2 x 4 to make sure everything is aligned properly.
Again, repeat these steps for the second side panel. Set aside.
Step 3: Build the Planter
Clamp the larger, front panels together.
Stand the panels up against the side that is on the ground and against the 2 x 4.
For ease of construction, it is helpful to use a brad nailer to hold the panels in place.
Repeat this for what will become the back.
Now you are ready to add the last side.
Nail it in place. With everything initially held in place with the nails, rotate the planter and reinforce with screws.
Add screws to both the front and back. It is helpful to use a ruler to check your spacing from the edge.
Step 4: Sand and finish
Sand each planter for a smoother surface. After painting, I decided to add trim to cover the screws. I had initially thought I might like the more “industrial look.” If that is the style that works for your decor, feel free to skip the trim.
Just like the “legs,” the trim will need to be cut at the 5° angle.
I used scrap fence boards for the trim by cutting them down on a table saw. If you don’t have a table saw you can purchase 1 x 2 material to use for the trim.
Step 5: Add the Tree
Now you are ready to add your tree!
Finish the Look for Your Christmas Front Door
The trees are the perfect accompaniment to the 17-ft. of garland that follows the brick arch of the entry.
The pair of lit wreaths continue the symmetry for a perfectly balanced, welcoming traditional Christmas front door.
For more DIY holiday ideas, see other articles in our Holiday Style Challenge series. Follow our Holiday Style Challenge board on Pinterest.
Visit The Home Depot’s online Holiday Decor Department for more beautiful Christmas front door decorations.
The post Traditional Christmas Front Door appeared first on The Home Depot Blog.
from mix1 http://ift.tt/2hBD3WY via with this info
0 notes
Text
Traditional Christmas Front Door
This traditional Christmas front door look was styled by Leslie Davis of Deeply Southern Home for this year’s Holiday Style Challenge. We sent Leslie a beautiful 17-ft. garland decorated with mixed pines and burgundy poinsettias and let her do the rest.
Read on to see how Leslie created two DIY planters for her Christmas trees!
Traditional Christmas Front Door
This is my favorite time of year to bring a festive look to the entry!
This year, I decided to flank each side of our Christmas front door with large outdoor trees. These trees come in traditional urns. I wanted to give them a bit more of a festive presence with these clean-lined DIY planters. They also add an extra bit of protection from wind.
DIY Festive Planter Tutorial
I painted the planters a deep red, Glidden California Claret, that coordinated with the oversized garland adorning the arch. The paint color can be customized to your own exterior style and colors.
The DIY planters are super simple builds, except for the addition of a few angle cuts. The good news is I’ve done my best to simplify the build. Even a math adverse person like myself can easily complete this project.
Materials
1 2 x 4 Pressure Treated Lumber
4 4 x 6 x 6 Premium Treated Picket Fence
Box of Spax #10 3 in. Screws
Fence Brackets to be used as feet ( FB24Z optional)
Potted Christmas Tree
Tools
Drill/Driver
Miter Saw
Table Saw (Optional)
Brad Nail Gun
Step 1: Cut the Boards
Cut the fence boards to fit around the base of the tree planter. Above is a sketch of the finished sizes. Double check to make sure your tree base will fit inside these measurements.
Don’t worry, it’s much easier than it seems. The shapes are basic trapezoids.
Each piece is cut at a 5° angle on a miter saw.
If you have to modify the size of the planter, cut the top of the top board and the bottom of the bottom board so that the difference when subtracted is 3¼ in.
For ease and accuracy, I also kind of cheated for the measurement of the middle.
Once the top and bottom pieces were cut, I set a board in between them with one side cut at the 5° and then used a yardstick to find the other measurement. Easy peasy!
Repeat this for both the back and the two side pieces which are smaller.
Cutting the Boards to Size, Continued
To be sure all of my corresponding pieces are exactly the same size, I cut all of them at the same time. Here’s how I do it.
The board on the top is my first one, another board is lined up perfectly on the far edge. I pull the blade down (not powered) and line the top board with the blade. Once the lower board is secure against the fence and lined, I pull back the top board and cut. Then you end up with boards that are exactly the same.
Cut 2 x 4’s to 16 in. with 5-degree ends. I added the optional fence caps to these 2 x 4’s for extra weatherproofing. The caps elevate the fence boards off the ground so that they can dry faster and not sit on cold damp concrete.
Now that you have six front/backs and six sides and the support 2 x 4’s you are ready to assemble.
Step 2: Side Assembly
Clamp the three smaller side panel fence boards together. Using 3 in. screws, attach the 2 x 4 to panel.
Repeat on the opposite side so that you have two “legs.” It is handy to use an extra 2 x 4 to make sure everything is aligned properly.
Again, repeat these steps for the second side panel. Set aside.
Step 3: Build the Planter
Clamp the larger, front panels together.
Stand the panels up against the side that is on the ground and against the 2 x 4.
For ease of construction, it is helpful to use a brad nailer to hold the panels in place.
Repeat this for what will become the back.
Now you are ready to add the last side.
Nail it in place. With everything initially held in place with the nails, rotate the planter and reinforce with screws.
Add screws to both the front and back. It is helpful to use a ruler to check your spacing from the edge.
Step 4: Sand and finish
Sand each planter for a smoother surface. After painting, I decided to add trim to cover the screws. I had initially thought I might like the more “industrial look.” If that is the style that works for your decor, feel free to skip the trim.
Just like the “legs,” the trim will need to be cut at the 5° angle.
I used scrap fence boards for the trim by cutting them down on a table saw. If you don’t have a table saw you can purchase 1 x 2 material to use for the trim.
Step 5: Add the Tree
Now you are ready to add your tree!
Finish the Look for Your Christmas Front Door
The trees are the perfect accompaniment to the 17-ft. of garland that follows the brick arch of the entry.
The pair of lit wreaths continue the symmetry for a perfectly balanced, welcoming traditional Christmas front door.
For more DIY holiday ideas, see other articles in our Holiday Style Challenge series. Follow our Holiday Style Challenge board on Pinterest.
Visit The Home Depot’s online Holiday Decor Department for more beautiful Christmas front door decorations.
The post Traditional Christmas Front Door appeared first on The Home Depot Blog.
from Roofing Pro http://ift.tt/2hBD3WY
Curated by a professional Roofing Contractor
from Blogger http://ift.tt/2zIcANL
via RoofingProToday
0 notes
Photo

Traditional Christmas Front Door http://ift.tt/2hBD3WY
This traditional Christmas front door look was styled by Leslie Davis of Deeply Southern Home for this year’s Holiday Style Challenge. We sent Leslie a beautiful 17-ft. garland decorated with mixed pines and burgundy poinsettias and let her do the rest.
Read on to see how Leslie created two DIY planters for her Christmas trees!
Traditional Christmas Front Door
This is my favorite time of year to bring a festive look to the entry!
This year, I decided to flank each side of our Christmas front door with large outdoor trees. These trees come in traditional urns. I wanted to give them a bit more of a festive presence with these clean-lined DIY planters. They also add an extra bit of protection from wind.
DIY Festive Planter Tutorial
I painted the planters a deep red, Glidden California Claret, that coordinated with the oversized garland adorning the arch. The paint color can be customized to your own exterior style and colors.
The DIY planters are super simple builds, except for the addition of a few angle cuts. The good news is I’ve done my best to simplify the build. Even a math adverse person like myself can easily complete this project.
Materials
1 2 x 4 Pressure Treated Lumber
4 4 x 6 x 6 Premium Treated Picket Fence
Box of Spax #10 3 in. Screws
Fence Brackets to be used as feet ( FB24Z optional)
Potted Christmas Tree
Tools
Drill/Driver
Miter Saw
Table Saw (Optional)
Brad Nail Gun
Step 1: Cut the Boards
Cut the fence boards to fit around the base of the tree planter. Above is a sketch of the finished sizes. Double check to make sure your tree base will fit inside these measurements.
Don’t worry, it’s much easier than it seems. The shapes are basic trapezoids.
Each piece is cut at a 5° angle on a miter saw.
If you have to modify the size of the planter, cut the top of the top board and the bottom of the bottom board so that the difference when subtracted is 3¼ in.
For ease and accuracy, I also kind of cheated for the measurement of the middle.
Once the top and bottom pieces were cut, I set a board in between them with one side cut at the 5° and then used a yardstick to find the other measurement. Easy peasy!
Repeat this for both the back and the two side pieces which are smaller.
Cutting the Boards to Size, Continued
To be sure all of my corresponding pieces are exactly the same size, I cut all of them at the same time. Here’s how I do it.
The board on the top is my first one, another board is lined up perfectly on the far edge. I pull the blade down (not powered) and line the top board with the blade. Once the lower board is secure against the fence and lined, I pull back the top board and cut. Then you end up with boards that are exactly the same.
Cut 2 x 4’s to 16 in. with 5-degree ends. I added the optional fence caps to these 2 x 4’s for extra weatherproofing. The caps elevate the fence boards off the ground so that they can dry faster and not sit on cold damp concrete.
Now that you have six front/backs and six sides and the support 2 x 4’s you are ready to assemble.
Step 2: Side Assembly
Clamp the three smaller side panel fence boards together. Using 3 in. screws, attach the 2 x 4 to panel.
Repeat on the opposite side so that you have two “legs.” It is handy to use an extra 2 x 4 to make sure everything is aligned properly.
Again, repeat these steps for the second side panel. Set aside.
Step 3: Build the Planter
Clamp the larger, front panels together.
Stand the panels up against the side that is on the ground and against the 2 x 4.
For ease of construction, it is helpful to use a brad nailer to hold the panels in place.
Repeat this for what will become the back.
Now you are ready to add the last side.
Nail it in place. With everything initially held in place with the nails, rotate the planter and reinforce with screws.
Add screws to both the front and back. It is helpful to use a ruler to check your spacing from the edge.
Step 4: Sand and finish
Sand each planter for a smoother surface. After painting, I decided to add trim to cover the screws. I had initially thought I might like the more “industrial look.” If that is the style that works for your decor, feel free to skip the trim.
Just like the “legs,” the trim will need to be cut at the 5° angle.
I used scrap fence boards for the trim by cutting them down on a table saw. If you don’t have a table saw you can purchase 1 x 2 material to use for the trim.
Step 5: Add the Tree
Now you are ready to add your tree!
Finish the Look for Your Christmas Front Door
The trees are the perfect accompaniment to the 17-ft. of garland that follows the brick arch of the entry.
The pair of lit wreaths continue the symmetry for a perfectly balanced, welcoming traditional Christmas front door.
For more DIY holiday ideas, see other articles in our Holiday Style Challenge series. Follow our Holiday Style Challenge board on Pinterest.
Visit The Home Depot’s online Holiday Decor Department for more beautiful Christmas front door decorations.
The post Traditional Christmas Front Door appeared first on The Home Depot Blog.
Leslie Davis
0 notes
Last Seen Blogs

thongvan-blog
Untitled
thongvan-blog
Untitled


goateer6
Untitled

whineandwine-mommylife-blog
whine to wine-a mommy blog