#I'm actually thinking of modeling basic things in Blender at some point probably
Explore tagged Tumblr posts
Visit Tumblr Blog
Explore Tumblr blogs with no restrictions, modern design and the best experience.
Last Seen Tumblr Blogs


Fun Fact
Kazakhstan’s Minister of Communications and Informatics has blocked the Tumblr site because it contained 60 sites of terrorism, extremism, and pornography in 2015.
Text
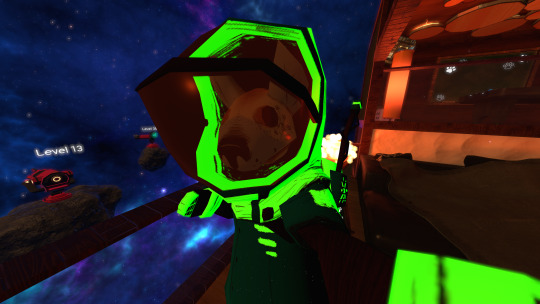
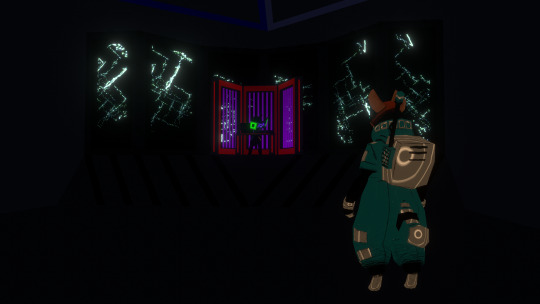
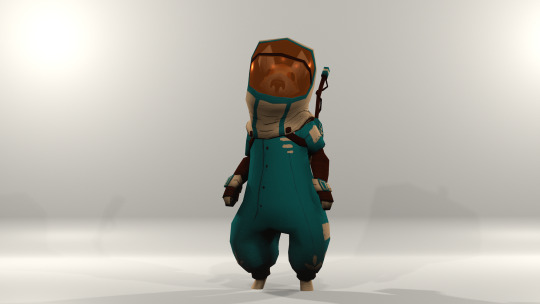
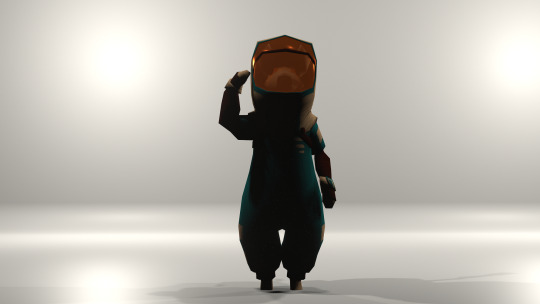
Oh to be a cute space-vacationing hyena roaming various dimensions.
#I'm still merely enjoying fiddling with customizing things in Unity and in 3D things#I'm actually thinking of modeling basic things in Blender at some point probably#ideally first environments like VRChat worlds. then maybe objects.#no goal for 3D characters yet but who knows. no promises on anything#vrchat#vr
30 notes
·
View notes
Text
Hei there demons. It is I, ya boi
A while ago I considered making a trivia-like video about the assets I've made for Killer In Purple 2, and maybe show off unused content as well as asset details you probably don't see in-game. Instead I'm posting here!
Part 1: THE VERY FIRST MODEL
I was approached by the dev of Killer in Purple 2, GoldieEntertainment (GFC) after showing off some voxel art I've made in a mobile app called Fancade, and invited to join in on helping expand on Killer In Purple 2. I was like heck yeah let's get this bread!
I downloaded a mobile voxel app called Mega Voxels that actually lets users export their creations, which is exactly what I needed! All set!
My first task was making a new model for the kid NPC that was being used in the game at the time, which was made by Goldie... on Blender according to him, if I recall correctly?
(video thumbnail)
It was also the only kid model in the game at the time.
Looking at it and the rest of the game at the time, I tried to stick to the "blocky aesthetic" it had going on. I started with the head/face.
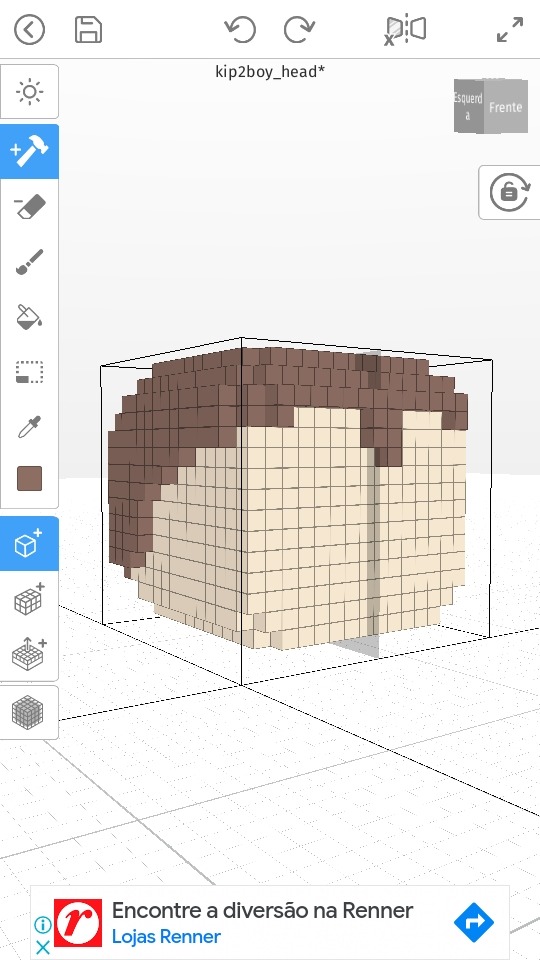
(don't mind the ads, you can't escape them nowadays.)
When I showed it to GFC he pointed out its "soulless stare" 😂😂😂 And I was not fully satisfied with the result either. So I went on from there.
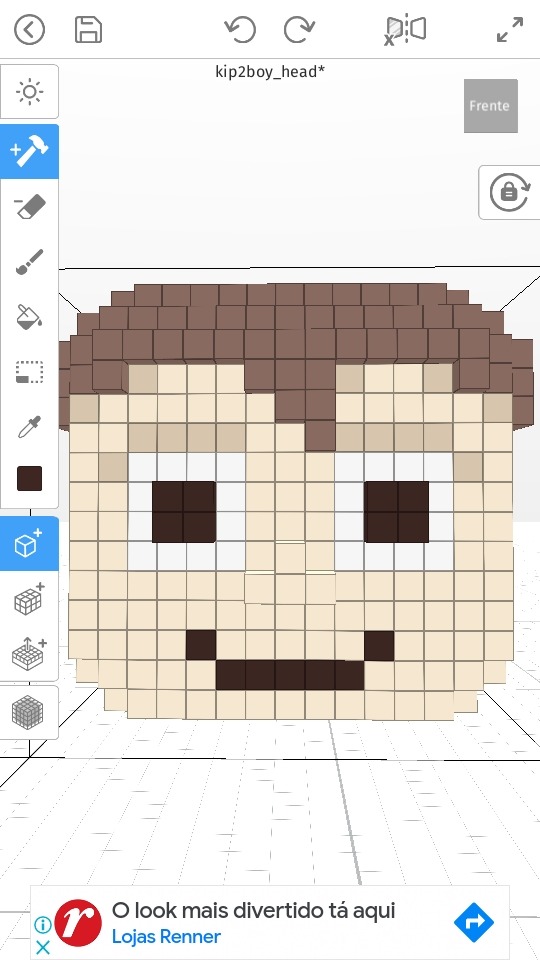
I decided to retain the blockiness but also making use of more color shades in order to smooth the edges and give it more personality. After some back and forth of experimenting and tweaking, this was the final result:
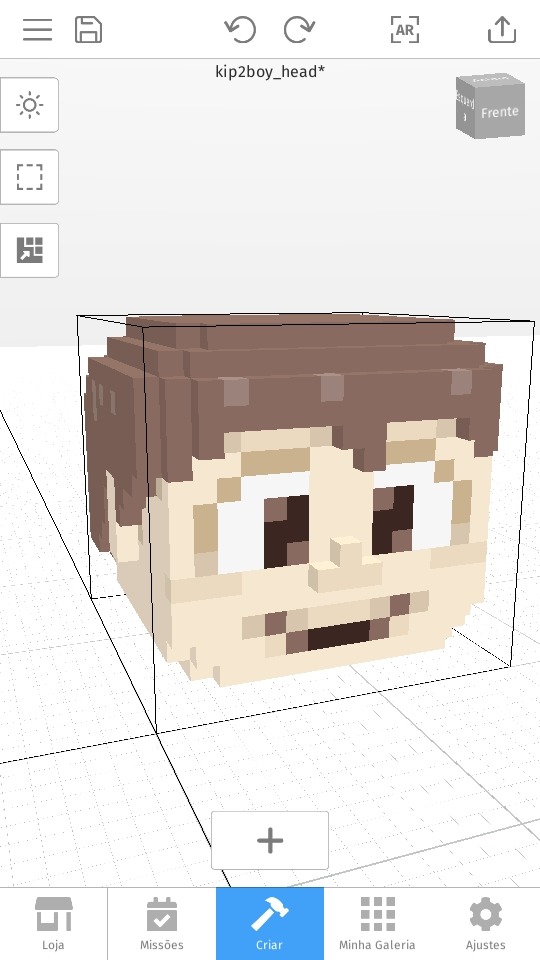
The little kiddy face we've all become familiar with! If you pay attention you'll see the eyes are still pretty much a square, with a tiny bit of different color shades surrounding it to give the illusion it's rounded, plus different pupil placement to curb the "soulless stare."
The hair is basic, based off GFC's original model while also drawing slightly inspiration from the sprites of Crying Child from FNAF 4.
"But Jelly," you ask, "what about the rest of the model, like the body? That's just a head." Well, I say: DON'T LOSE YOUR HEAD! We're about to get there! (im funny i swear)
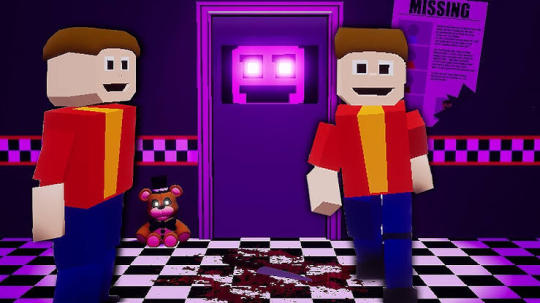
The body was surprisingly very straightforward; I tried to keep in mind where the original model was segmented and tried to stick to the same segmentation with the new body. I tried to keep the original clothing when coloring as well.
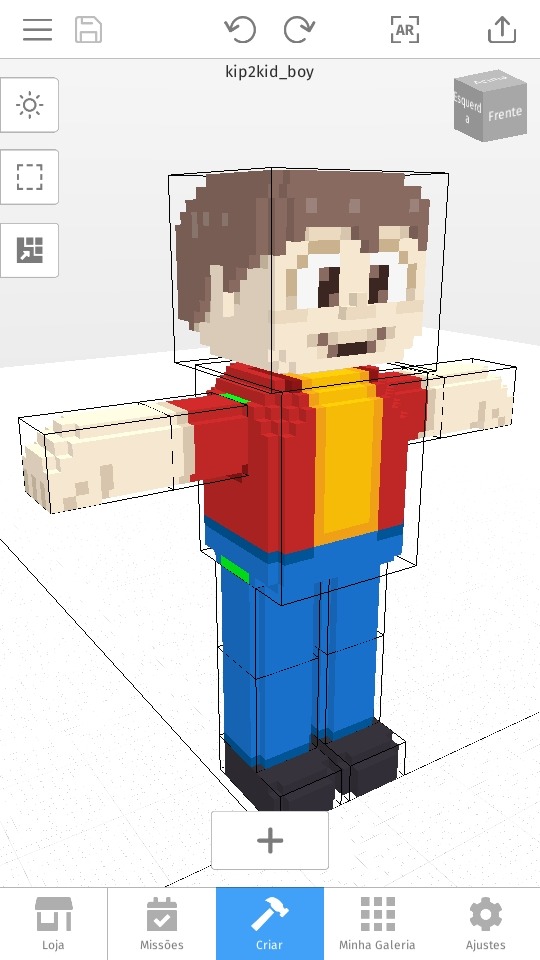
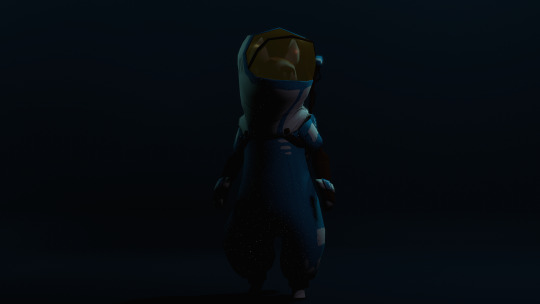
And here we have one (1) full boye, asserting his dominance!
(The solid green spots were to help GFC see where the different pieces connect, which he could easily color over once they served their purpose.)
Keep this fine young lad in mind, y'all, since he'll go on to also become the base for just about every other child character in the game. I made such choice to make things easier and faster for GFC; that way he could apply pretty much the same rigging and animations to them with minimal modifications, to save time.
Giving the characters different expressions was something that came only later once GFC figured out a way to do it, but it was something I had already been thinking about. He asked me to give the kids a small select of facial expressions; aside from the pre-existing neutral smile, I was also tasked with giving them a scared face for when they see William with the knife out or witness a kill, and a dead face for when... well, when William gives them the ultimate BONK on the head, I guess.
Scared is pretty straightforward, but what would be a dead expression? There are many ways one could go about it. So rather than making one, I made several dead faces with different designs, and left it up to GFC to pick up the "winner."
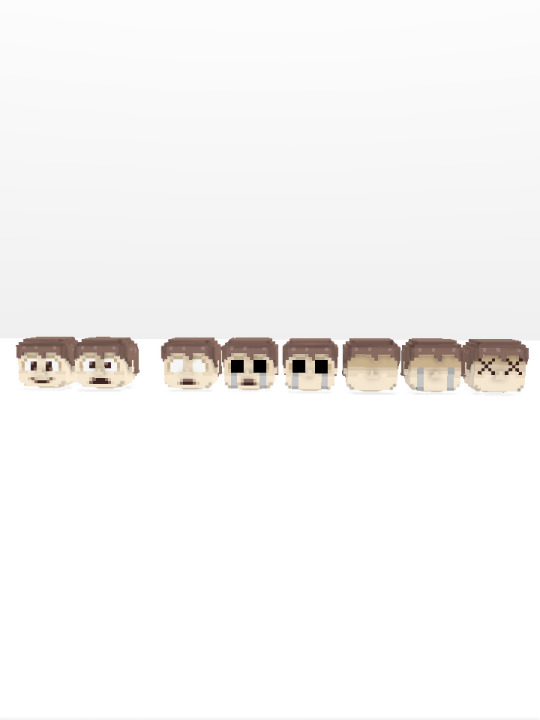
First is the default neutral smile, second is scared, and all remaining ones are different dead expressions.
I went for combinations of blank faces, empty/hollowed out eyes, tear marks matching the well-known children spirits in FNAF, as well as the cartoony X'd out eyes, which wound up being GFC's pick.
And with that we wrap up for now. These were my first steps in helping Killer In Purple 2 slowly become what it is now and my first contributions to the game (with the exception of the different expressions which we went for after a substantial amount of work.)
It all started with this little guy and his former soulless stare!
Stay tuned for whenever I decide to make new posts talking about other assets! ❤
#fnaf#fnaf fangame#killer in purple 2#kip2#jellycream art#jellycream speaks#voxel#voxel art#3d#3d art
2 notes
·
View notes
Note
This makes me wonder how much AI Art discourse is based on misunderstanding some pretty basic facts about how existing things work.
DALL-E and Midjourney use cloud computing for image generation, but they are not the totality of AI art;
If you just want to generate images you can download less than 10 gigs of Stable-Diffusion models to your home PC, and while there is a bunch of fiddly compatibility to work out in some cases, basically if you have a reasonably powerful Nvidia GPU from the last four or five years you can generate a set of four images on your home PC in less than a minute.
Now, everything has an impact of some kind on the environment, but "Buying a single GPU and using it at home during leisure time" strikes me as a very small impact that we generally don't worry much about.
Now, training your own models is a bit more resource intensive, apparently, but as far as I can tell in broad terms this is also fairly small in terms of, like, global cloud computing resources use (One source I found said training on Dreambooth on Google collab would cost you about $2.50 and take about 20 minutes).
Like, I think making a movie in Blender on your home PC is probably far more resource intensive and that still doesn't rise to the point that we should care.
So like... when people say that this stuff is just a collage is it possible that they aren't being metaphorical, but they actually think that's what's happening?
I've been thinking of that HBomberguy video on plagiarism where he calls AI art "complicated stealing" and I don't see how he can justify that at all, really.
Like, his own videos are monetized and use verbatim clips of intellectual property that he doesn't hold the copyright for, but he obviously doesn't consider that "stealing" from the copyright holder; a lot of his videos are actively hostile to their subjects as well, and in his plagiarism video he obviously feels that YouTube copyright claims can be used abusively.
Like, he really clearly subscribes to *some* kind of "Fair use" framework where one can not only use, but in fact *monetize* existing images and words without that constituting "theft".
There's a website called "Have I been trained" and as far as I can tell it doesn't do anything fancy to somehow reverse engineer training data; rather, *some* data sets used for AI training are transparent about what is inside them. In other words, the dataset credits all images that contribute to it, and have I been trained is a simple interface to search those existing credits.
So, HBomberguy can use, say, several verbatim video clips of Tommy Tallarico and monetize them for himself, and that isn't theft from Tommy Tallarico.
If I was to take *literally the exact same clips*, take screenshots of them, use them to train an AI model, list publicly the source of the model, and then use the model to generate an image, the resulting image *would* be theft from Tommy Tallarico.
I'm sorry but I really just don't see how that could possibly be the case, that the *more* you transform the source material the more it becomes plagiarism.
Okay, ai art is art, agreed. Sure. How ethical is it to use and promote a tool that not only is being used to replace human artist but also has a considerate negative impact on the environment?
is it ethical to be a CGI artist? (replaced other jobs, environmental impact). is it ethical to be a photographer? (replaced other jobs, environmental impact)
795 notes
·
View notes
Text
Notes on 3D Game Development in Game Maker Studio 2
Note: Originally published on r/gamemaker. Edited slightly to suit the new context.
Hello, this is Garrett Thompson, sole member of Act-Novel. Reality Layer Zero partially released recently, and so I felt that now was a good opportunity to go into a bit of technical depth on the project. Specifically, I wanted to write about how I made an engine primarily designed for 2D game development (Game Maker Studio 2) more amenable to 3D game development.
Game Maker 3D is sort of a niche topic, but if you're interested in doing some experimentation yourself, consider this a quick top-down look at how your project might end up being organized. I should note that I'm far from the only person doing this, and I may not be the most qualified to speak about it since I'm still learning things all the time, but I can share what I know, at least. First, though, I'd like to address a question that might be on your mind.
Why use Game Maker for this?
Granted, there are tons of engines out there that are much better at doing 3D than GM. You could simply download Unity or Unreal and develop inside of those very fully-featured 3D engines with very little start-up cost. On the other end of the effort spectrum, you could also simply cobble together your own engine from libraries and hotglue.
GM represents a kind of middle-ground between those two approaches, though. A lot of the basic math, graphics, and data structures stuff is handled for you, but you've got to implement the higher-level stuff-- 3D collisions, shaders, lighting, etc-- on your own. In some ways, that's a pain, but I find it also tends to keep your code simple enough that you can reasonably understand every little piece of it, which isn't always a case in a more fully-featured engine. In other words, you get many of the benefits of cobbling together your own 3D engine with fewer of the headaches.
For my project in particular, there's also a lot of 2D heavy lifting to be done-- I swear I spent about half a year just programming menus-- and that's certainly one area where the features offered by Game Maker offer more of a helping hand. The actual "3D" part of the code is, as you'll see later, not too complex, so the engine not having out-of-the-box solutions (to my knowledge) for 3D collisions or physics isn't too big of a set-back. In other words, whether Game Maker is going to act as more of a help or a hindrance is going to mainly depend on the project you're trying to make. That's largely true for both 2D and 3D-- although admittedly Game Maker's help-to-hindrance ratio for 2D games is probably substantially higher on average (versus 3D games).
So, with my obligatory Game Maker apologia out of the way, let's get into the specifics.
How do I even 3D?
The absolute basics of 3D are probably...
- Construct a polygonal primitive.
- Set-up a 3D camera.
There are already a number of tutorials for the camera bit. For learning both at once, I think I used this one. The GM documentation has a lot of good information here, too. Writing another how-to guide for this kind of thing would be, I think, somewhat redundant, so I won't do it!
However, what I will do is offer some insight for how to go from "I have a 3D camera rendering a polygonal plane to my screen" to "I have a way of reasonably making a 3D game."
How do I make a 3D scene?
Unless you want to construct all of your geometry in code (which, I mean, you're free to do if you want to), you'll probably want to use a 3D modeling tool for this (e.g. Blender). However, just modeling the scene won't be enough to get Game Maker to know how to render it. At some point you're going to have to *convert* that model to the internal vertex buffers that it expects. Fortunately, some smart people in the Game Maker community have written scripts to do just that. I believe I'm still using this one, even though more comprehensive solutions exist. I'm sure you can find one that suits your preferences with a quick Google search. You can also write your own, if you're handy with Blender extensions or the equivalent for your 3D modeler of choice.
Something I recommend before you get into modeling, though, is to organize all of the textures that will appear in your scene into one organized texture sheet (of power-of-two size, e.g. 256x256, 1024x1024, 2048x2048). Then, map the UV's of your model to the textures on this sheet. This will make it much simpler to tell GM what textures to put where whenever your model actually shows up in-game. You *can* combine meshes that use different texture sheets at runtime, but it's a bit of a bother, and why solve a problem with code when you can solve it with data?
Note: You can animate basically anything in the game by swapping out its texture at runtime with the next frame in a frame sequence. This is how I'm animating character sprites in 3D-- there's a 3D plane with a texture of one frame, but then that texture gets swapped with the next frame in the sequence, and so on. You can do this with a shader if you want to be, like, super-optimal with it, but it seems to also be mostly fine to just do it with the "separate texture pages" option checked in the sprite editor of the texture you want to use.
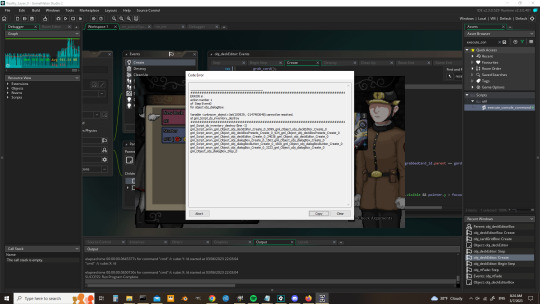
On the engine side, you can load the model inside of a game object, throw that game object into a room, and presto! In theory, everything should show up as you expect. In practice, though, sometimes you end up just seeing a black screen. This could be an issue with the camera position, or the scale of the model, or maybe you forgot to submit the vertex buffer in the Draw event, or really a million different other things. Maybe the model you're trying to load doesn't actually have any data in it?
Once you've got pixels drawing, though, you might be struck with a desire to make the scene more interactive. You *could* place game objects individually in the room editor, guessing about where everything should go and manually setting the Z-value of each in the instance creation code... but that sounds just awful, doesn't it?
So, what I ended up doing to make this process more visual and intuitive was to just treat Blender as a level editor in addition to a modeling tool. I duplicated the file I was using for the scene mesh model, combined all of the separate pieces into one "LevelMesh" object, and then started placing other objects (represented by default polygonal primitives-- cubes in this case) with descriptive names like "InteractableZone0", "Signpost8", "NPC2", and so on. The individual names for each unique object will be important later.
There's an intermediate step between setting up the scene in Blender and having it work in GM, which is, again, a data-conversion step. This time, instead of converting the data to a vertex buffer, it's being converted to JSON. If you're not familiar with JSON (how did you get this far in the post?), it's just a simple notation for objects (JavaScript Object Notation) that's remarkably similar to the struct syntax in GM. E.g. a JSON representation of a scene in Blender might look something like this (simplified for explanatory reasons):
"Scene": {
"LevelMesh": {
"baseName": "LevelMesh",
"x": 0.0,
"y": 0.0,
"z": 0.0
},
"InteractableZone0": {
"baseName": "InteractableZone0",
"x": 20.0,
"y": 40.0,
"z": 1.1111
},
"NPC0": {
"baseName": "NPC0",
"x": 42.0,
"y: 111.0,
"z": -22.8
}
}
You should definitely write (or borrow) an extension that converts your scene to JSON "automatically", since you'll probably have to tweak the positions of things and you'll want that process to be reasonably painless. The export script in this tool works splendidly, but the asset it's associated with (MMK) is dreadfully expensive if you're only using it for that purpose, and there's probably a cheaper solution floating around out there if you look for it. It doesn't have to be a special Game Maker JSON format-- just vanilla JSON will work fine.
Once you've got a JSON representation of your scene ready to go, you can load it into GM using the json_decode function. With the resulting ds_map in-hand, you can start generating instances.
In your room's creation code, load the map, step through it in a loop, and then each time you come across a new JSON object, create "some instance" according to the name (probably serialized as a "baseName" field) of the object. You'll probably want to create an engine-side ds_map that contains relationships between baseName strings and GM objects, e.g."InteractableZone0": obj_interactableZone3D, "NPC0": obj_characterController "LevelMesh": obj_exteriorScene
You can instantiate each of these according to the data in the scene JSON-- create them at the position specified, with the scale specified, and with any other encoded data you care about.
After instantiating each instance, you can configure them how you want to directly via their unique instance id, returned from the call to instance_create.
This... isn't exactly how I do things. Instead, I use a top-level "scene config" class to orchestrate the instantiation and configuration of each instance in a manner that's consistent, repeatable, and far less verbose. This might be a little bit too much engineering effort for a prototype, though, so you're free to bypass doing something similar if you wish.
--
So, with this, you've got a scene loaded, rendering, and with game objects instantiated inside of it, in the positions that you want them to be in, and configured how they ought to be. There's *probably* one major thing for you left to do, which warrants its own section of this post-- how do you get a character walking in here?
Height and Collisions
Movement in 3D is basically just movement in 2D, but with a z-axis. Thus, assuming you already know how to get a character moving around in 2D, doing it in 3D is just that, plus figuring out what your height (or z-value) ought to be.

More RGB than your custom PC.
At a glance: the left image contains height data (blue) of a scene, as well as the camera-restricted zone data (green) to keep the camera from moving out of bounds (this requires custom camera movement code, but it's pretty simple). The right image is the scene's collision map, where the red is "collision" and the black is... actually an "alpha" channel in the real collision map. You can technically put all three together in the same image, but in testing I found it was more efficient to treat the collision map as a separate image and use GM's built-in collision testing code (note: select "precise" on the image's collision settings).
The blue channel of the height-map on the left can be generated in Blender with a little bit of fiddling. The green channel, I added myself in GIMP. I also painted the collision map over the height map in GIMP, but exported it as a separate image.
The basic "high level" idea is that, for the height map, the "100% blue (i.e. a blue value of 255) areas represent the maximum height of the map (where the maximum height is defined "somewhere" in code), and 0% represents the minimum height (also defined "somewhere"). Every value between 0 and 255 is normalized at runtime to between 0 and 100, and then normalized again to somewhere between the minimum and maximum height. This is broadly the process we use to figure out the height (z-coordinate) of the ground at a given x/y coordinate.
You can do this with surface_getpixel, but that's excessively slow, so it's better to use a buffer. Once again, somebody already wrote code to enable this. Every time you need to figure out the height of a certain coordinate (e.g. how high-up the player character ought to be), you can just ask the height map in the buffer. But, wait, how do you know which pixel in the buffer to check?
The height-map and the 3D scene are not necessarily 1:1 scale. Unfortunately, this means that you'll have to "align the height-map" with the 3D scene manually. Personally, I wrote a tool that allows me to do this at runtime, and to then print the alignment information (e.g. height map x/y origin, scale) to the console. This process is a little bit tedious, and can sometimes result in things being ever-so-slightly off, but with enough fine-tuning you can get it "close enough" pretty consistently.
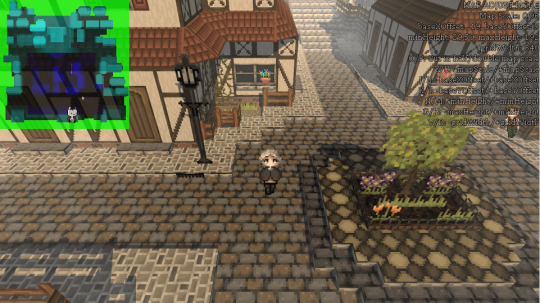
Top-left: The height map, and a sprite representing the player's absolute and relative x/y coordinates. Top-right: The map's current config information and adjustment controls.
The silver lining to this is that you can reuse the height-map configuration for the collision map, assuming the two images are 1:1, so you only need to get the map aligned once.
(Note: There might be better ways to do this. I'd love to hear about them.)
To keep the camera behaving, you're basically checking the same height-map buffer, but checking for green instead of blue, and checking for any value above 0 (since "camera movement" zones are binary-- either it's allowed or it isn't).
One downside of this single-height-map-based approach is that, naively, it doesn't support going under or over things, but there's actually nothing besides memory constraints stopping you from having multiple height maps for multiple different Z-values and just switching between them based on the player's current Z-position. You might be able to do something similar with collision maps to facilitate mechanics like, say, jumping, but I don't know for sure since I haven't tried doing that!
Always More to Do
With all of this done, you can now, potentially, pilot a player character around a 3D scene. Needless to say, that's still far away from what most games probably want to accomplish. You may not even be done fiddling with the lower-level 3D stuff by the time you've done all of this-- I didn't even get into implementing distance fog or lights and shadows (although that, too, can be done in Game Maker). There's also getting all of this to play nicely with however many UI surfaces you want to spin-up, and not to mention optimizing it to run reasonably-well on non-development hardware (hint: use vertex_freeze).
Nevertheless, this should serve as a pretty good foundation for anyone who's curious about GM3D. I'm sure many programmers can see a reasonable path forward from here on pushing this foundation through to actual full-on "game" status.
If I have instead only managed to dissuade you from investigating GM3D, I hope I have at least instilled a newfound sense of respect in you for early-3D game programmers, who doubtlessly had to jump through similar technical hurdles to get their projects up and running all those many years ago. Except they did it in C. And on calculator hardware. Without the internet! Yeesh!
#3D#reality layer zero#game maker studio 2#gms2#indiedev#indie games#programming#blender#technical#gamedev
0 notes