#InteriorWalls
Text

"Why did the construction manager want to break down the project into individual items like walls, floors, beams, and columns? So they could nail every detail!"
@anmksteeldetailing
@cpwworld
Tumblr
Twitter
Instagram
LinkedIn
#Walls:#WallsProject#exteriorwalls#InteriorWalls#PartitionWalls#Floors:#FloorsProject#GroundFloor#SecondFloor#ThirdFloor#FlooringMaterials#Beams:#BeamsProject#SteelBeams#ConcreteBeams#SupportBeams#Columns:#ColumnsProject#ConcreteColumns#SteelColumns#ColumnDesign
0 notes
Photo

Easy And Affordable Wall Decor: Ideas For Using Interior Film
Are you looking for a simple, budget-friendly way to give your home a fresh look? Look no further than interior surface film. The builders use this material to transform any wall into a work of art, and it's easy to install, making it a great DIY project for anyone. Here are some ideas for using interior surface film to decorate your home.
#walldecor#wall decor ideas#interiorfilm#builders#diy#interior surface film#homedecoration#gallery wall#interiorwalls#cabinet#decoratingtable
1 note
·
View note
Photo
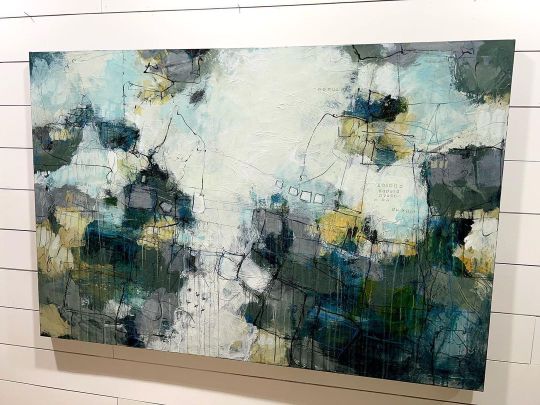
New painting!! 40x60 acrylic abstract painting. On Canvas with 1.5 gallery profile. I don’t have this painting listed on my website yet so if you are interested please send me a message. 😊 #art #largepainting #originalart #fineart #artforsale #localart #artforyourhome #interiordesign #interiorwall (at Town of Almonte, Ontario) https://www.instagram.com/p/Clt7bGFOiNF/?igshid=NGJjMDIxMWI=
#art#largepainting#originalart#fineart#artforsale#localart#artforyourhome#interiordesign#interiorwall
2 notes
·
View notes
Text
HPMC factory:
Widely used in wall putty,skim coat,tile adhesive,plaster mortar,paints,detergent etc.
Welcome to inquiry.
#HPMC#HydroxypropylmethylCellulose#Cellulose#TileAdhesive#ConstructionTest#BuildingMaterial#HEMC#HEC#tileadhesive#construction#adhesive#wallputty#terraceguard#TileandStone#tileAdhesive#constructionadhesive#constructionmaterial#constructionmaterials#constructionmaterialsupplier#painting#wallpaint#homepaint#paintcolor#interiorpaint#interior#exteriorwall#interiorwall#paint#tile adhesive#tile and grout maintenance
0 notes
Text


সবারই স্বপ্ন থাকে নিজের বসবাসের জায়গাটিকে একটা নান্দনিক ছন্দময় ডিজাইনে সাজিয়ে তুলতে।
যে কোন ধরনের সুন্দর সুন্দর ডিজাইনের কনসেপ্ট পেতে আমাদের পেজটি ঘুরে দেখুন।


#WallDecor#WallArt#WallDesign#WallInspiration#WallStyle#WallCraft#WallDetail#WallIdeas#WallAesthetics#WallTrend#WallFeature#WallInstallation#WallPattern#WallAccent#WallMural#WallPainting#WallHanging#WallStickers#WallDecals#WallGallery#WallShelves#WallPaneling#WallCladding#DecorativeWall#InteriorWall#ModernWallDecor#RusticWallDecor#VintageWallDecor#MinimalistWallDecor#ContemporaryWallDecor
0 notes
Text

Wall Painting Design for Home at Borabanda
*
*
*
#wallpaintingdesignforhome
#wallartpaintingideas
#besthomewallpainting
#paintingforhousewalls
#modernwallpaintingforhome
#wallpaintingdesignideas
#interiorwallpaintingdesign
#beautifulwallpaintingdesignandideas
#kidsbedroom
#3dwallpainting
#simple#tree#birds
#unique#color
#wallpaintinginhyderabad
#borabanda ect...
8333833355
040 40033355
0 notes
Text
Plastering - concrete plaster and estimations
Plaster can be characterized as lean mortar, generally used to cover workmanship surfaces (brickwork or stone works).
Mostly,we use plaster for interiorwalls of construction(houses,lintels,flooring,ceiling,etc)
They are lean combinations of restricting materials (lime or concrete) with filler materials like sand or squashed stone.
What's more, the most common way of covering surfaces with plaster is called plastering.
They are uncommonly ready for two reasons:
1. For improvement.
2. For assurance.
As an ornamental completion, plasters are utilized to give numerous appealing tones and finish plans for development and adds to asthetics as far as plan.
In defensive cover, plaster safeguards blocks or stones from direct disastrous assaults of air, rain,moisture and unsafe gases from manufacturing plants or enterprises.
Plastering alludes to the insurance accommodated a divider or roof as far as covering the surface by laying plaster (concrete plaster). Plastering is done to eliminate surface blemishes because of brickwork and to give smooth surface to painting.
Various sorts of plastering materials are used,but concrete plaster is utilized extensively.Some different kinds of plastering materials incorporate lime plaster,clay plaster, and so on
Step By Step Instructions To Apply Cement Plaster On Wall Surface:
Concrete Wall Plaster is generally applied in single coat or twofold coat.Cement plastering is regularly utilized as an optimal covering for the outside and inside surface of a divider.
Twofold coat plaster is applied where the thickness of the plaster is expected to surpass 15 mm or when it is important to acquire an exceptionally fine completion.
The most common way of applying a twofold coat concrete plaster to the divider surface comprises of the accompanying advances:
Stage 1 - Surface Preparation for Plastering.
Keep all the mortar joints of the divider thick, to give a decent attaching to hold the plaster.
Clean all divider joints and surfaces with a wire brush, there should be no oil or oil and so forth on the divider surface.
Roughen the whole divider to be plastered.
Wash the mortar joints and the whole divider to be plastered, and keep it wet for no less than 6 hours prior to applying concrete plaster.
Stage 2 - Groundwork for plaster.
The spots are fixed evenly on the divider and afterward in an upward direction a ways off of around 2 meters, covering the whole divider surface.
Through the plumb-sway, really look at the verticality of the spots.
In the wake of fixing the dabs, vertical portions of plaster, known as tirades, are framed between the dabs. These fill in as screw checks to keep up with plaster thickness.They hold the plasters and give consistency of surface.
Stage 3 - Applying first coat (or under coat or coat).
The proportion of concrete and sand for the principal coat plaster fluctuates from 1: 3 to 1: 6.
On account of block stone work the thickness of the primary coat plaster is in the ordinary 12 mm and on account of substantial workmanship the thickness fluctuates from 9 to 15 mm.
Apply the principal layer of plaster between the spaces shaped by screws on the outer layer of the divider. This is done through scoop.
Level the surface through level wooden floats and straight edges of wood.
Subsequent to evening out, pass on the primary coat to set however not to dry and afterward thicken it with a scratch instrument to key the second layer of plaster.
Stage 4 - Second coat (or completing coat or fine coat).
The thickness of the subsequent coat or completing coat might shift somewhere in the range of 2 and 3 mm.
The proportion of concrete and sand for the second layer of plaster shifts from 1: 4 to 1: 6.
Prior to applying the subsequent coat, dampen the main coat equitably.
To take out joining marks,the completing coat ought to be applied from beginning at top towards base.
Care to Taken After Plaster
Restorinz the works for at least 10 days to foster strength and hardness.Write the date of plastering on the divider/roof with an indelible marker. (So you can follow the relieving days).
All mortar squander adhered to dividers, floor, and MS sheet will be cleared after the day's worth of effort.
How to pick the right plastering material for House works?
Two central point to be considered in a plaster are surface assurance and material expense. In the event that the plastering quality increments and surpasses, the expense is impacted. Assuming cost is thought of and the nature of the plaster is given less significance then, at that point, surface security is compromised.
It should be adequately solid to support any environmental change all through the life expectancy of the design.
Plastering materials ought to be cheap and conservative.
The plastering material should have phenomenal functionality that can be applied during any atmospheric conditions (Hot or Cold).
Focuses in plastering task computations ought to be recollected:
The general thickness of the plastering should be at least 20 mm with two coats.
The proportions referenced in the plastering are the volumetric proportions of concrete and sand (previous concrete: sand = 1: 5, 1 piece of concrete and 5 pieces of sand in a mortar).
Concrete has a dry thickness of 1440kg/㎥
Weight of each sack of concrete = 50 kilograms or 110 pounds
Amount of each concrete sack =50 kg/1440 = 0.0348㎥
(Compute VOLUME OF 50KG CEMENT BAG)
Dry thickness of sand = 1600 kg/㎥
The Cement Plaster is done in two layers (two covers): the main layer of plastering is kept with a base thickness of 12 mm (for the most part between 12-15 mm) and this coat is utilized as a harsh coat or essential coat.
The subsequent coat ought to be kept with a thickness of 8 mm and is known as the plaster finish coat or optional coat.
For more - Tile Adhesive, Grout For Tile
0 notes
Photo

Swipe the slide to learn more. . . . . . #wainscotting #wainscottingdeco #wainscottingdesign #wainscott #wallpanellingdesign #wallpanelingideas #wallscoting #interiorwallartdesign #interiorwalldecor #interiorwallsolutions #interiorwalldesigns #interiorwalldecoration #interiorwalls #interiordesignerpune #interiorpune #interiorpuner #puneinterior #interiorfurniture #interiordesign #interiordesignindia #interiordesigns #interiordesignideas #interiorwallsolutions #interior123 #interiordesignlover (at Pune, Maharashtra) https://www.instagram.com/p/CaTwk0Js-4P/?utm_medium=tumblr
#wainscotting#wainscottingdeco#wainscottingdesign#wainscott#wallpanellingdesign#wallpanelingideas#wallscoting#interiorwallartdesign#interiorwalldecor#interiorwallsolutions#interiorwalldesigns#interiorwalldecoration#interiorwalls#interiordesignerpune#interiorpune#interiorpuner#puneinterior#interiorfurniture#interiordesign#interiordesignindia#interiordesigns#interiordesignideas#interior123#interiordesignlover
1 note
·
View note
Video
instagram
Restoration 1800s House @denisenelsondesign Ariadne&Charlie Painters . . . . . #ariadneandcharlie #paintingcompany #painters #paint #benjaminmoore #color #colorchoice #colorcombining #healingaloe #restoration #renovation #historichouse #plaster #interiorwalls #interiors https://www.instagram.com/p/BmdjLCehqfP/?utm_source=ig_tumblr_share&igshid=apuys88v76fy
#ariadneandcharlie#paintingcompany#painters#paint#benjaminmoore#color#colorchoice#colorcombining#healingaloe#restoration#renovation#historichouse#plaster#interiorwalls#interiors
1 note
·
View note
Photo

Abstract paintings available now! Take a look at the rest on my website. #abstractart #abstractmilwaukee #squarepaintings #interiorwalls #homedecor #interestinghomes (at Milwaukee, Wisconsin) https://www.instagram.com/p/CMH9Pa6HFCT/?igshid=1m3rnkxwsx99d
0 notes
Photo

#joker #wallportrait neon color work in udaipur . . Follow me 👉 @jags_art_udaipur . . . . Artist : @jagdish_menariya_artist Mob.96722269942 ______________________________________ #graffitiart #neonwallart #neon #neonpainting #neongraffiti #art #artistic #portrait #jokers #zoker #jokertattoo #colorfulwall #interiordesign #interiorwalls #wallmurals #ilustracion #wallart #udaipurblogz #udaipurdairies #instaudaipur #jaipur #chittodgarh #kotacityblog #ajmer #ajmersharif #cityoflakes #wallportrait #bobmarly #bobmarleyquotes (at Udaipur, Rajasthan) https://www.instagram.com/p/B9WgORbANQM/?igshid=10wvfep38xl9p
#joker#wallportrait#graffitiart#neonwallart#neon#neonpainting#neongraffiti#art#artistic#portrait#jokers#zoker#jokertattoo#colorfulwall#interiordesign#interiorwalls#wallmurals#ilustracion#wallart#udaipurblogz#udaipurdairies#instaudaipur#jaipur#chittodgarh#kotacityblog#ajmer#ajmersharif#cityoflakes#bobmarly#bobmarleyquotes
0 notes
Photo

Wonderful placement of a portrait and deliciously shabby wall! #midcenturypainting #art #interiorwalls #wallart #gallerywall #portraitpainting #vintageart https://www.instagram.com/p/B5GucnvHNTP/?igshid=sevmod1ww93e
0 notes
Photo

About a week ago I told you that I would share my tips on how to paint interior … A few week in the past I instructed you that I might share my recommendations on easy methods to paint inside partitions.
#about#diypainting#handcraftyourlife#homedecor#homeinspo#homestyling#homesweethome#interior#interiordecorating#interiordesign#interiorpaint#interiorpainting#interiorstyling#interiorwall#interiorwalls#livingroom#livingroomdecor#livingroomdesign#livingroomideas#livingroominspo#livingroominterior#livingroomstyle#livingroomwall#MadeWithLia#paint#painting#paintingtips#pocketofmyhome#share#wallcolor
0 notes
Photo

Monday Motivation Mixing textures and decorating a similar kind of furniture and accessories is a fun and creative way to have a subtle office look. Styling subtle and trendy textures combined with modern decoration patterns are the excellent combinations that bring life and a fresh vibe into office designs. Lets set your office space into a fun frilled enjoyable space. #officewall #officedecor #interiordesign #interiorwalls #mondaymotivation #wallpaper #wallcoverings #wallpaperart #wallinspiration #walltowallstyle #wallcolor https://www.instagram.com/p/B2dVp1rAAuD/?igshid=18z80gpyydf9
#officewall#officedecor#interiordesign#interiorwalls#mondaymotivation#wallpaper#wallcoverings#wallpaperart#wallinspiration#walltowallstyle#wallcolor
0 notes
Text


আকর্ষনীয় ডিজাইন আর স্থায়ীত্তের সমন্বয়।
আর মানসস্মত টেকসই ডেকোরেশন মানেই "Noha Gypsum Decoration"।
আমাদের রয়েছে দেশ-বিদেশের সর্বাধুনিক লেটেস্ট ডিজাইন ।


#WallDecor#WallArt#WallDesign#WallInspiration#WallStyle#WallCraft#WallDetail#WallIdeas#WallAesthetics#WallTrend#WallFeature#WallInstallation#WallPattern#WallAccent#WallMural#WallPainting#WallHanging#WallStickers#WallDecals#WallGallery#WallShelves#WallPaneling#WallCladding#DecorativeWall#InteriorWall#ModernWallDecor#RusticWallDecor#VintageWallDecor#MinimalistWallDecor#ContemporaryWallDecor
0 notes
Text

#Play School Compound Wall Art in Amaravathi School at Seethaphalmandi Hyderabad#*#playschoolcompoundwallart#simplecompoundwallideas#schoolwallpainting#playschool3dwallartpainting#contemporarypainting#primaryschool#paintingdesign#classroom#cartoonpainting#cartoonwall#paintingideas#schoolboundarywallpaintingdesign#interiorwall#nurseryschool#childcaredevelopment#playgroup#wallart#educationalwall#playarea#kids#amaravathischool#seethaphalmandi#hyderabad ect...
1 note
·
View note
Last Seen Blogs

frontrangetimber-blog
Front Range Timber

womanji
Life has many changes to it

nymp21
Imagines (all The
People)

tonybadillo
Tony Badillo
