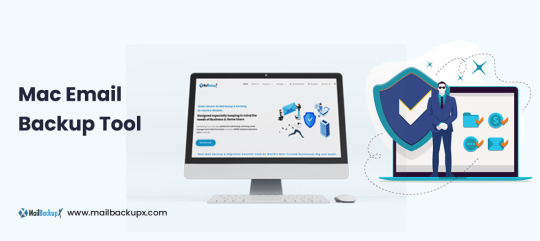
#Mac email backup tool
Explore tagged Tumblr posts
Visit Tumblr Blog
Explore Tumblr blogs with no restrictions, modern design and the best experience.
Last Seen Tumblr Blogs


Fun Fact
Tumblr.com is the 103rd most visited website in the world.
Text
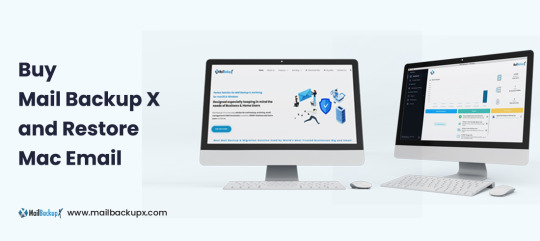
Backing up Apple Mail Smartly – A Simple yet Powerful Tool
Every email you’ve kept holds something. Like a client’s request, a friend’s promise, a receipt you’ll need someday. But Apple Mail wasn’t designed to safeguard these threads forever. For Apple Mail users, the mailbox grows organically, accumulating not just messages but layers of context. Yet without careful stewardship, these threads can become fragile, scattered across devices or trapped in formats that don’t adapt as needs evolve. This is the reason why Apple Mail backups are so important and often the essential part of the whole email system.

The true measure of an Apple Mail backup tool lies in how effortlessly it preserves this living archive while respecting the rhythms of your workflow.
Backing up Apple Mail comes down to storage. The emails flow constantly, folders expand, attachments multiply, and soon the archives grow larger than you anticipated. Where exactly you choose to store those backups shapes how effortlessly your backups integrate into your workflow. Mail Backup X understands this deeply, offering diverse storage solutions that adapt naturally to the distinct and varied ways you handle Apple Mail data.
Local Storage: Speed at Your Fingertips
Local storage remains the first choice for many, keeping backups within quick reach. Your Mac’s hard drive presents the simplest option. There's no intermediary, no reliance on network connectivity, and backups remain responsive because retrieval happens without delay. Mail Backup X makes local storage straightforward by giving direct access to any folder on your Mac.
It saves backup archives in a compressed .mbs format, neatly packaged and conveniently navigable. You select your preferred folder directly in the tool's interface, and the backups settle smoothly into place.
Mirrored Backups – Add Another Layer of Safety
For many users, an extra layer of storage safety matters. Mail Backup X addresses this through its mirror feature, allowing multiple copies of your Apple Mail backup to exist simultaneously. One copy could live comfortably on your Mac, another securely in the cloud, and yet another perhaps on an external hard drive. Each mirror syncs independently but consistently.
If one storage location becomes inaccessible or corrupted, your data remains safe within its alternate mirror. You never rely solely on a single copy. Mail Backup X maintains data integrity across multiple mirrors without complication.
Distributed Storage: Growing Without Constraints
Local storage, however, isn't always sufficient on its own. Apple Mail backups can expand without pause. As weeks turn into months and then years, storage limits begin to press.
Here, Mail Backup X offers distributed storage, a sophisticated yet uncomplicated answer. Rather than forcing a decision between multiple locations, the tool lets you combine several spaces into one cohesive storage strategy. Each chosen location holds a portion of your backup. When the primary location fills up, Mail Backup X shifts seamlessly to the next available space. It's an elegant solution for managing ever-growing archives without interrupting your routine.
Cloud Storage: Access Without Boundaries
Cloud storage offers advantages unique to itself. Mail Backup X integrates directly with popular cloud services, including Google Drive, Dropbox, and OneDrive. Cloud integration simplifies accessibility. You're no longer confined by hardware limitations or geographical locations.
Accessing your Apple Mail backup archives from different devices or locations becomes straightforward, providing flexibility beyond traditional storage solutions. The tool's intuitive interface guides you smoothly through selecting and configuring cloud spaces, allowing a painless setup process.
Encryption: Your Backup’s Security
If your emails are confidential or sensitive, Mail Backup X feature for encryption is going to be very important for you. Once you enable ‘Encryption’ in Profile settings, the tool automatically encrypts your backups regardless of storage location.
The encryption happens seamlessly in the background, requiring no technical knowledge from you. Your emails remain completely inaccessible to anyone without authorization, even when stored on third-party cloud platforms. There's no need for manual security checks or constant vigilance. Mail Backup X maintains this protection consistently across all your backup copies.
Portable & Isolated: The USB Snapshot Advantage
Another distinct strength of Mail Backup X emerges in its USB snapshot functionality. While all digital backups exist as data, USB drives offer something unique. It becomes a self-contained, movable copy of your emails that exists entirely on your terms. Mail Backup X's snapshot feature turns any external drive into a disconnected safe-deposit box for your Apple Mail backups.
Choosing Your Strategy: It’s About Your Workflow
Each storage solution within Mail Backup X aligns neatly with the specific needs of Apple Mail users.
Local storage prioritizes speed and convenience.
Distributed storage deftly handles expanding data volumes.
Mirrored copies build redundancy for critical data security.
Cloud integration offers unmatched accessibility and encryption layers.
USB snapshots bridge digital convenience with tangible reliability.
How you choose your storage isn't arbitrary. Mail Backup X presents these options clearly, anticipating rather than dictating your choices. The goal is always intuitive integration, avoiding disruption of the established patterns you've developed in managing Apple Mail. The tool’s approach to storage recognizes individual workflows and provides tailored adaptability instead of a one single solution for Apple Mail backups for everyone.
Ultimately, selecting storage for Apple Mail backups involves understanding your relationship with email management itself. If accessibility matters most, cloud solutions offer clear advantages. If security feels paramount, encrypted storage and mirrored backups stand out. For simplicity and immediacy, local or USB drive options resonate deeply. Distributed storage elegantly handles volume and long-term growth without fuss.
Mail Backup X doesn't dictate your backup storage strategy but rather enhances it. By offering clear, flexible choices, the software adapts naturally to diverse usage scenarios.
The emphasis remains on empowering you to backup Apple Mail effectively, respecting your individual preferences and practical necessities.
Backing up Apple Mail becomes a thoughtful practice but never overwhelming. The right storage spaces ensure backups integrate effortlessly into your workflow. Mail Backup X enables precise, practical management of Apple Mail data, always aligning closely with your evolving needs. Your choice of storage location subtly but meaningfully shapes how smoothly your email backups perform and how confidently you navigate your archive.
Experience It Firsthand with the Free Trial
Before committing, why not see how Mail Backup X fits into your workflow? InventPure, the company behind the software, offers a fully functional free trial without any limitations. Back up real emails from your Apple Mail database, test searches, restore messages, and explore every storage option just as you would with the full version.
It’s designed to give you an honest assessment for how the tool handles your actual Apple Mail backups, not just a demo. If it doesn’t make your backup process simpler and more reliable, you’ll know before spending anything or committing to a subscription.
0 notes
Text
Convert JPG to HEIC in Seconds – No Software Needed!
If you’ve ever tried uploading high-resolution photos but hit a storage wall, you’re not alone. With phones and cameras capturing bigger and better images, we’re all looking for smarter ways to save space without losing quality. That’s where HEIC comes in—and the best part? You don’t need to install a thing to make the switch from JPG to HEIC.
Let’s walk through how to do a quick, hassle-free JPG to HEIC conversion using a free online image converter—no downloads, no stress.
Why Convert JPG to HEIC?
Before we jump into the how, let’s look at the why.
HEIC (High Efficiency Image Coding) is a modern photo format used by Apple devices and increasingly supported across platforms. It delivers high-quality images at significantly smaller file sizes compared to JPG.
Here’s what that means for you:
Save storage – HEIC files can be up to 50% smaller than JPGs
Maintain quality – Less space doesn’t mean less sharpness
Faster uploads – Smaller files mean quicker sharing and uploading
So if you’re managing dozens—or hundreds—of images, switching formats can make a real difference.
The Easiest Way to Convert JPG to HEIC (No Software Needed)
You don’t need Photoshop. You don’t even need to install a converter app.
With the A2ZConverter.com, you can convert JPGs to HEIC in seconds using a free online image converter. It’s designed to be simple, fast, and totally browser-based.
Here's how to do it:
Go to A2ZConverter.com
Choose the "JPG to HEIC" tool from the homepage or image converter section.
Upload your JPG file (or drag and drop it into the box).
Click “Convert” – and that’s it!
Download your new HEIC file instantly.
No sign-ups, no software installs, no waiting.

Who Should Use This JPG Converter?
This tool is perfect for:
Photographers who want to optimize storage
iPhone users needing cross-device compatibility
Web designers minimizing image size for faster loading times
Everyday users trying to email or store photos without running out of space
Basically, if you have a JPG and want a smaller, smarter version of it, this online image conversion tool gets the job done.
Key Benefits of A2ZConverter’s Free Online JPG to HEIC Tool
Let’s break it down. Why choose this tool over others?
✅ Free to use – No hidden fees or trials
✅ No installation – 100% web-based
✅ Fast conversion – Get results in seconds
✅ Supports batch uploads – Convert multiple images at once
✅ Safe & secure – Files are deleted after conversion
✅ Mobile-friendly – Works great on your phone or tablet
Whether you’re on a desktop or browsing from your phone, A2ZConverter makes image conversion painless.
Pro Tips for HEIC Conversion
Want to get the most out of your HEIC files? Here are a few things to keep in mind:
Not every platform supports HEIC yet. While modern iPhones, Macs, and some Androids do, older Windows systems or websites might not. Consider keeping a JPG backup if compatibility is a concern.
Use batch conversion when dealing with albums or project folders—it saves tons of time.
Label your files clearly after conversion so you know which versions are HEIC and which are JPG.
This kind of planning can save you headaches later.
What Makes HEIC a Smart Choice?
You might be wondering: is it really worth switching?
The short answer: yes, especially if you handle a lot of images.
A typical 5MB JPG photo might compress down to under 2.5MB as a HEIC—with no noticeable loss in quality. Multiply that by 100 or 1,000 photos and you’ve suddenly freed up gigabytes of space.
That’s a win, whether you’re backing up your vacation pics or managing client files.
Bonus: Other Free Image Tools You Might Love
While you're at it, A2ZConverter offers other handy tools worth exploring:
PNG to JPG
HEIC to JPG (for when you need to go back)
JPG Compressor
WebP Converter
All are available online, and all are 100% free. Think of it like your personal image conversion toolkit—always available, always simple.
Final Thoughts: Convert Smarter, Not Harder
Image conversion shouldn’t be a chore. With a reliable, free online tool like A2ZConverter’s JPG to HEIC converter, you can streamline your photo storage and never worry about bloated file sizes again.
So next time you're running low on space or just want more efficient image handling, give it a try. It only takes a few seconds.
Ready to make the switch? Head over to A2ZConverter.com and try the free online JPG to HEIC converter today. No installs. No fuss. Just smarter images.
#jpg to heic#jpg to heic conversion#online image converter tool#online image conversion#free online image converter
0 notes
Text
4 Simple Methods to Shrink Your JPEGs

Reducing the size of JPEG images is crucial for anybody looking to increase website loading speed or conserve storage space. Smaller JPEGs use less bandwidth, load more quickly, and are simpler to share. Whether preparing images for your website, emailing them, or just trying to save storage space on your computer, shrinking your JPEG files can be a highly useful skill. In this extensive tutorial, we'll be going through four easy steps on how to reduce your JPEGs and some answers to questions people have when trying to shrink them.
Before you see the real methods for shrinking your JPEG files, though, you first understand how JPEGs function and why you would want to reduce their size.
What is a JPEG and How Does it Work?
In 1992, a compression standard known as JPEG, or Joint Photographic Experts Group, was developed. JPEG is amongst the most prevalent image representation forms on the web and in photography. It's popular because the file size for images can decrease without compromising quality.
JPEG is a lossy compression that discards some of the information from the original image while compressing. Sometimes, this data loss in the given image goes unnoticed by the human eye when the compression is moderate; however, the better you compress a JPEG, the more significant the loss in quality becomes.
JPEG compression is done by discarding less important visual information, such as small color details that the human eye is not very sensitive to. That allows it to compress significantly in file size, while being mostly useful with images having complex color patterns, such as photos. Still, JPEG-compressed images are quite large, so they may sometimes be shrunk further for efficient storage and faster online loading.
Learn how to make your photos look cool in Google Slides.
Why Shrink Your JPEG Images?
Here are a few main reasons for compressing a JPEG image.
Saving Storage Space: Generally, larger sizes of JPEG consume much of your computer's disk space on your phone or even the cloud storage; by shrinking JPEG, you allow more free space for other files to reside.
Faster Website Load Times: For a website owner, large image files can make your web page take longer to load. Smaller JPEGs help enhance page load times, which can be significant for user experience and search engine optimization.
Easier Sharing: Smaller JPEGs are easier to share through email, messaging, or even social networks. It requires less bandwidth and is uploaded much faster.
Faster Backups: The smaller sizes of the file will take much less time to upload to either cloud storage or even to an external hard drive, hence offering faster and quicker backups.
Effortlessly enhance your images using PhotoCut’s AI Image Upscaler.
How to Shrink a JPEG on Windows?
In case you need to shrink a JPEG on your Windows PC, there is an easy way around it. One easy tool is the Photos app. You don't need to download anything else; you can accomplish anything with only one app. This is the process for compressing a JPEG on a Windows PC.
On your PC, find the JPEG picture you want to compress. Double-clicking on it will launch the Photos app by default.
Tap Resize from the drop-down menu that appears after clicking the three dots in the Photos app's top right corner.
You have a range of preset sizes from which you can choose. For example, Small, Medium, or Large; or else, you could go for Define Custom Dimensions so you can put in your preferred pixel dimensions. Be sure to tick the Maintain aspect ratio so the image isn't distorted.
Once you've reduced the size of the image, click Save As and save your new, smaller JPEG file. This file will take up much less storage space but should remain at an acceptable quality level.
Quickly resizing your JPEGs without the need for additional software is possible using the Photos app.
How to Shrink a JPEG on a Mac?
If you're a Mac user, you can utilize Preview to reduce the size of your JPEG file. Here's what you ought to do:
Open Preview and locate the JPEG image you want to shrink. You do this simply by double-clicking on the JPEG image.
Preview View the Tools menu at the top of the page and select Adjust Size. You will see a dialog box where you may adjust the image's pixel size by either entering individual pixel values or changing them by a percentage. It is typically adequate to resize an image to around 50–60% of its original size for Web use.
The file size will automatically appear in the Resolution section of Preview. This will give you an idea of the space you have saved.
Once you've resized it as per your requirement, click OK to let it save the image in the compressed version. You'll then be able to share or upload it easily due to its now decreased size.
Preview is a dependable tool for shrinking JPEGs on your Mac with a simple process and time-saving efficiency.
How to Shrink a JPEG in Photoshop?
Adobe Photoshop is an excellent image editor program, containing the most elaborate tools for the compression and resizing of JPEG images. Below is how you can simply use Photoshop to shrink JPEG by following the following steps:
Open Photoshop and the JPEG image you want to compress.
In the top menu of the screen go to Image Size. In this dialog box, you can now change the Resolution to 72 PPI if you are doing web use. You can now also change the Width and Height dimensions as you need.
Photoshop has many resampling methods that control how the pixels get adjusted when you resize the image. For most high-quality output, Bicubic Sharper is usually your best bet.
Now compress the JPEG a bit by selecting File > Save for Web. Here you will find a Quality slider with which you can get the right balance between the size of your file and image quality. The usual quality for web use would be 60-80%.
Once you have it the way you want it, click on Save to save your compressed JPEG file.
This offers a great deal of control over the compression and resizing process, making Photoshop the best for professional photographers or those who require high-quality adjustments in images.
How to Shrink a JPEG Using an Online Compressor?
For someone who needs to compress an image and doesn't need software for installation, they can use online compressors. Here is one very popular and effective tool, PhotoCut's Online Image Compressor, and how you can compress your JPEG using an online tool:
Go to PhotoCut's online compressor, and upload the JPEG you'd like to shrink.
Using an internet connection, the tool will automatically determine your image's dimensions. Manually enter the width, height, or percentage to resize the image. Just remember that checking Maintain Proportions will avoid any distortion.
This will download the resized image once it compresses the photo. The file will now be smaller, and faster to upload, or share online.
Online compressors are fast and easy to use, having no technical requirements attached to their use. They are perfect for users who have to shrink JPEGs on the go.
Tips for Compressing JPEGs Without Losing Quality
Shrinking JPEGs can easily result in a great loss of quality. Here are a few simple tips on compressing JPEG without sacrificing too much visual integrity.
Choose the Right Compression Level: JPEG also gives you the option to change compression. A higher degree of compression of 80-90% will minimize loss of quality; however, the file will be much larger. A lower degree of compression of 50-60% will provide a much smaller file but with visible artifacts like blurring.
Crop the Image: If an image has too much white space or blank regions, crop it before compressing. This will save on file size and deliver the salient parts of the image.
Choose the Correct Format: PNG for transparent pictures and GIF for animations are options if you don't need every feature of a JPEG. Because lossless compression is used in each of these formats, no quality is compromised during compression.
Keep Backup Files: Always have a backup file of the original high-quality version before compressing images. In this way, you can always revert to the original if the compressed file does not meet your requirements.
Learn everything you need to know about removing filters from photos.
Conclusion
Shrinking JPEG images is a very necessary activity for people seeking to save storage space, enhance websites, or share images more efficiently. Whether using what comes with the Windows or Mac, more advanced software such as Adobe Photoshop, or even online tools, there is more than one way to miniaturize these JPEG files. Knowing the additional techniques and advice this article supports can help you reduce the size of your JPEGs without significantly deteriorating the image quality, making them appropriate for daily usage.
Find the best one-word captions for Instagram and post templates.
FAQs
Q1. Why would I want to shrink my JPEGs?
Ans. By shrinking JPEGs, you get to save much space on your device, thus uploading files easier, websites quicker to open, and sending through emails or even social media platforms makes it easier to share content online without exhausting too much bandwidth.
Q2. What does it mean to "shrink" a JPEG file?
Ans. A JPEG can be shrunk to make it smaller. Reducing the image's width, height, and proportions, or compressing the image to lessen its data, are common methods. Keeping the file size as small as possible without sacrificing quality is the goal.
Q3. Will shrinking my JPEG always degrade the image quality?
Ans. Yes, JPEG is a lossy compression format. This means that shrinking or compressing an image will result in some loss of quality. However, the amount of quality loss can be minute and hardly noticeable unless it is compressed to a high level. The difference is to find the right balance between file size and acceptable quality.
Q4. How can I shrink JPEGs without using software?
Ans. Many free online tools exist where you can reduce JPEGs without downloading any software. Some of the more popular ones include TinyPNG, JPEG-Optimizer, and PhotoCut's Online Image Compressor.
Q5. What is "compression level" and how does it affect JPEG shrinking?
Ans. Compression level refers to how much image data is discarded during compression. A higher compression level reduces the file size more but can introduce visible quality degradation. Lower compression levels retain more image data, preserving quality but resulting in a larger file size.
0 notes
Text
Expert Apple Technicians Recover Crashed Mac Drives
A crashed Mac drive can stop everything in its tracks locking you out of your system and making essential files seem permanently lost. Whether it’s your work machine, personal laptop, or a studio Mac with years of creative projects, a drive crash can feel like a digital disaster. The good news? Expert Apple technicians recover crashed Mac drives every day using tools and techniques specifically designed for Apple hardware and macOS.
If your Mac suddenly won’t boot, is stuck on a loading screen, or displays disk errors, now is the time to call in certified professionals who know exactly how to restore your system—and your data.
What Causes a Mac Drive to Crash?
A crashed drive can occur due to a number of issues, often without warning. Some of the most common causes include:
Hardware Issues
Aging or worn-out hard drives (especially HDDs)
SSD corruption due to bad memory cells
Power surges or unexpected shutdowns
Overheating or physical damage (e.g., from drops)
Software Problems
Failed macOS updates or installations
File system corruption (APFS, HFS+)
Malware or third-party software conflicts
Improper shutdown or forced restarts
A crash can make your Mac unbootable, freeze on the Apple logo, or display a flashing folder with a question mark—indicating your system can't locate a valid startup disk.
Why Trust Expert Apple Technicians?
When it comes to recovering data from a crashed drive, not all recovery services are created equal. Apple-certified technicians bring unique advantages:
Trained in Apple-Specific Systems
They have expert knowledge of macOS, Apple’s custom hardware, and unique security features like FileVault and the T2/M1/M2 chips. These systems require precise handling for successful recovery.
Access to Specialized Tools
From proprietary Apple diagnostics to advanced recovery utilities, certified technicians use industry-grade tools to recover data without causing further damage.
Safe Handling of Encrypted Drives
If your Mac uses FileVault or has a security chip, standard data recovery attempts may fail. Apple technicians understand the correct protocols to access encrypted data—securely and legally.
High Success Rate
Thanks to their experience and equipment, Apple experts boast much higher recovery rates than generic repair shops or consumer software solutions.
The Recovery Process, Simplified
Apple technicians follow a structured, step-by-step approach to recover crashed Mac drives:
1. Initial Assessment
Technicians begin by diagnosing the drive using Apple’s diagnostic tools and external recovery systems to determine the nature and extent of the crash.
2. Non-Invasive Cloning
If the drive is still accessible, a bit-by-bit clone is created to preserve the data and prevent further corruption during the recovery process.
3. Deep File Recovery
Using specialized tools for APFS, HFS+, and encrypted volumes, technicians extract data from the cloned image or directly from the original drive.
4. Data Verification
Recovered files are checked for completeness and integrity, ensuring they are usable and error-free before delivery.
5. Data Delivery & Backup Solutions
Your recovered files are returned to you on an external drive, cloud storage, or a replacement Mac. Apple experts can also help set up Time Machine or iCloud for ongoing protection.
What Can Be Recovered?
Depending on the condition of the drive, Apple technicians can often retrieve:
Documents, spreadsheets, and PDFs
Photos, videos, and music libraries
Email files and app data
iMovie, Final Cut, and Logic Pro projects
User profiles, preferences, and settings
Complete drive images or partitions
Even partially corrupted or encrypted files may be recoverable with the right tools and experience.
Warning Signs of a Failing Mac Drive
Don’t wait until your Mac crashes completely. Contact an expert if you notice:
Frequent crashes or freezes
Mac is stuck on the Apple logo
Apps take unusually long to open
Disk Utility reports drive errors
Files mysteriously disappear or won’t open
Clicking or buzzing noises (on older HDDs)
Catching these early can significantly improve the chances of a successful recovery.
Tips to Prevent Future Drive Crashes
After recovery, Apple experts often recommend proactive steps to prevent another data loss event:
Use Time Machine: Apple's built-in backup system can automatically protect your files.
Enable iCloud Syncing: Especially for documents, desktop files, and photos.
Avoid Forced Shutdowns: Always power down your Mac properly.
Keep macOS Updated: Regular updates patch security holes and improve disk management.
Don’t Ignore Disk Utility Warnings: Run First Aid regularly to fix minor errors before they grow.
A crashed Mac drive doesn’t mean all is lost. With the help of certified professionals, Apple technicians can recover data from even the most stubborn drive failures. Their deep knowledge of Apple systems, secure practices, and advanced recovery tools ensure you get the best chance at saving your data—quickly and safely.
If your Mac is showing signs of a crash or has already failed, don’t delay. Reach out to certified Apple experts today and take the first step toward recovery and peace of mind.
#iPhone Battery Replacement#Iphone Repair#Macbook Repair#iPad Screen Repair#macbook battery replacement
0 notes
Text
Price: [price_with_discount] (as of [price_update_date] - Details) [ad_1] K7 Ultimate Security Antivirus Software is fully loaded Windows Threat Protection, Anti Malware, Anti Ransomware, Email Scanning, Vulnerability Scan, Exploit Protection Advanced PC Security with System Monitor, USB Vaccination, External Device Scanning, External Device Blocking, Webcam Protection, Data Locker .Internet Security has Smart Firewall, Wi-Fi Advisor, Intrusion Detection & Prevention, Website Filtering, Browser Protection, and Drive-by-Download Blocking .Web Protection has a Safe Search, Safe Surf, Anti-Spam, Phishing Site Blocker, Malicious Site Blocker, Identity Protection Privacy/Parental Controls which Category Based Website Blocking, Cookies/ActiveX/Java Applets Blocking, Ad Blocking, Application Control. Data Backup & Restore Local & Network Backup, CD/DVD/USB Backup, Quick Data Restore from External Devices .PC Tuneup Tools for PC Optimization Mac.Real-time Protection, Total Malware Detection, Detects Mac and non-Mac Threats, Scheduled Scans Android .Anti-theft, Malware Protection, Device Tracking, Remote Data Wipe, Storage Protection, Web Protection, Wi-Fi Advisor, Burglar Alarm, Location Monitoring (Parental control), Application Privacy (Audit), Contacts Backup and Restore iOS. Anti-theft, Device Track, Burglar Alarm, Location Monitoring, Contacts Backup and Restore, Web Protection, Safe Surf, Data Usage Monitor, Social Network Privacy Scan. Multiple Layers of Protection: Safeguards your laptop, PC’s, Macs, tablets and smartphones against Viruses, Malware, ransomware, Spyware, Phishing and ensures secure browsing Digital Freedom: Work, surf, bank and shop in complete confidence, Ultimate Security Antivirus provides Zero-day protection using our ultra-fast, incredibly intelligent Cerebro Scanning Engine. Webcam Protection & Parental Control[Windows]: Prevents unauthorized applications and hackers from spying on you by blocking access to your webcam. K7 Ultimate Security Antivirus ensures kids’ privacy & safety on online by applying parental & privacy Measures. Backup & Restore: Ultimate Security’s complete protection prevents loss of important data by enabling you to back up all data and restoring whenever you want [Windows]; backup and restore Contacts [Android, iOS]. Email Delivery Instructions given in the description. Please ready fully for better understanding and ease of installation. [ad_2]
0 notes
Text
Everything You Need to Know About GU iCloud: Features, Benefits, and Setup Guide

In the digital age, cloud storage solutions have become essential for storing and managing data efficiently. GU iCloud is one such platform that offers a seamless and secure environment for users looking to store, share, and sync their files. This guide will explore the features, benefits, and tips for effectively using GU iCloud, helping you maximize your cloud storage experience.
What is GU iCloud?
GU iCloud is a cloud storage service designed to provide users with a flexible and reliable way to store their data. It allows for easy access across various devices, ensuring that your important files are always at your fingertips.
Key Features of GU iCloud
Cross-Platform Accessibility: Access your files from any device, including smartphones, tablets, and computers, with an internet connection.
Robust Security Measures: GU iCloud employs encryption protocols to safeguard your data, ensuring it remains protected from unauthorized access.
User-Friendly Interface: The intuitive design makes it easy for users of all skill levels to navigate and manage their files efficiently.
Real-Time Collaboration: Share files and collaborate with others in real-time, enhancing teamwork and productivity.
Benefits of Using GU iCloud
Utilizing GU iCloud provides numerous advantages that can enhance your overall data management experience.
Enhanced Accessibility
GU iCloud allows users to access files from anywhere, making it ideal for individuals and teams on the go.
Automatic Backups
Your data is automatically backed up, reducing the risk of loss due to device malfunctions or accidental deletions.
Scalable Storage Options
GU iCloud offers various storage plans to accommodate different user needs, from basic to extensive storage solutions for businesses.
How to Set Up GU iCloud
Getting started with GU iCloud is straightforward. Here’s a step-by-step guide:
Creating Your Account
Visit the GU iCloud website and sign up for an account by providing your email address and creating a password.
Downloading the App
Install the GU iCloud app on your devices—available for iOS, Android, Windows, and Mac—and log in with your credentials.
Uploading and Managing Files
Once logged in, you can upload files by dragging and dropping them into the app or using the upload button. Organize your files into folders for easier access.
Frequently Asked Questions
Q1. What types of files can I store on GU iCloud? GU iCloud supports various file types, including documents, photos, videos, and music.
Q2. Is my data secure with GU iCloud? Yes, GU iCloud employs strong encryption and security measures to protect your data from unauthorized access.
Q3. Can I share files with non-GU iCloud users? Yes, you can share files via links, allowing non-GU iCloud users to access shared documents easily.
Q4. How do I upgrade my storage plan? A: You can upgrade your storage plan directly through the GU iCloud app or website by selecting the desired plan.
Conclusion:
GU iCloud is an invaluable tool for anyone seeking efficient data management and secure storage solutions. With its robust features, user-friendly interface, and scalability, GU iCloud caters to individuals and businesses alike. By following the setup guide and utilizing the tips provided, you can ensure a smooth experience and make the most of your cloud storage. Embrace the power of GU iCloud and simplify your digital life today.
0 notes
Text
Top Data Recovery

Data recovery solution can safeguard against mishaps and guarantee maximum productivity and uptime. We offer a comprehensive data recovery solution for both Mac and PC users. The company provides solutions for individuals, teams, and businesses facing the challenge of lost or corrupted files. There are some red flags to watch out for from Wondershare that leave us a little worried about the company's overall reputation. Our latest version of the data recovery software can reconstruct and recover damaged RAID arrays, and it does so quickly and with unique non-intrusive read-only algorithms. The best data recovery tools feature quick scans, which allow you to scan and recover recently deleted or lost files easily without impacting the state of the storage device - Hard Disk Data Recovery.
Whether it’s a small mistake on your computer’s hard drive or data loss in your USB flash drive or SD card, it can handle it with ease. We offer data recovery service. If you find another free data recovery software. The search function, able to search for specific file types and thus speed up the process in some cases, is another highlight, although we would have liked to see sorting and exclusion filters. We had a hard time quantifying this free allowance on our tests, We specifically state they can recover devices that have suffered liquid damage and/or mechanical failures. We spend hours testing every product or service we review, so you can be sure you’re buying the best - SSD Data Recovery.
Data Recovery is the best data recovery software for businesses that need to recover large amounts of data. It offer a wide range of features, including the ability to recover data from SSDs, and it has a very high success rate. Its advanced features include email repair, email converter, file repair, server backup, data recovery and erasure. Businesses use data recovery software to protect themselves from data loss due to user error, hardware failure or software corruption. For more information please visit our site https://www.nowdatarecovery.com/
0 notes
Text
Mac Gmail backup facility with no extra efforts on the clients’ part
To carry Gmail backup is quite important if you wish to keep your data secure. It is the methodology that you choose for the same that would determine how the experience goes for you. Before you decide on which facilities you want in the Gmail backup software you should first have thorough information about the mail account, get it here- . Avoid using a freeware as it can cause harm to your precious data and thus cause irrevocable damage.

How to Gmail backup that is regularly effective on a long term?
The Gmail backup tool that can provide the same facility to other mail clients as well- Mail Backup X is the best every software you will come across for mail backup as well as archiving. It has got several superb inbuilt qualities that keep the mail backup process quite smooth and free of hassles. Everyone can try out the software for free for Gmail email backup as a free demo version of it available here.
Gmail backup facility relevant for other mail clients as well
This software functions quite well as a Gmail backup software as well as for other major mail clients. It can be used to backup and archive data from Gmail as well as Hotmail, yahoo mail, apple mail, outcook, postbox and thunderbird. It can also be used to change the format of the data files of these mail clients as it is compatible with them all. It can be thus used to change the format of the data files to and from .eml, .rge, .pst, .olm and .mbox. This makes it quite easy to share data to various platforms.
Auto-USB backup and inbuilt ftp client
The data files stored in usb cables can be automatically updated by this software as it smartly remembers the data folder name and its location in the database. To enhance the safety of the data after the backup they are saved in the pdf form. That procedure also makes them altogether safer and more shareable. Also, they are stored in the proper sequential order so that it does not get tough to find them.
It is possible to carry both primary backup and mirror backup with this software as it comes with an inbuilt ftp client. Keeping that tool active makes it easier to have a copy of all the data ready as it keeps arriving in the system.
Intrinsic ability to save storage space and to find data files instantly
While backing up your data this software also makes sure that you never run out of storage space. It religiously backs up your data, but also makes sure that the files are compressed before being stored. Also, it gets easier for the users to find out data files as there is an ultra-fast data search facility available with it which is also relevant for complex files.
You can get either the free demo version from the link below, and later upgrade to the full version or get the full version directly from the link below www.mailbackupx.com/make-backup-of-gmail-emails/.
youtube
#gmail backup#backup gmail#gmail backup tool#backup gmail mail#gmail backup software#gmail mail backup#gmail email#Youtube
1 note
·
View note
Text
G Suite Mail Backup Tool

Every business and profession faces risks that can take the menacing form of data loss. This is the reason why we must take effective measures to have the better of these risks. Since digital data is the very life force fueling a business, every effort must be made to repel any chances of data loss. A large chunk of digital data is present in the form of emails and these must be well protected by installing antimalware systems. But this is not enough; we also need data backup and recovery systems to keep data loss at bay. Therefore, we must use professional, third party tools which are way cheaper than expert services and way more convenient than manual methods to backup G suite or any other email service.
G suite backup with a tool that caters simplicity in usage
In order to backup emails with ease we so yearn for, we need a tool that caters user friendly features. It must enable users to personalize an email archiving session. No matter what volume of data is thrown at a tool, it must deliver flawless results. It must issue valid usage license to users and should come decked with an easy plus smooth interface. A tool should not shrink our wallets by overcharging us. If you want to backup G suite email with such a features-packed tool, then you cannot go wrong if you stamp your approval on Mail Backup X.
Mail Backup X- a professional G suite mail backup tool with user friendly features
Mail backup X is a tool that beats the exorbitant professional services in the area of pricing with its highly affordable price tag. This tool also beats the professional services when it comes to the sheer range of features on offer. Easy to use even for beginners, this tool maintains its peak and flawless performance on both Windows and Mac devices. It is compatible with a huge number of email services, which makes it a cost effective solution. Another thing that makes it an even more cost effective choice is this tool's untiring ability to cater the whole range of email management tasks like email migration and restore. You can customize an email backup, restore or achieving session in the light of your unique needs. The level of flexibility on offer from this tool is second to none. You can choose between full and selective backups. PDF archiving feature is also present. Your data is duly encrypted to present no chance to internet threats to meddle in your private affairs. You can also G suite mail contacts backup, which evidences the fact that this tool assures complete data retention. It is updated on a regular basis, which explains the reason why its smooth performance on both Windows and Mac is well sustained.
How to backup G suite email in a manner that affords significant savings in storage space?
To reap significant savings in storage space, you can throw the weight of your trust on this tool that has the unique ability of 3x data compression. The data compression algorithm employed by this tool has been fully tested, so there are no question marks about its safety. Even while using such a high degree of compression, you are assured of complete data retention. Even the folder hierarchy is not messed up during this process. 3x data compression will increase the rate of data transfer thereby leading to faster and effortless results.
G suite email backup that is safe as well
No matter how precarious the outside circumstances are, this tool will keep your data safe by using effective remedies against data theft. Encryption takes the top honors when it comes to completely shutting all doors that may become a source of unauthorized data access. Google approved login ensures that whenever you use this tool to source emails from an email client, the connection is always secure with no scope for unauthorized data access. The users are provided with the option to password protect their files tagged highly confidential. An offline mode of this tool gives vent to all data security concerns populating your mind space. To put it in short, you will not find a more secure tool to backup G suite.
Backup G suite mail folders without pounding your head with complexities
A tool may have the best lineup of features and may be highly secure as well, but its overall utility will diminish considerably if it pounds our head with complexities. Ease in use should be the foremost attribute of a tool, everything else matters thereafter. And this tool gets the balance between simplicity and sophistication absolutely right. No more usage of mind numbing technical terminologies. No more encounters with vague instructions that become a grapevine of confusions. No more getting caught up in an unnecessarily long line up of instructions which lead to brewing of confusions. Use this sophisticated yet straightforward tool to get the intended results in an effortless manner. Short and simple instructions, a user friendly interface, complete absence of heavy technical terminologies and usage of simple language, elevate the level of ease users feel while carrying out myriad email management tasks.
These tools has other ease-affording features as well that simplify email management to a great degree. These features include a smart mail viewer, incremental backups, a smart search module along with a live dashboard.
Backup G suite mail data with a free demo of this tool
There is no better way of discovering the trust-invoking qualities of this tool other than trying out its free demo. This tool has been growing in popularity at an unabated pace because it walks the talks by living up to the expectations of users. Even though everything about this tool is very true and transparent, you can get further insights into its user friendly technology by trying out its free demo. So what are you waiting for? Grab this inopportunity without any second thoughts for this tool is tailor-made to fulfill your diverse needs.
0 notes
Text
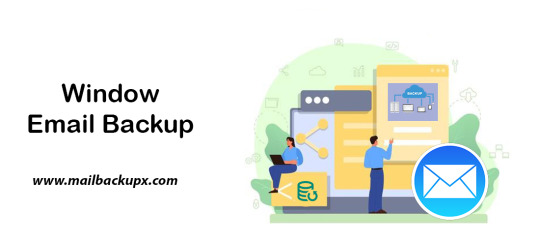
This is the best option to backup window emails with a number of features
The advantage of using outlook is that it comes compatible to Windows as well apart from Mac. So, it generates email files in the form of PST compatible window. Outlook has its own interface compatible with Windows. It is precise important to backup and restore the mails on windows outlook. You can learn more about windows backs and restore through the below link so that I can discuss the different features on how to backup windows emails.
I used Mail Backup X by InventPure for my Windows 8 with a bunch of incredible features. The download version of this tool comes for 32bit and 64bit processor so you can suit yourself according to the system you are using.
This is the best way to backup windows emails along with a number of features.
The tool can backup Outlook for Windows
The tool works on the platform of incremental backup support system as they mail arrives. No matter you work for windows outlook, the tool can backup Windows emailsvery easily.
It can import stored mails
If you plan for windows backup and restore, you can also import mail archive files exported from other mail clients like Outlook 2011 or 2016 Archive), eml files etc.
The tool has an inbuilt mail viewer
The tool comes with an inbuilt mail viewer in order to have a look at the archived emails without switching between multiple mail clients.
An advanced search option
The feature of advanced search module allows you to search emails from any particular person, subject or with a specific word in the entire database. Also, you can search for specific mails with attachments using AND and OR logics in the tool.
Organize Archive Mails in a PDF format
A very convenient option to archive al your mails as PDF retaining the folder structure. It creates a future proof and accessible account for all the archived mails. Also, protects the inbound and outbound mail messages from personal or business mail accounts suited for printing purpose.
Compresses the files for extra storage
The toolmakers uses a high compression algorithm, which is specially design to secure the mail data. It compresses and extracts the files reducing to required storage place. The tool also supports repair recovery record in case of any hardware corruption so that you may not end up losing any data.
All in one conversion mail tool
The tool gets you the freedom to move from different mail clients to mail client of your choice. It includes the format like (.pst, .eml) supported by all popular Mail clients like Outlook Windows, Office 365, Gmail, Yahoo.
Auto USB Backup Sync
The tool has an in-built auto USB backup feature where you can just map a USB drive to copy a backup of mails. The tool plays a smarter role in detecting when the drive is plug in and where to copy the data on that drive. For more information to backup windows, simply log on to the below link www.mailbackupx.com/windows-email-backup-tool/.
Video Tutorial to backup Windows mail with Step by Step Guide
youtube
1 note
·
View note
Text
4 Simple Methods to Shrink Your JPEGs

Reducing the size of JPEG images is crucial for anybody looking to increase website loading speed or conserve storage space. Smaller JPEGs use less bandwidth, load more quickly, and are simpler to share. Whether preparing images for your website, emailing them, or just trying to save storage space on your computer, shrinking your JPEG files can be a highly useful skill. In this extensive tutorial, we'll be going through four easy steps on how to reduce your JPEGs and some answers to questions people have when trying to shrink them.
Before you see the real methods for shrinking your JPEG files, though, you first understand how JPEGs function and why you would want to reduce their size.
What is a JPEG and How Does it Work?
In 1992, a compression standard known as JPEG, or Joint Photographic Experts Group, was developed. JPEG is amongst the most prevalent image representation forms on the web and in photography. It's popular because the file size for images can decrease without compromising quality.
JPEG is a lossy compression that discards some of the information from the original image while compressing. Sometimes, this data loss in the given image goes unnoticed by the human eye when the compression is moderate; however, the better you compress a JPEG, the more significant the loss in quality becomes.
JPEG compression is done by discarding less important visual information, such as small color details that the human eye is not very sensitive to. That allows it to compress significantly in file size, while being mostly useful with images having complex color patterns, such as photos. Still, JPEG-compressed images are quite large, so they may sometimes be shrunk further for efficient storage and faster online loading.
Learn how to make your photos look cool in Google Slides.
Why Shrink Your JPEG Images?
Here are a few main reasons for compressing a JPEG image.
Saving Storage Space: Generally, larger sizes of JPEG consume much of your computer's disk space on your phone or even the cloud storage; by shrinking JPEG, you allow more free space for other files to reside.
Faster Website Load Times: For a website owner, large image files can make your web page take longer to load. Smaller JPEGs help enhance page load times, which can be significant for user experience and search engine optimization.
Easier Sharing: Smaller JPEGs are easier to share through email, messaging, or even social networks. It requires less bandwidth and is uploaded much faster.
Faster Backups: The smaller sizes of the file will take much less time to upload to either cloud storage or even to an external hard drive, hence offering faster and quicker backups.
Effortlessly enhance your images using PhotoCut’s AI Image Upscaler.
How to Shrink a JPEG on Windows?
In case you need to shrink a JPEG on your Windows PC, there is an easy way around it. One easy tool is the Photos app. You don't need to download anything else; you can accomplish anything with only one app. This is the process for compressing a JPEG on a Windows PC.
On your PC, find the JPEG picture you want to compress. Double-clicking on it will launch the Photos app by default.
Tap Resize from the drop-down menu that appears after clicking the three dots in the Photos app's top right corner.
You have a range of preset sizes from which you can choose. For example, Small, Medium, or Large; or else, you could go for Define Custom Dimensions so you can put in your preferred pixel dimensions. Be sure to tick the Maintain aspect ratio so the image isn't distorted.
Once you've reduced the size of the image, click Save As and save your new, smaller JPEG file. This file will take up much less storage space but should remain at an acceptable quality level.
Quickly resizing your JPEGs without the need for additional software is possible using the Photos app.
How to Shrink a JPEG on a Mac?
If you're a Mac user, you can utilize Preview to reduce the size of your JPEG file. Here's what you ought to do:
Open Preview and locate the JPEG image you want to shrink. You do this simply by double-clicking on the JPEG image.
Preview View the Tools menu at the top of the page and select Adjust Size. You will see a dialog box where you may adjust the image's pixel size by either entering individual pixel values or changing them by a percentage. It is typically adequate to resize an image to around 50–60% of its original size for Web use.
The file size will automatically appear in the Resolution section of Preview. This will give you an idea of the space you have saved.
Once you've resized it as per your requirement, click OK to let it save the image in the compressed version. You'll then be able to share or upload it easily due to its now decreased size.
Preview is a dependable tool for shrinking JPEGs on your Mac with a simple process and time-saving efficiency.
How to Shrink a JPEG in Photoshop?
Adobe Photoshop is an excellent image editor program, containing the most elaborate tools for the compression and resizing of JPEG images. Below is how you can simply use Photoshop to shrink JPEG by following the following steps:
Open Photoshop and the JPEG image you want to compress.
In the top menu of the screen go to Image Size. In this dialog box, you can now change the Resolution to 72 PPI if you are doing web use. You can now also change the Width and Height dimensions as you need.
Photoshop has many resampling methods that control how the pixels get adjusted when you resize the image. For most high-quality output, Bicubic Sharper is usually your best bet.
Now compress the JPEG a bit by selecting File > Save for Web. Here you will find a Quality slider with which you can get the right balance between the size of your file and image quality. The usual quality for web use would be 60-80%.
Once you have it the way you want it, click on Save to save your compressed JPEG file.
This offers a great deal of control over the compression and resizing process, making Photoshop the best for professional photographers or those who require high-quality adjustments in images.
How to Shrink a JPEG Using an Online Compressor?
For someone who needs to compress an image and doesn't need software for installation, they can use online compressors. Here is one very popular and effective tool, PhotoCut's Online Image Compressor, and how you can compress your JPEG using an online tool:
Go to PhotoCut's online compressor, and upload the JPEG you'd like to shrink.
Using an internet connection, the tool will automatically determine your image's dimensions. Manually enter the width, height, or percentage to resize the image. Just remember that checking Maintain Proportions will avoid any distortion.
This will download the resized image once it compresses the photo. The file will now be smaller, and faster to upload, or share online.
Online compressors are fast and easy to use, having no technical requirements attached to their use. They are perfect for users who have to shrink JPEGs on the go.
Tips for Compressing JPEGs Without Losing Quality
Shrinking JPEGs can easily result in a great loss of quality. Here are a few simple tips on compressing JPEG without sacrificing too much visual integrity.
Choose the Right Compression Level: JPEG also gives you the option to change compression. A higher degree of compression of 80-90% will minimize loss of quality; however, the file will be much larger. A lower degree of compression of 50-60% will provide a much smaller file but with visible artifacts like blurring.
Crop the Image: If an image has too much white space or blank regions, crop it before compressing. This will save on file size and deliver the salient parts of the image.
Choose the Correct Format: PNG for transparent pictures and GIF for animations are options if you don't need every feature of a JPEG. Because lossless compression is used in each of these formats, no quality is compromised during compression.
Keep Backup Files: Always have a backup file of the original high-quality version before compressing images. In this way, you can always revert to the original if the compressed file does not meet your requirements.
Learn everything you need to know about removing filters from photos.
Conclusion
Shrinking JPEG images is a very necessary activity for people seeking to save storage space, enhance websites, or share images more efficiently. Whether using what comes with the Windows or Mac, more advanced software such as Adobe Photoshop, or even online tools, there is more than one way to miniaturize these JPEG files. Knowing the additional techniques and advice this article supports can help you reduce the size of your JPEGs without significantly deteriorating the image quality, making them appropriate for daily usage.
Find the best one-word captions for Instagram and post templates.
FAQs
Q1. Why would I want to shrink my JPEGs?
Ans. By shrinking JPEGs, you get to save much space on your device, thus uploading files easier, websites quicker to open, and sending through emails or even social media platforms makes it easier to share content online without exhausting too much bandwidth.
Q2. What does it mean to "shrink" a JPEG file?
Ans. A JPEG can be shrunk to make it smaller. Reducing the image's width, height, and proportions, or compressing the image to lessen its data, are common methods. Keeping the file size as small as possible without sacrificing quality is the goal.
Q3. Will shrinking my JPEG always degrade the image quality?
Ans. Yes, JPEG is a lossy compression format. This means that shrinking or compressing an image will result in some loss of quality. However, the amount of quality loss can be minute and hardly noticeable unless it is compressed to a high level. The difference is to find the right balance between file size and acceptable quality.
Q4. How can I shrink JPEGs without using software?
Ans. Many free online tools exist where you can reduce JPEGs without downloading any software. Some of the more popular ones include TinyPNG, JPEG-Optimizer, and PhotoCut's Online Image Compressor.
Q5. What is "compression level" and how does it affect JPEG shrinking?
Ans. Compression level refers to how much image data is discarded during compression. A higher compression level reduces the file size more but can introduce visible quality degradation. Lower compression levels retain more image data, preserving quality but resulting in a larger file size.
0 notes
Text
Recover Lost Mac Data with Apple Experts
Losing data from your Mac can feel like the end of the world—especially when it includes critical work documents, treasured memories, or irreplaceable personal files. Whether it's due to accidental deletion, a failed software update, or hard drive failure, data loss is frustrating and stressful. The good news? You don’t have to face it alone. With the help of Apple experts, recovering lost Mac data is not only possible, but often surprisingly successful.
Common Causes of Mac Data Loss
Before diving into how experts can help, it's important to understand what causes data loss on a Mac. Some of the most common scenarios include:
Accidental deletion of files or folders
Formatting a drive without proper backup
Corrupted system files or macOS crashes
Hardware issues (failed SSD/HDD)
Virus or malware attacks
FileVault encryption errors
Failed Time Machine backups
Even with Apple's reliable software and hardware ecosystem, these problems can arise unexpectedly. Thankfully, there are professionals who specialize in solving them.
Why Choose Apple Experts for Data Recovery?
While there are many third-party data recovery services and DIY tools available, Apple experts bring a level of precision, safety, and reliability that’s hard to beat.
1. Apple-Certified Training
Apple technicians are trained specifically in macOS architecture, Apple file systems (APFS and HFS+), and data security protocols. Their understanding of how Macs handle storage gives them a significant advantage in locating and recovering data safely.
2. Access to Specialized Tools
Professionals working within Apple’s ecosystem use advanced recovery software tailored to work with macOS systems. In some cases, they also have access to proprietary tools not available to the general public.
3. Security and Confidentiality
When you're dealing with personal or business-related files, privacy matters. Apple experts and authorized service providers operate under strict data handling and privacy policies. You can trust your data is in safe hands.
4. Hardware Repair Integration
If your Mac’s data loss stems from a hardware issue—like a failed hard drive, logic board damage, or power supply failure—Apple experts can fix or replace the damaged parts and recover the data, all under one roof.
How Apple Experts Recover Lost Mac Data
Here’s what the typical data recovery process looks like when handled by certified Apple professionals:
Step 1: Assessment
The process begins with a full diagnostic. Experts evaluate whether the issue is software-related, hardware-based, or both. This determines the recovery strategy.
Step 2: Drive Cloning (If Necessary)
To avoid further damage, professionals often clone the affected drive. This creates a safe working copy from which data can be recovered, reducing risk to the original data.
Step 3: Data Extraction
Using specialized tools, experts extract recoverable files from the cloned or original drive. This includes documents, emails, photos, videos, system files, and more—even if they’ve been deleted or corrupted.
Step 4: Verification
Recovered data is verified for integrity. In many cases, experts will sort the files and provide a preview or report of what’s been recovered.
Step 5: Data Return
The recovered files are copied onto a secure external drive or uploaded to iCloud or a backup destination of your choice.
When to Contact an Expert
While minor data loss can sometimes be resolved using basic recovery software, certain red flags mean you should go straight to the pros:
Your Mac won’t boot or freezes on startup
You hear strange noises (like clicking) from the drive
Files are missing after a macOS update
You formatted your drive by accident
FileVault encryption is causing access issues
Disk Utility can’t recognize or repair the disk
In these situations, time is critical. Continuing to use the drive can make the problem worse and decrease the chances of successful recovery.
Prevent Future Data Loss on Your Mac
Although Apple experts can work wonders with lost data, prevention is always better. Here are a few tips to help you stay safe going forward:
Enable Time Machine: This built-in macOS feature creates automatic backups you can restore from in emergencies.
Use iCloud Drive: Sync important files to the cloud so they’re accessible even if your Mac fails.
Avoid risky software: Be careful when installing unknown apps or updates that could corrupt your system.
Keep your system updated: Regular macOS updates can fix bugs and improve drive performance.
Run periodic disk checks: Use Disk Utility to monitor your drive’s health.
Losing important data can feel overwhelming, but it doesn’t have to be the end of the story. Whether your Mac suffered a crash, you deleted something by mistake, or your hard drive failed, Apple experts have the tools and training to help recover your lost data safely and effectively.
So if your Mac is giving you trouble and precious data seems gone for good don’t panic. Reach out to certified Apple technicians, and let the professionals bring your files back to life.
0 notes
Text
My search for a safe IMAP backup tool ends here
I believe everything has to have a security approach. I mean to mention that safety is important if you have a huge database and you want to back up the emails. I uses Mac for my daily activity so when I created an email account it asked me about IMAP.
IMAP account is very important while you configure any email account like outlook for Mac or Windows. IMAP is Internet Message Access Protocol. You require an IMAP account to access your emails. You can check out in the below link how IMAP is linked with emails.
I am very particular about safety of data. And when it comes toIMAP backup, I am more vigilant. Because I want to ensure a safe IMAP backup mac. It is the only important factor while looking for the right IMAP backup tool. Because the conventional toolsmight deliver email archival, however it might corrupt them.
My major area of concern has always been a safe IMAP backup solution rather than only backup mac mail. Because, there is no point using a tool that set up wrong expectations and corrupts it eventually.
Let me brief you this with an example.
I was operating different mail service providers on Mac, and it was very important for me to ensure its safety. As I was aware, I was looking for a tool that enable me a safe mac email backup. It becomes important when you are using two or more mail service providers on the same system. IMAP backup and restore was my biggest task ensuring hundred percent safety with data integrity.
I achieved hundred percent safety of my data with this IMAP backup software
It was through Mail Backup X by InventPure, I could ensure a safe backup. The only tool that utilize ultra-high compression algorithm design to secure and safeguard the mail data. Even though these terms were difficult for me to understand, I actually understood the meaning while performing IMAP backup.

The best thing about this application was that it can compress and extract the files reduce required storage space. The tool also encrypts the data for security into a coded language so that it would not corrupt any further. Also, the tool support repair recovery record in case of hardware corruption so that you do not lose any important information while performing IMAP backup and restore.
It also has a feature that adds benefit to the IT team as it helps to save time on uploading and retrieving data from Network Servers or FTP.
This explanation was enough for me to select this IMAP backup tool as it uses three times storage space while compressing the data safeguarding it at the same time.
I was confident of the IMAP backup software after using the demo
I was looking for a hundred percent assurance before using this IMAP backup outlook tool. And the only way to achieve this was browsing the official website.
So, I went ahead and tried the demo version for 15 days. This was the turning point to select the tool eventually. If you really want to ensure a safe data backup then just follow the below and archive with hundred percent safety assurance www.mailbackupx.com/imap-backup-tool/.
#IMAP#IMAP backup#backup IMAP#backup IMAP folder#backup IMAP data#IMAP mail backup#IMAP backup software
1 note
·
View note
Text
Restore email mac mails with zero tolerance data integrity
Data integrity is often misjudged when it comes restore mac email. It is about overall accuracy, completeness and consistency of data. So whenever, data transfer takes place, the tool is expected to transfer or convert eh files with completeness and accuracy.
A non-accurate or incomplete transfer of data means the file is unreadable or unrecognizable or broken. In worst cases, the data files transfer or conversion does not take place.
This makes it very crucial to use a highly skilled restore mac email tool for an efficient transfer with zero tolerance data integrity.
We deliver a highly skilled and well-engineered product Mail Backup X. The one of its own kind to restore email mac mails. A tool that maintains hundred percent data integrity and also restore mac email addresses.
The factor is also visible in the applications of the restore mac email app delivering complete data file without any deviation.
Different particulars are transferred while taking backup of emails from Mac. Therefore. We also make sure that mac users undergo the information on Mac OS and Apple mail for a detailed tour on different aspects of them. So, it is advisable to browse the below links on Mac OS and Apple mail for more information.
Maintain data integrity factor in various applications that restore mac emails
It is indicative of the fact that different applications of this restore mac email software preserves data integrity while taking backup of emails from Mac.
The third party mail archive application supports reading and import of common mail archives file formats like .mbox, .rge, .olm, .olk, .pst, .eml, that store mail data by mail clients like Outlook Mac, Outlook Windows, Office 365, Thunderbird, Postbox, Gmail, Yahoo etc.
The inbuilt mail archive application allows you to view important mails from different mail clients. The product allows you to read and import archive files from Mbox viewer, RGE viewer, OLM viewer, OLK viewer, PST viewer, EML viewer without the need to switch between or open mails with different mail clients.
The third application of inbuilt mail migration application is an advanced mail conversion feature to use mail client of your choice on Mac OS. It permits you convert and export mail data to all major mail data file formats like .mbox, .rge, .olm, .pst, .eml.
Test the tool to explore the best way to restore mac email
The best way to explore the data integrity factor is by testing the tool for a realistic experience.
All you need is to download the demo version of the restore mac email tool and on Mac. Use it for 15 days until the validity expires.Switch to the licensed version of the tool, once satisfied.
For complete access of the product, you can click on the licensed version of the tool along with a product key.
For more details on the software, log on to the below website and get all your queries answered in a systematic manner www.mailbackupx.com/restore-mac-email/.
#mac restore tool#mac mail restore#restore mac mailbox#restore mac folder#restore mac data#restore mac files#restore mac email
1 note
·
View note
Text
Mac email backup is very easy now
It has been a topic of discussion for long on how to mac email backup with an easy to use procedure.
Often it has been seen that Mac users complain about incomplete procedure on mac email backup. The foundation of an appropriate data backup always lies on a well instructed procedure. Therefore, it is very important to use a right, more precisely a professional tool for data backup.
While you may come across endless names for data backup tool, we offer the best in class product Mail Backup X. A well-engineered email backup tool for archiving emails from apple mailbox.
Also, the below links on Mac Operating System and Apple mail will make you understand about the subject in detail.
MacOS and Apple mail gives an idea on selection of the right tool considering different aspects of the mail communication tool.
The best way to mac email backup with clear instructions
Downloadthe mac email backup softwareand install on your Macformac email backup. Please follow the link for installation instructions.
Once the installation is completed, launch the tool from the Applications/ Quick Launch Menu.
You can start the fully functional trial run for 15 days or activate it if you have already purchased a license version of the tool.
You may choose to setup a new backup profile from the dashboard by choosing option “setup a new backup” oryou may click my backup profiles on the left side bar in the dashboard and click “set up a new backup profile”.
The next screen shows options to setup back for a list of mail clients. Choose Apple Mail and proceed to next step.
Once you click and choose Apple Mail to setup a backup you are presented with folder structure from Apple Mail accounts. Please select or deselect the folders out of all the mail accounts configured in Apple Mail.
The next step shows Advanced options like setting
* frequency of Mail backup (select automatic as its recommended or you may choose Manual or recurring at particular intervals).
* secure your backup archive by encrypting the data. So, it can only be viewed on this computer.
* you May also activate the USB Auto Snapshot option by assigning a USB drive. So, whenever you connect the USB drive, it automatically makes a snapshot copy of your local mail backup to the USB Drive in the background automatically.
8. You can set the location of backup to local disk drive or Cloud service by authenticating and adding Cloud Space (at Present Google Drive, DropBox and Microsoft One Drive are supported). Click save.
9. Apple Mail Backup Profile is set up and now your emails should have started to back up as per the options and settings you selected during the previous steps.
Demo is the preliminary answer on how to mac email backup on mac
In order to understand the basics of mac email backup, we recommend you to use the demo version of the tool initially.
The demo tool has various advantages before you proceed with the licensed product.
It is completely free and guides in the most systematic way on how to mac email backup. For more information, do visit the official website for a detailed tool on the software www.mailbackupx.com/how-to-backup-apple-mac-mail-mails-on-mac/.
1 note
·
View note
Text
Best solution to restore Apple email
Don’t look any further for a solution to restore Apple email
Maybe you have never felt the need to restore data. But you keep hearing the experts telling you to archive email data and keep ready for restore if need be. You cannot ignore this advice as it is extremely valid and important. Archiving emails and backing up data regularly is what any wise person will do because we know how data is so prone to damage or hacking or other kind of losses. This is especially true when original messages don’t get stored in device like the case with IMAP based services. You will need to restore Apple email in a case you lose data due to any reason like hardware failure or some other. You will be able to restore only if you have backed it up or archived email folders. Else, you will not be able to do anything. You need a good backup and recovery option for this. Although we will be focusing on a method which covers all IMAP based email services like Gmail, Thunderbird, Yahoo, etc., you can read a little about Apple email to get a fair idea why we must backup emails. Here is the link- https://en.wikipedia.org/wiki/Apple_Mail
Best way to restore Apple email is with a certified software

There are a few methods available to backup as well as restore Apple mails and other on Mac. Yet, you see experts recommending only certified tools. Why is it so? Why don’t they recommend a manual method or maybe restore Apple email app which works online? There must be some factor behind it. While manual methods are never recommended for any similar task which is to be done regularly, they also pose a great challenge to novices. And when we talk of online apps, they are fraught with dangers like data loss, data stealth, corruption, etc. Along with these risks, there is almost zero support available for any doubts or mishaps. This means we shouldn’t be using these apps. We should only use a reliable certified archiving and restoring tool like Mail backup X by InventPure. This is the best one out there for end users.
Now restore Apple email account and other multiple accounts in a short, precise, and easy way
This tool makes it really easy, quick, as well as accurate to backup and restore IMAP emails on Mac. There is something else also which we need to look at. If I am in a need of a software, and I have heard good things about it, even then it would be normal for my mind to have some doubts. All users face these doubts and thus this issue must be settled. This issue is settled by bringing to users a free albeit a limited use demo of this backup tool so that their doubts are settled. They can use most of the important functions that the full restore Apple email tool comes with and once satisfied, they can purchase full version for daily data preservation in the manner they prefer https://www.mailbackupx.com/restore-apple-email/.
1 note
·
View note