#Mail Chimp tutorial
Explore tagged Tumblr posts
Visit Tumblr Blog
Explore Tumblr blogs with no restrictions, modern design and the best experience.
Last Seen Tumblr Blogs


Fun Fact
Tumblr has been banned in Indonesia for providing people with access to pornographic content.
Text
Unleashing the Power of Mailchimp: Your Guide to Email Marketing Success
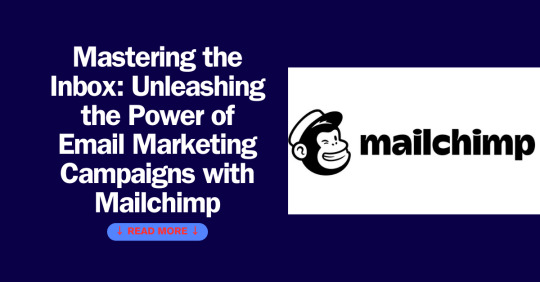
Email marketing remains a cornerstone of digital strategy, offering unparalleled opportunities for businesses to connect with their audience. At the forefront of this revolution is Mailchimp, a comprehensive platform that empowers marketers to craft, automate, and analyze their email campaigns with precision. Let's delve into how Mailchimp can transform your email marketing efforts and drive measurable results.
Crafting Engaging Email Campaigns with Mailchimp's Templates
Creating visually stunning emails that resonate with your audience has never been easier thanks to Mailchimp's vast selection of customizable templates. From sleek newsletters to promotional announcements, Mailchimp offers templates to suit every occasion and industry. Discover how Mailchimp's templates can help you captivate your subscribers and drive engagement.
Harnessing the Power of Email List Segmentation
Segmenting your email list allows you to deliver targeted content to specific groups of subscribers, resulting in higher open and click-through rates. With Mailchimp's advanced segmentation tools, you can divide your audience based on factors such as demographics, behavior, and preferences. Learn how to leverage email list segmentation to deliver personalized experiences that resonate with your subscribers and drive conversions.
Implementing Effective Email Marketing Strategies
Effective email marketing requires a strategic approach tailored to your business goals and audience needs. Whether you're nurturing leads, promoting products, or building brand awareness, Mailchimp offers a range of email marketing strategies to help you achieve your objectives. Explore how Mailchimp's features can help you execute targeted campaigns that deliver results and drive business growth.
Leveraging Mailchimp's Advanced Analytics
Understanding the performance of your email campaigns is crucial for optimizing your strategy and driving success. With Mailchimp's robust analytics dashboard, you can track key metrics such as open rates, click-through rates, and conversion rates in real-time. Discover how to leverage Mailchimp analytics to gain valuable insights into your audience's behavior and refine your email marketing strategy for maximum impact.
Maximizing Efficiency with Mailchimp's Automation
Automation is the key to streamlining your email marketing efforts and delivering timely, relevant messages to your subscribers. With Mailchimp's powerful automation features, you can set up automated workflows for welcome emails, abandoned cart reminders, and more. Learn how Mailchimp automation can help you save time, increase efficiency, and drive engagement across the customer journey.
Conclusion: Empower Your Email Marketing with Mailchimp
In conclusion, Mailchimp is the ultimate tool for businesses looking to take their email marketing to the next level. With its intuitive interface, customizable templates, advanced segmentation capabilities, and powerful automation features, Mailchimp empowers marketers to create, automate, and optimize their campaigns with ease. Discover how Mailchimp can help you unlock the full potential of email marketing and achieve unparalleled success.
Email campaign optimization | Email list segmentation | Email marketing strategies | Email marketing tools | Mailchimp analytics | Mailchimp automation | Mailchimp email marketing | Mailchimp templates | Mailchimp tutorial
#Email campaign optimization#Email list segmentation#Email marketing strategies#Email marketing tools#Mail Chimp analytics#Mail Chimp automation#Mail Chimp email marketing#Mail Chimp templates#Mail Chimp tutorial
0 notes
Text
Best email marketing tools
Sending email marketing campaigns can be time-consuming and stressful if you don’t have the right tools to help you out. Fortunately, there are some great tools on the market that can make your life easier, no matter your goals with email marketing. This article will compare two popular and useful email marketing platforms (Getresponse and Mail chimp) and explain which one we think offers more value. We’ll also go over our own experiences with both products and recommend them based on what they can do in terms of email marketing management, landing page creation, automation, reporting, and more. GetResponse Review
Get Response is a relatively new tool that was created in 2004. However, its global presence, excellent features and competitive pricing make it one of our favorite platforms for managing an email list. Get Response has a great interface and is ideal for marketers who want to send emails to both small and large lists quickly and easily. We recommend GetResponse over Mail Chimp because they have better integration with Google Analytics (more on that below). Not only that, but you can sign up for a free trial now! You’ll be given your own subscriber manager at no cost or obligation. Even if you choose not to subscribe to Get Response after your trial expires, you’ll still be able to see how well your site performs without spending any money. Best of all, their affordable packages start at just $15 per month so even small businesses can create outstanding results without breaking the bank! Getting started is easy and setup takes less than 30 minutes – you don’t need any coding experience or HTML knowledge whatsoever. In fact, if you plan to use responsive design for your website’s homepage then there’s absolutely no coding required! Simply enter your content into pre-built visual templates which will automatically adapt on mobile devices and tablets. There are also comprehensive reports provided by default. The automated reporting dashboard allows users to get creative with campaign strategies without needing expert know-how in Photoshop or Illustrator. If you find yourself asking How much do I spend on my mailing campaign? there are solutions available right within Get Response itself – super simple, effective solutions. Having trouble with R O I tracking? No problem! With Get Response’s advanced analytics capabilities, you’ll always be able to keep track of important information such as open rates and click through rates. Again: You can try Get- Response risk-free thanks to their 30 day money back guarantee! Furthermore, they offer an impressive amount of support including video tutorials, live chat options and a Q&A section to help with any technical difficulties. Does custom design matter? No problem. sign up here
Mail chimp Review
For most people, Mail Chimp is a great entry point to email marketing. Although it’s a bit more expensive than some other options, you do get more features for your money. The interface is simple and straightforward and makes it easy to create quality emails. When it comes to ease of use, there are few better options than MailChimp. However, if you want something with more customization, another option might be better suited for you. For example, Get Response has very user-friendly templates and features that may provide added value over Mail Chimp but also comes at a higher price point—though GetResponse does offer a free plan that could be just right for your business needs (but we’ll talk about that in our full review). We also like Convert Kit because of its unique focus on helping users build their email lists organically. We recommend making sure to see how you feel about each service through their free trials before committing to anything. That way, you can make sure they have what you need while still getting an accurate picture of their true functionality. One thing that’s important to note: Of all four companies we reviewed here, only A Weber offers a fully functional mobile app.
The better option_ getresponse Get Response is a robust, easy-to-use system with solid customer support. The pricing structure isn’t as flexible as Mail Chimp’s, but it is excellent for personal users and agencies alike. There are plans for scaling your business as well, which is helpful if you do decide to grow into an enterprise level operation. If you need advanced features like automation or in-depth segmentation abilities, then Get- Response might be more up your alley than Mail Chimp. Otherwise though, Mail Chimp offers more control over your campaigns at a lower price point—which could ultimately mean less money spent on advertising each month.
Use mail chimp as your backup tool MailChimp is popular, relatively easy to use, and fairly inexpensive. It also offers a bunch of great resources for new users, like a free e book about starting an email newsletter and a list of templates you can download to help you design your first newsletter. Plus, if you are planning on sending more than 2,000 emails per month (known as pro or premium accounts), Mail Chimp has better rates than many other services. We recommend using Mail Chimp as your backup email platform; it’s still one of our most-recommended choices for sending large amounts of email traffic. Related post
1 note
·
View note
Text
Have you always wanted to start a blog but don’t know where to begin?
I get it. There is so much information out there and it can get overwhelming. Extremely overwhelming. The great news is that you are in the right place.
I am going to break down the process of how to start a professional blog into 10 super simple steps for you, and I’ll leave the technical jargon behind.
Step One: Picking a Good Travel Blog Name
When it comes to picking a blog name, it is important that you pick a damn good one! One that stands out from the crowd.
One of the first things you should do is write down several ideas or words that come to mind. Think about your niche and what you want to write about, but also allow yourself to dream big.
What I mean by dream big is set yourself up to develop and grow as your blog does, and not restricting yourself in the years to come.
Say for example you are a backpacker and decide to include that in your name but over time your travel style changes. You may have put yourself into a box as your blog clearly states you are all about backpacking, so working with 5-star resorts will be a challenge.
The same goes for if you blog about Australia, so include that in your name. You have basically told the world that your blog is about Australia. What happens if you move to Canada?
Rebranding and redesigning is expensive and time-consuming so make sure you take the time to come up with a name that you love, and that gives you the flexibility to grow with your blog.
When choosing a name, you will also need to make sure the domain and social handles for that name are available.
Key takeaways:
Choose a unique and memorable name
Consider what you want to blog about
Allow yourself to dream big and avoid putting yourself in a box
Avoid Clichés
Confirm that the domain and social handles are available.
Yes, a great name is essential, however, you can’t spend 6 months thinking about it! There comes a point where you just have to make a decision. A great name is important but it certainly isn’t as important as the content you produce down the track.
To check if a domain is available you can use the Bluehost domain name checker. You don’t need to buy your domain, just make sure it is available. This tool will also suggest other domain names for you.
For access to printable worksheets to help you decide on your name and niche, click here.
Step two: Set up your domain and hosting
After you have decided on a name and checked that your preferred domain (eg. www.yourblogname.com) is available, it is time to set up your hosting.
Web hosting is the service that makes your website available to be viewed by others on the Internet and is something everyone has to do.
Now I know what you might be thinking, why do I have to set up and pay for hosting when there are free options like Squarespace, Blogger etc?
Well, the answer is simple. If you have decided you want to make money from blogging or at some point you think you might, you will need a self-hosted blog. It is best to set your blog up correctly the first time to avoid technical challenges down the road if you do decide to transfer your website.
That is why I recommend setting your hosting up with Bluehost
Bluehost is the #1 most used and trusted hosting network on the internet and is very affordable for new bloggers.
The Perks of Starting a Blog with Bluehost
FREE Domain
24/7 Support
FREE 30-day Money Back Guarantee
One Click WordPress Install
Now I know this may sound technical, and maybe it just sounds overwhelming and scary, but I am going to walk you through the process step by step. Bluehost makes it so simple that it is hard to screw it up.
Ready to go? Click here!
Instructions for setting up hosting with Bluehost
Click here to start setting up hosting and you will be taken to the below screen
Click Get Started Now
3. Select your plan
4. Choose a domain, either a new domain or one you already own! This should have been decided upon when you selected your blog name. Remember, .com is generally the best option!
5. Enter your personal and package information
6. Enter your payment information and create a password.
And you have successfully set up your hosting, woohoo! Now it is time to install WordPress.
For a step by step video tutorial, click here.
Step 3: Install WordPress
If you, in any way want to monetise your site and create a professional blog, it is essential that you use WordPress. After you create your password, you will be prompted to log in and select a theme. You can then start building your WordPress site.
Finally, you will receive emails from Bluehost with your account and WordPress information.
Welcome to your new blog!! Now it’s time to design!
For a detailed video tutorial on how to install WordPress, sign up for my FREE e-course on How to create a professional blog.
Step 4: Choose a theme and design your blog
Finally, the fun part, making your blog look awesome.
The first step is to pick a theme! What is a theme? It is the template for your website, that looks great and does not require coding.
WordPress has heaps of free themes, however, I recommend spending some money and choosing a mobile-friendly theme you love. A good theme will allow you to easily customise your site and make it look great. You can search for premium themes via WordPress or Theme forest.
So how do you install a theme?
Go back to your WordPress dashboard.
Hover over “Appearance” and click on themes.
Choose and activate a theme, then go to “YourDomainName.com” to see it!
For a detailed video on how to install a WordPress Theme, click here.
Step 5: Install Plugins
Another great way to customise your site is with Plugins. If your theme doesn’t offer a customisation you would like, a plugin usually does.
For example, you can get a plugin to have a Facebook pop up appear or your Instagram appear in your sidebar.
So how do you install a plugin?
Go to your WordPress Dashboard
Click Plugins from the side panel
Click Add New
Search for a plugin
Click Download
Activate
Edit settings (where applicable)
Plugins are great, but too many plugins cause too many problems. Here are a few of my basic recommendations:
Askimet – protects you from spam
Wordfence – website security
Jetpack – For website stats
WP smush – shrinks file sizes
Yoast – the BEST SEO plugin out there
W3 Total Cache – will help your site run faster
Insert Headers and Footers – to quickly add code to the header of your site
Broken Link Checker – Checks your blog for broken links and notifies you on the dashboard.
Google Analytics Dashboard for WP (GADWP) – Displays Google Analytics Reports in your Dashboard.
Pinterest Pin It Button – Pins images to Pinterest straight from your blog posts.
Social Warfare – Used to maximize social shares of your content.
To see a quick video on how to install plugins, sign up for my FREE e-course on How to create a professional blog.
Step 6: Install Google Analytics
Google Analytics is the industry standard for tracking traffic. Google Analytics tells you how many people visit your site, where they are from, how long they stay, what type of content is the most popular, etc, etc.
The stats you get from Google Analytics are what you will use to pitch to brands and companies.
You will need to sign up for Google Analytics and paste the tracking code into the header of the website. I recommend doing this via the Headers and Footers Plug In that we just installed.
This is an example of what Google Analytics looks like.
For a detailed video tutorial on how to install Google Analytics, sign up for my FREE e-course on How to create a professional blog.
Step 7: Claim your social media handles
When choosing your blog name, you should have already looked into the social media handles to ensure they are available.
I recommend signing up with:
Facebook Page (not a personal profile)
Twitter
Instagram
Pinterest
Google +
Youtube
Tumblr
Snapchat
When you start out, it will be essential to only focus on one or two social media channels. If you try to succeed in too many, you may spread yourself to thin and succeed at none. Regardless, you will want to at least set up all your accounts and leave them sitting there for when you do decide to focus on them.
For more information on how to set up your social media accounts, click here.
Step 8: Set up an email list
One of my biggest regrets is not setting up an email list from the start. Your email list will become your greatest asset over time. Conversions via emails are much higher than via social media, and your email list is the one thing you own. It’s yours, unlike social media sites.
Some email services include Mail Chimp and Convert Kit.
You will need to create an account with an email service provider and then create pop-ups and forms to encourage people to sign up for your email list. The best way to do this is by offering incentives for your readers to sign up. For example a free checklist, worksheet, ebook, online course or webinar. These are just a few ideas.
This is an example of the opt-in I use on A Travellers Footsteps.
For a video tutorial on creating an account and building an opt-in, click here.
Step 9: Start writing
The first place to start is with a solid about me page. Don’t overthink it. Grab yourself a coffee (or a glass of wine) and write. Don’t worry about mistakes, just write and edit it later! Once you have nailed your about me page, it is time to start on the content.
You should already have a predefined niche, which you decided on when choosing your blog name. Write about topics in your niche. It can take some time to find your voice and unique style. Don’t be afraid, just keep writing and it will come.
Step 10: Publish and start sharing your content with the world
FINALLY, I hear! You can hit the publish button! YAY!
After publishing, it’s time to share your work with the world. You can do this through your social media networks and email list.
I use Hootsuite to schedule my social media posts in advance, which helps me to stay consistent.
If you want more information about what to do after you hit publish, join my free e-course on How to start a successful blog.
Yay, you made it!
By this point, you must be feeling just about every emotion under the sun. You really do deserve some congratulations because the hardest part is over. And by the hardest part, I mean starting. Starting is the biggest challenge, and now you have overcome that, you are well on your way to success.
Make sure you pin this article for later!
How to start a professional blog Have you always wanted to start a blog but don’t know where to begin? I get it.
1 note
·
View note
Text
7 Dead Simple Ways to Bring People Back to Your Site | Increase Your Website Traffic
https://superspunarticle.com/?p=4435 7 Dead Simple Ways to Bring People Back to Your Site | Increase Your Website Traffic https://superspunarticle.com/?p=4435 Social Media Marketing tutorials. Recent tutorial coming from Neil Patel. In my opinion 1 of the most important sources of free videos on the web. Have you noticed over 95% of your traffic and 90% if you’re lucky, are brand new visitors? In other words, only 5 to 10% of your audience continually comes back. That sucks! But today, I’m going to share with you seven dead simple ways to bring people back to your site. RESOURCES & LINKS: ____________________________________________ Subscribers: https://subscribers.com/ HelloBar: https://www.hellobar.com/ Mailchimp: https://mailchimp.com/ PushCrew: https://pushcrew.com/ MobileMonkey: https://mobilemonkey.com/ ____________________________________________ The first dead simple way is through remarketing campaigns. Now remarketing campaigns means that you’re going to have to spend money on ads to get people back to your site. But think of it this way, if someone went all the way to your checkout page, or someone went all the way to your form field and didn’t complete a lead, what do you think that person is? That person is super qualified to be a potential customer. So why wouldn’t you want to get them back to your site and convince them to convert? Now, I’m not saying you should just do an ad to anyone who visits your site. Look at your checkout pages, your lead pages, any of the main pages that cause conversions. When you pixel those pages only and only have people who visit those pages see remarketing ads, not only will you get more people back to your site, but they’re more likely to convert into a customer or a lead. The second way to get people back to your site is through push notifications. Leveraging push notifications is an easy way to get more traffic, and here’s the beauty of it, push notifications have better open rates and click rates than emails. It’s much more effective and it’s easier because people just have to click a button to subscribe, they don’t have to put in an email or give you any of their personal information. The third way that you get people to keep coming back is email campaigns based of the visitor’s first intent. So you’re already collecting emails on your site, if you’re not, you should. Check out tools like Hello Bar, which allow you to collect emails. And you should check out tools like Mail Chimp, which allow you to send out emails for free. Collecting emails and sending out emails isn’t the most effective way back to your site. That’s why people have terrible email open rates and terrible click rates. The key is to match the intent on why someone came back to your site with the email campaign. For example, if someone came to my website to read an SEO article and I collected an email, when I email them back, I want to send them content information related to SEO. That’s a great way to get them back to the site. I don’t necessarily want to send all my SEO people conversion articles and all my conversion article people who first came to my site SEO content. It needs to be relevant. If someone’s coming to you for traffic, send them traffic advice. They’re coming to you for CRO advice, send them CRO. Now that’s an example that works for me. If it’s not relevant to why they first landed on your site, it won’t work well. The fourth strategy I have for you is called Mobile Monkey. Mobile Monkey is a Facebook Messenger tool. So you know with Facebook, they have Messenger, it’s a great way to communicate. And then that way, whenever you want to message them, tell them about a new article, you can get them to come back to your site with a click of a button, it’s not hard. Your open rates and your click rates are amazing. The fifth strategy I have is an exit pop-up, but hear me out, before you close this video. You’re going to be like, “Exit pop-up, I don’t like that, everyone uses them to collect emails.” I don’t want you to use an exit pop-up to collect an email. I want you to use an exit pop-up to have people follow you on Facebook, YouTube, Instagram, LinkedIn, whatever your favorite social site is, let them click with the click of a button and they can follow you on one of your favorite social profiles. Six, run time-based events like webinars, contests, things that are time-sensitive that only last for a while. I’m not talking about recorded webinars that last forever or contests that are never-ending, I’m talking about time-based stuff. The reason time-based stuff is super important, the moment someone knows that something’s available only for the next 24, 48 hours, they’re more likely to act, they’re more likely to click on that email, that push notification, that Facebook Messenger blast that you pushed out. ► If you need help growing your business check out my ad agency Neil Patel Digital @ https://neilpateldigital.com/ ►Subscribe: https://goo.gl/ScRTwc to learn more secret SEO tips. ►Find me on Facebook: https://www.facebook.com/neilkpatel/ #Traffic #NeilPatel #DigitalMarketing Originally published on this site Neil Patel’s YouTube channel Trust you valued the content that they shared. Leave us your feedback just below, share a short comment and let us know what topics you want us to cover in up coming posts. #//superspunarticle.com #ContentMarketing
0 notes
Text
What is Web scrapping? How is it useful for a data scientist?

Data science is transforming the world, and almost every industry is adopting it. From small startups to top-notch MNC’s, almost every company is pouring in money to extract data and achieve desirable results. For any product to get a good response from the market, it is important to do a complete market survey to understand who your potential customer is. What if we tell you that you can do all this staying right where you are. For any project, you require a vast amount of data to start. This is where web scraping comes into the picture. So what exactly is web scraping? Let's find out!
What is Web Scraping?
It is quite obvious that the first thing any business owner would do is look to generate potential clients. Have you ever thought of extracting data from a competitor's website, and using it to produce desired results?
Most companies use this methodology to enhance their business. Some try to copy data from the website and paste it. This can be done when there is a very small amount of information that needs extraction. But most sites have vast amounts of data. You can't copy and paste that much information. With the process of web scraping, you can extract almost any amount of data, and save it in the desired file format.
By definition, web scraping is nothing but the process of extracting data and saving it in the desired format, be it XLS. or CSV. format automatically. The time spent on gathering every information can get reduced to a considerable extent with the help of web scraping. It automates the whole process of copying and pasting.
Web Scraping in Retail and Manufacturing
Web scraping is a significant tool used in the retail and manufacturing industry. Manually keeping track of the prices of a product is never a feasible option, and it is quite time-consuming. Web scraping provides a better solution for this. You can extract competitors’ prices, and come up with a better pricing strategy to garner a considerable number of potential leads.
When it comes to purchasing materials from the retail market, you actually can’t visit every site and keep an eye on the retail market. This is where web scraping comes into the picture. Most companies spend enormous amounts of money to understand the retail market. However, with web scraping, you can reduce the cost spent on MAP compliance.
Using web scraping, you can analyze and track the customer sentiment. This enables you to come up with a product that meets the customer requirement and makes it more viable. Using web scraping, you can attain competitors product descriptions and understand the competitors marketing strategy.
Web Scraping in Financial and Equity Research
Major financial insights are available through newspapers and articles. It is not possible to go through every article, instead, you can opt for web scraping, through which you can extract all the data and keep track of all the information. There is a surplus amount of market data available on the internet, but it remains scattered across various websites, making it quite difficult to collect data from each site. Web scraping does that for you and helps you come up with the best investment strategies.
The insurance industry is another field that requires well defined and specified policies. You cannot copy it from any mediocre website. Using web scraping, you can extract suitable information from the most verified sites and come with a policy that meets all the standards laid by the Insurance Act of 1938.
Web Scraping in Sales and Marketing
Sales is one of the most pivotal departments in any industry. Most top-notch companies invest around 30-40% of the money on enhancing sales and creating a strong brand presence. With the surplus data that is available online, it has become difficult to extract suitable forms of information. This is where Web scraping comes into the picture.
It captures this data and provides a list of the kind of audience and their preferences. With this list, it is easy to target a specific group of people, and the chances of generating a potential customer increase to about 33%. With data scraping, you can collect information from social media platforms like Facebook, Twitter, Instagram and use this information to come up with posts that can garner greater attention and help build a brand presence.
Search engine optimization is a significant part of digital marketing. Without SEO content, it might be difficult for your site or content to feature at the top of the charts. With the help of web scraping, it is easier to extract the exact keywords to make your site reach high in the Google ranks.
There are several email marketing tools like Mail Chimp, Omnisend, and Hubspot that require client mail ideas to send a sales mail. Using web scraping, you can extract all the mail IDs and use these tools to send sales mail in one go. You can also create a chatbot and send customized messages to the potential customers generated using web scraping.
Best Programming languages for Web Scraping
It is quite obvious that the best programming language for web scraping in Python. There are many predefined libraries that you can use for web scraping.
Pandas: This library gets used for extracting data and manipulating it. It saves all the databases in a certain format.
Selenium: Selenium library extracts data from the web pages. It uses a web driver for Chrome for analyzing commands.
BeautifulSoup: This library is for extracting XML and HTML files. It employs data trees to extract data easily.
How Web Scraping is useful for a data scientist?
Web Scraping has multiple applications when it comes to data science. It gets used in real-time analytics, predictive analytics, natural language processing, and machine learning training models. With web scraping, it is easy to cluster, classify and contribute ideal sources of data.
Data science is more of statistics implemented with programming. Web Scraping extracts the desired data to enhance productivity and reduce the downtime of a workforce to a considerable extent. The roles and responsibilities of a data scientist are to garner an ideal amount of information, but with the help of web scraping, it is easier to extract this data and make this data usable for machine learning models.
From mediocre start-ups to top-notch MNCs, almost every enterprise uses data science and web scraping as a tool to produce potential leads. Companies like Facebook, Netflix, and Amazon have been roping in data scientists to extract the data and provide a better user experience. Recommendation engines are a product of data science and web scraping. The data about user preferences get recorded, and this information provides them with similar search results.
Closing Thoughts
Web scraping has become a significant tool used by most digital marketers and companies to achieve results. The implementation of web scraping in data science has reduced the work of data scientists to a considerable extent. Now all they have to do is use the ideal extracted data and conduct data analysis. The future of data science has become the next big thing, and the need for quality data scientists is on the rise. If you are looking to make a career out of data science, this is the best time to grab hold of the opportunity.
With the current COVID-19 pandemic, you can get yourself equipped with data science through free data science courses and there are also several Python tutorials for beginners. A premier tech-related educational institution like Great Learning can help you learn data science. The data science courses are excellent learning sources and favour e-learning as well. To know more details about the data science certification course or data science online course, get in touch with us today.
0 notes
Text
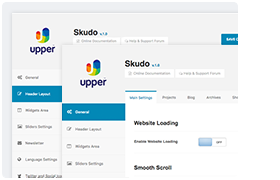
SKUDO V1.3.1 - RESPONSIVE MULTIPURPOSE WORDPRESS THEME


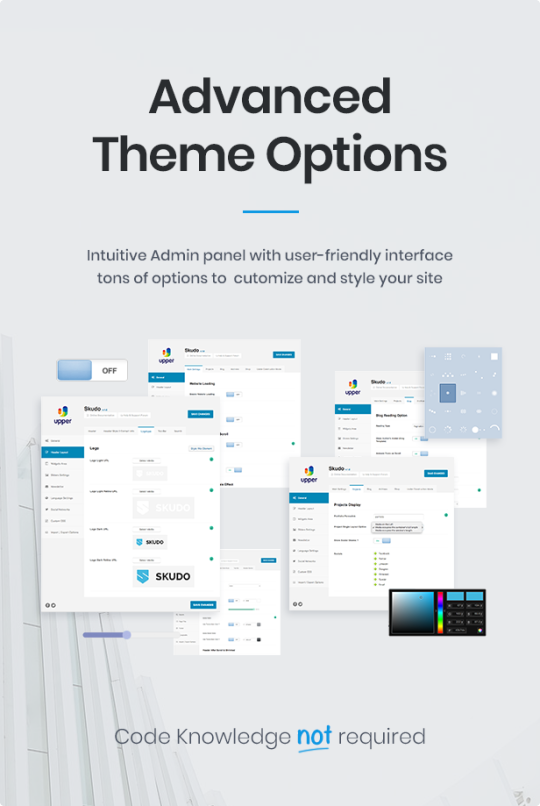


Skudo is a beautiful modern theme with eye catching design and super strong framework behind. This All-In-One package includes premium plugins, unlimited customizability, built-in mega menu, full WooCommerce design integration, typographic options with over 800+ Google fonts, robust admin panel with hundreds of options, tons of useful visual page builder elements and ready layouts available with just 1 click!


Fully Responsive Skudo looks great on any device, from mobile to desktop and beyond. Super Clean responsive design fits to any screen. Try resize your browser window and see for yourself!
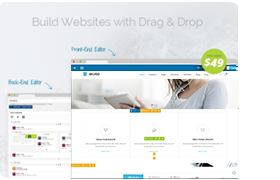
Visual Page Builder Skudo come with famous visual page builder, Visual Composer for WordPress is drag and drop frontend and backend page builder plugin that will save you tons of time working on the site content. No programming knowledge required!

One Click Demo Setup All presented demos are included on skudo package. You’ll be amazed at how easy it is to install the demo contents on this theme. Just 1 Click, for real!!
Powerful Admin Panel Skudo come with an strong admin panel + admin style options, where you can change the overall options of the theme, logos, colors, menus, languages, social, etc.

4 Menus/Header Styles Skudo come with 4 different menus styles, where you can add top bar, icons for search, social, woocommerce, top menus, etc. Also you have 3 styles of selected menu items, Rounded, Square and simple.

One / Multipage System Skudo allow you to have multipage or one page websites or even both systems at the same time! Simply choose the template of your page and organize the order with the wp menus. Easy!
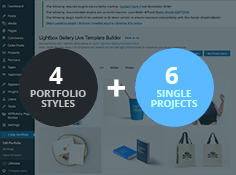
Unlimited Portfolios with CubePortfolio Build portfolios has never been so easy! With the live template builder you control every aspects like, type of portfolio, columns, colors, fonts, spacings, borders, etc.

Unlimited Colors With Skudo Admin Panel you can quickly and easily change the main colors throughout the entire theme. Also you can change some specifics colors directly on the visual page builder shortcodes.

Buit-in Mega Menu Building menus for your website has never been so easy! Works with regular WordPress menu, plus our own styles and functions for mega menus.

Multiple Loading Styles Skudo comes with a lot of different loading styles that you can easily choose via admin panel. You can also change fonts, backgrounds, colors etc. You can disable / enable this website loading.

Under-construction Mode If your website is not ready to show yet, simply activate our under construction mode, via skudo Options and work on it, only logged users can see the site. No extra plugins are needed here!

Super Easy Installation & Setup Quickly install the theme via Wordpress upload or FTP, then use our awesome 1 Click Demo Importer to set of demo pages, posts, sliders, widgets, theme options etc. Easy 2 minute setup!

4 Blog Types Skudo come with 4 blog types, masonry, normal wide, normal with right sidebar and normal with left sidebar. On both you can add right or left sidebars.

Revolution Slider Included (Save $18) Heaps of custom transitions/animations for each object, tons of unique transition effects and lots of easy to set options to create your own effects. Customize this slider with the convenient drag and drop backend.

Woo Commerce Ready Sell your stuff with Skudo, WooCommerce 2.0+ are fully compatible with this theme. Enjoy!

9 ready Contact Forms We use contact form 7 plugin for contact forms. We already setup 9 different forms for you, you just need to choose them from the visual composer element, contact from 7, nice and easy! Also you can create you own form.

Translation and WPML Ready WPML is 100% compatible with our theme. Also Skudo comes with .mo .po files, if you want to translate it to your own language. Nice and easy!

1400 Icons Available Skudo comes with a massive collection of icons that you can use. They are separated by styles so is more easy to you find the style you want. Also the builder presents you a preview of each icon.
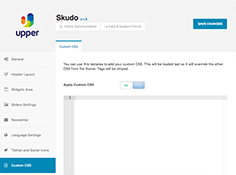
Custom CSS Need extra customizations? Easy! Add your own custom css directly from our panel options without editing core theme files. This is a best practice because this custom styles won’t be lost on a theme update.

Tons of Google fonts available Take control of your theme?s typography with custom fonts controlled through the skudo Style Options panel. Access the massive Google Fonts library and create your unique style.

Support & Video Tutorials We offer free support for all our buyers via support tickets page. Also skudo come with a extensive documentation with HD how-to videos to help you get started with our theme.

SEO Best Practices Get a hight ranking on search engines. skudo is built with web standards and SEO best practices in mind. It also is compatible with most of SEO plugins! Theme Features 4 Websites included! 150+ UI Blocks on the package Upper One Click Demo Import Tons of Pre-Designed Pages Available Ready for WordPress 5.0+ Tested and Approved Revolution Slider Included (Save 25$) Visual Compuser Included (Save 34$) ultimate VC Addons Included (Save 25$) Cube Portfolio Included (Save 17$) 100% Responsive Layout Retina Ready Tons of Header / Menu Options Sticky Nav Mega Menu Built In WooCommerce compatible Unlimited Colors & Styles Advanced Footer Options Clean & Modern Design Multiple Premium Slider Options Built with HTML5 & CSS3 Compatible with Many Popular Plugins Cross-Browser Compatibility FireFox, Safari, Chrome, IE9, IE10, IE11 Child Theme Compatible – includes basic child theme! Advanced Customization / Theme Options One Click Import/Export theme options Multiple Blog Designs Advanced Blog Options Advanced Search Options with AJAX Results! Multi-Lingual / RTL Ready Multiple Portfolio Designs 10 Built-in Custom Widgets Photo gallery with pop-up and full screen support Popular Plugin Design Integration WPML Ready Translation ready with po/mo files Google Web Fonts, System Integrated Font Awesome icons Built-in Social Feeds SEO Optimized Unlimited Sidebars, Left / Right Custom Page / Post Options Google Page Speed Optimized Advanced Typography Options Excellent Customer Support Frequent updates with new features Google Map Integrated Mail-Chimp Newsletter Integrated Twitter Integrated Support videos from any major services (YouTube, Vimeo) Support audio from any major services (SoundCloud) * Images in the live preview will not be part of the design/theme meant for sale.

Update v1.3.1 (25 April 19) Child theme issue with panel options styles Update v1.3 (21 March 19) New Social Icons VK, Yelp, Twitch, Houzz, Foursquare, Slack and Whatsapp One Click Demo import improvements Remove margin on page content div WP Bakery page builder plugin Slider Revolution plugin Utimate Addons plugin Update v1.2.2 (15 February 19) Responsive issue on Blog Grid Update v1.2.1 (9 December 18) Improve Gutenberg editor compatibility Update v1.2 (16 December 18) Support to WordPress 5.0 Gutenberg Support One Click Demo import improvements Improve Grid Ajax Portfolios Skudo Templates on page builder frontend Side panel issue on grid Ajax grids Close button on project overlay Audio Player issue on backend Page title issue that stay bellow header Newsletter style Contents and Newsletter code Skudo Custom Post types plugin WP Bakery page builder plugin Slider Revolution plugin Utimate Addons plugin Cubeportfolio plugin Documentation Update v1.1 (1 August 18) New Landing Agency Demo New Corporate Boxed Demo Boxed layout issue Header social icons color on wide menu Read the full article
0 notes
Text
7 Dead Simple Ways to Bring People Back to Your Site | Increase Your Website Traffic
Social Media Marketing tutorials.
Recent tutorial coming from Neil Patel. In my opinion 1 of the most important sources of free videos on the web.

Have you noticed over 95% of your traffic and 90% if you’re lucky, are brand new visitors? In other words, only 5 to 10% of your audience continually comes back. That sucks! But today, I’m going to share with you seven dead simple ways to bring people back to your site.
RESOURCES & LINKS: ____________________________________________ Subscribers: https://ift.tt/2SDVhUx
HelloBar: https://ift.tt/1iqzQkX
Mailchimp: https://mailchimp.com/
PushCrew: https://pushcrew.com/
MobileMonkey: https://ift.tt/2z1obDP ____________________________________________
The first dead simple way is through remarketing campaigns.
Now remarketing campaigns means that you’re going to have to spend money on ads to get people back to your site.
But think of it this way, if someone went all the way to your checkout page, or someone went all the way to your form field and didn’t complete a lead, what do you think that person is? That person is super qualified to be a potential customer.
So why wouldn’t you want to get them back to your site and convince them to convert? Now, I’m not saying you should just do an ad to anyone who visits your site.
Look at your checkout pages, your lead pages, any of the main pages that cause conversions. When you pixel those pages only and only have people who visit those pages see remarketing ads, not only will you get more people back to your site, but they’re more likely to convert into a customer or a lead.
The second way to get people back to your site is through push notifications.
Leveraging push notifications is an easy way to get more traffic, and here’s the beauty of it, push notifications have better open rates and click rates than emails.
It’s much more effective and it’s easier because people just have to click a button to subscribe, they don’t have to put in an email or give you any of their personal information.
The third way that you get people to keep coming back is email campaigns based of the visitor’s first intent.
So you’re already collecting emails on your site, if you’re not, you should.
Check out tools like Hello Bar, which allow you to collect emails. And you should check out tools like Mail Chimp, which allow you to send out emails for free. Collecting emails and sending out emails isn’t the most effective way back to your site.
That’s why people have terrible email open rates and terrible click rates. The key is to match the intent on why someone came back to your site with the email campaign.
For example, if someone came to my website to read an SEO article and I collected an email, when I email them back, I want to send them content information related to SEO.
That’s a great way to get them back to the site. I don’t necessarily want to send all my SEO people conversion articles and all my conversion article people who first came to my site SEO content.
It needs to be relevant. If someone’s coming to you for traffic, send them traffic advice. They’re coming to you for CRO advice, send them CRO. Now that’s an example that works for me.
If it’s not relevant to why they first landed on your site, it won’t work well.
The fourth strategy I have for you is called Mobile Monkey.
Mobile Monkey is a Facebook Messenger tool. So you know with Facebook, they have Messenger, it’s a great way to communicate.
And then that way, whenever you want to message them, tell them about a new article, you can get them to come back to your site with a click of a button, it’s not hard. Your open rates and your click rates are amazing.
The fifth strategy I have is an exit pop-up, but hear me out, before you close this video. You’re going to be like, “Exit pop-up, I don’t like that, everyone uses them to collect emails.”
I don’t want you to use an exit pop-up to collect an email. I want you to use an exit pop-up to have people follow you on Facebook, YouTube, Instagram, LinkedIn, whatever your favorite social site is, let them click with the click of a button and they can follow you on one of your favorite social profiles.
Six, run time-based events like webinars, contests, things that are time-sensitive that only last for a while.
I’m not talking about recorded webinars that last forever or contests that are never-ending, I’m talking about time-based stuff.
The reason time-based stuff is super important, the moment someone knows that something’s available only for the next 24, 48 hours, they’re more likely to act, they’re more likely to click on that email, that push notification, that Facebook Messenger blast that you pushed out.
► If you need help growing your business check out my ad agency Neil Patel Digital @ https://ift.tt/2Kiwn8k
►Subscribe: https://goo.gl/ScRTwc to learn more secret SEO tips. ►Find me on Facebook: https://ift.tt/2313ZvR
youtube
#Traffic #NeilPatel #DigitalMarketing
Originally published on this site Neil Patel’s YouTube channel
Trust you valued the content that they shared. Leave us your feedback just below, share a short comment and let us know what topics you want us to cover in up coming posts.
0 notes
Text
MailChimp Tutorial 2017 | How To Use MailChimp Step By Step For Beginners [Email Marketing]
MailChimp Tutorial 2017 | How To Use MailChimp Step By Step For Beginners [Email Marketing]
wordpress tutorial for beginners Learn How To Use Mailchimp From Start To Finish In This Complete Mailchimp tutorial for beginners! Start email marketing with mailchimp. Get Your Mailchimp … source
View On WordPress
#darrel wils...#email marketing#how to#how to use mailchimp#mail chimp#mailchimp#mailchimp email#mailchimp tutorial#mailchimp tutorial 2017#step-by-step#wordpress free plugin#wordpress free theme 2017#wordpress tutorial 2017#wordpress tutorial for beginners
0 notes
Text
Top 10 Email Marketing Blogs You Should Definitely Follow In 2019
Email marketing is a significant digital marketing category and has large share in driving your business towards profit. If you aspire to grow your brand and achieve your goal, relying on social media it’s not enough, Email marketing is a must. According to a survey by Hub Spot, Professionals use it more than other marketing platforms,Blogs; for example, are a free and effectual way of being familiar with email marketing trends.Some blogs, logical and are suitable for all kinds of brands. Let’s take a look at the list of top 10 emails marketing blogs you should follow in 2019.
1.Mail Chimp
Mail Chimp is the leading email marketing blog. The team at Mail Chimp has been very successful in advertising many brands across the globe regarding cheapest and best forms of marketing. They believe that providing marketers with correct tools and the right knowledge leads us directly to successful marketing.They post regularly, so you can get a lot of stuff in a short time period. Providing tips and advice on using tools and automating your emails marketing sector is their specialty.
📷2.Get Response
Email marketing is not a strategy just for big brands and accomplished corporations. In fact, many small businesses have grown because of well-implemented email campaigns.Many marketers spend their time and funds into optimizing this sector, just because it’s free and achievable by anyone.Get Response is another brilliant blog that has great articles on how to expand your small business using email marketing.
📷3.Vertical Response
A lot of brand managers around the globe recommend you Vertical Response for email marketing. In the world of email campaigns, they have proven to be some of the most valued advisers in the business.To update people about their ideas, goals, and programs, they have started an excellent blog. It is one of the most widespread marketing blogs around, you can find a lot about case studies and surveys connected to email marketing.There are strategies and practices spread into three levels of experience – novice, inter-media and expert level.
📷4.Campaign Monitor
It’s a very popular email marketing blog, Campaign Monitor is also a software development brand. They mainly experiment with selling email marketing strategies and solutions to the marketers, brand managers. Adding to their services, they run an excellent blog. It should certainly be on your reading list, mainly due to its huge range of useful content.Campaign Monitor specializes in tips and tricks linked to writing. The knowledge that you obtain from the blog and getting quality writing from online writing services like UK Best Essays and Superior Papers can actually do wonders to your marketing plans.After all, marketing campaign is the important of your overall marketing strategy and you need professional writers for your research papers, product descriptions, emails, and more.
📷5.Mail Bakery
Creating the right email campaigns takes a lot of imagination and creativity, but you have to need patience as well. There is a lot of choice available when it comes to email marketing.They provide original solutions to businesses and business persons around the world, specializing in various forms of email content creations.Unlike many other blogs, they have fetched every word and detail down to a fine science
6. Marketo
The Marketo blog is one of the most applauded sources of knowledge about email marketing. Their team of writers concentrates on both modern technologies, such as AI and ML.It is in lead because of their balance. Hence, they are so popular with marketers around the world.In addition to the blog, they too provide automation services with complete tutorials included.
📷7.Email on Acid
It is important to get right to the customers. Oodles of blogs focus on just the strategic part of email marketing, but not on content design and creation.If you want to find out more about these areas of email campaigns, the blog that they run is the flawless addition to your targeting strategies and it success. One sector that Email on Acid can help you a lot with is testing your content and much more.
📷8.Marketing Profs
Marketing Profs Concentrates on educating marketers of all levels of experience. From beginner’s guides to complete reviews of different tools. If you’re just beginning in the email marketing world, Marketing Profs would provide you with a straight forward entry into all the important details and areas.What’s particularly exciting about this blog is that articles aren’t the only thing that’s posted. They also post a lot of webinars, tutorials, and statistics you can use to back in your campaigns.
9.Marketing Land
One underestimated benefit of email marketing blogs is that the ability to gain valuable insights into how does the industry functions.The team at the Marketing Land blog specializes in conveying you the most important insights and info about the email marketing niche. With useful guides and clarifications, they break down the most difficult strategies to easy one.A common incidence of theirs is to have valued marketing experts write guest blogs and write their own guides and marketing handbooks.
📷10.Mail Jet
One more efficient approach to email marketing is to educate people on more.The Mail Jet email marketing blog is a great example for that. Instead of pointing out how to be successful, they also give negative examples, which helps you to avoid making decisive mistakes.In email marketing, it’s equally important to master strategies and to identify the right conclusions.At the end of every quarter, they have some special blog posts about new trends or revelations within the industry. It is one of the best Email Marketing Blogs running presently.
https://socialprachar.com/top-10-email-marketing-blogs-you-should-definitely-follow-in-2019/?ref=blogtraffic/nym
0 notes
Text
3 Email Marketing Tools To Help Grow Your Business

Email marketing is a powerful tool in any internet marketing strategy. Years ago, it was the only digital marketing tool available for businesses and bloggers, and now, it plays an essential role when pursuing current and potential leads for brands.
When compared to the ‘fun’ social media platforms like Instagram, Pinterest or Facebook, email marketing is often considered a mundane form of communication. However, ask any digital marketer and they’ll tell you that building your email marketing campaign should be top priority from day one.
Nevertheless, using email marketing requires a lot of tasks to manage such as:
Managing subscriptions of your clients
Sending planned emails to your potential customers
Sending out follow up emails
Sending out personalised emails
This can be a very overwhelming, especially for a small business that might not have a lot of employees, or none at all. That’s why email marketing services, also known as marketing automation tools or system, have become valuable for businesses to manage their email lists in a convenient and process driven way.
What To Look For In A Good Email Marketing Tool or System?

A good email marketing tool should enable you to create engaging email newsletters with an easy to use interface in addition, you should be able to easily manage contacts, experiment with A/B testing (testing two versions to see which gives a better result), email segmentation and track the performance of each campaign. All these features can create opportunities to find new leads and convert them into customers, as well as manage your relationship with existing customers.
Having said that, here’s a quick look at some of the most popular email marketing tools and how they can help you.
1. MailChimp
MailChimp is one of the more popular email marketing tools in the world, primarily because they offer predesigned templates and a free service plan. It is relatively user-friendly but when compared to several other email marketing tools, they offer less in the way of automation options. You can easily integrate MailChimp with WordPress, Magento, Shopify, and many other ecommerce platforms, ideal if you are running an online store.
While the lifetime free plan sounds amazing, there are strings attached. The free option only allows you to send 12,000 emails for up to 2,000 subscribers. This plan also omits key features like send-time optimization, advanced targeting, multi-variant testing etc. you are also obligated to display their branding in all your emails.
Last but not least, support for the free plan is restricted to emails, and that’s definitely not okay if you plan on building a business. Their paid plans start from $10 per month for up to 500 subscribers, and then increases with every 500 subscribers.
Some of MailChip’s main features include: Customization – Use predesigned template or customise your own email from scratch. Integration – Integrate your email campaigns with shopping carts and customer relationship management CRM systems. Mobile Distribution – Use Email Beamer (an email that connects to custom audiences in Mail Chimp) to send a campaign from any email app or your smartphone, without having to log in to MailChimp. Facebook Integration – Use Facebook to make connections, add fans, and get the word out about your newsletter.

2. Campaign Monitor
A highly regarded home-grown Aussie business, Campaign Monitor is widely used by leading companies in Australia as well as overseas. The email service has a pretty simple interface that is easy to navigate, and features like a drag-and-drop email builder and pre-designed templates to help create emails.

You can also personalise and segment email campaigns to send focused emails and track results. The service also provides a full analytics suite to track campaign performance, ideal if you’re sending out multiple email campaigns weekly.
Campaign Monitor offers three service packages with the basic package starting at $9 per month. However, the basic package only allows 2,500 emails per month (the other two are unlimited) and doesn’t include the analytics suite or marketing automations. Something to note is if you don’t plan on sending email frequently, they do provide the option of paying per campaign. Additionally, Campaign Monitor offers 15% off on their service packages to non-profit businesses.
Some of Campaign Monitor’s main features include: Drag and Drop Email Builder – Choose a predesigned template and easily edit it with one click. A/B Split Testing – Test different subject lines and messages to fine-tune your campaigns. Contact Segmentation – Build targeted segments and create campaigns tailored to individual needs. Security – Grow and store your lists in a secure, permission-based environment. Social Media Integration – Promote your campaigns on social media sites. Insights Analytics Suite –You’ll get insights on how to improve your campaign strategy. The suite includes geography, acquisition and engagement per campaign. Sign Up Forms – Build your email list with pop up registration forms on your website. Support – The service offers fee personal coaching and support by phone, and email.
3. Infusionsoft
Better suited for experienced marketers, Infusionsoft is an advanced marketing automation service that provides an integrated CRM system and intuitive interface. Like the other two services listed, Infusionsoft offers the option to choose predesigned templates or design your own emails. However, when compared to the other services, it is definitely not cheap.
The basic package which only provides users with marketing automations and CRM services starts at $99 per month, and as your contacts grow, so will your monthly fee. Integrating an e-commerce portal or trying to manage a sales pipeline will cost an additional $118 per month.
If you can look past the hefty fees, Infusionsoft does offer quite a lot of features, but another downside is that because of its numerous features, users need to invest a large chunk of time to learn how to use it properly to make the most of it. There is a basic training panel that you can browse through for guidance and video tutorials, but if you’ve never used an email marketing tool before, you will need some time to work it out.
Some of Infusionsoft’s Main Features Include: CRM – Managing your leads information is relatively easy although it requires quite a bit of scrolling through a small window. Marketing Automation – create segmented campaigns, landing pages and web forms, integrate social media platforms and track website visitors. Lead Scoring – Lead scoring and distribution tools make it possible for businesses to identify “hot” leads and improve overall productivity through visual lead scoring. Sales Automation – Along with pipeline management, lead scoring and distribution, there’s also sales reports on key performance metrics such as conversion rates and revenue. This makes it easier to understand where campaigns have been successful and where they are under-performing. Analytics Suite – Track and export campaign data to review performances. Support – The quick service offers which offers support by phone, email, and live chat.

Final thoughts There are dozens of email marketing services out there, and they’re all packed with different features that can help you to optimise your email campaigns. If you are not sure which one will work best with your business needs or which price plan to start with first, book a free 1-on-1 digital growth advisory session with our digital specialists to find an email marketing tool that suits you and your business needs.
#Email Newsletter Design#email marketing strategy#Email Marketing for Small Business#Email Marketing for Branding#1 on 1 Advisory Session#Digital Marketing Specialist#Netstripes#Australia
0 notes
Text
Best WordPress GPL Themes
New Post has been published on https://www.templified.com/best-wordpress-gpl-themes/
Best WordPress GPL Themes
We’ve gathered up all of the very best GPL themes for you to enjoy. These themes are an incredible way to get a site up and running quickly. If you’re on Theme Forest, you can look for the tag that says ‘This item is licensed 100% GPL’. If you’re somewhere else, you’re going to have to do a little more work. Or, just bookmark this page and check back often, we’ve got a ton of great GPL themes and we add more every day.
So, here we go, the best GPL WordPress themes we’ve found.
Reel Story
Reel Story is a premium theme for WordPress made especially for different content creators who want to present their work in a stylish way. Its responsive design lets your site adjust to the screen sizes of mobile phones, laptops, tablets, and other devices. This theme is fully customizable, allowing you to design your site to make it more engaging and appealing to your viewers.
It provides a ton of color options, layouts, fonts, and many other custom designs. It also has some built-in page layouts that you can directly use as it is. The theme comes with a visual drag and drop page builder to let you create your own layouts and structure the site the way you want it to look. It also comes with a portfolio module, allowing your audience to view your work smoothly.
Reel Story is retina ready, ensuring that your site is in its excellent quality in different resolutions and screen sizes. It is translation ready, and through the WPML plugin, your site is translated easily for your different viewers. It is coded with SEO in mind, and it provides an automatic backup option for more convenient blogging and editing. The theme offers one-click installation, making it much easier for you to start your website.
Demo/Purchase Get Hosting
The Thinker
The Thinker is a simple, clean and minimal blog theme. This theme isn’t about flashiness, it’s uncomplicated and feature filled at the same time. It’s got clean, gorgeous typography and a classic blog design that makes for a wonderful user experience. The responsive design certainly helps in that department. The Thinker gives you a couple differtent custom page templates, a cool slider too to help give your page a custom look that engages with your visitors. Upload images, logos, change out colors and more with the theme customizer. The Thinker is WPML compatible, it workd great with Jetpack and WooCommerce. The whole thing is simple to use and attractive. The fact that it’s GPL licensed is just the cherry on top.
Demo/Purchase Get Hosting
Fenix
Fenix is a full service WordPress theme, a premium quality theme that’s licensed 100% GPL. You can do just about anything you want to with Fenix. It’s got a beautiful and stylish WooCommerce shop built in, Fenix has a classic blog layout, it works with several of the leading page builders like Beaver Builder and Elementor. Those page builders are really great, they’re flexible and they aren’t going to slow your website down like some other page builders will. Fenix has tons of great video tutorials, is packed with free plugins, has one click demo data to set your site up fast. It really is a great theme.
Demo/Purchase Get Hosting
Full Frame
Full Frame is a WordPress theme that really takes advantage of the full width of your reader’s browser, allowing your images to take center stage, capturing the attention of your potential clients and readers. Full Frame showcases big images, big galleries and even videos with ease. That allows you to create a visual story that your viewers will really have a strong connection with and hopefully, it can even help to build your photography business. It’s a tough, competitive market and a well designed theme like Full Frame can help you capture the most of that market. The fact that this theme is licensed as GPL, that’s just another great feature.
You’ll probably want a theme that is very easy to customize, even for a beginner. That’s Full Frame and, frankly, any of GraphPaper Press’ themes. You can add background texture tiles or even a full image, add your custom logo and favicon too. Then, create your custom menus, add content to the widget areas and throw in some text blocks. The choice is yours. You can also choose from several post formats, like images and image galleries or audio and video. Quotes and links too. And if you know you need a responsive theme, and for most purposes you really should have a responsive design since they allow you to deliver a wonderful user experience no matter what screen resolution your readers use to access your site, then Full Frame is a wonderful choice, since it’s perfectly responsive.
Demo/Purchase Get Hosting
MagFolio
Now, this WooCommerce WP design is an attractive and flamboyant, completely template that blends lots of fun and professionalism and trust into one amazing GPL licensed package. Magfolio, it’s excellent for startups, tech web sites or design firms. This gorgeous flat template will impress internet users with its cutting-edge design and style. The design additionally happens to come bundled with a good number of great benefits that can help your site look amazing. One such trait, the mobile friendly responsive design, specialized background designs and more! This simple and powerful WordPress theme is cram packed with dreamy things that make it almost unbelievably simple to start a new WP site super quickly, no matter what style you want! I think the basic layout of this WordPress theme is incredibly beautiful and well thought out and your visitors will like their visit to your page.
Demo/Purchase Get Hosting
Lotos
If you’re looking for a simple theme that could work for any type of magazine or blog, and you’re into GPL themes, then Lotos is an option to consider. Lotos is clean, simple and minimalist in style with loads of widgets and custom post types, not to mention a simple interface for customization, and that makes it a real winner. Standard post types, video posts and audio post types are offered, along with images, image galleries, quotes and link post types too. Choose a left or right sidebar, or go without a sidebar if you want your readers to concentrate on your content without distractions. It’s all possible with Lotos. This theme is licensed 100% GPL too, so you have the flexibility to add to it, update it and even sell it to your clients. Pretty cool.
Demo/PurchaseGet Hosting
Monument Valley
If you want a great looking theme to use with your favorite page builder plugin, whether that’s Beaver Builder, Visual Composer, Elementor, Site Origin’s PageBuilder, Divi, Conductor or something else entirely, Monument Valley is a fantastic choice. This theme is simple to use, fast loading and it’s got a level of flexibility that’s almost unheard of for a GPL theme. Whether you’re creating a portfolio, an online store or just a regular old blog, you don’t have to settle for a layout that isn’t quite what you want, because Monument Valley works well using any page builder. This theme really will be great for SEO so if that’s a big concern of yours, this one should make your short list. Fast loading, conversion optimized, this theme has a ton going for it.
Demo/Purchase Get Hosting
Zerif Pro
This is Zerif Pro, a theme from ThemeIsle, which is one of my favorite theme makers around. This template is a one page theme with a creative, responsive feel, it’s simple to use, completely beginner friendly in terms of customization and there are tons of features that come standard with this theme. The best part is, you can always extend the functionality of Zerif Pro by adding plugins and widgets to the mix, extending what Zerif Pro does and making it even more powerful. All that without sacrificing performance. This is a well coded, fast loading GPL theme that has won over thousands of creative folks who are looking for a fantastic, reasonably priced WordPress theme.
Demo/Purchase Get Hosting
Tabor
We’re happy to add Tabor to our list of great GPL licensed WordPress themes. Tabor is like all of ThemeBeans’ templates, it’s clean and simple to look at, very user friendly and it’s also a very fast loading WordPress theme. Tabor is stripped down to the absolute essentials, so it’s perfect for SEO. Tabor integrates with all the most important plugins, your favorite SEO plugin, Optin Monster, Monster Insights, Medium, Mail Chimp and more. If you want a simple looking but beautiful WordPress theme for any kind of blog, this is a theme that should be on your short list.
Demo/Purchase Get Hosting
Elegance Pro
This theme is called Elegance Pro, it’s a clean, minimalist, simple and professional GPL licensed theme that’s really easy to use, fast loading and gorgeous. For any sort of blog or portfolio, you want a website that loads up fast, looks great on all devices and one that’s simple to use. That’s what the Elegance Pro theme brings to the table. This is a Genesis Framework child theme and like all of Studio Press’ templates, it’s 100% GPL licensed. Made by Stephanie Hellwig, a noted web designer, this theme provides a rock solid platform for building an amazing looking and flexible blog site. Definitely one of my favorite GPL themes and I think it’s absolutely worth checking out.
Demo/Purchase Get Hosting
0 notes
Link
Over the years, people have declared newsletters and email marketing dead, several times. This couldn’t be further from the truth. In fact, email marketing has an average return of$38 for every $1 spent — which alone should show you how beneficial email can be. MailChimp is also what I use to runmy own business and I love it so much I teach a full courseabout how to use MailChimp for business. I also earn $120 from MailChimp for every $1 I spent with MailChimp (I can’t complain at all about that return on investment).
72% of consumers prefer email as their source of business communication and 61% of people enjoy weekly promotional emails (keep that in mind if you worry about buggin your mailing list).
Emailing people via a newsletter is still the most effective way to communicate with an audience. While there are lots of tools you can use to send these emails, MailChimp is the best — and probably the tool used by the most users as well. 246 billion emails were sent via MailChimp in 2016 alone from their over-7 million users.
ASIDE: In case you’re wondering… why should you listen to me, the guy who wrote this? I’m Paul Jarvis, hi! Well, I’ve already taught over 5,600 awesome folks how to use MailChimp better and my ideas about mailing lists have been featured in USAToday, Wired and Adobe. I’m also a MailChimp expert, and my email marketing ideas and strategies on their blog. I’ve run my own business for almost 20 years, and I don’t mean to brag, but you’d be hard-pressed to find someone who gets the ins and outs of MailChimp more than I do. I’ve not only used it for my own business, but I’ve helped 100 of clients with their own MailChimp lists when I did web design for a living. Now back to this tutorial.
Why even have a mailing list for an online business?
If the above stats aren’t enough to sway you into setting up MailChimp for your business, think about it this way:
Imagine that you own a store in the middle of nowhere. There are no roads leading to your store, so every single day you drive for hours to a populated part of the closest town and try to convince people, one at a time, to come check your store out. You may get a handful of folks convinced that you aren’t a weirdo, and who come to check it out. Out of those few people, even less will buy something from you.
That sounds completely time-consuming and ridiculous, right?
If you don’t have a mailing list that’s exactly what you’re doing every time someone finds your website, doesn’t buy from you (because there wasn’t enough information or the time wasn’t right) and leaves. You’ve got to start to from scratch to get another visitor, over and over.
With a mailing list, you’re able to keep in touch with everyone who visited your store (once you ask for permission) and let them know when you have sales or when you’ve got something new to share with them. That way, after a while, you don’t have to go out and find potential customers at all, because you have a way of talking to them directly… instantly. Even if your digital store is in the middle of nowhere (as in, no one links to it), you can still drive hoards of interested people to if they’re on your list.
Sure, you can do similar on social media, but what about when Facebook changes how you can talk to your fans, or charges you $5 each time you want to talk to them? Of if magazine advertisement that used to cost $100 now costs $5,000?
Your mailing list can’t be taken away from you. Even if you want to move away from MailChimp (gasp!), you simply export your list and move it somewhere else—your subscribers can go with you anywhere you go.
Why do I recommend using MailChimp to people who run online businesses?
MailChimp is the easiest to setup and use super duper quickly (I’ll walk you through it below in less than X minutes).
MailChimp is totally free for up to 2,000 subscribers – including automation, A/B testing, landing pages, and custom templates.
MailChimp is fun: email marketing can be stressful, so their system does a great job of holding your hand when you need it and more importantly, making you laugh when you need it too.
MailChimp plays well with others: like your WordPress or SquareSpace website, your Shopify store, your Facebook and Twitter profiles, or even your LeadPages landing page.
I 100% believe that MailChimp is the best newsletter solution out there for an online business—whether you’re just starting out or you’ve been doing business for a while.
Here’s what I’ll cover in this MailChimp tutorial
How to create a MailChimp account
How to setup your first MailChimp list
How to connect your MailChimp list to your WordPress website.
How to style the first things new subscribers see in MailChimp
How to deliver a welcome message and bonus to new subscribers.
Now let’s get right into the MailChimp basics tutorial, since you’ve got a business to run (using what you learn below).
Free vs Paid MailChimp accounts
Which account is best for your business?
It’s simple, only upgrade to a paid account with MailChimp when you hit 2,000+ subscribers – otherwise you get almost all the same features for free (other than Inbox Preview, Delivery by Time Zone and few other minor things). Once you upgrade, you only pay for the subscribers you’ve got, so it starts at $10/month.
MailChimp also offers a $200/month PRO account, which is only useful is you’re doing super sophisticated stuff like advanced segmentation, multivariate testing, or want to run comparative reports. Heck, I’ve made over $1m from my MailChimp account and still don’t use or have their PRO account.
MailChimp Basic Terminology
Every software has it’s own words for what each of it’s features and functions are called. For MailChimp, it’s fairly obvious what each thing is, but since it varies from tool to tool, here’s a brief summary of what everything is called:
List: this is where subscriber email addresses are stored, who you can send campaigns and automations to.
Subscriber: this is someone (a contact) who has opted into your your list or given you consent to add them to your list. Legally, you can only add people as subscribers if they’ve given you permission.
Newsletters: these are the emails you send to the subscribers on your list. Campaigns can either be one-off blasts to your list or automations, which can be single emails or a series of emails that get sent when something specific happens (like a subscriber buys from you or signs up for a content upgrade).
Template: this is what your campaigns look like, and can use your logo, colours or fonts. MailChimp lets you create templates with their drag and drop creator, although plain-text emails still perform the best
Merge fields and groups: other newsletter tools refer to these as “tags” but in MailChimp you can associate different bits of information with every subscriber: like what page they signed up from, what they bought or didn’t buy, or what they’re interested in.
Getting Started: creating your MailChimp account
For this tutorial, I’m going to use a silly username, domain name, email address, and list name: Extreme Crappy Name. You’ll be using your own username, domain name, email address and list name—which is much better than Extreme Crappy Name!
The first thing you’ll do is go to MailChimp.com and click on “Sign up for free”.
You’ll be taken to this page, the account creation page.
Once you’ve filled it in with your details, you’ll receive an email to the email address you just filled in. Open it up and click the “Activate Account” big button.
After you’ve confirmed you’re not a robot (I hope you’re not a robot!), you’ll be asked to fill in a bit of information about yourself.
Fill in your name, a bit about your business, and a business address. Note that you have to provide a physical mailing address comply with international spam laws. This is why most businesses that don’t have a separate business address from their home address use a PO BOX (get one in Canada or the US for under $200 per year on average).
I pay $160 CAD for my small box each year, and it’s worth it so that 30,000 people don’t have my home address, plus every week goodies from subscribers (like books or cards) show up from them.
From there you can let MailChimp know if you sell anything online (don’t worry you can change your mind about that later) and connect your Twitter and Facebook profiles (not required or necessary, but useful if you want to share emails to your list on your social media accounts as well).
Once that’s done, you can let MailChimp know if you want to be on their list for getting started or how to use e-commerce with their software. Both of these lists are fun and contain gobs of useful information.
From there, you’ll be taken into your brand new, free MailChimp account! At any time, when you’re logged in, if you want to go back to your dashboard, click the chimp head (he’s called “Freddie”) in the top right:
First, it’s funny to be called “Crappy” by MailChimp, but that’s the name I told them to call me by for this tutorial. We’ll worry about everything else in a minute, but for now let’s just finish optimizing our new account.
Click on your name in the top left, then Account. Here’s where all your account details live, like how many subscribers you’ve got left on your free plan.
The first thing we need to do is make our account more secure, so click on Settings, then Security.
From here you can turn on two-factor authentication using the Authy app or just SMS (SMS is easier, so let’s do that). Click Enable, then enter your phone number. When you do this, you’ll get a security text message when you log into your account, to prove to MailChimp that it’s really you (so no one can hack your account, even if they get your username and password). This is also helpful when it’s time to finally upgrade to a paid account, once you hit 2,000+ subscribers, because if you use two-factor authentication, you get a 10% discount forever.
Once that’s done, click on Settings, then Verified Domains. You’ll see you’re already verified (from that first email you clicked on), but you aren’t authenticated.
Authentication is a step most people skip, but you shouldn’t. When you authenticate, you get better delivery results because the inboxes of your subscribers trust that the email they’re receiving from you is legitimately from you. Think of it like a licence plate for email—it proves that you are who you say you are. This helps your emails to not show up in spam or junk folders, so let’s do this step. If you’d like to watch a video of this step on its own, be sure to visit my authentication tutorial.
Click View Setup Instructions, and you’ll see two DNS changes you’ve got to make to your domain via your domain registrar (the place you registered your domain).
The above screenshot tells me I need to create a CNAME record and a TXT record so I can be authenticated to send from extremelycrappydomainname.com. Don’t worry about what a CNAME or TXT record is right now, just know you’ve got to create them. Since I use Hover (others use GoDaddy, NameCheap, Gandi, etc.), I’ll show you how to add those records using that service. If you’re stuck, contact your domain registrar and tell them that you’re wanting to create 2 records for your domain and need help. Their support will help walk you through doing that. So here’s what you do in Hover: go to the domain in question, click on DNS and then Add a Record.
Leave the MailChimp screen open with the records you need to create and open your domain registrar in another window or tab.
We’ll start with the CNAME, so we’ll change the Type from A to CNAME. We’ll enter the hostname and value (target name) exactly as they appear on the MailChimp page. In the case of this tutorial, I enter k1._domainkey and dkim.mcsv.net.
Next, we’ll add the TXT record, so we’ll click Add a Record again, change the Type from A to TXT. We’ll then enter @ as the Hostname and v=spf1 include:servers.mcsv.net ?all for the Content.
We’re now done with our domain registrar, so we can go back to the MailChimp screen, and click Authenticate Domain. If everything was done correctly, it’ll show you a checkmark beside Authentication under your domain name. If not, it may tell you to wait a little while (you can come back to this screen at any time) or tell you there was a problem (in which case, contact the help desk of your domain registrar to help you).
Now that the main parts of your account are setup and ready to go (they’re secure and you’re authenticated), you’re ready to setup your very first MailChimp list, hooray!
Don’t worry, if editing domain records stressed you out, you only have to do that once ever for your domain, and it’s the one and only time you’ve got to do anything related to domains in MailChimp.
How to setup your first MailChimp list
Remember that a list is really just a place MailChimp organizes all your subscribers. You can create as many lists as you want, but subscribers count towards your total (you pay for each one after 2,000 subscribers). Note, I teach you the best way to use only one list per account, so you never pay for duplicates, in the Chimp Essentials course.
Not to be cheeky, but if you signed up for a MailChimp account, you’ve already got a list! So congrats, you’ve half-finished this setup without doing anything (go you). By default, MailChimp creates your first list with a name that matches your business name (you filled that out when you created your account) and it adds you to your list, which is helpful so you see what your subscribers see when you email them.
If you want to create more lists, click Create List, but for this tutorial, let’s just setup the list you’ve got. See the down arrow beside Stats, in the right-hand column of the list? Click it.
These are all the settings for your new list, most we can skip (for now), but the important parts we should setup immediately. Click on List name and campaign defaults, and you’ll see some general information about your first list.
If you want to change the list name (who wouldn’t want their list to be called Extremely Crappy Name), you do that here.
What’s most important on this page are three things: Opt-in, reCAPTCHA and URL (paid option) and Unsubscribe Confirmations.
By default, MailChimp uses single opt-in, meaning if someone signs up for your mailing list, they don’t have to confirm they want onto it by clicking an email (that’s double opt-in). You can read about the benefits and drawbacks of each here. We’ll leave it set to single opt-in as that’s the most common.
reCAPTCHA requires contacts to confirm they aren’t robots. This is handy for both the singularity and to prevent spam signups. If you’re not worried about either, you can leave it off. That way real humans interested in joining your list have to jump through less hoops to get onto it.
The Campaign URL is something that’s created every time you send out a campaign. So each send to your list creates a webpage on MailChimp’s server that looks exactly like your campaign. This is handy in case you want to share that campaign on social media or your website, or even better, if your subscribers want to share your campaign on social media or their own website. If you have a free MailChimp account, don’t even worry about it, MailChimp generates a URL for each campaign randomly and automagically. If you have a paid account, you can create your own URLs.
You might be tempted to turn on Unsubscribe Automations (by checking the box, it’s so tempting!). If you do this, know that it technically breaks CAN-SPAM laws and can ruin your email addresses reputation because people generally mark those as spam, teaching everyone that your email should go to spam (which it shouldn’t, right?). So leave that off. ALWAYS.
How to set up MailChimp sign up emails
Now that the important settings are set, let’s give your new list some style.
Click on Signup Forms, beside Settings, and let’s get started. Then click General forms.
MailChimp is amazing because it lets you customize your signup process to match the style of your business, so logo, colours and fonts, all without touching any code.
Now, if you want to direct people to a signup page that MailChimp hosts for you for free, this is it. Except right now it’s ugly and grey.
So let’s give it some style by clicking on Design it. From here you can change the background, fonts, colours and form elements to match your own website. Do that until you’re pleased with how it looks.
Now, if you want to change any of the writing on the page, like “Subscribe to list” click on Translate it, and update the default text (not many people know to do this, so congrats on that!). Here’s what my own extremely crappy list signup page looks like.
Now if you want to send new subscribers a final subscription welcome message or even a gift (like a PDF download), click on the dropdown under Forms and response emails and select Final welcome email and make sure Send final welcome email is checked (FYI: in Chimp Essentials I show you how to create different onboarding emails based on content upgrades and specific product purchases). From here you can add some custom content by editing the area called Your subscription to our list has been confirmed.
If you want to add a download, like a PDF or audio file, to the final welcome email, then click the content box (outlined in red dashes) to edit the content, then highlight the words you want to link to (in the case above, it was “bonus PDF”) then click the link icon, which looks like a chain. Change the Link to dropdown from Web address to File and you’ll be taken to MailChimp’s uploader. Drag whatever file you want to link to onto the screen and boom, it’ll put in the URL to the file into the link box for you and you’re done.
Now the necessities of your mailing list are setup: you’ve set the options up, you’ve styled the form to match your brand and maybe you’ve even added in a little bonus for subscribers. Go you!
How to connect your MailChimp list to your WordPress website
A good thing about MailChimp is that there are so many ways to put a signup form onto your website. Let’s cover a few of the main and best ways to do it, although with WordPress the sky is the limit since there are infinite plugins.
Let’s look the best ways to get people to signup for your list:
Landing pages: this new MailChimp feature makes it easy to create a stunning page that you can link to from your social profiles, guest posts or even from your website. To create one, go to Campaigns, then Create a campaign, then Create a landing page. Once you give it a name, you’ll be able to style it and update any text you’d like. By adding a short blurb, and maybe a great background image (get one from Unsplash), you’ll be good to go to share the URL anywhere:
Once you’ve happy with the design, you can give it a Page title and hit publish. From here, just copy the URL you’re given anywhere you want to share your list:
In the future, if you need to update the text, the design or anything else, just un-publish it, make your changes, and publish it again.
As I mentioned, these landing pages are great to use in your social media bio’s and from guest posts.
WordPress Plugin: I could talk about how there are literally 1,000s of plugins to connect MailChimp to your WordPress site and discuss the pros and cons of each, but really, mc4wpis the best plugin because it works well and offers great support (they even support the free version of their plugin). Their free version works great if you need basic features or just a single form you want to use on pages on your website. The PRO version is only $59/year and offers the ability to create multiple forms, has reporting features and even integrates with some ecommerce stores—it’s what I use on every single website I’ve got.
To install mc4wp, go to your WordPress dashboard, click Plugins, then Add new, then search “mc4wp” and click Install Now and Activate.
MailChimp for WP will show up in your sidebar now, so click it. It’ll ask for your API key, which is fancy way of saying it needs your mailing list’s secret handshake. Click the link Get your API key here, and you’ll be taken back into your MailChimp account. On this page, click Create an API key.
Now copy it and paste it back into the mc4wp page in your WordPress site and click Save Changes.
Now your MailChimp account is connected to your WordPress site! If you click Form now, on the left, you can create a form that you can use on your homepage, blog posts, etc.—anywhere on your website. Give your form a name, select the right list (if you have more than one), and click the blue Add new form button.
Here’s your new form—you can change the text if you’d like, or leave it as-is. If you click Preview, you’ll see what the form looks like in your WordPress theme (hint: the PRO version lets you style the form without any programming). You can also click Get shortcode and paste that info any post, page or custom post. For now, let’s click Save Changes, and create a widget.
If your WordPress theme supports widgets, as most do, the easiest way to use mc4wp is to add it as a widget to your sidebar or footer. So if you click Appearance on the left, then Widgets, we can do that.
Now, if you simply drag the MailChimp Sign-Up Form widget to the widget area you want to use it on, you’ll be good to go. The subscriber form will now show up on every page that displays the widget area you added it to.
If you’d like to use your new mc4wp form on a specific page or post, grab the shortcode from the Form page and paste it into your content, like so:
Now you’ve got a fully functional sign-up form on your WordPress site. Go you!
Popups: setting aside the massive conversion about popups, how they can effect your search ranking and how they can potentially be annoying to visitors, they can also work well. I’ll leave your decision to use them or not use them up to you and what’s right for your business.
Phew, with that popup disclaimer out of the way, if you want to use them, here’s the easiest way to use a popup on MailChimp, since they offer you the ability to create them directly inside your MailChimp account. You can then add the code they give you to any website running on any content management system. Another easy way (which I won’t cover here) is to use the boxzilla plugin, from our new friends at mc4wp.
To add a popup using what MailChimp gives you, click on Lists, then Signup forms from the dropdown on the right of your list, beside the word Stats. Now click on Subscriber popup and you’ll see this.
Since the default is incredibly boring, we should customize it, just like we customized our signup process and the landing page. So use the customizations on the right to give your popup some style and pizazz. One thing to note is that you may way to use On exit for the Display setting, as Google can punish websites that show popups immediately.
Once you’re happy with the settings, click Generate Code and copy it, and click Publish. You can then paste that code into your WordPress site (or Wix, Weebly, Squarespace, etc.). Note that the popup only shows up once a year for each person who visits your site, so it won’t be super annoying.
Beyond these 3 simple ways—when you’ve mastered the basics, it’s time to supercharge your signup forms with advanced techniques which will turn your simple list into an email marketer’s paradise, by also collecting other information about subscribers, like where they signed up, what they bought or didn’t buy, and what they’re interested in. That’s covered in my Chimp Essentials course.
Now you know how to use landing pages, popups and a plugin to put your MailChimp signup form onto your website and out into the world. Make sure it’s easy for other folks to find and that there’s a good reason for them to sign up (i.e. always think about what’s in it for another person to join, instead of just “Signup for my list!”).
How to use MailChimp to send your first email to subscribers
Now that you’ve got a way for people to get onto your mailing list, it’s time to email them! This can be scary or stressful, but if someone signed up for your list, they only did that because they actually want to hear from you. So let’s create your first campaign.
In your MailChimp account, if you click Campaigns, then Create a Campaign, you’ll see several options: Create an Email, Create an Ad, and Create a Landing Page. Click on Create an Email, since that’s what we’re doing here and keep Regular selected (since we aren’t getting wacky with Automations or A/B testing in this tutorial).
Before we get started, give it a name. This name is for your internal purposes only, but for ease and speed, you can just name it what the subject line will be. Now you’ll see a screen with all the campaign options, so let’s go through them one at a time.
To start, we need to define who this email will go to, so we’ll click Add Recipients. The easiest thing to do is just pick your list and keep All Subscribers on list selected. This emails everyone who’s signed up. To get fancy/advanced, you can send campaigns to a segment or group.
Once that’s saved, click on Add From, right below it. This shows your subscribers who sent the email (i.e. you or your business). Give the name something they’ll recognize, for example, if they signed up on the Extremely Crappy Website, I’d put “Extremely Crappy Website” as the From name.
Next we want to Add Subject, and give our campaign a good subject line and preview text.
What makes a good subject line? Briefly, consider two main factors: What would make someone want to open the email? And, what’s honestly inside the email? Legally, you’ve got to be honest and not mislead with a subject line, but you’ve also got to think about what’s in it for the subscriber? They get tons of email a day, so what could catch their attention and click on your email?
Preview text is the little bit of text that appears under or beside the subject line in most email clients. Here’s what the preview text looks like in Gmail, where the preview text is “Before sending your campaign, your domain must be validated” and the subject line is “Verify Your Domain Before Sending”:
Now that the To, From, and Subject are setup, it’s time to move onto the main course, the actual email campaign, so click Design Email and we’ll get started.
MailChimp comes with a whack of email designs for you to use, they let you create your own styled templates, and even simply reuse a previous campaign’s style. Let’s create a new campaign style since this is our first email to our list.
From every text I’ve ever run (and most tests other experts have run), simple is always best. That means, less images, less text, less design, less elements. By doing this you ensure your emails are more likely to be read all the way through and then more likely to be clicked on. So let’s select, Simple Text, which is the last template on the list.
Now we can click on any element on the left to edit the text, from the header to the footer, and on the right you can edit or add new elements. If you feel overwhelmed with options here, do two things: add your content and change the link colour to match your website, that’s it. That’s more than enough to send a great email.
Once you’ve got your campaign written, you should preview it, so click on Preview and Test, then Enter Preview Mode.
You’ll be able to see exactly what your new campaign looks like on a desktop screen and a mobile device. This way, if anything looks or seems wrong, you can fix it. Once it’s ready to go, click Save and Continue (once you exit the preview screen if you’re in that). Now your email is ready to send!
You can click Schedule if you want to send it sometime in the future, or Send if you want to send it right now, so let’s do that. This is your moment of glory!
Here’s what it would look like when your subscribers receive it:
What’s next for your MailChimp list: Going beyond MailChimp basics
Congrats, you’ve now got the basics of MailChimp and email marketing down, GO YOU! This is just the first step though, as with most things, the basics are a solid start to a journey of learning. What I love about MailChimp is that it’s easy to get started (through this tutorial) and as you get more confidence and become more advanced, it’s there for you with amazing expert features.
0 notes
Text
Mailchimp Tutorial pdf
Have you ever thought of having a mailchimp tutorial pdf? dont worry, we are going to give you a mailchimp tutorial pdf and even a mailchimp video for more clearification and better understanding on how to use Mail Chimp Step by Step and Email Marketing. Now have you ever heard of mail chip? Or thought of email marketing before? Now we are going to giver you the neccessary information on email…
View On WordPress
#how to connect my phone to my PC in 30 sec using Xender#How to gain twitter followers#How to Record Screen on Iphone 6
0 notes
Text
New Post has been published on Themesparadise
New Post has been published on https://themesparadise.com/rayko-minimal-multi-concept-wordpress-theme/
Rayko - Minimal Multi-Concept WordPress Theme
Rayko is based on twitter bootstrap framework. This All-In-One package includes the awesome Revolution Slider Plugin ($19 Value), Visual Composer Plugin (34$ Value), Ultimate Addons Plugin ($18 Value) unlimited customizability, built-in mega menu, full WooCommerce design integration, premium Cube Portfolio plugin ($16 value), typographic options with over 600+ Google fonts, robust admin panel with hundreds of options to make it your own, tons of useful visual page builder elements and ready layouts available with just 1 click!
Fully Responsive
Rayko looks great on any device, from mobile to desktop and beyond. Super Clean responsive design fits to any screen. Try resize your browser window and see for yourself!
Visual Page Builder
Rayko come with famous visual page builder, Visual Composer for WordPress is drag and drop frontend and backend page builder plugin that will save you tons of time working on the site content. No programming knowledge required!
One Click Demo Setup
All presented demos are included on Rayko package. You’ll be amazed at how easy it is to install the demo contents on this theme. Just 1 Click, for real!!
Powerful Admin Panel
Rayko come with an strong admin panel + admin style options, where you can change the overall options of the theme, logos, colors, menus, languages, social, etc.
4 Menus/Header Styles
Rayko come with 4 different menus styles, where you can add top bar, icons for search, social, woocommerce, top menus, etc. Also you have 3 styles of selected menu items, Rounded, Square and simple.
One / Multipage System
Rayko allow you to have multipage or one page websites or even both systems at the same time! Simply choose the template of your page and organize the order with the wp menus. Easy!
Unlimited Portfolios with CubePortfolio
Build portfolios has never been so easy! With the live template builder you control every aspects like, type of portfolio, columns, colors, fonts, spacings, borders, etc.
Unlimited Colors
With Rayko Admin Panel you can quickly and easily change the main colors throughout the entire theme. Also you can change some specifics colors directly on the visual page builder shortcodes.
Buit-in Mega Menu
Building menus for your website has never been so easy! Works with regular WordPress menu, plus our own styles and functions for mega menus.
Multiple Loading Styles
Rayko comes with a lot of different loading styles that you can easily choose via admin panel. You can also change fonts, backgrounds, colors etc. You can disable / enable this website loading.
Under-construction Mode
If your website is not ready to show yet, simply activate our under construction mode, via Rayko Options and work on it, only logged users can see the site. No extra plugins are needed here!
Super Easy Installation & Setup
Quickly install the theme via WordPress upload or FTP, then use our awesome 1 Click Demo Importer to set of demo pages, posts, sliders, widgets, theme options etc. Easy 2 minute setup!
4 Blog Types
Rayko come with 4 blog types, masonry, normal wide, normal with right sidebar and normal with left sidebar. On both you can add right or left sidebars.
Revolution Slider Included (Save $18)
Heaps of custom transitions/animations for each object, tons of unique transition effects and lots of easy to set options to create your own effects. Customize this slider with the convenient drag and drop backend.
Woo Commerce Ready
Sell your stuff with Rayko, WooCommerce 2.0+ are fully compatible with this theme. Enjoy!
9 ready Contact Forms
We use contact form 7 plugin for contact forms. We already setup 9 different forms for you, you just need to choose them from the visual composer element, contact from 7, nice and easy! Also you can create you own form.
Translation and WPML Ready
WPML is 100% compatible with our theme. Also Rayko comes with .mo .po files, if you want to translate it to your own language. Nice and easy!
1400 Icons Available
Rayko comes with a massive collection of icons that you can use. They are separated by styles so is more easy to you find the style you want. Also the builder presents you a preview of each icon.
Custom CSS
Need extra customizations? Easy! Add your own custom css directly from our panel options without editing core theme files. This is a best practice because this custom styles won’t be lost on a theme update.
Tons of Google fonts available
Take control of your theme?s typography with custom fonts controlled through the Rayko Style Options panel. Access the massive Google Fonts library and create your unique style.
Support & Video Tutorials
We offer free support for all our buyers via support tickets page. Also Rayko come with a extensive documentation with HD how-to videos to help you get started with our theme.
SEO Best Practices
Get a hight ranking on search engines. Rayko is built with web standards and SEO best practices in mind. It also is compatible with most of SEO plugins!
Theme Features
Upper One Click Demo Import
Tons of Pre-Designed Pages Available
Ready for WordPress 4.8 Tested and Approved
Revolution Slider Included (Save 19$)
Visual Compuser Included (Save 34$)
ultimate VC Addons Included (Save 17$)
Cube Portfolio Included (Save 17$)
100% Responsive Layout
Retina Ready
Tons of Header / Menu Options
Sticky Nav
Mega Menu Built In
WooCommerce compatible
Unlimited Colors & Styles
Advanced Footer Options
Clean & Modern Design
Multiple Premium Slider Options
Built with HTML5 & CSS3
Compatible with Many Popular Plugins
Cross-Browser Compatibility FireFox, Safari, Chrome, IE9, IE10, IE11
Child Theme Compatible – includes basic child theme!
Advanced Customization / Theme Options
One Click Import/Export theme options
Multiple Blog Designs
Advanced Blog Options
Advanced Search Options with AJAX Results!
Multi-Lingual / RTL Ready
Multiple Portfolio Designs
10 Built-in Custom Widgets
Photo gallery with pop-up and full screen support
Popular Plugin Design Integration
WPML Ready
Translation ready with po/mo files
Google Web Fonts, System
Integrated Font Awesome icons
Built-in Social Feeds
SEO Optimized
Unlimited Sidebars, Left / Right
Custom Page / Post Options
Google Page Speed Optimized
Advanced Typography Options
Excellent Customer Support
Frequent updates with new features
Google Map Integrated
Mail-Chimp Newsletter Integrated
Twitter Integrated
Support videos from any major services (YouTube, Vimeo)
Support audio from any major services (SoundCloud)
* Images in the live preview will not be part of the design/theme meant for sale.
Update v1.1 (26 November 17) Added: WordPress 4.9 Support Updated: Visual Composer Plugin Updated: Ultimate Addons Plugin Fixed: Problem with Preview Pages before update Fixed: Audio Self host style issue Fixed: Flickr Widget https issue Update v1.0.1 (24 October 17) Updated: Rayko demo contents Fixed: Masonry template issue
Support
Our themes comes with an extensive help file with videos to help you understand how it works. If you encounter any problems or have questions once you purchased the theme feel free to drop us a line at www.upperinc.com/support
Support requests are being processed on business days from 14:00 to 19:00 (GMT +1) within 24/48h in the order they were received.
NOTE: Requests received via ThemeForest comments and personal messages, email, Twitter or FaceBook will take much longer time to process or can be not addressed at all!
If you like our themes, please do not forget to rate it
Other themes from us
Purchase Now
0 notes
Text
List Building – Are You Buying Email List Or Solo Ads?
.ui-tabs {display: table; } .ui-tabs-nav {display: table;} a.ui-tabs-anchor { font-family: Tahoma; font-size: 15px; color: #B52700; } div.ui-tabs-panel { font-family: Tahoma; font-size: 14px; font-weight: normal; color: #B35B22; }
Did You Just Buy Email List From Solo Ads?
List building for email marketing is not an option for any business, and if you do not do it right or maybe you are doing it ineffectively, you stand the risk to miss out on meeting your target numbers.
If you find yourself dreading the process of building an email list, you are not alone. In fact many business owners have for sometime relayed on buying email list also known as Solo Ads, which they then hammer with offers of products and services from their company.
Listen..
There is a good reason why list building has always worked for years in building long term customer relationships. With Solo Ads there is no element of relationship building. As a result, many offers you put in front of your customers through a solo ad campaign is guaranteed to get rejected.
This article ideal for list building beginners who have been doing list building all wrong and get hammered day in and day out with no results to show for.
Maybe you are an experienced online business marketer who gets somethings right in email list building but still get meagre results.
Even those of you who thinks you know everything you need to get list building off to a good start, yet face a bit of challenges due to the shifting trends and ways of making email list building work.
Here’s What you will Learn When You Download My FREE email list building Guide Plus FREE Email List Building Video Tutorial Guides.
The number one mistake Email List Building you can make that triggers a fright mechanism in your prospects ending up in failed campaigns.
Learn Why Solo ads will surely kill your business, as email list building may not really be the numbers game as you were led to believe.
The three part Email list building rock-solid strategy that has helped us generate from 50 to 1000 leads everyday.
Why great email list builders like Mike Dillard, Alex Becker and Russel Branson rarely feel the shortage of subscriber, sting of shifting ground in email list building strategies.
Now lets talk about the school boy errors you are making when building your email list. The worst thing you can do for starters is to assume that when you buy email list then that solo ad will turn out to be the perfect customer avatar for you!
This approach to email list building is flawed from get go. and here is why?
When a subscriber joins an email list, he/she is exchanging that email for value, If the expectation is met even better it has been exceeded! That’s when you have a customer who can trust you with their decision making when shopping for solutions in that particular area of expertise. This can be achieved through value stacking in what is commonly known as email indoctrination series campaign.
WTF Is Email Indoctrination?
An opportunity a customer gives you to give it a shot at capturing their attention which eventually leads on to become a buying customer. If you are looking to capture the attention of your audience then there is no better way to do it than crafting a series of compailing reasons why you are the one to offer the solution they are looking for online.
That series of introductory emails, where you layout what you can do for your potential client, introduce your product, your mission and of-course your company ethos… that’s what is called an email Indoctrination campaign.
Email Series #1: The Indoctrination Campaign
This first email is sent after a potential customer opts into your email list. Obviously, this person has some sort of interest in your brand—although this is likely a delicate interest, easily broken by spammy emails or a negative first, second, or third impression.
This email is your chance to tell the reader about yourself and gain their trust. In this first email, we discuss:
Who you are
What your position is
About the brand
How the brand started
What you care about (do you have kids? What are your hobbies? What moves you?) Where you’re from (is your business located in your hometown? Did you move there because you love the people or the scenery?)
Set The Center Stage
By Breaking Down What your reader can expect from you
This is where you get pretty personal. The more human you make yourself, the more your reader trusts you and feels a connection to your brand.
Email Series #2: The Engagement Campaign
This series is more of a pursuit—although the reader is still getting to know you.
Think of the engagement email campaign as a follow up to a lead magnet opt-in. So, whether your lead magnet is a free eBook download, coupon for your product, or DIY checklist—the engagement email series is sent post-download to make sure your prospective customer knows:
He or she made an awesome decision by receiving your lead magnet
Why the lead magnet will directly benefit him or her
Using your other products or services will continue to provide benefits
You are trustworthy
Your job throughout this email series is to ensure the reader he or she made a great choice by opting into your lead magnet and to offer the next step.
And Here’s How We Make It Happen
We craft a segmented email series that makes it super easy to effectively reach out to prospective customers affirming our position as experts who can be trusted on the subject matter, right before an offer is made.
The trouble with Solo Ads as your digital marketing partners, you can’t do list segmentation, let alone indoctrination, especially when the pay for the Solo ads supplier depends on him delivering clicks. You simply can’t leave a solo provider do this on their own and expect results.
In order to create successful email campaigns, our content writing team works with list janitors who clean our list and segment them appropriately according to customers needs, using some information tagging and other details from email list subscribers. The more you’re willing to put in the efforts in cleaning up your email list, the more effective the email series will be it’s that simple.
Listen Next week, I’ll share the general requirements and information you will need to create a truly engaging engagement and indoctrination campaign. Just make sure to subscribe so you do not miss out on that.
In these series of guides and video tutorials am breaking down this system I’ve Successfully been using for a few months now.
A simple marketing strategy that’s building my audience and email list and has been working really well lately… To say the least..am pleased with the result and this Case Study here shows, how over 1,000 new email subscribers daily are brought in – worry free – every single DAY since we started using this approach.
You’ve probably noticed that all of the most successful experts and companies in your industry have built huge social media audiences and email lists.
Here’s why:
Basically, it turns out, this group of people becomes your, “virtual distribution channel”. Once you’ve built up an audience of people who know you, like you and trust you, selling your products and services is as simple as sending an email. It’s the most reliable and predictable way to create a long term, sustainable business
So how do YOU do it?
How can you build a large audience and email list – QUICKLY – while minimizing risk?
Well, the formula is really simple, and it only involves three simple steps
1 – Target 2 – Cultivate 3 – Convert
I’d be happy to give you an over the shoulder walk through and show you exactly what we’re doing after learning this system from a respected mentor who’s amassed Over 40,900 new subscribers joining his email list using this strategy in the past 30 days, so I thought not everyone can afford high-end ticket mentoring programs. This is why I thought of putting together an online FREE training session to walk you through it in full detail.
You can click the link below to register today:
You’ll discover WHY building an email list is the single most valuable asset that you will ever own… How it works in synergy with your social media marketing efforts so you can have complete security in your business.
But… You will need a few tools first.
01 Email service providers
I personally use AWEBER but feel free to use Mail chimp or Get response. When it comes to Mailchimp vs Aweber comparison, which are two of the best-known e-marketing solutions currently available, it is all about choosing which one is the best fit for your business.
If you are a newbie, chances are that you are wondering what is an autoresponder let alone Aweber or Mailchimp?
What do Aweber and Mailchimp actually do?
Aweber and Mailchimp are tools that allow you to:
When building an email list, you will need a database where you can import and host a mailing list and captured data onto it using sign-up forms
These auto responders also lets you create e-newsletters (both HTML and plain text) which can be sent to your subscribers. And the best part of Aweber or Mailchimp is that you can automate your emails to subscribers via the use of ‘autoresponders’ which I will explain well in the next chapter. Aweber or Mailchimp will also review statistics related to your email marketing campaigns – open rate, click through, forwards etc, which gives you an insight into how your subscribers are interacting with your content.
What are autoresponders?
An autoresponders is the magic wand behind the scenes of automated content delivery in an e-newsletters format that is sent to your subscribers mailing list at pre-defined intervals
For example, in my business I have a welcome email, this email is set out to go to every subscriber 10 seconds from the time they optin into any of my business email list. This particular email is of great importance to my business as it sets out the whole centre stage for what is to come next. This is why my choice for aweber as my autoresponder of choice is undoubtedly of consequence. These essential emails can be set up so that straight after somebody signs up to your list, they receive a welcome or ‘onboarding’ message from your business; a week later they could receive a promo code for specific products; two weeks later they could receive an encouragement to follow you on social media. And so on!
There is no second chance to first time impressions so choose your Autoresponder here carefully.
The idea behind autoresponders is that much of your email marketing gets automated – it’s a sort of ‘set and forget’ scenario that saves you the bother sending out e-newsletters manually (although you can still of course do this as and when required). Regardless of whether you plump for Aweber or Mailchimp, it’s well worth investing some time in understanding autoresponders and using them effectively. Am saying this in good faith that you will realize the importance of their role and what sort of implications can autoresponders deal at your business if you get it wrong.
We’ll dig into autoresponder features a bit more comprehensively as we go along. But before we do that, let’s take a look at additional reading that you might want to pay attention to and what we will be covering in the days to come.
How Creating Content upgrades Helps In List Building
Strategies For Capturing emails
Rapid list building
Tripwire- Here’s How Using give aways or Freebies Help Grow Your List
Using webinars
Using free courses
Using social media- How To Leverage Social Communities For List Building
Sending emails- When , What, And How to cultivate a reciprocal relationship with your Email List
To close this article, let me point out that the Ugly Truth About Buying Email Lists still remains that you are the one to lose. With simple steps you could easily build yourself a robust and engaged email list of subscribers who are buzzing and willing to do business with your brand.
Sometimes opportunities can be consequential, your actions for seeking to acquire a solo ad campaign could possibly be well-intentioned, Maybe you just want your business to grow, and if you think encountering someone offering an inexpensive “shortcut” to building an email list is your answer, then you are completely off your mabbles.
Solo ad campaigns sounds like an awesome quick fix , however, buying email lists has never been an effective way to grow your email list. As a business, you want engaged readers that will find your emails valuable. The people on the for-sale lists did not agree to receive your emails, so the email addresses are not quality.
Additionally, sending unsolicited emails is against the CAN-SPAM act. According to the CAN-SPAM Act, a U.S. law that regulates commercial emails, you cannot sell or transfer email addresses, even in the form of a mailing list. Sending emails to people who didn’t ask for them is spam, and will make the readers will lose trust in your company.
A better way to grow your email list is through confirmed opt-in, which ensures that the people you are sending emails to want your emails. This also means you will get less unsubscribes. To learn about more effective ways to grow your list make sure to download your guide and subscribe to receive our weekly list building tutorials by email. If you have any questions relating to list building tactics, our Facebook Private group will be a great resource for you.
Buy email list -Did you find this article helpful? If you enjoyed what we shared and think that your friends and family can benefit, make sure to click share…
jQuery(document).ready(function() { jQuery( "#tabs_387" ).tabs({ collapsible: true, active: false }); jQuery( ".scroller_387" ).width(jQuery( ".scroller_387" ).width()+1); //jQuery( ".scroller_387" ).width('100%'); //jQuery( ".scroller_387 ul" ).width('100%'); jQuery( "#tabs_387" ).tabs({ collapsible: false }); //var n = jQuery(".scroller_387 ul li").length; //var w = (100/n-1); //jQuery(".scroller_387 ul li").width(w+'%'); });
The post List Building – Are You Buying Email List Or Solo Ads? appeared first on WordPress Tutorials.
from List Building – Are You Buying Email List Or Solo Ads?
0 notes
Text
How Mailchimp is killing the competition
Check this out http://bizanosa.com/mailchimp-killing-competition/
How Mailchimp is killing the competition
A video showing the Mailchimp automation feature.
Today I found out that Mailchimp automation will be free to everyone who uses Mailchimp. If you are on the free plan you should particularly be overly excited about this. The free plan allows you to send emails to at most 2000 subscribers. Once you hit over 2000 subscribers you will have to upgrade your account if you want to send your campaigns to all your subscribers.
Marketing Automation is very important. On top of saving you time, it will help you engage better with your buyers, subscribers , visitors, community or whoever your audience maybe.
If you are using any other Email Marketing solution and you have less than 2000 subscribers, stop wasting your money. You should move to Mailchimp . What you will do is:
Export your contacts from your current Email Solutions provider. All of them usually have a way for you to export your contacts.
Create a mailchimp Account. If you are unfamiliar with Mailchimp, join over 4000 students in my Mailchimp Tutorial for beginners. In the Mailchimp Tutorial you will learn how to import your subscribers into your new Mail chimp account.
Learn to use Mailchimp and use it for all your email Marketing tasks, including Marketing Automation. You will learn how to use all the features. You will create simple templates without any coding skills necessary. You will learn to send campaigns and how to create automations. You will learn a lot more.
Finally, Continue using Mailchimp for your marketing tasks.
If you want a simple email Marketing solution that is easy to learn, easy to use and provides the most features at no cost, I recommend Mailchimp hands down.
Head over to Mailchimp.com, create your account and start using it for all your email Marketing tasks.
Mailchimp has killed the competition because it provides the most features in their free plan. This gives anyone a chance at trying out email Marketing without spending a dime. By offering automation to all users, it has effectively killed them all. Automation used to be a paid feature. And you can do great things with it, now that it is free to ALL!
Click here to learn how to use Mailchimp >>
Article sources : https://blog.mailchimp.com/announcing-free-marketing-automation-for-everyone/
0 notes