#Marketplace Script Open Source
Explore tagged Tumblr posts
Visit Tumblr Blog
Explore Tumblr blogs with no restrictions, modern design and the best experience.
Last Seen Tumblr Blogs


Fun Fact
Hackers stole 65M passwords from Tumblr in 2013.
Text
Two Embers Trailer Analysis Part 1

(Go watch the trailer if you haven't already seen it.)
This is the battleground of Golden Wasteland before the fall, before it became a wasteland and a battleground.

Hopeful Steward (probably). Are they living alone now? We know from an earlier trailer that they had a sick parent, is this after their parent died?

Colors, domesticated manatees (one has the crystallization ailment). In the background, you can see pipes fractured and are leaking what looks like light. I've always wondered what the pipes of Wasteland/Eden piped around and I though it was water but it makes sense if it is light. Notice there's a line of people coming out of the building.

The line of people are all waiting to go inside and talk to the priest-looking person on the left. Who are they? Are they a doctor or something? What is this building?


This cleric or nurse or helper person then inspects the arm of this random person waiting in line and discovers they have the crystallization on their arm. Also notice the cleric's hat--is that written language script on it? Reminds me of Cuneiform.

Stewie setting up a tiny little shop in the marketplace. One thing I love about this trailer is we get to see the colors of everything. In game, many of the colors of the banners are faded with age and the spirits themselves are washed out or are shades of blue or gold so for many of them we really don't know what colors their clothing was, but here we get to see what kinds of clothing colors were common in the Sky Civilization before the fall.

Stewie notices something is wrong, looks up to see billowing stormclouds and the light in the towers fading and going out.

Everyone looks up to Eden, which glows brighter for a moment before going dark. Spooky.

This is the most enigmatic part of the trailer. This figure levitates downward in front of the Eden crystal--what I think is the power source for the Sky Civilization. I've seen some people hypothesize that that is the Eden Elder or King, a person named Resh, and possibly one of the Two Embers.

The very next scene shows a freaking tsunami of reddish darkness gushing into the city and washing over the army. This reminds me very strongly of Ganondorf's Malice/Gloom in Tears of the Kingdom.

Stewie and manatee flee the city by running on the pipes. A good thing too because in the next scene, Stewie's shelter is blown away in the wind.

THe next several scenes are with soldiers running to battle and getting into position. Some things I think are interesting are that the soldiers have different colors of tunic (different ranks or units?) and all their spears are glowing blue. Are they powered by something? What do they do with that power?

Stewie tells Manatee to be quiet (hiding it?) and gives the manatee the butterfly that their parent painted for them.

But then, someone grabs Stewie!

A soldier opens a device pointed at a bunch of manatees. Not sure what's going on here, but look at that blue diamond. Does it look familiar? Isn't that the kind of object you are seeking in the ocean in the Abyss questline?

But it doesn't matter, because this person rams their shoulder into the device and knocks it over. Who are they?

Brave soldiers line up and get ready to fight. Notice the shield crest. What's interesting to me is it is a different crest than what you can see on the shields in the wasteland. Not sure if it means anything.

Stewie gets knocked over and their painted butterfly goes flying out of their hand.

Suddenly they're in the vault?? Is that the Vault elder? Whoever they are, they're holding a memory lantern and touching Stewie's head. Are they putting Stewie's memories in a memory lantern? Are we going to get to see Stewie's memories?? :DDD

On the battlefield, dark dragons make their appearance.
>> Trailer Analysis pt 2
#sky cotl#sky children of the light#two embers#hopeful steward#trailer analysis#long post#you can tell I'm such a radiance moth from how much I pay attention to the colors of things
37 notes
·
View notes
Text
Indie Game Development Tools for Beginners
Intro:
Hey there, fellow gaming enthusiasts! It's your friendly neighborhood game developer, Techy Saad, here to guide you through the exciting world of indie game development. Whether you're a seasoned programmer looking to dive into game design or a complete beginner eager to bring your creative visions to life, this post is for you. Today, we'll be exploring some of the best tools and resources tailored for beginners venturing into the realm of indie game development. So, grab your coffee, fire up your imagination, and let's get started!
Welcome to the Indie Game Development Scene:
Starting a game development business is a thrilling experience that offers a plethora of creative opportunities, challenges, and tools. If you are just starting out, you will need to arm yourself with the necessary resources to see your game ideas through to completion. Luckily, the indie game development community has a wealth of easily navigable tools and resources to assist you in getting started.

Game Engines: The Heartbeat of Your Game
Game engines are the building blocks upon which you can construct your entire game. If you are just starting out, it is important to choose a user-friendly game engine so that you can minimize the learning curve and concentrate on letting your creativity run wild. Unity and Unreal Engine are two of the most well-liked options among independent developers because of their feature-rich features, wealth of documentation, and active communities.
Unity:
Unity is well-known for being user-friendly and adaptable, making it a great option for novices who want to start making games. Its user-friendly interface and extensive tutorials allow you to quickly prototype and create 2D or 3D games without any prior programming knowledge.
Unreal Engine:
Unreal Engine, a well-known tool for game development, is so good that even a novice can create engaging games with its Blueprint visual scripting system. Its marketplace also has a ton of assets and plugins that can help you make better games.
Visual Assets: Bringing Your Game to Life
While gameplay mechanics are important, visually appealing content is just as important for drawing players in and making them feel like they are in the game. If you are just starting out, using pre-made assets and graphic tools can help you produce games faster without sacrificing quality.
Blender:
As a free and open-source 3D creation suite, Blender is an invaluable tool for indie developers seeking to create stunning 3D models, animations, and visual effects for their games. With its user-friendly interface and extensive community tutorials, Blender is a must-have for beginners delving into 3D game development.
Read Full Article by Clicking Below:
Read Full:
#3d game development company#techysaad#writer on tumblr#video games#video gaming#programmer#coder#unity#unreal engine#blender#blog#technology#game design#game developers#game dev blogs
5 notes
·
View notes
Text
What Tools and IDEs Are Used in a Typical Python Programming Training Course?

Introduction
Python is one of the most popular programming languages in the world, known for its simplicity and readability. It's used in web development, data science, AI, and more. But writing Python code effectively requires more than just understanding syntax; you need the right tools and integrated development environments (IDEs). In any comprehensive Python online training with certification, understanding and using these tools is a crucial part of the learning journey.
According to the 2024 Stack Overflow Developer Survey, Python ranks as the most wanted language among developers. This shows a strong industry demand and growing interest from beginners. To keep up, python programming online training courses are integrating a variety of tools and IDEs that help learners practice, debug, and build projects more efficiently.
In this blog, we’ll explore the most commonly used tools and IDEs in a typical Python programming training course. You’ll learn what each tool does, why it matters, and how it helps in real-world scenarios.
Understanding the Python Development Environment
Before diving into individual tools, it's important to understand what makes up a Python development environment. In a typical Python online training with certification, the environment includes:
An IDE or code editor for writing Python code.
A Python interpreter to run the code.
Package managers like pip to install libraries.
Version control tools to track project changes.
Notebooks or dashboards for interactive development. These components help create a seamless workflow for coding, testing, and debugging.
Top IDEs Used in Python Online Training With Certification
PyCharm
Why it’s used in Python courses: PyCharm by JetBrains is one of the most feature-rich IDEs for Python. It supports python language online development with intelligent code completion, error highlighting, and integrated debugging tools.
Features:
Integrated debugging and testing
Smart code navigation
Refactoring tools
Version control support
Integrated terminal and Python console
Example in training: In Python online training with certification, students often use PyCharm to work on object-oriented programming projects or web development with Django.
Visual Studio Code (VS Code)
Why it’s popular: VS Code is lightweight, open-source, and customizable. With the Python extension installed, it becomes a powerful tool for any Python programmer.
Features:
IntelliSense for Python
Built-in Git support
Extensive extensions marketplace
Integrated terminal
Jupyter Notebook support
Example in training: VS Code is commonly used when introducing learners to data science libraries like Pandas and NumPy.
Jupyter Notebook
Why it’s essential for data science: Jupyter is more than an IDE; it's a web-based interactive computing platform. It allows you to mix code, output, visualizations, and markdown.
Features:
Inline visualization (great for Matplotlib, Seaborn)
Segment-based execution
Easy documentation with Markdown
Works seamlessly with Anaconda
Example in training: Used extensively in Python online training with certification for data analysis, machine learning, and statistics-based modules.
IDLE (Integrated Development and Learning Environment)
Why it’s beginner-friendly: IDLE is Python’s built-in IDE. While basic, it’s often introduced first to help learners focus on understanding syntax and logic without distractions.
Features:
Lightweight and easy to install
Simple REPL environment
Good for small scripts and exercises
Example in training: Used during the early phase of the course for learning variables, control flow, and functions.
Essential Tools for Python Programming
Python Interpreter
Every Python course requires a Python interpreter to execute the code. Python 3.x is the standard for most training programs today.
Key Use: Interprets and executes your code line-by-line, providing immediate output or error messages.
Anaconda Distribution
Why it’s useful: Anaconda is a bundle that includes Python, Jupyter, and hundreds of scientific libraries. It's widely used in data-heavy training modules.
Benefits:
Easy package management via Conda
Comes with Jupyter pre-installed
Ideal for machine learning and data analysis
Real-world tie-in: Many professionals use Anaconda in industry settings for AI and analytics work, making it highly relevant in Python online training with certification.
Version Control and Collaboration Tools
Git and GitHub
Why it's taught in courses: Version control is a must-have skill. Students are introduced to Git for local version tracking and GitHub for remote collaboration.
How it’s used:
Commit and push changes
Work in teams on group assignments
Review and merge pull requests
Example Project: Building a multi-file Python project with collaboration using Git branches.
Python Package Management Tools
pip (Python Package Installer)
Used in nearly every course, pip allows students to install packages from the Python Package Index (PyPI).
Command Example:
bash
pip install requests
virtualenv and venv
These tools are used to create isolated environments, avoiding package conflicts across projects.
Why it matters in training: It teaches learners how to manage dependencies correctly.
Code Linters and Formatters
Pylint and Flake8
These tools help identify syntax errors, poor coding practices, and PEP8 violations.
How it helps learners:
Immediate feedback on bad code
Encourages good coding habits
Prepares for real-world collaboration
Black
Black is an automatic code formatter that enforces a uniform style.
Why it’s taught: In professional development environments, consistent code style is crucial. Black makes that easy.
Jupyter Notebooks and Interactive Coding Tools
Google Colab
Why it’s included: Google Colab provides free cloud-based Jupyter notebooks with GPU support. It’s great for training AI and ML models.
Features:
No local setup required
Supports Python 3 and major libraries
Shareable and collaborative
Thonny
A beginner-friendly IDE ideal for introducing students to debugging and variable tracking visually.
Used for: Explaining loops, conditionals, and function scopes visually.
Real-World Applications in Training Projects
Web Development
Tools Used: PyCharm, Flask/Django, GitHub
Project Example: Build a blog website with CRUD features.
Data Analysis
Tools Used: Jupyter, Pandas, Matplotlib
Project Example: Analyze COVID-19 datasets and visualize trends.
Machine Learning
Tools Used: Google Colab, Scikit-learn, TensorFlow
Project Example: Build a linear regression model to predict housing prices.
Automation Scripts
Tools Used: VS Code, Selenium
Project Example: Automate login and data scraping from websites.
Key Takeaways
Python online training with certification includes tools that mirror real-world job roles.
IDEs like PyCharm and VS Code enhance learning through code suggestions, debugging, and integration.
Jupyter and Colab are essential for data-driven modules.
Git, pip, and virtual environments introduce real-world development workflows.
Code linters and formatters help build professional-level coding habits.
Conclusion
Whether you're aiming for data science, web development, or automation, understanding the tools and IDEs used in a python programming training course is crucial. These tools don't just make learning easier, they prepare you for real-world coding jobs.
Ready to sharpen your Python skills and build job-ready projects? Start learning with the right tools today!
0 notes
Text
PrestaShop Website Designing: Build a Powerful, Custom Ecommerce Store
In the rapidly evolving digital marketplace, having a well-designed, functional, and scalable ecommerce website is no longer optional — it’s essential. PrestaShop, a leading open-source ecommerce platform, offers businesses the flexibility and tools needed to create and manage successful online stores. This article explores the essentials of PrestaShop website designing, its advantages, and why it remains a preferred choice for ecommerce businesses around the world.
What is PrestaShop?
PrestaShop is a free, open-source ecommerce solution that enables businesses to build fully customized online stores. Since its launch in 2007, it has powered over 300,000 ecommerce websites globally. Known for its simplicity, adaptability, and comprehensive feature set, PrestaShop provides businesses with the tools to sell products online, manage inventory, process payments, and optimize the customer shopping experience.
Why Invest in PrestaShop Website Designing?
1. Open-Source and Customizable PrestaShop’s open-source framework offers complete control over your store’s design and functionality, allowing developers to tailor the site according to specific business needs.
2. Wide Selection of Themes and Modules With thousands of templates and modules available, businesses can quickly enhance their store’s design and add valuable features without extensive development work.
3. SEO-Optimized Framework PrestaShop supports essential SEO functionalities such as clean URLs, meta tags, sitemaps, and optimized product pages, ensuring your store can rank well in search engine results.
4. Multilingual and Multi-Currency Support The platform is designed to cater to international markets, supporting multiple languages and currencies, making it an ideal choice for businesses targeting global customers.
5. Secure and Scalable PrestaShop offers robust security features and the ability to scale as your product range and customer base grow, making it suitable for both small startups and large enterprises.
Key Components of PrestaShop Website Designing
A successful PrestaShop website requires more than just selecting a template. Professional website designing ensures a unique, functional, and user-friendly ecommerce experience. Key aspects include:
1. Custom Theme Development Custom themes aligned with your brand’s identity provide a unique and memorable user experience. This includes bespoke layouts, color schemes, typography, and product displays.
2. User Experience (UX) Focus Designing intuitive, easy-to-navigate interfaces enhances customer satisfaction and conversion rates. Every element, from product categories to checkout processes, should be seamless and mobile-friendly.
3. Performance Optimization Fast-loading websites are critical for ecommerce success. Optimizing images, scripts, and server performance ensures better user engagement and improved search rankings.
4. Essential Module Integration Adding key functionalities like secure payment gateways, product reviews, promotional tools, and inventory management modules enhances both the customer experience and operational efficiency.
5. Responsive, Mobile-First Design With a growing share of online shopping happening on mobile devices, ensuring your PrestaShop store is fully responsive and performs well on all screen sizes is a top priority.
Why Hire Professional PrestaShop Website Designing Services?
Working with an experienced PrestaShop website designing company offers several benefits:
Custom solutions tailored to your business goals
Expert integration of ecommerce functionalities
Optimized, SEO-friendly site structure
Ongoing support and maintenance services
Designs prepared for scalability and growth
Final Thoughts
A professionally designed PrestaShop website can transform your online business, delivering a seamless shopping experience to customers while providing powerful management tools for your operations. Whether you’re starting a new ecommerce venture or looking to upgrade an existing online store, investing in expert PrestaShop website designing services ensures your business remains competitive and future-ready.
If you’re considering building or redesigning your ecommerce website, partnering with a skilled PrestaShop development agency is a smart step toward achieving long-term digital success.
0 notes
Text
FoodTiger Nulled Script 3.6.0

Unlock the Power of FoodTiger Nulled Script for Your Food Delivery Business Are you ready to revolutionize your food delivery startup with a robust and feature-rich platform? Look no further than the FoodTiger Nulled Script—a powerful solution designed to streamline operations, support multiple restaurants, and deliver exceptional user experience. This script is perfect for entrepreneurs and developers looking for a fast, reliable, and customizable tool to kick-start their food ordering service without the hefty price tag. What is FoodTiger Nulled Script? The FoodTiger Nulled Script is a premium food delivery software that has been unlocked for free access. Originally developed as a high-end solution for managing food delivery businesses, this nulled version offers you all the premium features—without any restrictions. With its intuitive interface and powerful admin dashboard, you can manage restaurants, orders, and customers with ease. It’s an excellent alternative for startups looking to save money while still accessing top-tier software. Technical Specifications Platform: Laravel PHP Framework Database: MySQL Languages: Fully multilingual with built-in translation support Responsive: 100% mobile-friendly layout Third-Party Integration: Supports Stripe, PayPal, and more Outstanding Features & Benefits Multi-Restaurant System: Perfect for marketplaces—host multiple restaurants under one roof. Real-Time Order Tracking: Let your users track their orders from kitchen to doorstep. Advanced Admin Panel: Manage restaurants, menus, discounts, and delivery zones effortlessly. Modern UI/UX: Sleek and intuitive design that enhances customer satisfaction. Contactless Delivery: Built-in support for safe, contactless food delivery methods. Why Choose FoodTiger Nulled Script? Choosing the FoodTiger gives you access to premium tools without licensing fees. You get the flexibility to customize every part of the system, from UI layouts to backend logic. It’s ideal for freelancers, startups, and developers who want full control over their food delivery platforms. Say goodbye to limitations and hello to a world of possibilities—all without spending a dime. Common Use Cases Launching a multi-vendor food delivery app in your local area Building a white-label solution for restaurant chains Starting a commission-based food ordering marketplace Testing new delivery models and logistics solutions with zero upfront cost How to Install FoodTiger Nulled Script Download the FoodTiger Nulled Script from our website. Upload the files to your server using FTP or cPanel. Set file permissions and create a new MySQL database. Run the installer by accessing your domain in a web browser. Follow the setup wizard and enter your database credentials. Login to the admin panel and start configuring your platform. Frequently Asked Questions (FAQs) Is it legal to use the FoodTiger Nulled Script? While using nulled scripts may violate the original developer’s terms, many users opt for them to test or build proof-of-concept platforms. We encourage using it responsibly and considering licensing options if you plan to scale. Can I customize the FoodTiger Nulled Script? Absolutely. The script is fully open-source and built on Laravel, allowing deep customization of features, design, and functionalities. Is this version secure for live deployments? The FoodTiger Nulled Script includes the same core security features as the licensed version. However, always perform your own audits and use secure hosting practices for best results. Where can I download the FoodTiger Nulled Script? You can download the latest version directly from our website and get started today with no hidden costs or restrictions. Start Building Your Delivery Empire Today Whether you’re a developer building a food delivery app or an entrepreneur aiming to create the next big thing in local delivery services, the FoodTiger is your gateway to fast, affordable, and scalable success. Don’t miss the opportunity to harness this powerful tool for free.
Check out our other valuable downloads like betheme nulled and explore even more resources to enhance your web projects. Need additional themes and scripts? Visit our trusted partner for more tools like betheme nulled to power up your development journey.
0 notes
Text
Master Web Development with PHP: A Path to a Rewarding Career
In today’s digital age, the internet is not just a source of information but also a thriving marketplace, a global classroom, and a social gathering place. Behind the scenes of many of these web platforms lies a powerful server-side scripting language — PHP. With its versatility, ease of use, and robustness, PHP continues to be one of the most sought-after programming languages in the web development domain. For aspiring developers and IT professionals, mastering PHP is an essential step toward building a strong foundation in back-end development.
If you are looking to carve a niche in this domain, enrolling in a PHP Course in Chandigarh can be your gateway to a promising future.
What is PHP and Why is It Still Relevant?
PHP, or Hypertext Preprocessor, is an open-source, general-purpose scripting language especially suited for web development. Originally created in 1994 by Rasmus Lerdorf, PHP has evolved significantly, now powering over 75% of websites on the internet including giants like Facebook, WordPress, and Wikipedia.
Unlike client-side languages like HTML or JavaScript, PHP runs on the server. It allows you to build dynamic content that interacts with databases, manage sessions, and even handle e-commerce platforms securely. With frameworks like Laravel, CodeIgniter, and Symfony extending its capabilities, PHP is far from outdated — it's adapting and growing stronger.
Benefits of Learning PHP
1. Easy to Learn and Use
For beginners, PHP offers a relatively gentle learning curve. Its syntax is simple, making it easier for newcomers to understand and write scripts. It also integrates seamlessly with HTML, which is a huge plus for web developers.
2. Open Source and Cost-Effective
PHP is open-source, which means it's free to use. Additionally, a large community of developers actively contributes to its libraries and frameworks, making development faster and more secure.
3. Database Integration
PHP works well with various databases like MySQL, PostgreSQL, Oracle, and more. Its database connectivity makes it ideal for building data-driven applications.
4. Cross-Platform Compatibility
PHP runs on various operating systems like Windows, Linux, and macOS. Its cross-platform nature allows developers to deploy applications across different platforms with minimal changes.
5. Career Opportunities
The demand for PHP developers remains high due to the continuous need for websites and web applications. Whether you wish to work as a freelancer, join a tech startup, or land a job in an established IT company, PHP opens multiple career doors.
Who Should Consider PHP Training?
Students pursuing BCA, MCA, B.Tech, or M.Tech
Freelancers looking to expand their skill set
Web designers wanting to transition to full-stack roles
Entrepreneurs planning to develop web platforms
Professionals seeking a career change into web development
No matter your background, learning PHP can significantly increase your value in the job market.
What to Expect from a PHP Course?
A well-structured PHP course should cover both fundamental and advanced topics. Here’s what a typical syllabus may include:
Introduction to Web Development and Server-Side Scripting
PHP Syntax and Variables
Control Structures: Loops, If-Else Statements
Functions and Arrays
Forms and User Input Handling
Sessions and Cookies
File Handling
MySQL Database Integration
Object-Oriented Programming (OOP) in PHP
Working with PHP Frameworks (e.g., Laravel)
Building Dynamic Web Applications
Security Best Practices
Moreover, practical projects and real-time application development should be an integral part of the curriculum to ensure that students gain hands-on experience.
Why Choose PHP Training in Chandigarh?
Chandigarh has rapidly emerged as a major educational and IT hub in North India. Known for its quality institutions and vibrant student community, it offers a conducive environment for learning and professional growth.

If you are looking to start your journey in web development, choosing the right training center is crucial. Among the many options available, enrolling in PHP Training in Chandigarh can provide the guidance and mentorship needed to master this dynamic scripting language.
Institutes in Chandigarh offer structured courses led by industry professionals who bring years of experience to the classroom. These training programs often include live projects, internships, and job placement assistance — features that can greatly accelerate your career.
What Makes a Good PHP Training Institute?
When selecting a training institute for PHP, here are some key factors to consider:
1. Experienced Faculty
Trainers should not only be skilled in PHP but also have industry exposure to provide practical insights and real-world applications.
2. Hands-On Learning
Theoretical knowledge is important, but hands-on practice makes all the difference. A good course should offer coding exercises, assignments, and capstone projects.
3. Updated Curriculum
Given the dynamic nature of web development, the syllabus should be regularly updated to include the latest versions of PHP, frameworks, and tools.
4. Internship & Placement Support
Look for institutes that offer internship opportunities and job placement support. A reputed institute often has tie-ups with IT companies for smoother job transitions.
5. Student Reviews
Check testimonials, Google reviews, or speak to alumni. This can give you a realistic idea of the quality of training offered.
Career Path After Completing a PHP Course
Upon completing your PHP Course in Chandigarh, you can explore various career opportunities:
PHP Developer
Web Developer
Full Stack Developer (with additional front-end skills)
Software Engineer
Backend Developer
Freelancer or Entrepreneur
The starting salary for PHP developers in India ranges from ₹2.5 LPA to ₹4.5 LPA, and with experience and specialization (e.g., in Laravel or WordPress), the compensation can rise significantly.
The Future of PHP
Despite the rise of newer languages like Python, Node.js, and Ruby, PHP remains strong due to its simplicity and widespread use. WordPress alone, which is built on PHP, powers over 43% of all websites globally. As long as the internet continues to grow, PHP will have a place in the developer’s toolkit.
Final Thoughts
Learning PHP is not just about acquiring a programming skill — it’s about opening doors to a world of opportunities in the tech landscape. Whether you're a student, a professional, or someone seeking a fresh start, a comprehensive PHP course can equip you with the tools needed to build dynamic websites and applications.
And if you're serious about turning your passion into a career, enrolling in a professional PHP Training in Chandigarh could be the best decision you'll make for your future.
0 notes
Text
How to Choose the Best Neon Sign Board Design for Your Storefront
If you’re a business owner trying to stand out in a crowded marketplace, there’s one visual trick that still works wonders: Neon Sign Board Design. These glowing signs are more than just eye candy — they’re brand beacons, drawing in curious customers and giving your storefront a distinct personality. But how do you choose the right one? Let’s walk you through how to pick a neon sign board design that doesn’t just light up — it converts.
💡 Why Neon Signs Still Work Wonders In a world dominated by digital ads, there’s something beautifully analog about neon signs. They’re nostalgic, eye-catching, and — when designed well — unforgettable. From cozy cafés and fashion boutiques to gyms and tech stores, a well-designed neon board adds character, boosts foot traffic, and makes your store Instagrammable. But here’s the catch: Not all neon signs are created equal. 🎨 Step 1: Define Your Brand’s Personality Your neon sign isn’t just a name in lights. It’s an extension of your brand. Start by asking yourself: ● Are you playful or premium? ● Do you want vintage vibes or modern minimalism? ● Should your message shout or whisper? If you’re running a trendy café, a handwritten-style neon with warm pinks or oranges might suit. A luxury store, on the other hand, might opt for a crisp white sign in an elegant serif font. A great Neon Sign Board Design should immediately tell your story without saying a word.
🏪 Step 2: Size and Placement Matters Where you place your neon sign affects everything — its visibility, brightness, and effectiveness. Take note of: ● Viewing angles: Can it be seen from the street or only from up close? ● Height: Eye-level signs often perform better than those mounted too high. ● Surroundings: Will the background clash or complement your neon colors? If your storefront is on a busy street in Chennai or Coimbatore, you’ll want a bold and large neon design that grabs attention even at a glance.
🎯 Step 3: Choose Words That Work Neon is minimalist by nature — you can’t write a paragraph in glowing tubes. So your message has to be short, catchy, and clear. Some proven ideas: ● Your brand name ● A short tagline like “Stay Bold” or “We Brew Magic” ● A single word like “Open” or “Glow” When in doubt, simplicity wins. Remember, a great Neon Sign Board Design is meant to be understood in seconds.
🎨 Step 4: Pick the Right Colors and Fonts Neon signs come in a spectrum of colors, from hot pink to electric blue. But color isn’t just about beauty — it’s about emotion. ● Red grabs attention (think: restaurants or fashion) ● Blue feels calm and trustworthy (ideal for spas or tech) ● Yellow/Orange is energetic and cheerful ● White gives a clean, premium look Match your color to your brand values. Then pair it with a readable font — avoid overly decorative scripts unless you’re a tattoo studio or an art café. At Tamil Nadu Signs, we help clients choose combinations that pop without overwhelming the eye. Our in-house design team ensures every curve and glow is tailored to your brand. ⚡ Step 5: Go Custom (Because Cookie-Cutter is Boring) The biggest mistake businesses make? Settling for pre-made neon signs. A custom Neon Sign Board Design ensures: ● Your sign fits your wall perfectly ● The design reflects your brand identity ● You get to pick the message, colors, and size that matter At https://tnsigns.in/neon-sign-board/, we specialize in fully customized neon boards across Tamil Nadu. Whether it’s for a small store or a large commercial space, we design it your way. 🛠 Step 6: Consider Durability and Maintenance Today’s LED neon signs are safer, longer-lasting, and more energy-efficient than traditional gas neon tubes. Still, you want to ask:
● Is it indoor or outdoor-rated? ● Is the power source hidden? ● Can you clean it easily? ● Is it weatherproof? We use high-quality materials designed to last in India’s humid, dusty, and hot weather conditions. It’s not just about beauty — it’s about performance. 🛒 Step 7: Choose the Right Vendor You want someone who: ● Understands branding ● Offers design + manufacturing under one roof ● Gives quality guarantees That’s where Tamil Nadu Signs stands out. We don’t just make signs — we build storefront statements. From concept to installation, your vision becomes our mission. 👉 See real designs and happy clients here: https://tnsigns.in/neon-sign-board/
0 notes
Text
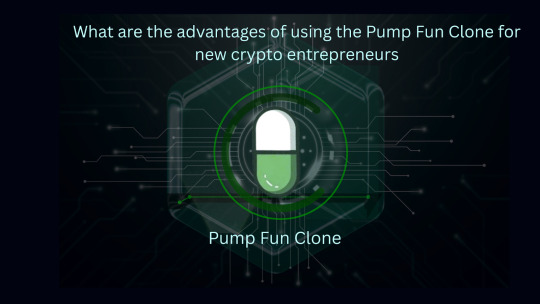
What are the advantages of using the Pump Fun Clone for new crypto entrepreneurs
Introduction
Pump.fun clone It is a customizable platform that very closely mimics the working of the Pump.fun decentralized meme coin creation and trading platform in Solana blockchain, helping users to create, launch, and trade custom tokens quite easily especially meme tokens without extensive knowledge of blockchain. By adopting a Pump.fun clone, crypto entrepreneurs would have an easy entry into the meme coin market with a stellar and secure platform that exploits the proven success of Pump.fun model.
What is pump fun clone
A Pump.fun clone is a platform that reestablishes the services of Pump.fun, which serves as a decentralized meme coin generator and launchpad. It allows users to create, launch, and trade custom tokens, especially meme coins. Just like Pump.fun, it serves millions of users willing to do so. Several means can be employed by developers to create a clone of Pump.fun. Some include using pre-built clone scripts on the building on open source projects like Memex or going custom developed to an bring unique features and brand aspects to it. Considerations in developing Pump.fun clones include the selection of appropriate blockchain networks, for example Solana or Ethereum strong security measures; and compliance with regulatory requirements to build user confidence.
what are the advantages of using the Pump Fun Clone
Rapid Market Entry
With a Pump fun clone in hand, entrepreneurs can now enjoy a fully functional setup to send off their very own platform for memes currencies across creation and trading almost instantaneously. This factor greatly contributes toward a reduction of time as well as resources usually required for developing a whole system from scratch for a swift market entry. With a ready-made framework in hand, entrepreneurs can devote all energy toward customization and branding to present their platform distinctly, with the technological infrastructure provided duly taking care of reliable and huge operations.
Cost Efficiency
The amalgamation of programming and testing a platform from zero would be a costly affair, more so for an entrepreneur in need of financing. The other option would be to go with the copycat script; for instance, a Pump fun clone script gives a cost-effective solution through a ready framework that can be customized according to specific requirements. This means that it greatly cuts down the cost of initial development while enabling the fastest possible way of market entry, thus allowing efficient allocation of resources. Moreover, clone scripts work on tried-and-tested business models; this greatly reduces the risk involved with untested concepts.
User-Friendly Token Creation
The clone of Pump fun clone simplifies the process of creating and launching meme coins with no technical expertise required by the user. A user-friendly interface allows people to create tokens just by providing basic information such as the name of the token, its symbol, and a related image. By making it so easy to do, this increases the potential user base and promotes even more activity in the cryptocurrency space. There are also multi blockchain integrations in the system, allowing token projects to broaden across different networks. An approach that democratizes token-making allows an assortment of users to join the crypto space without the need to possess any coding skills.
Customization and Branding
With a Pump fun clone script businesses can be effectively customize the look and feel of their platform to match their brand identity while providing an unmatched experience for the end users. Customization includes brand specific logos, colors, and other graphics that promote its identity and differentiate it from its competitors in the crowded marketplace. Further, business people will remodel how the platform will function according to individual business goals to meet the needs of audience preferences. This flexibility will create a better engagement and loyalty surrounding the platform.
Integrated Security Measures:
A Clone of Pump fun clone does hold out very well to security in token creation and trade through multiple measures true to its name. The entire token operations are based on standardized, pre-audited smart contracts - which minimize the chances of their vulnerability while ensuring reliable execution. There are liquidity locking mechanisms that help keep safe some liquidity pools from unauthorized withdrawal, thus protecting users from rug pulls and enhancing their trust. There are also advanced fraud detection systems that take care of suspicious activity in trading to provide a safe environment for trading, and these system audits for security, therefore contributing to the robustness of the platform by finding out while at the same time addressing lines of potential vulnerabilities. All of this makes a safe and secure environment for creating and trading tokens.
Scalability
Scaling - the pump fun clone is the same, which tells whether the site will hold an increasing amount of users and transaction volume as it grows. This was achieved with multi-chain enabled: Solana and Ethereum Virtual Machine (EVM) networks, increasing transaction speed while lowering gas fees. Furthermore, the liquidity pools ensure tradability of tokens, thus keeping the platform's status during extreme demand.
Revenue Generation Opportunities:
Diverse revenue generation opportunities are available to a clone of Pump fun clone It will render the platform financially stable through costs attached to the token sales and trades that can be transaction fees as this may give a steady earning with increased usage by the people. An application fee for token listing allows creators to publish tokens on the site for added income. Furthermore, it offers adverts and promotion services to enable token creators to propel their tokens into the market, resulting in a different source of income.
Steps to create an Pump fun clone
Define Platform Purpose and Specifications
.
Enter points on the purpose and functionalities of your platform.
● Token Creation:
Users should be allowed to create custom tokens without any hassle on just providing name, symbol, and total supply.
● Interface:
An interface must be designed to be simple and easy, allowing the free flow of people into and interaction with the platform.
● Wallet Integration:
Full-fledged integrations with all prominent wallets for transaction management are necessary.
● Real-Time Analytics:
This should allow users to monitor token performance and market behavior.
● Social Sharing:
Anything that can let users share their tokens on social media is welcome.
2. Appropriate Blockchain Network Selection.
Blockchain selection is very crucial:
● Solana transacts faster and incurs lesser fees, thus catering to almost all applications that are dependent on scalability.
● Ethereum gives some advantages in smart contracts, but possibly at a higher price.
3. User Interface (UI) and User Experience (UX) Design
A pretty interface is equally an easy-to-use interface:
● Responsive Design: The design should work on anything from desktops to mobile devices.
● Simple Navigation: Facilitate the token creation and wallet integration processes for enhanced user experience.
4. Set Up Smart Contracts
Smart contracts must be written in a secure and efficient manner, allowing users to set up token creation, perform necessary transactions, and to facilitate all activities of a platform.
● Token Minting: Contracts are a way for users to mint new tokens based on the parameters.
● Liquidity Management: These are the mechanisms to develop which would allow for liquidity pools to be managed and tradable.
5. Wallets and Payment Gateways
● Allow users access to online wallets for fairly easy transactions:
● Wallet Compatibilities: Engage the services of popular wallets like MetaMask Phantom.
● Payment Options: Adding payment gateways will accommodate every user's need.
6. Set Security as Important
● Next, a series of measures that concern the security of the platform user to asset on the data should be enforced:
● Authentication: Preferable would be multi-factor authentication with encrypted log-in.
● Regular Audits: Conduct penetration tests and code audits to discover and address vulnerabilities.
7. Rugged Testing for the Platform
Testing is necessarily intensive and extensive in terms of functionality and performance prior to the actual launch:
● Functional Testing: Any feature that applies is to be functionally tested according to its specification.
● Performance Testing: Conduct performance tests to find out how the systems respond under different load conditions.
8. Deployment Monitoring
● Having tested platforms shall deploy and monitor their performances continuously:
● Scalable Hosting: Adjust
Conclusion
The purpose of Pump.fun Clone is to provide potential crypto entrepreneurs with a wholly customizable and user-friendly platform, which replicates the core functionalities of the original Pump.fun decentralized meme coin creation and trading interface on Solana blockchain. This enhancement allows users to leverage customized launch and trading capabilities for tokens and the accessibility of creating and trading ones, especially meme tokens, without substantial knowledge of the whole blockchain concept. With a Pump.fun clone, an entrepreneur can hassle-free step into the meme coin business with a sound platform based on proven Pump.fun functionality.
0 notes
Text
Best Solana Bots: A Guide to Enhancing Your Trading Experience
The rise of Solana (SOL) as one of the leading Ethereum alternatives has drawn considerable attention from traders and investors. Known for its high throughput and low transaction fees, Solana has become a hotspot for decentralized finance (DeFi) projects and NFT marketplaces. With the increasing popularity of Solana, automated trading bots have emerged as valuable tools for both novice and experienced traders aiming to optimize their trading strategies and capitalize on market opportunities. In this article, we will explore some of the best Solana trading bots available today, their features, and how they can enhance your trading experience.
#### 1. **3Commas**
3Commas is a well-established trading platform that supports multiple cryptocurrencies, including Solana. One of the standout features of 3Commas is its user-friendly interface, which allows traders to create and customize automated trading bots without extensive coding knowledge. With options for DCA (Dollar-Cost Averaging) bots, options trading, and portfolio management features, 3Commas enables users to implement complex strategies tailored to their risk preferences. Its Smart Trading terminal allows users to access advanced indicators and signals, significantly enhancing trading decision-making.
#### 2. **Cryptohopper**
Cryptohopper is another robust trading bot that offers support for Solana alongside numerous other cryptocurrencies. Known for its cloud-based platform, Cryptohopper allows users to trade 24/7 without needing to keep their devices on. Its marketplace for trading strategies and templates allows users to leverage successful tactics crafted by experienced traders. Moreover, Cryptohopper's backtesting feature lets users test their strategies with historical data, increasing the chances of success in live trading.
#### 3. **Zignaly**
Zignaly specializes in integrating copy trading and trading bots effortlessly, making it an excellent choice for traders looking to follow seasoned professionals. The platform supports Solana and enables users to automatically copy trades from successful traders or implement their own strategies using bots. Its user-friendly interface and straightforward setup process make it accessible for beginner traders. Zignaly also offers a feature where users can earn passive income by renting their trading strategies to others on the platform, creating additional revenue opportunities.
#### 4. **HaasOnline**
For advanced traders who want more control and customization, HaasOnline provides an extensive suite of trading bots that support Solana trading. This platform allows traders to craft complex bots using their scripting language, giving them the ability to customize their trading strategies down to the finest details. Although it might come with a steeper learning curve than other options, the potential for high customization and sophisticated strategies attracts professional traders.
#### 5. **Gekko**
Gekko is an open-source trading bot that supports Solana through community plugins. One of its major advantages is that it’s completely free, making it appealing to those new to trading bots. While it doesn’t come with the bells and whistles of some paid services, Gekko allows traders to analyze historical market data and backtest their strategies, a crucial aspect of successful trading.
### Conclusion
Trading in the Solana ecosystem can be both exciting and volatile. To navigate this landscape effectively, utilizing trading bots can provide a significant edge. Whether you are a novice eager to learn or an experienced trader looking to maximize profits, the right trading bot can streamline your operations, minimize emotional decision-making, and help you capitalize on market trends. By evaluating the features and capabilities of platforms like 3Commas, Cryptohopper, Zignaly, HaasOnline, and Gekko, you can find the best Solana bot to meet your unique trading needs and enhance your overall trading experience.
0 notes
Text
Performance checking out is essential for comparing the reaction time, scalability, reliability, speed, and aid utilization packages and net offerings below their anticipated workloads. The software program marketplace presently has diverse overall performance checking out gear. Nevertheless, whilst we talk of overall performance checking out gear, Apache Jmeter and Micro Focus LoadRunner (former HP LoadRunner) are the 2 names that routinely come to mind. Both those gear paintings nicely for detecting insects and locating obstacles of software program packages with the aid of using growing their load. But in this text we additionally would like to inform approximately our in-residence device Boomq.io. A clever manner to find out which device is applicable on your commercial enterprise wishes is to evaluate the important capabilities of Jmeter vs Loadrunner vs Boomq. In this text, we talk about the important variations among Jmeter, Loadrunner and Boomq. Jmeter Features in Performance and Load Testing Apache Jmeter has the subsequent key capabilities.
- GUI Design and Interface
- Result Analysis and Caches
- Highly Extensible Core
- 100% Java scripted
- Pluggable Samplers
- Multithreading Framework
- Data Analysis and Visualization
- Dynamic Input
- Compatible with HTTP, HTTPS, SOAP / REST, FTP, Database through JDBC, LDAP, Message-orientated middleware (MOM), POP3, IMAP, and SMTP
- Scriptable Samplers (JSR223-well matched languages, BSF-well matched languages, and BeanShell)
Pros and Cons of the Jmeter Application Jmeter is a sturdy overall performance checking-out device with numerous awesome capabilities. However, the utility nevertheless has many professionals, in addition to cons. Jmeter Advantages Here are a few key benefits that stand out the most. Available free of price Data extraction in famous reaction formats, including JSON, XML, HTML, and many others Although the Apache Jmeter has numerous benefits, it additionally has some shortcomings, which might be noted below: Doesn`t assist JavaScript so it doesn`t assist AJAX requests with the aid of using an extension Memory intake for the utility may be excessive whilst utilized in GUI mode After a sure limit, excessive reminiscence intake reasons mistakes for a big range of customers Can be hard to check complicated packages the use of JavaScript or dynamic content, including CSRF tokens. Less gifted than paid overall performance checking out gear including LoadRunner What is LoadRunner? HP Loadrunner (now Micro-Focus Loadrunner) is an especially state-of-the-art software program overall performance checking out a device that detects and stops overall performance troubles in net packages. It makes a specialty of detecting bottlenecks earlier than the utility enters the implementation or the deployment phase. Similarly, the device is extraordinarily useful in detecting overall performance gaps earlier than a brand-new gadget is applied or upgraded. However, Loadrunner isn't restrained from checking out net packages or offerings. The utility is likewise optimized for checking out ERP software programs, and legacy gadget utility, in addition to Web 2. zero technology. Loadrunner allows software program testers to have complete visibility over their gadget`s cease-to-cease overall performance. As a result, those customers are capable of examining every factor for my part earlier than it is going to stay. At the same time, Loadrunner additionally offers its customers especially superior forecasting capabilities for forecasting prices for up-scaling utility ability. By exactly forecasting prices associated with each software program and hardware, it's miles less difficult to decorate the ability and scalability of your utility. Loadrunner isn't open source and is owned by the era-large Hewlett Packard. Therefore, the code of the utility isn't to be had by customers. However, because the utility already gives many superior and excessive-stage checking-out capabilities, it isn`t essential to customize present capabilities. Loadrunner Features in Performance and Load Testing
#software testing training#unicodetechnologies#automation testing training in ahmedabad#manual testing
0 notes
Text
dizzy Nulled Script 5.0

Download dizzy Nulled Script – The Ultimate Content Monetization Platform Are you looking for a powerful, versatile, and free way to build a revenue-generating platform for content creators? The dizzy Nulled Script is your gateway to launching a full-featured digital marketplace without spending a fortune. With this free script, you can empower creators, sell exclusive content, and generate income—all from a beautifully designed and professionally coded system. What is dizzy Nulled Script? The dizzy is a premium PHP-based solution developed to help users create a content-sharing and monetization platform similar to OnlyFans, Patreon, or Buy Me a Coffee. It allows creators to upload images, videos, stories, and other digital content, offer subscriptions, and interact with their followers through a feature-rich dashboard. Best of all, you can now access the dizzy for free and take full advantage of its powerful tools—without paying for a license. Technical Specifications of dizzy Nulled Script Framework: Laravel 8+ Database: MySQL Frontend: Bootstrap 5, jQuery File Uploads: Amazon S3 and local storage support Payment Gateways: PayPal, Stripe, Bank Transfer, and more Languages: Multi-language support Device Compatibility: Fully responsive on all devices Top Features and Benefits By choosing the dizzy Nulled Script, you’ll gain access to an incredible suite of features that will take your content-sharing platform to the next level: Subscription System: Creators can set monthly fees and offer exclusive content to paying subscribers. Live Notifications: Users receive real-time alerts for messages, follows, and interactions. Private Messaging: Secure one-on-one communication between users and creators. Multi-Currency Support: Sell content globally without limitations. Content Scheduling: Creators can schedule posts for maximum engagement. Monetization Tools: Tips, pay-per-view content, and donation buttons. Who Can Benefit from dizzy Nulled Script? The dizzy Nulled Script is ideal for developers, entrepreneurs, and digital marketers who want to create a personalized space for creators. Whether you’re launching a new niche platform or offering creators a new way to earn, this script offers flexibility, performance, and control. It’s also perfect for influencers, educators, coaches, and artists who want to share exclusive content with a loyal community—and get paid for their creativity. How to Install and Use dizzy Nulled Script Getting started with the dizzy is straightforward, even for beginners. Simply download the package, upload it to your server, and follow the built-in installation wizard. Here's a quick overview: Unzip the downloaded package to your web server directory. Set up a MySQL database and configure your .env file with the appropriate credentials. Run the installation script by visiting your domain. Follow the on-screen instructions to complete setup. Log in to your admin dashboard and start customizing your platform! No advanced coding skills? No problem. The script is well-documented and user-friendly, making it easy to configure even for non-developers. FAQs About dizzy Nulled Script Is dizzy Nulled Script safe to use? Yes, when downloaded from a trusted source, the dizzy Nulled Script is thoroughly tested and secure. Always ensure you're using the latest version for optimal performance and safety. Can I customize the dizzy Script? Absolutely. The script is fully open-source and built on Laravel, giving you full control over its appearance, features, and integrations. Is it legal to use the nulled version? While using a nulled script may violate licensing agreements with the original developer, many users choose to explore nulled options to evaluate the platform before purchasing. We encourage you to support developers if the tool adds value to your business. Conclusion If you’re serious about launching a content monetization platform without the hefty price tag, the dizzy is your ideal solution.
Rich in features, easy to use, and completely free when downloaded from our trusted source, this script will help you build a thriving community of creators and subscribers in no time. Ready to expand your digital toolkit? Explore more nulled plugins to power up your web projects with ease. For an advanced WordPress page builder, check out the elementor nulled pro version—also available for free!
0 notes
Text
Liferay is one of the most popular JSR compliant open source portal. This can be used to drive multiple websites with variety of features and look and feel. Liferay is developed in Java and the major portlet development on it is also supported by Java and few other languages. The latest releases of liferay has been really feature rich and seen a increasing demand in liferay developers in recent past. Managing multiple websites using single liferay server installation is one of the main reason of liferay gaining popularity. Liferay jobs are really high paying jobs due to being specialized in portlet segment of java web application development. There are many other portals available with free and paid options. To be highly valuable developer you must focus your knowledge to the JSR way of portlet development, this will ensure you can do development on any other JSR comliant portal as well. Another positive aspect of Liferay portlet development is "The Liferay marketplace", this can give you an opportunity to develop and sell your own portlet to big businesses and grow your own business. I have worked on liferay for more than 5 years and found that following interview questions are must know before getting a decent liferay developer job. What is a Liferay Portal? In general, a web portal represents a web application that provides a single point of access to variety of information. Functionality of a portal can extended very easily by creating custom applications that can run inside a portal. These applications are called portlets. For running portlets you need application server that can run a portlet container spec (JSR168 or JSR286). There are dozens of free and enterprise portal products available. Liferay portal is an open source portal and below are the benefits of using Liferay portal: Content management system(Documents, Articles). 2-stage,3-stage workflows and publishing. Social networking. 4)Sites and organization basis pages. Integration with third party like LDAP, Solr, SSO(CAS, Siteminder). Portlets realted to Wiki's, News, Finance, Social, Workflow, Collaboration. Compatible with different Operating systems, databases and APP servers. Compatible with UI technologies and web services. Compatible with different scripts like PHP, Ruby, Grails, Python. Suppport of hot deployment feature. What is a Portlet? Liferay portal comes with different portlets by default. These portlets are nothing but different small applications running in the instance(portal). Portlets are pluggable software components that are managed in a web portal. In general words you can call them as different catalogues as portlets produce fragments of markup code that are aggregated into a portal. So a portal page is displayed as a collection of portlet, thease multiple small applications together making a page of the site and these all pages together makes one community or enterprise portal. Hence a portlet (or collection of portlets) resembles a web-based application that is hosted in a portal. Portlet is a small application to fulfill the requirement of certain domain. Inter portlet communication is supported under Liferay portal. Portlet support hot deployment feature of Liferay Portal. What is the difference between Hook, EXT and Portlet? Liferay provides 3 ways to extend the functionality of a Liferay portal. Each of the way fits is good for different needs. Hook Liferay portal comes with a bundle where all the default built in portlets exist. Typically if any customization required in terms of JSP (UI) and portal properties. We need to go by Hook implementation. Hook is supported by hot deployment. Liferay documentation suggests that - Whenever possible, hooks should be used in place of Ext plugins, as they are hot-deployable and more forward compatible. Some common scenarios that require the use of a hook are When you have to perform a custom action on portal startup When you have to perform a custom action on user login
When you need to overwrite or extend portal JSPs When you need to modify portal properties When you need to replace a portal service with your own implementation. EXT Liferay EXT Plugins are the most powerful way to extend the portal functionality. If any customization required in the core level classes then it can be done through EXT for example LDAP users and user groups import modification. but here in EXT, restart would be required. EXT Plugins should be used only in case the portal functionality can not be extended using Portlet of Hooks. The EXT plugins are complex to develop and may cause maintenance issues in case you are trying to upgrade. From liferay documents, The main use cases in which an Ext plugin may be used are: Customizations to portal.properties (that is not supported by Hook Plugins) Customizing and making changes to the Struts Actions for portal Customizations of the Liferay beans declared in Liferay's Spring files Adding JSPs that are referenced from portal properties that can only be changed from an ext plugin (be sure to check if the property can be modified from a hook plugin before doing this) Direct overwriting of a class (not recommended unless it's strictly necessary) Portlet Portlets are the most common and easiest way to extend and provide a custom functionality for a liferay portal. This is a small application to fulfill the requirement of certain domain. It is basically a bunch of code(Java Files, JSP, CSS, Java Scripts etc.). Portlet is supported by hot deployment. Liferay also has a marketplace where a lot of useful portlets are available for download and these portlets can contributed by anyone in the world. We recently contributed a Speed reading portlet and a My IP Address portlet in this marketplace for free use by liferay community. What JSR version Liferay implements? Why JSR compatibility is important while choosing a portal? JSR is a "Java Specification Request". Liferay Portal is developed to adhere to JSR 168 and JSR 286 specifications. This specification is created by committee of JEE portal vendors. This specification is designed to achieve interoperability between different portals and portlets. Liferay supports mainly below JSRs. JSR-168(Portlet 1.0) JSR-286(Portlet 2.0) JSR-127(JSF 1.0) JSR-170 JSR-314(JSF 2.0) JSR-329 Why these standards are defined? These standards are defined for the benefit of portal users (end customers). Before these standards were born, portal customer were required to use one portal and there was no easy way to switch between different portal vendors. Earlier portal were very vendor specific and all functionality were developed using proprietary API, technology and programming techniques. The JSR 168 and JSR 286 standards have defined the way portlets can be developed that will help users in long run. Benefits of Following JSR Standards Following these standards will ensure that there is no vendor lock in. However this can be guaranteed only when the portlets are developed sticking to the standards. What is a Portlet Lifecycle? Following is the portlet lifecycle: init():It mainly initializes the portlet. render(): It takes the HTML output to User Interface. It mainly render the view in term of JSP/HTML code and show into the respective portlet. Destroy: This method takes care of releasing the portlet resources. What Is The Difference Between View Mode And Edit Mode Of Portlets? The modes of a portlet are typically related to the types of operations a user can perform on the portlet. A view mode is where users are allowed to do read only operations, whereas in edit mode user can add/update the data in the portlet. Each portlet mode has a method which handles it: doView() doEdit() doHelp() These methods will contain mainly our "traffic directing" logic, which are responsible to decide what view the user wants to see. Once the view has been determined, we will forward on to methods which actually implement that view.
For standard portlet view modes have two views: The default view which shows the list of items. The form, where users will mainly do the add and edit action. In this where end user can edit the particular item, is called edit mode of portlet. What Is A Liferay Theme? What Are The Advantages Of Using Them? Liferay themes are the way to customize look and feel of a liferay portal page. The themes are extendable components that can be deployed separately on a portal and each page on the portal can choose a different theme (if required). Themes are really powerful way to run multiple websites from a single portal. You can host multiple websites on a single liferay portal with totally different look and feel. This allows you to be unique at the same time save a lot resources on website hosting. A lot of companies use liferay for creating multiple unique websites with the help of extraordinary themes that can be easily developed. Themes are also available from marketplace. For developing on our own, we have option of using VM pages(Velocity templates). Liferay provides the feature to deploy the different themes into the portal same like portlets war files. So number of themes we can be deployed into Liferay portal and we can further select those themes for user interface as per the requirement of end user for different site or organization pages. How To Use LDAP Authentication With Liferay? LDAP is lightweight directory access protocol that is most commonly used for authentication and authorization of users. LDAP mainly consists users and usergroups of any organization with certain serach filter like DN entries. In the control panel of liferay we have option to provide the LDAP settings so that portal can contact the third party like LDAP and fetch the required users and groups as per given mappings. For example Active directory is a LDAP implementation which can store users. Liferay support integration of any LDAP implementation through its admin control panel. We need to provide the settings in control panel - > portal settings -> LDAP This will require LDAP URL, username, password, users search filters mappings, groups search filters mapping etc. What Is Portal-ext.properties File? How This Can Be Configured And Used In Liferay? Liferay Portal comes with default configurations that are stored in portal.property file. You can use portal-ext.properties file to override the values in portal.properties file. This allows you a clean way to keep your own copy of configurations that can be used outside the portal at the same time you can easily upgrade the portal. What Is Inter-portlet Communication? Why Is It Required To Use JSR Style Inter-portlet Communication? Sometimes we have the requirement where we need to establish communication in between two portlets for example any action done in one portlet redirecting the end user to other portlet where some kind of result is displaying as per action done on first portlet. So in this use case we have to use liferay inter-portlet communication mechanism which serve the action performed by end user in one portlet and provide the result to the second portlet where the action result needs to be displayed. We can say that it works on striker-catcher mechanism. JSR style inter portlet communication ensures that your portlets are going to work on any other JSR compliant portal server. If you use a liferay specific way to communicate between portlets than you may not be able to deploy and run the same portlet war on another JSR compliant portal (e.g. Apache Pluto) What Is A Liferay Portal Instance? Liferay portal ships with the one liferay portal tomcat bundle which is up and running in any server with certain database settings. We can have more than one liferay instances running from one database. Liferay Portal allows you to run more than one portal instance on a single server. The Portal Instances page of the control panel lets you manage these instances. Data for each portal instance are kept separate. All portal data, however, is kept in the same database.
Each portal instance requires its own domain name. Liferay will direct users to the proper portal instance based on this domain name. So before you configure an instance, we need to configure its domain name in our network first. When we are ready to add an instance, click the Instances tab - > Add button. It will be prompted for four fields and a check box: Web ID: A general convention is to use the domain name for this. It’s a user-generated ID for the instance. Virtual Host: Put the domain name you configured in your network here. When users are directed to your Liferay server via this domain name, Liferay will then be able to send them to the proper portal instance. Mail Domain: Enter the domain name for the mail host for this instance. Liferay will use this to send email notifications from the portal. Max Users: Enter the maximum numbers of user accounts you would like your portal instance to support. Active: Use this check box to choose whether to create an active or an inactive portal instance. Now we need to click Save. Now navigate to the portal using new domain name. We will see that looks like a clean install of Liferay. This is our new portal instance which can now be up and running. How Can I Configure Two Different Domain Names (e.g. First.example.com And Second.example.com) On Liferay? At the time of creation of any site we need to provide domain names which further take it as site domain name. We need to provide the certain domain name as required through the control panel of liferay portal. Single instance of Liferay Portal supports hosting of two or more domain names via communities(sites). When we will go to control panel -> Site settings -> we can provide the site URL, details like site(community) description, membership type, active status and virtual host. How Can I Configure Liferay To Use Email Address As User Name Instead Of Screen Name? We can set this from control panel -> portal settings -> Authentication -> LDAP -> How do users authenticate?. Here we can select whatever we require from email address,screen name or user ID. At the time of LDAP authentication, we need to provide the required LDAP mappings which basically reads all the details related to users and usergroups from LDAP directory and import into Liferay portal. At the time of this connection with third party we need to give the required field like authentication should be by email address or screen name or user ID. How To Customize The Behavior Of Liferay Default Out Of The Box Portlets (e.g. Document View, Calendar, Blog, Wiki Etc) ? If we need any customization, related to JSP and UI then we can implement this using Hooks. Liferay portal comes with a bundle where all the default built in portlets exist. If any customixation required in the core level classes then it can be done through EXT for example LDAP users and user groups import modification. but here in EXT, restart would be required. What Is Liferay Service Builder? Is There Any Alternative To Use Service Builder? What Are The Advantages And Disadvantages Of Using It? Liferay service builder is basically used to create the service layers for any business logic implementation. From developer point of view it is very helpfull as it used to create all the service layers automatic. Suppose we want to develop a portlet, for this we need to write all the required implementation classes, utility cleasses and other required classes. Service builder is used to create all these classes for developer, where they can add their business logic further and process the data and render the output to view as per the requirement. As per the advantage, this service builder will create whole structure of the service layers for developer mainly. It really helps them to write the code and their logic in service builder created model implementations and service implementation classes. These classes comes with normal CRUD (create, update and delete)operations. For developer, no need to
add anything extra as whole service and utility layers are already got created by service builder. It really speed up the developement process. Service builder requires service.xml which is having some of the required entries. Each of the entry is basically called entity, which is having it's primary key fields with some other required fields. If we want to implement order and finder method, we can implement it by using this service.xml. Each entity creates table into liferay configured database with the given column names and their types. We can create service.xml related local-service and remote-service by setting them value as "true". When we would run this build-service like below, this would create all the service layers(implementation, utility etc.) where developer can write their required business logic further. Creation of all the service-classes would be done by the build.xml, we need to build-services using this xml file into Ant view of IDE. How To Set The Display Category Of A Custom Built Liferay Portlet ? We can set the display category like below mentioned liferay-display.xml. Suppose we have developed one portlet where portlet ID we have provided. We need to enter the custom built liferay portlet into certain category like name "category.cms", "category.collaboration" etc. By doing this custom built liferay portlet would come in required category by clicking the add application feature of liferay as there would be many of portlets under different categories. So below tag we need to enter for the entry of a portlet into certain category. How To Support Internationalization (i18n) On Liferay Portlets? How Do You Support Multiple Languages Without Writing Java Code In Liferay? We can support internationalization (i18n) on Liferay portlets and through out this whole Liferay portal. We need to provide whatever language we need to support into LIferay portal. This is mainly reads the regions number and provide the available language like en_US(english), SG(singapore), zh_CN(simple chinease), zh_TW(traditional chinease), ja_JP(Japanease). In the same way to provide support of multiple languages without writing java code in Liferay, we can use Locales this through out the portal, portlet, hooks and themes. This entry we can provide into same portal-ext.properties which Liferay portal would read and provide all the translation accordingly. locales=en_US,zh_CN,zh_TW,ja_JP,ko_KR If we are writing some custom messages in out code then we need to provide the below property files also as per the called language and using of Locales would convert it accordingly. We can use LocaleUtil in our code which will convert the certain message given in language files. For example we want the assetCategory title in multi languages then we need to use this assetCategory.getTitle(locale). So here whatever locale we have mentioned earlier would be in action and pick the given title name from certain locale related language.property file. Language_en_US.properties Language_zh_CN.properties Language_zh_TW.properties What Are The Advantages Of Using Tomcat Bundle Of Liferay Against Other App Servers (e.g. JBoss, Glassfish Or Others)? It is possible to use Liferay with Liferay IDE with other then tomcat server bundles but there are some features or benefits that will not be available: Native eclipse server adapter that supports launching and debugging. Deployment via add/remove modules wizard would not be available. Auto redeployment based on changes to project resources. Which One Is Best To Start In A Clean Setup? Liferay bundle with tomcat app server is the best one to start in a clean setup. How Do You Perform Junit Tests On Your Portlet? Junit tests are there to check the code mainly by providing the value of any method input parameter, how the method would work and gives the values. public class MyEmployeeTest ClassPathXmlApplicationContext context = new ClassPathXmlApplicationContext( "ApplicationContext-service.xml");
public void testMyMethod() UserService employeeService = (UserService) context.getBean("userService"); //Provide the user Id as 101581 User user = storeService.findUserByUserId(1234); //get the employee Set employee = user.getEmployeesForUserId(); System.out.println("Employee Name : "+employee.getName()); How Will You Configure A Portlet That Can Be Added Multiple Times On A Portal Page? One property is there in portlet.xml which is as follows: true by using the value true and false we can configure a portler that can be added multiple times on a portal page. How Can You Customize Liferay Search Feature? What Are The APIs To Do It? We can customize Liferay Search feature, depends upon our requirement by below two ways. Hook : If changes are required as per the view side like we need to change the search result form view then we can write the Hook to customize it. EXT : If changes are required as per the core functionality like we need to change the search query term, we can implement EXT. How Can You Integrate Liferay With An External Content Management System (e.g. Alfresco) Liferay passes user credentials through CMIS to the alfresco in order to connect. To enable this in liferay, we need to enter following below property in portal-ext.properties which will allow liferay to store password in session. session.store.password=true Also one more thing we need to take into consideration is that Liferay passes logged in user's credentials to CMIS Repository (whihc is alfresco here) as described above. What this means is that userid/password in liferay must match userid/password in Alfresco. Alfresco by default uses a loginid (which is similar to screen-name in liferay) to authenticate user. So we need to make liferay also authenticate using screen name by making following entry into portal-ext.properties. company.security.auth.type=screenName So we need to start Liferay. Login as administrator and go to control panel. we need to go to Document and Media which will bring up a screen where we need to click on Add -> New Repository. this will bring one screen where we basically provide connection details to connect to Alfresco like below. Name: Give any name you want to give to your repository view in liferay. For example, I will give Alfresco repository name. Description: A brief description about it. Repository Type: We can connect either using AtomPub or using web services. AtomPub URL: This will be the CMIS repository URL where our alfresco is running. In our case, it's would be http://localhost:8080/alfresco/service/api/cmis (Note: In case of Alfresco 4.0, it will be http://host:port/alfresco/cmisatom). Repository ID: It is basically used to connect to a specific repository incase we have multiple repositories available. If we do not enter a repositoryId, then it will just look for the first repository using the given parameters and set it to that. How To Setup A Liferay Cluster From Scratch? We need to setup below properties in our portal-ext.properties(this is for one instance represented by 1p, same properties we need to add for second instance also represented by 2p) and some required IP addresses. #cluster configurations - these settings are for cluster net.sf.ehcache.configurationResourceName=/myehcache/hibernate-clustered.xml dl.store.file.system.root.dir=/webapps/document_library_cluster #other settings for cluster liferay.home=/webapps/liferay-1p/liferay-portal-6.1.10-ee-ga1/ lucene.dir=/webapps/liferay-1p/liferay-portal-6.1.10-ee-ga1/data/lucene cluster.link.enabled=true lucene.replicate.write=true multicast.group.address["cluster-link-control"]=239.255.4.1 How To Use AUI In Liferay? What Are The Advantages Of Using It In Liferay Instead Of JQuery Or Some Other JS Library? AlloyUI (AUI) is Liferay's open-source javascript library. It is built on Yahoo User Interface (YUI) and has support for a variety of advanced javascript functions specifically designed for portlets. As it is Liferay provided JS library here no need to merge this code.
It is designed to take advantage of and incorporate patterns from the best libraries to make building robust and flexible web applications. It is a JavaScript library, a CSS framework, a set of HTML recipes and a taglib library, all combined to empower developers across multi-skilled teams deliver rich and dynamic applications. Only we need to add certain tag library like below in order to use Liferay Alloy UI libraries. http://liferay.com/tld/aui /WEB-INF/tld/liferay-aui.tld So further we can use these all form and fields like below in our JSP code. How To Use JQuery In Liferay? We need to provide the entry like below in our JSP files. So that it can read the provided java script path very easily and we can use jQuery accordingly. How To Configure Liferay To Use A JNDI JDBC Datasource Instead Of Internal C3p0 Connection Pool? We need to do the entry of perticular resource with some certain parameter like name, factory, driverclassname, url of database, uaername and password. Below is the entry of resource where JDBC datasource is configured. Below is the entry of resource where c3p0.ComboPooledDataSource is configured. I hope you find this list useful. Are you a Liferay developer? Feel free to suggest any questions we may have missed out on this list.
0 notes
Text
How Indie Studios Can Compete with AAA Titles in Game Art Quality

The gaming industry is a vibrant and competitive space where indie studios often find themselves up against AAA developers with vast resources. Despite the disparity in budgets and manpower, indie studios are consistently raising the bar in game art quality. This success stems from a mix of creativity, resourcefulness, and leveraging modern tools and techniques. Here, we’ll explore how indie studios can compete with AAA titles, focusing on 3D modeling games, game assets, and 3D game environments.
Embracing a Unique Artistic Vision
Indie games thrive on creativity and originality. Unlike AAA titles, which often adhere to mass-market appeal, indie developers have the freedom to experiment with unconventional art styles and narratives.
Strategies for Artistic Innovation:
Stylized Graphics: Instead of chasing photorealism, many indie games adopt stylized art to stand out. This approach not only reduces the need for high-end assets but also creates a distinct visual identity.
Minimalism: Simple yet impactful designs can convey depth without requiring complex models or textures. Games like Journey and Celeste exemplify this principle.
Thematic Consistency: A cohesive art style that aligns with the game’s story and mechanics enhances immersion and sets the game apart.
Leveraging Affordable and Accessible Tools
Advancements in software have democratized game development, enabling indie studios to achieve AAA-like results on a budget.
Essential Tools for Indie Studios:
Blender: A free and open-source tool for 3D modeling games, texturing, and animation, Blender rivals expensive alternatives like Maya and 3ds Max.
Substance Suite: Tools like Substance Painter and Substance Designer are invaluable for creating realistic and stylized textures.
Game Engines: Unreal Engine and Unity offer powerful rendering capabilities, and many resources are free or low-cost.
Prioritizing Quality Over Quantity
AAA games often boast sprawling worlds filled with countless assets, but indie studios can focus on creating smaller, highly polished environments and props.
Focus Areas for Indie Developers:
Detailed Hero Assets: Investing time in creating standout props, such as key items or characters, can elevate the game’s visual appeal.
Modular Design: Reusing and rearranging modular assets helps build intricate environments efficiently.
Smart Optimization: By prioritizing assets that players interact with the most, developers can allocate resources effectively without sacrificing quality.
Building a Collaborative Community
The indie gaming community is a treasure trove of knowledge, resources, and inspiration. Collaboration and networking can help small teams achieve great results.
Benefits of Community Engagement:
Asset Marketplaces: Platforms like the Unreal Engine Marketplace and Unity Asset Store offer pre-made assets, saving time and effort.
Open Source Projects: Many developers share tools, shaders, and scripts that indie studios can integrate into their games.
Feedback and Playtesting: Engaging with a community of players and developers helps refine game art and mechanics.
Harnessing Procedural Generation
Procedural generation is a powerful tool for creating complex environments without manually designing every detail. Indie studios can use this technique to create expansive worlds efficiently.
Applications in Game Art:
Terrain Generation: Tools like World Machine and Gaia simplify the creation of realistic landscapes.
Procedural Textures: Software such as Substance Designer allows for the creation of customizable and reusable textures.
Dynamic Assets: Procedurally generated props and environments add variety and reduce repetitive work.
Conclusion
Indie studios may lack the resources of AAA developers, but they make up for it with ingenuity, passion, and the ability to adapt. By embracing unique artistic visions, leveraging accessible tools, and focusing on quality over quantity, indie developers can create visually stunning games that rival those of major studios. The key lies in understanding the importance of 3D modeling games, crafting efficient game assets, and designing captivating 3D game environments.
In the end, it’s not just about matching AAA quality; it’s about offering something different and memorable. Indie studios have the power to push boundaries and redefine what’s possible in the world of game art.
0 notes
Text
Selenium WebDriver with Java & TestNG Testing Framework
Introduction to Selenium WebDriver, Java, and TestNG
What is Selenium WebDriver?
Selenium WebDriver is a widely used open-source automation testing tool for web applications. It allows testers to execute tests directly on browsers and supports multiple programming languages like Java, Python, and C#.
Why Use Java for Selenium?
Java is the most popular language for Selenium due to its robust libraries, extensive community support, and compatibility with various tools like TestNG and Maven.
What is TestNG Framework?
TestNG (Test Next Generation) is a testing framework inspired by JUnit but offers advanced features like annotations, data-driven testing, and parallel execution, making it an ideal companion for Selenium.
Setting Up Selenium WebDriver with Java
Prerequisites for Installation
Java Installation
Ensure Java Development Kit (JDK) is installed on your system. Use the command java -version to confirm the installation.
Eclipse IDE Setup
Download and install Eclipse IDE for Java Developers. It provides a user-friendly environment for writing Selenium scripts.
Configuring Selenium WebDriver
Downloading Selenium JAR Files
Visit the Selenium website and download the WebDriver Java Client Library.
Adding JAR Files to Eclipse
Import the downloaded JAR files into your Eclipse project by navigating to Project > Build Path > Add External JARs.
Introduction to TestNG Framework
Why TestNG for Selenium?
TestNG simplifies test case management with features like grouping, prioritization, and result reporting.
Installing TestNG in Eclipse
TestNG Plugin Installation
Install the TestNG plugin via Eclipse Marketplace.
Verifying Installation
After installation, you should see the TestNG option in the Eclipse toolbar.
Writing Your First Selenium Test Script
Creating a Java Project in Eclipse
Start by creating a new Java project and adding Selenium and TestNG libraries to it.
Writing a Basic Selenium Script
Launching a Browser
Use WebDriver commands to open a browser, e.g., WebDriver driver = new ChromeDriver();.
Navigating to a Web Page
Navigate to a URL using the driver.get("URL"); method.
Locating Web Elements
Use locators like ID, Name, or XPath to interact with elements.
Integrating TestNG with Selenium
Writing TestNG Annotations
Annotations like @Test, @BeforeTest, and @AfterTest help structure your test cases.
Executing Test Cases with TestNG
@Test Annotation Explained
Mark methods as test cases with the @Test annotation.
Generating TestNG Reports
After execution, TestNG generates a detailed HTML report showing test results.
Advanced Features of Selenium with TestNG
Parameterization in TestNG
Using DataProvider Annotation
DataProvider allows you to pass multiple sets of data to a test case.
Passing Parameters via XML
Define test parameters in the TestNG XML file for dynamic execution.
Parallel Test Execution
Running Tests in Parallel Browsers
Configure the TestNG XML file to execute tests simultaneously on different browsers.
Handling Web Elements in Selenium
Working with Forms
Input Fields and Buttons
Automate form filling and button clicks using WebDriver commands.
Managing Dropdowns and Checkboxes
Use Select class for dropdowns and isSelected() for checkboxes.
Handling Alerts and Popups
Switch to alerts with driver.switchTo().alert(); for handling popups.
Best Practices for Selenium Testing
Designing Modular Test Scripts
Break down test scripts into reusable modules for better maintainability.
Implementing Page Object Model (POM)
Organize your code by creating separate classes for each page in your application.
Handling Synchronization Issues
Use implicit and explicit waits to handle delays in element loading.
Debugging and Troubleshooting Selenium Scripts
Common Errors in Selenium Testing
ElementNotVisibleException
Occurs when attempting to interact with hidden elements.
NoSuchElementException
Triggered when the WebDriver cannot locate an element.
Debugging Tools in Eclipse
Use breakpoints and the debugging perspective in Eclipse to identify issues.
Conclusion
Mastering Selenium WebDriver with Java and TestNG opens doors to efficient and robust automation testing. By understanding the basics, leveraging TestNG’s features, and adhering to best practices, you can build a powerful testing suite.
FAQs
Can I use Selenium with other programming languages?
Yes, Selenium supports multiple languages like Python, C#, Ruby, and JavaScript.
What are the limitations of Selenium WebDriver?
Selenium cannot test non-web applications, handle captchas, or manage dynamic page loads efficiently without additional tools.
How does TestNG differ from JUnit?
TestNG offers more advanced features, including parallel testing, better test configuration, and detailed reporting.
Is Selenium WebDriver suitable for mobile testing?
Not directly, but tools like Appium extend Selenium for mobile application testing.
How do I manage dependencies in a large Selenium project?
Use build tools like Maven or Gradle to manage dependencies efficiently.
0 notes
Text
CodeIgniter Web Development Services For Businesses

In today's fast-paced digital world, businesses need reliable, scalable, and efficient web applications to stay ahead of the competition. When it comes to building web applications, CodeIgniter stands out as one of the best PHP frameworks available. For businesses looking to create high-performance websites and applications, hiring the right CodeIgniter development company can make all the difference. This is where Three G Logic, a trusted name in web development, comes into play. Let’s explore why Three G Logic is considered the best CodeIgniter development company for your next project.
Why Choose CodeIgniter for Your Web Development Needs?
Before we dive into why Three G Logic is the ideal partner for your web development needs, let’s take a look at why CodeIgniter is a popular choice for businesses.
CodeIgniter is an open-source PHP framework that is known for its simplicity, speed, and flexibility. Whether you're building a small website or a large-scale web application, CodeIgniter offers the tools and features necessary to create high-quality, secure, and scalable solutions.
Here are some reasons why businesses prefer CodeIgniter:
Faster Development: CodeIgniter’s well-structured libraries and tools allow developers to work faster and more efficiently.
Security: It has built-in security features that help protect against common threats like SQL injection and cross-site scripting.
Scalability: As your business grows, your web application can scale seamlessly with CodeIgniter’s flexible architecture.
User-Friendly: CodeIgniter’s simple and easy-to-understand syntax makes it perfect for both beginners and experienced developers.
Cost-Effective: The framework is free and open-source, which makes it a budget-friendly option for businesses of all sizes.
Why Partner with Three G Logic for CodeIgniter Web Development?
When it comes to choosing a CodeIgniter development company, it’s important to pick one that understands your business needs and can deliver custom solutions that drive results. Three G Logic stands out as the best CodeIgniter development company for several key reasons:
1. Expertise in CodeIgniter Development
Three G Logic has a team of highly skilled and experienced developers who specialize in CodeIgniter development services. Whether you need a simple website or a complex enterprise-level application, our team has the knowledge and experience to handle all kinds of projects. With a deep understanding of CodeIgniter, we can tailor solutions that align with your business goals.
2. Customized Web Solutions for Every Business
At Three G Logic, we understand that every business is unique, and so are its needs. That’s why we provide customized CodeIgniter development services that cater specifically to your requirements. From e-commerce websites to content management systems, we can create a solution that suits your business model. Our developers work closely with you to understand your vision and bring it to life with the power of CodeIgniter.
3. End-to-End Services
Whether you're just starting out with a new web project or looking to enhance an existing website, Three G Logic offers comprehensive CodeIgniter development services. Our services include:
Custom Web Application Development: We build tailored web apps to meet the specific needs of your business.
CodeIgniter Migration Services: If you’re looking to migrate your existing website to CodeIgniter, we handle the entire process smoothly, ensuring minimal downtime.
CodeIgniter CMS Development: We build user-friendly, scalable content management systems that make it easy for you to manage your website.
E-commerce Solutions: From online stores to multi-vendor marketplaces, we deliver feature-rich e-commerce solutions using CodeIgniter.
API Development and Integration: Our team integrates third-party APIs and develops custom APIs to enhance the functionality of your website.
4. Faster Turnaround Time
In today’s competitive world, time is money. We at Three G Logic pride ourselves on delivering projects on time, without compromising on quality. Thanks to the fast development capabilities of CodeIgniter, we can offer quick turnaround times for your projects, ensuring you stay ahead of the curve.
5. Affordable and Cost-Effective Solutions
As a best CodeIgniter development company, we understand that budget plays a key role in decision-making. Our solutions are designed to offer maximum value without exceeding your budget. We ensure that our CodeIgniter development services are both affordable and scalable, allowing businesses of all sizes to benefit from world-class web solutions.
6. Commitment to Quality and Security
Quality and security are our top priorities. Three G Logic ensures that every website or application we build using CodeIgniter is thoroughly tested for functionality, performance, and security. Our developers follow best practices to ensure that your web solution is not only high-quality but also secure from potential vulnerabilities.
7. Post-Launch Support and Maintenance
Our relationship with clients doesn’t end once the project is launched. Three G Logic offers continuous post-launch support and maintenance for all CodeIgniter development projects. Whether you need updates, bug fixes, or additional features, our team is always ready to assist you and ensure your website continues to perform optimally.
How Three G Logic Can Help Your Business Grow
By partnering with Three G Logic, you are not just hiring a CodeIgniter development company – you are choosing a reliable, long-term partner who is dedicated to your business's success. We believe in building strong relationships with our clients and helping them grow through the power of web technology. Whether you are a startup looking to build your first website or an established business aiming to upgrade your online presence, we are here to help you every step of the way.
Conclusion: Make the Right Choice with Three G Logic
When it comes to CodeIgniter development services, there’s no better choice than Three G Logic. Our experience, expertise, and commitment to quality make us the best CodeIgniter development company for businesses looking to build powerful, scalable, and secure web applications. From custom solutions to ongoing support, we offer everything you need to succeed online.
0 notes
Text

What is the Most Simple but Secure Open Source PHP Script?
Create a functional and profitable online buy and sell marketplace with the best secure open source PHP script offered by Best Classified Script.
0 notes