#Memcache admin
Explore tagged Tumblr posts
Visit Tumblr Blog
Explore Tumblr blogs with no restrictions, modern design and the best experience.
Last Seen Tumblr Blogs


Fun Fact
Tumblr posted its first advertisements in May 2012 and subsequently earned $13M in revenue.
Text
Memcache Admin
To see what is going on in Memcache: wget http://phpmemcacheadmin.googlecode.com/files/phpMemcachedAdmin-1.2.2-r262.tar.gz tar -xvzf phpMemcachedAdmin-1.2.2-r262.tar.gz chmod +r * chmod 0777 Config/Memcache.php More information: https://code.google.com/p/phpmemcacheadmin/
View On WordPress
0 notes
Text
Best Laravel Development Services for Fintech App Security & Speed
In 2025, the fintech sector is booming like never before. From digital wallets and neobanks to loan management systems and investment platforms, the demand for secure, fast, and scalable applications is skyrocketing. Behind many of these high-performing platforms lies one key technology: Laravel development services.
Laravel is a PHP-based web framework known for its elegant syntax, built-in security features, and flexibility. It has quickly become a go-to solution for fintech companies looking to build robust and future-ready apps.
In this blog, we’ll dive deep into why Laravel development services are the best choice for fintech applications, especially when it comes to security and speed. We’ll also answer key FAQs to help you make an informed decision.
Why Laravel is the Smart Choice for Fintech Development
1. Bank-Grade Security
Security is non-negotiable in fintech. Laravel offers features like:
CSRF protection
Encrypted password hashing (Bcrypt and Argon2)
SQL injection prevention
Two-factor authentication integrations
Secure session handling
When you hire expert Laravel development services, you ensure that your fintech app is guarded against common cyber threats and vulnerabilities.
2. Speed & Performance Optimization
In fintech, milliseconds matter. Laravel is designed for high performance. With features like:
Built-in caching with Redis or Memcached
Lazy loading of data
Queues for background processing
Lightweight Blade templating engine
Laravel apps are optimized to run fast and efficiently, even with complex data and multiple users.
3. Modular & Scalable Structure
Fintech startups need to evolve quickly. Laravel’s modular architecture allows developers to add new features without rewriting the whole app. Need to add payment gateways, KYC verification, or investment tracking? Laravel makes it easier and more maintainable.
4. API-Ready Backend
Most fintech apps need strong API support for mobile apps, third-party services, or internal dashboards. Laravel offers:
RESTful routing
API authentication with Laravel Sanctum or Passport
Seamless data exchange in JSON format
This makes Laravel development services ideal for creating flexible, API-first applications.
5. Developer Ecosystem & Community
Laravel has one of the strongest developer communities, which means:
Quick access to pre-built packages (e.g., for payments, SMS alerts, OTP login)
Frequent updates and support
Access to Laravel Nova, Horizon, and Echo for admin panels, job queues, and real-time data respectively
This helps fintech businesses reduce time-to-market and focus on innovation.
Real-World Use Case: Laravel in Fintech
A Canadian lending startup partnered with a Laravel development services provider to build a loan origination platform. The app included borrower onboarding, KYC checks, EMI tracking, and real-time risk analysis. Using Laravel:
The app handled over 10,000 users in the first 3 months.
Page load times were under 1 second even during peak hours.
The system passed a third-party penetration test with zero critical vulnerabilities.
Key Laravel Features That Fintech Businesses Love
Feature
Why It Matters for Fintech
Blade Templates
Speeds up frontend UI without complex JS
Laravel Sanctum
Easy API token management for mobile apps
Laravel Queue System
Handles transactions, notifications in background
Migration System
Helps keep track of database changes easily
Test Automation Support
Essential for secure and bug-free releases
How to Choose the Right Laravel Development Services
Here are 5 tips to find the best Laravel team for your fintech project:
Check for Security Expertise: Ask how they handle encryption, SSL, and data privacy.
Look for Fintech Experience: Have they built apps in finance, banking, or insurance?
Ask About Performance Tuning: Do they use Redis, CDN, or job queues?
Review Client Testimonials: Look for real business results and successful launches.
Support & Maintenance: Fintech apps need ongoing updates. Make sure they offer it.
FAQs: Laravel Development Services for Fintech
Q1: Can Laravel handle sensitive financial data securely?
Yes. Laravel offers built-in tools for encryption, secure session handling, and protection against OWASP top 10 vulnerabilities. Many fintech platforms successfully use Laravel.
Q2: Is Laravel fast enough for real-time fintech applications?
Absolutely. With caching, queues, and efficient routing, Laravel delivers low-latency responses. For real-time data (like trading apps), Laravel Echo and WebSockets can be used.
Q3: Can Laravel be used for mobile fintech apps?
Yes. Laravel is commonly used as a backend for mobile apps (using Flutter, React Native, or native frameworks). Laravel APIs are easy to connect with mobile frontends.
Final Thoughts
In the fintech world, the margin for error is razor-thin. Security breaches or slow load times can lead to user loss and legal trouble. That’s why choosing the right tech stack and more importantly, the right development team is crucial.
With Laravel, you get a framework that’s powerful, secure, and scalable. By partnering with professional Laravel development services, fintech companies can:
Launch secure and lightning-fast apps
Stay compliant with global standards
Scale features and users effortlessly
Beat the competition in speed and reliability
So, if you're planning to build or upgrade your fintech platform in 2025, now is the perfect time to invest in trusted Laravel development services.
0 notes
Text
Top Django Interview Questions and Answers in 2025

Introduction
If you're aiming for a career in web development, you've probably come across Django, and guess what? It's still going strong in 2025. Whether you're a fresh graduate or an experienced developer eyeing a transition, knowing the top Django interview questions and answers will give you a big edge.
From start-ups to the world's biggest social networking site Instagram, this framework has changed things a lot. It's one of the favorites due to its simplicity, security, and scalability. But with the increasing competition, interviewers have started to pick brains. So let us prepare you with some of the most relevant and updated top Django interview questions and answers that you will need for 2025.
Basics of Django
What is Django?
Django is a high-level Python web framework that lets you rapidly develop secure and maintainable web applications with as little coding as possible. Basically, it follows the "batteries-included" philosophy, which states that user authentication, content management, and database administration are included from the start.
Key Features of Django Framework
MTV architecture (Model-Template-View)
ORM (Object-Relational Mapping)
Admin Interface
Built-in security features
Highly scalable and portable
What Are Django’s Advantages over Other Frameworks?
It's Pythonic-clean and easy to read
Fastest development cycle
Rich documentation
Large community
Tons of third-party packages
Django Interview Questions Asked Quite Often (Beginner Level)
Explain MTV Architecture in Django?
MTV stands for:
Model: It defines what the data structure is.
Template: HTML-like design files.
View: Contains business logic that connects the models and templates.
It's like the way Django interprets Model-View-Controller.
How Does a Request in Django Differs from a Response?
Every HTTP request in Django goes through many processes, that are URL dispatcher, view function, and finally returning an HTTPResponse object. It simply can be thought as a pipeline managing routing, logic, and output.
What Are Models in Django?
Models specify the structure of your database in terms of Python classes; they also act as a bridge between the application and the database using Django's ORM.
Intermediate Questions for Django Interviews
How to Differentiate between a Project and an App?
Project: The entire web application.
App: A component or module within a project (eg., blog, cart, and user).
You can plug many apps into one project.
What Are QuerySets, and How Do They Work?
A queryset is a collection of queries that can be executed against a database to retrieve objects. It is lazy — meaning it will not query the database until the results are explicitly requested.
Advanced Questions for Django Interviews
How are Security Issues (XSS, CSRF, etc.) Handled by Django?
Django has built-in protections against:
CSRF tokens in forms
Auto-escaping of templates in XSS
SQL injection with an ORM
Protection against clickjacking by middleware
What Is Middleware in Django?
Middleware is a framework of hooks into Django's request/response processing. It is a light, low-level plugin system for globally altering Django's input or output. For example, it can be useful for:
Logging requests
Modifying responses
Enforcing authentication
What Are Ways to Enhance Django Application Performance?
Use caching (Redis or Memcached).
Optimize QuerySets.
Minimize template logic.
Compress static files.
Use Django Debug Toolbar for diagnosis.
Real-life Scenario Questions
What Will You Do to Scale a Django App under Heavy Load?
Load balancing.
Caching with Redis.
Use CDNs for serving static/media.
Database indexing optimization.
Perform asynchronous tasks with Celery.
How to Connect Django with Frontend Frameworks like React?
Using Django REST Framework for building APIs.
Serve the React app separately or embed it inside templates.
Handle authorization either through JWT or session-based login.
Which Tools Are Used for Testing in Django?
unittest (built-in)
pytest-django
py for test coverage
factory_boy for test data
Tips to Crack Django Interviews
Practice Coding Daily
Even 30 minutes a day adds up so quickly, and try to focus on real-world projects.
Build Real Projects
Nothing beats practical experience. Try to build a blog, an e-commerce site, or a task manager.
Mock Interviews and Technical Tests
Use a platform like Pramp or Interviewing.io to get a feel for what a real interview will be like.
Conclusion
In 2025, mastering the top Django interview questions and answers can be the very key to opening up your way into a development career. Companies have trusted Django for its speed, security, and scalability, and now, being prepared seems to be your golden ticket. Whether you are brushing up or new to the area, this guide will make you succeed.
At TCCI, we don't just teach computers — we build careers. Join us and take the first step toward a brighter future.
Location: Bopal & Iskcon-Ambli in Ahmedabad, Gujarat
Call now on +91 9825618292
Visit Our Website: http://tccicomputercoaching.com/
Note: This Post was originally published on TCCI - Tririd Computer Coaching Institute and is shared here for educational purposes.
#best computer courses in bopal ahmedabad#computer courses near me#software training in Bopal Ahmedabad#TCCI - Tririd Computer Coaching Institute#top Django interview questions and answers
0 notes
Text
Ultimate Guide to Choosing Between Laravel and Django for Your Next Web App
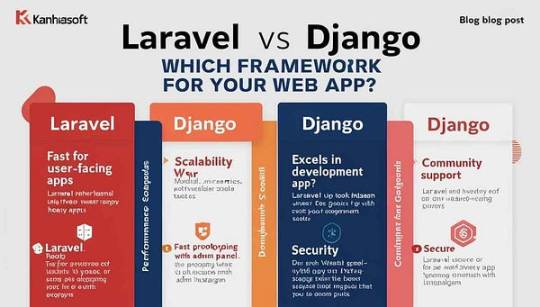
Building a web application is no small feat. It’s like assembling a spaceship — every component matters, and choosing the wrong framework can send your project into a black hole. At Kanhasoft, we’ve spent years crafting custom software solutions that feel like a secret superpower for our clients. Two of our favorite tools? Laravel and Django, the rockstars of web development frameworks. But which one is the best framework for your web app? Spoiler: there’s no one-size-fits-all answer, but we’re here to break it down so you can make an informed choice.
Whether you’re a startup dreaming of the next big app or an enterprise streamlining operations, this guide will compare Laravel vs Django across performance, scalability, security, and more. Let’s dive into the nitty-gritty and help you pick the perfect framework for your next project.
Why Laravel and Django? The Heavyweights of Web Development
Laravel (PHP-based) and Django (Python-based) are battle-tested frameworks loved by developers and businesses alike. Both power robust, scalable web apps, but they cater to slightly different needs. At Kanhasoft, a software development company with expertise in both, we’ve built everything from eCommerce platforms to data-heavy enterprise systems using these tools. So, why are they so popular?
Laravel: Known for its elegant syntax and rapid development, Laravel is a PHP framework that makes building feature-rich apps a breeze. It’s packed with tools like Eloquent ORM, Blade templating, and built-in authentication.
Django: The Python-powered Django is all about “batteries included,” offering a full-stack ecosystem with ORM, admin panels, and security features out of the box. It’s a favorite for data-driven and rapid-prototyping projects.
Performance: Speed That Keeps Up with Your Ambition
When it comes to performance, both Laravel and Django deliver, but their strengths differ. Laravel, built on PHP, shines in environments with high user traffic, like eCommerce platforms. Its caching tools (e.g., Redis, Memcached) and optimization features ensure snappy response times. At Kanhasoft, we’ve used Laravel to build custom software for marketplaces that handle thousands of transactions daily without breaking a sweat.
Django, on the other hand, leverages Python’s efficiency and excels in CPU-intensive tasks, like data processing or machine learning integrations. Its asynchronous capabilities (introduced in Django 3.1) make it a strong contender for real-time apps. For example, we’ve powered Django web development projects with complex analytics dashboards that crunch numbers in milliseconds.
Verdict: Choose Laravel for user-facing apps with heavy traffic. Go with Django for data-heavy or computation-intensive projects. Need both? A software development company like Kanhasoft can blend their strengths with microservices.
Scalability: Growing Without the Growing Pains
Scalability is where your web app proves it can handle success. Laravel’s modular structure and support for microservices make it a go-to for apps that need to scale horizontally. Think of platforms like Airbnb or Uber — Laravel’s ecosystem (with tools like Laravel Vapor) can support massive user bases. We’ve built scalable Laravel apps at Kanhasoft that seamlessly grew from MVP to enterprise-grade solutions.
Django’s scalability is equally impressive, thanks to its clean architecture and Python’s versatility. Companies like Instagram and Pinterest run on Django, proving it can handle billions of requests. Django’s ability to integrate with cloud platforms (e.g., AWS, Google Cloud) makes it ideal for startups planning to scale fast. Our custom software projects often use Django for rapid prototyping that evolves into robust systems.
Verdict: Both frameworks scale well, but Laravel is better for modular, user-centric apps, while Django suits data-driven, cloud-native systems. Let’s explore another critical factor: development speed.
Development Speed: From Vision to Victory
Time-to-market is a make-or-break factor for startups and enterprises alike. Laravel’s developer-friendly features — like pre-built authentication, routing, and Artisan CLI — accelerate development. Its vibrant community and packages (via Composer) mean you’re never starting from scratch. At Kanhasoft, we’ve used Laravel to deliver custom software in record time, empowering clients to launch ahead of competitors.
Django’s “batteries included” philosophy gives it an edge for rapid prototyping. Its built-in admin panel, form handling, and ORM let developers focus on business logic rather than boilerplate code. For Django web development, we’ve built MVPs in weeks, complete with admin dashboards that clients love tweaking themselves.
Verdict: Laravel is faster for feature-rich apps with complex frontends. Django wins for quick prototypes and data-heavy backends. Your timeline and team’s expertise will tip the scales.
Security: Keeping Your App Fortified
In today’s world, a single security breach can sink your app’s reputation. Laravel and Django both prioritize security, but their approaches differ. Laravel offers built-in protections like CSRF tokens, XSS prevention, and secure authentication. Its regular updates and active community keep vulnerabilities at bay. We’ve used Laravel to build secure eCommerce platforms that handle sensitive payment data with ease.
Django is a security powerhouse, with features like SQL injection prevention, CSRF protection, and automatic escaping of HTML. Its “secure by default” mindset makes it a favorite for industries like healthcare and finance. At Kanhasoft, our Django web development projects often include custom security layers for enterprise clients.
Verdict: Both are secure, but Django’s out-of-the-box protections make it slightly easier for beginners to avoid pitfalls. Laravel’s flexibility suits teams with strong security expertise.
Community and Ecosystem: Support That Powers Progress
A framework’s community can be your lifeline during development. Laravel’s ecosystem is massive, with thousands of packages on Packagist and a thriving community on forums like Laracasts. Need a payment gateway or API integration? Laravel’s got you covered. Our team at Kanhasoft leans on Laravel’s ecosystem to deliver custom software tailored to unique client needs.
Django’s community, while smaller, is equally passionate. Python’s vast ecosystem (e.g., libraries like NumPy, Pandas) makes Django a powerhouse for AI and data-driven apps. The Django REST Framework is a game-changer for API development, and we’ve used it to build seamless integrations for clients.
Verdict: Laravel’s ecosystem is broader for web app features, while Django’s Python roots give it an edge for AI and analytics. Choose based on your app’s niche requirements.
Kanhasoft’s Take: Making Technology Your Superpower
At Kanhasoft, we believe technology should feel like a secret superpower. Whether you choose Laravel or Django, our software development company can turn your vision into reality. Laravel’s elegance powers our eCommerce and marketplace projects, while Django’s versatility drives our AI and ERP solutions. Can’t decide? We’ve even combined both in microservices architectures for clients who want the best of both worlds.
Here’s the thing: the best framework for your web app depends on your goals. If you’re building a user-facing platform with complex features, Laravel’s speed and flexibility are hard to beat. If your app leans on data processing, AI, or rapid prototyping, Django’s ecosystem is your ally. Either way, partnering with a software development company like Kanhasoft ensures your app is built to succeed.
FAQs About Laravel vs Django
Q1: Which is better for startups, Laravel or Django? A: Laravel is ideal for startups needing feature-rich apps with quick market entry, thanks to its rapid development tools. Django suits startups focused on data-driven MVPs or AI integrations, offering fast prototyping and scalability.
Q2: Is Django more secure than Laravel? A: Both are secure, but Django’s “secure by default” features (e.g., automatic SQL injection prevention) make it slightly easier for beginners. Laravel offers robust security with proper configuration, ideal for experienced teams.
Q3: Can Laravel and Django be used together? A: Yes, in a microservices architecture. For example, Kanhasoft has built apps using Laravel for the frontend and Django for data-heavy backends, ensuring the best of both worlds.
Q4: Which framework is faster for web app development? A: Laravel accelerates development for complex, user-facing apps with tools like Artisan. Django is faster for prototypes and data-driven apps due to its built-in admin and ORM.
Q5: How do I choose the best framework for my web app? A: Consider your project’s goals, team expertise, and timeline. Laravel suits eCommerce or modular apps; Django excels in analytics or AI-driven projects. Consult a software development company like Kanhasoft for tailored advice.
Conclusion: Your Web App, Your Superpower
Choosing between Laravel and Django isn’t about picking a winner — it’s about finding the framework that makes your web app a powerhouse. At Kanhasoft, we’ve seen both frameworks transform ideas into reality, from sleek marketplaces to intelligent ERP systems. As a software development company, our mission is to make technology feel effortless, like a superpower you wield with confidence.
So, what’s your next step? Evaluate your project’s needs, weigh the strengths of Laravel vs Django, and let your vision guide you. Better yet, reach out to Kanhasoft for a free consultation. We’ll help you choose the best framework for your web app and build custom software that sets you apart. Let’s make your app the hero of your story — contact us today!
0 notes
Text
Best Caching Modules for Drupal: Recommendations and Setup Guides
Caching is a critical aspect of optimizing Drupal site performance. Properly implemented caching can significantly reduce load times and server load, improving the overall user experience. Drupal offers several caching modules that can help you manage and optimize caching efficiently. Here’s a guide to the best caching modules for Drupal, along with setup instructions.
1. Drupal Core Caching
Before diving into contributed modules, it’s important to understand Drupal’s built-in caching mechanisms:
Page Caching: Stores entire rendered pages for anonymous users.
Dynamic Page Cache: Caches rendered pages for authenticated users, reducing the need for repeated processing.
Entity Caching: Caches entities (e.g., nodes, users) to speed up access to content.
You can enable these settings via Configuration > Performance.
2. Best Caching Modules
1. Memcache / Memcached
Overview: Memcached is a distributed memory object caching system that can significantly improve performance by caching data in memory.
Installation and Setup:
Install Memcache/Memcached:
Install Memcached server on your system.
Install the Memcache PHP extension.
Using Composer: bash composer require drupal/memcache
Enable the Module:
Go to Extend (admin/modules), search for Memcache, and enable it.
Configure Memcache:
Update your settings.php file with Memcache settings.
php $settings['cache']['default'] = 'cache.backend.memcache';$settings['memcache']['servers'] = ['127.0.0.1:11211'];$settings['memcache']['key_prefix'] = 'drupal_';
Restart Services:
Restart the Memcached service.
bash sudo systemctl restart memcached
2. Redis
Overview: Redis is an advanced key-value store that can be used for caching, session storage, and more. It offers high performance and flexibility.
Installation and Setup:
Install Redis:
Install Redis server on your system.
Install the Redis PHP extension.
Using Composer: bash composer require drupal/redis
Enable the Module:
Go to Extend (admin/modules), search for Redis, and enable it.
Configure Redis:
Update your settings.php file with Redis settings.
php $settings['cache']['default'] = 'cache.backend.redis';$settings['redis']['connection']['host'] = '127.0.0.1';$settings['redis']['connection']['port'] = '6379';$settings['redis']['cache']['default'] = 'cache';
Restart Services:
Restart the Redis service.
bash sudo systemctl restart redis
3. Advanced Aggregate
Overview: Advanced Aggregate improves the default CSS and JavaScript aggregation in Drupal by providing more options and optimizations.
Installation and Setup:
Install the Module:
Using Composer:
bash composer require drupal/advagg
Alternatively, download from Drupal.org and place it in the modules/contrib directory.
Enable the Module:
Go to Extend (admin/modules), search for Advanced Aggregate, and enable it.
Configure Advanced Aggregate:
Go to Configuration > Development > Performance.
Configure aggregation settings, such as enabling advanced CSS and JavaScript aggregation.
4. Cache Tags
Overview: The Cache Tags module helps you manage cache invalidation by allowing you to clear specific caches based on tags.
Installation and Setup:
Install the Module:
Using Composer:
bash composer require drupal/cache_tags
Alternatively, download from Drupal.org and place it in the modules/contrib directory.
Enable the Module:
Go to Extend (admin/modules), search for Cache Tags, and enable it.
Configure Cache Tags:
Configure settings to define how cache tags should be used and invalidated.
5. Boost
Overview: Boost is a caching module designed for Drupal 7 that provides static page caching for anonymous users, which can significantly improve performance.
Installation and Setup:
Install Boost:
Download Boost from Drupal.org and place it in the sites/all/modules/contrib directory.
Enable the Module:
Go to Extend (admin/modules), search for Boost, and enable it.
Configure Boost:
Go to Configuration > Performance > Boost.
Configure Boost settings, such as cache expiry times and paths to cache.
6. Cloudflare
Overview: Cloudflare is a CDN that provides caching and optimization services for websites, including Drupal sites.
Installation and Setup:
Sign Up and Configure Cloudflare:
Sign up for a Cloudflare account and configure your domain.
Install Cloudflare Module:
Using Composer:
bash composer require drupal/cloudflare
Alternatively, download from Drupal.org and place it in the modules/contrib directory.
Enable the Module:
Go to Extend (admin/modules), search for Cloudflare, and enable it.
Configure Cloudflare:
Go to Configuration > System > Cloudflare.
Enter your Cloudflare API credentials and configure caching and optimization settings.
7. Additional Optimization Tips
**Use Drupal’s Built-in Cache Management:
Regularly clear and manage caches via Configuration > Performance.
Optimize Database Tables:
Regularly run database optimization queries to keep your database performant.
Monitor Performance:
Use tools like New Relic or Google PageSpeed Insights to monitor and analyze site performance.
Conclusion
Implementing and configuring caching modules can greatly enhance the performance of your Drupal site. By using a combination of Memcache, Redis, Advanced Aggregate, Cache Tags, Boost, and Cloudflare, you can optimize caching at various levels, from server-side to client-side. Regular monitoring and adjustments will help maintain optimal performance as your site grows and evolves.
Hire a Drupal Developer Hire Drupal Web Developers Drupal Website Development Company
Drupal Developers Drupal Agency Drupal Development CompanyFreelance Drupal Developer
Drupal Development Agency Drupal Development Services Drupal Development Firm Drupal Web Agency Drupal Website Developer Drupal Consulting Services Find Drupal Developer
Drupal Web Development Company Drupal Companies Drupal Web Design Agency
Drupal Web Development Agency Hire Dedicated Drupal Developers Drupal Web Development Services Best Drupal Developers Drupal Digital Agency Drupal Web Design Company
Top Drupal Development Companies Drupal Developer Company Drupal Web Design Services
Drupal Development Shop Best Drupal Development Companies Drupal SEO Company
Drupal Website Company Hire Drupal Programmers Top Drupal Companies Best Drupal Agencies Hire Drupal Expert Best Drupal Development Agency Companies That Build Drupal Websites
Dedicated Drupal Developers in India Drupal 8 Development Company Drupal 8 Enterprise Web Development Drupal 9 Development Company Drupal Agency Near Me Drupal Agency Website
Drupal CMS Development Company Drupal CMS Development Services Drupal Consulting Company
Drupal Design Agency Drupal Design Company Drupal Developers Near Me Drupal Development Consulting Company Drupal Development Services Providers Drupal Ecommerce Agency
Drupal Ecommerce Development Services Drupal Experts for Hire Drupal Migration Company
Drupal Module Development Services Drupal SEO Agency Drupal Support Company Drupal Web Company Drupal Web Design Firm Drupal Web Design Firms Drupal Web Design Services Providers
Drupal Web Design Studio Drupal Web Developer Company Drupal Web Development Firm
Drupal Web Development Service Provider Drupal Web Development Services Company
Drupal Web Expert Drupal Website Design Company Drupal Website Development Services
Enterprise Drupal Development Expert Drupal Developers Expert Drupal Programmer
Expert Drupal Web Developer Hire Dedicated Drupal Developer Hire Drupal Designers
Outsource Drupal Development Top Drupal Developers Top Drupal Experts Web Agency Drupal
#hire drupal developers#hire drupal experts#hire drupal ajency#hire drupal coders#drupal development services#drupal
0 notes
Text
Best Caching Modules for Drupal: Recommendations and Setup Guides
Caching is a critical aspect of optimizing Drupal site performance. Properly implemented caching can significantly reduce load times and server load, improving the overall user experience. Drupal offers several caching modules that can help you manage and optimize caching efficiently. Here’s a guide to the best caching modules for Drupal, along with setup instructions.
1. Drupal Core Caching
Before diving into contributed modules, it’s important to understand Drupal’s built-in caching mechanisms:
Page Caching: Stores entire rendered pages for anonymous users.
Dynamic Page Cache: Caches rendered pages for authenticated users, reducing the need for repeated processing.
Entity Caching: Caches entities (e.g., nodes, users) to speed up access to content.
You can enable these settings via Configuration > Performance.
2. Best Caching Modules
1. Memcache / Memcached
Overview: Memcached is a distributed memory object caching system that can significantly improve performance by caching data in memory.
Installation and Setup:
Install Memcache/Memcached:
Install Memcached server on your system.
Install the Memcache PHP extension.
Using Composer: bash composer require drupal/memcache
Enable the Module:
Go to Extend (admin/modules), search for Memcache, and enable it.
Configure Memcache:
Update your settings.php file with Memcache settings.
php $settings['cache']['default'] = 'cache.backend.memcache';$settings['memcache']['servers'] = ['127.0.0.1:11211'];$settings['memcache']['key_prefix'] = 'drupal_';
Restart Services:
Restart the Memcached service.
bash sudo systemctl restart memcached
2. Redis
Overview: Redis is an advanced key-value store that can be used for caching, session storage, and more. It offers high performance and flexibility.
Installation and Setup:
Install Redis:
Install Redis server on your system.
Install the Redis PHP extension.
Using Composer: bash composer require drupal/redis
Enable the Module:
Go to Extend (admin/modules), search for Redis, and enable it.
Configure Redis:
Update your settings.php file with Redis settings.
php $settings['cache']['default'] = 'cache.backend.redis';$settings['redis']['connection']['host'] = '127.0.0.1';$settings['redis']['connection']['port'] = '6379';$settings['redis']['cache']['default'] = 'cache';
Restart Services:
Restart the Redis service.
bash sudo systemctl restart redis
3. Advanced Aggregate
Overview: Advanced Aggregate improves the default CSS and JavaScript aggregation in Drupal by providing more options and optimizations.
Installation and Setup:
Install the Module:
Using Composer:
bash composer require drupal/advagg
Alternatively, download from Drupal.org and place it in the modules/contrib directory.
Enable the Module:
Go to Extend (admin/modules), search for Advanced Aggregate, and enable it.
Configure Advanced Aggregate:
Go to Configuration > Development > Performance.
Configure aggregation settings, such as enabling advanced CSS and JavaScript aggregation.
4. Cache Tags
Overview: The Cache Tags module helps you manage cache invalidation by allowing you to clear specific caches based on tags.
Installation and Setup:
Install the Module:
Using Composer:
bash composer require drupal/cache_tags
Alternatively, download from Drupal.org and place it in the modules/contrib directory.
Enable the Module:
Go to Extend (admin/modules), search for Cache Tags, and enable it.
Configure Cache Tags:
Configure settings to define how cache tags should be used and invalidated.
5. Boost
Overview: Boost is a caching module designed for Drupal 7 that provides static page caching for anonymous users, which can significantly improve performance.
Installation and Setup:
Install Boost:
Download Boost from Drupal.org and place it in the sites/all/modules/contrib directory.
Enable the Module:
Go to Extend (admin/modules), search for Boost, and enable it.
Configure Boost:
Go to Configuration > Performance > Boost.
Configure Boost settings, such as cache expiry times and paths to cache.
6. Cloudflare
Overview: Cloudflare is a CDN that provides caching and optimization services for websites, including Drupal sites.
Installation and Setup:
Sign Up and Configure Cloudflare:
Sign up for a Cloudflare account and configure your domain.
Install Cloudflare Module:
Using Composer:
bash composer require drupal/cloudflare
Alternatively, download from Drupal.org and place it in the modules/contrib directory.
Enable the Module:
Go to Extend (admin/modules), search for Cloudflare, and enable it.
Configure Cloudflare:
Go to Configuration > System > Cloudflare.
Enter your Cloudflare API credentials and configure caching and optimization settings.
7. Additional Optimization Tips
**Use Drupal’s Built-in Cache Management:
Regularly clear and manage caches via Configuration > Performance.
Optimize Database Tables:
Regularly run database optimization queries to keep your database performant.
Monitor Performance:
Use tools like New Relic or Google PageSpeed Insights to monitor and analyze site performance.
Conclusion
Implementing and configuring caching modules can greatly enhance the performance of your Drupal site. By using a combination of Memcache, Redis, Advanced Aggregate, Cache Tags, Boost, and Cloudflare, you can optimize caching at various levels, from server-side to client-side. Regular monitoring and adjustments will help maintain optimal performance as your site grows and evolves.
Hire a Drupal Developer Hire Drupal Web Developers Drupal Website Development Company
Drupal Developers Drupal Agency Drupal Development CompanyFreelance Drupal Developer
Drupal Development Agency Drupal Development Services Drupal Development Firm Drupal Web Agency Drupal Website Developer Drupal Consulting Services Find Drupal Developer
Drupal Web Development Company Drupal Companies Drupal Web Design Agency
Drupal Web Development Agency Hire Dedicated Drupal Developers Drupal Web Development Services Best Drupal Developers Drupal Digital Agency Drupal Web Design Company
Top Drupal Development Companies Drupal Developer Company Drupal Web Design Services
Drupal Development Shop Best Drupal Development Companies Drupal SEO Company
Drupal Website Company Hire Drupal Programmers Top Drupal Companies Best Drupal Agencies Hire Drupal Expert Best Drupal Development Agency Companies That Build Drupal Websites
Dedicated Drupal Developers in India Drupal 8 Development Company Drupal 8 Enterprise Web Development Drupal 9 Development Company Drupal Agency Near Me Drupal Agency Website
Drupal CMS Development Company Drupal CMS Development Services Drupal Consulting Company
Drupal Design Agency Drupal Design Company Drupal Developers Near Me Drupal Development Consulting Company Drupal Development Services Providers Drupal Ecommerce Agency
Drupal Ecommerce Development Services Drupal Experts for Hire Drupal Migration Company
Drupal Module Development Services Drupal SEO Agency Drupal Support Company Drupal Web Company Drupal Web Design Firm Drupal Web Design Firms Drupal Web Design Services Providers
Drupal Web Design Studio Drupal Web Developer Company Drupal Web Development Firm
Drupal Web Development Service Provider Drupal Web Development Services Company
Drupal Web Expert Drupal Website Design Company Drupal Website Development Services
Enterprise Drupal Development Expert Drupal Developers Expert Drupal Programmer
Expert Drupal Web Developer Hire Dedicated Drupal Developer Hire Drupal Designers
Outsource Drupal Development Top Drupal Developers Top Drupal Experts Web Agency Drupal
#hire drupal developers#hire drupal professionals#hire drupal master#drupal development company#hire drupal experts
0 notes
Text
How to Build Scalable Web Applications with Python

In today’s fast-paced digital landscape, building scalable web applications is crucial for businesses looking to grow and adapt to increasing user demands. Python, with its simplicity and versatility, has become a go-to language for developers aiming to create robust and scalable web applications. This article will guide you through the essential steps to build scalable web applications with Python, highlighting key frameworks, best practices, and the benefits of partnering with a Python web development services provider company like Innvonix.
Choosing the Right Framework
Selecting the appropriate framework is the first step in building a scalable web application. Python offers several powerful frameworks, each with its own strengths:
Django: Known for its "batteries-included" philosophy, Django provides a comprehensive suite of tools out-of-the-box. Its ORM, authentication system, and admin interface make it ideal for building scalable applications rapidly.
Flask: Flask is a lightweight micro-framework that offers flexibility and control. It allows developers to add components as needed, making it perfect for small to medium-sized applications that require customization.
FastAPI: FastAPI is a modern framework designed for high-performance applications. It leverages asynchronous programming to handle large volumes of requests efficiently, making it an excellent choice for building APIs and real-time services.
Best Practices for Scalability
Modular Architecture: Breaking down your application into smaller, manageable modules is essential for scalability. This allows for independent development, testing, and deployment of different components, making it easier to scale specific parts of the application as needed.
Database Optimization: Efficient database management is critical for scalability. Use indexing, query optimization, and database partitioning to ensure your application can handle large datasets and high traffic without performance degradation.
Asynchronous Programming: Leveraging asynchronous programming techniques can significantly improve the scalability of your application. Frameworks like FastAPI and libraries like asyncio enable your application to handle multiple requests concurrently, reducing response times and increasing throughput.
Caching: Implementing caching mechanisms can drastically reduce the load on your server and database. Tools like Redis and Memcached store frequently accessed data in memory, providing faster access and reducing the need for repeated database queries.
Load Balancing: Distributing incoming traffic across multiple servers ensures that no single server becomes a bottleneck. Load balancers like Nginx or HAProxy can help distribute the load evenly, improving the overall performance and reliability of your application.
Containerization and Microservices: Using containers (e.g., Docker) and adopting a microservices architecture can enhance scalability by allowing you to deploy and manage different parts of your application independently. This approach also makes it easier to scale individual services based on demand.
Leveraging Python Development Services
Building a scalable web application can be complex, especially when considering the myriad of technologies and best practices involved. Partnering with a Python web development company can streamline the process and ensure your application is built to handle future growth.
Innvonix, a leading Python development company based in the USA, specializes in creating scalable, high-performance web applications. Their team of experienced developers offers comprehensive Python development services, including:
Custom Web Development: Tailored solutions that meet your specific business needs.
API Development: Building robust APIs to facilitate seamless integration with other services and platforms.
Database Management: Optimizing database performance for scalability and efficiency.
Performance Optimization: Identifying and addressing performance bottlenecks to ensure smooth operation under high traffic.
Maintenance and Support: Ongoing support to keep your application running smoothly and securely.
Conclusion
Building scalable web applications with Python involves choosing the right framework, implementing best practices, and leveraging professional development services. By adopting a modular architecture, optimizing databases, using asynchronous programming, caching, load balancing, and containerization, you can create a robust and scalable application that meets the demands of your growing user base.
Partnering with a reputable Python web development company like Innvonix can further enhance your application's scalability and performance. Their expertise in Python development services ensures that your application is built to handle future growth and evolving business needs.
Invest in the right tools and expertise today to build a scalable web application that stands the test of time and supports your business's success.
#python#python development service#python development company#hire python developers#python app development#Python services#web developement#web development services
0 notes
Text
Open Panel ve Open Admin Nedir?
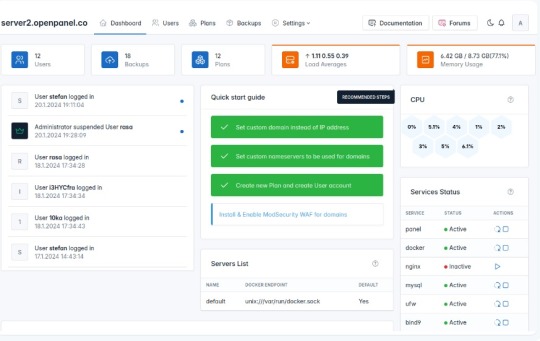
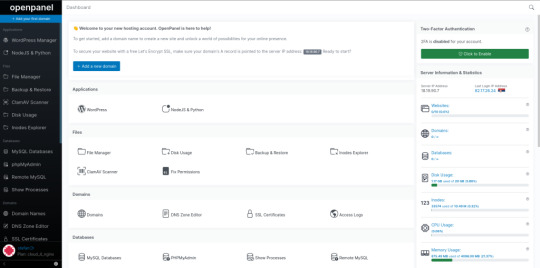
Cpanel, AApanel, Cyberpanel gibi çok çeşitli çözümlerinin yanına sağlam bir rakip geldi.İlk izlenim olarak bilgi bulunmasada sanki Sentora Panel temel alınarak geliştirilmiş gibi görünüyor.Şimdilik Beta aşamasında olsada sürekli gelişen ve umut vadeden bu yazılımı deneyebilirsiniz. Günümüzün ana bilgisayarları için özel olarak tasarlanan OpenPanel, ihtiyaçlarınızı karşılamak için bir küme oluşturmanız ve ölçeklendirmeniz gereken kapsamlı bir araç ve özellik seti sunar.OpenAdmin, kullanıcı oluşturma ve yönetme, barındırma planları oluşturma, yedeklemeleri yapılandırma ve OpenPanel ayarlarını düzenleme gibi görevleri verimli bir şekilde işleyebileceğiniz yönetici düzeyinde bir arayüz sunar. Gereksinimler Donanım Gereksinimleri İşletim sistemi ve sürümü İşlemci RAM Disk Alanı Mimari Ubuntu 22.04 veya daha yeni Minimum: 1,1 GHzÖnerilen: 2 GHz Minimum: 1 GBÖnerilen: 4 GB Minimum: 12 GBÖnerilen: 20 GB 64 bit Open Panel :(Müteri Arayüzü)OpenPanel, web ve sunucu yönetiminin karmaşıklıklarını basitleştirmeyi amaçlayan son kullanıcılar için sağlam bir arayüz sunar. Etki alanı eklemekten web sitelerinizi yönetmeye kadar, belgelerimiz arayüzde sorunsuz bir şekilde gezinmek için ihtiyacınız olan her şeyi kapsar. Open Panel
Open Admin:(Sunucu Yöneticisi Arayüzü)OpenAdmin, sunucu yapılandırmaları ve yönetimi üzerinde hassas kontrol isteyen yöneticiler için tasarlanmıştır. Belgelerimiz, sunucu ortamınızı özelleştirmenize ve güvence altına almanıza yardımcı olacak derinlemesine bilgi sağlar Open Admin
Demo:https://demo.openpanel.co/openadmin/ Ayrıntılar için : https://openpanel.co Web sunucuları Nginx Run Nginx web sunucusu hafif, açık kaynaklı bir çözümdür. Nginx web sunucusunun OpenPanel sürümü, alan adı başına önbellek hariç tutma, önbellek temizleme, URL yeniden yazma ve FastCGI önbelleğinin yapılandırılmasını sağlar. Apache Kullanıcı başına Apache web sunucusunu çalıştırın. Apache'nin .htaccess dosyaları desteği, kullanıcıların dizin başına genel yapılandırma ayarlarını özelleştirmesine ve geçersiz kılmasına olanak tanır. Kullanıcı hizmetleri Alan Adları Otomatik SSL yenilemelerine sahip etki alanı adları ekleyin, takma adlar ve alt etki alanları ekleyin (Uluslararasılaştırılmış etki alanları desteklenir), yönlendirmeler oluşturun, HTTPS'yi zorlayın ve vhost dosyalarını düzenleyin. Dosya Yöneticisi Herhangi bir yükleme sınırı olmadan aynı anda birden fazla dosyayı zahmetsizce yükleyin. Dosyaları düzenleyin, izinleri ayarlayın, dosyaları kopyalayın veya taşıyın, yeni dosyalar ekleyin ve çeşitli dosya yönetimi görevlerini gerçekleştirin. PHP sürümleri Kullanıcılar her etki alanı için farklı PHP sürümleri kullanabilir, yeni sürümler yükleyebilir, yeni etki alanları için varsayılan bir sürüm ayarlayabilir, php.ini dosyalarını düzenleyerek sınırları değiştirebilir. NodeJS ve Python NodeJS ve Python uygulamalarını zahmetsizce oluşturun ve yönetin. Proxy web siteleri bu uygulamalardan içeriği sorunsuz görüntülemek için. WP Yöneticisi Wp-admin'e otomatik giriş, seçenek düzenleme, isteğe bağlı yedekleme, hata ayıklama ve çeşitli ek işlevler gibi özelliklere sahip otomatik WordPress yükleyicisi. MySQL ve phpMyAdmin MySQL veritabanlarını ve kullanıcılarını kolayca oluşturun ve yönetin. PhpMyAdmin'e otomatik olarak giriş yapın, uzaktan MySQL erişimini etkinleştirin ve yapılandırma ayarlarını istediğiniz sınırlarla ayarlayın. SSL sertifikaları Otomatik SSL üretimi ve yenilenmesi, güncel SSL sertifikalarıyla sürekli koruma sağlayarak web sitenizin güvenliğinin zahmetsizce yönetilmesini sağlar. Nesne Önbellekleme Özel REDIS ve Memcached örneklerini kullanarak nesne önbelleği uygulayın. Bellek sınırlarını belirleyin, hizmetleri başlatın / durdurun ve günlükleri verimli bir şekilde görüntüleyin. SSH ve Web Terminali Terminale SSH üzerinden uzaktan erişin veya otomatik olarak Web Terminaline giriş yapın. Daha fazla kolaylık sağlamak için önceden yüklenmiş WPCLI ve NPM ile birlikte gelir! Sunucu ayarları Her kullanıcı, sunucu yapılandırmaları üzerinde tam kontrole sahiptir ve hizmetleri yüklemelerini veya yeniden başlatmalarını, sistem yapılandırmalarını düzenlemelerini ve diğer çeşitli idari görevleri yerine getirmelerini sağlar. Cron İşleri Planlanan eylemleri verimli bir şekilde planlamak ve yönetmek için cronjobs'u doğrudan OpenPanel arayüzünden planlayın ve düzenleyin. DNS Bölge Düzenleyicisi Etki alanlarınız için DNS bölge dosyalarını kolayca düzenleyin ve OpenPanel arabirimi aracılığıyla A, AAAA, CNAME, MX, TXT vb. Gibi çeşitli kayıtlar ekleyin. Kaynak kullanımı Gerçek zamanlı CPU ve bellek kullanımını izleyin, geçmiş eğilimleri kontrol edin ve performansı optimize etmek için sunucu yapılandırmasını gerektiği gibi ayarlayın. Ziyaretçi raporları Web sitenizin erişim günlüklerinden otomatik olarak oluşturulan, görsel olarak çekici ziyaretçi raporlarına erişin. Ziyaretçi konumlarını, erişilen sayfaları, IP'leri, hata sayfalarını ve daha fazlasını kolaylıkla keşfedin. Etkinlik günlükleri OpenPanel arabirimindeki her eylem kaydedilir ve kullanıcıların kimin ne zaman ve ne yaptığını kolayca izlemesine olanak tanır ve sunucu günlüklerini eleme ihtiyacını ortadan kaldırır. Hesap ayarları Kullanıcılar kişiselleştirilmiş bir deneyim için e-posta adreslerini ve şifrelerini değiştirebilir, 2FA'yı etkinleştirebilir, dil tercihlerini ayarlayabilir ve karanlık modu etkinleştirebilir. Sunucu yönetimi Basit sunucu dağıtımı OpenPanel'i birkaç dakika içinde yükleyin. Tek bir komutla kümenize yeni sunucular sağlayın. Kaynak kullanım yönetimi Barındırılan tüm web siteleriniz için tutarlı performans sağlamak amacıyla CPU, G / Ç bant genişliği, IOPS, nproc ve belleği kullanıcı başına sınırlandırın. Web sunucularını değiştirme Şu anda, web sunucusu olarak yalnızca Nginx desteklenmektedir, ancak LiteSpeed için yaklaşan destek yöneticilere tercih ettikleri web sunucusunu seçme seçeneği sunacaktır. Yapılandırmayı düzenle Yöneticiler, sistemi belirli gereksinimlere uyacak şekilde yapılandırma esnekliği sağlayarak panel erişimi için etki alanları belirleme, bağlantı noktalarını değiştirme ve hem OpenPanel hem de OpenAdmin arabirimleri için ayarları düzenleme yeteneğine sahiptir. Kaynak kullanım istatistikleri Gerçek zamanlı izleme ile CPU ve Bellek kullanımını, Ağı ve yükü izleyin. Hizmet Yönetimi Hizmetleri izleyin, yeniden başlatın, günlükleri görüntüleyin ve yönetici arayüzünden verimli bir şekilde ek yönetim görevleri gerçekleştirin. Akıllı Bildirimler Sunucunuzun durumu hakkında bilgi sahibi olmak için yeniden başlatma, yüksek kaynak kullanımı, web sitesi saldırıları, başarısız hizmetler ve diğer kritik durumlar gibi bildirimler alın. Terminal Komutları OpenCLI, Yöneticiler için terminal arabirimi olarak hizmet vererek, 100'den fazla kullanılabilir komuta erişimi olan çeşitli OpenPanel ayarlarının otomasyonuna izin verir. Kullanıcı arayüzü markalaşma OpenPanel'i, barındırma şirketinizin görünümünü ve hissini yansıtan renkler, logolar, yazı tipleri ve daha fazlası ile tamamen özelleştirin. Tamamen duyarlı Herhangi bir özellik sınırlaması olmadan masaüstü, tablet ve mobil cihazlarda OpenPanel'e erişin. Karanlık mod OpenPanel, kullanıcıların doğrudan arayüzden tek bir tıklamayla etkinleştirebileceği ve kullanıcı deneyimini geliştirebileceği yerleşik bir karanlık moda sahiptir. Sunucu Bilgisi Gerçek zamanlı kullanım verilerini, IP adresini, ad sunucularını ve diğer önemli sunucu bilgilerini doğrudan OpenPanel arayüzünde görüntüleyin. Gelişmiş Arama Güçlü bir arama işlevselliği ile aradığınızı hızlı ve kolay bir şekilde bulun. Çok dilli destek OpenPanel çeviriye hazır. Her oturum açma OpenPanel'i tercih ettikleri dilde görüntüleyebilir. Klavye Kısayolları OpenPanel, gelişmiş kullanıcılara odaklanarak tasarlandı ve arayüzde navigasyon hızınızı artırmak için 20'den fazla klavye kısayolu sunuyor. Kullanıcı yönetimi Hesapları askıya alma / silme OpenPanel erişimini ve web sitelerini anında devre dışı bırakmak için müşteri hesaplarını askıya alın. Artık gerekli olmadığında hesapları silin. Yükseltme / Aşağı indirme paketi Bir müşterinin paketini başka bir barındırma paketinize sorunsuz bir şekilde yükseltin veya düşürün. Özel IP adresi Kullanıcılara bir IPv4 adresi tahsis ederek web siteleri ve hizmetleri için özel bir IP sağlayın. kimliğe bürünme Bir müşterinin hesabına erişmek ve hesabınızdan ayrılmak zorunda kalmadan tam olarak ne gördüklerini görmek için otomatik giriş yapın. Kullanıcı başına Apache veya Nginx Yöneticiler her kullanıcı için web sunucusu olarak Apache veya Nginx'i seçebilir. Bu esneklik, yöneticilerin hepsi aynı sunucuda Apache ve Nginx kullanan diğer kullanıcıları kullanan kullanıcıların bir karışımını barındırmasını sağlar. Güvenlik Kullanıcı konteynerizasyonu Her kullanıcı hesabı kapsayıcıdır. Kapsayıcıların diğer kullanıcılara veya sunucu dosyalarına erişimi yoktur. Kaynak sınırlaması Yöneticiler, bağlantı noktası hızı, disk kullanımı, düğümler, web sitesi sayısı, MySQL veritabanları ve etki alanları dahil olmak üzere plan başına belirli sınırlar belirleme yeteneğine sahiptir. SSL / TLS Sertifikaları otomatik olarak şifreleyelim. Kullanıcılar yeni sertifikalar oluşturabilir ve tüm web sitesi trafiğini HTTPS'ye sorunsuz bir şekilde yönlendirebilir. ModSecurity Yöneticiler ModSecurity'yi tek bir tıklamayla etkinleştirebilir ve OWASP kural setini yapılandırabilir. Ayrıca, bireysel kullanıcılar alan adı başına ModSecurity'yi etkinleştirme veya devre dışı bırakma esnekliğine sahiptir. Güvenlik duvarı Yöneticiler (UFW) güvenlik duvarı kurallarını doğrudan yönetici arayüzünden yönetebilir. Yalnızca gerekli bağlantı noktaları kullanıcılar için açıktır ve yöneticiler bunlar üzerinde tam kontrole sahiptir. İki Faktörlü Kimlik Doğrulama Kullanıcılar, OpenPanel hesapları için İki Faktörlü Kimlik Doğrulamayı etkinleştirerek güvenliği artırabilir. Yöneticiler, herhangi bir kullanıcı için 2FA'yı uygulama veya devre dışı bırakma esnekliğine sahiptir. Sınırlı kabuk erişimi Son kullanıcılar, kapsayıcılarına kök düzeyinde erişimden kısıtlanır. Ayrıca, güvenliği artırmak için, bir kullanıcının kapsayıcısındaki tüm hizmetler farklı kullanıcı hesapları altında çalışır. IP engelleme Her kullanıcı, belirli IP adreslerini engelleyerek web sitelerine erişimi kısıtlamak için kişiselleştirilmiş bir araç sağlayarak, etki alanına özgü bir IP blok listesi yapılandırma yeteneğine sahiptir. Yönetici panelini devre dışı bırak Yöneticiler, OpenPanel'in temel işlevlerini korurken OpenAdmin arayüzünü tek bir tıklamayla zahmetsizce devre dışı bırakabilir. Ayrı hizmetler Hem OpenAdmin hem de OpenPanel, kullanıcı web sitelerinden tam bağımsızlığı koruyarak ayrı veritabanları ve web sunucuları kullanır. Özel bağlantı noktaları Yöneticiler, varsayılan bağlantı noktasını özelleştirme (ör. 2083'ten değiştirme) ve belirli tercihlere hitap etmek için dizin yolunu (ör. / Openpanel'den) değiştirme esnekliğine sahiptir. Entegrasyonlar (Yakında) WHMCS Modülü( Yakında gelmesi planlanıyor) Önde gelen web barındırma yönetimi ve faturalandırma yazılımı ile entegre edin. REST API'sı Güçlü RESTful API'mız, zaten kullandığınız 3. taraf sistemlerle entegre olmanızı sağlar. Read the full article
0 notes
Text
Here at ComputingPost, we like exploring various network and system monitoring tools. So far we have covered the basic setup and usage of Zabbix, telegraf/InfluxDB, Grafana, and Prometheus. Zabbix functionality is similar to Cacti, though Cacti is more fit for network graphing. In this guide, we’ll look at how to install and configure Cacti on Ubuntu 20.04|18.04 Linux server. What is Cacti? Cacti is a completely open-source network monitoring and graphing tool that was designed as a front-end application for the industry-standard data logging tool RRDtool. Cacti harness the power of RRDTool’s data storage and graphing functionality. Some good features of Cacti include: Fast polling of metrics Support for multiple data acquisition methods Support for advanced graph templating User management functionality with ACL Cacti provide an intuitive and easy to use web interface which can be used for small LAN installations up to complex networks with thousands of servers and networking devices. Install Cacti Server on Ubuntu 20.04/18.04 Cacti has a number of dependencies that need to be installed and configured before you can deploy Cacti server itself. This guide will cover the installation of these dependencies one by one: Step 1: Update system and upgrade all packages We always start with server packages upgrade to avoid any dependency issues: sudo apt update sudo apt upgrade -y You can reboot the server after upgrade: sudo reboot Step 2: Install php and required modules We now need to install php and some php modules required by cacti. Run the following commands to get everything and installed. sudo apt -y install apache2 php php-mysql,curl,net-socket,gd,intl,pear,imap,memcache,pspell,tidy,xmlrpc,snmp,mbstring,gmp,json,xml,common,ldap sudo apt install libapache2-mod-php The most important module is php-snmp and php-mysql. Make sure they are installed. You can check your php version using the command: $ php -v PHP 7.4.3 (cli) (built: Nov 25 2021 23:16:22) ( NTS ) Copyright (c) The PHP Group Zend Engine v3.4.0, Copyright (c) Zend Technologies with Zend OPcache v7.4.3, Copyright (c), by Zend Technologies Update PHP parameters: sudo vim /etc/php/*/apache2/php.ini Set correct timezone: date.timezone = "Africa/Nairobi" Update memory limit: memory_limit = 512M Also adjust Maximum execution time of each script: max_execution_time = 300 Restart Apache Web server Step 3: Configure Apache Web server Ensure Apache web server is installed: sudo apt install apache2 After installing Apache, configure basic security by allowing Prod ServerTokens only. sudo vim /etc/apache2/conf-enabled/security.conf Change line 25 ServerTokens Prod This directive configures what you return as the Server HTTP response. Valid options are Full | OS | Minimal | Minor | Major | Prod. Set ServerName: $ sudo vim /etc/apache2/apache2.conf ServerName cacti.example.com Set Server Admin to receive an email in case of issues. $ sudo vim /etc/apache2/apache2.conf ServerAdmin [email protected] If you have ufw enabled, open http and https ports on the firewall. $ sudo ufw allow http Rule added Rule added (v6 $ sudo ufw allow https Rule added Rule added (v6) You need to restart apache web service after making these changes: sudo systemctl restart apache2 Step 4: Install and Configure MariaDB Database Run the following commands to install MariaDB server on Ubuntu:s sudo apt install mariadb-server -y Tune MariaDB database for Cacti Add the following settings under [mysqld]: $ sudo vim /etc/mysql/mariadb.conf.d/50-server.cnf [mysqld] innodb_file_format=Barracuda innodb_large_prefix=1 collation-server=utf8mb4_unicode_ci character-set-server=utf8mb4 innodb_doublewrite=OFF max_heap_table_size=128M tmp_table_size=128M join_buffer_size=128M innodb_buffer_pool_size=1G innodb_flush_log_at_timeout=3 innodb_read_io_threads=32 innodb_write_io_threads=16 innodb_io_capacity=5000 innodb_io_capacity_max=10000
innodb_buffer_pool_instances=9 Comment out other settings on local #around line 116 #character-set-server = utf8mb4 #collation-server = utf8mb4_general_ci Restart mariadb service sudo systemctl restart mariadb To check any of these settings, use mysql select statement, e.g. $ sudo mysql -u root MariaDB [(none)]> select @@tmp_table_size; +------------------+ | @@tmp_table_size | +------------------+ | 134217728 | +------------------+ 1 row in set (0.00 sec) MariaDB [(none)]> exit Bye Or MariaDB [(none)]> show variables like 'join_buffer_size'; Once Database server installation is done, you need to create a database for Cacti: $ sudo mysql -u root -p CREATE DATABASE cacti DEFAULT CHARACTER SET utf8 COLLATE utf8_unicode_ci ; GRANT ALL PRIVILEGES ON cacti.* TO 'cacti_user'@'localhost' IDENTIFIED BY 'strongpassword'; GRANT SELECT ON mysql.time_zone_name TO cacti_user@localhost; ALTER DATABASE cacti CHARACTER SET utf8mb4 COLLATE utf8mb4_unicode_ci; FLUSH PRIVILEGES; EXIT; Test database connection: $ mysql -u cacti_user -p Enter password: strongpassword MariaDB [(none)]> show databases; +--------------------+ | Database | +--------------------+ | cacti | | information_schema | +--------------------+ 2 rows in set (0.00 sec) MariaDB [(none)]> \q Setup mysql timezone for cacti database user $ sudo su - $ mysql_tzinfo_to_sql /usr/share/zoneinfo | mysql -u root -p mysql Enter password: Warning: Unable to load '/usr/share/zoneinfo/leap-seconds.list' as time zone. Skipping it. Step 5: Install SNMP and Cacti on Ubuntu 20.04/18.04 The last package installation step is for Cacti and snmp packages. Cacti depend on Snmp and rrdtool tool for its functions. Install these packages using the command: sudo apt install snmp snmpd snmp-mibs-downloader rrdtool When asked to select the web server, choose Apache. Clone Project from github: $ sudo apt install git $ git clone -b 1.2.x https://github.com/Cacti/cacti.git Cloning into 'cacti'... remote: Enumerating objects: 75698, done. remote: Counting objects: 100% (1608/1608), done. remote: Compressing objects: 100% (496/496), done. remote: Total 75698 (delta 1155), reused 1536 (delta 1105), pack-reused 74090 Receiving objects: 100% (75698/75698), 127.92 MiB | 7.02 MiB/s, done. Resolving deltas: 100% (56327/56327), done. Updating files: 100% (3621/3621), done. After cloning the Cacti repository, move the files into the /var/www/html directory: sudo mv cacti /var/www/html Let’s now pre-populate the database used by cacti: sudo mysql -u root cacti < /var/www/html/cacti/cacti.sql With the database populated we can go ahead and create the config.php file in /var/www/html/cacti/include: sudo mv /var/www/html/cacti/include/config.php.dist /var/www/html/cacti/include/config.php Modify Cacti configuration file and make sure to change the database settings as needed: $ sudo vim /var/www/html/cacti/include/config.php $database_type = 'mysql'; $database_default = 'cacti'; $database_hostname = 'localhost'; $database_username = 'cacti_user'; $database_password = 'strongpassword'; Step 6: Configure SNMP Start by enabling the loading of MIBs by commenting out the following line on /etc/snmp/snmp.conf sudo vim /etc/snmp/snmp.conf Change mibs : to # mibs : Configure SNMP community name by editing /etc/snmp/snmpd.conf sudo vim /etc/snmp/snmpd.conf Enable full access from localhost: rocommunity MyCacti localhost Disable public access by commenting below lines: rocommunity public default -V systemonly rocommunity6 public default -V systemonly To # rocommunity public default -V systemonly # rocommunity6 public default -V systemonly Restart snmpd service: sudo systemctl restart snmpd Validate snmp configurations using snmpwalk command line tool: $ sudo snmpwalk -v 2c -c MyCacti localhost system SNMPv2-MIB::sysDescr.0 = STRING: Linux ubuntu 5.4.0-73-generic #82-Ubuntu SMP Wed Apr 14 17:39:42 UTC 2021 x86_64 SNMPv2-MIB::sysObjectID.0 = OID: NET-SNMP-MIB::netSnmpAgentOIDs.10
DISMAN-EVENT-MIB::sysUpTimeInstance = Timeticks: (1964) 0:00:19.64 SNMPv2-MIB::sysContact.0 = STRING: Me SNMPv2-MIB::sysName.0 = STRING: ubuntu SNMPv2-MIB::sysLocation.0 = STRING: Sitting on the Dock of the Bay SNMPv2-MIB::sysServices.0 = INTEGER: 72 SNMPv2-MIB::sysORLastChange.0 = Timeticks: (6) 0:00:00.06 SNMPv2-MIB::sysORID.1 = OID: SNMP-FRAMEWORK-MIB::snmpFrameworkMIBCompliance SNMPv2-MIB::sysORID.2 = OID: SNMP-MPD-MIB::snmpMPDCompliance SNMPv2-MIB::sysORID.3 = OID: SNMP-USER-BASED-SM-MIB::usmMIBCompliance SNMPv2-MIB::sysORID.4 = OID: SNMPv2-MIB::snmpMIB SNMPv2-MIB::sysORID.5 = OID: SNMP-VIEW-BASED-ACM-MIB::vacmBasicGroup SNMPv2-MIB::sysORID.6 = OID: TCP-MIB::tcpMIB SNMPv2-MIB::sysORID.7 = OID: IP-MIB::ip SNMPv2-MIB::sysORID.8 = OID: UDP-MIB::udpMIB SNMPv2-MIB::sysORID.9 = OID: SNMP-NOTIFICATION-MIB::snmpNotifyFullCompliance SNMPv2-MIB::sysORID.10 = OID: NOTIFICATION-LOG-MIB::notificationLogMIB SNMPv2-MIB::sysORDescr.1 = STRING: The SNMP Management Architecture MIB. SNMPv2-MIB::sysORDescr.2 = STRING: The MIB for Message Processing and Dispatching. SNMPv2-MIB::sysORDescr.3 = STRING: The management information definitions for the SNMP User-based Security Model. SNMPv2-MIB::sysORDescr.4 = STRING: The MIB module for SNMPv2 entities SNMPv2-MIB::sysORDescr.5 = STRING: View-based Access Control Model for SNMP. SNMPv2-MIB::sysORDescr.6 = STRING: The MIB module for managing TCP implementations SNMPv2-MIB::sysORDescr.7 = STRING: The MIB module for managing IP and ICMP implementations SNMPv2-MIB::sysORDescr.8 = STRING: The MIB module for managing UDP implementations SNMPv2-MIB::sysORDescr.9 = STRING: The MIB modules for managing SNMP Notification, plus filtering. SNMPv2-MIB::sysORDescr.10 = STRING: The MIB module for logging SNMP Notifications. SNMPv2-MIB::sysORUpTime.1 = Timeticks: (6) 0:00:00.06 SNMPv2-MIB::sysORUpTime.2 = Timeticks: (6) 0:00:00.06 SNMPv2-MIB::sysORUpTime.3 = Timeticks: (6) 0:00:00.06 SNMPv2-MIB::sysORUpTime.4 = Timeticks: (6) 0:00:00.06 SNMPv2-MIB::sysORUpTime.5 = Timeticks: (6) 0:00:00.06 SNMPv2-MIB::sysORUpTime.6 = Timeticks: (6) 0:00:00.06 SNMPv2-MIB::sysORUpTime.7 = Timeticks: (6) 0:00:00.06 SNMPv2-MIB::sysORUpTime.8 = Timeticks: (6) 0:00:00.06 SNMPv2-MIB::sysORUpTime.9 = Timeticks: (6) 0:00:00.06 SNMPv2-MIB::sysORUpTime.10 = Timeticks: (6) 0:00:00.06 Remember to replace MyCacti with the name of your community string. Step 7: Configure Cacti Server on Ubuntu 20.04/18.04 Set Cacti directory permissions: sudo chown -R www-data:www-data /var/www/html/cacti Create systemd unit file for Cacti: sudo tee /etc/systemd/system/cactid.service + (Add device) Fill server details and scroll down and click “Save” button. Step 10: Using Cacti Spine Poller The spine is a multi-thread, high-speed data collection tool that acts as a replacement for cmd.php for Cacti. You can install and use it by following the guide in the link below: How To Install Cacti Spine poller on Ubuntu
0 notes
Text
Scss prepros comments stay in compressed

SCSS PREPROS COMMENTS STAY IN COMPRESSED FULL
SCSS PREPROS COMMENTS STAY IN COMPRESSED CODE
SCSS PREPROS COMMENTS STAY IN COMPRESSED FREE
SCSS PREPROS COMMENTS STAY IN COMPRESSED WINDOWS
Web Colour Data is a web service to easily find out “which colors are used on a web page”. This is also the engine behind GitHub Pages, which you can use to host your project’s page or blog right here from GitHub. It takes a template directory (representing the raw form of a website), runs it through Textile or Markdown and Liquid converters, and spits out a complete, static website suitable for serving with Apache or your favorite web server. Jekyll is a simple, blog aware, static site generator. There is no server-side components, no build process needed. Essentially, it’s the easiest way to make open source documentation from Readme files.
SCSS PREPROS COMMENTS STAY IN COMPRESSED FULL
It is a small JavaScript file that fetches Markdown files and renders them as full pages. ICEcoder has a powerful JavaScript API for easily interacting with it and it works with many popular languages (PHP, JS, CSS, LESS, Ruby, etc.).įlatdoc is the fastest way to create a site for your open source project. There is support for Emmet and comes bundled with Adminer (for managing MySQL).
SCSS PREPROS COMMENTS STAY IN COMPRESSED CODE
The syntax of the code is highlighted, broken tags and HTML structure are displayed + allows selecting them easily. It works by simply dropping its app folder to anywhere we prefer and any files there (and inside subfolders) are ready to be edited. ICEcoder is an open source and web-based IDE that is built with PHP and works fast. ICE Coder : PHP Powered and Open Source Web IDE It has support for multiple caching methods (apc, memcache, memcached, wincache, files, pdo and mpdo), the period of caching can be defined and has a very simplified API.ĩ. PhpFastCache is an open source PHP caching library that comes as asingle-file and can be integrated so quickly. JSONmate has support for JSONP too and it is an open source project. Also, it has a very nice visual editor for customizing the data and a visualizer that provides a different view for it. JSONmate is a web app that can beautify (and uglify) JSON strings where these strings can be directly pasted or loaded from a remote URL. There are options for the compiling process like the output format or its style (compressed, nested.).ħ. It auto-compiles the source and injects the CSS (also HTML and JS) to the browser so that no refresh is needed.
SCSS PREPROS COMMENTS STAY IN COMPRESSED WINDOWS
Prepros is an open source application for Windows OS that can do that automatically for Less, Sass, Scss, Stylus, Jade, Coffeescript, Haml and Markdown. Markup used is very simple and the whole framework is pretty lightweight(5.7KB minified and gzipped). The framework is built with responsive layouts in mind and has styles fortypography, grids, forms, buttons, tables and navigation. It uses Normalize.CSS anddoesn’t use any JavaScript but only HTML-CSS. Pure is a fresh one that is created by Yahoo!. Pingendo has built-in support for Bootstrap + Foundation frameworks an Font Awesome (more such stuff will be added). There is a DOM-tree editor which we can quickly view the tree and edit their styles and/or properties.
SCSS PREPROS COMMENTS STAY IN COMPRESSED FREE
It is currently free (can become paid after the beta – no info on that) and focuses on easing web authoring. Pingendo is a fresh IDE that is currently in beta status and available for Win + Mac. Pingendo : An IDE for Front-End Frameworks Products can have different tax rates, many shipping methods are supported and it is integrated with Omnipay (multi-gateway payment processing library).Ĥ. It is capable of managing stores of any size and having complex products + categories. Sylius is an open source and free e-commerce solution for PHP (and based on Symfony2). Sylius : Open Source PHP E-Commerce Solution Also, the website has an encode and decoder for converting any text.ģ. Characters can be sorted as categories and a search exists for locating them easily. Unicode-Table is a website providing a great unicode character table that lists unicode numbers and HTML codes of any character. Unicode- Table : Website for Unicode Characters Contact requests can be accepted/declined, statuses can be set (online, away.) and there are “typing” notifications to inform the “listening” users. It sits in the footer of web pages just like Facebook-chat and has support for one-to-one or multi-user conversations. Converse.js : Open Source & Facebook Like Chat ClientsĬonverse.js is an open source chat application that can connect to any XMPP/Jabber server (like Google Talk,Skype, etc.). We hope that these tools will make your work flow smoother and allow you to save some time in doing the things that matter. Below, we have listed some useful and fresh tools for web developers and designers.
0 notes
Text
Struts support rational application developer

#Struts support rational application developer install#
#Struts support rational application developer android#
#Struts support rational application developer software#
#Struts support rational application developer Pc#
Extended Spring / Hibernate based framework to provide automatic auditing of change to business model and developed other infrastructure components for use in J2EE applications.
J2EE: Eclipse(RAD / WSAD), Websphere 4 & 6, EJB, Spring + MVC, Struts 1.1 + Tiles, JMS(MQ),ĪNT, JDBC & Hibernate (DB2), Drools rules engine, TDD (JUnit, CruiseControl), Subversion, UML
Developed multi store price management and product propagation components.
Developed Content Management sub-system incorporating external news feeds and linking articles to products.
Developed WC 7 based e-commerce sites and provided support for WC 6 based sites.
J2EE / Java 6: Eclipse (RAD), Websphere Commerce 6 & 7, EJB, DB2, Spring, Agile
Responsible for other server-side administration systems required for the client applications.
#Struts support rational application developer android#
Developed server side systems to retrieve, aggregate, transform and cache data feeds for the multi award winning Sky Sports iPad application, plus the Sky Sports iPhone and Android applications.Java 6: Eclipse (SpringSource Tool Suite), Spring 3, Spring (Integration, MVC), XSLT, JSON, Plist, JUnit, Tomcat, Memcached, Solr, NoSql(MongoDb, CouchDb), MySql, Hibernate, Maven, Agile, TDD, JIRA Developed script driven "mock service" to assist testing.Developed General Insurance applications using Java 8 and Spring Integration.Java 8: Intellij, Spring Integration, XSLT, JSON, TDD, JIRA The framework's components can be tested against outputs from the equivalent Tensorflow configuration. Developed a Scala Breeze / Apache Spark based CNN and FCN ML framework as an exercise to gain a better understanding of how neural networks are built.Developing a supporting application to generate large datasets of random, syntactically and semantically valid documents.Developing a Scala / NLP based application to correlate arbitrary structured documents (XML, Json, SQL) into related datasets by tag and content similarity.Scala (Breeze, Apache Spark), Tensorflow, Java Now working with Scala and Machine Learning frameworks with an interest in integrating ML into commercial applications
#Struts support rational application developer software#
Twenty years of commercial Java for both software houses and end user organisations, working with a variety of development methodologies and keeping up to date with all technical developments in the field.
#Struts support rational application developer install#
Sincerely, I don't know why IBM oblies to us to install theirs fixes if we don't need it.Current Role: Java / Scala Architect / Senior DeveloperĬonsultancy with over thirty years experience in the development and implementation of large scale, business critical systems in the insurance, banking, telecommunications, media, retail and airline sectors. I have been googlin' for 1 day without any correct answer. So, is there any possibilities to tell RSA 8.5.1 or WebSphere 6.1 that I DO NOT WANT this feature and it let me to publish my web app normally? I',m in a rush and I have to continue working. Moreover, I am worried if the webapp could be affected by this additional feature.
#Struts support rational application developer Pc#
I have to ask persmissions for local admin on the pc if I want to install the fix. This wouldn't be a problem if was a private app, but it wasn't. The message appears in a popup and it tells me something like WebSphere (6.1) supports EJB 3.0 and that I have to install those features both WebSpehere and my app. Before this problem, I was developing in RAD 7.0 (using the same version of WebSphere) without problems.īut when I had to migrate to RSA 8.5.1, and after configure all JNDI references, jdbc connections and resources locations, when I start WebSphere, and after deploy the web app, WebSphere doesn't let me to publish the web app. The web app is developed in Struts 1 with Spring 3.0. My problem is related to the publish of a web app in RSA 8.5.1 using WebSphere 6.1.
0 notes
Text
10 Easy Ways to Accelerate Your Magento Website Speed

If you’ve been wondering why your Magento website is slow, you need to turn to Magento speed optimization. This means that you need to take certain steps to undo the tricky causes that caused your website to become slow in the first place.
Optimize your Magento website in ten easy steps
Your Magento developer will be the best person to help you optimize your website’s speed. If you don’t have one, you can reach out to us at Forix.
Optimize your website’s server and system requirements
The website’s server and system requirements can be considered as the two most essential factors to help you speed up your Magento 2 website. Magento is a powerful store, which means that you must host your Magento store on a dedicated server or VPS hosting.
Make sure to update the latest version of Magento 2
Magento releases a new version from time to time, which helps in automatically updating the performance, including other tweaks. So, make sure to update your store version whenever an update is notified.
Enable Varnish Cache
Click on the Admin panel, go to Store > Configuration > Advanced.
Click System under the Advanced tab, and go to the Full-Page Cache section.
Change the Caching Application field value from “Built-in Cache” to “Varnish Caching”.
Configure Memcached
Configuring the Memcached section will help decrease the database load. It is a free and open source distributed memory object caching system.
Activate Flat Categories and Products
Go to your Magento store’s admin panel. Then follow this Store > Configuration > Catalog.
Then click on Catalog which is under the Catalog tab.
Go over to the Storefront section. Here, you will find two fields which are Use Flat Catalog Category and Use Flat Catalog Product.
Change these fields to Yes.
Minimize Javascript and CSS
From the Admin panel, go to Store > Configuration > Advanced.
Under the Advanced tab, click Developer.
In the Javascript Settings section, change the values in three fields: Merge JavaScript Files, Enable JavaScript Bundling and Minify JavaScript Files to Yes.
Then, change the fields Merge CSS Files and Minify CSS Files in the CSS Settings tab to Yes.
Setup Content Delivery Network
Go to the Admin panel, go to Store > Configuration > General.
Click Web under the General tab.
Explore the Base URLS (Secure) section and add HTTPS URLs.
Use a good theme
There are amazing themes out there but you need to select the one that’s also lightweight and fast. Selecting such a theme can help improve the loading speed of your Magento 2 website.
Choose Extensions
Some users select extensions that contain bugs without knowing it, which affects the Magento speed. Therefore, make sure to always use a bug-free third-party extension for your Magento 2 store.
Optimize Images
Your ecommerce store is obviously going to have tons of images, which is bound to slow down your website. However, if you optimize your images in the following ways, you can eliminate this problem to a large extent.
Compress the images
Use the image Optimizer module
Upload your store’s logo in PNG or SVG format
Product images should be in JPEG format
Get your Magento speed optimization services from Forix today.
Related Links:
Magento Development:
Magento Development Services
B2B Magento Development
Magento Maintenance/Support:
Magento Maintenance Services
Magento Support Services
Magento Emergency Support
Magento Performance:
Magento Performance Optimization
Magento Speed Optimization
Magento Conversion Rate Optimization
Magento Payment:
Magento Payments
Magento Integrations:
Magento Integrations
Magento PIM Integration
Magento NetSuite Integration
Magento Sage Integration
Magento Salesforce Integration
Magento SAP Integration
Magento QuickBooks Integration
Magento Microsoft Dynamics Integration
Source: https://forixcommerce.blogspot.com/2022/08/10-easy-ways-to-accelerate-your-magento.html
#Magento Development Services#Magento speed optimization#B2B Magento Development#Magento Maintenance Services#Magento Support Services#Magento Emergency Support#Magento Performance Optimization#Magento Speed Optimization#Magento Conversion Rate Optimization
0 notes
Text
Differences between Laravel vs. django?
Laravel:
Laravel's libraries are not as strong as django and rails but are sufficient for making any kind of website. Also see Laravel framework architecture.
Bundles and composer provide number of bundle modular packaging system and dependencies.
Routing - The easiest to mange and abstract way of routing. It just makes everything hassle free and the abstraction provided takes out each and every complexity
Eloquent ORM support - Another service provided to abstract and automate the model part. Relationships and mapping of database with our application with a simple convention over configuration technique
Migrations - A way to version our database scripts in much elegant manner. No need to keep all the checks on migrations. A team working on a project can just pull the given migration and all is set and ready to go.
Queue management - To abstract the unnecessary tasks and get them queued behind the scenes and make user response time much faster.
Inhouse support for Redis. It can also be extended to memcached.
Dependency Injection - Easy testing and automating dependency loading
Artisan - Making command line apps in a moment
Django:
Django has very powerful library with following features:
The built in admin section, decorators and view classes are the strength of Django
The auto generated forms for models with validation makes is very easy
A caching framework which can use any of several cache methods.
Support for middleware classes which can intervene at various stages of request processing and carry out custom functions.
An internal dispatcher system which allows components of an application to communicate events to each other via pre-defined signals.
An internationalization system, including translations of Django's own components into a variety of languages.
A serialization system which can produce and read XML and/or JSON representations of Django model instances.
An interface to Python's built in unit test framework.
An extensible authentication system.
The dynamic administrative interface.
Tools for generating RSS and Atom syndication feeds.
A sites framework that allows one Django installation to run multiple websites, each with their own content and applications.
Tools for generating Google Sitemaps.
Built-in mitigation for cross-site request forgery, cross-site scripting, SQL injection, password cracking and other typical web attacks, most of them turned on by default.
A framework for creating GIS applications.
1 note
·
View note
Text
6 Brilliant Tips Every Django Developer Should Know
Working on a Django project? One of the biggest headaches is ensuring timely development and quick delivery of the project. We are here to accelerate the development by bringing forth the knowledge of these interesting and must-use tips that will help you accomplish your job faster. These tips that we will talk about here will help the developer with any level of expertise and experience in Python Django Development Services. Let’s get started!

Configure with relative paths
Moving around your Django project to different locations can be quite a tedious task. It is always better if you plan for these movements beforehand; else the job becomes quite difficult and complex.
A minor edit in the Django code and you will be able to deploy your Django project to a different location in no time. The settings file for Django should be location independent. This helps when more than one person is working on the project. This also helps when you are moving your project from the web server to a different path in the root directory.
In case you change the location of the Django project or deploy it to another directory, the URL will change too. You cannot afford this change, and this will happen as you tend to hardcode the link. However, instead of hardcoding, if you use the {%url%} then you get an absolute URL, which is independent of the location. This tag will take the view name and the parameters, and uses reverse lookup to return the page that the URL has asked for. These links won’t return broken paths if you make small changes to the urls.py file in the directory. This is a very basic tip for maintaining the url and the path, even when the Django project has changed the location.
Django admin for PHP
The user authentication system in Django is one of the best features so far, specifically from the admin and access giving perspective. Not only is it easy to set up, but also a robust system that makes user authentication and configuration easy and accessible.
The best part is that you can now use the Django admin for your PHP apps as well. This can be done with the loose coupling philosophy, which is integral to Django. Create a database schema in Django and get its admin interface and with small pieces of code connect it to your PHP apps. You can read the coding and other aspects in detail in the documentation.
An excellent debugging toolbar
The debugging of an application is essential, and the debugging toolbar helps ensure a bug-free app. The debugging toolbar is effective with Django as it not only detects the errors in the application you have developed but also accelerates development.
It removes any elements that can lead to application rejection, and helps process an error free application.
This toolbar is part of the middleware and represents the panel object on request and processes and renders the response generated by the browser. A few methods are overridden to render the debugging toolbar
Unit testing
this is an excellent tip, especially if you want to introduce smooth changes to the app. The unit testing helps maintain the old code and the backward compatibility of the project. This is another inherent tool of the Django framework. For detailed information into how you can use the unit test and how it will affect your application’s testing capabilities have been introduced in the documentation.
The cheatsheet tip
the cheatsheet that comes with the Django documentation can help in developing quality projects faster. They are specifically designed for the template, models and forms. You have various template tags, and filters that you can choose from. Apart from that, you also have the data formatting syntax quick reference, which will help in making coding easy for you.
The cheatsheet has fields, common field options, meta class options and modelAdmin options for the various models in Django framework. This cheatsheet can help introduce models into the application easy.
You also have a cheatsheet for form fields, and standard error messages to display.
Summing up
There memcache and hacking scripts for Django that will prove useful to you when you need to introduce fast loading and encryption within your application. You will need to study the documentation in detail, as all the tips and techniques have been detailed out in it, in a user-friendly way.
If you want to discuss a project or need more inputs on Python Django Development, our team is available for you. Fill out the form and email us with your queries, and we will respond within 24 hours.
#Django Development Services#Python Development Services#Django Development Company#Python Web Development#Python Web Development Services#Django Application Development
1 note
·
View note
Text
Ananova announced the Top Web Hosting plan optimized and designed for ConcreteCMS users’ compatibility, security, performance, and ease of use requirements and satisfaction. The provider offers an easy-to-use script installer, cPanel control panel, outstanding stability, and affordable price. ConcreteCMS hosting is for both personal and business users.

ConcreteCMS is an open-source PHP-based Content Management System with several innovative features. The developers consider it an excellent solution and easy to develop and edit web pages with a WYSIWYG editor without the need for a developer, with no coding or web development experience is required. The easy-to-use drag and drop allows the exact content placement where web admin wants it. They can quickly write and edit content by pointing and clicking in edit mode. Furthermore, Media Manager allows adding images, flash, maps, surveys, guest books, or several other website components to your site.
The platform comes with an easy-to-use slick, well-designed, user-friendly interface. Its version control system makes overwriting concerns obsolete. The platform comes with a wide variety of built-in statistics to let the web admin know and keep up to date with everything on its website. It’s highly customizable with a wide selection of attractive themes found within the ConcreteCMS Marketplace. User-friendly theme controls help you design a professional website. The platform dashboard enables the generation of SEO-friendly sitemap and adds customizable metadata that generates new visits from free search traffic. The platform provides an Auto-Save feature, and the developers need not worry about losing content.
A developer can add functionality to its website using ConcreteCMS plugins like image gallery, content block, stylized maps, display weather, site forms, and more.
With ConcreteCSM, the hosting consumer can develop an online community, create educational sites for schools or universities, design business or corporation sites, e-Commerce websites, design websites for churches, clubs, and individual profile websites.
The Ananova team recommends A2’s ConcreteCMS hosting as the plan features: cPanel Control panel, blazing-fast, high-speed, most accessible, fine-tuned, reliable, high-performance SwiftServer platform, perpetual security, Optimized 1-click caching setup solution, APC, Turbo Cache, OPcache, and Memcache, and developer-friendly tailored to customer needs. The A2Hosting Turbo servers enable 20X faster page loads speeds. The hosting plan gets activated instantly and comes with ConcreteCMS pre-installed.
The experienced web developer that prefers extended functionality or new beginner customers can signup to A2 optimized ConcreteCMS hosting plan to build a website. ConcreteCMS website builders don’t need to know much technical code, as its Content Management System makes it easy to get started. A user can set up ConcreteCMS using a 1-click Softaculous tool in the cPanel control panel or choose a pre-installed ConcreteCMS setup. A user is informed of updates or the newest version for a more secure and high-performing website.
The company offers 99% uptime commitment, money-back guarantee, web development tips, marketing strategies. Followers receive hosting news sent to their email. The company provides promotional prices for the new customer and renewal at regular rates.
The hosting plans offered include Web Hosting, WordPress Hosting, Managed WordPress Hosting, VPS Hosting, Managed VPS Hosting, Dedicated Hosting, Managed Dedicated Hosting, & Reseller Hosting. The Ananova visitors can compare its hosting plans with other premium providers. The provider is specialized in WordPress, Drupal, and Joomla CMS options.
Hosting Plans include:
STARTUP starts from $2.99 monthly for a single website. The provider offers 72% off if paid for 36 months, i.e., $10.99. The plan comes with 100GB SSD Storage,
The DRIVE stats with $5.99 per month, and the provider offers a 53% discount when paid for 36 months, i.e., $12.99. The plan comes with 2X Resources unlimited SSD storage to host unlimited websites.
The TURBO BOOST starts at $6.99 per month, and the provider offers a 66% discount if paid for 36 months in advance, i.e., $20.99. The websites are hosted on Turbo Servers up to 20X faster for extra Power. The customer can host unlimited websites with unlimited NVMe SSD Storage.
The TURBO MAX starts at $12.99 per month, and the company offers a 50% discount if paid for 36 months in advance, i.e., $25.99. The customer websites are hosted on the provider’s fastest shared server with Turbo up to 20X Faster and 5X more resources, provided with Unlimited NVMe SSD Storage.
Its hosting plans feature SSL Certificates, Site Builder, Domains, cPanel, latest Linux OS, Free & Easy Site Migration, Free Automatic Backups & risk-free Money-Back Guarantee. Its solutions fit businesses, e-commerce portals, agencies, blogs, and individuals.
The visitors can chat & contact sales & Guru Crew support staff 24×7, submit a support ticket through a customer portal, read a blog, endorsements, and knowledgebase. The company claims to provide a 99.9% Uptime Commitment.
ABOUT ANANOVA.COM
Ananova.com empowers individuals, web developers, and businesses to make educated buying decisions when researching hosting solutions.
Ananova.com is a trusted provider of current, unbiased, comprehensive web host reviews and reports developed using in-depth, real-time, data-driven tracking, social media sentiment analysis, and honest user commentary.
Ananova.com is the only source for this type of data-driven, unbiased educational information supplemented with authentic user reviews and comments. All information is available for free to all visitors, so they are empowered to make confident decisions on their web hosting investments.
0 notes
Text
Đánh giá Hawk Host, mã giảm giá [ coupon Hawkhost ]

Hawk Host là một nhà cung cấp host được đông đảo cộng đồng webmaster đánh giá cao. Nhận nhiều phản hồi tốt cũng như mã giảm giá Hawkhost ra mắt thường xuyên. Chính vì diều này mà lượng khách hàng sử dụng dịch vụ hosting tại nhà cung cấp này ngày càng đông.
Hawk Host là gì?
HawkHost chính là một đơn vị cung cấp hosting có trụ sở tại Canada. Hiện tại, Hawkhost theo như admin biết nó là một trong những đơn vị cung cấp hosting tốt nhất trên toàn cậu đặc biệt là Việt Nam.

HawkHost – đơn vị cung cấp Hosting nước ngoài tốt nhất hiện nay
Được thành lập từ năm 2004, Hawk Host đã và đang phát triển vô cùng mạnh mẽ, nhanh chóng. Tại thời điểm hiện tại HawkHost có tổng 07 trung tâm Datacenters được liệt kê dưới đây:
Dallas, Texas
Washington, DC
Los Angeles, California
Singapore (load về VN rất tốt)
Amsterdam, Netherlands
Hong Kong, China (load về VN rất tốt)
Toronto, Canada
Đánh giá chi tiết Hawk Host
Điều đầu tiên mà Hawkhost trang bị server đời mới có cấu hình khá mạnh. Việc phân chia tài nguyên hợp ly giúp việc tải trang từ các DC gần Việt Nam về rất nhanh. Khi website bạn load nhanh, đồng nghĩa với việc được Google yêu quý. Chủ yếu Hawkhost được tin yêu là do người dùng trải nghiệm tốt khi truy cập web nhanh. Và tất nhiên thì Hawkhost là nhà cung cấp hosting ở nước ngoài có trụ sở sever được đặt ở Hong Kong và Singapore cho nên vấn đề địa lý cũng đã được giải quyết. Đánh giá chung cho dịch vụ hosting Hawkhost là chất lượng ổn định, ít bị downtime. Tuy nhiên nếu cáp APG hay AAg găpk sự cố thì việc tải trang từ nhà cung cấp này có phần chậm. Một số webmaster ngại phải sử dụng địch vụ Việt Nam vì lo ngại vấn đề hỗ trợ không tốt. Chính vì điều này mà Hawkhost là sự lựa chọn tốt tại thời điểm hiện nay. Đội ngữ support của nhà cung cấp này củng khá chuẩn. Theo đánh giá cá nhân cũng như nhiều admin khác thì web có sự ổn định ở Hawk Host là nền tẳng lựa chọn. Đây là yếu tố quan trong quyết định lượng user sử dụng cho tới thời điểm hiện tại
Về chất lượng của Hawk Host
Khi sử dụng Hosting của Hawkhost người dùng sẽ được cung cấp rất nhiều tính năng hữu ích. Quản trị Cpanel rất dễ quản lý, tích hợp SSL free, Cache LiteSpeed mạnh mẽ.
Cpanel
Hawk Host cung cấp cho người dùng giao diện Cpanel rất dễ dàng quản lý cũng như vô cùng thân thiên với người sử dụng. Hawk Host còn cho phép bạn quản lý cũng như cài đặt website WordPress vô cùng dễ dàng với chỉ vài cú click chuột. Cho đến thời điểm lên bài viết này thì HawkHost đã triển khai thành công Cpanel 62 cho toàn bộ server của mình.
cPanel Hawk Host dễ dàng quản lý và cấu hình
Ngoài ra thì Hawk Host cũng đầu tư cơ sở hạ tầng đồng bộ. Việc phân bổ tài nguyên các gói hợp lý khiên server rất ít khi bị quá tải. Với Hawk Host thì Cpanel được tích hợp với trình quản lý backup tự động hàng ngày (R1Soft Backup) cho phép backup và khôi phục dữ liệu dễ dàng hơn. Ngoài ra thì Hawk Host cũng đã tích hơp thêm dịch vụ sao lưu JetBackup vào cPanel.
Tăng tốc website Hawkhost
Hawk Host đã sử dụng LiteSpeed thay cho Apache server vốn được rất nhiều nhà cung cấp hosting sử dụng. Điểm nổi bật của LiteSpeed là nó cho tốc độ nhanh hơn 900% khi load nội dung tĩnh và hơn 50% khi xử lý PHP request so với Apache. Và ngay cả khi bạn đã cài đặt SSL thì LiteSpeed vẫn cho tốc độ nhanh gấp hơn 3 lần so với Apache. Ngoài ra thì LiteSpeed còn hỗ trợ HTTP/2, làm tăng tính bảo mật website và tải dễ dàng hơn. Tất cả các gói hosting của Hawkhost đều sử dụng Memcached giúp làm tăng tốc độ tải trang rõ rệt nhất.
Khả năng Uptime lên đến 99,99%
Với Hawk Host thì thời gian uptime có thể cam kết lên đến 99,99%. Uptime chính là thời gian mà server, máy chủ hoạt động liên tục mà không xảy ra bất kỳ trục trặc nào hết.

Thời gian uptime của Hawk Host lên đến 99,99%
Và thông thường thì các nhà cung cấp dịch vụ hosting lớn ở trên thế giới hiện nay đều có thời gian uptime từ 99 đến 100%. Và khi bạn sử dụng HawkHost thì họ cam kết đảm bảo 99,99% Uptime dành cho website của bạn.
Về Datacenter
Với HawkHost thì bạn có thể chuyển đổi location của máy chủ trong quá trình sử dụng Hosting của Hawk Host. Nói một cách dễ hiểu thì khi bạn đã đăng ký chọn location ở Hong Kong, và sau đó nếu như bạn muốn chuyển sang location ở Singapore thì bạn chỉ cần mở ticket và gửi đến support của Hawk Host và yêu cầu hỗ trợ chuyển server. Điều đặc biệt là chưa đến nửa ngày thì server của bạn sẽ được chuyển đổi thành công (nhanh bất ngờ chưa!). Ngoài ra thì cho đến thời điểm hiện tại thì Hawk Host đã tích hợp thêm Live Chat giúp bạn dễ dàng tương tác với đội ngũ hỗ trợ của Hawk Host nhé.
Về bảo mật
Hawk Host được chạy trên một hệ thống phân mảnh giúp website bạn tránh không bị người ngoài truy cập vào dữ liệu của bạn. Ngoài ra thì Hawk Host đã tích hợp sẵn hệ thống bảo mật DDoS là một hệ thống lưới để giúp giảm thời gian chết cũng như các máy chủ của họ chạy trên LiteSpeed. Một điểm đáng chú ý như đã chia sẻ về điều ưa thích của mình khi sử dụng Hawk Host đó chính là LiteSpeed đã hỗ trợ HTTP/2. Đây là giao thức duyệt web mới giúp cải thiện seo tốt hơn. Ngoài ra thì bạn cũng có thể kích hoạt dịch vụ SSL miễn phí với Let’s Encrypt ở ngay trong cPanel. Kết luận: Hawkhost là một nhà cung cấp hosting chất lượng và ổn định trên thế giới. Dược cộng đồng webmaster việt đánh giá cao. Tin tưởng vào dịch vụ mà nhà cung cấp này dành cho anh em chạy web, hay ủng hàng chất lượng nhé các bạn.
Mã giảm giá Hawkhost
Hawk Host có rất nhiều chương trình khuyến mãi cho những nhanh viên cũ và mới. Thường mã giảm giá của nhà cung cấp server này giao động từ 20-75%. Dưới đây là những cập nhật mã giảm giá theo từng thời điểm cụ thể. Để sử dụng mã giảm giá bạn hãy thực hiện các bước dưới đây. Theo dõi Video cách nhập mã giảm giá từ HawkHost nhé. Hướng dẫn nhập mã giảm giá Hawk Host
Mã giảm giá Hawk Host update
HawkHost có rất nhiều coupon giảm giá host, server, vps. Bạn hãy truy cập vào liên kết bên dưới mà nhập mã khuyến mãi upade: Bạn có thể truy cập: https://ift.tt/1oR1GW1 Mã giảm giá Cloud Hosting hay Shared Hosting:
Hawk Host Giảm giá 30% trọn đời : HHI-WOBVQ1S7TT
Giảm giá Shared Hosting Hawk Host 40% hóa đơn đầu: Hawkhost50
Coupon Shared Hosting Hawk Host 25%: february2020, 2 mã 35% : whtsharedv3, whtsharedv4
Coupon giảm giá Hawk Host Reseller Hosting: Bạn truy cập vào trang web link bên trên và tiến hành đặt hàng gói Reseller Hosting tiếp đến nhập mã giảm giá để hưởng ưu đãi nhé.
Coupon giảm giá Hawk Host Reseller Hosting 30% trọn đời có 2 mã : whtresellerv2 và whtresellerv3 và rfebruary2020
Coupon giảm giá Hawk Host Semi Dedicated:
Coupon giảm giá 30% trọn đời Semi Dedicated Hosting : whtsdv4
Coupon 25% trọn đời Semi Dedicated Hosting : sdfebruary2020
Mã giảm giá HawkHost sẽ được cập nhật liên tục. Quý độc giả muốn sử dụng mã giảm giá vui lòng truy cập vào đường dẫn bên trên nhập mã giảm giá. Mọi thông tin về mã giảm giá HawkHost vui lòng để lại comment bên dưới.
The post Đánh giá Hawk Host, mã giảm giá [ coupon Hawkhost ] appeared first on 7 vien ngoc rong - Game 7 viên ngọc rồng online.
0 notes