#MySQL 8.0 Guide
Explore tagged Tumblr posts
Visit Tumblr Blog
Explore Tumblr blogs with no restrictions, modern design and the best experience.
Last Seen Tumblr Blogs


Fun Fact
Tumblr has 16.74 million mobile monthly users in the US.
Text
MySQL 8.0 Guide: Beginner to Pro 2023
Mastering MySQL 8 0 A Comprehensive Guide is your go to reference for grasping and using the power of MySQL 8 0 in your database
0 notes
Text
How to Install TYPO3: A Complete Beginner’s Guide
TYPO3? Super robust. But getting it going is more than just flipping a switch. You want guidance that’s clear, practical, and won’t leave you Googling every second step.

Why Install TYPO3 with Composer?
Using Composer makes installation faster, cleaner, and easier to manage. It keeps your TYPO3 project structured, helps you stay up-to-date, and is the method recommended by the TYPO3 community.

Step 1: Check System Requirements
Make sure your server environment is ready. TYPO3 needs:
PHP 8.1 or higher
MySQL 8.0 or MariaDB 10.3+
Apache or NGINX web server
Composer installed
SSL (recommended)
Minimum 2 GB RAM for smooth setup
Step 2: Set Up the TYPO3 Project
Use Composer to create your TYPO3 project. This will download the necessary files and prepare the folder structure. Once done, move into your project directory to continue.
Step 3: Configure the Web Server
Your web server needs to point to the public folder inside your TYPO3 project. This is where TYPO3 stores all public-facing files. Make sure URL rewriting is enabled so TYPO3 can handle clean URLs properly.
Step 4: Create a Database
Set up a new, empty database. TYPO3 will use this to store content, users, configuration, and all your website data.
Step 5: Run the Web Installer
Open your TYPO3 site in a browser. The TYPO3 installer will guide you through:
Connecting to your database
Creating the admin user
Finishing the basic setup
The setup takes just a few minutes if all requirements are met.
Step 6: Log In and Get Started
After installation, you can access the TYPO3 backend. Use the admin account you just created to log in. From here, you’re ready to start adding pages, installing extensions, and managing your website.
Optional: Add a Site Package
If you want a ready-made starting point, you can install a TYPO3 site package. These packages include pre-configured templates and demo content to help you explore TYPO3 faster.
Final Thoughts
Installing TYPO3 is simple if you follow these steps:
Check your system
Set up the project with Composer
Configure the web server
Create a database
Run the installer
Log in and build your site
TYPO3 is ideal for professional websites that need long-term flexibility, structure, and performance.
0 notes
Text
BeDrive Nulled Script 3.1.5

Discover the Power of BeDrive Nulled Script – The Ultimate File Sharing & Cloud Storage Solution If you're searching for a powerful, user-friendly, and reliable cloud storage solution, look no further than the BeDrive Nulled Script. Designed for modern entrepreneurs, developers, and tech-savvy users, this high-performance platform offers seamless file sharing and secure cloud storage at your fingertips—without breaking the bank. What is BeDrive Nulled Script? The BeDrive Nulled Script is a premium file sharing and cloud storage platform developed using cutting-edge web technologies. It's the perfect alternative to mainstream services like Google Drive and Dropbox, offering the same robust functionalities with full control over your data. With its clean user interface and rich feature set, BeDrive is an ideal solution for startups, SaaS providers, and digital product marketplaces. Why Choose BeDrive Nulled Script? Getting your hands on the BeDrive Nulled Script means unlocking the full potential of a premium cloud storage system—entirely free. Whether you're hosting large files, collaborating with teams, or managing private user folders, BeDrive handles it all with efficiency and style. Thanks to its nulled version, users can enjoy premium features without the hefty licensing fees, making it a go-to choice for budget-conscious innovators. Technical Specifications Backend: Laravel Framework (robust, secure, and scalable) Frontend: Vue.js for a fast and interactive UI Database: MySQL or MariaDB supported Storage: Compatible with local storage, Amazon S3, and DigitalOcean Spaces File Types: Supports documents, videos, images, and compressed files Security: User authentication, folder permissions, and file encryption Key Features and Benefits Multi-user Support: Allow multiple users to register and manage their own files securely. Drag-and-Drop Upload: Easy file uploads with a modern drag-and-drop interface. File Previews: View PDFs, images, and videos directly within the platform. Folder Organization: Create, rename, and manage folders just like on your desktop. Sharing Options: Share files publicly or privately with time-limited links. Advanced Admin Panel: Monitor user activity, storage usage, and platform performance. Popular Use Cases The BeDrive Nulled Script is incredibly versatile. Here are just a few ways you can use it: Freelancers: Share deliverables securely with clients and collaborators. Agencies: Manage and distribute digital assets for projects and campaigns. Online Communities: Offer cloud storage features as part of a paid membership site. Startups: Launch your own file-sharing or backup service without building from scratch. Installation Guide Setting up the BeDrive Nulled Script is quick and hassle-free. Follow these steps to get started: Download the full script package from our website. Upload the files to your preferred hosting server. Create a new MySQL database and import the provided SQL file. Run the installation wizard to complete setup and admin configuration. Start uploading and sharing your files instantly! Make sure your hosting environment supports PHP 8.0 or later for optimal performance. FAQs – BeDrive Nulled Script 1. Is the BeDrive Nulled Script safe to use? Yes, the script is thoroughly tested for safety and performance. We recommend using secure hosting and regular updates to keep your platform safe. 2. Do I need coding knowledge to use it? No, the platform is designed to be user-friendly. However, basic web hosting knowledge will make installation and customization easier. 3. Can I monetize my BeDrive installation? Absolutely! Add premium user plans, integrate ads, or offer subscription models to monetize your cloud service. 4. What if I face issues during setup? We provide comprehensive installation documentation, and our community is always ready to help you troubleshoot any challenges. Download BeDrive Nulled Script Now Unlock the full potential of premium cloud storage for free with the BeDrive .
No hidden costs, no licensing fees—just powerful tools at your command. Looking for more great tools? Check out our vast library of nulled plugins to boost your digital projects. Also, if you're searching for top-quality WordPress themes, don’t miss the avada nulled theme—another fan-favorite you can grab for free!
0 notes
Text
The Complete Guide to Migrating Your TYPO3 Website to TYPO3 v13
Introduction
Upgrading your TYPO3 website to TYPO3 v13 is a significant step that enhances performance, security, and user experience. This comprehensive guide provides a step-by-step roadmap to ensure a smooth and successful migration.

Understanding the Advantages of TYPO3 v13
Before migrating, it’s important to know what TYPO3 v13 brings:
Enhanced Performance: Faster page loads and a more responsive backend.
Improved Security: Latest security updates to protect your website.
New Features: Better content management tools and user-friendly enhancements.
Future-Proofing: Ensures long-term support and compatibility with new technologies.
Preparing for the Migration
A well-planned upgrade reduces risks. Here’s what you should do:
✔️ Backup Everything
Make a full backup of your website files and database.
Store it securely in case something goes wrong during migration.
✔️ Check System Requirements
TYPO3 v13 requires:
PHP 8.2+
Databases: MySQL 8.0+, MariaDB 10.3+, PostgreSQL 12+, SQLite 3.31.0+
Web Server: Apache, Nginx, or IIS (latest versions recommended)
✔️ Review Installed Extensions
Check if your extensions are compatible with TYPO3 v13.
Update them or find alternatives if they are no longer supported.
The Migration Process: Step-by-Step
Follow these steps to upgrade your website safely:
🔹 Update the TYPO3 Core
Download the latest TYPO3 v13 package.
Replace the old core files with the new ones.
🔹 Run the Upgrade Wizard
TYPO3 provides built-in Upgrade Wizards that update your database and configurations.
Follow the wizard's recommendations to ensure smooth migration.
🔹 Test Your Website Thoroughly
Check if all pages, extensions, and features work properly.
Fix broken links, missing images, or layout issues.
Conclusion
Upgrading to TYPO3 v13 enhances your website’s performance, security, and future readiness. By following these steps, you can ensure a smooth transition with minimal disruptions. Stay updated, monitor your website, and enjoy the latest features of TYPO3 v13!
#TYPO3#TYPO3UpgradeGuide#TYPO3v13#TYPO3WebsiteMigration#TYPO3Community#SEO#TYPO3CMSUpdate#TYPO3v13Migration
0 notes
Photo

Deploy laravel project with docker swarm We check three major step in this guide Setup laravel project with docker compose Deploy the stack to the swarm Create gitlab-ci Setup laravel project with docker compose we will explore the process of deploying a laravel project using docker swarm and setting up a CI/CD pipline to automate the deployment process. Now let’s start with containerize a laravel project with docker compose we need three separate service containers: An app service running PHP7.4-FPM; A db service running MySQL 5.7; An nginx service that uses the app service to parse PHP code Step 1. Set a env variable in project In root directory of project we have .env file now we need to update some variable DB_CONNECTION=mysql DB_HOST=db DB_PORT=3306 DB_DATABASE=experience DB_USERNAME=experience_user DB_PASSWORD=your-password Step 2. Setting up the application’s Docekrfile we need to build a custom image for the application container. We’ll create a new Dockerfile for that. Docker file FROM php:7.4-fpm # Install system dependencies RUN apt-get update && apt-get install -y \ git \ curl \ libpng-dev \ libonig-dev \ libxml2-dev \ zip \ unzip # Clear cache RUN apt-get clean && rm -rf /var/lib/apt/lists/* # Install PHP extensions RUN docker-php-ext-install pdo_mysql mbstring exif pcntl bcmath gd # Get latest Composer COPY --from=composer:latest /usr/bin/composer /usr/bin/composer # Set working directory WORKDIR /var/www Step 3. Setting up Nginx config and Database dump file In root directory create a new directory called docker-compose Now we need two other directories, a nginx directory and mysql directory So we have this two route in our project laravel-project/docker-compose/nginx/ laravel-project/docker-compose/mysql/ In nginx directory create a file called experience.conf we write nginx config in this file like: server { listen 80; index index.php index.html; error_log /var/log/nginx/error.log; access_log /var/log/nginx/access.log; root /var/www/public; location ~ \.php$ { try_files $uri =404; fastcgi_split_path_info ^(.+\.php)(/.+)$; fastcgi_pass app:9000; fastcgi_index index.php; include fastcgi_params; fastcgi_param SCRIPT_FILENAME $document_root$fastcgi_script_name; fastcgi_param PATH_INFO $fastcgi_path_info; } location / { try_files $uri $uri/ /index.php?$query_string; gzip_static on; } } In mysql directory create a file called init_db.init we write mysql initialization in this file like: DROP TABLE IF EXISTS `places`; CREATE TABLE `places` ( `id` bigint(20) unsigned NOT NULL AUTO_INCREMENT, `name` varchar(255) COLLATE utf8mb4_unicode_ci NOT NULL, `visited` tinyint(1) NOT NULL DEFAULT '0', PRIMARY KEY (`id`) ) ENGINE=InnoDB AUTO_INCREMENT=12 DEFAULT CHARSET=utf8mb4 COLLATE=utf8mb4_unicode_ci; INSERT INTO `places` (name, visited) VALUES ('Berlin',0),('Budapest',0),('Cincinnati',1),('Denver',0),('Helsinki',0),('Lisbon',0),('Moscow',1); Step 4. Creating a multi container with docker-compose We need a building three container that should share networks and data volumes. Ok so create a docker-compose file in root directory of project For craete a network for connecting services we define network in docker-compose file like this: networks: experience: driver: bridge App service: app: build: context: ./ dockerfile: Dockerfile image: travellist container_name: experience-app restart: unless-stopped working_dir: /var/www/ volumes: - ./:/var/www networks: - experience DB service: db: image: mysql:8.0 container_name: experience-db restart: unless-stopped environment: MYSQL_DATABASE: ${DB_DATABASE} MYSQL_ROOT_PASSWORD: ${DB_PASSWORD} MYSQL_PASSWORD: ${DB_PASSWORD} MYSQL_USER: ${DB_USERNAME} SERVICE_TAGS: dev SERVICE_NAME: mysql volumes: - ./docker-compose/mysql:/docker-entrypoint-initdb.d networks: - experience Nginx service: nginx: image: nginx:1.17-alpine container_name: experience-nginx restart: unless-stopped ports: - 8000:80 volumes: - ./:/var/www - ./docker-compose/nginx:/etc/nginx/conf.d networks: - experience So our docker-compose file be like this: version: "3.7" services: app: build: context: ./ dockerfile: Dockerfile image: travellist container_name: experience-app restart: unless-stopped working_dir: /var/www/ volumes: - ./:/var/www networks: - experience db: image: mysql:8.0 container_name: experience-db restart: unless-stopped environment: MYSQL_DATABASE: ${DB_DATABASE} MYSQL_ROOT_PASSWORD: ${DB_PASSWORD} MYSQL_PASSWORD: ${DB_PASSWORD} MYSQL_USER: ${DB_USERNAME} SERVICE_TAGS: dev SERVICE_NAME: mysql volumes: - ./docker-compose/mysql:/docker-entrypoint-initdb.d networks: - experience nginx: image: nginx:alpine container_name: experience-nginx restart: unless-stopped ports: - 8100:80 volumes: - ./:/var/www - ./docker-compose/nginx:/etc/nginx/conf.d/ networks: - experience networks: experience: driver: bridge Step 5. Running application with docker compose Now we can build the app image with this command: $ docker-compose build app When the build is finished, we can run the environment in background mode with: $ docker-compose up -d Output: Creating exprience-db ... done Creating exprience-app ... done Creating exprience-nginx ... done to show information about the state of your active services, run: $ docker-compose ps Well in these 5 simple steps, we have successfully ran our application. Now we have a docker-compose file for our application that needs for using in docker swarm. Let’s start Initialize docker swarm. After installing docker in your server *attention: To install Docker, be sure to use the official documentation install docker check docker information with this command: $ docker info You should see “swarm : inactive” in output For activate swarm in docker use this command: $ docker swarm init The docker engine targeted by this command becomes a manager in the newly created single-node swarm. What we want to use is the services of this docker swarm. We want to update our service like app with docker swarm, The advantage of updating our service in Docker Swarm is that there is no need to down the app service first, update the service, and then bring the service up. In this method, with one command, we can give the image related to the service to Docker and give the update command. Docker raises the new service without down the old service and slowly transfers the load from the old service to the new service. When running Docker Engine in swarm mode, we can use docker stack deploy to deploy a complete application stack to the swarm. The deploy command accepts a stack description in the form of a Compose file. So we down our docker compose with this command: $ docker-compose down And create our stack. ok if everything is ok until now take a rest Deploy the stack to the swarm $ docker stack deploy --compose-file docker-compose.yml For example : $ docker stack deploy --compose-file docker-compose.yml staging Probably you see this in output: Creating network staging_exprience Creating service staging_nginx failed to create service staging_nginx: Error response from daemon: The network staging_exprience cannot be used with services. Only networks scoped to the swarm can be used, such as those created with the overlay driver. This is because of “driver: bridge” for deploying your service in swarm mode you must use overlay driver for network if you remove this line in your docker compose file When the stack is being deployed this network will be create on overlay driver automatically. So our docker-compose file in network section be like this: networks: experience: And run upper command: $ docker stack deploy --compose-file docker-compose.yml staging For now you probably you see this error : failed to create service staging_nginx: Error response from daemon: The network staging_experience cannot be used with services. Only networks scoped to the swarm can be used, such as those created with the overlay driver. Get network list in your docker: $ docker network ls Output: NETWORK ID NAME DRIVER SCOPE 30f94ae1c94d staging_experience bridge local So your network has local scope yet because in first time deploy stack this network save in local scope and we must remove that by: $ docker network rm staging_experience After all this run command: $ docker stack deploy --compose-file docker-compose.yml staging Output: Creating network staging_experience Creating service staging_app Creating service staging_db Creating service staging_nginx Now get check stack by: $ docker stack ls Output: NAME SERVICES staging 3 And get service list by: $ docker service ls Output: If your REPLICAS is 0/1 something wrong is your service For checking service status run this command: $ docker service ps staging_app for example And for check detail of service run this command: $ docker service logs staging_app for example Output of this command show you what is problem of your service. And for updating your a service with an image the command you need is this: $ docker service update --image "<your-image>" "<name-of-your-service>" --force That's it your docker swarm is ready for zero down time deployment :))) Last step for have a complete process zero down time deployment is create pipeline in gitlab. Create gitlab-ci In this step we want create a pipeline in gitlab for build, test and deploy a project So we have three stage: stages: - Build - Test - Deploy Ok let’s clear what we need and what is going on in this step . We want update laravel project and push our change in gitlab create a new image of this changes and test that and after that log in to host server pull that updated image in server, and update service of project. For login to server we need define some variable in gitlab in your repository goto setting->CI/CD->VARIABLES Add variable Add this variables: CI_REGISTRY : https://registry.gitlab.com DOCKER_AUTH_CONFIG: { "auths": { "registry.gitlab.com": { "auth": "<auth-key>" } } } auth-key is base64 hash of “gitlab-username:gitlab-password” SSH_KNOWN_HOSTS: Like 192.168.1.1 ssh-rsa AAAAB3NzaC1yc2EAAAADAQABAAABgQCGUCqCK3hNl+4TIbh3+Af3np+v91AyW4+BxXRtHBC2Y/uPJXF2jdR6IHlSS/0RFR3hOY+8+5a/r8O1O9qTPgxG8BSIm9omb8YxF2c4Sz/USPDK3ld2oQxbBg5qdhRN28EvRbtN66W3vgYIRlYlpNyJA+b3HQ/uJ+t3UxP1VjAsKbrBRFBth845RskSr1V7IirMiOh7oKGdEfXwlOENxOI7cDytxVR7h3/bVdJdxmjFqagrJqBuYm30 You can see how generate ssh key in this post: generate sshkey SSH_PRIVATE_KEY: SSH_REMOTE_HOST: root@ This is your variables in gitlab. So let’s back to gitlab-ci In root directory of project create a new file .gitlab-ci.yml and set build stage set test stage And in the last set deploy stage like: stages: - Build - Test - Deploy variables: IMAGE_TAG: $CI_REGISTRY_IMAGE:$CI_COMMIT_REF_SLUG-$CI_COMMIT_SHORT_SHA build: stage: Build image: docker:20.10.16 services: - docker:dind script: - docker login -u $CI_REGISTRY_USER -p $CI_REGISTRY_PASSWORD $CI_REGISTRY - docker build --pull -f Dockerfile -t $IMAGE_TAG . - docker push $IMAGE_TAG preparation: stage: Test image: $IMAGE_TAG needs: - build script: - composer install artifacts: expire_in: 1 day paths: - ./vendor cache: key: ${CI_COMMIT_REF_SLUG}-composer paths: - ./vendor unit-test: stage: Test image: $IMAGE_TAG services: - name: mysql:8 alias: mysql-test needs: - preparation variables: APP_KEY: ${APP_KEY} MYSQL_ROOT_PASSWORD: ${MYSQL_ROOT_PASSWORD} MYSQL_DATABASE: ${MYSQL_DATABASE} DB_HOST: ${DB_HOST} DB_USERNAME: ${DB_USERNAME} DB_PASSWORD: ${DB_PASSWORD} script: - php vendor/bin/phpunit staging-deploy: stage: Deploy extends: - .deploy-script variables: APP: "stackdemo_app" STACK: "travellist-staging" only: - develop needs: - unit-test environment: name: stage .remote-docker: variables: DOCKER_HOST: ssh://${SSH_REMOTE_HOST} image: docker:20.10.16 before_script: - eval $(ssh-agent -s) - echo $IMAGE_TAG - echo "$SSH_PRIVATE_KEY" | tr -d '\r' | ssh-add - - mkdir -p ~/.ssh - chmod 700 ~/.ssh - echo "HOST *" > ~/.ssh/config - echo "StrictHostKeyChecking no" >> ~/.ssh/config - echo -n $CI_REGISTRY_PASSWORD | docker login -u $CI_REGISTRY_USER --password-stdin $CI_REGISTRY .deploy-script: extends: - .remote-docker script: - cp $develop_config /root/project/core - docker pull $IMAGE_TAG - docker service update --image "$IMAGE_TAG" "$APP" --force dependencies: [] Change something in your project and push to gitlab and wait for it To see all pipeline pass like this : And this is beautiful. https://dev.to/holyfalcon/deploy-laravel-project-with-docker-swarm-5oi
0 notes
Text
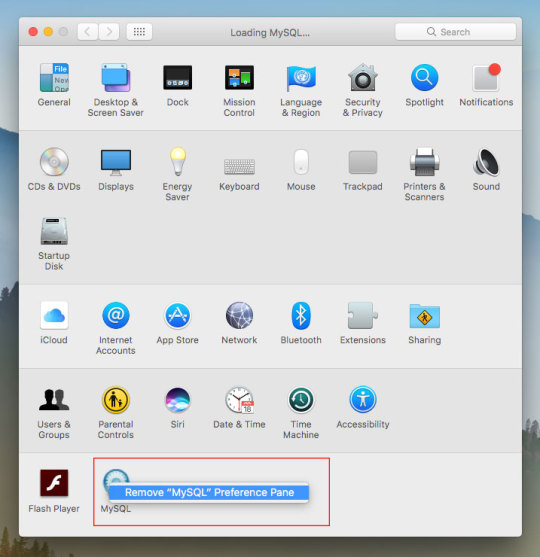
Mysql Download For Mac Mojave

Mysql Workbench Download For Mac
Mysql Install Mac Mojave
I am more of a command line user when accessing MySQL, but MySQLWorkBench is by far a great tool. However, I am not a fan of installing a database on my local machine and prefer to use an old computer on my network to handle that. If you have an old Mac or PC, wipe it and install Linux Server command line only software on it. Machines as old as 10/15 years and older can support Linux easily. You don't even need that much RAM either but I'd got with minimum of 4GB for MySQL.
The Mojave installer app will be in your Applications folder, so you can go there and launch it later to upgrade your Mac to the new operating system. Make a bootable installer drive: The quick way. Sep 27, 2018 So before you download and install macOS 10.14 Mojave, make sure your Mac is backed up. For information on how to do this, head over to our ultimate guide to backing up your Mac. How to download.
Apr 24, 2020 Download macOS Mojave For the strongest security and latest features, find out whether you can upgrade to macOS Catalina, the latest version of the Mac operating system. If you still need macOS Mojave, use this App Store link: Get macOS Mojave.
Oct 08, 2018 Steps to Install MySQL Workbench 8.0 on Mac OS X Mojave Step 1. Download the Installer. Follow this link to download the latest version of MySQL Workbench 8.0 for Mac. When I write this article, the Workbench version 8.0.12 is available. Save the file to your download directory.
Or...
Use Virtualbox by Oracle to create a virtual server on your local machine. I recommend Centos 7 or Ubuntu 18.04. The latter I used to use exclusively but it has too many updates every other week, whereas Centos 7 updates less often and is as secure regardless. But you will need to learn about firewalls, and securing SSH because SSH is how you will access the virtual machine for maintenance. You will have to learn how to add/delete users, how to use sudo so you can perform root based commands etc. There is a lot more to the picture than meets the eye when you want to use a database.
I strongly recommend not installing MySQL on your local machine but use a Virtual Machine or an old machine that you can connect to on your local area network. It will give you a better understanding of security when you have to deal with a firewall and it is always a good practice to never have a database on the same server/computer as your project. Databases are for the backend where access is secure and severely limited to just one machine via ssh-keys or machine id. If you don't have the key or ID you ain't getting access to the DB.
There are plenty of tutorials online that will show you how to do this. If you have the passion to learn it will come easy.
Posted on
Apple released every update for macOS, whether major or minor, via Mac App Store. Digital delivery to users makes it easy to download and update, however, it is not convenient in certain scenarios. Some users might need to keep a physical copy of macOS due to slow Internet connectivity. Others might need to create a physical copy to format their Mac and perform a clean install. Specially with the upcoming releasee of macOS Mojave, it is important to know how the full installer can be downloaded.
We have already covered different methods before which let you create a bootable USB installer for macOS. The first method was via a terminal, while the second method involved the usage of some third-party apps, that make the whole process simple. However, in that guide, we mentioned that the installer has to be downloaded from the Mac App Store. The installer files can be used after download, by cancelling the installation wizard for macOS. However, for some users, this might not be the complete download. Many users report that they receive installation files which are just a few MB in size.
Luckily, there is a tool called macOS Mojave Patcher. While this tool has been developed to help users run macOS Mojave/macOS 10.14 on unsupported Macs, it has a brilliant little feature that lets you download the full macOS Mojave dmg installer too. Because Mojave will only download on supported Macs, this tool lets users download it using a supported Mac, created a bootable USB installer and install it on an unsupported Mac. Here is how you can use this app.
Download macOS Mojave installer using macOS Mojave Patcher

Download the app from here. (Always use the latest version from this link.)
Opening it might show a warning dialogue. You’ll have to go to System Preferences > Security & Privacy to allow the app to run.Click Open Anyway in Security & Privacy.
Once you are able to open the app, you’ll get a message that your machine is natively supported. Click ok.
Go to Tools> Download macOS Mojave, to start the download. The app will ask you where you want to save the installer file. Note that the files are downloaded directly from Apple, so you wouldn’t have to worry about them being corrupted.The download will be around 6GB+ so make sure that you have enough space on your Mac.Once the download starts, the app will show you a progress bar. This might take a while, depending on your Internet connection speed.
Mysql Workbench Download For Mac
Once the download is complete, you can use this installer file to create a bootable USB.
Mysql Install Mac Mojave
P.S. if you just want to download a combo update for Mojave, they are available as small installers from Apple and can be downloaded here.
1 note
·
View note
Text
This guide is to help you with the insta... https://www.computingpost.com/how-to-install-mysql-8-0-on-centos-7-rhel-7/?feed_id=20473&_unique_id=637b17efa2985
0 notes
Text
How to Install MySQL 8.0 on Rocky Linux 9

MySQL is a SQL-based relational database management system (Structured Query Language). It is a popular database software for a variety of well-known applications. MySQL is used for data warehousing, e-commerce, and logging applications, but the most often utilized function is online database storage and administration. MySQL has been in use for almost 20 years and is widely regarded as one of the most secure and dependable database systems. Despite this, it has a number of disadvantages that should be addressed before adopting it for mission-critical applications. One disadvantage is that it does not handle transactions across several tables, which might result in a data inconsistency if the system fails. Furthermore, some of the more complex capabilities found in other database systems, such as stored procedures and triggers, are not supported by MySQL. MySQL is a fantastic solution for many applications, but it must be used with caution in a production context.
The database management system’s current edition, MySQL 8.0, includes new features and security fixes. This latest version of MySQL includes support for joins with bigger data sets, improved efficiency when importing huge files, and many changes to InnoDB, SQL mode, dubbed’strict sql mode,’ which will make MySQL more SQL-compliant. There are also speed improvements for DML statements and replication, as well as various additional security features. With these enhancements, MySQL 8.0 delivers a more robust and secure data management platform.
In this guide, you will learn how to install MySQL 8.0 on Rocky Linux 9 via the command line terminal, as well as how to secure, update, and, if required, deactivate the MySQL service.
https://www.markaicode.com/how-to-install-mysql-8-0-on-rocky-linux-9/
0 notes
Text
LaraClassifier Nulled Script 15.1.3

Unlock the Power of Classified Ads with LaraClassifier Nulled Script Are you searching for a robust and dynamic classified ads CMS that doesn’t compromise on flexibility and performance? Look no further—LaraClassifier Nulled Script is the ultimate solution for entrepreneurs and web developers seeking to launch a fully-featured geo-classified ads website without breaking the bank. With this powerful script, you can create a professional, scalable platform that rivals any premium marketplace in the industry—all for free. What is LaraClassifier Nulled Script? LaraClassifier Nulled Script is a powerful PHP-based classified ads content management system (CMS) built with Laravel, one of the most trusted PHP frameworks. Designed with modern developers and business owners in mind, it offers geo-location features, intuitive admin management, and an elegantly responsive front-end layout that adapts seamlessly across devices. Perfect for general classifieds or niche verticals, this script empowers you to build a feature-rich website with minimal effort. And with the nulled version, you can access premium functionalities without any licensing costs. Technical Specifications Framework: Laravel 9+ Database: MySQL / MariaDB Server Requirements: PHP 8.0 or later, Apache/Nginx, OpenSSL, PDO, Mbstring, Tokenizer Front-End: Bootstrap-based responsive layout Multilingual Support: Fully translation-ready Outstanding Features and Benefits Geo-Location Targeting: Automatically detect user location to display region-specific ads for a more personalized experience. SEO-Optimized: Get ahead in search rankings with built-in meta tags, sitemap generation, and schema.org compatibility. Built-In Monetization: Offer premium ad placements, sponsored listings, and ad packages to generate steady revenue. Advanced Search Filters: Allow users to filter results based on categories, locations, and keywords quickly and easily. Modern Admin Dashboard: Enjoy intuitive controls for managing users, categories, posts, payment gateways, and more. Social Login & Sharing: Enable easy login via Facebook or Google and encourage ad sharing across social platforms. Why Choose LaraClassifier Nulled Script? Unlike many open-source solutions that require extensive customization, LaraClassifier Nulled Script is ready to deploy out of the box. The nulled version includes all pro features, removing limitations and saving you hundreds of dollars in licensing fees. Plus, by using this script, you’ll gain access to premium tools that streamline management and optimize user experience—without any hidden costs. Real-World Use Cases Local Classifieds Portal: Build a city-based platform for local buyers and sellers to connect instantly. Niche Marketplaces: Target specific audiences—like job seekers, real estate, automotive, or pet classifieds. Community Boards: Create a community notice board for events, services, and second-hand goods. Freelance Listings: Showcase gigs, freelance services, and remote work opportunities. Easy Installation and Setup Guide Installing LaraClassifier Nulled Script is straightforward, even for beginners: Download the nulled script package from our site. Upload the files to your server via FTP or cPanel. Set appropriate file permissions as required. Navigate to the installation URL and follow the step-by-step installer wizard. Configure your database, create the admin account, and launch your site! For those looking to boost visibility right from the start, consider pairing this script with All in One SEO Pack Pro to maximize search engine performance and drive targeted traffic. Frequently Asked Questions (FAQs) Is LaraClassifier Nulled Script safe to use? While nulled scripts carry certain risks, downloading from a trusted source like ours ensures a clean, malware-free package. Always scan files and perform security audits before deploying on a live server. Can I customize the design of my classifieds site? Absolutely! The script is built on Laravel and Bootstrap, making it highly customizable.
Whether you're changing layouts, adding plugins, or modifying the theme, flexibility is at your fingertips. Does the script support multiple currencies? Yes. LaraClassifier Nulled Script supports multiple currencies and languages, allowing you to reach global users effortlessly. What payment gateways are included? Popular gateways like PayPal, Stripe, and offline payment options are built-in, ensuring smooth financial transactions for premium listings. Ready to Get Started? Why pay for what you can get for free? Download LaraClassifier today and unlock a world of possibilities. Build a professional, revenue-generating classified ads website without the usual upfront costs. Whether you’re a developer, entrepreneur, or hobbyist, this script gives you everything you need to succeed in the digital marketplace. Also, if you're in search of a premium theme to pair with your classified website, don’t miss out on betheme nulled—a versatile WordPress theme perfect for all your creative projects.
0 notes
Text
Rhel Desktop Iso

Red Hat Enterprise Linux (RHEL) is a Linux distribution developed by Red Hat and targeted toward the commercial market. Red Hat Enterprise Linux is released in server editions for x86, x8664, Itanium, PowerPC and IBM System z architectures, and desktop editions for x86 and x8664 processors. Red Hat Enterprise Linux, or RHEL, is the go-to enterprise-level Linux distribution for those customers who want support from a vendor.
Redhat Linux is one of the many Linux distributions and one of few open-source OS with enterprise class of technical support. Indeed, it’s well backup by many big boys such as IBM, Dell, HP-Compaq, Oracle, etc. Apart from that, a scale-down version of Fedora Core is also selected for well-known

One-Laptop-Per-Child project (OLPC)

! OLPC is a nice and caring idea of developing $100 laptop (XO-1 or Children’s Machine) for children around the world, especially to those in developing countries, to provide them with access to modern form of knowledge and education! Unlike Windows Vista or its predecessor, you neither need to really pay for a genuine Redhat Linux CD nor you’ll see high-tech hologram printed. Redhat Linux is free-of-charge OS, unless you need to access their technical support or using Redhat Enterprise Linux. Having say that, you can easily and freely download Redhat Linux CD ISO image from its FTP server. Although, development of the free version Redhat Linux has been discontinued after the release of Redhat Linux 9. Then, it’s Fedora Core – a merger between the Redhat Linux and old Fedora Linux projects in September 2003! Anyway, Redhat Inc (NYSE:RHT) sponsorship is ensuring that Fedora Core will continue available for free download and installation.

Centos 6 Minimal Iso
As a home user, there might be little or not problem at all by using the most up-to-date Linux distribution, such as Fedora Core 7. However, upgrade is not always an easy job for Linux administrators, who are maintaining legacy application servers running on old Redhat Linux distribution! So, one of the Linux administrator responsibilities is to ensure all the Linux installation CDs or ISO images are securely maintained and regularly backup. If you have lost track of them, you’ll appreciated if someone or somewhere still have a copy for download!

Here are the last resources – the official archive of Redhat Linux CD ISO images available for download from Redhat file servers. Also included are Redhat Linux LiveCD for OLPC project and the latest Fedora Core 7 download links:
Centos 5 Iso
Rhel Desktop Version Iso Download
Download official Redhat OLPC Linux CD ISO image
Download latest Fedora Core Linux CD ISO image
FTP direct download Redhat Linux 6.2 CD ISO image
FTP direct download Redhat Linux 7.0 CD ISO image
FTP direct download Redhat Linux 7.1 CD ISO image
FTP direct download Redhat Linux 7.2 CD ISO image
FTP direct download Redhat Linux 7.3 CD ISO image
FTP direct download Redhat Linux 8.0 CD ISO image
FTP direct download Redhat Linux 9 CD ISO image
Rhel 8 Desktop Iso
How To Setup TinyDNS Server In 3 Minutes – Walker News 29-06-07@15:59
[…] Last weekend was my first time to setup and configure DNS server for a small office network with hundred units of networked computers. As usual, due to cost factor, the management decides to run an open-source DNS daemon on an aging Intel-based PC with Red Hat Linux 9. […]
Create Linux Loopback File System On Disk File – Walker News 01-07-07@00:19
[…] you create a Linux file system without using partition DIRECTLY – sort of file system within file system […]
How To Install Wordpress Blog In 3 Minutes – Walker News 18-07-07@16:16
[…] (Linux, Apache, MySQL, and PHP), I’m writing this 3-minutes WordPress setup guide for Red Hat Linux (my another 3-minutes setup guide […]
How To Mount And Read CD ISO Image In Linux – Walker News 19-08-07@23:29
[…] may heard about disk image, particularly CD ISO image. Literally, an ISO disk image is a single binary file that encapsulates the contents of hard disk, […]
Using Linux od Command To View File In Bit – Walker News 21-09-07@00:14
[…] shown in the diagram, a Bash shell script called simple.sh that was scp from Windows Vista to Red Hat Linux failed to execute properly, with an error message “bad interpreter no such file or […]
How To Fix Weird Character In Linux Man Page – Walker News 26-09-07@00:20
[…] confirmed that this groff formatting trick works in Red Hat Linux 8 Professional and Red Hat Linux Enterprise Linux […]
want red hat 9
i really very happy to get this site .since 3 days i have been searching for this kind of sites.today only i got this site.it should have a familiar access.thanks to concern teams
Regards ,Maniskearan Loganathan
i have download the red hat linux 9 cd iso image.i have copied the en folder from linux 9 folder.how to write in the cd and how to install the linux os from that.pls give tips
hi there
can anyone provide me the ftp login and password for downloading the iso images archieve please do the needfulll
pls…. send me login and password for downloading REDHAT 7.2 . AND ALSO SEND THE LINK WHERE I’M DOWNLOAD THE FILE.
The link to download Red Hat 7.2 is already in the article.
If you’re prompted to login, use the anonymous login method:
thx a lot , excelent job
thanks If you’re prompted to login, use the anonymous login method:
i want redhat 7.3
Thank you for the access to these ISO files for Redhat 7.2. I am making an effort to use Kylix 3 and it was certified on this version. All the best in your walkings!
This site is great for redhat iso’s and even legacy redhat iso’s here lately I have been searching for a really really old copy of redhat linux 2.5, does anyone know where I can get it?
The links that you have gave will no longer work for now.
i download En linux 9 it’s Red Hat Server include that’s file ..?
thx
Dears, Am downloading Redhat 7.2 , thanks for that , but i want to know which specific files that should i download and how to mount it ?
If you’re looking for English version, then browse to “en”, “iso”, “i386” folder.
Depends on how you want to use the ISO files, e.g. if install on physical machine, then you should burn the ISO file to disc. To read the ISO file on Linux, you can try this.
Hi, thanks for the iso files!!
thanks man! been looking for a site like this one, glad i found it. More power!
I want redhat 6.3 64bit
THANKS
Hi there, I have downloaded and tried installing several different iso’s of redhat, versions 8 and 9. Unfortunately, my computer will not boot from the CD; other CD’s will boot however, so I know the drive is good. I have a disc one iso for version that I downloaded a few years back and it runs but I can’t find disc two to continue the installation. If it helps, my computer is a Compaq desktop with a i845 chipset. It does meet the requirements for the system but for some reason, I can’t get any of the iso’s I’ve downloaded to work! Please help!!!!!
Thank you!
First of all, did you verify the MD5 file checksum of the ISO images you’ve downloaded?
If the file checksum is valid, then I suspect you didn’t “burn” the ISO image correctly onto the CD/DVD-ROM.
Otherwise, the images hosted by the official site might have corrupted.
0 notes
Text
Understanding Indexes in MySQL: Part One
Indexes in MySQL are a very complex beast. We have covered MySQL indexes in the past, but we have never taken a deeper dive into them - we will do that in these series of blog posts. This blog post should act as a very general guide to indexes while the other parts of these series will dive a little bit deeper into these subjects. What are Indexes? In general, as already noted in a previous blog post about indexes, an index is an alphabetical list of records with references to the pages on which they are mentioned. In MySQL, an index is a data structure that is most commonly used to quickly find rows. You might also hear the term “keys” - it refers to indexes too. What do Indexes Do? In MySQL indexes are used to quickly find rows with specific column values and to prevent reading through the entire table to find any rows relevant to the query. Indexes are mostly used when the data stored in a database system (for example, MySQL) gets bigger because the larger the table, the bigger the probability that you might benefit from indexes. MySQL Index Types As far as MySQL is concerned, you might have heard about it having multiple types of indexes: A B-Tree INDEX - such an index is frequently used to speed up SELECT queries matching a WHERE clause. Such an index can be used on fields where values do not need to be unique, it also accepts NULL values. A FULLTEXT INDEX - such an index is used to use full text search capabilities. This type of index finds keywords in the text instead of directly comparing values to the values in the index. A UNIQUE INDEX is frequently used to remove duplicate values from a table. Enforces the uniqueness of row values. A PRIMARY KEY is also an index - it’s frequently used together with fields having an AUTO_INCREMENT attribute. This type of index does not accept NULL values and once set, the values in the column which has a PRIMARY KEY cannot be changed. A DESCENDING INDEX is an index that stores rows in a descending order. This type of index was introduced in MySQL 8.0 - MySQL will use this type of an index when a descending order is requested by the query. Choosing Optimal Data Types for Indexes in MySQL As far as indexes are concerned, there’s also the need to keep in mind that MySQL supports a wide variety of data types and some data types cannot be used together with certain kinds of indexes (for example, FULLTEXT indexes can only be used on text-based (CHAR, VARCHAR or TEXT) columns - they cannot be used on any other data types) so before actually choosing the indexes for your database design, decide on the data type you are going to use on the column in question (decide what kind of data class you are going to store: are you going to store numbers? String values? Both numbers and string values? etc.), then decide on the range of the values you are going to store (choose the one that you don’t think you will exceed because increasing the data type range can be a time-consuming task later on - we recommend you opt to use a simple data type), and if you do not intend to use NULL values in your columns, specify your fields as NOT NULL whenever you can - when a nullable column is indexed, it requires an extra byte per entry. Choosing Optimal Character Sets and Collations for Indexes in MySQL Aside from data types, also keep in mind that each character in MySQL takes up space. For example, UTF-8 characters may take anywhere between 1 and 4 bytes each, so you might want to avoid indexing, for example, 255 characters and only use, say, 50 or 100 characters for a certain column. The Benefits and Drawbacks of Using Indexes in MySQL The main benefit of using indexes in MySQL is the increased performance of search queries matching a WHERE clause - indexes speed up SELECT queries matching a WHERE clause because MySQL doesn’t read through the entire table to find rows relevant to the query. However, bear in mind that indexes have their own drawbacks. The main ones are as follows: Indexes consume disk space. Indexes degrade the performance of INSERT, UPDATE and DELETE queries - when data is updated, the index needs to be updated together with it. MySQL does not protect you from using multiple types of indexes at the same time. In other words, you can use a PRIMARY KEY, an INDEX and a UNIQUE INDEX on the same column - MySQL does not protect you from doing such a mistake. If you suspect that some of your queries are becoming slower, consider taking a look into the Query Monitor tab of ClusterControl - by enabling the query monitor you can see when a certain query was last seen and its maximum and average execution time which can help you to choose the best indexes for your table. How to Choose the Best Index to Use? To choose the best index to use, you can use MySQL’s built-in mechanisms. For example, you can use the query explainer - the EXPLAIN query. It will explain what table is used, if it has partitions or not, what indexes are possible to use and what key (index) is used. It will also return the index length and the amount of rows your query returns: mysql> EXPLAIN SELECT * FROM demo_table WHERE demo_field = ‘demo’G *************************** 1. row *************************** id: 1 select_type: SIMPLE table: demo_table partitions: NULL type: ref possible_keys: demo_field key: demo_field key_len: 1022 ref: const rows: 1 filtered: 100.00 Extra: NULL 1 row in set, 1 warning (0.00 sec) In this case, keep in mind that indexes are frequently used to help MySQL efficiently retrieve data when data sets are larger than usual. If your table is small, you might not need to use indexes, but if you see that your tables are getting bigger and bigger, chances are you might benefit from an index. In order to choose the best index to use for your specific scenario though, bear in mind that indexes can be a leading cause of performance problems too. Keep in mind that whether MySQL will effectively use the indexes or not depends on a couple of factors including the design of your queries, the indexes in use, the types of indexes in use, also your database load at the time the query is executed and other things. Here’s a couple of things to consider when using indexes in MySQL: How much data do you have? Perhaps some of it is redundant? What queries do you use? Would your queries use LIKE clauses? What about ordering? What kind of an index would you need to use to improve the performance of your queries? Would your indexes be large or small? Would you need to use an index on a prefix of the column to make its size smaller? It is worth noting that you should probably avoid using multiple types of indexes (e.g a B-Tree index, a UNIQUE INDEX and a PRIMARY KEY) on the same column too. Improving Query Performance with Indexes To improve query performance with indexes, you need to take a look at your queries - the EXPLAIN statement can help with that. In general, here’s a couple of things you should consider if you want your indexes to improve the performance of your queries: Only ask the database for what you need. In most cases, using SELECT column will be faster than using SELECT * (that is the case without using indexes too) A B-tree index might be a fit if you search for exact values (e.g SELECT * FROM demo_table WHERE some_field = ‘x’) or if you want to search for values using wildcards (e.g SELECT * FROM demo_table WHERE some_field LIKE ‘demo%’ - in this case, bear in mind that using LIKE queries with anything in the beginning of it might do more harm than good - avoid using LIKE queries with a percentage sign in front of the text you’re searching - that way MySQL might not use an index because it doesn’t know what does the row value begin with) - though keep in mind that a B-tree index can also be used for column comparisons in expressions that use the equal (=), more than (>), more than or equal to (>=), less than (<), less than or equal to (<=) or BETWEEN operators. A FULLTEXT index might be a fit if you find yourself using full-text (MATCH ... AGAINST()) search queries or if your database is designed in such a way that only uses text-based columns - FULLTEXT indexes can use TEXT, CHAR or VARCHAR columns, they cannot be used on any other types of columns. A covering index might be of use if you want to run queries without additional I/O reads on big tables. To create a covering index, cover the WHERE, GROUP BY and SELECT clauses used by the query. We will further look into the types of indexes in the upcoming parts of this blog series, but in general, if you use queries like SELECT * FROM demo_table WHERE some_field = ‘x’ a B-tree INDEX might be a fit, if you use MATCH() AGAINST() queries you should probably look into a FULLTEXT index, if your table has very long row values, you should probably look into indexing a part of the column. How Many Indexes Should You Have? If you ever used indexes to improve the performance of your SELECT queries, you have probably asked yourself a question: how many indexes should you actually have? In order to understand this, you need to keep the following things in mind: Indexes are usually the most effective with big amounts of data. MySQL uses only one index per each SELECT statement in a query (subqueries are seen as separate statements) - use the EXPLAIN query to find out which indexes are the most effective for the queries you use. Indexes should make all of your SELECT statements fast enough without compromising too much on disk space - “fast enough”, however, is relative so you would need to experiment. Indexes and Storage Engines When dealing with indexes in MySQL, also keep in mind that there might be some kinds of limitations if you use various engines (for example if you use MyISAM as opposed to InnoDB). We will go into more detail in a separate blog, but here are some ideas: The maximum number of indexes per MyISAM and InnoDB tables are 64, the maximum number of columns per index in both storage engines is 16. The maximum key length for InnoDB is 3500 bytes - the maximum key length for MyISAM is 1000 bytes. The fulltext indexes have limitations in certain storage engines - for example, the InnoDB fulltext indexes have 36 stopwords, MyISAM stopword list is a little bit bigger with 143 stopwords. InnoDB derives these stopwords from the innodb_ft_server_stopword_table variable while MyISAM derives these stopwords from the storage/myisam/ft_static.c file - all words that are found in the file will be treated as stopwords. MyISAM was the only storage engine with the support for full-text search options until MySQL 5.6 (MySQL 5.6.4 to be exact) came around meaning that InnoDB supports full-text indexes since MySQL 5.6.4. When a FULLTEXT index is in use, it finds keywords in the text instead of comparing values directly to the values in the index. Indexes play a very important role for InnoDB - InnoDB locks rows when it accesses them, so a reduced number of rows InnoDB accesses can reduce locks. MySQL allows you to use duplicate indexes on the same column. Certain storage engines have certain default types of indexes (e.g for the MEMORY storage engine the default index type is hash) Summary In this part about indexes in MySQL, we have gone through some general things related to indexes in this relational database management system. In the upcoming blog posts we will go through some more in-depth scenarios of using indexes in MySQL including the usage of indexes in certain storage engines etc. - we will also explain how ClusterControl can be used to achieve your performance goals in MySQL. Tags: MySQLIndexesclustercontrolperformance https://severalnines.com/database-blog/understanding-indexes-mysql-part-one
0 notes
Text
Databases are considered one of the important services in a production environment. They are used to store and organize data. Depending on how data is stored and retrieved, databases can be categorized as: Relational databases (RDBMS or SQL databases): where data is stored in tables and rows, the tables are then linked using keys. They include MySQL, MariaDB, PostgreSQL, SQLite e.t.c Non-relational databases(NoSQL databases): here data is stored using a storage model optimized for specific requirements. They include Couchbase, Apache Cassandra, MongoDB, Redis, Apache HBase e.t.c MySQL is a popular open-source developed and distributed by the Oracle Corporation. It was founded in 1995 in Sweden and went open-source in 2000. In the year 2002, another MySQL headquarters was created in USA. In 2003, MyQSL entered a partnership with SAP and many features were added. In 2008, MySQL was acquired by Sun Microsystems. In 2009, Sun Microsystems was acquired by Oracle making MySQL an Oracle project. MariaDB is a free and open-source relational database fork of the MySQL database. It was developed by the original developers of the MySQL database after the Oracle Corporation intended to make MySQL and enterprise/paid version in 2010. MariaDB is known for its performance, stability, openness, and the MariaDB Foundation which accepts contributions on technical merit. The latest improvements are advanced clustering with Galera Cluster 4 and compatibility features with the Oracle Database. This guide will provide all the required steps on how to install and configure MariaDB / MySQL Database on Rocky Linux 9 / Alma Linux 9. #1. Install MariaDB / MySQL on Rocky Linux 9|AlmaLinux 9 Rocky Linux 9 and Alma Linux 9 released recently, provide MySQL 8 and MariaDB 10.5 in their default repositories. This makes it easy to install these latest release versions on your system. Install a preferred database on your system using the below steps: Option 1. Install MariaDB on Rocky Linux 9 / AlmaLinux 9 MariaDB 10.5 though not the latest release version of MariaDB can be installed easily by running the command: sudo dnf install mariadb-server mariadb Dependency Tree: Transaction Summary ================================================================================ Install 13 Packages Total download size: 18 M Installed size: 107 M Is this ok [y/N]: y Once installed, start and enable MariaDB the service: sudo systemctl enable --now mariadb Verify if the service is running: $ systemctl status mariadb ● mariadb.service - MariaDB 10.5 database server Loaded: loaded (/usr/lib/systemd/system/mariadb.service; enabled; vendor preset: disabled) Active: active (running) since Sat 2022-07-23 10:05:47 CEST; 2s ago Docs: man:mariadbd(8) https://mariadb.com/kb/en/library/systemd/ Process: 18153 ExecStartPre=/usr/libexec/mariadb-check-socket (code=exited, status=0/SUCCESS) Process: 18175 ExecStartPre=/usr/libexec/mariadb-prepare-db-dir mariadb.service (code=exited, status=0/SUCCESS) Process: 20589 ExecStartPost=/usr/libexec/mariadb-check-upgrade (code=exited, status=0/SUCCESS) Main PID: 20448 (mariadbd) Status: "Taking your SQL requests now..." Tasks: 12 (limit: 23441) Memory: 78.5M CPU: 268ms CGroup: /system.slice/mariadb.service └─20448 /usr/libexec/mariadbd --basedir=/usr Option 2. Install MySQL Database on Rocky Linux 9 / AlmaLinux 9 MySQL 8.0 released on May 11, 2021, offers a lot of amazing features that include: Transactional data dictionary. Common Table Expressions. Windows Functions. InnoDB & XML enhancements. Error log improvements such as error numbering & reduced verbosity. Improved support for Native JSON data and document store functionality. This version is provided in the default Rocky Linux 9 / AlmaLinux 9 repositories. It can be installed by issuing the command: sudo dnf install mysql-server
Dependency Tree: Transaction Summary ================================================================================ Install 8 Packages Total download size: 20 M Installed size: 176 M Is this ok [y/N]: y Once installed, start and enable the MySQL service: sudo systemctl start mysqld sudo systemctl enable mysqld Check if the service is running on your system. $ systemctl status mysqld ● mysqld.service - MySQL 8.0 database server Loaded: loaded (/usr/lib/systemd/system/mysqld.service; enabled; vendor preset: disabled) Active: active (running) since Sat 2022-07-23 10:08:59 CEST; 8s ago Main PID: 31834 (mysqld) Status: "Server is operational" Tasks: 38 (limit: 23441) Memory: 460.9M CPU: 2.865s CGroup: /system.slice/mysqld.service └─31834 /usr/libexec/mysqld --basedir=/usr #2. Using MariaDB / MySQL on Rocky Linux 9|AlmaLinux 9 Once installed MariaDB/MySQL databases can be used. First, secure the installation by setting a password for the root user. sudo mysql_secure_installation Proceed as shown: On MySQL ..... Securing the MySQL server deployment. Connecting to MySQL using a blank password. VALIDATE PASSWORD COMPONENT can be used to test passwords and improve security. It checks the strength of password and allows the users to set only those passwords which are secure enough. Would you like to setup VALIDATE PASSWORD component? Press y|Y for Yes, any other key for No: Y .... There are three levels of password validation policy: LOW Length >= 8 MEDIUM Length >= 8, numeric, mixed case, and special characters STRONG Length >= 8, numeric, mixed case, special characters and dictionary file Please enter 0 = LOW, 1 = MEDIUM and 2 = STRONG: 2 .... Please set the password for root here. New password: Re-enter new password: Do you wish to continue with the password provided?(Press y|Y for Yes, any other key for No) : y ...... On MariaDB: NOTE: RUNNING ALL PARTS OF THIS SCRIPT IS RECOMMENDED FOR ALL MariaDB SERVERS IN PRODUCTION USE! PLEASE READ EACH STEP CAREFULLY! In order to log into MariaDB to secure it, we'll need the current password for the root user. If you've just installed MariaDB, and haven't set the root password yet, you should just press enter here. Enter current password for root (enter for none): Press_Enter OK, successfully used password, moving on... Setting the root password or using the unix_socket ensures that nobody can log into the MariaDB root user without the proper authorisation. You already have your root account protected, so you can safely answer 'n'. Switch to unix_socket authentication [Y/n] y You already have your root account protected, so you can safely answer 'n'. Change the root password? [Y/n] y New password: Re-enter new password: Password updated successfully! ..... Remove anonymous users? [Y/n] y .... Disallow root login remotely? [Y/n] y ... Remove test database and access to it? [Y/n] y .... Reload privilege tables now? [Y/n] y All done! If you've completed all of the above steps, your MariaDB installation should now be secure. Thanks for using MariaDB! Now login using the created root password: $ mysql -u root -p Enter password: Welcome to the MySQL monitor. Commands end with ; or \g. Your MySQL connection id is 10 Server version: 8.0.28 Source distribution Copyright (c) 2000, 2022, Oracle and/or its affiliates. Oracle is a registered trademark of Oracle Corporation and/or its affiliates. Other names may be trademarks of their respective owners. Type 'help;' or '\h' for help. Type '\c' to clear the current input statement. mysql> Check the version using the command: mysql> SELECT VERSION(); Sample Output: Create a User and Database: To create a user and database in MariaDB/MySQL, use the commands below replacing where required: CREATE DATABASE sampledb; CREATE USER 'test_user'@'%' IDENTIFIED BY 'Passw0rd';
GRANT ALL ON sampledb.* TO 'test_user'@'%' WITH GRANT OPTION; FLUSH PRIVILEGES; After this, you will have a database named sampledb and a user test_user who can be accessed remotely created as swell. Check the available databases: mysql> SHOW databases; +--------------------+ | Database | +--------------------+ | information_schema | | mysql | | performance_schema | | sampledb | | sys | +--------------------+ 5 rows in set (0.00 sec) mysql> View users: mysql> SELECT User, Host FROM mysql.user; +------------------+-----------+ | User | Host | +------------------+-----------+ | test_user | % | | mysql.infoschema | localhost | | mysql.session | localhost | | mysql.sys | localhost | | root | localhost | +------------------+-----------+ 5 rows in set (0.00 sec) mysql> To delete a user, use the command with the below syntax: DROP USER 'username'@'host'; Create Tables We can then create and insert data into a table. For example in the created table above: USE sampledb; CREATE TABLE playground ( equip_id serial PRIMARY KEY, type varchar (50) NOT NULL, color varchar (25) NOT NULL, location varchar(25) check (location in ('north', 'south', 'west', 'east', 'northeast', 'southeast', 'southwest', 'northwest')), install_date date ); Insert the data into the preferred table: INSERT INTO playground (type, color, location, install_date) VALUES ('slide', 'blue', 'south', '2017-04-28'); INSERT INTO playground (type, color, location, install_date) VALUES ('swing', 'yellow', 'northwest', '2018-08-16'); View the added data: mysql> SELECT * FROM playground; +----------+-------+--------+-----------+--------------+ | equip_id | type | color | location | install_date | +----------+-------+--------+-----------+--------------+ | 1 | slide | blue | south | 2017-04-28 | | 2 | swing | yellow | northwest | 2018-08-16 | +----------+-------+--------+-----------+--------------+ 2 rows in set (0.00 sec) mysql> exit #3. Configure MariaDB / MySQL Database Once installed, you can customize your MariaDB / MySQL Database as preferred. There are several configurations you can make by editing the configuration file stored at /etc/my.cnf.d/*. First stop the service: ##MariaDB sudo systemctl stop mariadb ##MySQL sudo systemctl stop mysqld Now proceed and make the desired configurations by editing files below: ##For MySQL sudo vim /etc/my.cnf.d/mysql-server.cnf ##For MariaDB sudo vim /etc/my.cnf.d/mariadb-server.cnf Changing the MySQL/MariaDB Listening Address By default, both MySQL and MariaDB listen on localhost, but if you want to access the database remotely, you need to allow it to listen to all IP addresses by adding/uncommenting the line: [mysqld] bind-address=0.0.0.0 Change the MySQL/MariaDB data directory By default, MariaDB and MySQL store data at /var/lib/mysql/. You can configure the database to store its data in a custom path. For example at /mnt/datastore sudo mkdir /mnt/datastore sudo chmod -R 777 /mnt/datastore/ sudo chown -R mysql:mysql /mnt/datastore With the custom path created, you need to copy the files in the old directory to the new path using the command: sudo dnf install rsync -y sudo rsync -av /var/lib/mysql/* /mnt/datastore For the path to be accessible, configure SELinux as shown: sudo semanage fcontext -a -t mysqld_db_t '/mnt/datastore(/.*)?' sudo restorecon -Rv /mnt/datastore Now open the configuration file and add the data directory as shown: For MySQL [mysqld] datadir= /mnt/mysql socket= /mnt/mysql/mysql.sock mysqlx_socket= /mnt/mysql/mysqlx.sock [client] socket= /mnt/mysql/mysql.sock For MariaDB you need to edit two files to accommodate the data directory: sudo vim /etc/my.cnf.d/mariadb-server.cnf Make the below changes to the file: [mysqld] datadir= /mnt/mysql socket= /mnt/mysql/mysql.sock
mysqlx_socket= /mnt/mysql/mysqlx.sock Save the file and also edit the below file for the clients on MariaDB. sudo vim /etc/my.cnf.d/client.cnf Add the custom port and socket: [client] socket= /mnt/mysql/mysql.sock # This group is not read by mysql client library, # If you use the same .cnf file for MySQL and MariaDB, # use it for MariaDB-only client options [client-mariadb] socket= /mnt/mysql/mysql.sock Configure a Custom Port The default port used by MySQL/MariaDB is 3306. However, you can configure the database to use another port. For example 4545 Open the configuration file and make these settings for the server and client connections. For MySQL [mysqld] port=4545 [client] port=4545 For MariaDB, you need to edit two files: $ sudo vim /etc/my.cnf.d/mariadb-server.cnf [mysqld] port=4545 Edit the client port. $ sudo vim /etc/my.cnf.d/client.cnf [client] port=4545 [client-mariadb] port=4545 Configure SELinux for the custom port: sudo semanage port -a -t mysqld_port_t -p tcp 4545 Restart the Services After the changes have been made, start the MySQL/MariaDB service: ##MariaDB sudo systemctl start mariadb ##MySQL sudo systemctl start mysqld Verify the changes made: $ sudo ss -plunt|grep 4545 tcp LISTEN 0 151 0.0.0.0:4545 0.0.0.0:* users:(("mysqld",pid=33606,fd=24)) Allow the set port through the firewall: sudo firewall-cmd --add-port=/tcp --permanent sudo firewall-cmd --reload Remember to replace the port appropriately. Access MySQL/MariaDB Remotely Once the listen address and port have been configured, you can access the database remotely from a MySQL client. For example, we will try accessing the database using the created user from the remote host: mysql -h -u -p -P For example, using the default MySQL port to 3306, the command will be: mysql -h 192.168.205.13 -u test_user -p -P 3306 Sample Output: After configuring a custom port, we will have the command as shown. MariaDB/MySQL Performance Tuning and Optimization When dealing with a large environment, the MariaDB / MySQL Database can have performance problems. To improve database performances, you may be required to tune the options. SQL performance tuning can be defined as the process of maximizing query speeds on a relational database. Before that, you need to evaluate a few resources: Storage: if you are using a traditional hard disk, it is recommended that you upgrade to a solid-state drive (SSD) for improved performance. You can use tools like iotop or sar from the sysstatpackage to check the disk input/output rates Processor: The top command can be used to measure how fast your system is. You may be required to check the MySQL processes and the percentage processor use. Memory: it is possible to improve the memory cache of MySQL to improve performance. This however requires you to have enough memory on your system Network: The network can also play part in low performances. You need to ensure that the network is sufficient to manage the load. The SQL performance tuning might involve several techniques such as: Writing more efficient database queries Structuring the database to retrieve data more efficiently. Tweaking the MySQL configuration files. Tweaking MySQL configuration files involves editing the /etc/mysql/my.cnf.d/* files. There are several configs defined here: query_cache_size: this is the size of the cache of MySQL queries waiting to run. It is recommended that the values be small, around 100-200MB max_connection: the number of connections allowed into the database innodb_buffer_pool_size: this config is used to allocate system memory as a data cache for your database innodb_io_capacity: It is used to set the rate for input/output from your storage device. This directly relates to the type and speed of your storage drive. max_heap_table_size: is the limit on an ENGINE=MEMORY table you create
LEAST(max_heap_table_size, tmp_table_size): is the cap on how big to let certain implicit temp tables to get These values can be defined as desired. For example: [mysqld] tmp_table_size=64M max_heap_table_size=64M After making the changes, restart the service: ##MariaDB sudo systemctl restart mariadb ##MySQL sudo systemctl restart mysqld That is it! We have successfully installed and configured MariaDB / MySQL Database on Rocky Linux 9 / Alma Linux 9. I hope this was informative.
0 notes
Text
Oracle Linux 8首個重要維護版本更新發布

圖片來自於 Oracle
Oracle在更新日誌中寫道:“在Oracle Linux 8中,適用於傳統Oracle Linux 8服務器的核心操作環境和相關軟件包是通過整合BaseOS和Applications Streams方式進行發行的。BaseOS為您提供了運行環境的運行用戶空間。ApplicationStreams提供了一系列應用程序以前在軟件集合以及其他產品和程序中分發的文件,可以在用戶空間中運行。”

Oracle Linux 8 Update 1更新中最值得關注的是,適用於64位(x86_64)Intel和AMD平台的Red Hat兼容內核(RHCK)Linux 4.18.0-147.el8內核軟件包。該軟件包修復了諸多BUG,安全更新和功能增強,而且還移除了���Btrfs和OCFS2文件系統的支持,並將VDO Ansible模塊移至Ansible軟件包。此外,它還作為開發人員預覽版添加了對64位ARM(AArch64)平台的安裝支持。
此版本還引入了Udica,以允許用戶通過創建定制的安全策略來更好地控制容器如何訪問主機系統資源。其他更新的組件包括MySQL 8.0, SELinux user-space tools 2.9 with boltd_t SELinux type for managing Thunderbolt 3 devices and bpf SELinux policy for controlling Berkeley Packet Filter, SELinux policy 3.14.3, SETools 4.2.2, OpenSSH 8.0p1, OpenSCAP 1.3 .1和scap-security-guide 0.1.44.
在本次Oracle Linux 8 Update 1更新中,Cockpit Web控制台也獲得了更新。支持同步多線程(SMT)配置,並具有禁用SMT的功能,對虛擬機管理頁面的改進以及更新的網絡頁面(新功能)防火牆設置。此外該版本添加了針對英特爾Optane DC永久內存技術的內存模式。
那些對在其個人計算機或服務器上運行Oracle Linux 8 Update 1感興趣的人可以立即從Oracle軟件交付云免費下載ISO安裝映像,以及通過Oracle Container Registry和Docker Hub的官方Docker映像。用戶還可以從Unbreakable Linux Network(ULN)和Oracle Linux yum服務器下載單個RPM軟件包。
.
from Oracle Linux 8首個重要維護版本更新發布 via KKNEWS
0 notes
Text
Jira Service Desk 4.0.0 Release Notes
We're excited to present Jira Service Desk 4.0.
In our latest platform release, Jira Service Desk harnesses an upgraded engine that provides faster performance, increased productivity, and greater scalability. Dive in and discover all the goodies awaiting your service desk teams.
Highlights
Lucene upgrade
jQuery upgrade
Everyday tasks, take less time
Accessible priority icons
New options in advanced search
AUI upgrade
AdoptOpenJDK support
End of support for fugue
New customer portal in the works
Resolved issues
Get the latest version
Read the upgrade notes for important details about this release and see the full list of issuesresolved.
Compatible applications
If you're looking for compatible Jira applications, look no further:
Jira Software 8.0 release notes
Lucene upgrade to power performance
A welcome change we inherit from Jira 8.0, is the upgrade of Lucene. This change brings improvements to indexing, which makes it easier to administer and maintain your service desk. Here’s an overview of what to expect:
Faster reindexing
Reindexing is up to 11% faster. This means less time spent on reindexing after major configuration changes, and quicker upgrades.
Smaller indexes
Index size has shrunk by 47% (in our tests, the index size dropped from 4.5GB to 2.4GB). This means a faster, more stable, Jira that is easier to maintain and troubleshoot.
jQuery upgrade
Outdated libraries can lead to security vulnerabilities, so we've upgraded jQuery from version 1.7.2 to 2.2.4. This new version includes two security patches, and the jQuery migrate plugin 1.4.1 for a simplified upgrade experience. Learn more
Everyday tasks, take less time
We know how important it is for agents to move through their service desk with ease, and for admins to scale their service desk as their team grows. The back end upgrade combined with a bunch of front end improvements, makes work more efficient for admins, agents, and customers alike:
Viewing queues is twice as fast in 4.0 compared to 3.16.
Opening the customer page is 36% faster in 4.0 compared to 3.16
Project creation for an instance with 100 projects, is twice as fast in 4.0 compared to JSD 3.15.
Project creation for an instance with up to 200 projects, is six times faster in 4.0 compared to JSD 3.15.
We'll continue to take performance seriously, so that your service desk team can get the most out of their day!
Accessible priority icons
We’ve updated our priority icons to make them more distinctive and accessible. These changes allow Jira users with color blindness, to instantly recognize the relationship between icons, and their level of importance. Here’s a comparison of old and new icons that you'll be seeing around Jira Service Desk:

New options in advanced search
Check out these new options for when you are using advanced search:
Find contributors and date ranges (updatedBy)
Search for issues that were updated by a specific user, and within a specified date range. Whether you're looking for issues updated in the last 8 hours, two months, or between June and September 2017 – we've got you covered. Learn more
Find link types (issueLinkType)
Search for issues that are linked with other issues by particular link types, like blocks or is duplicated by. This will help you quickly find any related blockers, duplicates, and other issues that affect your work. Learn more
Atlassian User Interface (AUI) upgrade
AUI is a frontend library that contains all you need for building beautiful and functional Atlassian Server products and apps. We've upgraded AUI to the more modular 8.0, making it easier to use only the pieces that you need.
AdoptOpenJDK comes to Jira
Oracle stopped providing public updates for Oracle JDK 8 in January 2019. This means that only Oracle customers with a paid subscription or support contract will be eligible for updates.
In order to provide you with another option, we now support running Jira Service Desk 4.0 with AdoptOpenJDK 8. We'll continue to bundle Jira Service Desk with Oracle JDK / JRE 8.
End of support for fugue
In Jira Service Desk 4.0, we've removed com.atlassian.fugue, and updated our APIs to use Core Java Data types and Exceptions.
You can read the full deprecation notice for next steps, and if you have any questions – post them in the Atlassian Developer Community.
Get ready for the new customer portal experience
We're giving you more ways to customize your help center and portals, alongside a fresh new look that will brighten up your customer's day. This first-class, polished experience will be available in the not too distant future, so keep an eye on upcoming release notes. In the meantime, here’s a taster…

Added extras
4-byte characters
Jira now supports 4-byte characters with MySQL 5.7 and later. This means you can finally use all the emojis you've dreamed about!
Here's a guide that will help you connect Jira to a MySQL 5.7 database.
Add-ons are now apps
We're renaming add-ons to apps. This changed in our Universal Plugin Manager some time ago, and now Jira Service Desk follows suit. This change shouldn't really affect you, but we're letting you know so you're not surprised when seeing this new name in Jira administration, and other pages.
Issues in Release
Fixed: The SLA "within" field keeps increasing when the SLA is paused
Fixed: The SLA information is not included in the Excel and HTML export
Fixed: Anonymous comments cause display issues in Activity section in Issue Navigator
Fixed: Portal Settings - Highlight and Text on highlights values are swapped on subsequent edits
Fixed: Inconsistent JIRA Service Desk REST API Pagination
Fixed: JSON export doesn't differentiate public from internal comments
Fixed: Asynchronous cache replication queue - leaking file descriptor when queue file corrupted
Fixed: New line character in issue summary can break issue search detailed view
Fixed: Jira incorrectly sorts options from Select List custom fields with multiple contexts
Fixed: DefaultShareManager.isSharedWith performs user search 2x times
Fixed: Unknown RPC service: update_security_token
Fixed: Copying of SearchRequest performs user search
Fixed: Data Center - Reindex snapshot file fails to create if greater than 8GB
Fixed: The VerifyPopServerConnection resource was vulnerable to SSRF - CVE-2018-13404
Fixed: XSS in the two-dimensional filter statistics gadget on a Jira dashboard - CVE-2018-13403
Fixed: DC index copy does not clean up old files when Snappy archiver is used
Fixed: SQL for checking usages of version in custom fields is slow even if no version picker custom fields exist
Suggestion: Improve FieldCache memory utilisation for Jira instances with large Lucene
Fixed: Search via REST API might fail due to ClassCastException
Fixed: Upgrade Tomcat to the version 8.5.32
Suggestion: Webhook for Project Archive on JIRA Software
Fixed: Deprecate support for authenticating using os_username, os_password as url query parameters
Fixed: JQL input missing from saved filter
Fixed: CachingFieldScreenStore unnecessary flushes fieldScreenCache for create/remove operation
Suggestion: Favourite filters missing in Mobile browser view
Fixed: DC node reindex is run in 5s intervals instead of load-dependent intervals
Suggestion: Don't log Jira events to STDOUT - catalina.out
Fixed: Adding .trigger-dialog class to dropdown item doesn't open a dialog
Fixed: Issue view/create page freeze
Suggestion: Add Additional Logging Related to Index Snapshot Backup
Suggestion: Add additional logging related to index copy between nodes
Fixed: JIRA performance is impacted by slow queries pulling data from the customfieldvalue table
Fixed: Projects may be reverted to the default issue type scheme during the change due to race condition
Suggestion: As an JIRA Datacenter Administrator I want use default ehcache RMI port
Fixed: Two dimensional filter statistics gadget does not show empty values
Suggestion: Embed latest java critical security update (1.8.0.171 or higher) into the next JIRA (sub)version
Fixed: JIRA inefficiently populates fieldLayoutCache due to slow loading of FieldLayoutItems
Suggestion: Provide New look Of Atlassian Product For Server Hosting As Well
Fixed: Startup Parameter "upgrade.reindex.allowed" Not Taking Effect
Fixed: Remote Linking of Issues doesn't reindex issues
Fixed: Index stops functioning because org.apache.lucene.store.AlreadyClosedException is not handled correctly
Suggestion: Add Multi-Column Index to JIRA Tables
Fixed: 'entity_property' table is slow with high number of rows and under high load
Fixed: JIRA Data Center will skip replication operations in case of index exception
Fixed: Improve database indexes for changeitem and changegroup tables.
Suggestion: CSV export should also include SLA field values
Fixed: Priority icons on new projects are not accessible for red-green colour blind users
Fixed: Two Dimensional Filter Statistics Gadget fails when YAxis is a Custom Field restricted to certain issue types
Fixed: Unable to remove user from Project Roles in project administration when the username starts with 0
Suggestion: The jQuery version used in JIRA needs to be updated
Fixed: MSSQL Selection in config.sh Broken (CLI)
Suggestion: Upgrade Lucene to version 7.3
Fixed: User Directory filter throws a 'value too long' error when Filter exceeds 255 chars
Suggestion: Add support for 4 byte characters in MySQL connection
Fixed: xml view of custom field of multiversion picker type display version ID instead of version text
Fixed: Filter gadgets take several minutes to load after a field configuration context change
Suggestion: Ship JIRA with defaults that enable log rotation
Fixed: The xml for version picker customfield provides the version id instead of the version name
Suggestion: JQL function for showing all issues linked to any issue by a given issue link type
Suggestion: Ability to search for issues with blockers linked to them
Suggestion: Reduce JIRA email chatiness
Source
0 notes
Photo

A Quick Start Guide to MySQL 8.0's Document Store: https://t.co/ISJrCpsIPu (Based around using the Node.js connector.)
0 notes
Text
Unofficial MySQL 8.0 Optimizer Guide
http://www.unofficialmysqlguide.com/ Comments
0 notes