#NETMASK
Explore tagged Tumblr posts
Visit Tumblr Blog
Explore Tumblr blogs with no restrictions, modern design and the best experience.
Last Seen Tumblr Blogs


Fun Fact
69% of Tumblr users are millennials.
Text
Konfigurasi IP Address, Subnetting dengan VLSM, dan Subnetting Mask
C. Tugas Praktik
Konfigurasi IP Address, Subnetting dengan VLSM, dan Subnet Mask
1. Tujuan
a. Peserta didik diharapkan mampu melakukan konfigurasi IP address di komputer jaringan.
b. Peserta didik diharapkan mampu memahami konsep teknik subnetting dengan metode VLSM. c. Peserta didik diharapkan dapat memahami teknik penggunaan subnet mask.
2. Landasan teori
a. Variable Length Subnet Mask (VLSM)
VLSM adalah cara melakukan implementasi pengalokasian blok IP. Hal tersebut dilakukan oleh pemilik network (network administrator) dari blok IP yang telah digunakan (bersifat lokal dan tidak dikenal di internet). Terdapat beberapa keuntungan dari subnetting VLSM. Keuntungan-keuntungan tersebut dipaparkan dalam poin-poin berikut.
1) Umumnya, dapat mengurangi lalu lintas jaringan atau reduced network traffic.
2) Dapat dijadikan sarana mengoptimalkan cara kerja jaringan atau optimized network performance.
3) Menyederhanakan pengelolaan yang umumnya disebut simplified management.
4) Untuk alternatif pengembangan jaringan yang jarak geografisnya jauh (facilitated spanning of large geographical distance).
5) Dapat menghemat ruang alamat.
Bentuk lain dari teknik subnetting yakni berupa VLSM. Pada umumnya, subnetting yang digunakan tidak berdasarkan jumlah banyaknya IP dalam satu subnet atau class. Namun, hanya ingin membuat banyak host sehingga jaringan yang banyak dapat dipisah pada subnet ataupun class.
b. Skenario
Pada suatu perkantoran, jaringannya menggunakan IP address class C dengan alamat network satu sembilan dua titik, satu enam delapan titik, nol titik, nol titik. Jaringan dibagi menjadi lima buah subnet per divisi. Masing-masing divisi tidak dapat saling terhubung atau berkomunikasi melalui jaringan lokal. Rincian host per divisi diuraikan sebagai berikut.
1) Subnet #1 (Divisi Keuangan) memiliki jumlah 50 host.
2) Subnet #2 (Divisi Tata Usaha) memiliki jumlah 50 host.
3) Subnet #3 (Divisi R&D) memiliki jumlah 50 host.
4) Subnet #4 (Divisi HRD) memiliki jumlah 30 host.
5) Subnet #5 (Divisi Pelayanan) memiliki jumlah 30 host.
Rincian di atas tidak akan tercapai jika menggunakan statik subnetting. Oleh karena itu, jika menggunakan subnetting dengan nilai dua lima lima titik, dua lima lima titik, dua lima lima titik, satu sembilan dua. hanya akan mendapat 4 subnet dengan setiap subnet memiliki 64 host. Namun, untuk kasus ini dibutuhkan 5 subnet. Apabila telah menggunakan subnet dengan nilai 255.255.255.224, kemungkinan dapat dibuat sebanyak 8 subnet. Namun, setiap subnetnya hanya memiliki jumlah host maksimal 32 host, padahal membutuhan 50 host untuk 3 subnet dan 30 host untuk 2 subnet.
c. Perhitungan menggunakan VLSM
1) Diketahui alamat network dengan nilai satu sembilan dua titik, satu enam delapan titik, nol titik, nol. Alamat tersebut masuk ke kelompok IP kelas C sehingga subnet mask default-nya yaitu dua lima lima titik, dua lima lima titik, dua lima lima titik, nol.
2) Pertama, tentukan netmask untuk tiga divisi yang jumlah client maksimumnya adalah 50 client atau 50 host. Apabila telah menggunakan teknik subnetting CIDR, dapat menggunakan netmask dengan nilai dua lima lima titik, dua lima lima titik, dua lima lima titik, satu sembilan dua, dengan maksimal host yaitu 62 yang memiliki rincian berikut.
a) Jumlah subnetnya sebagai berikut.
n = 2x
n=2²
n=4
b) Menentukan jumlah host setiap subnet.
Host=2-2
Host=26-2
Host = 62 host
2 notes
·
View notes
Text
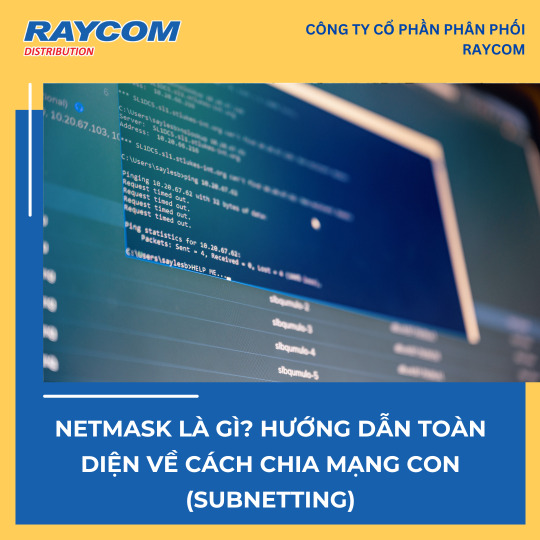
🧮🧮 NETMASK LÀ GÌ? HƯỚNG DẪN TOÀN DIỆN VỀ CÁCH CHIA MẠNG CON (SUBNETTING)
🌐 Trong kỷ nguyên IoT và mạng máy tính hiện đại, netmask (mặt nạ mạng) đóng vai trò then chốt trong việc tổ chức và quản lý địa chỉ IP hiệu quả. Dù bạn là người đam mê công nghệ hay chỉ đơn giản muốn hiểu netmask là gì, bài viết này sẽ cung cấp cho bạn cái nhìn toàn diện về tầm quan trọng và cách ứng dụng netmask trong thực tế.
👉 Xem chi tiết bài viết: https://raycom.vn/netmask-la-gi-huong-dan-toan-dien-ve-cach-chia-mang-con-subnetting/
Hãy để lại bình luận hoặc gửi tin nhắn trực tiếp cho Raycom nếu bạn cần thêm thông tin hoặc đăng ký báo giá. Chúng tôi rất mong nhận được sự tương tác và sẵn sàng hỗ trợ bạn tận tình! 💖💖
------------------------------------------------
CÔNG TY CỔ PHẦN PHÂN PHỐI RAYCOM ☎️ Hotline: 0932 728 972 🏫 37 Đường số 6, KDC Cityland Park Hills, Phường 10, Quận Gò Vấp, TP.HCM
0 notes
Link
#Automation#backup#cloudstorage#configuration#filesharing#homeserver#Linux#NAS#network-attachedstorage#NFS#OpenMediaVault#Performance#RAID#Samba#Security#self-hosted#Setup#Storage#systemadministration#Ubuntu#ZFS
0 notes
Text
How to Configure a Static IP Address in Ubuntu 24.04
Ubuntu 24.04 LTS typically assigns IP addresses dynamically using DHCP. However, setting a static IP is beneficial for network management, remote access, and services that require a fixed IP.
Methods to Configure a Static IP
You can set a static IP using:
GUI (Graphical User Interface) – For Ubuntu desktop users.
CLI (Command Line Interface) – Recommended for servers or users comfortable with the terminal.
1. GUI Method
To configure a static IP via GUI:
Click the network icon in the top-right corner.
Click the > icon next to Wired or Wireless connection.
Select (Wired) Settings to access network details.
Go to the IPv4 tab in the settings menu.
Toggle IPv4 Method to Manual.
Enter:
IP Address (e.g., 192.168.1.100)
Netmask (e.g., 255.255.255.0)
Gateway (e.g., 192.168.1.1)
(Optional) Add DNS servers (e.g., 8.8.8.8, 8.8.4.4).
Click Apply to save settings.
Verify the updated IP under the Details tab.
2. CLI Method (Recommended for Servers)
Follow these steps to configure a static IP via the command line:
Step 1: Identify Network Interface
Run the command nmcli d to list available network interfaces and note the interface name (e.g., enp0s3).
Step 2: Edit Netplan Configuration File
Netplan configuration files are stored in /etc/netplan/. Open the correct file for editing using sudo nano /etc/netplan/01-netcfg.yaml.
Step 3: Modify Configuration
Replace enp0s3 with the actual interface name and update the IP, subnet, gateway, and DNS:
network: version: 2 renderer: networkd ethernets: enp0s3: dhcp4: no addresses: - 192.168.1.10/24 routes: - to: default via: 192.168.1.1 nameservers: addresses: [8.8.8.8, 8.8.4.4]
Save and exit the editor.
Step 4: Secure the File
Run sudo chmod 600 /etc/netplan/01-netcfg.yaml to protect the configuration file.
Step 5: Apply the Changes
Use sudo netplan apply to apply the new network settings.
Step 6: Verify the Static IP
Run ip a to check if the new static IP has been assigned to the network interface.
Conclusion
Configuring a static IP in Ubuntu 24.04 ensures a stable network connection. The GUI method is suitable for desktops, while the CLI method is recommended for servers. Proper management prevents IP conflicts and improves network reliability.
0 notes
Text
Konfigurasi IP Address, Subnetting dengan VLSM, dan Subnet Mask
C. Tugas Praktik
Konfigurasi IP Address, Subnetting dengan VLSM, dan Subnet Mask
1. Tujuan
a. Peserta didik diharapkan mampu melakukan konfigurasi IP address di komputer jaringan.
b. Peserta didik diharapkan mampu memahami konsep teknik subnetting dengan metode VLSM.
c. Peserta didik diharapkan dapat memahami teknik penggunaan subnet mask.
2. Landasan teori
a. Variable Length Subnet Mask (VLSM)
VLSM adalah cara melakukan implementasi pengalokasian blok IP. Hal tersebut dilakukan oleh pemilik network (network administrator) dari blok IP yang telah digunakan (bersifat lokal dan tidak dikenal di internet). Terdapat beberapa keuntungan dari subnetting VLSM. Keuntungan-keuntungan tersebut dipaparkan dalam poin-poin berikut.
1) Umumnya, dapat mengurangi lalu lintas jaringan atau reduced network traffic.
2) Dapat dijadikan sarana mengoptimalkan cara kerja jaringan atau optimized network performance.
3) Menyederhanakan pengelolaan yang umumnya disebut simplified management.
4) Untuk alternatif pengembangan jaringan yang jarak geografisnya jauh (facilitated spanning of large geographical distance).
5) Dapat menghemat ruang alamat.
Bentuk lain dari teknik subnetting yakni berupa VLSM. Pada umumnya, subnetting yang digunakan tidak berdasarkan jumlah banyaknya IP dalam satu subnet atau class. Namun, hanya ingin membuat banyak host sehingga jaringan yang banyak dapat dipisah pada subnet ataupun class.
b. Skenario
Pada suatu perkantoran, jaringannya menggunakan IP address class C dengan alamat network 192.168.0.0. Jaringan dibagi menjadi lima buah subnet per divisi. Masing-masing divisi tidak dapat saling terhubung atau berkomunikasi melalui jaringan lokal. Rincian host per divisi diuraikan sebagai berikut.
1) Subnet #1 (Divisi Keuangan) memiliki jumlah 50 host.
2) Subnet #2 (Divisi Tata Usaha) memiliki jumlah 50 host.
3) Subnet #3 (Divisi R&D) memiliki jumlah 50 host.
4) Subnet #4 (Divisi HRD) memiliki jumlah 30 host.
5) Subnet #5 (Divisi Pelayanan) memiliki jumlah 30 host.
Rincian di atas tidak akan tercapai jika menggunakan statik subnetting. Oleh karena itu, jika menggunakan subnetting dengan nilai 255.255.255.192, hanya akan mendapat 4 subnet dengan setiap subnet memiliki 64 host. Namun, untuk kasus ini dibutuhkan 5 subnet. Apabila telah menggunakan subnet dengan nilai 255.255.255.224, kemungkinan dapat dibuat sebanyak 8 subnet. Namun, setiap subnetnya hanya memiliki jumlah host maksimal 32 host, padahal membutuhan 50 host untuk 3 subnet dan 30 host untuk 2 subnet.
C. Perhitungan menggunakan VLSM
1) Diketahui alamat network dengan nilai 192.168.0.0. Alamat tersebut masuk ke kelompok IP kelas C sehingga subnet mask default-nya yaitu 255.255.255.0.
2) Pertama, tentukan netmask untuk tiga divisi yang jumlah client maksimumnya adalah 50 client atau 50 host. Apabila telah menggunakan teknik subnetting CIDR, dapat menggunakan netmask dengan nilai 255.255.255.192 dengan maksimal host yaitu 62 yang memiliki rincian berikut.
a) Jumlah subnetnya sebagai berikut.
n = 2
n = 22
n = 4
b) Menentukan jumlah host setiap subnet.
Host = 27-2
Host = 26-2
Host = 62 host
1 note
·
View note
Text
/etc/network/interfaces
auto lo
iface lo inet loopback
auto eth0
iface eth0 inet dhcp
auto eth0:1
iface eth0:1 inet static
address 10.10.10.2
netmask 255.255.255.0
0 notes
Text
Add second network interface enp0sX with static IP on Debian
If you need to add a second network interface, say, `enp0s8` and give it a static IP on Debian, follow these steps: 1. Edit the network config file: sudo vi /etc/network/interfaces 2. At the end of the file, after all the other network blocks, add the network block for enp0s8: auto enp0s8 iface enp0s8 inet static address 192.168.56.100 # Replace with your desired IP netmask…
0 notes
Text
does a vpn provide a netmask
🔒🌍✨ Get 3 Months FREE VPN - Secure & Private Internet Access Worldwide! Click Here ✨🌍🔒
does a vpn provide a netmask
VPN netmask explanation
A VPN netmask is a vital component of a Virtual Private Network (VPN) that helps in maintaining the security and privacy of online activities. In simple terms, a netmask is a series of numbers that determine which part of an IP address pertains to the network and which part identifies the specific device on that network. When combined with an IP address, the netmask allows devices to correctly route data packets to their intended destinations.
In the context of VPNs, the netmask plays a crucial role in establishing secure connections by defining which devices are part of the same network and can communicate with each other. By using netmasks, VPNs can create private tunnels within a public network, ensuring that data remains encrypted and secure from unauthorized access.
Understanding how netmasks work can also help users troubleshoot connectivity issues within a VPN. By correctly configuring netmasks on devices, users can prevent data leaks and ensure that their online activities are shielded from prying eyes.
In conclusion, a VPN netmask is a fundamental aspect of VPN technology that facilitates secure communication over public networks. By grasping the concept of netmasks and their significance in VPNs, users can enhance their online privacy and security, making their internet experience more secure and reliable.
Netmask in VPN usage
In VPN (Virtual Private Network) usage, understanding the concept of netmask is crucial for effective network configuration and security. A netmask, also known as a subnet mask, is a binary pattern used to divide an IP address into network and host portions. It determines which portion of the IP address belongs to the network and which portion identifies the specific host on that network.
In the context of VPNs, netmasks play a significant role in defining the scope of the virtual network created by the VPN. When devices connect to a VPN, they are assigned IP addresses within a predefined range, known as the VPN subnet. The netmask associated with this subnet determines the number of available IP addresses and the size of the network.
For example, a common netmask used in VPN configurations is 255.255.255.0, which corresponds to a subnet with 254 usable IP addresses (excluding the network and broadcast addresses). This netmask divides the IP address into the network portion (the first three octets) and the host portion (the last octet).
Properly configuring the netmask ensures that devices within the VPN can communicate with each other securely while restricting access from outside sources. By defining the network boundaries, the netmask helps prevent unauthorized access and potential security breaches.
Additionally, netmasks are essential for routing traffic within the VPN. They determine which devices are part of the same network and can communicate directly with each other without needing to go through additional routing steps.
In summary, netmasks are fundamental components of VPN configurations, defining the scope of the virtual network and facilitating secure communication between devices. Understanding and correctly configuring netmasks are essential for optimizing the performance and security of VPN deployments.
VPN security features
Title: Exploring Essential VPN Security Features for Enhanced Online Privacy
In today's interconnected digital landscape, safeguarding online privacy is paramount. Virtual Private Networks (VPNs) have emerged as indispensable tools for preserving anonymity and security while browsing the internet. However, not all VPNs are created equal, and understanding their security features is crucial for selecting the most effective one. Here, we delve into the fundamental security features that define a reliable VPN service.
Encryption Protocols: Top-tier VPNs employ robust encryption protocols such as AES (Advanced Encryption Standard) with 256-bit keys. This encryption ensures that data transmitted between your device and the VPN server remains unreadable to prying eyes, thwarting hackers and malicious actors.
No-Logs Policy: A reputable VPN provider adheres to a strict no-logs policy, meaning they do not retain any records of users' online activities. This commitment to privacy ensures that even if compelled by authorities, the VPN cannot disclose users' browsing history, enhancing anonymity.
Kill Switch: The kill switch feature is a failsafe mechanism that automatically disconnects your device from the internet if the VPN connection drops unexpectedly. This prevents data leakage and ensures that your IP address remains concealed at all times.
Multi-Platform Support: A versatile VPN should offer compatibility across various devices and operating systems, including Windows, macOS, Android, and iOS. This ensures seamless protection for all your devices, whether at home or on the go.
DNS Leak Protection: DNS (Domain Name System) leaks can inadvertently expose users' browsing activities to third parties. A reliable VPN includes built-in DNS leak protection mechanisms to prevent such breaches, ensuring comprehensive privacy safeguards.
By prioritizing these essential security features, users can fortify their online defenses and enjoy uninterrupted access to the internet without compromising privacy. Whether for personal or professional use, investing in a reputable VPN with robust security measures is an invaluable step towards safeguarding digital privacy in an increasingly interconnected world.
VPN encryption technology
VPN encryption technology plays a crucial role in ensuring online privacy and security for internet users. VPN, which stands for Virtual Private Network, creates a secure and encrypted connection between the user's device and the internet. This encryption technology helps in protecting sensitive data, such as personal information, passwords, and browsing history, from cyber threats like hackers, identity thieves, and government surveillance.
There are several encryption protocols used by VPN services to safeguard user data. Some of the commonly used encryption protocols include OpenVPN, IPSec, L2TP/IPSec, and SSTP. These protocols use complex algorithms to encrypt data packets, making it nearly impossible for unauthorized parties to intercept and decipher the information being transmitted.
The level of encryption provided by VPN services varies, with some using military-grade encryption methods to ensure maximum security. AES (Advanced Encryption Standard) with 256-bit keys is considered one of the most secure encryption standards used by VPN providers. This robust encryption technology helps in creating a secure tunnel through which user data travels, keeping it safe from prying eyes.
Using a VPN with strong encryption technology is particularly important when accessing public Wi-Fi networks, as these networks are vulnerable to cyber attacks. By encrypting data before it is transmitted over the network, VPNs help in safeguarding sensitive information and maintaining online privacy.
In conclusion, VPN encryption technology is a fundamental aspect of maintaining online security and privacy in today's digital age. By utilizing encryption protocols and standards, VPN services offer users a secure way to browse the internet, access geo-blocked content, and communicate online without compromising their sensitive data.
VPN privacy protection
VPN, which stands for Virtual Private Network, plays a crucial role in safeguarding your online privacy and data security. In today's digital age, where cyber threats are rampant, utilizing a VPN can provide you with an additional layer of protection.
When you connect to a VPN server, your internet traffic is encrypted, making it difficult for hackers, governments, or ISPs to intercept and monitor your online activities. This encryption ensures that your data remains private and secure, especially when using public Wi-Fi networks where your information is vulnerable to cyber attacks.
Moreover, VPNs mask your IP address, replacing it with one from the VPN server location. This feature not only helps in protecting your anonymity but also allows you to bypass geo-restrictions, giving you access to region-locked content and services.
Another significant advantage of using a VPN for privacy protection is the ability to prevent online tracking. With the increasing prevalence of tracking technologies, browsing the internet without any form of protection can lead to the invasion of your privacy. VPNs help in shielding your online behavior from trackers, ads, and other prying eyes, thus ensuring a more private browsing experience.
In conclusion, VPNs are powerful tools that offer comprehensive privacy protection by encrypting your data, hiding your IP address, and preventing online tracking. By incorporating a VPN into your online routine, you can take control of your digital privacy and enjoy a more secure and unrestricted online experience.
0 notes
Text
Thanks for the fun distraction from my work @blairelythere
Last song: The Pretty Reckless - And So It Went. No particular reason, just came up as the most recent song in my playlist during my commute.
Favorite color: Orange(specifically the color of worked copper) and Navy Blue
Last movie/TV show: The new Scott Pilgrim animated series, currently 3/4 of the way through and really enjoying it
Sweet/spicy/savory?: Salty, I have a sodium deficiency 🙃 Sweet and savory are both good but I'd put savory ahead of sweet. Spicy and I don't get along.
Relationship status: Poly and casually dating someone
Last thing I googled: CIDR to netmask chart; I'm at work atm
Current obsession: I've got two atm Steam engines: marine, rail, and stationary. I always have a lingering fascination with large mechanical objects of all types, but this grew out of a previous obsession with the different types of diesel locomotive drive systems. Sailing ships: the historical age of sail hasn't been my thing(yet) but it's always at the periphery of my interests. Currently though I'm watching two series about sailing ships getting built from scratch or seriously rebuilt. And a small handful of minor fixations: Factorio: Space Age expansion(the devblog is back baby), Mechanicus(the game specifically), assorted DnD blorbos(both mine and other's), Blood on the Clocktower, trying to learn blender(again)
Tag People: @overgrownmoon @nosongunsung11 @dogliker73 @horsehound @leaflovingal
Nine people I'd like to get to know better
Tagged by @meghawhopp <33
Last song: Down by the River by Borislav Slavov from the Baldur’s Gate 3 Soundtrack (or more specifically the cover of Down by the River by Nerissa Ravencroft)
Favorite color: Blue and purple!
Last movie/TV show: Seinfeld, I’m currently on season four!
Sweet/spicy/savory?: I have a huge sweet tooth, so sweet things
Relationship status: Single
Last thing I googled: I searched up the show “Arthur” because I was trying to find that one meme where Buster was like “You really think someone would do that, just go on the internet and spread lies?”
Current obsession: Fragaria memories and tears of themis mostly^^
Tag Nine People: @kyaruun @xinieeee @deadmansbistro @florapot @hunita812 @scuffle-with-spirals @rexonalapis @maxellera @manicpixiedoomedgirl
8K notes
·
View notes
Photo

Custom crochet mask. - link in bio - Your crochet wishes fulfills @knitjolanta 🧚♀️ Design and beadwork @rasaviljewelry #balaclava #balaclavamask #mask . . . . . . . #masks #artmask #crochetmask #netmask #festivalmask #wearableart #wearmask #fullheadmask #fullfacemasks #fashionforbankrobbers #falseface #iseejewellery #couturefashion #hatterist #facecover #maskcrochet https://www.instagram.com/p/Ccsn3pyNdM3/?igshid=NGJjMDIxMWI=
#balaclava#balaclavamask#mask#masks#artmask#crochetmask#netmask#festivalmask#wearableart#wearmask#fullheadmask#fullfacemasks#fashionforbankrobbers#falseface#iseejewellery#couturefashion#hatterist#facecover#maskcrochet
1 note
·
View note
Text
Módulos auxiliares do Metasploit com o Parrot Security
Novo post em https://udigrudroid.wordpress.com Módulos auxiliares do Metasploit com o Parrot Security Continuando a minha aventura com o Metasploit framework no ParrotSec começada no post anterior.

Continuando a minha aventura com o ParrotSec começada no post anterior – e permanecendo com a utilização do Metasploit framework por ser minha ferramenta predileta para testes de penetração – neste post estou compartilhando as minhas anotações sobre o uso dos módulos auxiliares (auxiliary modules) da referida ferramenta. Continue lendo!
View On WordPress
#Ataque pela internet(WAN)#Auxiliary Modules#DHCP falso#DNS falso#DNS malicioso#DNS Spoofing#DNSSERVER#envenenamento por ARP#Evitar os Ataques MitM#FTP falso#IEEE_802.1X#LHOST#LPORT#Módulos auxiliares do Metasploit#Metasploit Framework#NETMASK#Parrot Security#ParrotSec#port forwarding#SRVHOST#TARGETACTION#TARGETDOMAIN#TARGETHOST#Wireshark
0 notes
Text
subnet cheat cheat
⭐ ⏩⏩⏩️ DOWNLOAD MOD - LINK 🔥🔥🔥🔥🔥 Subnet Cheat Sheet – A Tutorial and Thorough Guide. Here is the vivid picture of subnets, subnet mask & step-by-step process of subnetting. Word 'subnet' stands. Get your free IPv4 subnet cheat sheet Do you know how many addresses are available in this subnet? Stay cool and get your cheat sheet today! IPv4 Subnet Mask Cheat Sheet. Addresses Netmask Amount of a Class C. /31 2 1/ /30 4 1/64 /29 8 1/ Subnet Mask Cheat Sheet · See also RFC · Addresses Hosts Netmask Amount of a Class C · Guide to sub-class C blocks · /25 -- 2 Subnets -- Hosts/Subnet / para calcular mascaras de las subredes mas rapido cidr subnet mask of addresses wildcard 16 32 64 Ipv4 subnets cheat sheet v1. Te invitamos a conocer los servicios y soluciones (Centro de Datos, Nube, IPTV, Telefonía, Marketing, IoT y Ciberseguridad) que nos encanta brindar…. Subnet Mask Cheat Sheet. Soporte y Tecnología > Internet & Redes. Subnet Mask Cheat Sheet. Páginas: (1/1). Voodoo: Les dejo un index que les servirá de.
7 notes
·
View notes
Text
Vulnerability in 'netmask' npm Package Affects 280,000 Projects

Source: https://www.securityweek.com/vulnerability-netmask-npm-package-affects-280000-projects
More info: https://sick.codes/universal-netmask-npm-package-used-by-270000-projects-vulnerable-to-octal-input-data-server-side-request-forgery-remote-file-inclusion-local-file-inclusion-and-more-cve-2021-28918/
3 notes
·
View notes
Text
Drivers Telsey Network & Wireless Cards

The easiest fix to your concern if you don't want to spend a lot, is to get an external USB wireless network dongle and use that instead of the 1x1 card you have inbuilt on your computer, Alternatively, you can replace the wireless card as well, refer to phone support to get the same done, depending on your warranty with HP. How ASUS Eee PC X101CH Monitor Driver Utility updates your Windows 8 64 bit computers ASUS. Connect a printer to your driver telsey 802 11g wireless usb without. Realtek AC'97 Audio Driver. Atheros AR5002G Wireless Network Adapter Driver: WLANAtheros8.0.0.90.zip. The #1 Driver Update utility.
Drivers Telsey Network & Wireless Cards Login
Drivers Telsey Network & Wireless Cards Download
5, 2018 /PRNewswire/ -. The 'The 2G, 3G, 4G & 5G Wireless Network Infrastructure Market: 2017-2030 - with an Evaluation of Wi-Fi and WiMAX' report from SNS Research has been added to. Setup Static IP from CLI. Plug a USB-to-Serial Console Cable into the Console Port. Locate and plug the RJ45 end into the Console port on the appliance. Plug the USB end into a laptop or desktop computer. If your computer does not have the software drivers installed for the usb-to-serial cable please visit the following page:- Appliance USB to Serial Cable- you must have the drivers.
Dana Telsey, CEO of Telsey Advisory Group (TAG), has been elected to the International Council of Shopping Center’s Board of Trustees for an initial three year term. Telsey was appointed as one of nine new trustees on Monday, May 21, 2018.
Skip to end of metadataGo to start of metadata
Drivers Telsey Network & Wireless Cards Login
Setup Static IP from CLI

Plug a USB-to-Serial Console Cable into the Console Port
Drivers Telsey Network & Wireless Cards Download
Locate and plug the RJ45 end into the Console port on the appliance.
Plug the USB end into a laptop or desktop computer.
If your computer does not have the software drivers installed for the usb-to-serial cable please visit the following page: -> Appliance USB to Serial Cable -> you must have the drivers installed otherwise your computer will not be able to communicate with the appliance through the console cable.
From the computer determine which USB port the console cable is plugged into.
For Windows: open up device manager and expand the ports area, see below example:
in the above example, COM3 is the port.
From the computer, open up a terminal program and connect to the above detected COM port.
use the following connection settings:
Speed: 115200 n8 1
Hardware/Software flow control: disabled
For example, on a Windows computer, you can use Putty (free downloadable program) and connect as seen below (with your detected port in place of COM3):
The terminal screen should appear with login prompt. The username and password for root login will be mentioned on Quick Start Guide included in the box. By default login username is root and password is sangoma . Use nano editor to change the default network configuration file. The command is nano /etc/sysconfig/network-scripts/ifcfg-eth0
Change following parameters to set the IP , Subnet Mask and Default Gateway Address Do not change other parameters if there are any. BOOTPROTO=static ONBOOT=yes IPADDR= <Your IP Address> GATEWAY= <Your Default Gateway Address> NETMASK= <Your Network Subnet Mask> Press Ctrl-O to save the configuration file. Press Enter to complete the save and then Ctrl-X to exit the editor. Run following command to apply your network settings. service network restart Connect your network cable to default LAN port of your device. The link should come up. You should be able to ping your default gateway address and that verifies your successful local network connection. So far , you have setup your appliance on local network only. You need internet connection to Activate this deployment.
You need to set your Domain Name Servers in the following file. This is important to bring your system on Internet. nano /etc/resolv.conf You need to add nameserver <Your Name Server> line for each DNS server entry. Press Ctrl-O to save the configuration file. Press Enter to complete the save and then Ctrl-X to exit the editor.
Check internet connectivity using ping portal.sangoma.com If you receive successful ping response . You are good to continue your further setup using web browser to Activate the deployment.
1 note
·
View note
Text
3 ore, ma alla fine sono riuscito a far andare il modem in modalità PPPoE Passthrough, e NTP non ha rotto più le palle.
ppp0: flags=4305<UP,POINTOPOINT,RUNNING,NOARP,MULTICAST> mtu 1492
inet 84.X.X.X netmask 255.255.255.255 destination 62.X.X.X
ppp txqueuelen 3 (Point-to-Point Protocol)
RX packets 108499 bytes 28649873 (27.3 MiB)
RX errors 0 dropped 0 overruns 0 frame 0
TX packets 81359 bytes 65778250 (62.7 MiB)
TX errors 0 dropped 0 overruns 0 carrier 0 collisions 0
ntp_gettime() returns code 0 (OK)
time e274160c.508d4bac Sat, May 23 2020 23:37:16.314, (.314656345),
maximum error 36427 us, estimated error 1 us, TAI offset 0
ntp_adjtime() returns code 0 (OK)
modes 0x0 (),
offset 0.000 us, frequency -25.207 ppm, interval 1 s,
maximum error 36427 us, estimated error 1 us,
status 0x2001 (PLL,NANO),
time constant 6, precision 0.001 us, tolerance 500 ppm,
Speriamo che il provider non si incazzi.

#avevo provato a fare sta' cosa a luglio 2019#fallimento completo#poi ho sbattuto la testa sulla tazza del cesso e...#vabbè sapete già la storia di Emmett Brown
15 notes
·
View notes