#Netgear Nighthawk Extender Setup
Explore tagged Tumblr posts
Visit Tumblr Blog
Explore Tumblr blogs with no restrictions, modern design and the best experience.
Last Seen Tumblr Blogs


Fun Fact
Mobile Tumblr US users spend an average of 4.04 minutes per session on the app.
Text
The Best 4G Router for Your Car: Stay Connected on the Road
Description: Discover the best 4G router for your car or outdoor adventures. Stay connected with fast, reliable internet wherever you go. Perfect for road trips, camping, or remote work.
Introduction In today’s fast-paced world, staying connected is no longer a luxury—it’s a necessity. Whether you’re on a road trip, camping in the wilderness, or working remotely from your vehicle, having a reliable internet connection is crucial. This is where the best 4G router for cars and outdoor use comes into play. In this article, we’ll explore the top 4G routers designed for vehicles and outdoor environments, ensuring you stay connected no matter where your journey takes you.
Why You Need a 4G Router for Your Car
Seamless Connectivity on the Go A 4G router for your car ensures you have a stable internet connection while traveling. Whether you’re streaming music, navigating with GPS, or video calling, a reliable router keeps you connected.
Perfect for Remote Work With the rise of remote work, many professionals are turning their cars into mobile offices. A 4G router allows you to work efficiently from anywhere, even in areas with weak Wi-Fi signals.
Ideal for Outdoor Adventures Camping, hiking, or RV trips often take you to remote locations with limited connectivity. A 4G router ensures you stay connected for emergencies, navigation, or entertainment.
Key Features to Look for in the Best 4G Router When choosing a 4G router for your car or outdoor use, consider the following features:
High-Speed Connectivity: Look for routers that support 4G LTE speeds for fast and reliable internet.
Portability: Compact and lightweight designs are ideal for travel.
Battery Life: Long-lasting batteries ensure uninterrupted connectivity.
Durability: Outdoor routers should be weather-resistant and rugged.
Easy Setup: User-friendly interfaces and quick installation are essential.
Top 4G Routers for Cars and Outdoor Use
1. Netgear Nighthawk M1 Mobile Router
The Netgear Nighthawk M1 is widely regarded as one of the best 4G routers for cars and outdoor use. It offers blazing-fast 4G LTE speeds, supports up to 20 devices, and features a long-lasting battery. Its compact design makes it perfect for travel, and the intuitive interface ensures easy setup.
Key Features:
Download speeds up to 1Gbps
5040mAh battery with up to 24 hours of use
Dual-band Wi-Fi for seamless connectivity
2. Huawei E5787 Mobile Wi-Fi Router
The Huawei E5787 is another excellent choice for car and outdoor use. It supports 4G LTE Cat6 speeds, ensuring fast and stable internet. The router is compact, lightweight, and features a user-friendly touchscreen display.
Key Features:
Download speeds up to 300Mbps
3000mAh battery with up to 12 hours of use
Supports up to 10 devices simultaneously
3. TP-Link M7350 4G LTE Mobile Router
The TP-Link M7350 is a budget-friendly option that doesn’t compromise on performance. It offers reliable 4G LTE connectivity, supports up to 10 devices, and features a compact design.
Key Features:
Download speeds up to 150Mbps
2550mAh battery with up to 8 hours of use
Easy-to-use interface
4. Alcatel Linkzone MW41NF 4G LTE Mobile Router
The Alcatel Linkzone MW41NF is a lightweight and portable 4G router ideal for car and outdoor use. It offers reliable connectivity and supports up to 15 devices.
Key Features:
Download speeds up to 150Mbps
2000mAh battery with up to 6 hours of use
Compact and travel-friendly design
How to Choose the Best 4G Router for Your Needs
Assess Your Usage: Determine how many devices you’ll connect and the type of activities you’ll be doing (streaming, gaming, remote work, etc.).
Check Coverage: Ensure the router supports the frequency bands used by your mobile carrier.
Consider Battery Life: If you’ll be using the router for extended periods, opt for a model with a long-lasting battery.
Evaluate Portability: Choose a compact and lightweight router for easy travel.
Tips for Maximizing Your 4G Router’s Performance
Position the Router Properly: Place the router in a central location for optimal signal strength.
Use an External Antenna: For areas with weak signals, consider using an external antenna to boost connectivity.
Monitor Data Usage: Keep track of your data consumption to avoid overage charges.
Secure Your Network: Use strong passwords and encryption to protect your connection from unauthorized access.
Conclusion Investing in the best 4G router for your car or outdoor adventures is a game-changer. Whether you’re working remotely, streaming entertainment, or staying connected during emergencies, a reliable 4G router ensures you’re never left without internet. The Netgear Nighthawk M1, Huawei E5787, TP-Link M7350, and Alcatel Linkzone MW41NF are all excellent options to consider. Choose the one that best fits your needs and enjoy seamless connectivity wherever your journey takes you.
1 note
·
View note
Text
0 notes
Text
Can’t Find New Extender Setup Button After Connecting To Netgear_Ext? -
Netgear WiFi range extender can be set up and installed using various different ways. However, the most used way to install a Netgear extender is the manual method. Whether you want to perform the Netgear EX3700 setup or the latest Nighthawk model setup, the manual method requires you to connect to Netgear_Ext SSID and access mywifiext.net.
Once you have logged in to mywifiext, you will see the ‘New Extender Setup’ button. That’s where a majority of users often stuck! If you are also not able to find the New Extender Setup button, we have got your back. This post is all about to get rid of this issue. Scroll down to read more.
For More Info - https://streamingwords.com/cant-find-new-extender-setup-button-after-connecting-to-netgear_ext/
0 notes
Text
does netgear nighthawk support vpn poe
🔒🌍✨ Get 3 Months FREE VPN - Secure & Private Internet Access Worldwide! Click Here ✨🌍🔒
does netgear nighthawk support vpn poe
Netgear Nighthawk VPN compatibility
Netgear Nighthawk routers are known for their high-performance features and advanced capabilities, making them a popular choice among consumers looking for reliable networking solutions. One important feature that many users look for in a router is VPN compatibility.
Fortunately, most Netgear Nighthawk routers come with built-in support for VPN connections. This means that users can easily set up a secure and encrypted connection to a VPN server for protecting their online privacy and security. Whether you want to access geo-restricted content, secure your online activities from prying eyes, or simply enhance your online security, having VPN compatibility on your Netgear Nighthawk router can be a valuable asset.
Setting up a VPN on a Netgear Nighthawk router is typically straightforward, thanks to the user-friendly interface and detailed setup instructions provided by Netgear. Users can choose from various VPN protocols, such as OpenVPN and PPTP, depending on their specific needs and preferences.
By using a VPN on your Netgear Nighthawk router, you can ensure that all your devices connected to the network are protected by the VPN encryption, offering a comprehensive security solution for your entire home network. Additionally, VPN compatibility on the Netgear Nighthawk routers allows for seamless integration with various VPN services, giving users the flexibility to choose the VPN provider that best suits their requirements.
In conclusion, Netgear Nighthawk routers offer excellent VPN compatibility, making them a great choice for users who prioritize online security and privacy. With easy setup processes and robust security features, Netgear Nighthawk routers provide a reliable and secure networking solution for homes and businesses alike.
Netgear Nighthawk PoE support
Title: Understanding Netgear Nighthawk PoE Support: Powering Your Network with Ease
In the realm of networking hardware, Netgear Nighthawk routers stand out for their robust performance and innovative features. One such feature that elevates the Nighthawk series is Power over Ethernet (PoE) support. PoE simplifies the deployment of network devices by allowing both data and power to be transmitted over a single Ethernet cable. Let's delve deeper into the significance of PoE support in Netgear Nighthawk routers.
PoE support in Netgear Nighthawk routers enables users to connect various devices, such as wireless access points, IP cameras, and VoIP phones, without the need for separate power sources. This not only streamlines installation but also reduces clutter and eliminates the hassle of managing multiple cables and power adapters.
The versatility of PoE support extends to outdoor installations, where power outlets may be scarce or impractical. With compatible outdoor Nighthawk routers and PoE-capable devices, users can extend their network coverage to outdoor areas effortlessly, enhancing security and connectivity without the need for complex wiring setups.
Moreover, Netgear Nighthawk routers with PoE support often feature advanced management capabilities, allowing users to monitor and control connected PoE devices remotely. This facilitates efficient troubleshooting, configuration adjustments, and power management, thereby optimizing network performance and minimizing downtime.
For businesses, PoE support in Nighthawk routers translates to cost savings and scalability. By leveraging existing Ethernet infrastructure to power network devices, organizations can avoid the expenses associated with installing additional power outlets and running new power lines, especially in large or multi-story buildings.
In conclusion, Netgear Nighthawk routers with PoE support empower users with a convenient and efficient networking solution. Whether for home or business use, the integration of PoE technology enhances flexibility, reliability, and cost-effectiveness, making it a valuable feature for modern networking environments.
Netgear Nighthawk VPN configuration
Configuring a VPN (Virtual Private Network) on your Netgear Nighthawk router can enhance your online privacy and security. With VPN support, you can encrypt your internet connection and route it through a remote server, shielding your browsing activity from prying eyes and potential threats. Here's a step-by-step guide to configuring a VPN on your Netgear Nighthawk router:
Choose a VPN Provider: First, select a reputable VPN provider that offers support for router configurations. Popular options include ExpressVPN, NordVPN, and IPVanish.
Subscribe to the Service: Sign up for a subscription plan with your chosen VPN provider. Follow their instructions to create an account and make the necessary payments.
Access Your Router's Settings: Open a web browser on a device connected to your Nighthawk router and enter the router's IP address in the address bar. Log in using your router's admin credentials.
Navigate to VPN Settings: Once logged in, locate the VPN settings within your router's dashboard. This may be found under "Advanced" or "Security" settings, depending on your router model.
Enter VPN Credentials: Input the VPN server address, username, and password provided by your VPN provider. These details are usually found in your VPN account dashboard or confirmation email.
Choose VPN Protocol: Select the VPN protocol recommended by your provider. Common options include OpenVPN, PPTP, and L2TP/IPsec.
Apply Settings: Save your changes and apply the VPN settings. Your router may need to restart to activate the VPN connection.
Test Your Connection: Once the router has restarted, test your VPN connection to ensure it's working correctly. Visit a website like whatismyip.com to confirm that your IP address is now masked by the VPN server's address.
By following these steps, you can configure a VPN on your Netgear Nighthawk router to safeguard your online activities and enjoy a more secure internet browsing experience.
Netgear Nighthawk PoE setup
Title: Simplifying Power over Ethernet (PoE) Setup with Netgear Nighthawk
Power over Ethernet (PoE) is a revolutionary technology that streamlines the deployment of network devices by combining power and data transmission over a single Ethernet cable. Netgear Nighthawk routers incorporate PoE functionality, offering a seamless solution for powering various network peripherals such as IP cameras, access points, and VoIP phones.
Setting up PoE with Netgear Nighthawk routers is a straightforward process. Here's a step-by-step guide to get you started:
Check Router Compatibility: Ensure that your Netgear Nighthawk router supports PoE functionality. Most modern Nighthawk models are equipped with PoE ports designed to deliver both power and data.
Connect PoE Devices: Begin by connecting your PoE-compatible devices, such as IP cameras or access points, to the PoE ports on the Nighthawk router using Ethernet cables. These ports are typically labeled with "PoE" or "LAN/PoE."
Power On: Once the devices are connected, power on your Netgear Nighthawk router. It will automatically detect the PoE devices and provide power to them through the Ethernet cables.
Configure Settings (Optional): Depending on your network requirements, you may need to configure specific settings for the PoE devices through the router's web interface. This includes assigning IP addresses, setting up security protocols, and adjusting power allocation.
Monitor Performance: After setup, monitor the performance of your PoE devices using the Netgear Nighthawk router's management software or mobile app. You can view connected devices, check power usage, and troubleshoot any issues that may arise.
By leveraging the power of PoE technology with Netgear Nighthawk routers, users can enjoy a simplified and efficient network setup. Whether for home or business use, this integrated solution offers flexibility, scalability, and convenience, making it an ideal choice for modern networking needs.
Netgear Nighthawk VPN PoE features
Title: Unlocking Secure Connectivity: Exploring Netgear Nighthawk VPN PoE Features
In today's digital landscape, safeguarding sensitive data and ensuring secure connectivity are paramount concerns for businesses and individuals alike. Netgear, a leading provider of networking solutions, addresses these concerns with its innovative Netgear Nighthawk VPN PoE (Power over Ethernet) router. This cutting-edge device combines robust VPN capabilities with Power over Ethernet functionality, offering a comprehensive solution for both networking and security needs.
One of the standout features of the Netgear Nighthawk VPN PoE router is its integrated VPN (Virtual Private Network) support. VPNs create a secure, encrypted connection over the internet, shielding data from prying eyes and potential threats. With this router, users can establish VPN tunnels to remote locations, enabling secure communication and data transfer between offices, remote workers, or branch locations. This ensures that sensitive information remains confidential and protected, even when accessed over unsecured networks.
Additionally, the Power over Ethernet functionality of the Nighthawk VPN PoE router adds another layer of convenience and flexibility to network deployments. PoE technology allows both power and data to be transmitted over a single Ethernet cable, eliminating the need for separate power sources for connected devices such as IP cameras, VoIP phones, or access points. This simplifies installation and reduces clutter, making it ideal for both home and business environments.
Moreover, the Netgear Nighthawk VPN PoE router boasts advanced security features such as firewall protection, intrusion detection, and content filtering, further enhancing network security and integrity. With its intuitive user interface and robust management capabilities, configuring and managing VPN connections and network settings is streamlined and hassle-free.
In conclusion, the Netgear Nighthawk VPN PoE router is a versatile and reliable solution for organizations and individuals seeking to enhance their network security and connectivity. With its combination of VPN support, Power over Ethernet functionality, and advanced security features, it provides peace of mind in an increasingly connected world.
0 notes
Text
n a few easy steps – you can power cycle your Netgear Nighthawk router. In this article – you will find the easy instructions that will help you execute and complete the power cycling process with ease. But, before we provide you the instructions – let us make you familiar with the fact – that power cycling in simple words means restarting. And, this process is helpful giving the router a fresh start – and fix major issues with it like – Netgear Nighthawk setup – login, firmware update failure, and more.
0 notes
Text
WIFI
WiFi Repeaters: How WiFi Routers Improve Signal Strength 2023
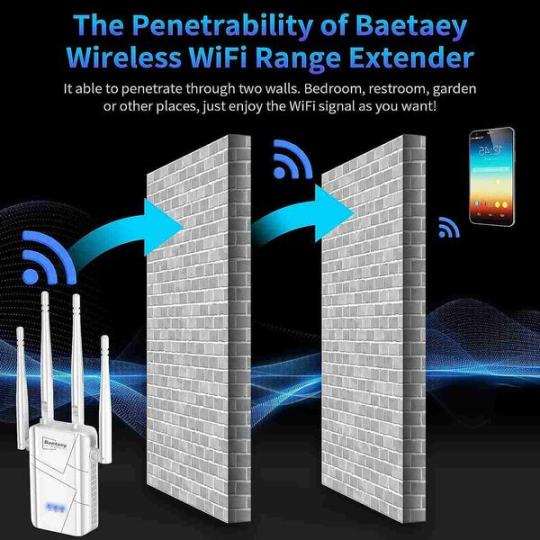
WiFi is the answer to an escalating need for fast, reliable internet connections. The digital world has surrounded us with many gadgets that need continual communication. This is where wifi repeater help. These gadgets, often called WiFi extenders or boosters, amplify your WiFi signal and provide internet access to locations where your router cannot.
The concept of WiFi repeaters isn’t new, but its demand and application have grown exponentially in recent years. As we continue to add more wireless devices to our arsenal, the need for a strong, uninterrupted internet signal becomes more important. Therefore, understanding the role of WiFi repeaters holds the key to unlocking an efficient and effective wireless network.
Understanding how routers work as wifi repeater
The primary function of a router is to distribute the internet signal from your modem to your devices. However, routers can also double as WiFi repeaters or relayers. Your wireless signal can be strengthened by repeating it with routers.
A router repeater wirelessly connects to your network and rebroadcasts the signal. It amplifies your WiFi signal as a relay or bridge. This is especially helpful in larger homes or offices where the router’s signal may not reach every corner.

Benefits of using routers as WiFi relayers
There are a multitude of benefits to using routers as WiFi relays. Firstly, it provides better WiFi coverage. By extending the range of your WiFi signal, you can enjoy a strong internet connection even in the farthest corners of your home or office.
Second, routers may be cost-effective repeaters. Instead of buying a new router, use an old one as a repeater. Reusing and recycling equipment saves money.
Improved signal strength may boost internet speeds. While the repeater may be slower than the router, it will be far quicker than no connectivity.
A look at the best WiFi range extenders of 2015
In 2015, remarkable WiFi range extenders were released. The performance, functionality, and price of these gadgets were praised. The best WiFi range extenders of 2015 are below.
Due to its range and speed, the Opticover Wireless Range Extender was popular. It was easy to set up and compatible with most routers. The MSRM US754 WiFi Extender was another top-rated choice, known for its stable connection and user-friendly setup process.

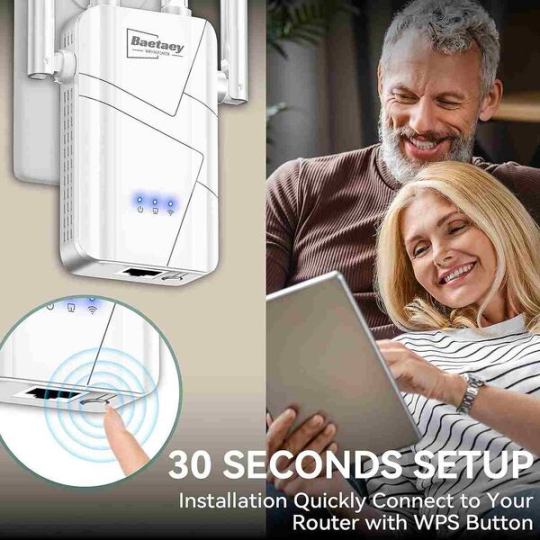
How to set up your WiFi repeater
The procedure for setting up your WiFi repeater couldn’t be easier. Finding an appropriate spot for the repeater is the first step. Ideally, it would be midway between your router and the area you wish to cover.
The repeater must be connected to the system next. A web browser can usually access the repeater’s user interface and do these activities. In this area, provide the network’s SSID, encryption type, and password.
Differentiating between a WiFi booster, extender, and repeater
While the terms WiFi booster, extender, and repeater are often used interchangeably, there are slight differences between them. There are three devices available, each with its own method for extending the range and improving the strength of your WiFi signal.
An existing WiFi router may have its signal strength increased by using a WiFi booster. However, a WiFi extender is able to rebroadcast the WiFi signal from your router. WiFi repeaters are similar to extenders in that they both boost the signal and establish a new network. You’ll need to switch networks as you go, although the signal will be stronger at greater distances.
The Best WiFi Extenders of 2015: A Comparison
Comparing the best WiFi extenders of 2015, it’s clear that each device had its own unique strengths. The Opticover Wireless Range Extender offered excellent range and speed, while the MSRM US754 WiFi Extender was praised for its stable connection and easy setup.
The Netgear Nighthawk EX7000 Wi-Fi Range Extender stood out with its impressive speed and advanced features, although it was also the most expensive option. Ultimately, the best WiFi extender for you depends on your specific needs and budget.
WiFi Repeaters: How WiFi Routers Improve Signal Strength 2023
0 notes
Text
Ultimate Guide For Netgear Nighthawk X4 ac 2200 Setup Issue
Netgear Nighthawk X4 ac 2200 Setup is quite an easy and straightforward task. In this, you will get a step-by-step guide to do the same. If you are unable to find how to Netgear Nighthawk X4 ac 2200 Setup. Then you are at the right place, here you will learn how to do so. Netgear Nighthawk X4 ac 2200 is a WiFi range extender, that expands your existing WiFi range with speeds up to 2200 Mbps.
It also provides the most steady WiFi and the most instantaneous internet connection. But many users don’t know how to Netgear Nighthawk X4 ac 2200 Setup. And some of them find doing this difficult, especially, those who are non-technical. If you are one of them, then do not get upset. Below is the guide for Netgear Nighthawk X4 ac 2200 Setup. Simply go through the following instructions.
Step-by-Step Guide for Netgear Nighthawk X4 ac 2200 Setup
Netgear Nighthawk X4 ac 2200 Setup is not a complicated task as you think, it is more straightforward than you think. In this, you will get to know how to do this. With this, extender device, you can develop a better vigorous WiFi network at home. This is the most simple and effective way to extend the WiFi range of the router.
There are three methods through which you can easily Netgear Nighthawk X4 ac 2200 Setup. The first is through Netgear Installation Assistance, the second is through the WPS button, and the third is through Fastlane Technology.
Steps for Netgear the Nighthawk X4 ac 2200 Setup Via Installation Assistance
Doing this through the Netgear Installation Through is not a complicated task, it is simpler than you think. Follow the below instruction to do the same via the installation assistance.
Turn on your Nighthawk X4 ac 2200 by connecting it to the power outlet.
After this, place your wireless router near the extender.
Now you need to plug your Netgear extender into a power outlet.
Then wait for some seconds, until the extender LED light turns green.
Now you have to attach the extender to the router and launch the web browser in your system.
And then enter www.mywifiext.net in the search field, and you will see Netgear installation assistant on the screen.
After this, you have to follow the on-screen instructions and attach the Netgear extender to the existing network.
Now place your extender in the most suitable location.
If still, the connection is poor, then move the extender closer to your router, and try again. Do this, until you see the link status LED light turn white.
Once you have located the most acceptable location, then connect the other device to the extender.
Techniques for the Netgear Nighthawk X4 ac 2200 Setup through the WPS button
If you don’t want to Netgear Nighthawk X4 ac 2200 Setup through the Netgear Installation Assistance. Then here is another method to do the same, that is through the WPS button. To do this, you just need to read and follow all steps.
Turn on the WiFi extender, and place your extender close to the router in the same place.
Then plug in your Netgear WiFi extender into the power source, and wait until the power LED light on the extender turns green.
Now press the WPS on the extender, located on the rear or back side of it.
The white LED light on the Netgear Nighthawk X4 ac 2200 indicates a good connection between the router and the extender.
Now you can move your Netgear extender to a new location.
Try to place it in the location, where you have poor or weak WiFi coverage.
Ways for the Netgear Nighthawk X4 ac 2200 Setup Via FastLane Technology
Setup through FastLane Technology, allows you to enjoy maximum WiFi performance. Here are the steps to do the setup via the FastLane technology.
Firstly, connect your router to the Netgear Nighthawk X4 ac 2200.
After this, use any internet browser, and make sure that you use the latest version of your preferred browser.
After this, in the search field of the web browser, enter mywifiext.net.
Then the login page of the extender will appear, in this fill in your username and password and click on the login button.
Now when the Netgear Genie page appears, click on “Do More” and then on “FastLane.”
Then there are two options for users. The first option is, the device is connected to the extender at 2.4GHz.
And the second is, it is connected to the extender at 5 GHz, and the extender is connected to the router at 2.4 GHz.
You can choose according to your preference. And then click on the button to save the changes you made.
Binding Up
It is quite frustrating when you are unable to set up your Netgear Nighthawk X4 ac 2200. Follow the above instructions for the Netgear Nighthawk X4 ac 2200 Setup. And hopefully, this above guide will help you with the same. You just need to follow the above easy and detailed instructions as given to do the same.
Doing setups of the Netgear Nighthawk X4 ac 2200 extender is not a complicated task, it is simpler than you think. If you don’t know how to do this, then simply obey the above instructions. So, before seeking assistance from someone else, try to go through the techniques, that are given above for Netgear Nighthawk X4 ac 2200 Setup.
1 note
·
View note
Text
Netgear Access Point Setup : Find the Way

Are you unable to find How To Set Up a Netgear Wireless Router as an Access Point? Then don’t worry, you are at the right place. Here you will get to know how to do the same.Netgear WiFi extender is a wireless repeater, which is placed between the base router and the location where you want better wireless coverage.
It also expands the WiFi network, by connecting to your existing network and improving coverage. And it repeats the wireless signal from your router to expand its coverage. Netgear WiFi extender is also known as a WiFi booster. Performing Netgear Access Point Setup is not a challenging task, it is simpler than you think. If you are unable to do this on your own, then here are some simple steps to do the same. Simply go through the following guide for Netgear Access Point Setup.
Methods for How To Set Up a Netgear Wireless Router as an Access Point
If you ask yourself, what to do with unused wireless network devices, then you may need to learn How To Set Up a Netgear Wireless Router as an Access Point. Using an old router as an access point helps to extend the range of the network and eliminate those dead spots. If you don’t know How To Set Up a Netgear Wireless Router as an Access Point.
Then the following instructions will help you to do the same. Simply go through the below steps for the Netgear Access Point Setup.
Firstly, you need to cover the WAN or internet port of the secondary router with tape to prevent you from accidentally using it later.
After this, launch a web browser on the device, which is connected to the network of your router.
And then enter www.routerlogin.net on the address field of the web browser.
Now Netgear WiFi extender login page will appear, login with your default credentials i.e., username and password.
The default name of the WiFi extender is “Admin” and fill in the login information carefully because the username and password are case-sensitive.
After this basic home page or dashboard will appear on the screen.
From the homepage, click on “Advanced,” and then on “Advanced Setup.”
After this, choose “Wireless Access Point.” Some models might use slightly different menu labels, like Router / AP / Bridge Mode.
Then from the Nighthawk Pro Gaming routers, click on the “Settings” option.
And then click on “Setup,” and then choose “Wireless Access Point.”
Now select “Access Point” mode, and choose the IP Address settings on this access point.
Also, make sure that you get it from the existing router by default. Only enable fixed IP settings on this device setting if you have advanced network experience.
And if you want to do it manually, then assign a specific IP address to the router while it is in AP mode.
After doing this, click on “Apply” and lose the Internet connection between your router and your computer. Now our Netgear router is in AP mode.
Sum up
Certainly, the above instructions will help you with How To Set Up a Netgear Wireless Router as an Access Point. So, before seeking help from some, go through the above easy, and simple methods to do the same. And it is also required to follow the above steps as given.
Netgear Access Point Setup does not require too many steps, you just need to go through some simple and easy steps to do the same. From now on, you can use your Netgear as an access point.If the above steps are unable to help you with Netgear Access Point Setup. Then you may need expert assistance. Try to get in touch with Netgear experts. They will provide you with full assistance, and also help you with Netgear Access Point Setup.
0 notes
Text
Nighthawk Extender Login Page
Accessing the Nighthawk extender login page is easy using mywifiext.net. Type the default gateway address of the Netgear extender in the browser’s address field. Then log in with the extender’s default credentials like the username and password.
2 notes
·
View notes
Link

Circle smart parental control on Nighthawk AC1900 lets you protect your kids from online threats and manage all the connected device. Apart from this, the router comes with Netgear Nighthawk app OpenVPN, and ReadyCloud that helps in securing your personal data, photos, and videos easily from anywhere, anytime.
#netgear nighthawk app#netgear nighthawk setup#netgear router app#netgear genie setup#netgear wifi extender setup#netgear wifi router setup#netgear nighthawk extender setup
1 note
·
View note
Text
The Netgear Nighthawk EX8000 setup is a Triple Band wifi repeater that is incredibly simple to use. The Nighthawk AC3000 includes a dedicated 5 GHz band that can handle rates of up to 1.7 Gbps, which you may enhance to accommodate your PCs. There are numerous ways to configure a Netgear EX8000, which are listed below:
Connect your EX8000 gadget to a WPS Wi-Fi network. The easiest way to configure your EX8000 Wi-Fi extender is via secured setup, which does not need you to log into any of your computers or provide any information. for more info. visit : www.mywifiext.net
0 notes
Text
Hey. Are you searching for the setup of the NETGEAR NIGHTHAWK X6S WIFI mesh extender! mywifiext/local
If you are searching for NETGEAR NIGHTHAWK X6S wifi extender. We provide all information about extender in one click here:- https://medium.com/@mywifiext31/setup-of-the-netgear-nighthawk-x6s-wifi-mesh-extender-3a1ee0671750
Some related link:- https://wwwmywifiextnet.com/2020/02/04/login-of-the-nighthawk-x6s-mesh-extendermywifiext-net/
https://wwwmywifiextnet.com/2020/02/04/how-can-the-user-setup-the-netgear-nighthawk-x4-extender-mywifiext-net/
https://wwwmywifiextnet.com/2020/01/25/how-you-can-setup-the-netgear-nighthawk-ac-2200-extendermywifiext-net/
https://wwwmywifiextnet.com/2020/01/24/setup-of-the-netgear-nighthawk-ax-8-extender-mywifiext-net/
https://wwwmywifiextnet.com/2020/01/24/how-the-user-can-log-into-netgear-nighthawk-x-6-extender/
https://wwwmywifiextnet.com/2020/01/24/login-into-the-netgear-nighthawk-ac-1900-ex6400-wi-fi-mesh-extender/
#mywifiext/local#netgear extender login#netgear nighthawk extender setup#mywifiext net login#www mywifiext net login
0 notes
Text
0 notes
Link
Netgear nighthawk extender helps you to keep your WiFi devices connected with your home network. Dial +1-844-910-3999 for Netgear extender setup guide.
#Netgear Nighthawk#Nighthawk Login#Netgear Nighthawk Setup#netgear nighthawk extender setup#Netgear Extender Setup#192.168.l.254
0 notes
Text
How do I reset my Netgear Nighthawk router to factory settings?
Are unable to log into your Netgear Nighthawk router? Have you forgotten the user name and password of your WIFI device? Well, the only option left is to implement the reset process on your Netgear Nighthawk router. Often users deal with Netgear Nighthawk setup problems. The issues may range from slow internet connectivity to not getting WIFI proper signal. These all are the requirements that a person needs to reset the router.
Why do we need a Netgear Nighthawk setup to reset?
· If your Netgear Nighthawk device is going offline, again and again,
· it might not be able to connect to the access page by putting in the password.
· The Netgear Nighthawk router might face weak or slow connectivity.
· The WIFI card inserted into your device might not be inserted properly.
· The position of your Netgear Nighthawk router also matters a lot.
· Place the router to an optimal locus where no hurdles are lying around.
· Check whether your router is getting a proper internet connection or not.
· If there are any connection issues, the router will not turn up.
· The power cord of your device should be associated with the modem, computer, and Netgear Nighthawk device.
Netgear Nighthawk Before reset- requirements

Being aware of the fact that a factory reset erases all the personalized information of your device including the WIFI network name, username, and password. SO, if you need any data for later use, make sure you have taken a backup of the data you might need.
· Once you attained Netgear Nighthawk back-up, follow a few more steps before reset:
· Remove your default WIFI password, in case it ever changes or is configured to something else.
· Log out of your previous logged Netgear Nighthawk account which applies to the hard reset.
Perform Netgear Nighthawk Router Factory reset
1. Via Hard reset button

1. Before the reset, verify the router is turned up If not press the power on the button given at the back of the router.
2. Take a survey of your Netgear Nighthawk device to find out the hard reset button on it.
3. Look for a reset pin or a similar object, such as a screw or a match stick.
4. Press the reset button which is hiding under a small hole.
5. Press the reset button with the help of any reset object.
6. Do not release the reset button for up to fifteen seconds.
7. When the power LED light begins blinking, the reset process is going on.
8. When you see the power LED has stopped flickering, the Netgear router has done with the reset process and attained all its default settings.
Netgear Nighthawk Factory reset
2. Via Netgear Nighthawk app
Performing a reset process using the Netgear Nighthawk app is a very simple and smooth process. Just do as following:
· Go to the app basket of your devices, such as the play store or Apple app store.
· Search for the Nighthawk app and as you found, download it.
· When the app is downloaded and installed on your device successfully, launch it.
· On launching the app, log in to your Netgear account.
· Once done, without any delay navigate to the settings of your Netgear Nighthawk settings.
· Locate the reset option under settings and click on it.
· As you select and click the reset option, your Netgear Nighthawk device is set to default factory settings.
How can I log in back to the Netgear Nighthawk dashboard after reset?

1. Initially connect your Netgear Nighthawk device to the computer. For this, you need to use an Ethernet cable.
2. Use the LAN port of your router and the same on your computer to establish this connection.
3. Secondly, use the WAN port of your router and the same of your modem to associate them using another Ethernet cable.
4. If you already had made this setup, leave and proceed to the next step.
5. On your device that you are using for configuration purposes, launch a web browser.
6. Type in the IP key address 192.168.1.1 or the web domain www.nighthawk-app.com and click the enter button.
7. Enter the username and password in the needed field and then click the login tab.
8. If you don't find the username and password, look into the user manual or the label on your device.
9. However, you may use admin as the username and password as the password to complete the username and password field.
10. After that, you can see you have acquired the Basic home page or dashboard of your router.
The Basic Home page of your router is the place where you can set up the entire settings of your router. From here, you may change the WIFI password, Username, and security encryptions. After reset, the router gains all its default login credentials which are not considered safe. You must have changed them to give an extra layer of protection to your device.
Netgear Nighthawk reset- Conclusion
This is how a user can reset his Netgear Nighthawk router. Remember that a factory reset removes all the settings and personal information, so you need to keep a backup off all you need. There are some cautions that each one of us should follow before reset and after reset. Wrong use of the reset process leads to corrupt your firmware of the Netgear Nighthawk router.
If you are not a tech-savvy person, get in touch with our technical experts. They will surely help you to process a reset process on your Netgear Nighthawk device. You should consider all the above-mentioned precautions and suggestions during the reset process. While facing any issue that is given in the above section, go for a reset process. After reset, log in back to the web-based interface of your router is the foremost requirement as the entire device connected to the router will have gone disconnected from the network.
#nighthawk-app.com#netgear nighthawk app#www.nighthawk-app.com#netgear nighthawk#netgear nighthawk router#netgear nighthawk login#netgear nighthawk r7000#netgear nighthawk ac1900#netgear nighthawk setup#netgear nighthawk x10#netgear nighthawk extender#netgear nighthawk mesh#nighthawk netgear#nighthawk x6 r8000 firmware#netgear nighthawk x6 r8000#netgear nighthawk x6 setup#netgear r8000#netgear genie
1 note
·
View note
Photo

nighthawk-app.com
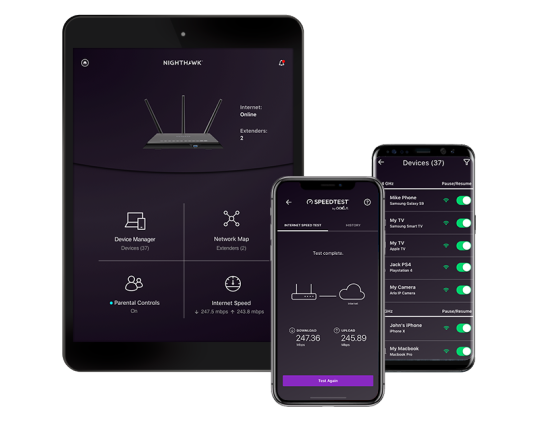
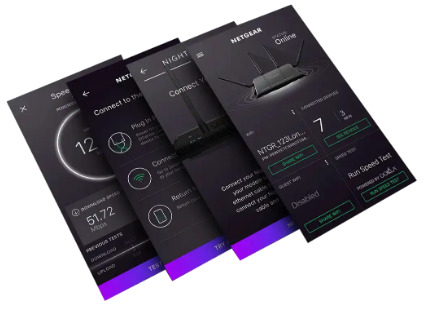
The Nighthawk App is fantastically easy to access and you can download it quickly from the Apple App Store or Google Play Store. Nighthawk App goes with resuscitated features like unavailable affiliation and this new segment gives you consistent control and screens your NETGEAR home relationship from any spot in two or three phases. You can use by far most of the features from the dashboard of the Nighthawk App, for instance, engage Armor Security, share Guest Wi-Fi Guest Network, speed test, stop Wi-Fi collusion and some more.
#nighthawk-app.com#netgear nighthawk app#www.nighthawk-app.com#netgear nighthawk#netgear nighthawk router#netgear nighthawk login#netgear nighthawk r7000#netgear nighthawk ac1900#netgear nighthawk setup#netgear nighthawk x10#netgear nighthawk extender#netgear nighthawk mesh#nighthawk netgear
1 note
·
View note