#NoStoveNoProblem
Text
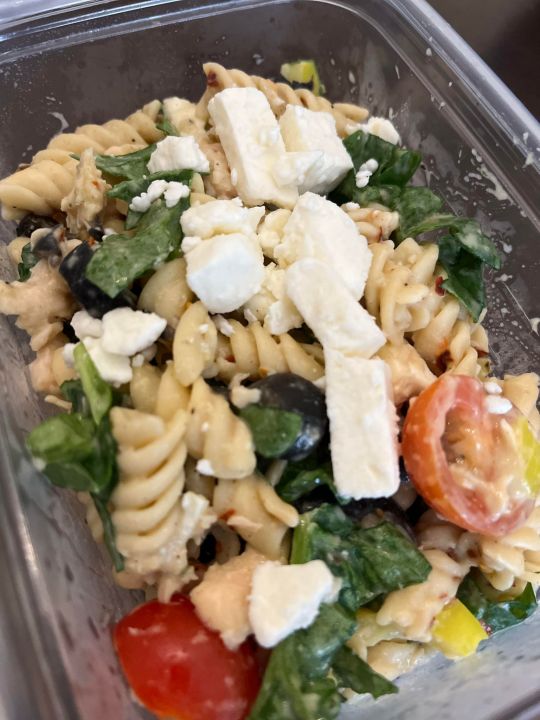
Chicken and Spinach Pasta Salad
I was away for a bit! LARP took a hiatus cause of Covid, and when I got back, I really just leaned on making my old recipes. Since going back, I've been going with my bestie -- so I've been making for two! That does slow down trying new recipes for a bit, as I need to make sure I'm making something we'll both like -- but it also opens up new possibilities!
For instance -- she makes a killer cucumber salad, which we'll totally include here the next time we make it for game.
Until then! We have a new recipe, I got this online somewhere ages ago -- but it's undergone some changes after coming into my care. The original recipe, while pretty good, was also pretty bland. And it was more made to be a bring to a bbq kind of thing instead of being something that could stand alone. We also decided on a higher protein chickpea pasta instead of regular pasta, just to give it a little extra oomph in the healthy department.
Now to the stats!
Ease to Transport: 5 of 5 Mason jars or tupperware is all you need! I think what you choose to use will more be dictated by how much your yield is and how many veggies you add.
Ease of Cleanup at Game: 5 of 5 This is one of those things that's best dealt with when you get home. Just close up the jar/tupperware so it doesn't dry out, and wash it when you get home. If you're going to be waiting a lot of days, or don't want to deal with couple-day-old food scraps, feel free to run a paper towel over it or something similar on site.
Taste: 4 of 5 This is a recipe with a lot of room. My bestie and I recommend leaning toward bold flavors as much as possible. Extra spices, extra flavored veggies, anything will help. We're still dialing it in, and I can see this being a recipe I do an update for as soon as I really nail it down hard.
Healthiness: 5 of 5 This is a good mix of carbs, fats, and protein. It's a good boost of energy, with some healthy salts to make sure you're retaining water. If you need more calories, consider adding some antipasta or charcuterie sides, or serve with veggies!
Recipe taken from the following link: Taste of Home Chicken and Spinach Pasta Salad
Ingredients: (Makes anywhere from 3 - 6 servings, I tend to get 4)
4 cups baby spinach (pull the stems and chop)
8 ounces rotini (measured while uncooked)
1/2 cup hummus (spicy or herby preferred)
4 tbsp Greek dressing
1 cup chicken cooked and shredded
2 cups cherry tomatoes, halved
1 (2.25 oz) can of sliced olives, drained
1/2 cup hot banana peppers, minced (use jarred or canned)
1/4 - 1 cup crumbled feta
1/2 - 1 tbsp Greek seasoning
dried red pepper flakes to taste
Directions
This is a relatively easy recipe! There's only a couple of special steps to make sure that you get the best results.
Cook your pasta to al dente, then rinse it in cold water, set it aside to let it cool a bit more.
Combine the hummus, Greek dressing (I like a feta/olive dressing, but something like Green Goddess would be good, too), greek seasoning, and red pepper flakes. Get them mixed well enough that the hummus has thinned out a bit, it should have kind of a loose but creamy consistency. Keep the dressing on hand, in case you need a little extra.
Add the pasta, toss the dressing to make sure it coats the pasta well, then stir in the olives, peppers, spinach, tomatoes, chicken, and half of the feta. I like to add them one or two ingredients at a time, mix, and then add the next, just to make sure everything gets distributed well.
Portion the salad out into your desired number of containers, and top with the rest of the feta cheese, and a sprinkle of red pepper flakes.
Notes: Make this ahead of time -- at least one or two days before your game. The flavors need a chance to really meld, and the pasta only gets better with a couple days in the fridge. We found extra dressing in with the hummus was necessary -- especially on account of the fact that we live in a very dry climate. Testing different hummus flavors is encouraged!
ProTip: If you need some short cuts, feel free to get canned or packet chicken. And you can go with whole leaf spinach and not mincing your banana peppers, but I like the smaller bites to prevent any costume stain emergencies!
Nutrition (per serving):
This assumes the way I made it, herb hummus, chickpea pasta, a full cup of feta, and full fat salad dressing.
Calories: 594 Fat: 29g Carbohydrates: 57g Protein: 38g
1 note
·
View note
Photo

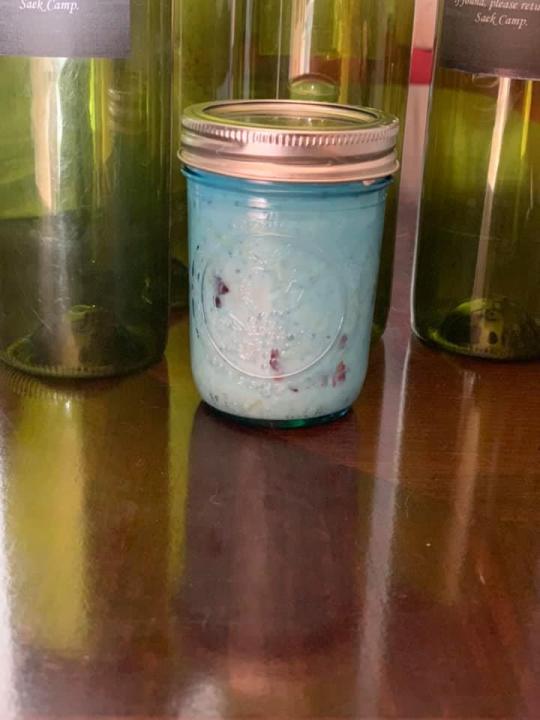
Dinner is prepped! It’s Wednesday again and I am working til 8pm! I had so many things on my to-do-list for this morning but it did not turn out as planned...a couple nights ago a pipe broke in our ceiling so yesterday we had only cold water as the plumber had to go find the right pipe! Then this morning, due to water damage, our oven/stove no longer works 🙈 I wanted to bake some cupcakes to bring to work tomorrow for a mini bday celebration...and prep some quinoa and make oats on the stove etc...couldn’t do any of that! But hubby and I will go find a new stove/oven tonight and then let the baking begin! 🤣 it’s going to be a longggg night! On the positive note, I luckily still managed to fit in a gym session, an ICE cold shower 🙈, and sat down to order groceries AND prep n vegan no-cook salad for dinner! 💪🏻 this salad has cherry tomatoes, rocket, tomatoes, shredded carrots, and chopped cucumbers! #vegandinner #chickpea #rocketsalad #mealprepwednesday #longworkday #staypositive #gymsession #salads #dinnerfortwo #healthymeals #fitness #alwayschooseyourhealth #loveyourself #freshingredients #notasplanned #pipesburst #nostovenoproblem #nooven (at Dubai, United Arab Emirates)
#staypositive#alwayschooseyourhealth#chickpea#gymsession#healthymeals#salads#nooven#loveyourself#freshingredients#notasplanned#nostovenoproblem#pipesburst#rocketsalad#vegandinner#mealprepwednesday#longworkday#fitness#dinnerfortwo
0 notes
Text
Raspberry Vanilla Summer Porridge
Ease to Make: 5 of 5
All of the Summer Porridge recipes are super easy to make. Just throw everything together and let it sit for at least 8 - 12 hours (though overnight is best.) I make all of my Summer Porridge recipes the Friday morning before I drive out to game (I’ve been bringing four with me, two breakfasts, two snacks) and it works out great.
Ease to Transport: 5 of 5
This is one of the easiest to bring. Just throw the Mason Jar in your cooler, and you’re good to go!
Ease of Cleanup at Game: 5 of 5
Another place where it wins for ‘easy’! Seal the jar back up when you’re done eating, and you can wash it out when you get back home. As I’ve said before -- don’t put off cleaning the jar too long when you get home, or it will get pretty slimy.
Taste: 3 of 5
Of all of the Summer Porridge recipes I’ve played with, I have to admit, this was my least favorite. It was a little too “safe”. In a lot of ways, it was kind of the blank slate of Porridge recipes. With honey and vanilla extract as the only flavors in the oatmeal (I didn’t think the raspberry preserves added any flavor, but they kind of added color). It wasn’t bad per se, but it also didn’t wow me.
Healthiness: 4 of 5
Major points for the protein in Greek Yogurt, the general healthiness of Chia Seeds, and the good fiber of the Oatmeal. But at only a ¼ - 1.2 cup of fruit, it’s not a lot of added plant matter. That said, I’d supplement with more fruit on the side and if you want a few extra calories I recommend maybe a hard boiled egg or two. (Or pre-cooked bacon if you’re looking for some fats and protein.)
Recipe taken from the following link:
https://www.theyummylife.com/recipes/224
Ingredients:
1/4 cup uncooked old fashioned rolled oats
1/3 cup skim milk
1/4 cup low-fat Greek yogurt (I recommend vanilla)
1-1/2 teaspoons dried chia seeds
1/4 tsp vanilla extract
1 tbsp raspberry jam, preserves, or spread
1/4 cup raspberries (or enough to fill jar)
Directions:
If you have time, get the preserves out of the fridge and let them warm up a bit. I found the cold preserves didn’t mix in easily at first, they might be a bit easier if they’re warm.
Add the oats, milk, yogurt, chia seeds, vanilla extract, and jam into the jar first. Lid the jar, and give it a good shake until it’s well combined. Cut the raspberries in half and then add them in, and give it another stir (let the raspberries break up as you’re stirring them. Let sit overnight, and eat chilled.
Notes:
This recipe benefits from good quality ingredients. Do yourself a favor and get decent preserves, good raspberries, and quality vanilla extract (none of the super cheap stuff, please!) I feel like this recipe needs something. If I were to make it in the future I might throw in fresh mint or switch to orange extract just to give it a little something more (treat it a bit like a cocktail). Some experimentation may be necessary in the future!
As I said up top, this recipe isn’t bad. I didn’t actively dislike the flavor, but I’m always a fan of things that will leap up and slap me in the face (flavor wise), and this recipe lacked that quality. Vanilla can sometimes be just so... vanilla. But if you’re more into less flavor, especially in the morning before your brain and your stomach has woken up, this might be a better recipe for you!
Nutrition:
Calories: 230
Fat: 4g
Carbohydrates: 51g
Protein:11g
4 notes
·
View notes
Text
Tuna Salad Wraps
I forgot to take a picture when I made these! But the picture would have been largely unsurprising. They’re wraps.
I was trying to find new recipes for the last game that would be easy for me to make, I had been on vacation prior to game and I was so behind on pretty much everything that I was stressing -- thus, I started looking for wraps and sandwiches.
Ease to Make: 5 of 5
I mean, honestly. It’s a wrap. The hardest part is learning to actually do the wrapping -- but as long as you don’t overstuff your tortilla, you can watch a video on youtube and get the hang of it pretty fast.
Ease to Transport: 3 of 5
So, I tried to make the whole wrap at home, and then take it with me complete -- which was a mistake. You’ll need to transport this in basically four parts. Lettuce, tomato, tortillas, and tuna salad mix. That makes it a bit of a bear for packing purposes.
Ease of Cleanup at Game: 4 of 5
I’m docking it a point for cleanup since you will have to wrap your wraps on site, meaning you’ll probably need a semi-clean place to work, and a flat surface. I just think it’s going to be a bit crazier. And then you probably want to at least rinse out your tuna container, that smell can be pervasive if you let it linger.
Taste: 5 of 5
Honestly, I expected this to taste far healthier than it did. I went with the Greek yogurt instead of the mayo to reduce the fat in the recipe. It was really good, surprisingly so! I guess I shouldn’t be shocked because I do love sriracha, and if you do too -- you’ll like this one. Honestly, if you like tuna salad sandwiches, give this a try, you’ll be pleasantly surprised.
Healthiness: 5 of 5
If you go with the Greek yogurt, and tuna in water, there’s really nothing here to dock points on. It’s a solid, high protein, low fat recipe. I also tend to use low carb wraps just to reduce the calories there, which means you could just eat this for days.
Recipe taken from the following link:
https://gimmedelicious.com/spicy-sriracha-tuna-wraps/
Ingredients:
(*Makes two wraps*)
1 can Tuna (in oil or water, your taste) drained
2 tbsp Sriracha
2 tbsp mayo (or plain Greek yogurt, sour cream, or mashed avocado)
¼ cup onion, diced
¼ cup celery, diced
Optional: Spices of your choice, try a little salt, pepper, dill, or tarragon
2 medium tortillas
Baby lettuce of your choice
1 tomato, sliced
Directions
This one is super easy, just mix the tuna, sriracha, mayo (I went with the greek yogurt, it was delicious), onion, and celery together. I ended up adding a little salt and pepper, and some dried dill to my mix as well. Store in a tupperware container to take with you.
Slice your tomato at home as close to the last minute as possible and pack separately of your tortillas and your baby lettuce (I prefer arugula).
When you’re ready to eat, make your wraps, and you’re good to go!
Tip: I ended up doubling the tuna mix and eating two wraps per meal. I use a low carb spinach wrap so the wraps were really low in calorie! (Too low!)
Notes:
I made the mistake of making the wraps at home and packing them pre-wrapped. I’m going to go ahead and just say not to do this. The wraps get soggy, though they still taste good. Absolutely just make the wraps on site, do yourself that favor!
I served this with potato chips, just for something nice and easy, but if you’re gunning something healthier, then go for fresh vegetables, and use the rest of your plain greek yogurt (if you went that direction) and sriracha to make a dip for the veggies!
Nutrition (per wrap): This assumes tuna in water, and greek yogurt
Calories: 268
Fat: 6g
Carbohydrates: 27g
Protein: 27g
1 note
·
View note
Text
Chicken Pesto Orzo Salad

Ease to Make: 3 of 5
This dish does take a little work to put together, and a little bit of know how -- that said, I wouldn’t call it hard. It’s just takes a lot of dishes to put together, so you’ll end up with a bit of a destroyed kitchen when you’re done.
Ease to Transport: 5 of 5
In all, this will be a really easy dish to move. Just package it in two tupperware containers, and take it with you. Eating at game is as easy as dumping it straight into a bowl. This dish doesn’t suffer by being cold -- it’s actually a really nice cold dish!
Ease of Cleanup at Game: 4 of 5
Pasta tends to turn into tiny, clingy chunks of awful if left alone. Especially little pasta like orzo, which dries more quickly than its larger counterparts. So be sure to rinse out your tupperware and your bowl (and your pan if you elect to reheat this dish) when you’re done eating, just to make your life easier.
Taste: 5 of 5
There’s a lot of complex flavors in this dish, so it comes out great. I love that it’s equally good cold as it is hot, so you can decide on site how you want to eat it. Do you heat it up over a camp stove, or just eat it cold for lunch? The red wine vinegar and the basil pesto play off each other nicely in this dish, giving it a clean, flavorful appeal.
Healthiness: 5 of 5
This dish is brimming with protein! The arugula and tomatoes give it some great nutrients, and all of the olive oil is good for your heart. All in all, this is one of the healthiest dishes I make.
Recipe adapted from a “Prep+Pared” meal box.
Ingredients (Makes 2 servings):
12 oz chicken (chopped into 1/2 inch strips)
2 roma tomatoes (halved lengthwise)
2 - 3 ounces baby arugula (half a store bought package)
1/4 cup Basil Pesto (store bought is fine!)
2 tbsp red wine vinegar
3 oz (dry) orzo, cooked. (Makes about a cup and a half)
salt and pepper
olive oil
grated parmesan and red pepper flakes to taste (optional)
Directions
If you start your pasta water heating at the same time you start chopping your chicken, everything should be done at roughly the same time.
Take a medium skillet or frying pan, and set at slightly over medium heat (avoid medium high). Pour in 2 tsps of olive oil, and let the pan and oil get hot. Season your chicken strips with salt and pepper, and add to the hot pan to start them cooking. (If you have a splatter shield for your pan, this is a great time to use it -- this dish does make a bit of a mess otherwise. Splatter shields are silly cheap at IKEA!)
Let your chicken brown for about 4 - 5 minutes, but keep an eye on it so it doesn’t start blackening. If you start charring it, turn your stove down a little, and stir the chicken more often. Salt your roma tomato halves, and add them to the pan cut side down. Cook the chicken and tomatoes together for about five minutes.
While you’re cooking the chicken and tomatoes, start the salad. In a large mixing bowl, add your arugula, red wine vinegar, and as much salt and pepper as you like then set aside for a moment.
Somewhere in here, your pasta should finish cooking (orzo usually takes about 9 minutes). When the orzo is done, strain it and toss it over the arugula, giving the mix a stir to let the arugula begin to wilt.
When your chicken is browned all over, and cooked all the way through, go ahead and remove it from the pan to add to the arugula-orzo bowl. Check your tomatoes. You want to be able to crush them with a wooden spoon without too much trouble. If your store sells freakishly large roma tomatoes (as mine does) go ahead and smash the tomatoes at this point with your wooden spoon until they’re in small, chunky bits (this is a cathartic process that will scare your cats if you have them), and let them sit over the heat for another minute or two to continue to soften before tossing the crushed tomatoes in the bowl as well.
Top the mix by adding your basil pesto, and then mix everything well to combine. Serve in two bowls, and top with Parmesan and red pepper flakes as desired.
Notes:
This is a great dish if you don’t mind having the same lunch two days in a row, or if you’re cooking for you and a partner to go together. It’s easily scale-able to larger groups as well, so you can make a huge bowl of this pasta salad to share.
The original recipe for this dish called for 4 ounces of orzo (which, if you’re looking at the back of the orzo box, you’ll realize is 2 actual servings). While I do enjoy having pasta in this salad, I found that to be entirely too much pasta, muting the flavors of the rest of the dish, and adding a mess of unnecessary calories. If you need any extra filler for this dish, I recommend adding more arugula. The arugula adds a nice peppery bite, which is more complimentary to the pesto and the vinegar (in my opinion).
The original recipe also called for the chicken to be served in whole-breast form on the side, as opposed to mixed in. In that recipe, you divide the pesto in half, add one half to the orzo-arugula salad, and the other half tops the chicken. It was fine... but I found myself adding a bite of pasta to every cut of chicken I made, so I decided to just make this into a salad. I’ve never looked back.
Sides for this dish are largely unnecessary, I think. But if you’re craving something on the side, I might go with some slices of a nice sharp cheese or maybe fresh orange wedges.
Nutrition (per serving):
Calories: 423
Fat: 10.1g
Carbohydrates: 37.3g
Protein: 43g
5 notes
·
View notes
Text
Hot Coffee, The Drink of Gods
If you want hot coffee at game, and you don’t have electricity -- your choices can be a bit limited. We’re lucky enough at my site that we do have electricity, and there’s some very kind people who bring Keurig machines (but you do need to bring your own k-cups). However, I know most places the electricity may be hard to come by, or you may just not like the waste that k-cups produce. So here’s a few ideas for hot coffee that are a little friendlier for LARP.
Instant Coffee
The technology behind instant coffee has gotten WAY better since I was a kid. I don’t know that I’d go as far as to say it will ever be my favorite coffee, but in a pinch -- it’s not bad. Instant coffee these days comes in either individual packets, or large containers (again, if you wish to reduce waste). Instant coffee keeps fairly well, being completely freeze dried, and if you get the larger containers, you can adjust your coffee to water ratio until it gets as close to the good stuff as you like. The link below is to the Necafe’ Classico -- as it is one of the best instant coffees I’ve tried!
https://www.amazon.com/Nescafe-Clasico-Instant-Coffee-Ounce/dp/B0052OOLZY/ref=asc_df_B0052OOLZY/?tag=hyprod-20&linkCode=df0&hvadid=198111057496&hvpos=1o9&hvnetw=g&hvrand=4270922197100372701&hvpone=&hvptwo=&hvqmt=&hvdev=c&hvdvcmdl=&hvlocint=&hvlocphy=9030820&hvtargid=pla-391660042522&psc=1
Tea Style Brewing Method
You can always make coffee the same way you make tea. Make little satchels of coffee that you steep in hot water until it’s as dark as you like. As with the cold brewing method, do make sure not to squeeze your coffee pouch after brewing, as that will just encourage more of the bitter notes into your drink -- which you don’t need! Here’s a link in case you’d like better instructions! The nice thing about this is you can make your satchels at home, and just bring them with you for coffee on the go.
https://www.instructables.com/id/Customize-your-own-portable-coffee-bags/
Stovetop Coffee Machine
If you’re as old as I am, you might recognize a stovetop percolator if you saw it. They fell out of fashion some time in the 70s or 80s, but remain in the minds of some coffee aficionados who swear they make a better cup of coffee than auto-drip machines. The good news is, they can be pretty cheap! They take a little work to get right, so practice at home before you go to game. You can brew your coffee over a propane camp stove (though I wouldn’t try to do this over one of the small Sterno cans, they just don’t get hot enough). If you’d like to see the kind of pot I mean, click the link below!
https://www.amazon.com/dp/B074C5LRRV/ref=sspa_dk_detail_1?psc=1&pd_rd_i=B074C5LRRV&pd_rd_w=uVsxE&pf_rd_p=8a8f3917-7900-4ce8-ad90-adf0d53c0985&pd_rd_wg=K9dnI&pf_rd_r=EVX5G6TY9WXR3CV4ZAPA&pd_rd_r=ce200325-a8d7-11e9-a93c-6bb543d57023
Turkish Coffee
For the truly adventurous, or the consummate coffee snob -- there is always Turkish coffee. Easily one of my favorite coffee styles in the world, Turkish coffee is powerful and flavorful, while usually never getting as bitter as you would imagine it to be. You will need a camp stove to make Turkish coffee, but serving it is a gorgeous, period perfect affair -- especially if you happen to have a culture in your game that takes any inspirations from the middle east.
This method is not for the faint of heart! It takes practice to get right, and is not a quick process. It will also necessitate more in-game cleanup. But it can be one of the most rewarding, and one of the best tasting if you’re in the mood for a decent cup of coffee (or want to impress your friends!)
Turkish Coffee Set (on Amazon): https://www.amazon.com/CopperBull-Thickest-Copper-Turkish-Saucers/dp/B014VBDD4I/ref=sr_1_13?crid=YI77HRNPP0ZR&keywords=copper+turkish+coffee+pots&qid=1563482364&s=gateway&sprefix=copper+turkish+coffee%2Caps%2C197&sr=8-13
How to Brew Turkish Coffee: https://foolproofliving.com/how-to-make-turkish-coffee/
4 notes
·
View notes
Text
Chicken, Pesto, and Cranberry Quesadillas

The first of my recipes, and one of the tastiest! Here’s the stats:
Ease to Make: 5 of 5
* The ingredients are all really easy to get a hand on, and relatively inexpensive. The actual making of the quesadilla is super simple.
Ease to Transport: 5 of 5
* Sandwich bags all the way! Very easy to find a spot in your cooler.
Ease of Cleanup at Game: 5 of 5
* You can eat it straight out of the sandwich bag, or toss it on a plate, no problems.
Taste: 4 of 5 (if hot: 5 of 5)
* It loses a bit of nuance when cold/room temperature, but it’s still really delicious.
Healthiness: 3 of 5
* This dish has a lot of dairy for its calories, and less vegetable/fruit than I’d like -- but it’s not bad if you make sure to use low calorie options, and put a salad on the side. (See my Tabbouleh which will be posted soon!)
Recipe taken from the following website, however I made a few adjustments for myself: https://busybuthealthy.com/chicken-pesto-cranberry-quesadillas/
Ingredients (Makes 2 servings):
1/4 cup Neufchatel Cheese
1 tablespoon pesto (store bought)
1/4 cup dried sweetened cranberries
4 ounces chicken (cooked)
2/3 cup low fat cheddar cheese blend
2 Spinach Tortillas, roughly 8 - 10 inches in diameter.
Directions
Preheat oven to 400 degrees F. Prepare a baking sheet that’s wide enough for your tortillas with parchment or foil, and a little bit of non stick spray.
Cook your chicken how you like, I did mine in a small amount of olive oil, salt, and pepper on the stovetop. Chop/shred the chicken into small pieces.
Mix chicken, Neufchatel, pesto, cranberries, and cheese in a bowl, season with salt and pepper as desired.
Spread the mixture on one of the tortillas into a relatively even layer. Set the second tortilla on top and press down to make sure it stays in place. Move the tortilla sandwich to the baking sheet, and bake in oven for 15-20 minutes until cheese is melted and browned slightly.
Once it’s cooked, go ahead and cut it into wedges while it’s hot and leave on the counter to cool. Once cool, separate into servings using sandwich baggies and hold in the fridge/cooler until you’re ready to eat!
Notes:
I brought both servings with me to game, and only ended up eating one. I gave the other serving to a friend who hadn’t really sat down to eat all day. He said he really liked it, too!
I ended up having to use Gluten Free Spinach Wraps. The only regular spinach wraps were HUGE. I didn’t notice any issues with the flavor, so I think I’ll stick with this in the future.
Optionally, I think this is a dish that would be well served by being reheated. I haven’t had a chance to test this, but if you have access to a fire or a camp stove, consider storing your wedges wrapped in aluminum foil, and heating up on the stove/fire for a few minutes before eating. The gooey cheese and heated sweet cranberries are very nice!
Though, this dish is still pretty tasty cold!
Nutrition (per serving):
Calories: 517
Fat: 26.7g
Carbohydrates: 40.2g
Protein: 31.2g
3 notes
·
View notes
Text
Blueberry Maple Summer Porridge

Ease to Make: 5 of 5
As with all of the summer porridge recipes, this is a really easy dish to make. Everything is just going into one jar to sit overnight. I made all of my summer porridge dishes the morning before I left for LARP, just to make sure they didn’t get too soggy, but after a little testing I’m happy to say I think you can make them the night, and they’ll keep fine all weekend.
Ease to Transport: 5 of 5
This one doesn’t get any easier, it just goes right in the mason jar! Just make sure to keep the mason jars in your cooler until you’re ready to eat.
Ease of Cleanup at Game: 5 of 5
Super easy, just seal the mason jar, and put it back in the cooler to wash at home. I recommend not putting off the cleanup of the jars too long, as they will get stinky.
Taste: 5 of 5
The website that recommended this dish said you could use fresh or frozen blueberries. I used fresh in my first attempt, and I don’t think I’m going to turn back. The fresh blueberries had a really nice texture with the oatmeal, and the maple syrup was wonderful.
Healthiness: 4 of 5
Major points for the protein in Greek Yogurt, the general healthiness of Chia Seeds, and the good fiber of the Oatmeal. But at only a 1/4 - 1.2 cup of fruit, it’s not a lot of added plant matter. That said, I’d supplement with more fruit on the side and if you want a few extra calories I recommend maybe a hard boiled egg or two. (Or pre-cooked bacon if you’re looking for some fats and protein.)
Recipe taken from the following link:
https://www.theyummylife.com/recipes/220
Ingredients:
1/4 cup uncooked old fashioned rolled oats
1/3 cup skim milk
1/4 cup low-fat Greek yogurt (I recommend vanilla)
1-1/2 teaspoons dried chia seeds
2 teaspoons maple syrup (more or less to taste)
1/4 cup blueberries (or enough to fill jar)
Directions
In a half pint mason jar, add the oats, milk, yogurt, chia seed, and maple syrup. Put the lid on the jar, and shake it until it’s well combined, remove the lid then stir in the blueberries until the jar is full. Close the jar, then let it sit at least overnight -- keep it chilled until you’re ready to eat!
Notes:
I would absolutely recommend fresh blueberries for this dish, I felt the tartness on real blueberries really added something to the dish. I brought the extras with me to game and ate them during setup. They’re a lovely treat on a hot afternoon!
Another recommendation is to get the good maple syrup. Don’t try to get away with cheap pancake syrup -- get the real deal, 100% maple syrup. If you’ve never had it, you won’t understand why I’m recommending it until you try it. It really is a totally different taste experience. If you’re going to splurge the calories for sugar, make sure it’s good sugar!
Nutrition (per serving):
Calories: 215
Fat: 4g
Carbohydrates: 48g
Protein: 12g
2 notes
·
View notes
Text
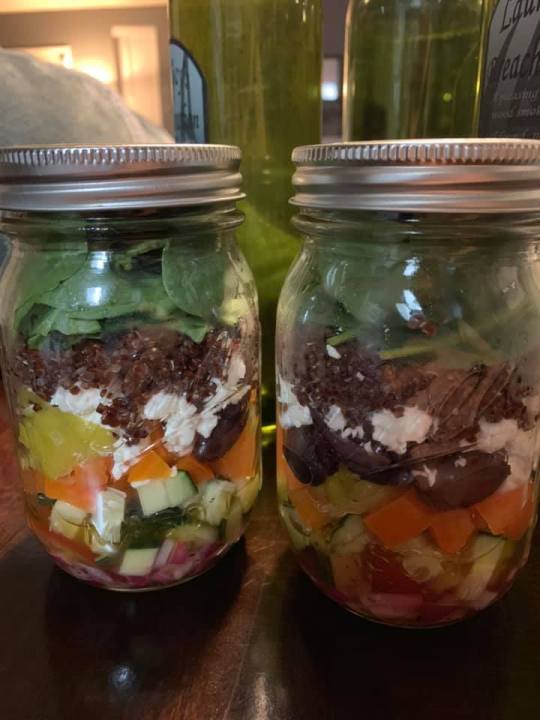
Mason Jar Quinoa Greek Salad
Ease to Make: 4 of 5
This one isn’t bad, but it’s getting docked a point for the amount of chopping necessary for the various ingredients. It takes a hot minute to get everything prepared for the jars, but as there’s no real cooking involved, I would still consider this one pretty easy.
Ease to Transport: 5 of 5
As with all of the Mason Jar recipes on LARP Gourmet, this is super easy to transport, just throw the Mason Jar in your cooler, and you’re good to go.
Ease of Cleanup at Game: 3 of 5
This one gets docked points, as I ultimately decided this salad was no fun to eat while in the Mason Jar. I ended up dumping it into a bowl so I could get a bite of different ingredients. Then, because of the salad dressing, it was necessary to give the bowl a once over before I stashed it away. I got attacked the second night, and now I have Quinoa Spackle in my bowl, which is being soaked in my sink at the time of this writing.
Taste: 5 of 5
Once I got done screwing with this recipe, it was amazing. I really liked the flavor, and it was really refreshing. Also, the amount of salty things in here (olives, feta, and pepperoncini) it’s great for helping to keep you hydrated.
Healthiness: 5 of 5
I really think this recipe has it all. It’s got a good variety of vegetables, a little dairy, and I served it with bread and Genoa salami. You could easily add any other protein you like, and the quinoa adds a good healthy bite to this recipe as well.
Recipe taken from the following link:
This one is a bit more of an amalgamation of about four recipes. I wasn’t crazy with the first one, but the starting point for the process was here:
https://www.simplyrecipes.com/recipes/greek_salad_in_jars/
Ingredients: (Makes 2)
Dressing:
1.5 tbsp red wine vinegar
1/8 tsp salt
black pepper
1/8 tsp dried oregano
½ tsp honey
2.5 tbsp olive oil
Salad:
¼ cup diced red onion
½ cup cherry tomatoes, halved
¼ cucumber, diced
½ orange bell pepper, diced
½ cup chopped Kalamata olives
½ cup cooked quinoa
2 pepperoncini, sliced
¼ cup feta (2 ounces) (crumbled)
baby spinach (to the top of the jar, about a cup)
Serve With:
Pita or Naan Bread (1 serving)
Genoa Salami (1 - 1.5 servings)
Directions
Cook quinoa according to package instructions (I find for smaller amounts of quinoa, it’s good to double the water, as it boils off so much faster). Let the Quinoa cool before adding it to the jar.
Put onions in salad dressing to let them marinate in bottom of jar, so their flavor mellows and mingles a bit with the dressing. Top onions with layers of tomato, cucumber, orange bell pepper, pepperoncini, olives, and feta. Over the feta, add the cooled quinoa, and then top with spinach. I ended up tearing the spinach in half before adding it to the jar so it’d fit a little better.
Serve with Naan/pita and Genoa salami on side.
Notes:
When I started with this idea, the original recipes I found were lacking some of my favorite salad additions, like pepperonici, and some sort of protein. This recipe came out of additions I enjoy, for the most part, and to maximize flavor.
I could take or leave the bread as an addition for this recipe. It was nice filler, but I didn’t find it to add to my enjoyment of this meal. I think the salami is 100% necessary however. Some sort of thin sliced, salty meat -- take your pick on what that is. The cold protein was welcome, and helped me feel as though the meal was much more complete. For that reason, I only included the salad calories below, as you can pick your sides and add your calories as necessary.
Nutrition (per serving, salad only):
Calories 404
Total Fat 27.3g
Carbs: 35.2g
Protein: 9.1g
1 note
·
View note
Text
Healthy Cole Slaw

I was fighting for a coleslaw recipe that would be a lot healthier than it’s mayo-soaked counterpart. My first attempt at this recipe went a little south. I over doctored it, and it was a HUGE pain to make. I’ve simplified it down to something that can be made in a few minutes.
It’s made with plain Greek yogurt and dijon mustard -- so it has plenty of flavor and punch! And if you use pre-made broccoli slaw, it’s an easy recipe.
Ease to Make: 5 of 5
You could shred your own veggies for this, but honestly -- I think it’s a lot of trouble when you can get a bag pre-shredded at the store. You won’t need the whole bag for this recipe, but I use broccoli slaw for everything. It’s just a matter of mix and serve (save the onions, which will need to be chopped!)
Ease to Transport: 5 of 5
This side salad will be great with any sort of dish. It’s the kind of thing that will sit well in some tupperware in your cooler, and mature nicely. The recipe below makes two servings, but can be easily sized up for a bigger group.
Ease of Cleanup at Game: 5 of 5
You don’t have to worry too much about cleaning the tupperware on site (though sealing it at game will make sure it’s a bit easier to clean when you get home). Dried Greek yogurt just flakes off of dishes, so it’s much easier to clean than most higher fat sauces.
Taste: 5 of 5
This one was the round two recipe. I messed it up the first time (and I wasn’t crazy about the prep-work needed for it). The first go I found that it needed a little more mustard -- but I would say at most it needs a heaping tablespoon. Any more than that, and it throws off the flavor. Keep the spices simple for this dish, just some salt and pepper. If you like raisins, a second box wouldn’t be amiss.
Healthiness: 5 of 5
As there’s no mayo in this dish, it’s basically all veggies and protein, and a little bit of dried fruit! It doesn’t really get much healthier than that. The Greek yogurt and mustard still makes it a tasty, and satisfying coleslaw!
Recipe taken from the following link:
https://inspiralized.com/summer-broccoli-carrot-slaw-salad/
Ingredients: (Makes 2 servings)
8 ounces bagged broccoli slaw
1/4 cup chopped red onion
1 box raisins (the 100 calorie size)
1/2 cup plain Greek yogurt
1 tbsp dijon mustard
1/2 tbsp lemon juice
1/2 tbsp apple cider vinegar (if needed for the sauce, taste it first.)
salt and pepper to taste
Directions
This is a simple mix and stir recipe. Toss everything into a bowl and give it a good stir. I didn’t even bother to mix the sauce first or anything.
Notes:
The apple cider vinegar is totally optional, but I found that there was an upper limit to how good the lemon juice tasted. If you want the sauce a little runnier, then I recommend switching to apple cider vinegar once you’ve gotten to about a half a tablespoon of lemon juice.
I think a second box of raisins in this dish would be good. The parent recipe called for the raisins to be soaked, and I found that posed absolutely no benefit to the taste or texture of the raisins or the dish. In fact, I liked the raisins soaking in the liquids of the sauce instead of just plain old water.
I did actually go to all the trouble of shredding my own veggies for the first try of this recipe. Though I liked having the broccoli florets in the dish, I don’t think it’s worth the trouble (to be frank). Maybe if you do have one of those spiral cutters in the home, it might be alright -- but I live in the Alton Brown theory of not having too many gadgets that only do one thing.
For my money, the ease of making this dish off bagged broccoli slaw can’t be overstated. And the Greek yogurt gives it a nice kick of protein, so it’s got extra health benefits!
Nutrition (per serving):
Calories: 163
Fat: 3.1g
Carbohydrates: 28.7g
Protein: 9.4g
1 note
·
View note
Text
Apple Cinnamon Summer Porridge

Ease to Make: 5 of 5
As with all of the summer porridge recipes, this is a really easy dish to make. Everything is just going into one jar to sit overnight. I made all of my summer porridge dishes the morning before I left for LARP, just to make sure they didn’t get too soggy, but after a little testing I’m happy to say I think you can make them the night, and they’ll keep fine all weekend.
Ease to Transport: 5 of 5
This one doesn’t get any easier, it just goes right in the mason jar! Just make sure to keep the mason jars in your cooler until you’re ready to eat.
Ease of Cleanup at Game: 5 of 5
Super easy, just seal the mason jar, and put it back in the cooler to wash at home. I recommend not putting off the cleanup of the jars too long, as they will get stinky.
Taste: 4 of 5
This one was the only of the three summer porridge recipes that didn’t call for real fruit in it. And honestly, it felt like it was lacking because of it. The applesauce added nothing to the texture of the dish, and I really couldn’t taste it either. More experimentation with real apples is necessary.
Healthiness: 4 of 5
Major points for the protein in Greek Yogurt, the general healthiness of Chia Seeds, and the good fiber of the Oatmeal. But at only a 1/4 - 1.2 cup of fruit, it’s not a lot of added plant matter. That said, I’d supplement with more fruit on the side and if you want a few extra calories I recommend maybe a hard boiled egg or two. (Or pre-cooked bacon if you’re looking for some fats and protein.)
Recipe taken from the following link:
https://www.theyummylife.com/recipes/221
Ingredients:
1/4 cup uncooked old fashioned rolled oats
1/3 cup skim milk
1/4 cup low-fat Greek yogurt (I recommend vanilla)
1-1/2 teaspoons dried chia seeds
1/2 teaspoon cinnamon
1 teaspoon honey, optional (or substitute any preferred sweetener)
1/4 cup unsweetened applesauce, or enough to fill jar
Directions
In a half pint mason jar, add the oats, milk, yogurt, chia seed, cinnamon, and honey. Put the lid on the jar, and shake it until it’s well combined, remove the lid then stir in the applesauce until the jar is full. Close the jar, then let it sit at least overnight -- keep it chilled until you’re ready to eat!
Notes:
As I said in the taste section, I felt like this dish really suffered for not having real fruit in it. I want to test the recipe with fresh raw apple, but I’m afraid that might be too crisp against the soft oatmeal. If it doesn’t work, my second try is going to be baking apples with the cinnamon and honey called for in the recipe, and then adjusting both in the recipe depending on how the baked apples come out.
All told, I wouldn’t say this dish was bad -- I just think it was the least successful of the three that I tried.
Nutrition (per serving):
Calories: 210
Fat: 4g
Carbohydrates: 48g
Protein: 11g
1 note
·
View note
Text
Egg White Frittatas

Ease to Make: 3 of 5
The egg part is easy, and the baking part’s not bad -- but pretty much all of the vegetables that go into this dish need to be processed in some way (chopping, shredding, etc). That means this dish is kind of a bear in the prep department.
Ease to Transport: 4 of 5
This one is pretty easy in terms of just having to go in a sandwich bag or tupperware. I opted for the sandwich bags to ensure they were easy to go into the cooler, but I found they were easily damaged, and the intense cold of my icepacks hurt the texture of the eggs.
Ease of Cleanup at Game: 5 of 5
Super easy. Since I went with sandwich bags, it was just throwing out the bags once I was done.
Taste: 2 of 5
This dish fell over hard for me on taste. I think when they’re fresh and hot they’re probably pretty good -- but after a couple of days in a cooler, they’re a bit mushy, and not in a good way.
Healthiness: 5 of 5
I really can’t complain about the health benefits of the dish. Egg whites for protein, vegetables for nutrients, and all hand made so there’s no surprises. I just wish they’d worked out a bit better for me!
Idea taken from the following website:
https://busybuthealthy.com/mini_frittatas/
Ingredients (makes 12 mini frittatas):
1 32 ounce container of eggs whites (you won’t use all of it)
1/2 zucchini, shredded or grated
1 oz sun dried tomatoes, chopped (dried in the baggie, not packed in oil)
1 green onion, sliced thin
1 tbsp Sweet Basil, Citrus, and Garlic Rub (I used Lawry’s bought off Amazon)
Salt and Pepper to taste
Directions
Prep a standard muffin tin by spraying every part of it with non-stick spray. Take special care to get all of the corners of the cups, but do get the top too -- it’ll help if you drip anything between the cups.
Preheat your oven to 350 degrees. Pour 1/4 cup of the egg whites straight into each muffin cup. Cook in the oven until the egg whites turn white and opaque (about 5 - 6 minutes) but make sure they’re not completely done cooking. Remove from oven and distribute your zucchini, sun dried tomatoes, onion, and spices into each cup.
Cook for another 5 - 10 minutes depending on your oven. You’ll know when they’re done when you jiggle the pan and none of the frittatas move. Take out of the oven and set on the counter to cool without disturbing them further. If you poke them, they might deflate.
When the pan is cool enough to handle, and the frittatas are only warm to the touch, remove from their muffin cups, and let them continue to cool on the counter without the muffin pan until they’re room temperature. Don’t pack them early into sandwich bags or the condensation will wreck the texture (this is partially the mistake I made!)
Once cooled, divide into sandwich baggies to pack for game.
Notes:
This was the only real ‘miss’ of the recipes for the weekend, and for once I’m not sure what I’d do to fix them. I don’t think any re-heating would help them, for the most part. If you were eating these warm out of the oven, though, they’d probably be pretty good -- but that doesn’t really help in the LARP setting.
There’s probably other toppings that would do better in the long haul, I think the addition of feta would have been a nice, salty bite that these probably needed -- but I also don’t think I care about them enough to try to salvage them in the future. I’m including them just so it doesn’t look like every dish I make is a complete win. And I never know, maybe someone out there will figure out where I went wrong, and can correct me on my methods, and we go from there.
Ultimately, I served these alongside the breakfast oatmeal, and I found that it was largely unnecessary. I think I will still bring straight hardboiled eggs (with a little salt) and a little fruit just for an extra bite of food with the oatmeal. But I don’t think going to the lengths to make these is necessary.
Nutrition (per each frittata):
Calories: 46
Fat: 0.5g
Carbohydrates: 1.5g
Protein: 7g
7 notes
·
View notes
Text
DIY Mason Jar Ramen

Ease to Make: 3 of 5
Despite how easy it is to carry at game, it does take a good handful of ingredients to do well, and a lot of the ingredients needed to be precooked and cooled before they went into the jar. Start this one early! It keeps well.
Ease to Transport: 5 of 5
Mason Jars! Super easy, these are full pint size, no muss no fuss.
Ease of Cleanup at Game: 5 of 5
Just seal the Mason Jar back up when you’re done, and bring it home to wash at home. The sealed Mason Jar won’t get super crusty, so it’ll still be easy to clean when you’re back at a real sink. (I still recommend not putting it off too long though – or it’ll get stinky.)
Taste: 4 of 5 (Though I have ideas to make it better for me)
Overall, I liked this dish. But! I felt like it had WAY too much pasta. I used a serving of spaghetti in each jar, and I think I could probably take it down to 1/2 - 3/4 of a serving and be much happier. I want more space for meat and vegetables.
Healthiness: 5 of 5
This dish has a little bit of everything! Good healthy carbs, good lean meats, vegetables, and hydration. With the soy sauce in the bottom, you also get a bit of extra salt to help you retain the water you’re having, making it a great LARP dish.
Idea taken from the following website:
https://www.thekitchn.com/how-to-make-diy-instant-noodle-cups-222560
Ingredients (per serving as shown above):
1 serving (2 ounces) pasta of your choice, cooked, drained, and cooled.
4 ounces meat of your choice, cooked and cooled (I went with pork)
¼ cup frozen carrots and peas mix (pre diced to this size)
¼ cup frozen corn
2 tsp chili garlic sauce (adjust to taste)
2 tsp soy sauce (adjust to taste)
1/2 tsp Better than Bouillon stock mix (adjust to taste)
1 green onion (sliced thin)
Fresh Sprouts
Directions
Cook your meat and pasta, and then set them aside to let them cool before putting them in the jar. I cooked pork chops very basically in a pan over medium high heat, in a bit of olive oil, salt, and pepper. Any protein will do, however -- tofu, soy crumbles, pork, chicken, or beef -- whatever strikes your fancy.
If you want to go more traditional with the pasta you can -- but to make it easy on the wallet, you can use any pasta you like. If it’s a normal dried pasta, be sure to pre-cook and cool it. Some thin, Asian pastas don’t need to be pre-cooked as they will cook in the boiling water (same as if you were making top ramen). Be sure to read the directions for any pasta you buy! Ultimately, your noodles are going to be in hot water for about five minutes, if that’s enough to cook the pasta, you can put the pasta straight in as-is.
Then it’s just about layering! Put your sauce items in the bottom (chili garlic sauce, the Better than Bouillon mix, and soy sauce), then put in your meat, then the frozen vegetables (no need to thaw them first), then the pasta, and lastly top with your fresh vegetable items -- in my case there are sprouts and green onion slices on top, though you can’t see them under the lid.
When you’re ready to eat, simply pour boiling water into the mason jar to the top, seal, and shake to combine all the ingredients. Let it sit for about five minutes to let everything get hot, then eat! (See the notes below for a pro tip!)
Notes:
For my next go with this, I think I might turn it into more of a soup instead of ramen, and use a pasta like orzo. I think it’ll be a bit easier to eat with a spoon, and I won’t slop as much of the broth on my costume. As I indicated in the stats section, I also want to reduce the amount of pasta I have in this dish, as I felt like the pasta took away from the flavor of the soup and the vegetables. I’ll post a new recipe once I’ve had a chance to play around and really get this where I want it.
Additionally: if you think about it, and you have the chance -- take the mason jar out of your cooler about a half hour before you plan to put in the hot water. Though mason jars are resilient to temperature changes, I’ve noticed that the jar itself retains the cold from the cooler VERY well. When I put boiling water in, the cold from the jar leeched the heat from the water quickly, and I ended up with only moderately hot soup. Nothing in your mason jar will deteriorate so quickly as to be an issue if you leave it out of the cooler for a couple of hours (a lot of people on the original website for this dish talked about taking it to work for lunch where it just sat on their desk until it was ready to eat.) That in mind, I think it’s best to give it some time to come to “room” temperature, so you can have nice, hot soup!
Nutrition (per serving):
Calories: 536
Fat: 16.7g
Carbohydrates: 59.9g
Protein: 35.4g
4 notes
·
View notes
Text
Banana Chocolate Summer Porridge

Ease to Make: 5 of 5
The ingredients are all really easy to get a hand on, and relatively inexpensive. It requires no cooking, and really just needs time to sit! I made mine the Friday morning before I left for game.
Ease to Transport: 5 of 5
Mason Jars! Super easy, and these are the half-pint size, it’s simple to find a place for them in your gear.
Ease of Cleanup at Game: 5 of 5
Just seal the Mason Jar back up when you’re done, and bring it home to wash at home. The sealed Mason Jar won’t get super crusty, so it’ll still be easy to clean when you’re back at a real sink. (I still recommend not putting it off too long though -- or it’ll get stinky.)
Taste: 5 of 5
I really liked this dish! And it smelled so good that a friend of mine asked for a bite while I was eating. He really liked it too! And I don’t think he’s quite as granola hippy as I am when it comes to food. It’s a good, filling, healthy chocolate fix for the middle of game that’ll make sure you have plenty of energy.
Healthiness: 4 of 5
Major points for the protein in Greek Yogurt, the general healthiness of Chia Seeds, and the good fiber of the Oatmeal. But it only fits 1/4 - 1/2 of a banana per serving, so I’d supplement with more fruit on the side. I also ate these with Egg White Frittatas (which I wasn’t crazy about, more on that in a later post), so if you want a few extra calories I recommend maybe a hard boiled egg or two, and a little extra fruit. (Or pre-cooked bacon if you’re looking for some fats and protein.)
Recipe taken from the following website:
https://www.theyummylife.com/recipes/222
Ingredients:
1/4 cup uncooked old fashioned rolled oats
1/3 cup skim milk
1/4 cup low-fat Greek yogurt (I recommend vanilla)
1.5 teaspoons dried chia seeds
1 tablespoon cocoa powder (unsweetened, I used Hershey’s Special Dark)
1 teaspoon honey, optional (or substitute any preferred sweetener)
1/4 cup diced ripe banana, or enough to fill jar (approx. half of a small banana)
Directions
Using a half pint mason jar, add the oats, milk, yogurt, chia seeds, cocoa powder, and honey. Lid the jar, then shake it thoroughly. Cut up the bananas, and add banana pieces until the jar is mostly full, then stir the pieces in (if the jar is too full it’s a bit hard to stir). Top with the remaining banana pieces, and push them down into the oatmeal to make sure they’re not exposed to air.
Chill overnight and eat the next day!
Notes:
This was easily one of the most successful LARP dishes. I made four total Summer Porridge servings, two of this one, a Blueberry Maple, and an Apple Cinnamon. These were easy, filling, and full of nutrients to keep you going during long LARP games. Additionally, they’re SUPER easy to make, and you don’t have to worry about cleaning the mason jar at game, so it’s low impact while you’re playing.
I will say it is important to make sure you get the old fashioned rolled oats! quick oats and steel cut oats will not give you the same results. Fortunately, old fashioned rolled oats are really easy to find (and super cheap if your grocery store has a bulk section).
Nutrition (per serving):
Calories: 245
Fat: 5g
Carbohydrates: 56g
Protein: 13g
2 notes
·
View notes
Text
Cold Brew Coffee (Starbucks Style!)

-- Ease to Make: 5 of 5
This is a quintessential set it and forget it drink. It takes very little effort.
-- Ease to Transport: 5 of 5
It’s best cold, but can be kept room temperature if necessary. Very easy to transport!
-- Taste: 5 of 5
I generally hate cold coffee -- but I do like this stuff!
-- Healthiness: 1 of 5
I mean... it’s coffee. It really doesn’t offer you a health benefit, and it’s dehydrating. But... coffee. I’m not a nice person at LARP without it.
Notes and the Method:
I don’t know many people who don’t run on caffeine of some sort at LARP. For me, coffee is part of my life blood. And it’s super easy to make!
Generally speaking, I find cold coffee to be an abomination, but when you’re talking about games in July in Southern California -- cold drinks can’t be beat. I make entirely too much. But I like to be able to share, and it’s super cheap.
Basically, the theory is simple, you make a coffee concentrate using water and coarse grounds, and then dilute it with an equal amount of water. I’ve found that if you want a full gallon of coffee (give or take) you need to make about 0.6 gallons of the concentrate, as you lose a bit of it with the grounds.
Here’s how it works (for 1 Gallon):
Ingredients:
-- 10 ounces fresh Coarse Ground coffee. Do NOT BUY the pre-bagged stuff, go somewhere where you can grind it yourself, and set the grinder on the most coarse setting it has. Don’t trust your local chain coffee shop to grind it right, I’ve discovered most of them ignore you when you tell them what setting you want.
-- 10 cups good water. I do like to buy water for this recipe as opposed to using tap. Good water makes good coffee!
-- 8 - 10 more cups good water that will be used to dilute the concentrate.
You can adjust the amount you get out of this recipe with some simple math. For every ounce of ground coffee, you use a cup of water (cold or room temperature). The coffee + water mix makes a concentrate that you will then dilute by half. So, if you want only 2 cups of cold brew, you would use 1 ounce of coffee + 1 cup of water, let the concentrate brew, and then dilute it with 1 more cup of water.
To make, put your coffee in with the correct amount of water. In this case, 10 ounces of coffee in 10 ounces of water. Seal the container your coffee is in, give it a quick swirl to make sure the grounds are wet, and set it in your fridge for 24 hours.
Once done, strain the concentrate into a bowl or something similar. I use the metal strainer out of my teapot to catch the coffee grounds. Do NOT press the coffee grounds to get the extra water out. If you press the grounds, you’ll get all the bitter oils and your coffee will taste awful. Just let it strain gently, and then throw the grounds away.
Using a measuring cup of some sort, measure and pour the coffee concentrate back into whatever receptacle you plan to use to keep it. Then measure the same exact amount of clean water to add to the concentrate. If you’re using a gallon container, like me, you’ll want to stop at 8 cups of concentrate (if you end up with more) so you have enough room for the other 8 cups of cold water!
I take the single serve cups of half and half with me to game. I don’t use sugar in my coffee, and this coffee comes out nice enough that it really doesn’t need to be doctored that much! I recommend getting fun flavors, as the long brewing time really lets the flavors mingle into the coffee.
2 notes
·
View notes
Text
Tabbouleh

Ease to Make: 2 of 5
This one takes a little more work to make, and you have to be a little more knowledgeable around the kitchen to be able to deal with the Bulgar wheat. It doesn’t generate a huge amount of dirty dishes (which is a bonus in my book). It took me about 30 minutes, which isn’t terrible -- but if you’re not good with a chef’s knife, it’s going to take you significantly longer to make.
Ease to Transport: 5 of 5
Way easy! Just throw it in a tupperware (or two) and store in your cooler. Because these are very chopped salads, they don’t need the same space a leaf salad needs, and the salad isn’t as prone to visible bruising when stored in ice.
Ease of Cleanup at Game: 5 of 5
Just seal the tupperware so it doesn’t dry out and throw back in your cooler. Clean the tupperware when you get home, and you’re all set to go. It doesn’t get much easier than that!
Taste: 5 of 5
I admit, this one gets a boost just because I LOVE Tabbouleh. If you’ve never had it before, you’re in for a treat! I served this alongside the Quesadillas, and it was perfect.
Healthiness: 5 of 5
This is a great side salad full of flavor and good fats. It really doesn’t get much healthier than this.
Idea taken from the following website (I couldn’t find the exact ingredients, so my list is below):
https://www.themediterraneandish.com/tabouli-salad/
Ingredients (Makes 2 servings):
2 tbsp bulgar wheat (I ended up with red bulgar)
1 roma tomato (chopped very fine)
¼ English cucumber (chopped very fine)
½ bunch parsley (chopped very fine)
6 mint leaves (chopped very fine)
1 green onion (chopped very fine)
salt (to taste)
1 tbsp lime juice
1 tbsp olive oil
Directions
Chop the tomato, salt it very lightly, and then spread the tomato in a single layer on a small pile of paper towels on a plate. Let the paper towels wick the extra moisture out of the tomatoes. You absolutely want to do this first to let the tomatoes sit while you do everything else.
Cook the buglar wheat in a small pan on your stovetop, following the directions as closely as you can. See the notes below for some pro tips!
Chop your remaining vegetables and herbs while the buglar wheat cools down a bit. You don’t want to put piping hot bulgar wheat in with the rest of your ingredients, on account of the fact that piping hot wheat will wilt everything else.
Mix everything together, and ideally let it sit at least overnight before you eat it. As Alton Brown likes to say, your patience will be rewarded.
Notes:
With this small amount of bulgar -- it may be necessary to add about twice as much water, and not cover the pan. If you cover the pan you’ll end up with a boil over, and bulgar wheat everywhere -- which is kinda hard to chip off your stove afterwards. (I speak from unfortunate experience.) Keep an eye on the wheat while it’s cooking, and add more water slowly if needed. Make sure you’re adding the water slowly so you don’t change the temperature of the cooking water too dramatically. You want the wheat to come out moist, but not watery. Once it gets toward the end, stir it around a bit to boil off the rest of the water, and you should be good to go.
Generally speaking, I’m usually an advocate for fresh squeezed lime juice, but I find it doesn’t make a huge difference in this recipe what with it competing against fresh parsley and mint. Save yourself some pre-game time... buy lime juice in a squeeze bottle, and just use that.
If you’ve been trying to practice chopping skills, this is the best recipe for it. Your ingredients aren’t cooking, so they don’t have to be perfectly similar in size. It means you have some leeway to play around without ruining your recipe. As long as you get everything nice and small, you’re all set. Get yourself a good cutting board that doesn’t slide around, and use this time to practice good chopping habits with an awesome chef’s knife. Make sure it’s sharp! More injuries come from dull knives than you’d imagine!
Nutrition (per serving):
Calories: 180
Fat: 7.9g
Carbohydrates: 26.2g
Protein: 5.2g
0 notes
Last Seen Blogs

nhoomatthews
Nhoo Matthews

kurjallisuus
kurjallisuus

zgggjl
无标题

remnant3056
DraugCell

glassgrasslunchtime
like a puppet with its strings cut