#Platforms for Hosting Open Source Projects Beyond GitHub
Explore tagged Tumblr posts
Visit Tumblr Blog
Explore Tumblr blogs with no restrictions, modern design and the best experience.
Last Seen Tumblr Blogs


Fun Fact
Tumblr was attacked by a cross-site scripting worm deployed by the Internet troll group GNAA on Dec 3, 2012.
Text
Top 10 Platforms for Hosting Open Source Projects Beyond GitHub
View On WordPress
0 notes
Text
How To Get An Online Internship In the IT Sector (Skills And Tips)

Internships provide invaluable opportunities to gain practical skills, build professional networks, and get your foot in the door with top tech companies.
With remote tech internships exploding in IT, online internships are now more accessible than ever. Whether a college student or career changer seeking hands-on IT experience, virtual internships allow you to work from anywhere.
However, competition can be fierce, and simply applying is often insufficient. Follow this comprehensive guide to develop the right technical abilities.
After reading this, you can effectively showcase your potential, and maximize your chances of securing a remote tech internship.
Understand In-Demand IT Skills
The first step is gaining a solid grasp of the most in-demand technical and soft skills. While specific requirements vary by company and role, these competencies form a strong foundation:
Technical Skills:
Proficiency in programming languages like Python, JavaScript, Java, and C++
Experience with front-end frameworks like React, Angular, and Vue.js
Back-end development skills - APIs, microservices, SQL databases Cloud platforms such as AWS, Azure, Google Cloud
IT infrastructure skills - servers, networks, security
Data science abilities like SQL, R, Python
Web development and design
Mobile app development - Android, iOS, hybrid
Soft Skills:
Communication and collaboration
Analytical thinking and problem-solving
Leadership and teamwork
Creativity and innovation
Fast learning ability
Detail and deadline-oriented
Flexibility and adaptability
Obtain Relevant Credentials
While hands-on skills hold more weight, relevant academic credentials and professional IT certifications can strengthen your profile. Consider pursuing:
Bachelor’s degree in Computer Science, IT, or related engineering fields
Internship-specific courses teaching technical and soft skills
Certificates like CompTIA, AWS, Cisco, Microsoft, Google, etc.
Accredited boot camp programs focusing on applied skills
MOOCs to build expertise in trending technologies like AI/ML, cybersecurity
Open source contributions on GitHub to demonstrate coding skills
The right credentials display a work ethic and supplement practical abilities gained through projects.
Build An Impressive Project Portfolio
Nothing showcases skills better than real-world examples of your work. Develop a portfolio of strong coding, design, and analytical projects related to your target internship field.
Mobile apps - publish on app stores or use GitHub project pages
Websites - deploy online via hosting services
Data science - showcase Jupyter notebooks, visualizations
Open source code - contribute to public projects on GitHub
Technical writing - blog posts explaining key concepts
Automation and scripts - record demo videos
Choose projects demonstrating both breadth and depth. Align them to skills required for your desired internship roles.
Master Technical Interview Skills
IT internship interviews often include challenging technical questions and assessments. Be prepared to:
Explain your code and projects clearly. Review them beforehand.
Discuss concepts related to key technologies on your resume. Ramp up on fundamentals.
Solve coding challenges focused on algorithms, data structures, etc. Practice online judges like LeetCode.
Address system design and analytical problems. Read case interview guides.
Show communication and collaboration skills through pair programming tests.
Ask smart, well-researched questions about the company’s tech stack, projects, etc.
Schedule dedicated time for technical interview practice daily. Learn to think aloud while coding and get feedback from peers.
Show Passion and Curiosity
Beyond raw skills, demonstrating genuine passion and curiosity for technology goes a long way.
Take online courses and certifications beyond the college curriculum
Build side projects and engage in hackathons for self-learning
Stay updated on industry news, trends, and innovations
Be active on forums like StackOverflow to exchange knowledge
Attend tech events and conferences
Participate in groups like coding clubs and prior internship programs
Follow tech leaders on social mediaListen to tech podcasts while commuting
Show interest in the company’s mission, products, and culture
This passion shines through in interviews and applications, distinguishing you from other candidates.
Promote Your Personal Brand
In the digital age, your online presence and personal brand are make-or-break. Craft a strong brand image across:
LinkedIn profile - showcase achievements, skills, recommendations
GitHub - displays coding activity and quality through clean repositories
Portfolio website - highlight projects and share valuable content
Social media - post career updates and useful insights, but avoid oversharing
Blogs/videos - demonstrate communication abilities and thought leadership
Online communities - actively engage and build relationships
Ensure your profiles are professional and consistent. Let your technical abilities and potential speak for themselves.
Optimize Your Internship Applications
Applying isn’t enough. You must optimize your internship applications to get a reply:
Ensure you apply to openings that strongly match your profile Customize your resume and cover letters using keywords in the job description
Speak to skills gained from coursework, online learning, and personal projects
Quantify achievements rather than just listing responsibilities
Emphasize passion for technology and fast learning abilities
Ask insightful questions that show business understanding
Follow up respectfully if you don’t hear back in 1-2 weeks
Show interest in full-time conversion early and often
Apply early since competitive openings close quickly
Leverage referrals from your network if possible
This is how you do apply meaningfully. If you want a good internship, focus on the quality of applications. The hard work will pay off.
Succeed in Your Remote Internship
The hard work pays off when you secure that long-awaited internship! Continue standing out through the actual internship by:
Over Communicating in remote settings - proactively collaborate
Asking smart questions and owning your learning
Finding mentors and building connections remotely
Absorbing constructive criticism with maturity
Shipping quality work on or before deadlines
Clarifying expectations frequently
Going above and beyond prescribed responsibilities sometimes
Getting regular feedback and asking for more work
Leaving with letters of recommendation and job referrals
When you follow these tips, you are sure to succeed in your remote internship. Remember, soft skills can get you long ahead in the company, sometimes core skills can’t.
Conclusion
With careful preparation, tenacity, and a passion for technology, you will be able to get internships jobs in USA that suit your needs in the thriving IT sector.
Use this guide to build the right skills, create an impressive personal brand, ace the applications, and excel in your internship.
Additionally, you can browse some good job portals. For instance, GrandSiren can help you get remote tech internships. The portal has the best internship jobs in India and USA you’ll find. The investment will pay dividends throughout your career in this digital age. Wishing you the best of luck! Let me know in the comments about your internship hunt journey.
#itjobs#internship opportunities#internships#interns#entryleveljobs#gradsiren#opportunities#jobsearch#careeropportunities#jobseekers#ineffable interns#jobs#employment#career
4 notes
·
View notes
Text
How To Get An Online Internship In the IT Sector (Skills And Tips)

Internships provide invaluable opportunities to gain practical skills, build professional networks, and get your foot in the door with top tech companies.
With remote tech internships exploding in IT, online internships are now more accessible than ever. Whether a college student or career changer seeking hands-on IT experience, virtual internships allow you to work from anywhere.
However, competition can be fierce, and simply applying is often insufficient. Follow this comprehensive guide to develop the right technical abilities.
After reading this, you can effectively showcase your potential, and maximize your chances of securing a remote tech internship.
Understand In-Demand IT Skills
The first step is gaining a solid grasp of the most in-demand technical and soft skills. While specific requirements vary by company and role, these competencies form a strong foundation:
Technical Skills:
>> Proficiency in programming languages like Python, JavaScript, Java, and C++ >> Experience with front-end frameworks like React, Angular, and Vue.js >> Back-end development skills - APIs, microservices, SQL databases >> Cloud platforms such as AWS, Azure, Google Cloud >> IT infrastructure skills - servers, networks, security >> Data science abilities like SQL, R, Python >> Web development and design >> Mobile app development - Android, iOS, hybrid
Soft Skills:
>> Communication and collaboration >> Analytical thinking and problem-solving >> Leadership and teamwork >> Creativity and innovation >> Fast learning ability >> Detail and deadline-oriented >> Flexibility and adaptability
Obtain Relevant Credentials
While hands-on skills hold more weight, relevant academic credentials and professional IT certifications can strengthen your profile. Consider pursuing:
>> Bachelor’s degree in Computer Science, IT, or related engineering fields. >> Internship-specific courses teaching technical and soft skills. >> Certificates like CompTIA, AWS, Cisco, Microsoft, Google, etc. >> Accredited boot camp programs focusing on applied skills. >> MOOCs to build expertise in trending technologies like AI/ML, cybersecurity. >> Open source contributions on GitHub to demonstrate coding skills.
The right credentials display a work ethic and supplement practical abilities gained through projects.
Build An Impressive Project Portfolio
Nothing showcases skills better than real-world examples of your work. Develop a portfolio of strong coding, design, and analytical projects related to your target internship field.
>> Mobile apps - publish on app stores or use GitHub project pages >> Websites - deploy online via hosting services >> Data science - showcase Jupyter notebooks, visualizations >> Open source code - contribute to public projects on GitHub >> Technical writing - blog posts explaining key concepts >> Automation and scripts - record demo videos
Choose projects demonstrating both breadth and depth. Align them to skills required for your desired internship roles.
Master Technical Interview Skills
IT internship interviews often include challenging technical questions and assessments. Be prepared to:
>> Explain your code and projects clearly. Review them beforehand. >> Discuss concepts related to key technologies on your resume. Ramp up on fundamentals. >> Solve coding challenges focused on algorithms, data structures, etc. Practice online judges like LeetCode. >> Address system design and analytical problems. Read case interview guides. >> Show communication and collaboration skills through pair programming tests. >> Ask smart, well-researched questions about the company’s tech stack, projects, etc.
Schedule dedicated time for technical interview practice daily. Learn to think aloud while coding and get feedback from peers.
Show Passion and Curiosity
Beyond raw skills, demonstrating genuine passion and curiosity for technology goes a long way.
>> Take online courses and certifications beyond the college curriculum >> Build side projects and engage in hackathons for self-learning >> Stay updated on industry news, trends, and innovations >> Be active on forums like StackOverflow to exchange knowledge >> Attend tech events and conferences >> Participate in groups like coding clubs and prior internship programs >> Follow tech leaders on social media >> Listen to tech podcasts while commuting >> Show interest in the company’s mission, products, and culture
This passion shines through in interviews and applications, distinguishing you from other candidates.
Promote Your Personal Brand
In the digital age, your online presence and personal brand are make-or-break. Craft a strong brand image across:
>> LinkedIn profile - showcase achievements, skills, recommendations >> GitHub - displays coding activity and quality through clean repositories >> Portfolio website - highlight projects and share valuable content >> Social media - post career updates and useful insights, but avoid oversharing >> Blogs/videos - demonstrate communication abilities and thought leadership >> Online communities - actively engage and build relationships
Ensure your profiles are professional and consistent. Let your technical abilities and potential speak for themselves.
Optimize Your Internship Applications
Applying isn’t enough. You must optimize your internship applications to get a reply:
>> Ensure you apply to openings that strongly match your profile >> Customize your resume and cover letters using keywords in the job description >> Speak to skills gained from coursework, online learning, and personal projects >> Quantify achievements rather than just listing responsibilities >> Emphasize passion for technology and fast learning abilities >> Ask insightful questions that show business understanding >> Follow up respectfully if you don’t hear back in 1-2 weeks >> Show interest in full-time conversion early and often >> Apply early since competitive openings close quickly >> Leverage referrals from your network if possible
This is how you do apply meaningfully. If you want a good internship, focus on the quality of applications. The hard work will pay off.
Succeed in Your Remote Internship
The hard work pays off when you secure that long-awaited internship! Continue standing out through the actual internship by:
>> Over Communicating in remote settings - proactively collaborate >> Asking smart questions and owning your learning >> Finding mentors and building connections remotely >> Absorbing constructive criticism with maturity >> Shipping quality work on or before deadlines >> Clarifying expectations frequently >> Going above and beyond prescribed responsibilities sometimes >> Getting regular feedback and asking for more work >> Leaving with letters of recommendation and job referrals
When you follow these tips, you are sure to succeed in your remote internship. Remember, soft skills can get you long ahead in the company, sometimes core skills can’t.
Conclusion
With careful preparation, tenacity, and a passion for technology, you will be able to get internships jobs in USA that suit your needs in the thriving IT sector.
Use this guide to build the right skills, create an impressive personal brand, ace the applications, and excel in your internship.
Additionally, you can browse some good job portals. For instance, GrandSiren can help you get remote tech internships. The portal has the best internship jobs in India and USA you’ll find.
The investment will pay dividends throughout your career in this digital age. Wishing you the best of luck! Let me know in the comments about your internship hunt journey.
#internship#internshipopportunity#it job opportunities#it jobs#IT internships#jobseekers#jobsearch#entryleveljobs#employment#gradsiren#graduation#computer science#technology#engineering#innovation#information technology#remote jobs#remote work#IT Remote jobs
5 notes
·
View notes
Text
Affordable Artificial Intelligence Courses in Delhi Without Compromising Quality
Artificial Intelligence (AI) is no longer a futuristic concept—it’s now a critical driver of innovation across industries. From self-driving cars to chatbots and predictive analytics, AI is shaping the way the world operates. As demand for AI professional’s skyrockets, many individuals in India’s capital city are searching for Artificial Intelligence courses in Delhi that offer quality education without a hefty price tag.
But can you really find an affordable Artificial Intelligence course in Delhi without compromising on curriculum, certifications, and career outcomes? The answer is yes—and in this guide, we’ll help you explore cost-effective AI learning options that still deliver industry-relevant skills.
Why Affordability Matters in AI Education?
AI education often comes with a price tag—especially when it includes live sessions, hands-on projects, expert mentorship, and career guidance. However, not everyone can invest lakhs of rupees into an upskilling program. Fortunately, Delhi is home to several institutes and programs that strike a balance between affordability and academic rigor.
Whether you're a student, a working professional, or a job seeker switching careers, your ideal AI course should offer:
A comprehensive syllabus
Experienced trainers
Practical, project-based learning
Placement assistance or certifications
A reasonable fee structure
Top Affordable Artificial Intelligence Courses in Delhi
Here are some of the most budget-friendly yet high-quality AI courses available in Delhi right now:
1. Boston Institute of Analytics – Delhi Campus
Overview: Boston Institute of Analytics (BIA) offers one of the most comprehensive and affordable Artificial Intelligence courses in Delhi, especially known for combining global curriculum standards with local industry needs.
Course Highlights:
Covers Python, Machine Learning, Deep Learning, NLP, Computer Vision, and Generative AI
Hands-on capstone projects and hackathons
Weekend and weekday classroom batches
Industry-recognized certification
EMI options available for fee payment
Fee Range: ₹50,000 – ₹80,000 (with financial assistance options)
Why It Stands Out: BIA focuses on practical exposure and real-world case studies, ensuring students are job-ready without paying exorbitant tuition fees.
What to Look for in a Quality Yet Affordable AI Course
Before enrolling in any Artificial Intelligence course in Delhi, consider these non-negotiables:
1. Updated Curriculum
Ensure the course includes:
Python for Data Science
Machine Learning (supervised & unsupervised)
Deep Learning (ANN, CNN, RNN)
NLP (Natural Language Processing)
Generative AI (ChatGPT, DALL·E, etc.)
Model Deployment and AI Ethics
2. Project-Based Learning
Theory alone doesn’t help. Look for capstone projects, hackathons, and portfolio development.
3. Industry Mentors
Institutes like BIA bring in guest faculty from top tech firms, which adds tremendous value.
4. Certification
Make sure you get a valid and recognized certificate that improves your resume visibility on platforms like LinkedIn, Naukri, and Internshala.
5. Placement Support
Job assistance can include:
Resume and portfolio building
Mock interviews
Job referrals
Internship opportunities
Tips to Maximize ROI from an Affordable AI Course
Even if you choose a budget-friendly program, you must be proactive to get the most out of it:
✅ 1. Work on Open-Source Projects
Contribute to GitHub or join AI-related community projects. This adds real-world exposure.
✅ 2. Participate in Hackathons
Websites like Kaggle, Devfolio, and HackerEarth host AI challenges that can help you test your skills.
✅ 3. Network Locally
Attend AI meetups in Delhi, such as PyDelhi or AI Saturdays. Many job opportunities arise from networking.
✅ 4. Learn Beyond the Syllabus
Use free platforms like Coursera, YouTube (StatQuest, Krish Naik), and Google AI blog to supplement your learning.
✅ 5. Build a Portfolio Website
Showcase your projects, blog about your learning, and keep your LinkedIn profile active.
Who Should Enroll in These Courses?
Affordable AI courses in Delhi are perfect for:
College students looking for job-ready skills before graduation
Working professionals planning a career switch to AI
Entrepreneurs and startup founders who want to leverage AI in their businesses
Freelancers and data enthusiasts who want to stay relevant in the tech industry
Final Thoughts
The idea that "affordable means low quality" doesn't hold true anymore—especially in the field of AI education. In a city like Delhi, where opportunity meets ambition, there are several cost-effective Artificial Intelligence courses in Delhi that still offer exceptional career value, certification, and practical training.
Among them, the Boston Institute of Analytics in Delhi is a standout choice. With its industry-aligned curriculum, expert faculty, hands-on training, and global certification—all at an accessible price—it ensures you don’t need to break the bank to break into the AI industry.
#Best Data Science Courses in Delhi#Artificial Intelligence Course in Delhi#Data Scientist Course in Delhi#Machine Learning Course in Delhi
0 notes
Text
Git vs GitHub: A Simple Comparison

In the world of software development, Git and GitHub are two terms that are often used interchangeably, but they serve distinct purposes. Both are essential tools for developers, but understanding their differences can help you use them more effectively.
Git: Your Code’s Personal Logbook
Git is a tool installed on your computer to track every tweak you make to your project’s code. Created by Linus Torvalds in 2005, it’s like a meticulous journal that records each version of your work. You can save changes (called commits), try new ideas in separate “branches,” and easily fix mistakes by reverting to earlier points. Best of all, it works offline, giving you complete control over your project.
Why Git shines:
Change History: Every edit is saved, letting you revisit or undo anything.
Branching: Experiment with features without risking your main codebase.
Efficiency: It’s fast and handles large projects smoothly.
GitHub: The Code-Sharing Platform
GitHub is an online service where your Git projects are stored and shared. Launched in 2008, it’s like a community hub for developers. You upload your repositories to GitHub, allowing teammates or even global contributors to view, edit, or suggest improvements. Beyond storage, it offers tools like pull requests for code reviews, issue trackers for tasks, and automation for testing or deploying.
What makes GitHub special:
Collaboration: Share projects, review contributions, and merge updates easily.
Community: Connect with developers, fork projects, or highlight your work.
Automation: Tools like GitHub Actions streamline repetitive tasks.
Their Differences
Purpose: Git manages code changes on your device; GitHub hosts and enables teamwork online.
Access: Git is free and open-source; GitHub has free and premium plans.
Features: Git focuses on version control; GitHub adds collaboration and management tools.
Operation: Git works without internet; GitHub requires a connection.
How They Complement Each Other
Imagine using Git to craft your project locally, saving changes as you go. When ready, you push it to GitHub, where others can review or contribute. Git keeps your work organized, while GitHub makes it accessible and collaborative.
0 notes
Text
We're number one, they open-source bragged

Welcome to the October edition of the Open Home Foundation newsletter, the place to learn about the latest and greatest things for your smart home that improve its privacy, choice, and sustainability.
The Open Home newsletter is written by Paulus Schoutsen - President of the Open Home Foundation, founder of Home Assistant, and Nabu Casa. Was this email forwarded to you? Subscribe here!
This has been an incredible month for the Open Home Foundation. It started out with a real challenge we worked hard to overcome, but it ended with some of the best news for the future of the open home—that Home Assistant is the largest open-source project. Also, this edition has the results from our recent request to improve our voice assistant’s wake word engine, along with another winning Home Assistant release.
The Open Home Continues to grow
I’m writing this edition of the newsletter from a hotel room in San Francisco, right after taking the stage with Frenck at this year's GitHub Universe. When we were invited to speak at the day 2 keynote, we were incredibly humbled, and I didn’t think twice about it. Both Frenck and I personally owe a lot to GitHub; it's a platform that lets us create, connect, and ultimately change the course of our lives. On a professional level, Github makes the work we do on Open Home projects possible, and they have always gone above and beyond to support Home Assistant, along with hosting many of our other projects and libraries. We also knew this was a chance to share everything we’ve learned in building a big community on the platform with other aspiring open-source creators.

Frenck and I on the GitHub Universe Keynote stage with Kyle Dailge, COO of GitHub, and fellow Home Assistant user.
We had just celebrated Home Assistant’s 11th anniversary, and getting to speak at GitHub Universe seemed like the perfect way to cap this all off, but little did we know we were just about to receive our biggest Birthday gift yet. On day one of Universe, GitHub published its annual Octoverse report, highlighting the platform's biggest trends and projects. It named Home Assistant 2024’s largest open-source project by contributors. Home Assistant had more than 21,000 people contribute over the year, an increase from last year's roughly 17,000 contributors. We also ranked 2nd for the number of first-time contributors, meaning there are thousands of people who chose our project as their first foray into the world of open-source.
This isn’t the only one of our associated projects on this year’s top projects list, its amazing to see Open Home Foundation collaboration partner Zigbee2MQTT at the 10th spot for first-time contributors. The project provides more choice in the smart home and deserves the support. This win for these projects shows how interdependent we all are, and that a rising tide lifts all boats. It also shows that there is a big appetite to build and share projects that allow people to have a more open home, one that gives them privacy, choice, and sustainability.

Our community meetup at Universe that Missy, our community manager, organized and GitHub graciously provided the space.
This links perfectly to what we said on stage; by designing something that gives people full control and empowers them to build, we have grown one of the biggest and most awesome open communities on GitHub. We explained how the project encourages people to look under the hood, and tinker, and has tools and channels to encourage people to learn, and then share their creations. It's a virtuous circle in which the community builds cool things that attract new users, who build new things. We also spoke about how our community is our guiding star, keeping us on course. I feel the larger we get the stronger the mission becomes and I’m so thankful for all the support we get from the community - they make this all possible.
Important changes to the Open Home Foundation
When we launched the Open Home Foundation in April of this year, it was the logical culmination of years of work on the Home Assistant project. We sought a lot of advice along the way and eventually found that establishing the foundation in Switzerland would give us the best protections for Open Home projects. We looked for inspiration from other organizations defending our digital rights, and eventually settled on moving ownership of projects to a non-profit Verein (“association”) that would be supported by for- and non-profit partners.
Since establishing the foundation, we have not been sitting still and have been looking for ways to make the foundation even stronger. This is why we’re now moving the Open Home Foundation from being a Verein to a Stiftung (“foundation”); this is even more strict and is an overall better fit. Proton also created a Swiss Stiftung earlier this year, and though it differs structurally from our foundation, they have done a great job explaining why an organization would choose this structure and the benefits. From the outside, it will be hard to see any difference in how we operate, but internally it brings extra protections and helps ensure the future of the foundation and the projects it supports.
Another change we’re working on is to make it easier for organizations around the world to donate to the Open Home Foundation. We’re currently applying to be a 501(c)(3) organization in the United States, which will make it much easier for companies located there to support our work. We can’t say anything today about new supporters, but watch this space!
2024.10: Heading in the right direction...
1 note
·
View note
Text
The Evolution of Source Code Repositories: From SVN to Git and Beyond

Source code repositories are fundamental to modern software development, facilitating version control, collaboration, and project management. Over the years, these repositories have evolved significantly, driven by technological advancements and changing development practices. This article traces the evolution of source code repositories, from the early days of SVN (Subversion) to the rise of Git and explores the future trends shaping repository management.
The Rise of SVN (Subversion)
SVN, or Subversion, emerged in the early 2000s as a centralized version control system (VCS) designed to replace CVS (Concurrent Versions System). SVN offered features like atomic commits, versioned directories, and support for branching and merging. It became widely adopted due to its stability and familiar workflow for developers accustomed to CVS.
Limitations of SVN and the Emergence of Distributed Version Control
Despite its popularity, SVN had limitations, particularly in handling distributed workflows and scalability for large projects. This paved the way for the emergence of distributed version control systems (DVCS), with Git leading the charge.
The Dominance of Git
Git, created by Linus Torvalds in 2005, revolutionized version control with its distributed architecture and emphasis on speed, data integrity, and support for non-linear development. Key features that propelled Git's adoption include:
Distributed Development: Each developer maintains a complete copy of the repository, enabling offline work and faster branching and merging.
Branching and Merging: Lightweight branches allow developers to experiment and collaborate on features independently, with seamless merging capabilities.
Community and Ecosystem: GitHub, launched in 2008, and GitLab provided robust platforms for hosting Git repositories, enhancing collaboration, code review, and project management.
Advantages of Git Over SVN
Git's decentralized nature and robust branching model offered several advantages over SVN:
Performance: Git's local operations and efficient data structures (such as the commit graph) ensure fast performance, even with large repositories.
Flexibility: Git's support for branching, merging, and distributed workflows enables agile development practices and collaboration among geographically dispersed teams.
Popularity and Adoption: Git became the de facto standard for version control in both open-source and enterprise environments, driven by its vibrant community, extensive tooling support, and integration with CI/CD pipelines.
Beyond Git: Trends in Source Code Repositories
While Git remains dominant, newer trends and technologies are shaping the future of source code repositories:
Decentralized Version Control: Technologies like Mercurial and Bazaar continue to offer alternatives to Git, emphasizing ease of use and decentralized workflows.
Integration with DevOps: Source code repositories are increasingly integrated with CI/CD pipelines, enabling automated testing, deployment, and infrastructure as code (IaC).
Cloud-Native Repositories: Cloud-based repository platforms offer scalability, reliability, and collaboration features, catering to modern development practices and distributed teams.
Future Directions and Innovations
Looking ahead, the future of source code repositories is likely to focus on:
Enhanced Collaboration: AI-driven tools for code review, automated documentation generation, and intelligent issue triaging.
Security and Compliance: Integrated security scanning, vulnerability management, and compliance automation to safeguard code repositories.
Blockchain and Decentralization: Exploring decentralized version control systems leveraging blockchain technology for enhanced security, transparency, and verifiability.
The evolution of source code repositories, from SVN to Git and beyond, reflects the dynamic nature of software development and the continuous quest for efficiency, scalability, and collaboration. Git's rise marked a pivotal shift towards distributed version control, empowering developers with powerful tools and fostering a global community of contributors. As technology advances, source code repositories will continue to evolve, integrating AI, cloud-native solutions, and decentralized models to meet the demands of modern software development practices. Embracing these innovations ensures that repositories remain not just tools for version control, but catalysts for innovation and collaboration in the digital age.
0 notes
Text
The Concepts of Open Source
Suggested Reading Time: 6min
Copyright belongs to Xiamen University Malaysia Open Source Community Promotion Group (for Community Service course)
*WeChat Public Account: XMUM_OSC *Original Hyperlink: https://mp.weixin.qq.com/s/n8FM7ulAgpfiP2mMBc9qcA
We chose to promote Open Source Community as our Community Service topic because the members of our group are all majoring in Software Engineering and Computer Science Technology. It is deeply understood that Open Source is not a term far from our daily school-life but also a kind of treasure that is deserve to be explored.
Open Source, namely, open the source code of a program to the public. Programmers not included in the development group are able to investigate, optimize and even expand the functions of the original program. Nowadays, more and more IT companies are devoted to support the career of Open Source. On the one hand, software developers can build their software using existing open source projects to reduce duplication of efforts. On the other hand, companies can gain the public’s help, including optimization and expansion, by sharing their source code which is under developing.
It is reported by CCTV that software, whether for mobile phones or computers, relies on up to 150 open source components on average. The earliest open source project was developed in the US, where today more than 100 foundations built for this area are registered. Recently in China, several large IT companies have also launched some high-quality open source projects. For example, HUAWEI’s HarmonyOS, Tencent’s TBase and Ali’s Mars.
Among Chinese Internet companies, the development of open source software is become a new trend. The latest data shows that the number of Chinese developers on Github, the largest code-hosting platform, is growing rapidly and second only to the users in the US. The Institute of Software of the Chinese Academy of Sciences has also started the major infrastructure construction of the open source software supply chain, which is aimed to provide high-quality and low-risk open source software to key devices and systems, especially for those built for manufacturing.
The Concepts of Open Source
When it comes to Open Source, people can easily think about security, collaboration, low cost, positive development and freedom. These words are full of positive energy. That’s why someone describe open source as a kind of spirit. The opposite of open source, closed source, is usually associated with limitation, closure, lack of ambition, and vendor lock-in.
What supports the development of open source is neither feelings nor religious belief in freedom, but the market behind open source. The increasing demand of open source projects comes from the demand of IT instruction. IT instruction strongly relies on IT companies. However, what these companies are able to do now can be substituted by open source components. Software, like music, is inherently a digital commodity with zero distribution costs, leading to the demand gathering platforms like GitHub. Programmers can share their code on these platforms to meet the needs. In return, GitHub also brings a lot of attention to programmers who write useful programs, which, while they may not get a direct financial return, can help their careers.
Maxime Beauchemin, who created AirFlow and SuperSet while working at Airbnb, identifies three advantages of using open source BI in this article: ease of scaling, leverage the power of the community, and avoid vendor lock-in. One of the key reasons open source “takes over” the modern data stack, he noted, is that it is easier to find and test open source software, and the main costs of software distribution come from getting users to know you (search costs) and educating them to use it (transaction costs).
Simply put, open source is a superior approach at building and distributing software because it provides important guaranties around how software can be discovered, tried, operated, collaborated on and packaged. For those reasons, it is not surprising that it has taken over most of the modern data stack: infrastructure, databases, orchestration, data processing, AI/ML and beyond.
The Reduction of Search Cost
Alex Danco recommends Nadia Eghbal's “Working in Public: The Making and Maintenance” of Open Source Software in his newsletter. The book demonstrates the changes in the way open source works.
If you look at most open source projects today, the distribution of doers and bystanders is clearly skewed. Typically, 95% of the work on a project is done by a single core person, or even a single developer. The long tail “contributors” are actually more like users or consumers, sometimes pulling requests, sometimes marking issues, but they are more like fans watching football games than major participants.
Given the appearance of the platforms like Github, it is easier to create, distribute, and discover software, open source is no longer a collaborative community but a Show for creators. Since there is no barrier to entry for anyone to join a project, popular projects are overrun by petty users, and the creators have to face the difficulties of all participants and sometimes vicious verbal attacks. This seems to echo Fred Brooks's point in The Mythical Man-Month: “Adding marginal engineers to a mission creates more costs than benefits.”
The Reduction of Transaction Cost
We shape our tools, and our tools, in turn, shape us. Open source platforms like GitHub accelerate the discovery of software and mean that anyone can see your Show without any background. More modular and plug-and-play open source software is being developed these days because a tool with a smaller focus on not only has a larger audience but also requires a lower cost of trust.
By removing restrictions, open source protocols reduce the transaction cost of software, not just the high price of software licenses, but also the cost of trust. Traditional software has a long sales cycle because it takes a lot of time to educate customers and build trust, and customers spend a lot of time verifying that the software matches their needs in order to reduce unnecessary losses. Hence, many ToB companies like to hold conferences to increase customer awareness.
“It is easy to show that the total contribution of a program to society is reduced by assigning an owner to it. Each potential user of the program, faced with the need to pay to use it, may choose to pay, or may forego use of the program. When a user chooses to pay, this is a zero-sum transfer of wealth between two parties. But each time someone chooses to forego use of the program, this harms that person without benefiting anyone. The sum of negative numbers and zeros must be negative. But this does not reduce the amount of work it takes to develop the program. As a result, the efficiency of the whole process, in delivered user satisfaction per hour of work, is reduced.”
Famous Richard Stallman once wrote in “Why Software Should Be Free”.
This paragraph perfectly illustrates the unit economics of open source.
1 note
·
View note
Text
What was the Best Graphic Design Software in 2019
The graphic design process requires software tools that can provide solutions to real-time design problems. Ranging from free tools for a beginner designer to paid ones for a pro, you can find all sorts of tools to suit your design niche. If you are in need of any kind of design, a placeholder will do, but for anything beyond that you will simply have to dig deep to find the exact design software that fits your needs. From simple to complex and free to paid, here are some examples of the best graphic design software in 2019.
1) Adobe Illustrator CC
Image source: Digital Arts Online This program is Adobe’s flagship product, perhaps even more so than Photoshop. With hundreds of useful and imaginative options available, Adobe Illustrator allows you to create perfection down to the very last vector of every image. In fact, Adobe Illustrator is considered to be the software that most professional graphic designers use to create high-quality and complex designs. The main focus of Adobe Illustrator is to create pictures from scratch or edit one of the stock photos from its built-in library. More importantly, Adobe Illustrator receives two major updates a year, offering 100 GB of cloud storage with the subscription. Why choose Adobe Illustrator? Adobe Illustrator is a great graphic design tool that doesn’t have a 100% compatibility with other software outside the Adobe software suite, a.k.a the “Creative Cloud”. While Adobe Illustrator is perfectly usable on its own, it truly shines when coupled with the rest of the Adobe graphic design tools. If you’re planning on using other Adobe tools or already are, definitely use Adobe Illustrator to maximize the compatibility synergy. Pros: Supreme precision Professional results Synergizes with other Adobe tools Cons: Subscription based, costing $20.99/month Not 100% compatible with non-Adobe products
2) Adobe Photoshop
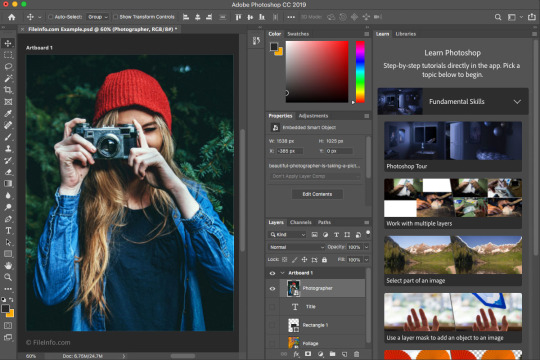
Image source: FileInfo The classic and one of the most well-known graphic design software out there, Adobe Photoshop was initially created in 1988 and has been steadily improved since. The software mostly deals with raster images, which are those that are made using a pixel-based program or a digital camera. Professionals wanting a smooth blend of photorealistic elements would definitely want to pick Adobe Photoshop. The various intricate shadow and color manipulation options enables you to take any number of pictures, perfectly splice them together, and achieve something that looks completely real to the point that today, there’s even a verb created out of this which is “photoshopped”. Why choose Adobe Photoshop? The biggest advantage of Photoshop is in its wealth of options and how well they’re documented. Thanks to Photoshop’s popularity, there’s literally hundreds of tutorials and walkthroughs for any given option to help ease a newbie into becoming a graphic design pro. While there is still a learning curve, it’s easier than ever to get into Photoshop and become a pro at using it, which is considered to be a skill in its own right. Pros: Extremely well supported Most compatible graphic design software on the market Professional-quality results Intricate graphic design options Best suited for photorealistic (raster) images Cons: Subscription based, costing $20.99/month Requires some learning
3) Pixlr
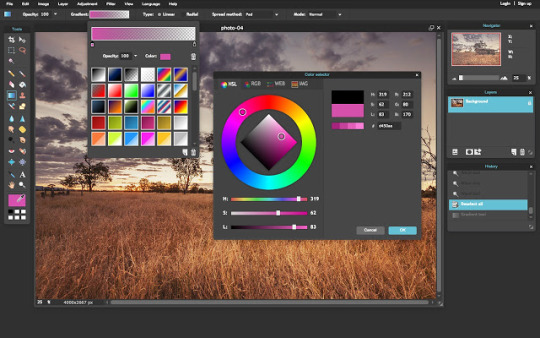
Image source: Chrome Web Store In 2019, browsers have become better than ever before. They are versatile and have moderate hardware requirements, allowing them to do everything except graphic design; for that, you’ll also need to use something like Pixlr. Serving as an internet-based collection of graphic design tools, Pixlr allows anyone to jump right in and start creating wonderful graphic design content using only a browser or Pixlr app within seconds. From taking a screenshot to editing and downloading it, Pixlr covers all the basics of capturing photos and editing. Why choose Pixlr? The biggest advantages of Pixlr are the mobility and immediacy it affords. By using only a browser (or app for mobile devices), you can edit, save, and continue editing on the go whenever you’ve got a few minutes of spare time. Professional graphic designers tend to pack it for travel because they can’t work without their special hardware. Hence, Pixlr allows for a very convenient and lightweight work schedule that adapts to you. Advanced Pixlr editor costs $5/month but also reveals its biggest downside – the dearth of options in the free version of Pixlr. Pros: Low hardware and software requirements Free Beginner-friendly Cons: Not suitable for detailed, in-depth work
4) Sketch
Image source: PC Mag Some graphic design projects are so complicated that they require an entire team to complete. That’s where Sketch comes in. Focusing on collaborative solutions, Sketch allows an entire team to coordinate and stay up-to-date through innate Sketch tools while still being a highly competent program for graphic design. Why choose Sketch? In a large organization, it’s hard to keep track of who’s doing what and when. Using Sketch Libraries, the entire company can be on the same page, with designers having a consistent style and managers able to keep track of the progress and make sure everyone is synchronized. Even better, Sketch also works with Dropbox and GitHub. Pros: Contains collaborative tools Free trial Cons: Only available on Mac Not ideal for a single user
5) Inkscape

Image source: Techworld This is a free graphic design tool that can be used for vector-based images. Like other free solutions, it is supported by the community, often leaving you to scratch your head if you were to get stuck on it. If you have any questions, you are meant to engage with the community until you find the answer you were looking for. Inkscape is a welcome addition to the graphic design market, mainly because by using it, we support the idea of free software. It is free both in terms of it costing $0 and it not being constrained by anyone. Why choose Inkscape? Inkscape is an open source, meaning that everything surrounding its functionality is under public scrutiny. You could, in theory, check out the code used to create it and tweak it to your heart’s desire or make your own version of Inkscape and sell it for profit. There is no company lording over how you should use Inkscape – it truly is a free and flexible graphic design tool. The idea of building a community through joint effort is present in every aspect of Inkscape. In fact, users are even able to contribute to translations and write help articles for the program. Although Inkscape is close to being completely finished, it is still considered to be a program that has quite some bugs and quirks you’ll have to find workarounds for. Pros: Free Open source Has a community built around it Cons: Lack of professional support Still in beta as of October 2019
6) Apple Motion
Image source: Larry Jordan More and more static content is being woven together into animations and hosted on video platforms. In cases where you want to rehash and reuse static graphic design leftovers to create an animation, Apple Motion will be a suitable choice. Why choose Apple Motion? Animations and animated transitions are the forte of Apple Motion. The program is well-stocked with pre-made effects that make it easy for anyone to ‘drag & drop’ their way to glitzy and shiny animated content made out of scraps. Pros: User- and beginner-friendly In-depth controls for nuanced effects Cons: Only available on Mac
7) CorelDRAW
Image source: PC Mag Clean, professional, and detailed – those are the main attributes of CorelDRAW. Using the symmetrical drawing function, you can produce mirrored images of anything you draw and edit them however you see fit. From tiny details to massive projects, CorelDRAW does everything a professional graphic designer could ever want a software to do. However, learning how to handle the wealth of options it offers is another challenge for a beginner graphic designer. Why choose CorelDRAW? CorelDRAW is an extraordinary tool with a price to match it. If you’re designing the most intricate and complex graphic designs out there, CorelDRAW is truly one of the best and most reliable software solutions to use. For everything else, there are cheaper and more accessibles programs out there that will do the job just fine. Pros: Interface compatible with touch devices Scalable graphics engine allows adding tiny details to massive projects Produces results of professional quality Cons: Price Steep learning curve
8) Affinity Designer
Image source: AppKed Affinity Designer is a graphic design tool capable of producing designs of sublime quality. You can zoom in and out to your desire, allowing you to screen the details or take a look at the larger image. From miniature designs to massive projects, Affinity Designer can handle it all, provided that you have the hardware to match. Why choose Affinity Designer? Affinity Designer excels at producing otherworldly, creative art that’s inspired by meditation and religious works. If you’re the type of designer that isn’t content with fiddling with stock photos, give Affinity Designer a spin and see what you end up with. Pros: Realistic shadow editing Layered editing One million percent zoom Cons: Hardware requirements
9) Canva
Image source: Canva If Pixlr is too complicated for you, luckily there’s Canva for you to use. With simple graphic design options, Canva isn’t meant to compete with the likes of Adobe Photoshop. However, it merely provides the bare minimum of utility for any user, even those with very little to no graphic design experience, wanting to start their own business or print out a graphic design without having to call anyone to walk them through it. Templates automate the design process even further and now graphic design is doable with just the simple use of a mouse. Why choose Canva? Canva has a clean, minimalistic interface and options to match. There’s not much depth in Canva but that’s actually perfect for senior users who might get flustered encountering the wealth of editing options in a more professional editor. Pros: Perfect for layman users Free Cons: Requires an internet connection
10) Adobe InDesign
Image source: All PC World This is another one of Adobe’s products with the same monthly subscription but a slightly different toolset. It is mainly used for print and publishing design, such as books or any other document that contains multiple pages. The interface is balanced and smartly adjusts to the user’s needs, providing them with contextual information on the go. Plus, the main benefit of Adobe InDesign is that it provides a comprehensive overview of the project, allowing you to troubleshoot problems before you send the file off for printing. Just like with all other Adobe products, you will be nudged towards buying as many other Creative Cloud programs as possible since they all coordinate seamlessly. For example, it’s possible to get the entire Adobe font library within InDesign and then have specific fonts from it used across the entire project done in other Adobe software solutions. Why choose Adobe InDesign? Complex publishing graphic designs that have an intricate structure or layout will be those that will benefit from Adobe InDesign the most. The more different parts there are in the project, the more work there is to be done when changing anything. Thankfully, InDesign allows you to view the entire project at once to find out what should be changed and where. Changes and adjustments become a breeze when InDesign is involved. Pros: Integration with other Adobe products Huge font selection Overview and easy adjustment of the entire project Cons: Subscription based, costs $20.99/month Some features are still barebones
11) Xara Designer Pro X
Image source: Magix Different stages of design might require changes to be made to its parts or the entire project while still maintaining the color and font. Changing individual elements in the projects while keeping its integrity will require a special type of graphic design software, and this is where Xara Designer Pro X comes in. Xara Designer Pro X comes with over a million stock photos and templates. Why choose Xara Designer Pro X? This is one of those software products that attempt to be a single solution for all your graphic design needs, and when it comes to desktop publishing, Xara Design Pro X definitely succeeds. This is quite a capable tool that can equally handle both raster and vector images with ease. However, it can also output documents, images, or even entire HTML websites. Pros: Extensive templates library Available on Steam Cons: Pricey at $299 Windows only
12) Gravit Designer
Image source: Gravit Designer In some instances, you simply can’t do without Windows but that’s an operating system that does become oppressive after a while. The ideal graphic design software would thus allow you to skip and hop from one operating system to another as you please, maintaining all your projects in sync. Gravit is one such cross-platform graphic design solution meant for professionals. Why choose Gravit Designer? Precision vector tools in Gravit Designer make it a child’s play to make creative, dreamy designs out of any shapes and colors imaginable. You can create all the print and digital designs for a product from start to finish, including stationery and app UI. A neat feature of Gravit Designer is the ability to import an image and turn it into a set of fully editable vectors. Pros: Trial and free version Cross-platform Flexible vector editing options Cons: Subscription based, $49/year Read the full article
1 note
·
View note
Text
What Happens to Open Source Code After The Developer's Death?

While for a long time there has been a battle between open source software and proprietary software, it must be recognized that for several years now, these two worlds have not been seen as opposed, but somewhat complementary. One of the advantages of these open source software, beyond the ability to easily contribute to open source projects, is that open source code can be used and modified as desired in both open source and commercial software. Jim Weirich is a developer who has had several open sources tools like Rake, Builder, RubyGems, Ruby KoanS and more. He was also a significant contributor to the Ruby community of the western world. In 2014, Weirich died leaving behind a panoply of tools used by a large number of people. But to ensure the durability of these tools that were sometimes developed by Weirich only, we must resume his projects. Justin Searls, the developer at Ruby and co-founder of the software company Test Double, noted that after the death of Weirich in 2014, one of the tools left by the developer was not maintained. This means that if there were security patches and other bugs that were submitted by the contributors, there would be no one to approve these changes. Over time, the code of the tool would become obsolete, because incompatible with new technologies. Through this case, Searls points out that the death of Weirich highlights a growing concern in the open source software community. In other words, what happens to open source code after the disappearance of developers? Although some people might find a simple answer by saying that we need to turn to other open source tools that are maintained, the same problem would arise again if the tool is maintained by a person or a small community of volunteers and that these are unavailable or dead. When companies developed their software without resorting to dependencies in the open source community, the problem involved only a handful of people and was therefore imperceptible. But with the integration of open source code in many commercial software, the importance of maintaining open source code at all times resurfaces. The case of the Heartbleed flaw detected in OpenSSL is an edifying example. OpenSSL is an encryption toolkit consisting of two libraries (TLS and SSL). It is used by the majority of companies on the web to ensure the security of their communication for their commercial and non-commercial services. In 2014, a fault called Heartbleed was detected in these tools and allowed an attacker to recover the contents of the server memory without leaving any digital trace. According to the information reported, this tool would be developed by a small team of volunteers who did not have the time or resources to carry out comprehensive security audits. Beyond the security issues caused by the abandonment of an open source project, Searls reports that compatibility issues can arise in many software when a developer dies and abandons a project that is integrated with many software. To better demonstrate the scale of the problems generated by open source open source projects, Libraries.io, a group that examines connections between software projects, has identified more than 2400 open source libraries that are used in at least 1000 other programs. But have received little attention from the open source community. As an example, last year, when developer Azer Koçulu removed a small library called Leftpad on the Internet, it created a domino effect that would have caused headaches to Facebook, Netflix, and other sites as well. To avoid abandoning Weirich's open source Rspec-Given test tool, Searls turned to Github, which hosted the project code. But the platform refused to give him control of the page because the owner did not designate him as the new project manager after his death. To avoid abandoning Weirich's open source Rspec-Given test tool, Searls turned to Github, which hosted the project code. But the platform refused to give him control of the page because the owner did not designate him as the new project manager after his death. Given the difficulties that could arise in the management of an open source project after the death of its owner, what solutions can you recommend to avoid these problems? Read the full article
#developer#DigitalLiteracy#Heartbleed#JimWeirich#JustinSearls#Leftpad#OpenSourceCode#skilldevelopment
20 notes
·
View notes
Text
Startup Tips – How to Hire the Best Software Engineers?
Hiring software engineers is a multi-faceted skill that lies at the crossroad of social networking, technical acumen, process management, and intuition.

Are you an entrepreneur who has the responsibility to understand all-too-well the extent and depth of the hiring challenge.
It is a fact that exceptional software developers are difficult to evaluate.
How do you explore the candidate’s ability to innovate and think creatively?
How do you determine if they are team players?
Is the candidate willing to take constructive feedback?
How do you investigate someone’s moral fiber?
Evaluating soft criteria is not an easy task, doing so isn’t essential in the quest to hire software developers.
Attempts at evaluating crucial and elusive attributes consist of questions that are sufficiently transparent for the correct answers.
The major pitfall is to solely focus on technical minutia, rather than testing the candidate’s ability to solve a problem, think creatively, and to work compatible with the rest of the team.
In this particular post, here are some great source, screen, and interview software engineers without making a dent in your already stretched budget.
Source
Know who you need
Firstly, before you start hiring software engineers, you should know what your requirements are. The more specific you are the better filters you have.
A defined set of skills will help you start looking at the right place. Also, the clarity of what you are looking for should be there in your communication.
For example, are you looking for a front end software engineer or backend developer?
Know where to look
Secondly, the need is clearly defined, inputs have been gathered from stakeholders, agreed on the candidate’s specifications, the next step is to set up a search strategy.
Sourcing means to proactively identify who are:
Actively look for jobs
Not actively looking for a job
If signing up for paid services isn’t an option, the following are the legit resources that you can tap into
LinkedIn
Create a company page
Create a careers page
Publish engaging content
Look for recommendations and testimonials
Use free ads
Participate in discussions and group
Facebook, Twitter, Instagram,
Creative job posting on the company’s page
Strengthen company presence, highlight employee achievement, events, encourage referrals
GitHub
Filter search results based on relevant criteria reaching people of interest
Stack Overflow
Look for candidates having specific skill-set at a particular location
Use the job listing portal
Reddit
Create a personal and company profile
Look for relevant subreddits using keywords
Quora
Establish yourself as a leader
Identify the domain experts, engage them in conversations and build a new relationship
Glassdoor
Sign up for an enhanced employer profile
Promote the company’s brand
Gather metrics to fine-tune hiring strategy
Meetup and Developer events
Make connections and build a mutually beneficial relationship with them
Hackathons
Network with exceptional talent and industry experts; build a talent pipeline
Conduct a recruiting hackathon
LinkedIn
Create an interesting profile and legit company page.
Linkedin is a great platform to create a referral chain and helps in getting recommendations/testimonials to humanize your brand.
This sourcing talent can be found by networking through new, past, and present contacts.
Additionaly, this talent solution can help leverage the magic of data-driven recruiting to get the best people you can.
SImilarly, with the help of free ads and participating in group discussions, it is easy to enhance the visibility of the brand among developers thereby fostering a relationship with them.
Facebook, Twitter. Instagram
As the focal point of the online interaction, these websites help you promote your company and culture through an existing employee.
And cut through the noise and find niche networks using eye-catching ads, videos, anecdotes, photos, and hashtags.
GitHub
GitHub is an online project hosting service where developers share open-source projects.
When there is a public account that is up and running, you can get complete contact information, websites you chose to display, number of followers, Github contributions, and repositories.
Stack Overflow
Stack Overflow is an online community for programmers to learn, share their knowledge, and advance their careers.
Basic details and summary regarding developers are accessible; use the filters to refine your search.
Nonetheless, for passive candidates, check out the career section. It is important to engage in meaningful discussions with people of interest.
Reddit
Reddit is an online community where users submit content, like text posts or direct links, in very specific “subreddits.”
Developers and thought leaders ask questions and discuss technology-related topics here.
This can be a valuable source of highly skilled programmers. Note that Reddit has its own Boolean search terminology.
Quora
Quora is a Q&A website that is able to facilitate social interactions and interesting conversations.
It is important to first build your reputation by answering questions regarding hiring.
You can then identify domain experts by exploring the topics of interest and initiate conversations.
Despite this, it is a possibility that Quora doesn’t help source candidates directly, it helps in designing a more relevant hiring strategy.
Glassdoor
A promising tool for recruiting, Glassdoor exerts a huge social influence on job aspirants.
Everyone goes on Glassdoor to write and read anonymous reviews about companies and company life.
So, it is important that you build an awesome brand while being honest and transparent. Recruits can gather valuable metrics from this website.
Meetups and developer events
Meetups help in uniting people while sharing professional interests. It is important to find potential candidates without having to go to any events as many attendee lists are public.
Once the interest list is made, it is important to filter your candidates. You can send them a personalized email.
It should be noted, the developer events can help you by giving an opportunity to network with the most sort-out technical experts. It is easy to make connections and build mutually beneficial relationships with them.
Hackathon
Hackathon is an amazing place to network with exceptional talent and industry experts.
Additionally, it is easy to build a talent pipeline of hardworking, smart, and passionate software engineers by attending the right events.
The next step is screening.
Screen
Now is the time to move in screening the candidates.
Applicant tracking systems and recruiting tools has made it easy for entrepreneurs.
This is done after cutting down on the cost, time, and effort they invest in managing and retaining employees.
In the traditional recruitment method, you invited applicants, screened them mutually, interviewed shortlisted candidates, and then finally hire them. But this complete hiring process was not flexible, cost-effective, or accurate.
Undoubtedly, the detailed reports help you in giving a perfect picture of what the people can really do. Sometimes, researching the presence on social media gives you a snapshot of potential hires having a professional persona.
Particularly, a phone conversation is a tricky way to vet candidates.
Interview
This is certainly a two-way street. Both the candidate and you have to make decisions.
Once you have got the ideal candidate, you should decide if they:
Are you passionate regarding what they are doing or excited about what they hope to do?
Can you communicate effectively?
Do you have a good grasp of the area of expertise?
Are you able to adapt to any environment and coordinate with the team?
It is good that you hire for their knowledge, flexibility as well as experience. Explore their area of expertise and online presence.
Moreover, go ahead and ask them general questions. Engage them in a conversation and it will help you know a lot about mental agility and problem-solving ability.
If you are a non-techie entrepreneur, it is best when you can take help from any of your reliable in-house team members.
See how the software engineer fares in the audition and this will make the hiring decision very simple and clear for you.
Nonetheless, the key metrics you should consider are competence, creativity, problem-solving skill, and overall amicability.
Software Engineers Technical Acumen
An effective determination of technical proficiency goes far beyond the nuances of the programming language or the technology stack.
Well, these technical details should certainly not be ignored, they are one of the most important elements of the evaluation process.
Subsequently, the leading software engineer never wastes time on committing unrealistic expectations.
Moreover, learning a new language and technology is a trivial exercise for a senior tech lead.
This has to be the fundamental technical strength and understanding, creative thinking, problem-solving that is critical to evaluate.
Apart from this, the proven method for accomplishing this is to pose a programming challenge unconstrained by language.
Present the candidate with a particular problem and ask him/her to code the solution.
Furthermore, the only requirement should be: the solution should be correct. Remember the objective here is to evaluate the software engineers:
Ability to solve
Knowledge
Coding style
Additionally, this type of technical screening will help you a lot.
Speaking of Language
You have to choose the best software engineer, so being technologically savvy should not be the only factor to consider.
Communication and soft skills also matter. These professionals should be able to communicate clearly, effectively both verbally and in writing.
In addition, these skills are easy to evaluate in the course of an interview. Verbal skills are important for maximizing effective team interaction and interchange of the idea.
Technical writing samples should be preferred by asking the software developer or software development team.
Especially, this will help to evaluate not only writing skills but also technical clarity. It also provides the opportunity to review and analyze so that you can discuss and critique their techniques. This helps to serve a valuable filter.
Conclusion
Last but not the least, start by ensuring you understand your product and what all will it take to complete.
Do in-depth research as it will help you select the right software engineer for your project.
Apart from this, the aforementioned tips described can serve as a valuable source for finding, hiring, and retaining software engineers for startups that are best in the industry.
Additionally, we have shared with you the top tips to hire software engineers for startups. Furthermore, this is the best and highly talented to work in your company.
Finally, be sure about the requirements, expectations, weigh all the options and look at the right places.
Whenever you think of hiring software programmers, it shouldn’t be rocket science.
Find the path that is right for your company and execute it.
There will be success and you can be assured to be on the right path.However, you have to keep in mind that effective hiring is not a destination, it is a journey.
0 notes
Photo

How to Boost Your Developer Career with a Personal Brand
Personal branding is one the most (in)famous trends of the last decade.
In this article, I’ll talk about what a personal brand is and how building one can help boost your career. I’ll show you how to stake your claim in the online space as well as three paths you can follow to level up your brand. That’s plenty to talk about, so let’s get this started.
The argument for a personal brand as a developer
Our first stop is Wikipedia, where we can find the following definition:
Personal branding is the practice of marketing people and their careers as brands. It is an ongoing process of developing and maintaining a reputation and impression of an individual, group, or organization.
That’s the part most of people have in mind when they think about personal branding. They think about the current diva of the day. About famous media celebrities. About publicity stunts that are meant to push you into the limelight. About presenting a fake facade in order to obtain undeserved rewards. And many other less-than-pleasant examples.
However, there’s another aspect to personal branding — the other side of the coin, so to speak. Right after the definition above, the Wikipedia article has the following phrase:
In Be Your Own Brand, first published in 1999, marketers David McNally and Karl Speak wrote: “Your brand is a perception or emotion, maintained by somebody other than you, that describes the total experience of having a relationship with you.”
In other words, your personal brand includes what other people say about you when you’re not there. It includes your reputation, your body of work, the testimonials other people give about you. Nowadays it includes your tweets and your posts on Facebook. To many people, your pictures on Instagram matter just as much (if not more) as your contributions to open-source software. Want to travel in the USA? Be prepared to let them know all your social media accounts for the last five years. (Sources: Sophos and BBC). And the examples can continue.
Everything you say and do affects your public image and your reputation. And that can have devastating impact on your career. Remember the Aria Richards case back in 2013? She was a developer taking part in a conference where she published a tweet about some male developers making sexual jokes behind her, including their picture. In the fallout, one of the guys was fired, but Aria lost her job as well, because her action was deemed to be damaging to the reputation of the company employing her. (Sources: ArsTechnica and CBSNews).
Fortunately, it’s not just about mitigating possible damage. A great personal brand can increase your leverage at a level you wouldn’t dream about it. It can put you in a better light when applying to a new job, and you’ll have better negotiating power when discussing the salary and the perks of the position. If you have your own business, it can bring you more and better clients and projects. What’s not to like about it?
But there’s one caveat in all this: be authentic. Don’t do it to project something you aren’t, or as a money-grabbing move or, worse, to cover negative aspects. That’s the main reason people react badly when hearing about personal branding.
This subject alone (the pros and cons of personal branding) can fill a whole book and goes beyond the scope of this article. So, stop letting others write your story and take control of your narrative. All this being said, let’s push forward.
Stake your claim and establish your presence
The first phase in building your personal brand is staking your claim in the online space and laying down the foundations for further expansion. It is, in my opinion, the most important part of the process. If you do nothing else from the other things we’ll talk about later, but you work on this part, I’m confident you’ll get a lot further than many other people.
We’re currently living in the age of social media, so you might be surprised to hear that this foundation is actually your own website. Yes, a website. The old-fashioned kind, where you buy a domain name, arrange hosting and upload the files on the server for everyone else on the Internet to find.
“That’s the dumbest idea I’ve heard,” you might say. “I don’t need a website. I have my CV on LinkedIn, my pictures on Facebook and Instagram, my articles on Medium, my code on GitHub and I keep in touch with everyone on Twitter. Why would I waste time and effort with a website that I have to promote as well?”
From a certain point of view, all that sounds quite reasonable. But all those options have one thing in common: they’re all third-party platforms, and you’re actually renting the right to use them. You might not pay with money, but they are gathering data about you and your habits that’s either used to target ads your way or it’s passed to third parties for the same reasons. Remember, if you’re not paying for something, then you are the product being sold.
It all comes down to a simple truth: you can’t build your home on rented land. You can lose access to social media at any moment. All these platforms have somewhere in their terms and conditions a clause that allows them to terminate their service to you at any time without having to provide an explanation. Or your account could get hacked or deleted. Your tens or hundreds of thousands of followers? All gone in a blink of an eye if you lose access to the platform.
That’s why you need something you own completely — a place to present yourself without being beholden to a platform that only cares about their own interests. You need a way to gather contacts, followers, connections and clients and be able to keep them. Yes, websites and servers do get hacked. But in that case, all you need to do is install the latest backup and you’re up and running again.
Let’s get down to the trinity of items needed to establish your online presence:
A domain name
You need your own custom domain name for multiple reasons. It gives you more legitimacy and it opens the gates for further options down the road. www.johnnydev.com is a lot better than johnnydev2335.github.io, don’t you think? We can have a very long discussion over whether it’s better to choose a “brand name” or your own given name for the domain. However, that’s a conversation for another time and place.
Hosting
There are plenty options of free hosting for developers: GitHub Pages, Netlify and many more. In many cases, that’s all you need to have a website up and running. For some of the more advanced options, though, it’s better to get some classic dedicated hosting.
Custom email address
This is the same story as with the domain name above. I think we can agree that [email protected] is more professional than [email protected] or some other email address you created when you were 16 years old.
Now all you have to do is upload your site and let everyone know about it. You can go from something as simple as a single static page to something complex like a WordPress blog or a static site generator like Gatsby or Hugo. Don’t despair if design isn’t your strong point. There are plenty of free themes and templates available.
Remember, you don’t have to code the website yourself. You get extra brownie points and bragging rights for writing as much code as possible yourself, but that’s not a requirement. If time’s at a premium for you, just grab a free template or theme and get started. Be sure to check the code for any hidden, unpleasant surprises, though, or use trusted sources, like curated collections and communities. All major players, like WordPress, Gatsby or Hugo, come with curated themes that you can choose from.
Once you have a website
Congratulations! You just became the proud owner of your own piece of online real estate. You how have a place where you can link all your social media profiles, upload your CV, write some blog posts or even articles. If you want to take it even further and remove further your dependency on other platforms, you can start your own email list. But that’s a topic for another time. For now, we’ll focus on three paths you can take to further increase your influence, your reputation and, ultimately, your personal brand. These are paths that other developers have taken before, and they got a lot of benefits out of that choice. They’re also not mutually exclusive. You can mix and match until you get the combination that works best for you.
Continue reading How to Boost Your Developer Career with a Personal Brand on SitePoint.
by Adrian Sandu via SitePoint https://ift.tt/2RY9gXb
0 notes
Link

Late Friday, the United States Securities and Exchange Commission (SEC) announced that it is suing two offshore entities, Telegram and its wholly owned subsidiary, TON Issuer, for holding an unregistered token sale.
According to the complaint filed in the federal district court in Manhattan on the same day, Telegram sold approximately 2.9 billion crypto tokens, called Grams (GRM) to 171 buyers for a total of $1.7 billion. Around a quarter of that sum, $424.5 million, allegedly belonged to 31 purchasers based in the U.S.
As a result, the SEC has obtained a temporary restraining order against Telegram and TON, seeking “certain emergency relief,” as well as permanent injunctions, disgorgement with prejudgment interest and civil penalties. Now, the official Telegram channel for TON investors is suggesting that the launch, scheduled for Oct. 31, could be postponed. So, what is happening with the largest private initial coin offering (ICO) in history?
Brief introduction to TON
GRM is a native currency of Telegram Open Network (TON), a blockchain platform aimed at facilitating payments and hosting decentralized applications (DApps) beyond Visa’s scalability levels. The project is developed by Telegram, an open-source encrypted messenger lead by two Russian entrepreneurial brothers, Pavel and Nikolai Durov, who fled their native country. TON will ostensibly be integrated into the app, which boasts over 200 million users worldwide and is widely popular within the blockchain and cryptocurrency community.
According to third-party research, TON has the potential to serve as a gateway for crypto assets and related apps to “bank the unbanked” as well as become the first discovery platform for Web 3.0 applications — “akin to the App Store for Web 2.0.”
TON saw one of the most successful ICOs in the industry. In 2018, Telegram raised almost $1.7 billion in two private token sale rounds, held in February and March. According to the documents Pavel Durov filed with the SEC, only those investing a minimum of $1 million were allowed to partake in the TON sale. The offering was limited to accredited investors in order to minimize the scrutiny from U.S. regulators.
In early October, Telegram published the entire TON source code on Github and announced that the launch of its long-awaited blockchain project would be scheduled for the end of the month. Additionally, the company revealed that all investors had been provided with TON key generation software and were to receive their GRM tokens by Oct. 16.
Additionally, on Oct. 8, Telegram released the terms of use for its native cryptocurrency wallet, Grams Wallet, which is designed to be paired with TON. The company simultaneously stressed that it has no control over the blockchain. Those terms also distanced the company from regulations, stating “we are not responsible for determining whether taxes apply to any transactions you make using the Services or for collecting, reporting, withholding or remitting any taxes arising from any virtual currency transactions.”
ICO troubles: Unsolicited GRM sale in July, SEC’s probe
The first problems concerning the TON token sale surfaced in July, when Gram Asia — reportedly the largest holder of Telegram‘s Gram tokens in the region — started selling rights to its GRM holdings in partnership with Japan-based crypto exchange Liquid at $4.00 per token, thus tripling the original $1.33 sale price.
Apparently, the sale — which TON did not sanction — contradicted the token purchase contract. As a TON investor shared with Cointelegraph at the time, all buyers had explicitly agreed not to let go of their ownership rights prior to the launch and were not allowed to:
“ENTER INTO ANY swap or other AGREEMENT THAT TRANSFERS, in whole or in part, ANY OF THE ECONOMIC CONSEQUENCES OF OWNERSHIP OF THE INVESTMENT CONTRACT represented by this Purchase Agreement or any Tokens.”
Now, just a couple of weeks prior to the TON release, the SEC has stepped in with a restraining order, halting the token offering. The regulator’s complaint alleges that Telegram and its TON subsidiary did not register the sale of the GRM token, which the SEC deems to be a security.
Because the Securities Act of 1933 requires that all securities be registered with the SEC, the agency considers the sale of GRM tokens “unlawful.” Notably, according to public documents from 2018, Telegram had informed the SEC that both of its $850 million offerings were supposedly made under Rule 506(c) and/or Regulation S under the Securities Act of 1933. Essentially, that means that because GRM tokens were sold only to accredited investors, the offering was not required to be registered with or qualified by the SEC.
However, it now seems that the SEC is not convinced. “Telegram committed to deliver Grams to the Initial Purchasers in conjunction with the launch of the TON Blockchain by no later than October 31, 2019 and it plans to sell millions of additional Grams at the same time,” the complaint reads. “As of October 11, 2019, Telegram has not filed a registration statement with the SEC for this planned offering of securities.” Steven Peikin, co-director of the SEC’s division of enforcement, claimed:
“Telegram seeks to obtain the benefits of a public offering without complying with the long-established disclosure responsibilities designed to protect the investing public. We have repeatedly stated that issuers cannot avoid the federal securities laws just by labeling their product a cryptocurrency or a digital token”
The agency highlighted that once the GRM tokens are released, by no later than Oct. 31, their purchasers and Telegram “will be able to sell billions of Grams into U.S. markets,” therefore continuing the unregistered token sale. Stephanie Avakian, the other co-director of the SEC’s enforcement division, said:
“Our emergency action today is intended to prevent Telegram from flooding the U.S. markets with digital tokens that we allege were unlawfully sold.”
Telegram’s response
Telegram and TON did not respond to Cointelegraph’s request for comment on the complaint. However, TON Board, a private channel created “by investors and for investors in the Telegram Open Network (TON) as well as for future major holders of Grams,” wrote:
“Due to the increased level of regulatory uncertainty we take a break to analyze new information and adapt our policies.
TON Board will be with you again once we have more clarity on the legal status of the TON and Gram as well as permitted type of analysis that may be published on them.
We are looking forward to sharing more information with you as soon as it’s possible.”
TON Board has also deleted all previous messages from its channel.
Experts: U.S. regulators are taking on crypto actors with renewed vigor
Internet attorney and cybersecurity law professor Andrew Rossow believes that by putting the brakes on the TON sale, the SEC is showing it will no longer accept token offerings skirting securities regulations. He told Cointelegraph:
“The SEC isn’t playing around. It’s time these companies recognize this. It’s been very upfront and clear for several years now that most tokens offered by these companies qualify as securities and must comply with federal regulations.”
According to Rossow, the SEC’s current enforcement action against Telegram is the highest-level action taken to date, and it will potentially jeopardize the company’s ability to continue selling its tokens abroad in other jurisdictions. “This means this is far from over and will have some legal ramifications for Telegram and consequences for its shortcutting,” the legal expert told Cointelegraph, elaborating:
“This current action will do two things—legally establish the standard and seriousness the SEC has for token offerings and force the U.S. courts to now take a clearer stance in the world of digital monies and security offerings.”
The SEC’s intervention is happening against the backdrop of increasing scrutiny showcased by U.S. regulators, notes Selva Ozelli, international tax attorney and CPA.
As Ozelli pointed out, on the same day the SEC started its probe into the TON sale, the U.S. Commodity Futures Trading Commission, the Financial Crimes Enforcement Network, and the SEC issued a joint statement to remind people — from both offshore and the U.S. — who are engaged in activities involving digital assets of their Anti-Money Laundering and Countering the Financing of Terrorism obligations under the Bank Secrecy Act. “Such persons need to also comply with U.S. tax laws, since U.S. regulators have jurisdiction over such entities,” Ozelli told Cointelegraph.
It is yet another piece of evidence of U.S. financial watchdogs attempting to regulate coin issuances for any local markets, Robert W. Wood, a tax lawyer of San Francisco-based Wood LLP, agreed. “On the tax side, there is increasing evidence there too that the IRS is gearing up and pushing harder,” he told Cointelegraph.
The court has ordered the defendants (TON Issuer and Telegram) to deliver “any opposing papers” no later than Oct. 18. Additionally, its representatives have been summoned to argue its case in court on Oct. 24. Until then, the judge has warned Telegram against any ongoing or future violations, “including but not limited to by delivering Grams to any person or entity or taking any other steps to effect any unregistered offer or sale of Grams.”
0 notes
Text
5 Best JavaScript Editors: Developers Rank the Best Tools Worldwide
New Post has been published on https://is.gd/gMRjl2
5 Best JavaScript Editors: Developers Rank the Best Tools Worldwide


JavaScript has continued to grow in importance over the last decade. In fact, according to StackOverflow’s Insights, JavaScript has been the most popular programming language for the past 7 years, edging out popular languages including Python, C# and Java. The State of Javascript survey, which includes responses from over 20,000 developers, reveals that five JavaScript editors stand out accounting 95% of all usage!
1. Visual Studio Code
VSCode is the dominant leader in online JavaScript editors. Featuring cross platform support on Linux, macOS and Windows, VSCode has built in code completion for your node.js modules and JavaScript code. As expected with Microsoft, Typescript is a first class citizen. Git is seamlessly integrated, meaning you can make commits, reviews diffs and more in real-time all without leaving the editor. Visual Studio Code is a lightweight code editor that was built from the ground up for speed. Autocompletion goes beyond function completion and also offers documentation and function argument information as you develop. Microsoft has done an excellent job with community engagement and VSCode has a vibrant developer community creating powerful extensions which save additional time. Sought after features such as live preview and chrome debugging with devtools are easily accessible through the Visual Studio Marketplace. In addition, if you really want to get under the covers, the entire text editor source code is hosted on github as open source software.
Sublime Text

A commercial editor with a large user base, developers find the $80 fee for Sublime Text well worthwhile due to its speed (in part derived from it being written in C++). As with VSCode, there is a great developer and plugin community that has filled in the gaps creating a powerful editor environment for JavaScript. Often referred to as a midpoint between bloated IDE and lean editors such as VIM, Sublime opens files fast and leans on plugins via package control to make it a great experience for JS development. Leveraging Babel for intelligent syntax highlighting /smart code completion and gitgutter for diffs and pushes, Sublimelinter for seamless ESlint and JShint tie-ins makes Sublime a fast, capable and lightweight JavaScript editor.
VIM

One of the earliest and still very popular text editors, VIM is highly customizable and configurable with exceptional keyboard shortcut support. It’s long history and keyboard dominated interface have produced a developer community with must have plugins like prettier, ALE and powerful command line support enabling you to leverage ESLint and Flow. VIM is incredibly customizable and no two JavaScript developers use it in the same way. If you started early with VIM, you may be very productive in it, but for those new to JavaScript development,, VSCode, Sublime Text or Jetbrains WebStorm is a better choice.
WebStorm
Jetbrains popular WebStorm is a paid editor that has a loyal following and is regularly updated. Branded, “the smartest JavaScript IDE,” WebStorm lives up to the marketing by offering coding assistance across Node.js, HTML and CSS. It also supports built in assistance with popular JavaScript frameworks including Meteor, Angular, React, jQuery, vue.js and electron. Github support is integrated within the IDE and other version control options are supported through official plugins including git integration, Mercurial, Perforce, and Subversion. A built in debugger for Node.js with test integration, tracing and profiling along with seamless command line tool integration round out this IDE. Attention to detail and workflow optimization including automatic saving of file changes is a hallmark of WebStorm. Regular updates with new features and a Early Access Program make the paid subscription worthwhile for many developers.
Atom

Marketed as a hackable text editor for the 21st century, Atom has been growing in popularity. Atom has already established a loyal following and vibrant developer community. Packages give advanced integration options offering real-time collaboration and pair coding, git and github integration and more. A cross platform editor with OS X, Windows and Linux support, Atom runs on Electron and enables deep customization and styling. As a JavaScript developer you can customize Atom using JavaScript, HTML, CSS and Node.js.
Conclusion
Developers are a unique breed, creating thousands of diverse solutions to meet every specific need or niche. Modern editors and IDEs have embraced plugin architectures which allow quick customization and levage community contributions making it possible for generalized editors such as VSCode to meet more developer’s unique needs. This enables seasoned developers to focus on their JavaScript projects rather than hacking their dev environment while allowing new developers to hit the ground running.
This article was originally published on JSCharting.
0 notes
Text
Building Desktop Apps With Electron And Vue
About The Author
Front-end developer based in Lagos, Nigeria. He enjoys converting designs into code and building things for the web. More about Timi …
Electron is an open-source software framework developed and maintained by GitHub. It allows for the development of desktop GUI applications using web technologies. In this tutorial, Timi Omoyeni explains what you need to keep in mind when building a desktop application with Vue.js using the Vue CLI Plugin Electron Builder.
JavaScript used to be known as the language for building websites and web applications especially with some of its frameworks such as React, Vue, and Angular but over time (as early as 2009), it became possible for JavaScript to run outside the browser with the emergence of Node.js, an open-source, cross-platform, JavaScript runtime environment that executes JavaScript code outside a web browser. This has led to the ability to use JavaScript for a whole lot more than just web applications, and one of which is building desktop applications using Electron.js.
Electron enables you to create desktop applications with pure JavaScript by providing a runtime with rich native (operating system) APIs. You can see it as a variant of the Node.js runtime that is focused on desktop applications instead of web servers.
In this tutorial, we’re going to learn how to build desktop applications using Electron, we’re also going to learn how to use Vuejs to build Electron applications.
Note: Basic knowledge of Vue.js and the Vue CLI is required to follow this tutorial. All of the code used in this tutorial can be found on my GitHub. Feel free to clone and play around with it!
What Are Desktop Applications?
Desktop applications are applications that run stand-alone in desktop or laptop computers. They are applications that perform specific tasks and are installed solely for this purpose.
An example of a desktop application is your Microsoft Word, which is used for creating and typing documents. Other examples of common desktop applications are web browsers, Visual Studio Code, and Adobe Photoshop. Desktop applications are different from web applications because you have to install the desktop application in order for you to access and make use of it, and they sometimes do not need internet access for them to work. Web apps, on the other hand, can be accessed by simply visiting the URL that such an app is hosted on and always need internet access before you can access them.
Examples of frameworks used in building desktop apps include:
Java Java is a general-purpose programming language that is class-based, object-oriented, and designed to have as few implementation dependencies as possible. It is intended to let application developers write once, run anywhere (WORA), meaning that compiled Java code can run on all platforms that support Java without the need for recompilation.
Java FX According to their official documentation, it is an open-source, next-generation client application platform for desktop, mobile, and embedded systems built on Java.
C# C# is a general-purpose, multi-paradigm programming language encompassing strong typing, lexically scoped, imperative, declarative, functional, generic, object-oriented, and component-oriented programming disciplines.
.NET .NET is a free, cross-platform, open-source developer platform for building many different types of applications. With .NET, you can use multiple languages, editors, and libraries to build for web, mobile, desktop, gaming, and IoT.
What Is Electron?
Electron is an open-source framework for building desktop applications. It was formerly known as ‘Atom shell’ and is developed and maintained by GitHub. It lets you write cross-platform desktop applications using HTML, CSS, and JavaScript. This means that you can build desktop applications for Windows, MacOS and other platforms using one code base. It is based on Node.js and Chromium. Examples of applications built with Electron include the popular Atom editior, Visual Studio Code, WordPress for desktop, and Slack.
Installation
You can install Electron in your project using NPM:
npm install electron --save-dev
You can also install it globally if you’re going to be working with electron apps a lot using this command:
npm install electron -g
Building Vuejs Apps For Desktop With Electron
If you’re familiar with building web applications using Vuejs, it is possible to build desktop applications using Vuejs. All you need for this is the Vue CLI Plugin Electron Builder.
The Vue CLI Plugin Electron Builder
This tool allows you to build Vue apps for desktop with Electron, this means that it makes your Vue application work as an electron app. This means that your Vue application which possibly is a web application can be extended to work in desktop environments without the need to build a separate desktop application in another framework. This gives Vue developers the option and power to go beyond the web. Going forward, you can work on that idea you have and give users a desktop application option — one that can run on Windows, macOS, and LinUX.
To see this in action, we’re going to be building a News app using the News API. The application will provide breaking news headlines and allow you to search for articles from news sources and blogs all over the web with their API. All you need to get started with them is your personal API key which can be gotten from here.
We’ll be building a simple app that offers the following:
A page that displays top and breaking headlines from a selected country with the option to choose a country using their /top-headlines endpoint. News API provides news from a list of countries that they support, find the list here.
News from a selected category using a combination of their /everything endpoint and a query parameter q with which we’ll specify our category.
After getting your API Key, we can create our application using the Vue CLI. Ensure you have the Vue CLI installed on your system, if you do not, install it using this command:
npm install -g @vue/cli # OR yarn global add @vue/cli
Once this is done, create your News app using the CLI:
vue create news-app
We’ll fetch the data from the News API by using Axios for this tutorial, but you can use any alternative you’re more comfortable with. You can install Axios by using any of the following commands:
//NPM npm install axios // YARN yarn add axios
The next step would be to set up an Axios instance for global config in our application. We’re going to be creating a plugins folder in the src folder where we’ll create this axios.js file. After creating the file, add the following lines of code:
import axios from "axios"; let baseURL = `https://newsapi.org/v2`; let apiKey = process.env.VUE_APP_APIKEY; const instance = axios.create({ baseURL: baseURL, timeout: 30000, headers: { "X-Api-Key": apiKey, }, }); export default instance;
Here, we define our baseURL and apiKey which we got from News API and pass it to a new instance of Axios. This instance accepts the baseURL and apiKey together with a timeout property. News API requires you to add your API Key when making a request to their API and offers 3 ways to attach it to your request but here, we’re adding it to the header X-Api-Key property after which we export instance. Once this is done, we can now use this config for all our Axios requests in our app.
When this is done, you can add the Plugin Electron builder with the CLI using this command:
vue add electron-builder
You’ll be prompted to select your preferred Electron version, I selected version 9.0.0 because it is the latest version of Electron (at the time of writing).
When this is done, you can now serve your application using this command:
Using Yarn(strongly recommended) yarn electron:serve OR NPM npm run electron:serve
This will take some time to compile and serve your app. When that is done, your application will pop open on your system, this should look like this:
Auto-open state of your electron app. (Large preview)
If you close the devtools of your app, it should look like this:
Landing page your app. (Large preview)
This electron plugin is super helpful and easy to use because every part of the development of this app works the same way as a Vue app. This means you can have one codebase for both your web application and desktop app. Our app will have three parts:
A landing page that renders top news from a country chosen at random.
A page for rendering top news from the user’s country of choice.
A page that renders top news from a category of the user’s selection.
For this, we’re going to be needing a header component for all our nav links. So let us create a file in the components folder and name it header.vue, and afterward add the following lines of code to it:
<template> <header class="header"> <div class="logo"> <div class="logo__container"> <img src="../assets/logo.png" alt="News app logo" class="logo__image" /> </div> <h1>News App</h1> </div> <nav class="nav"> <h4 class="nav__link"> <router-link to="/home">Home</router-link> </h4> <h4 class="nav__link"> <router-link to="/top-news">Top News</router-link> </h4> <h4 class="nav__link"> <router-link to="/categories">News By Category</router-link> </h4> </nav> </header> </template> <script> export default { name: "app-header", }; </script> <style> .header { display: flex; flex-wrap: wrap; justify-content: space-between; } .logo { display: flex; flex-wrap: nowrap; justify-content: space-between; align-items: center; height: 50px; } .logo__container { width: 50px; height: 50px; } .logo__image { max-width: 100%; max-height: 100%; } .nav { display: flex; flex-wrap: wrap; width: 350px; justify-content: space-between; } </style>
Here, we create a header component that has our app name and logo (image can be found on my GitHub) together with a nav section that contains links to the other parts of our application. The next thing would be to import this page on our layout page — App.vue so we can see our header on every page.
<template> <div id="app"> <app-header /> <router-view /> </div> </template> <script> import appHeader from "@/components/Header.vue"; export default { name: "layout", components: { appHeader, }, }; </script> <style> @import url("https://fonts.Googleapis.com/css2?family=Abel&family=Staatliches&display=swap"); html, #app { min-height: 100vh; } #app { font-family: "Abel", sans-serif; -webkit-font-smoothing: antialiased; -moz-osx-font-smoothing: grayscale; text-align: center; color: #2c3e50; background-color: #fff; } #app h1 { font-family: "Staatliches", cursive; } a { font-weight: bold; color: #2c3e50; text-decoration: none; } a:hover { text-decoration: underline; } a.router-link-exact-active { color: #42b983; } </style>
Here, we replace the default content in the template section with our newly created header component after we have imported and declared it in the script section. Finally, we add some styling for the whole app in the style section.
Now if we try to view our app, it should look like this:
Empty landing page. (Large preview)
The next step would be to add content to our Home.vue file. This page would host the first section of our app; Top news from a country selected at random. Update your Home.vue file with the following lines of code:
<template> <section class="home"> <h1>Welcome to News App</h1> <h4>Displaying Top News from </h4> <div class="articles__div" v-if="articles"> <news-card v-for="(article, index) in articles" :key="index" :article="article" ></news-card> </div> </section> </template> <script> import { mapActions, mapState } from "vuex"; import NewsCard from "../components/NewsCard"; export default { data() { return { articles: "", countryInfo: "", }; }, components: { NewsCard, }, mounted() { this.fetchTopNews(); }, computed: { ...mapState(["countries"]), }, methods: { ...mapActions(["getTopNews"]), async fetchTopNews() { let countriesLength = this.countries.length; let countryIndex = Math.floor( Math.random() * (countriesLength - 1) + 1 ); this.countryInfo = this.countries[countryIndex]; let { data } = await this.getTopNews( this.countries[countryIndex].value ); this.articles = data.articles; }, }, }; </script> <style> .articles__div { display: flex; flex-wrap: wrap; justify-content: center; } </style>
In the script section of this file, we import mapState and mapActions from Vuex, which we’ll be using later on in this file. We also import a NewsCard component (we’ll create this next) that would render all news headlines on this page. We then make use of the fetchTopNews method to fetch the latest news from a country selected at random from the array of countries in our store. This country is passed to our getTopNews action, this would be appended to the baseURL as a query for a country like so baseURL/top-news?country=${randomCountry}. Once this is done, we loop through this data and pass it to the article prop of our Newscard component in the template section. We also have a paragraph that indicates which country the top news is from.
The next thing would be to set up our NewsCard component that will display this news. Create a new file inside your components folder, name it NewsCard.vue, and add the following lines of code to it:
<template> <section class="news"> <div class="news__section"> <h1 class="news__title"> <a class="article__link" :href="article.url" target="_blank"> </a> </h1> <h3 class="news__author" v-if="article.author"></h3> <!-- <p class="article__paragraph"></p> --> <h5 class="article__published"></h5> </div> <div class="image__container"> <img class="news__img" src="../assets/logo.png" :data-src="article.urlToImage" :alt="article.title" /> </div> </section> </template> <script> export default { name: "news-card", props: { article: Object, }, mounted() { this.lazyLoadImages(); }, methods: { lazyLoadImages() { const images = document.querySelectorAll(".news__img"); const options = { // If the image gets within 50px in the Y axis, start the download. root: null, // Page as root rootMargin: "0px", threshold: 0.1, }; const fetchImage = (url) => { return new Promise((resolve, reject) => { const image = new Image(); image.src = url; image.onload = resolve; image.onerror = reject; }); }; const loadImage = (image) => { const src = image.dataset.src; fetchImage(src).then(() => { image.src = src; }); }; const handleIntersection = (entries) => { entries.forEach((entry) => { if (entry.intersectionRatio > 0) { loadImage(entry.target); } }); }; // The observer for the images on the page const observer = new IntersectionObserver(handleIntersection, options); images.forEach((img) => { observer.observe(img); }); }, }, }; </script> <style> .news { width: 100%; display: flex; flex-direction: row; align-items: flex-start; max-width: 550px; box-shadow: 2px 1px 7px 1px #eee; padding: 20px 5px; box-sizing: border-box; margin: 15px 5px; border-radius: 4px; } .news__section { width: 100%; max-width: 350px; margin-right: 5px; } .news__title { font-size: 15px; text-align: left; margin-top: 0; } .news__author { font-size: 14px; text-align: left; font-weight: normal; } .article__published { text-align: left; } .image__container { width: 100%; max-width: 180px; max-height: 180px; } .news__img { transition: max-width 300ms cubic-bezier(0.4, 0, 1, 1), max-height 300ms cubic-bezier(0.4, 0, 1, 1); max-width: 150px; max-height: 150px; } .news__img:hover { max-width: 180px; max-height: 180px; } .article__link { text-decoration: none; color: inherit; } </style>
Here, we display data passed into this component using the article object prop. We also have a method that lazy loads the images attached to each article. This method loops through the number of article images we have and lazy loads them when they become visible. Finally, we have styles targeted at this component in the style section.
The next thing will be to set up our store so we can start getting the latest news. Add the following lines of code to your index.js file:
import Vue from "vue"; import Vuex from "vuex"; import axios from "../plugins/axios"; Vue.use(Vuex); const store = new Vuex.Store({ state: { countries: [{ name: "United States of America", value: "us", }, { name: "Nigeria", value: "ng", }, { name: "Argentina", value: "ar", }, { name: "Canada", value: "ca", }, { name: "South Africa", value: "za", }, ], categories: [ "entertainment", "general", "health", "science", "business", "sports", "technology", ], }, mutations: {}, actions: { async getTopNews(context, country) { let res = await axios({ url: `/top-headlines?country=${country}`, method: "GET", }); return res; }, }, }); export default store;
We are adding two properties to our store, one of these properties is countries. This property contains an array of countries’ object. We also have the categories property; this contains an array of available categories on the News API. The reader will like the freedom to view the top news from specific countries and categories; this will also be needed in more than one part of the app and that is why we’re making use of the store. In the actions section of our store, we have a getTopNews method that fetches top news from a country(this country was passed from the component that called this action).
At this point, if we open our app, we should see our landing page that looks like this:
Updated landing page. (Large preview)
The background.js file
This file is the entry point for Electron into your app. It controls all the Desktop app-like settings for this app. The default state of this file can be found on my GitHub.
In this file, we have some predefined configurations set for the app such as the default height and width for your app. Let’s take a look at some of the things you can do in this file.
Enabling the Vuejs devtools
By default, you have access to dev tools in Electron but it is not enabled after installation. This is as a result of an existing bug on windows 10, so if you open you background.js file, you will find some commented out code with comments that state why they’re commented out:
// Install Vue Devtools // Devtools extensions are broken in Electron 6.0.0 and greater // See https://github.com/nklayman/vue-cli-plugin-electron-builder/issues/378 for more info // Electron will not launch with Devtools extensions installed on Windows 10 with dark mode // If you are not using Windows 10 dark mode, you may uncomment these lines // In addition, if the linked issue is closed, you can upgrade electron and uncomment these lines // try { // await installVueDevtools() // } catch (e) { // console.error('Vue Devtools failed to install:', e.toString()) // }
So if you’re not affected by this bug, you can uncomment the try/catch block and also search for installVueDevtools in this same file(line 5) and also uncomment it. Once this is done, your app will automatically restart, and when you check your dev tools, you should see the Vuejs Devtools.
Vuejs in devtools. (Large preview)
Selecting A Custom Icon For Your App
By default, the Electron icon is set as the default icon for your app, and most of the time, you probably would like to set your own custom icon. To do this, move your icon into your public folder, and rename it to be icon.png. The next thing to do would be to add the required dependency, electron-icon-builder.
You can install it using any of the following commands:
// With Yarn: yarn add --dev electron-icon-builder // or with NPM: npm install --save-dev electron-icon-builder
Once this is done, you can run this next command. It will convert your icon into Electron format and print the following in your console when this done.
Generated info in terminal. (Large preview)
The next thing would be to set the icon option in background.js file. This option goes inside the BrowserWindow option that is imported from Electron. To do this, update BrowserWindow to look like this:
// Add this to the top of your file /* global __static */ // import path import path from 'path' // Replace win = new BrowserWindow({ width: 800, height: 600 }) // With win = new BrowserWindow({ width: 800, height: 600, icon: path.join(__static, 'icon.png') })
Now if we run yarn run electron:build and view our app, we should see the updated icon being used as the app icon but it doesn’t change in development. This issue helps address a manual fix for it on macOS.
Setting Title For Your App
You will notice the title of your app is set to the app name (news-app in this case) and we’ll need to change it. To do that, we have to add a title property to the BrowserWindow method in our background.js file like this:
win = new BrowserWindow({ width: 600, height: 500, title: "News App", icon: path.join(__static, "icon.png"), webPreferences: { // Use pluginOptions.nodeIntegration, leave this alone // See nklayman.github.io/vue-cli-plugin-electron-builder/guide/security.html#node-integration for more info nodeIntegration: process.env.ELECTRON_NODE_INTEGRATION, }, });
Here, we’re setting the title of our app to ‘News App’. But if your index.html file has a title selected or your title doesn’t change to this, try adding this code to your file:
win.on("page-title-updated", (event) => event.preventDefault());
We’re listening for an event that gets fired when our title is updated from BrowserWindow. When this event is fired, we’re telling Electron not to update the title with the one found in index.html file.
Another thing that might be worth changing is the productName, this controls what name appears when you hover on your app’s icon or what your computer recognizes the app as. Right now, the name of our app is Electron. To change this name in production, create a vue.config.js file and add the following lines of code to it:
module.exports = { pluginOptions: { electronBuilder: { builderOptions: { productName: "News App", }, }, }, };
Here, we define productName to be ‘News App’ so that when we run the build command for our app, the name changes from ‘Electron’ to ‘News App’.
Multi Platform Build
By default, when you run the build command, the app that gets created is dependent on the platform that it is being run on. This means if you run the build command on LinUX, the app that gets created would be a LinUX desktop app. The same also applies to other platforms(macOS and windows). But Electron comes with the option to specify a platform (or two platforms) you want to generate. The available options are:
mac
win
linUX
So in order to build the Windows version of your app, run the following command:
// NPM npm electron:build -- --win nsis // YARN yarn electron:build --win nsis
Conclusion
The completed application can be found on my GitHub. The official Electron documentation provides information and a guide that helps you customize your desktop app whichever way you want. Some of the things I tried out but aren’t included in this tutorial are:
Customizing your dock on macOS — https://www.electronjs.org/docs/tutorial/macos-dock.
Setting resizeable, maximizable, and many more — https://github.com/electron/electron/blob/master/docs/api/browser-window.md#new-browserwindowoptions.
So if you’re looking to do much more with your Electron application, their official docs is a good place to start.
Related Resources
Node.jshttps://en.wikipedia.org/wiki/Node.js
Java (programming language)https://en.wikipedia.org/wiki/Java_(programming_language)
Electron (software framework)
JavaFX 14
electronjs
Electron Documentation
Vue CLI Plugin Electron Builder
Lazy Loading Images for Performance Using Intersection Observer by Chris Nwamba
axios
Getting Started With Axios In Nuxthttps://www.smashingmagazine.com/2020/05/getting-started-axios-nuxt/) by Timi Omoyeni
(ks, ra, yk, il)
Website Design & SEO Delray Beach by DBL07.co
Delray Beach SEO
source http://www.scpie.org/building-desktop-apps-with-electron-and-vue/ source https://scpie.tumblr.com/post/624279195687747584
0 notes
Text
Building Desktop Apps With Electron And Vue
About The Author
Front-end developer based in Lagos, Nigeria. He enjoys converting designs into code and building things for the web. More about Timi …
Electron is an open-source software framework developed and maintained by GitHub. It allows for the development of desktop GUI applications using web technologies. In this tutorial, Timi Omoyeni explains what you need to keep in mind when building a desktop application with Vue.js using the Vue CLI Plugin Electron Builder.
JavaScript used to be known as the language for building websites and web applications especially with some of its frameworks such as React, Vue, and Angular but over time (as early as 2009), it became possible for JavaScript to run outside the browser with the emergence of Node.js, an open-source, cross-platform, JavaScript runtime environment that executes JavaScript code outside a web browser. This has led to the ability to use JavaScript for a whole lot more than just web applications, and one of which is building desktop applications using Electron.js.
Electron enables you to create desktop applications with pure JavaScript by providing a runtime with rich native (operating system) APIs. You can see it as a variant of the Node.js runtime that is focused on desktop applications instead of web servers.
In this tutorial, we’re going to learn how to build desktop applications using Electron, we’re also going to learn how to use Vuejs to build Electron applications.
Note: Basic knowledge of Vue.js and the Vue CLI is required to follow this tutorial. All of the code used in this tutorial can be found on my GitHub. Feel free to clone and play around with it!
What Are Desktop Applications?
Desktop applications are applications that run stand-alone in desktop or laptop computers. They are applications that perform specific tasks and are installed solely for this purpose.
An example of a desktop application is your Microsoft Word, which is used for creating and typing documents. Other examples of common desktop applications are web browsers, Visual Studio Code, and Adobe Photoshop. Desktop applications are different from web applications because you have to install the desktop application in order for you to access and make use of it, and they sometimes do not need internet access for them to work. Web apps, on the other hand, can be accessed by simply visiting the URL that such an app is hosted on and always need internet access before you can access them.
Examples of frameworks used in building desktop apps include:
Java Java is a general-purpose programming language that is class-based, object-oriented, and designed to have as few implementation dependencies as possible. It is intended to let application developers write once, run anywhere (WORA), meaning that compiled Java code can run on all platforms that support Java without the need for recompilation.
Java FX According to their official documentation, it is an open-source, next-generation client application platform for desktop, mobile, and embedded systems built on Java.
C# C# is a general-purpose, multi-paradigm programming language encompassing strong typing, lexically scoped, imperative, declarative, functional, generic, object-oriented, and component-oriented programming disciplines.
.NET .NET is a free, cross-platform, open-source developer platform for building many different types of applications. With .NET, you can use multiple languages, editors, and libraries to build for web, mobile, desktop, gaming, and IoT.
What Is Electron?
Electron is an open-source framework for building desktop applications. It was formerly known as ‘Atom shell’ and is developed and maintained by GitHub. It lets you write cross-platform desktop applications using HTML, CSS, and JavaScript. This means that you can build desktop applications for Windows, MacOS and other platforms using one code base. It is based on Node.js and Chromium. Examples of applications built with Electron include the popular Atom editior, Visual Studio Code, WordPress for desktop, and Slack.
Installation
You can install Electron in your project using NPM:
npm install electron --save-dev
You can also install it globally if you’re going to be working with electron apps a lot using this command:
npm install electron -g
Building Vuejs Apps For Desktop With Electron
If you’re familiar with building web applications using Vuejs, it is possible to build desktop applications using Vuejs. All you need for this is the Vue CLI Plugin Electron Builder.
The Vue CLI Plugin Electron Builder
This tool allows you to build Vue apps for desktop with Electron, this means that it makes your Vue application work as an electron app. This means that your Vue application which possibly is a web application can be extended to work in desktop environments without the need to build a separate desktop application in another framework. This gives Vue developers the option and power to go beyond the web. Going forward, you can work on that idea you have and give users a desktop application option — one that can run on Windows, macOS, and LinUX.
To see this in action, we’re going to be building a News app using the News API. The application will provide breaking news headlines and allow you to search for articles from news sources and blogs all over the web with their API. All you need to get started with them is your personal API key which can be gotten from here.
We’ll be building a simple app that offers the following:
A page that displays top and breaking headlines from a selected country with the option to choose a country using their /top-headlines endpoint. News API provides news from a list of countries that they support, find the list here.
News from a selected category using a combination of their /everything endpoint and a query parameter q with which we’ll specify our category.
After getting your API Key, we can create our application using the Vue CLI. Ensure you have the Vue CLI installed on your system, if you do not, install it using this command:
npm install -g @vue/cli # OR yarn global add @vue/cli
Once this is done, create your News app using the CLI:
vue create news-app
We’ll fetch the data from the News API by using Axios for this tutorial, but you can use any alternative you’re more comfortable with. You can install Axios by using any of the following commands:
//NPM npm install axios // YARN yarn add axios
The next step would be to set up an Axios instance for global config in our application. We’re going to be creating a plugins folder in the src folder where we’ll create this axios.js file. After creating the file, add the following lines of code:
import axios from "axios"; let baseURL = `https://newsapi.org/v2`; let apiKey = process.env.VUE_APP_APIKEY; const instance = axios.create({ baseURL: baseURL, timeout: 30000, headers: { "X-Api-Key": apiKey, }, }); export default instance;
Here, we define our baseURL and apiKey which we got from News API and pass it to a new instance of Axios. This instance accepts the baseURL and apiKey together with a timeout property. News API requires you to add your API Key when making a request to their API and offers 3 ways to attach it to your request but here, we’re adding it to the header X-Api-Key property after which we export instance. Once this is done, we can now use this config for all our Axios requests in our app.
When this is done, you can add the Plugin Electron builder with the CLI using this command:
vue add electron-builder
You’ll be prompted to select your preferred Electron version, I selected version 9.0.0 because it is the latest version of Electron (at the time of writing).
When this is done, you can now serve your application using this command:
Using Yarn(strongly recommended) yarn electron:serve OR NPM npm run electron:serve
This will take some time to compile and serve your app. When that is done, your application will pop open on your system, this should look like this:
Auto-open state of your electron app. (Large preview)
If you close the devtools of your app, it should look like this:
Landing page your app. (Large preview)
This electron plugin is super helpful and easy to use because every part of the development of this app works the same way as a Vue app. This means you can have one codebase for both your web application and desktop app. Our app will have three parts:
A landing page that renders top news from a country chosen at random.
A page for rendering top news from the user’s country of choice.
A page that renders top news from a category of the user’s selection.
For this, we’re going to be needing a header component for all our nav links. So let us create a file in the components folder and name it header.vue, and afterward add the following lines of code to it:
<template> <header class="header"> <div class="logo"> <div class="logo__container"> <img src="../assets/logo.png" alt="News app logo" class="logo__image" /> </div> <h1>News App</h1> </div> <nav class="nav"> <h4 class="nav__link"> <router-link to="/home">Home</router-link> </h4> <h4 class="nav__link"> <router-link to="/top-news">Top News</router-link> </h4> <h4 class="nav__link"> <router-link to="/categories">News By Category</router-link> </h4> </nav> </header> </template> <script> export default { name: "app-header", }; </script> <style> .header { display: flex; flex-wrap: wrap; justify-content: space-between; } .logo { display: flex; flex-wrap: nowrap; justify-content: space-between; align-items: center; height: 50px; } .logo__container { width: 50px; height: 50px; } .logo__image { max-width: 100%; max-height: 100%; } .nav { display: flex; flex-wrap: wrap; width: 350px; justify-content: space-between; } </style>
Here, we create a header component that has our app name and logo (image can be found on my GitHub) together with a nav section that contains links to the other parts of our application. The next thing would be to import this page on our layout page — App.vue so we can see our header on every page.
<template> <div id="app"> <app-header /> <router-view /> </div> </template> <script> import appHeader from "@/components/Header.vue"; export default { name: "layout", components: { appHeader, }, }; </script> <style> @import url("https://fonts.Googleapis.com/css2?family=Abel&family=Staatliches&display=swap"); html, #app { min-height: 100vh; } #app { font-family: "Abel", sans-serif; -webkit-font-smoothing: antialiased; -moz-osx-font-smoothing: grayscale; text-align: center; color: #2c3e50; background-color: #fff; } #app h1 { font-family: "Staatliches", cursive; } a { font-weight: bold; color: #2c3e50; text-decoration: none; } a:hover { text-decoration: underline; } a.router-link-exact-active { color: #42b983; } </style>
Here, we replace the default content in the template section with our newly created header component after we have imported and declared it in the script section. Finally, we add some styling for the whole app in the style section.
Now if we try to view our app, it should look like this:
Empty landing page. (Large preview)
The next step would be to add content to our Home.vue file. This page would host the first section of our app; Top news from a country selected at random. Update your Home.vue file with the following lines of code:
<template> <section class="home"> <h1>Welcome to News App</h1> <h4>Displaying Top News from </h4> <div class="articles__div" v-if="articles"> <news-card v-for="(article, index) in articles" :key="index" :article="article" ></news-card> </div> </section> </template> <script> import { mapActions, mapState } from "vuex"; import NewsCard from "../components/NewsCard"; export default { data() { return { articles: "", countryInfo: "", }; }, components: { NewsCard, }, mounted() { this.fetchTopNews(); }, computed: { ...mapState(["countries"]), }, methods: { ...mapActions(["getTopNews"]), async fetchTopNews() { let countriesLength = this.countries.length; let countryIndex = Math.floor( Math.random() * (countriesLength - 1) + 1 ); this.countryInfo = this.countries[countryIndex]; let { data } = await this.getTopNews( this.countries[countryIndex].value ); this.articles = data.articles; }, }, }; </script> <style> .articles__div { display: flex; flex-wrap: wrap; justify-content: center; } </style>
In the script section of this file, we import mapState and mapActions from Vuex, which we’ll be using later on in this file. We also import a NewsCard component (we’ll create this next) that would render all news headlines on this page. We then make use of the fetchTopNews method to fetch the latest news from a country selected at random from the array of countries in our store. This country is passed to our getTopNews action, this would be appended to the baseURL as a query for a country like so baseURL/top-news?country=${randomCountry}. Once this is done, we loop through this data and pass it to the article prop of our Newscard component in the template section. We also have a paragraph that indicates which country the top news is from.
The next thing would be to set up our NewsCard component that will display this news. Create a new file inside your components folder, name it NewsCard.vue, and add the following lines of code to it:
<template> <section class="news"> <div class="news__section"> <h1 class="news__title"> <a class="article__link" :href="article.url" target="_blank"> </a> </h1> <h3 class="news__author" v-if="article.author"></h3> <!-- <p class="article__paragraph"></p> --> <h5 class="article__published"></h5> </div> <div class="image__container"> <img class="news__img" src="../assets/logo.png" :data-src="article.urlToImage" :alt="article.title" /> </div> </section> </template> <script> export default { name: "news-card", props: { article: Object, }, mounted() { this.lazyLoadImages(); }, methods: { lazyLoadImages() { const images = document.querySelectorAll(".news__img"); const options = { // If the image gets within 50px in the Y axis, start the download. root: null, // Page as root rootMargin: "0px", threshold: 0.1, }; const fetchImage = (url) => { return new Promise((resolve, reject) => { const image = new Image(); image.src = url; image.onload = resolve; image.onerror = reject; }); }; const loadImage = (image) => { const src = image.dataset.src; fetchImage(src).then(() => { image.src = src; }); }; const handleIntersection = (entries) => { entries.forEach((entry) => { if (entry.intersectionRatio > 0) { loadImage(entry.target); } }); }; // The observer for the images on the page const observer = new IntersectionObserver(handleIntersection, options); images.forEach((img) => { observer.observe(img); }); }, }, }; </script> <style> .news { width: 100%; display: flex; flex-direction: row; align-items: flex-start; max-width: 550px; box-shadow: 2px 1px 7px 1px #eee; padding: 20px 5px; box-sizing: border-box; margin: 15px 5px; border-radius: 4px; } .news__section { width: 100%; max-width: 350px; margin-right: 5px; } .news__title { font-size: 15px; text-align: left; margin-top: 0; } .news__author { font-size: 14px; text-align: left; font-weight: normal; } .article__published { text-align: left; } .image__container { width: 100%; max-width: 180px; max-height: 180px; } .news__img { transition: max-width 300ms cubic-bezier(0.4, 0, 1, 1), max-height 300ms cubic-bezier(0.4, 0, 1, 1); max-width: 150px; max-height: 150px; } .news__img:hover { max-width: 180px; max-height: 180px; } .article__link { text-decoration: none; color: inherit; } </style>
Here, we display data passed into this component using the article object prop. We also have a method that lazy loads the images attached to each article. This method loops through the number of article images we have and lazy loads them when they become visible. Finally, we have styles targeted at this component in the style section.
The next thing will be to set up our store so we can start getting the latest news. Add the following lines of code to your index.js file:
import Vue from "vue"; import Vuex from "vuex"; import axios from "../plugins/axios"; Vue.use(Vuex); const store = new Vuex.Store({ state: { countries: [{ name: "United States of America", value: "us", }, { name: "Nigeria", value: "ng", }, { name: "Argentina", value: "ar", }, { name: "Canada", value: "ca", }, { name: "South Africa", value: "za", }, ], categories: [ "entertainment", "general", "health", "science", "business", "sports", "technology", ], }, mutations: {}, actions: { async getTopNews(context, country) { let res = await axios({ url: `/top-headlines?country=${country}`, method: "GET", }); return res; }, }, }); export default store;
We are adding two properties to our store, one of these properties is countries. This property contains an array of countries’ object. We also have the categories property; this contains an array of available categories on the News API. The reader will like the freedom to view the top news from specific countries and categories; this will also be needed in more than one part of the app and that is why we’re making use of the store. In the actions section of our store, we have a getTopNews method that fetches top news from a country(this country was passed from the component that called this action).
At this point, if we open our app, we should see our landing page that looks like this:
Updated landing page. (Large preview)
The background.js file
This file is the entry point for Electron into your app. It controls all the Desktop app-like settings for this app. The default state of this file can be found on my GitHub.
In this file, we have some predefined configurations set for the app such as the default height and width for your app. Let’s take a look at some of the things you can do in this file.
Enabling the Vuejs devtools
By default, you have access to dev tools in Electron but it is not enabled after installation. This is as a result of an existing bug on windows 10, so if you open you background.js file, you will find some commented out code with comments that state why they’re commented out:
// Install Vue Devtools // Devtools extensions are broken in Electron 6.0.0 and greater // See https://github.com/nklayman/vue-cli-plugin-electron-builder/issues/378 for more info // Electron will not launch with Devtools extensions installed on Windows 10 with dark mode // If you are not using Windows 10 dark mode, you may uncomment these lines // In addition, if the linked issue is closed, you can upgrade electron and uncomment these lines // try { // await installVueDevtools() // } catch (e) { // console.error('Vue Devtools failed to install:', e.toString()) // }
So if you’re not affected by this bug, you can uncomment the try/catch block and also search for installVueDevtools in this same file(line 5) and also uncomment it. Once this is done, your app will automatically restart, and when you check your dev tools, you should see the Vuejs Devtools.
Vuejs in devtools. (Large preview)
Selecting A Custom Icon For Your App
By default, the Electron icon is set as the default icon for your app, and most of the time, you probably would like to set your own custom icon. To do this, move your icon into your public folder, and rename it to be icon.png. The next thing to do would be to add the required dependency, electron-icon-builder.
You can install it using any of the following commands:
// With Yarn: yarn add --dev electron-icon-builder // or with NPM: npm install --save-dev electron-icon-builder
Once this is done, you can run this next command. It will convert your icon into Electron format and print the following in your console when this done.
Generated info in terminal. (Large preview)
The next thing would be to set the icon option in background.js file. This option goes inside the BrowserWindow option that is imported from Electron. To do this, update BrowserWindow to look like this:
// Add this to the top of your file /* global __static */ // import path import path from 'path' // Replace win = new BrowserWindow({ width: 800, height: 600 }) // With win = new BrowserWindow({ width: 800, height: 600, icon: path.join(__static, 'icon.png') })
Now if we run yarn run electron:build and view our app, we should see the updated icon being used as the app icon but it doesn’t change in development. This issue helps address a manual fix for it on macOS.
Setting Title For Your App
You will notice the title of your app is set to the app name (news-app in this case) and we’ll need to change it. To do that, we have to add a title property to the BrowserWindow method in our background.js file like this:
win = new BrowserWindow({ width: 600, height: 500, title: "News App", icon: path.join(__static, "icon.png"), webPreferences: { // Use pluginOptions.nodeIntegration, leave this alone // See nklayman.github.io/vue-cli-plugin-electron-builder/guide/security.html#node-integration for more info nodeIntegration: process.env.ELECTRON_NODE_INTEGRATION, }, });
Here, we’re setting the title of our app to ‘News App’. But if your index.html file has a title selected or your title doesn’t change to this, try adding this code to your file:
win.on("page-title-updated", (event) => event.preventDefault());
We’re listening for an event that gets fired when our title is updated from BrowserWindow. When this event is fired, we’re telling Electron not to update the title with the one found in index.html file.
Another thing that might be worth changing is the productName, this controls what name appears when you hover on your app’s icon or what your computer recognizes the app as. Right now, the name of our app is Electron. To change this name in production, create a vue.config.js file and add the following lines of code to it:
module.exports = { pluginOptions: { electronBuilder: { builderOptions: { productName: "News App", }, }, }, };
Here, we define productName to be ‘News App’ so that when we run the build command for our app, the name changes from ‘Electron’ to ‘News App’.
Multi Platform Build
By default, when you run the build command, the app that gets created is dependent on the platform that it is being run on. This means if you run the build command on LinUX, the app that gets created would be a LinUX desktop app. The same also applies to other platforms(macOS and windows). But Electron comes with the option to specify a platform (or two platforms) you want to generate. The available options are:
mac
win
linUX
So in order to build the Windows version of your app, run the following command:
// NPM npm electron:build -- --win nsis // YARN yarn electron:build --win nsis
Conclusion
The completed application can be found on my GitHub. The official Electron documentation provides information and a guide that helps you customize your desktop app whichever way you want. Some of the things I tried out but aren’t included in this tutorial are:
Customizing your dock on macOS — https://www.electronjs.org/docs/tutorial/macos-dock.
Setting resizeable, maximizable, and many more — https://github.com/electron/electron/blob/master/docs/api/browser-window.md#new-browserwindowoptions.
So if you’re looking to do much more with your Electron application, their official docs is a good place to start.
Related Resources
Node.jshttps://en.wikipedia.org/wiki/Node.js
Java (programming language)https://en.wikipedia.org/wiki/Java_(programming_language)
Electron (software framework)
JavaFX 14
electronjs
Electron Documentation
Vue CLI Plugin Electron Builder
Lazy Loading Images for Performance Using Intersection Observer by Chris Nwamba
axios
Getting Started With Axios In Nuxthttps://www.smashingmagazine.com/2020/05/getting-started-axios-nuxt/) by Timi Omoyeni
(ks, ra, yk, il)
Website Design & SEO Delray Beach by DBL07.co
Delray Beach SEO
source http://www.scpie.org/building-desktop-apps-with-electron-and-vue/
0 notes