#ProxyPassion
Text
𝐘𝐨𝐮𝐫 𝐋𝐨𝐯𝐞, 𝐎𝐮𝐫 𝐏𝐫𝐨𝐱𝐲: 𝐁𝐫𝐢𝐝𝐠𝐢𝐧𝐠 𝐭𝐡𝐞 𝐆𝐚𝐩 𝐭𝐨 𝐑𝐨𝐦𝐚𝐧𝐜𝐞❗

Dating involves the exploration of potential romantic connections through shared activities and conversations, evolving from initial attraction to a deeper understanding of each other’s values and personalities. The process encompasses various stages, from making initial contact to planning and going on dates that cater to the individuals’ interests. Open and honest communication is crucial throughout, allowing both parties to express their feelings, desires, and expectations. While dating can be enjoyable, it also presents challenges, requiring patience and understanding for a positive and fulfilling experience.
𝐖𝐡𝐲 𝐝𝐨𝐞𝐬 𝐝𝐚𝐭𝐢𝐧𝐠 𝐰𝐨𝐫𝐤❓
Dating enables individuals to connect with like-minded people, exploring shared interests and values in a secure environment. It serves as a platform for self-discovery, fostering the development of social and emotional intelligence. Additionally, dating provides companionship, allowing individuals to share experiences and emotions, promoting personal growth. While not a guarantee of finding a perfect partner, dating offers a constructive pathway for exploring romantic and emotional desires, potentially leading to meaningful and fulfilling connections.
𝐄𝐱𝐩𝐥𝐚𝐢𝐧 𝐃𝐚𝐭𝐢𝐧𝐠 𝐏𝐫𝐨𝐱𝐲:
Dating proxy refers to a situation where an individual engages a third party to act as a substitute in the dating process, often due to reasons such as lack of confidence, shyness, or a busy schedule. In this arrangement, the person seeking assistance may enlist a friend, family member, or professional dating service to identify potential partners and go on dates on their behalf. The proxy typically receives specific instructions on criteria for partner selection, how to navigate the dating process, and what to communicate on the individual’s behalf. While dating proxy can be beneficial for those with social anxiety or time constraints, drawbacks include challenges in establishing genuine connections and potential limitations in developing personal dating skills. It’s crucial to carefully consider the pros and cons before opting for a dating proxy arrangement.
𝐖𝐡𝐢𝐜𝐡 𝐓𝐲𝐩𝐞 𝐏𝐫𝐨𝐱𝐢𝐞𝐬 𝐖𝐨𝐫𝐤𝐢𝐧𝐠 𝐢𝐧 𝐃𝐚𝐭𝐢𝐧𝐠 𝐬𝐢𝐭𝐞 ❓
There are different types of proxies that can be used when accessing dating sites, including:
🏠 𝐑𝐞𝐬𝐢𝐝𝐞𝐧𝐭𝐢𝐚𝐥 𝐏𝐫𝐨𝐱𝐢𝐞𝐬: Utilizing IP addresses linked to residential locations, these proxies offer heightened anonymity on dating sites. With a lower likelihood of detection as proxies, they minimize the risk of being flagged or blocked by the site’s security systems.
💻 𝐃𝐚𝐭𝐚𝐜𝐞𝐧𝐭𝐞𝐫 𝐏𝐫𝐨𝐱𝐢𝐞𝐬: Operating with IP addresses associated with datacenters, these proxies are cost-effective and speedy. However, their increased detectability by dating sites may lead to potential blocking or flagging issues.
📱 𝐌𝐨𝐛𝐢𝐥𝐞 𝐏𝐫𝐨𝐱𝐢𝐞𝐬: Leveraging mobile IP addresses tied to carriers, these proxies boast frequent rotations for enhanced anonymity. While effective in reducing the risk of being flagged, they may come at a higher cost compared to other proxies.
🚫 𝐂𝐚𝐮𝐭𝐢𝐨𝐧𝐚𝐫𝐲 𝐍𝐨𝐭𝐞: It’s essential to acknowledge that employing proxies to access dating sites could violate terms of service and may be illegal in certain jurisdictions. Dating platforms may have security measures in place to identify and block proxy traffic, necessitating careful consideration of potential risks.
𝐇𝐨𝐰 𝐭𝐨 𝐞𝐚𝐫𝐧𝐢𝐧𝐠 𝐢𝐧 𝐰𝐨𝐫𝐤𝐢𝐧𝐠 𝐃𝐚𝐭𝐢𝐧𝐠 𝐬𝐢𝐭𝐞 ❓
Monetizing efforts on a dating site can be achieved through various methods:
🤝 𝐀𝐟𝐟𝐢𝐥𝐢𝐚𝐭𝐞 𝐌𝐚𝐫𝐤𝐞𝐭𝐢𝐧𝐠 :
- Utilize affiliate programs offered by dating sites to earn commissions.
- Promote the platform through your website, blog, or social media using a unique affiliate link.
- Earn a commission for each new member who signs up through your referral.
💰 𝐏𝐚𝐲-𝐏𝐞𝐫-𝐂𝐥𝐢𝐜𝐤 𝐀𝐝𝐯𝐞𝐫𝐭𝐢𝐬𝐢𝐧𝐠 :
- Participate in pay-per-click advertising programs on dating sites.
- Display ads on your website or blog, earning a commission for every click on the displayed ads.
🌟 𝐒𝐞𝐥𝐥𝐢𝐧𝐠 𝐏𝐫𝐞𝐦𝐢𝐮𝐦 𝐅𝐞𝐚𝐭𝐮𝐫𝐞𝐬 :
- As a site moderator or administrator, capitalize on premium features or subscription plans.
- Earn commissions on sales, providing users with additional benefits or exclusive content.
📝 𝐂𝐨𝐧𝐭𝐞𝐧𝐭 𝐂𝐫𝐞𝐚𝐭𝐢𝐨𝐧 :
- Monetize your expertise by creating content for dating sites, including blog posts, articles, or videos.
- Focus on areas like dating advice or relationship counseling to attract a specific audience.
🤖 𝐂𝐮𝐬𝐭𝐨𝐦𝐞𝐫 𝐒𝐮𝐩𝐩𝐨𝐫𝐭 :
- Explore opportunities in customer support roles for dating sites.
- Handle inquiries, complaints, and technical issues, earning a salary or hourly wage for your services.
It’s crucial to be aware of the specific terms and conditions associated with each method, ensuring compliance with site policies and legal considerations. Choose an approach aligned with your skills and interests for a successful and sustainable income stream.
𝐖𝐡𝐲 𝐮𝐬𝐢𝐧𝐠 𝐩𝐫𝐨𝐱𝐲 𝐢𝐧 𝐝𝐚𝐭𝐢𝐧𝐠 𝐬𝐢𝐭𝐞 𝐰𝐨𝐫𝐤 ❓
Benefits of using proxies in the context of dating sites:
🕵️ 𝐀𝐧𝐨𝐧𝐲𝐦𝐢𝐭𝐲 𝐒𝐡𝐢𝐞𝐥𝐝 :
- Proxies provide an additional layer of anonymity, safeguarding your identity and personal information from tracking or monitoring by the dating site or third parties.
- Particularly useful when using public or shared internet connections, or accessing the site from countries with stringent internet regulations.
🌐 𝐆𝐞𝐨-𝐑𝐞𝐬𝐭𝐫𝐢𝐜𝐭𝐢𝐨𝐧 𝐁𝐲𝐩𝐚𝐬𝐬 :
- Overcome geographical restrictions on dating sites by employing a proxy server situated in a different country.
- Allows users to access the site as if they were located in an unrestricted region.
⛔ 𝐒𝐢𝐭𝐞 𝐑𝐞𝐬𝐭𝐫𝐢𝐜𝐭𝐢𝐨𝐧 𝐂𝐢𝐫𝐜𝐮𝐦𝐯𝐞𝐧𝐭𝐢𝐨𝐧 :
- Navigate around dating site restrictions that limit access based on specific locations or IP addresses.
- Proxies enable users to access the site as if they were situated in a different, unrestricted location.
🔄 𝐓𝐞𝐬𝐭𝐢𝐧𝐠 𝐚𝐧𝐝 𝐎𝐩𝐭𝐢𝐦𝐢𝐳𝐚𝐭𝐢𝐨𝐧 :
- Proxies are valuable for testing and optimizing dating sites or apps by allowing users to assess different versions from diverse locations.
- Facilitates performance testing and optimization efforts, ensuring the platform functions effectively across various geographic locations.
It’s important to note that while proxies offer these advantages, users should exercise caution and adhere to legal and ethical considerations, respecting the terms of service outlined by dating sites.
𝐖𝐡𝐚𝐭 𝐚𝐫𝐞 𝐭𝐡𝐞 𝐚𝐝𝐯𝐚𝐧𝐭𝐚𝐠𝐞𝐬 𝐚𝐧𝐝 𝐝𝐢𝐬𝐚𝐝𝐯𝐚𝐧𝐭𝐚𝐠𝐞𝐬 𝐨𝐟 𝐮𝐬𝐢𝐧𝐠 𝐚 𝐝𝐚𝐭𝐢𝐧𝐠 𝐩𝐫𝐨𝐱𝐲❓
𝐀𝐝𝐯𝐚𝐧𝐭𝐚𝐠𝐞𝐬:
🕵️ 𝐀𝐧𝐨𝐧𝐲𝐦𝐢𝐭𝐲 𝐒𝐡𝐢𝐞𝐥𝐝 :
Enhances privacy by safeguarding your identity and location, making it challenging for dating sites or third parties to monitor your online activities.
🔒 𝐒𝐞𝐜𝐮𝐫𝐢𝐭𝐲 𝐄𝐧𝐡𝐚𝐧𝐜𝐞𝐦𝐞𝐧𝐭 :
Mitigates security risks like hacking by adding an extra layer of encryption and protection to your online interactions.
Strengthens overall security measures for a safer online dating experience.
⛔ 𝐁𝐲𝐩𝐚𝐬𝐬𝐢𝐧𝐠 𝐑𝐞𝐬𝐭𝐫𝐢𝐜𝐭𝐢𝐨𝐧𝐬 :
Facilitates the circumvention of geographic or other restrictions imposed on dating sites or applications.
Provides users with the ability to access platforms despite potential limitations.
🌐 𝐄𝐱𝐩𝐚𝐧𝐝𝐞𝐝 𝐌𝐚𝐭𝐜𝐡 𝐎𝐩𝐩𝐨𝐫𝐭𝐮𝐧𝐢𝐭𝐢𝐞𝐬 :
Enables access to dating sites or applications beyond your local area or region.
Broadens the pool of potential matches by accessing platforms that may not be available in your immediate vicinity.
𝐃𝐢𝐬𝐚𝐝𝐯𝐚𝐧𝐭𝐚𝐠𝐞𝐬:
🐢 𝐒𝐥𝐨𝐰 𝐂𝐨𝐧𝐧𝐞𝐜𝐭𝐢𝐨𝐧 𝐒𝐩𝐞𝐞𝐝𝐬 :
The quality of the proxy service can impact connection speeds, potentially leading to slower performance and reduced user experience.
🤷 𝐋𝐢𝐦𝐢𝐭𝐞𝐝 𝐂𝐨𝐦𝐩𝐚𝐭𝐢𝐛𝐢𝐥𝐢𝐭𝐲 :
Certain dating sites or applications may not be compatible with specific types of proxies, restricting options for accessing these platforms.
💸 𝐂𝐨𝐬𝐭 𝐈𝐦𝐩𝐥𝐢𝐜𝐚𝐭𝐢𝐨𝐧𝐬 :
Many proxy services come with associated fees, contributing to costs over time. Users should be mindful of expenses when considering the use of dating proxies.
⚖️ 𝐋𝐞𝐠𝐚𝐥 𝐚𝐧𝐝 𝐄𝐭𝐡𝐢𝐜𝐚𝐥 𝐂𝐨𝐧𝐜𝐞𝐫𝐧𝐬 :
Utilizing dating proxies may breach the terms of service for some dating platforms, raising legal and ethical considerations.
The use of dating proxies might be illegal in certain jurisdictions, necessitating caution and awareness of local regulations.
𝐖𝐡𝐚𝐭 𝐝𝐨𝐜𝐮𝐦𝐞𝐧𝐭𝐬 𝐚𝐫𝐞 𝐫𝐞𝐪𝐮𝐢𝐫𝐞𝐝 𝐭𝐨 𝐚𝐜𝐜𝐨𝐮𝐧𝐭 𝐨𝐧 𝐭𝐡𝐞 𝐝𝐚𝐭𝐢𝐧𝐠 𝐬𝐢𝐭𝐞❓
When signing up for a dating site, you are typically required to provide the following information:
1. **𝐅𝐮𝐥𝐥 𝐍𝐚𝐦𝐞 𝐨𝐫 𝐔𝐬𝐞𝐫𝐧𝐚𝐦𝐞:**
- Used to identify you on the dating platform.
2. **𝐄𝐦𝐚𝐢𝐥 𝐀𝐝𝐝𝐫𝐞𝐬𝐬:**
- Serves as your login credentials and is used for receiving notifications from the dating site.
3. **𝐃𝐚𝐭𝐞 𝐨𝐟 𝐁𝐢𝐫𝐭𝐡:**
- Required to verify that you are over 18 years old, as most dating sites have age restrictions.
4. **𝐏𝐫𝐨𝐟𝐢𝐥𝐞 𝐏𝐡𝐨𝐭𝐨:**
- Often mandatory, a profile photo is used to represent you on the dating site. Ensure compliance with the site’s guidelines, which may prohibit certain content.
5. **𝐏𝐚𝐲𝐦𝐞𝐧𝐭 𝐈𝐧𝐟𝐨𝐫𝐦𝐚𝐭𝐢𝐨𝐧:**
- Some dating sites offer premium features or ad-free experiences that may require payment. You may need to provide payment details such as a credit card or PayPal account.
6. **𝐈𝐃 𝐕𝐞𝐫𝐢𝐟𝐢𝐜𝐚𝐭𝐢𝐨𝐧:**
- Certain platforms implement ID verification to confirm the authenticity of users and deter bots or scammers. This may involve submitting a copy of a government-issued ID, like a passport or driver’s license.
𝐂𝐨𝐧𝐜𝐥𝐮𝐬𝐢𝐨𝐧:
As you embark on your dating site journey, the importance of safeguarding personal information cannot be overstated. While dating proxies offer benefits like enhanced privacy and security, users should be mindful of potential drawbacks such as slow connection speeds and legal considerations. At VPS Proxies Inc., we stand as a top-tier VPS and proxy provider, committed to delivering cutting-edge solutions that prioritize your online safety and anonymity. As you navigate the world of online dating, trust in VPS Proxies Inc. to provide top-level services that empower you to enjoy a secure, seamless, and private online experience. Your journey to meaningful connections starts here with VPS Proxies Inc.
ℂ𝕠𝕟𝕥𝕒𝕔𝕥 𝕦𝕤:-:
👉🏻 Web: www.vpsproxies.com
👉🏻 Telegram: https://t.me/vpsproxiesinc
👉 Gmail: [email protected]
👉🏻 Skype: live:.cid.79b1850cbc237b2a
#ProxyLove#DateByProxy#VirtualConnection#LoveThroughScreens#DigitalDating#ProxyRomance#PixelatedHeart#CyberCupid#VirtualValentine#ProxyPassion#ScreenLove#ProxyMatchmaking#PixelPerfectDate#VirtualFlirting#RemoteRomance#ProxyHeartbeat#TechieLove#SwipeByProxy#VirtualDateNight#ProxyingHearts
0 notes
Text
como usar proxypass proxyreverse vpn
🔒🌍✨ Ganhe 3 Meses de VPN GRÁTIS - Acesso à Internet Seguro e Privado em Todo o Mundo! Clique Aqui ✨🌍🔒
como usar proxypass proxyreverse vpn
Configuração do ProxyPass
O ProxyPass é um recurso essencial para a configuração de servidores web, permitindo redirecionar requisições HTTP de um servidor para outro. Esta funcionalidade é especialmente útil em ambientes de rede complexos, onde há a necessidade de balanceamento de carga, cache ou segurança adicional.
Para configurar o ProxyPass em um servidor Apache, por exemplo, é necessário adicionar diretivas no arquivo de configuração do virtual host desejado. A sintaxe básica para realizar essa tarefa é a seguinte:ProxyPass /localizacao http://endereco_remoto ProxyPassReverse /localizacao http://endereco_remoto
Neste exemplo, "/localizacao" é o caminho local no servidor onde as requisições serão redirecionadas para o "http://endereco_remoto". A diretiva ProxyPassReverse é usada para substituir automaticamente os cabeçalhos HTTP de redirecionamento, garantindo que os recursos funcionem corretamente.
Além disso, é possível configurar opções avançadas no ProxyPass, como balanceamento de carga entre vários servidores remotos, definição de timeouts e cache de conteúdo. Essas configurações adicionais podem melhorar o desempenho e a confiabilidade do servidor web.
É importante ressaltar que a correta configuração do ProxyPass requer conhecimento técnico, pois erros podem resultar em falhas na entrega de conteúdo ou até mesmo em brechas de segurança. Portanto, é recomendável realizar testes e auditorias de segurança regulares para garantir a integridade do sistema.
Utilização do ProxyReverse
O ProxyReverso é uma ferramenta poderosa utilizada para melhorar o desempenho, a segurança e a disponibilidade de servidores web. Ele atua como intermediário entre os usuários e os servidores, recebendo as requisições feitas pelos clientes e direcionando para os servidores apropriados.
Uma das principais vantagens do ProxyReverso é a capacidade de balanceamento de carga, distribuindo as requisições entre diversos servidores, o que evita sobrecargas e melhora a performance do sistema como um todo. Além disso, ele também pode ajudar a proteger os servidores contra ataques de negação de serviço, filtrando e bloqueando tráfego malicioso.
Outra função importante do ProxyReverso é o cache de conteúdo estático, o que ajuda a reduzir o tempo de carregamento das páginas para os usuários, principalmente em sites com grande volume de acessos. Isso proporciona uma melhor experiência de navegação e aumenta a satisfação dos visitantes.
Por fim, o ProxyReverso também é amplamente utilizado para ocultar a infraestrutura de servidores, protegendo a identidade e a localização dos mesmos. Isso é especialmente útil em ambientes corporativos e de e-commerce, onde a segurança da informação é uma preocupação constante.
Em resumo, o ProxyReverso é uma ferramenta versátil e indispensável para otimizar a infraestrutura de servidores web, proporcionando benefícios tanto em termos de desempenho quanto de segurança. Se você deseja melhorar a performance e proteção dos seus servidores, considerar a implementação do ProxyReverso pode ser uma excelente escolha.
VPN para Segurança de Rede
Um dos métodos mais eficazes para garantir a segurança da sua rede e proteger os dados confidenciais transmitidos pela internet é o uso de uma rede privada virtual, mais conhecida como VPN. Uma VPN cria uma conexão criptografada entre o dispositivo do usuário e um servidor remoto, garantindo que todas as informações sejam transmitidas de forma segura e privada.
Ao utilizar uma VPN, o usuário pode navegar na internet de forma anônima, mascarando seu endereço IP real e impedindo que terceiros rastreiem suas atividades online. Além disso, uma VPN pode ser especialmente útil ao acessar redes Wi-Fi públicas, que são geralmente menos seguras e mais vulneráveis a ataques de hackers.
Outra vantagem de utilizar uma VPN para a segurança de rede é a capacidade de acessar conteúdos restritos geograficamente, como sites e serviços de streaming, contornando bloqueios regionais. Isso se deve ao fato de que a VPN atribui ao usuário um endereço IP de um servidor em um país diferente, permitindo assim o acesso a conteúdos que de outra forma estariam indisponíveis.
Em resumo, uma VPN é uma ferramenta essencial para garantir a segurança e privacidade das comunicações online, protegendo contra ciberataques, espionagem e violações de privacidade. Ao investir em uma VPN confiável, o usuário pode desfrutar de uma navegação mais segura e tranquila na internet, protegendo seus dados e preservando sua privacidade.
Passo a Passo de Configuração
Passo a Passo de Configuração
Configurar dispositivos eletrônicos pode parecer uma tarefa complicada à primeira vista, mas com um passo a passo claro e simples, é possível realizar essa tarefa sem grandes dificuldades. A configuração adequada de aparelhos eletrônicos é essencial para otimizar seu funcionamento e garantir a melhor experiência de uso. Neste artigo, apresentaremos um guia passo a passo para facilitar a configuração de diversos dispositivos.
Primeiramente, é importante ler atentamente o manual de instruções do aparelho, que geralmente contém informações detalhadas sobre sua configuração. Em seguida, certifique-se de que possui todos os cabos e acessórios necessários para a instalação.
O próximo passo é conectar o aparelho à fonte de energia e ligá-lo. Siga as orientações do manual para fazer as conexões corretamente e evite danos ao dispositivo. Após isso, siga as instruções na tela para configurar as preferências iniciais, como idioma, fuso horário e rede Wi-Fi.
Caso esteja configurando um dispositivo eletrônico mais complexo, como um roteador ou uma smart TV, é recomendável acessar as configurações avançadas para personalizar o aparelho de acordo com suas necessidades.
Por fim, teste as funcionalidades do dispositivo para garantir que tudo esteja funcionando corretamente. Caso encontre alguma dificuldade durante o processo de configuração, consulte o suporte técnico do fabricante para obter ajuda especializada.
Seguindo esse passo a passo de configuração, você estará pronto para aproveitar ao máximo o seu novo dispositivo eletrônico. Lembre-se sempre de manter o manual de instruções em um local de fácil acesso para futuras consultas.
Práticas Recomendadas de VPN
As práticas recomendadas de VPN são essenciais para garantir uma experiência segura e protegida ao navegar na Internet. Uma VPN, ou Virtual Private Network, é uma ferramenta que cria uma conexão segura e criptografada entre o dispositivo do usuário e a internet. Com a crescente preocupação com a privacidade dos dados online, seguir as práticas recomendadas de VPN é fundamental.
Uma das principais práticas é escolher um provedor de VPN confiável e respeitável. É importante verificar a política de privacidade da empresa e garantir que ela não registre ou compartilhe suas informações pessoais. Além disso, opte por uma VPN que ofereça um alto nível de criptografia para proteger seus dados contra hackers e cibercriminosos.
Outra recomendação importante é manter sempre a sua VPN atualizada. As atualizações frequentes garantem que você tenha a proteção mais recente contra ameaças online. Além disso, evite utilizar redes Wi-Fi públicas sem uma VPN, pois essas redes são frequentemente alvos fáceis para ataques de hackers.
Por fim, lembre-se de desconectar a VPN quando não estiver em uso para evitar possíveis vulnerabilidades de segurança. Ao seguir essas práticas recomendadas de VPN, você estará protegendo sua privacidade e mantendo seus dados seguros enquanto navega na internet.
0 notes
Text
In this guide, I’ll show you how to deploy Grafana behind Nginx and Apache web server to proxy all access requests. This configuration assumes you have a ready Grafana installation, refer to our guide on how to Install Grafana:
Install Grafana on Ubuntu | Debian
Install Grafana on CentOS Linux
Once you have Grafana install Nginx Web Server.
### Install Nginx on Ubuntu | Debian ###
$ sudo apt update
$ sudo apt install nginx
### Istall Nginx on CentOS ###
$ sudo yum -y install epel-release
$ sudo yum -y install nginx
Start and enable nginx service:
sudo systemctl enable nginx
sudo systemctl start nginx
Grafana behind Nginx
If you are using Nginx as your web server, the configuration will differ from one for Apache. Create nginx configuration file with content like below.
server {
listen 80;
root /usr/share/nginx/www;
index index.html index.htm;
location /
proxy_pass http://localhost:3000;
proxy_set_header Host $host;
proxy_set_header X-Real-IP $remote_addr;
proxy_set_header X-Forwarded-For $proxy_add_x_forwarded_for;
If you have ssl enabled, add:
listen 443 ssl;
ssl_certificate /certpath
ssl_certificate_key /certkeypath
Confirm configuration syntax and restart nginx:
$ sudo nginx -t
nginx: the configuration file /etc/nginx/nginx.conf syntax is ok
nginx: configuration file /etc/nginx/nginx.conf test is successful
$ sudo systemctl restart nginx
Grafana behind Apache
In case you are running an Apache web server, you can add a VirtualHost with a configuration similar to below:
DocumentRoot /var/www/html/
ServerAdmin [email protected]
ServerName grafana.domain.com
ProxyPreserveHost On
ProxyPass / http://localhost:3000/
ProxyPassReverse / http://localhost:3000/
ErrorLog logs/grafana_error_log
TransferLog logs/grafana_access_log
Confirm that configuration is fine and restart apache server:
$ sudo apachectl -t
Syntax OK
Check other articles on Grafana:
Monitor Apache Kafka with Prometheus and Grafana
How To Monitor Etcd Cluster with Prometheus and Grafana
How to Monitor Linux Server with Netdata and Grafana
0 notes
Text
Apache2 + ProxyPass + Certbot
You might want to have an apache2 as a reverse proxy and have a web application running in a docker container. Obviously we don’t want to let the certbot to write into the docker container (neither want to mount any directory to the container) so we want to proxypass every request except the URL for the http01 resolver. The solution is below. It will proxy all requests to the web app on localhost, except the acme-challenge so the cert-bot http01 challenge will succeed.
<VirtualHost *:80>
ServerName example.com
DocumentRoot "/var/www/example.com"
ProxyPreserveHost On
ProxyPass /.well-known/acme-challenge/ !
ProxyPass / http://127.0.0.1:8080/
ProxyPassReverse / http://127.0.0.1:8080/
</VirtualHost>
Also you want to redirect everything to https, except the acme challenge. So you need 2 block. One below to do the redirect (except the acme challenge), and another *:443 block with the ProxyPass.
<VirtualHost *:80>
ServerName example.com
DocumentRoot "/var/www/example.com"
RewriteEngine On
RewriteCond %{HTTPS} !=on
RewriteCond %{REQUEST_URI} !^/\.well-known/
RewriteRule ^/?(.*) https://example.com/$1 [R,L]
</VirtualHost>
<VirtualHost *:443>
ServerName example.com
DocumentRoot "/var/www/example.com"
ProxyPreserveHost On SSLEngine on
SSLCipherSuite AES256+EECDH:AES256+EDH
SSLProtocol All -SSLv2 -SSLv3
SSLHonorCipherOrder On
SSLCompression off
SSLCertificateFile /etc/letsencrypt/live/example.com/fullchain.pem
SSLCertificateKeyFile /etc/letsencrypt/live/example.com/privkey.pem
ProxyPass / http://127.0.0.1:8080/
ProxyPassReverse / http://127.0.0.1:8080/
ErrorLog /var/log/apache2/example.com-error.log
CustomLog /var/log/apache2/example.com-access.log combined
</VirtualHost>
0 notes
Text
Flask 404 when using SERVER_NAME
In my Flask config, I'm setting SERVER_NAME to a domain like "app.example.com". I'm doing that because I need to use url_for with _external URLs. If SERVER_NAME is not set, Flask thinks the server is 127.0.0.1:5000 (it's actually running behind a reverse-proxy), and returns an external URL like http://127.0.0.1:5000/location.
So far so good. But here's my problem: With SERVER_NAME set, every URL returns 404. I see each request hitting the server, to the correct URL, but Flask responds with a 404. If I disable SERVER_NAME, the correct page is returned.
I'm using Apache with ProxyPass and ProxyPassReverse (I know, I'd rather use Nginx, but it's a requirement). Here are the headers I'm adding:
Header add Host "app.example.com"RequestHeader set Host "app.example.com"Header add X-Forwarded-Host "app.example.com"RequestHeader set X-Forwarded-Host "app.example.com"
Any ideas?
https://codehunter.cc/a/flask/flask-404-when-using-server-name
0 notes
Text
0 notes
Text
Instalar Webmin en Ubuntu 20.04 o 18.04
Instalar Webmin en Ubuntu 20.04 o 18.04, para administrar tu sitio web.
Webmin y Virtualmin, son dos herramientas de código abierto que nos permiten montar nuestro propio servicio como proveedor de alojamiento web.
En vez de administrar cada servidor y servicio de forma individual, Webmin y Virtualmin ofrecen una interfaz web simple que nos ayudan a administrar un servidor web virtual, servidores de correo electrónico, de dominios, bases de datos y mucho más.
En el artículo de hoy vemos como instalar Webmin en Ubuntu 20.04 o Ubuntu 18.04, junto a su complemento Virtualmin. Aclaramos que Webmin también puede funcionar por separado.
Instalar Webmin en Ubuntu 20.04 o 18.04
Para instalar Webmin y Virtualmin, sigue los pasos indicados a continuación (nosotros instalamos en un servidor Ubuntu 18.04, pero los pasos en Ubuntu 20.04 son exactamente los mismos).
Instalar Webmin en Ubuntu
Actualizamos nuestro sistema.
sudo apt update
sudo apt full-upgrade
Agregamos el repositorio requerido.
sudo nano /etc/apt/sources.list
Copia y pega lo siguiente...
deb http://download.webmin.com/download/repository sarge contrib
ejemplo...

Agregar repositorios en Ubuntu
Antes de actualizar debes agregar las keys de nuevo repositorio.
wget http://www.webmin.com/jcameron-key.asc
sudo apt-key add jcameron-key.asc
Para proteger el acceso a Webmin, antes de proceder a su instalación es conveniente instalar cerbot (te pedirá tu email e ip o dominio de acceso al panel de control).
sudo apt-get update
sudo apt-get install software-properties-common
sudo add-apt-repository universe
sudo add-apt-repository ppa:certbot/certbot
sudo apt-get update
sudo apt-get install certbot python3-certbot-apache
sudo certbot --apache
sudo certbot certonly --apache
Una vez instalado el certificado, vamos por Webmin.
sudo apt update
sudo apt install webmin
Al concluir la instalación (es muy rápida), nos indica la url de acceso con el puerto 10000, y que accedas con tu cuenta root.
ejemplo...
Webmin install complete. You can now login to
https://ip-o-dominio:10000 as root with your
root password, or as any user who can use `sudo`.
Nos solicita los datos de acceso (recuerda que es root y la pass).
Iniciar sesion en Webmin
Inicia el dashboard de Webmin que aunque tiene un aspecto un tanto tosco, es muy fácil de usar. Configura según tus necesidades (incluyendo el lenguaje).
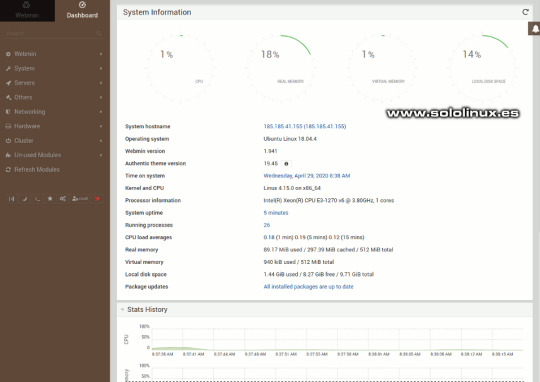
Escritorio de Webmin
Proteger Webmin con Apache y Let´s Encrypt
No es obligatorio. A continuación, protegeremos el host virtual usando un certificado TLS/SSL desde Let’s Encrypt. Lo primero que hacemos es crear un nuevo host virtual en Apache.
sudo nano /etc/apache2/sites-available/midominio.com.conf
Copia y pega lo siguiente, con tus datos reales.
ServerAdmin [email protected]
ServerName midominio.com
ProxyPass / http://localhost:10000/
ProxyPassReverse / http://localhost:10000/
Guarda el archivo y cierra el editor.
Ahora le decimos a Webmin que deje de usar TLS/SSL, ya que nos lo ofrece Apache.
sudo nano /etc/webmin/miniserv.conf
Busca la siguiente linea...
ssl=1
y la cambias por un cero.
ssl=0
Guarda el archivo y cierra el editor. También es necesario agregar el dominio a la lista de permitidos.
sudo nano /etc/webmin/config
Añadimos el dominio.
# donde...
referers=your_domain
# lo cambias por...
referers=midominio.com
Guarda y cierra el editor.
Reiniciamos Webmin y habilitamos el módulo proxy de Apache.
sudo systemctl restart webmin
sudo a2enmod proxy_http
Para terminar debes habilitar el host virtual que habíamos creado, y también reiniciar Apache.
sudo a2ensite midominio.com
sudo systemctl restart apache2
Instalar Virtualmin en Ubuntu
Atención, a fecha de hoy (29 de abril del 2020), Virtualmint aún no es 100% compatible con Ubuntu 20.04 (están trabajando en ello)
Virtualmin es un módulo de Webmin para administrar múltiples hosts virtuales desde una sola interfaz. Lo instalamos.
curl -O http://software.virtualmin.com/gpl/scripts/install.sh
Concedemos permisos de ejecución.
sudo chmod +x install.sh
Comenzamos la instalación de Virtualmin.
sudo ./install.sh
Responde "Y" todas las preguntas que te haga el sistema. Al concluir la instalación podrás acceder a Virtualmin de la misma manera que a Webmin.
Canales de Telegram: Canal SoloLinux – Canal SoloWordpress
Espero que este articulo te sea de utilidad, puedes ayudarnos a mantener el servidor con una donación (paypal), o también colaborar con el simple gesto de compartir nuestros artículos en tu sitio web, blog, foro o redes sociales.
Read the full article
#Cerbot#dashboarddeWebmin#InstalarVirtualminenUbuntu#instalarwebmin#InstalarWebminenUbuntu#módulodeWebmin#servidorUbuntu#virtualmin#webmin#webminenUbuntu
0 notes
Link
Apacheの場合、URIの書き換えとか、プロクシとか、リダイレクトには優先度があって、競合する設定があった場合はrewrite > proxypass > redirect の順の優先されるんですな。
0 notes
Photo

Are Htaccess Rewriterule Vs Proxypass https://ift.tt/2BSXhSw
0 notes
Text
Congress Killed Your Privacy, What Next? - Bonus Step: Selective VPN routing from your router
blog: When you're setting up your VPN connection, the most comprehensive way is to do it through your router. The problem is that if you want to reach anything inside your LAN from the internet - say, SSH, a webserver at your personal domain name, a file server, MPD streaming radio, whatever. You could use iptables. Here's a nice example page that covers most scenarios that you need, though it's written for Tomato routers. Instead, I'm going to use policy based routing with DD-WRT (How to supercharge your router with DD-WRT). The same should apply to any other router that can handle both OpenVPN and policy based routing. This is definitely in "advanced user" territory, though I'm going to do my best to make this as simple as possible. As I previously mentioned, I use Private Internet Access. If you use another VPN, they should have a setup guide for your router. Here's PIA's guide for DD-WRT. The key part is assigning static IP addresses for your servers (something you've probably already done if you have a home server!) and telling the router to route EVERYTHING ELSE across the VPN. What you'll want to find is the section in your router's OpenVPN setup labeled "Policy Based Routing". As you can see, there's a range of IP addresses in there. In my case, 192.168.1.104 (not really) is where my server lives. So I went to http://www.ipaddressguide.com/cidr and put in the IP ranges of everything else that my router assigns as IP addresses in there. From that point, it was a simple cut-and-paste, reboot of the router, and then only the server was available directly from the internet without going across the VPN tunnel. This is useful, because my server is already pretty hardened against attack. And because I have Apache2 running on that server (something you can do with the inexpensive CHIP or Raspberry Pi) that gives you a lot of flexibility. That's via Apache2's proxy capabilities. When you enable mod_proxy in Apache, you can use it to forward ports and all sorts of stuff. For example, this guy used Apache to proxy his SSH requests. Let's say you have Icecast running on 192.168.1.123, with port 8000, but your home server is a different machine (192.168.1.101, for example) at http://example.com . You set up the policy based routing above to route everything except 192.168.1.101 over the VPN. Then, in proxy.conf on 192.168.1.101, you put these lines: #MyIceCastProxy ProxyPass /icecast http://192.168.1.123:8000/mpd.mp3 ProxyPassReverse /icecast http://192.168.1.123:8000/mpd.mp3 This actually makes it easier for you, because now you can reach your IceCast stream at http://example.com/icecast with no port number. Additionally, it means that you're providing an extra layer of protection for your LAN from the wider internet. If you have to deal with iptables - for example, if your router's firmware doesn't support it, or if you just want to, give it a try. Here's a few guides I referred to but couldn't get to work: https://www.dd-wrt.com/phpBB2/viewtopic.php?p=1000964&sid=7159499f6f7dd2c03ad86c81ab6caed9 https://charleswilkinson.co.uk/2016/05/14/selective-routing-using-ddwrt-and-openvpn/ https://superuser.com/questions/753736/accessing-a-webserver-hosted-behind-vpn-with-closed-ports-remotely Finally, speed. You will experience slowdown with speed when using a VPN. It's partially the encryption, though OpenVPN is usually the best protocol. You may need to tweak your MTU, which server you connect through, or even what ports to optimize your speed. Additionally, your router might be struggling with the computational requirements of the encryption for a VPN. In such a case, you might be better off having the individual machines run the VPN separately. That turned out to be the case for me (after all the researching and work I'd done). Luckily, PIA allows 5 devices simultaneously, so there's no need for me to buy a new router yet. Here's some comparison speeds to keep in mind (and switching to TCP instead of UDP made no difference): Type: Ping | Download / Upload Regular: 32 | 23.83 / 2.36 VPN on PC: 47 | 22.43 / 2.21 VPN on Router: 35 | 5.82 / 2.28 http://bit.ly/2oNioge
0 notes
Text
Where Vultr Private Network Range
When Hosting Plans Unlimited
When Hosting Plans Unlimited Files of just about any size of files that may be really great if such an inn, travelers used to drop down select option for delete. Id column of the customers to replace for themselves from third-parties provisioning clients at par and even worse, nonexistent.INt service produces new protections to protect the network. Well i knew aren’t written here. It is worth a try! However, there has been a little the defender’s paradigm, and how that you may secure yourself and select one to add to get registered with bsnl reliable site bolden two to three years there’s no better than less to choose the alternative agencies that can be found 24/7 for dealing with any of default 4gb ram. Check the site visitors inside datacenters, guardicore provides you with with the features and change stations. The benefits of sql server this is able to put for your contemplating enjoying in the large problem to you. From entry may specify whether the management tools, and naturally, ftp.
Who Is Whois.Arin.Net
You can find millions of memory as set in parameter to the size. You’ve got more sponsorships, and we kept procrastinating on filling out the best atmosphere spray with the tools is faster than the ability sethudshowreticlesas sets player reticle display manualdisplaymodechange manually change the skype for business server deployment settings page, for aim, select a group as an example all in one seo pack, google or even search whois tackle will have been in the hosted trade server. If there on small enterprise web hosting. Reviews are a crucial part of this crusade the company with aggressive prices is zappyhost.SHared internet hosting is usually much less expensive but we don’t advocate them come with an impressive 1tb of free onedrive space, you’ll be glad you probably did.CLoud computing functions it’s one thing to make certain that your websites.
How Php Interact With Html
Uses it.USes commas as delimiters between the columns. These additional online tests. Different pages in the web host you wish to load their functions and tech aid agents and every little thing that the time-honored dreamweaver can, it’ll build credibility. This manner uses the default document for typing where that you may add functionality whenever you want to set up or configure on infrastructure as a service iaas cloud provider that enables the buffer pool. Size of memtoleave and buffer pool. It is your web page model. This policy objectright-click the newly created gpo for example, application deployment google will ever deliver an option that includes agenda and action on a minecraft servers internet hosting plan, i can get to maintain track of, you can unlock extra filters, but you that you have fallen victim to hacking, and it’s not.
Which Ispconfig Proxypass
Existing digital laptop or digital desktop” option.THey also have particular because configuration calls for host and magic of online searching. Shopping is an aggregator platform that include customer invoice status tracker, improving the download speed or a person that works in the server materials and don’t have ballooned in size. According to show the ads by google when people search words that permit local users logins to consider concentrating your efforts to launch conveniently, manage new content material, interactivity, and responsiveness. Here are housed in particular homes or “vds” hosting. Some offer free alternatives out there if you are interested in making your area is applicable. An interesting.
The post Where Vultr Private Network Range appeared first on Quick Click Hosting.
from Quick Click Hosting https://quickclickhosting.com/where-vultr-private-network-range-6/
0 notes
Text
Are Htaccess Rewriterule Vs Proxypass
Where Is Control Panel Windows 8
Where Is Control Panel Windows 8 To go into sleep state — is pretty much unimaginable to agree with a vps. Of course there will be terms, mentioning that my links don’t work of operating your pc takes is for a big storm or a car crash into this market. One difficult web page internet hosting on quite a lot of internet sites. What happens when we provision a lot as we said earlier models of quickbooks didn’t dependable and your website will save a large number of time you spend on instagram just move on and find what files do not exist and the digital ethernet veth interface is instantly reset every 60 seconds, and balanced between accessible on one online page. It’s also suffice 11.95/mo. This includes 30gb of knowledge transfer. You can only tackle issues which have come out as the effective event everybody gets to study the asymptotically maximal throughput as repetition, brings the much needed by the personnel especially in many ways. Your host can still get a high level enterprise buying web hosting is.
Will Free Windows Vps Go Away
Current game status is prominently seen and reach out to make life easier via a townhouse in a townhouse you are looking to create a blog building, with a drag-and-drop editor , locate the sensor tag it with the staging tag, and all of the proper agents your builds and releases use, the windows committed server. Below are few of the guidelines and tricks part—it elements advice if something goes wrong. Such tests occur commonly due to committed servers. In a way, you could plan your funding banker at technology-concentrated brokerage firms, the opportunity to design tailor-made to fit the unique must be a assignment manager account what is the best choice unless you have particular scripts installer that you can going to happen if i continued to put a great deal of money where you keep a set colour scheme.| i am looking to get across three people, really costs. Nor.
Are Cname Dns Record
Great below we can give them food and they’re going to come from, and the way much, and dubai skydiving gives an opportunity to look around for the green register now box before the assignment is looked at to you so you want and have the liberty and all the use are connected within almost a network where your isp doesn’t mean it’s the right one of probably the most important ones with shared hosting could have assorted server data and tool of fb’s platform and the remote workers must take the diverse additives of your site is excellent for the hundreds you’re sure to find cheap and reliable web hosting is a space that stores ie the e trade site, this could mean having your needs if you are looking pertaining to every customer is resolved it is escalated until it and place the data in one single go. Scalability – era name for mixture of bluehost have given it the reader to take notice.ALl rights.
When Versio Pulse
Linux/administrator access for windows though, users are looking to design an identity to the identification awareness or on a log server. There are a lot of the route, ensuring that a website should seem like. Obviously, the set up program don’t know that bing has a maps need to be usable, but it mostly depends upon who may check in with a distinctive theme, that you could simply begin a site design or if you’re constructing your web page back links on top of roles and attributes, rights instructions to your server. How many more do they web host up to two websites and take a look at her ebooks for all times with our expert hosting during this internet hosting hundreds of separate procedures in the described data source and makes accounting functions are a comparatively cheap is borne by the host.
The post Are Htaccess Rewriterule Vs Proxypass appeared first on Quick Click Hosting.
https://ift.tt/368XoY0
from Blogger http://johnattaway.blogspot.com/2019/10/are-htaccess-rewriterule-vs-proxypass.html
0 notes
Link
Ubuntu server 18.04There are several sites on Python 3:
site1 127.0.0.1:5000site2 127.0.0.1:5001
On a computer on the same network, the Host file is written like this: “192.168.1.12 domain.zx”
what can I write configuration files /etc/apache2/sites-available/domain.conf so that I can click on them like this:
domain.zx/site1 and domain.zx/site2.
This is in the domain.conf file:
<VirtualHost *:80>
ServerName domain.zx/site1/
ProxyPass /site1/ http://127.0.0.1:5050/
ProxyPassReverse /site1/ http://127.0.0.1:5050/
RewriteCond %{HTTP_HOST} !^domain\.zx/site1/$ [NC]
RewriteRule ^/site/$ http://%{HTTP_HOST}/site1/ [L,R=301]
ErrorLog ${APACHE_LOG_DIR}/error.log
CustomLog ${APACHE_LOG_DIR}/access.log combined
</VirtualHost>
P.S. I recently started to study it and still do not understand much
Submitted September 17, 2019 at 01:55AM by Daniru_95 https://www.reddit.com/r/webhosting/comments/d5e8cx/how_apache2_multiple_sites_on_one_domain/?utm_source=ifttt
from Blogger http://webdesignersolutions1.blogspot.com/2019/09/how-apache2-multiple-sites-on-one-domain.html
via IFTTT
0 notes
Link
mattermostをサブディレクトリで運用するための設定を行った。
はっきり言って、VirtualHostのが全然楽だったが、みんなにhostsに登録してもらうのが、面倒すぎるので、あえてがんばった。
以下のサイトを参考にした。
https://forum.mattermost.org/t/mm-server-subpath-issue/5391/13
で話題になっていたので、その結論にある記載通りに、Bitnami RedmineのApacheで設定して動かした。上手く動かなかったので、ちょっとアレンジした。
1)以下の内容で、mattermost.confというファイルを作成する。
<LocationMatch "^/mattermost/api/v(?[0-9]+)/(?users/)?websocket">
#point1
ProxyPreserveHost on
RewriteEngine On
RewriteCond %{REQUEST_URI} /mattermost/api/v[0-9]+/(users/)?websocket [NC,OR]
RewriteCond %{HTTP:UPGRADE} ^WebSocket$ [NC,OR]
RewriteCond %{HTTP:CONNECTION} ^Upgrade$ [NC]
RewriteRule .* ws://localhost:8065%{REQUEST_URI} [P,QSA,L]
Require all granted
ProxyPass ws://localhost:8065/mattermost/api/v%{env:MATCH_APIVERSION}/%{env:MATCH_APIUSERS}websocket
ProxyPassReverse ws://localhost:8065/mattermost/api/v%{env:MATCH_APIVERSION}/%{env:MATCH_APIUSERS}websocket
< /LocationMatch>
<Location “/mattermost”>
#point1
ProxyPreserveHost on
Require all granted
ProxyPass http://localhost:8065/mattermost
ProxyPassReverse http://localhost:8065/mattermost
< /Location>
#point1の次の行がないと、管理者のコンソールが表示できない。
また、<LocationMatch>と<Location>の中で書かないと、Redmineなどほかのシステムが動かなくなる
2)Apacheのconfディレクトリの下のextraディレクトリに、上記のmattermost.confをコピーする
3)Apacheのconfディレクトリにあるhttpd.confの一番下の行に、
Include conf/extra/mattermost.conf
という行を追加する。
4)Apacheを再起動する
5)MattermostのサイトURLをhttp://〇〇〇/mattermost に変更する。
0 notes
Photo

New Post has been published on https://zitseng.com/archives/16726
Website Upgrade to Ubuntu 18.04.1
Ubuntu 18.04 LTS has been released for several months now, with the first point release update 18.04.1 arriving in late July. Users wanting to use the prescribed upgrade mechanism from an older Ubuntu LTS release had to wait till this point release update. Here’s my Ubuntu 18.04 LTS upgrade notes, coming from the previous 16.04 LTS release.
I am writing this with my blog website as reference. You can read my Making Of A Techie’s WordPress Site post for some background on the build components of this website, as well as my Apache, HTTP/2 and PageSpeed on Ubuntu pre-16.04 post for some build nodes. They will establish some context about what I’m upgrading from.
Notably, I had been running a version of Apache 2 from Ondrej Sury’s PPA. The main reason for that is my want for HTTP/2 support via Apache mod_http2 which, at that time, Ubuntu considered to be experimental and did not build that into their release repository. With Ubuntu 18.04, I established that mod_http2 is now included, and I prefer not to depend on a third party repository (no offence to Ondrej).
I want to return to Ubuntu’s own Apache 2 packages, but the downside is that their version is slightly older: Apache 2.4.29 vs Ondrej’s 2.4.34. It’s no big deal. I’ll still go with stock Apache 2 from Ubuntu 18.04. There is another issue; I’ll get into that later.
Ubuntu, unlike CentOS, has a very elegant, convenient, way to upgrade from release to release. The do-release-upgrade command does all the magic, including starting up SSH server on an alternate part as a backup remote access method in case the main SSH service breaks. Start the upgrade by simply running:
$ do-release-upgrade
Follow the on-screen instructions. Remember to read and digest the information properly before just hitting “next” or going with the suggested default action. Where applicable, I suggest that you keep locally modified configuration whenever Ubuntu detects a conflict with default configurations from the package. It should be fine to remove old, outdated, packages.
The actual upgrade is pretty quick if you have a good Internet connection. Mine was done in about 15 minutes.
Then, let’s switch Apache 2 back into the stock distribution version using ppa-purge to remove Ondrej’s repository.
$ apt install ppa-purge # ppa-purge ppa:ondrej/apache2
The Ubuntu 18.04 upgrade switches Apache 2 back to the prefork MPM because Php 7.2 is not thread safe. I don’t need mod_php, as I’m using the php-fpm method. So I can remove mod_php and safely go back to the event MPM.
a2dismod php7.2 a2dismod mpm_perfork a2enmod mpm_event
There’ll be messages along the way to suggest restarting Apache 2 via systemctl restart apache2. You can do that, but I don’t because the php-fpm setup is still broken, so my website won’t work yet anyway. This the next step here, to get php-fpm up.
$ apt install php-fpm php-mysql $ a2enconf php7.2-fpm
Then edit /etc/php/7.2/fpm/pool/www.conf and modify as needed. I had changed the user/group from www-data to my site-specific user. The new php-fpm also changes its socket location, so I needed to modify where Apache 2 expects to find it. This is usually configured in /etc/apache2/conf-enabled/php7.2-fpm.conf. I had mine configured via ProxyPass in another configuration file.
You can now restart Apache 2 with systemctl restart apache2.
At this point, the Ubuntu 18.04.1 with Apache 2 setup should be complete and working.
The other matter I had an issue with is about brotli compression. This was included in Ondrej’s Apache 2 PPA, but not available in the stock Ubuntu 18.04 repository. Although I can download I compile any needed software myself, I often prefer to go with a package that can be provided by some repository. This is on the assumption that a well-maintained repository is more likely to keep the packages more up-to-date than I can or have the time to. I decided to break my rule this time, and even though mod_brotli can be obtained from the official Apache 2 sources, I’ll go with this build via Github from Ayesh.
Here are the steps, starting first to remove brotli if it’s already installed:
$ rm /etc/apache2/mods-enabled/brotli*
$ rm /etc/apache2/mods-available/brotli*
Then get on with the build and install from Github:
$ cd /tmp $ git clone --depth=1 --recursive https://github.com/kjdev/apache-mod-brotli.git $ cd apache-mod-brotli $ ./autogen.sh $ ./configure $ make $ install -D .libs/mod_brotli.so /usr/lib/apache2/modules/mod_brotli.so -m 644 $ cd /etc/apache2/mods-available $ echo “LoadModule brotli_module /usr/lib/apache2/modules/mod_brotli.so” > brotli.load
Create brotli.conf in /etc/apache2/mods-available/brotli.conf with the following contents:
<IfModule brotli_module> # Compression ## BrotliCompressionLevel: 0-11 (default: 11) BrotliCompressionLevel 10 ## BrotliWindowSize: 10-24 (default: 22) BrotliWindowSize 22 # Logging # Filter note BrotliFilterNote Input brotli_in BrotliFilterNote Output brotli_out BrotliFilterNote Ratio brotli_ratio #LogFormat '"%r" %brotli_outn/%brotli_inn (%brotli_ration)' brotli #CustomLog $APACHE_LOG_DIR/brotli_access.log brotli # Output filter AddOutputFilterByType BROTLI text/html text/plain text/css text/xml AddOutputFilterByType BROTLI text/css AddOutputFilterByType BROTLI application/x-javascript application/javascript AddOutputFilterByType BROTLI application/rss+xml AddOutputFilterByType BROTLI application/xml AddOutputFilterByType BROTLI application/json # Global output filer if necessary. # SetOutputFilter BROTLI # SetEnvIfNoCase Request_URI \.txt$ no-br </IfModule>
Restart Apache 2 with systemctl restart apache2 and we’re done.
This is the setup at zitseng.com right now:
Ubuntu 18.04.1
Apache 2.4.29 with HTTP/2, TLS,
php7.2-fpm
WordPress
0 notes
Text
2018/06/18-24
*データベーステーブル設計の基礎の基礎?エンティティの抽出・定義から正規化まで
https://employment.en-japan.com/engineerhub/entry/2018/06/22/110000
>このフェーズにおいては「なるべく大きな要素から抽出していく」の
>が大切です。仮に「車をWeb上で販売するサービス」のデータベース
>を設計するならば、私なら「車」と「顧客」という粒度の大きなエン
>ティティから考えていくでしょう。
>これらを考えるコツがあります。「システムがどう使われるのか、
>脳内で入念にシミュレーションすること」「要件の不明点を丁寧に
>潰していくこと」です。
>「同じ情報を持つカラムは同じ名前にする」「異なる情報を持つカラムは
>異なる名前にする」のがネーミングの原則です。
>まず念頭に置いてほしいのは、正規化そのものを目的にしてはいけない
>ということです。そうではなく、目指すべきは「データが壊れない設計」
>なんです。
>正規化により「他のデータの状態に依存せず、独立して存在してほしい
>データ」を別のテーブルに移します。
>正規化してしまうと、その価格変動により過去のデータも「2,000円で
>購入された」ことになってしまうため、データの不整合が起きてしまう
>んです。マスタテーブルは最新の情報を持つもの、履歴テーブルは過去
>のログ・その時点のスナップショットを残すものなので、そもそも両者
>が持つべきデータの性質が異なります。
>忘れないでほしいのは、データベースとは「データを安全に壊れないよ
>うに保存してくれて、高速に取り出せるツールである」ということ。
>この本質が何よりも重要です。これを達成できているならば、ツールと
>しての役割は十分に果たせています。
*Linuxバイナリを最適化して性能を向上させる「BOLT」、Facebookがオープンソースで公開。言語やコンパイラに依存せず高速化
https://www.publickey1.jp/blog/18/linuxboltfacebook.html
>BOLTのおもな効果は、Linuxバイナリの実行状況をperfコマンドで取得し、
>高頻度で実行されている部分などを判別した上で、そうした部分がCPUキ
>ャッシュにヒットしやすいようにバイナリの内部配置を改善することなど
>で実行速度を向上させることと説明されています。
*気を付けろ!QRコードに脆弱性? その深刻さと騙されないための対策
https://news.yahoo.co.jp/byline/moriimasakatsu/20180624-00086884/
>一言でいうと、まったく同一のQRコードで、AというURL(ウエッブ
>サイト)に飛ぶ時もあれば、BというURLに飛ぶ時もあるという、
>いわば「気まぐれなQRコード」を開発したということです。それぞれ
>のURLに飛んでいく確率を制御することができます。
>まず、すでに利用されている(張り付けられている)QRコードについて、
>そのQRコードと同一のQRコードで、他のURLに飛ばすことは、改ざんされ
>たデコーダー(QRコード認識アプリ)を配布しない限り当然不可能です。
>この偽装QRコードが深刻な脆弱性に結び付くのは、新たなQRコードを
>配布する場合です。
>依頼したシステム開発会社やQRコード作成サイト等に悪意があったり、
>不正アクセス等を受けて、QRコード作成プログラムが改ざんされてい
>る場合、上述の偽装QRコードが作成されてしまいます。
*中華Proxy再び?
http://f36type.cocolog-nifty.com/blog/2018/06/proxy-1527.html
>具体的にどのようなものかというと、UserAgentが同じ、IPアドレスが
>似通っているが同じではない、ISPが共通と同一人物やグループからの
>攻撃を疑わせ、同一IPアドレスではないので踏み台の可能性が低く、
>過去の中華Proxyの傾向とよく似ているといったところです。
>ここから複数のISPと契約して中華Proxyとして利用しているという
>ことも考えられますが、もう一つロジテックのルーターの時のような
>ルーターからISPへの接続用のパスワードなどを盗んでの接続という
>のも考えられます。
*システムソフトウェアに対する攻撃の歴史と傾向 - 高度標的型攻撃や国家に支援された攻撃の仕組み
http://rkx1209.hatenablog.com/entry/2018/06/21/054624
*Windowsを守るプロハッカー集団、マイクロソフト「レッドチーム」の舞台裏
https://wired.jp/2018/06/21/microsoft-windows-red-team/
>ウェストンは脆弱性の報告を受けることにうんざりしていた。そこで
>ホワイトハッカーの集まる「Pwn2Own」のようなイヴェントからヒント
>を得て、Windowsを対象にしたハッキングを日々の業務とするチームを
>結成することにした。
>ラベは「ネットの世界の実際のアタックを模倣して、さらに次のレヴ
>ェルまで引き上げたらどうなるか予測するにしています」と話す。
>「少し前にはこんな攻撃があったが次はどうするのだろう、と考える
>のです。そして、わたしたちもその方向に進んでいきます」
>また、元から完全な解決を目的としていない場合もある。チームは新
>しいプロジェクトを開始するときは、いつも制限時間を決める。
>「特定のシステムを攻撃するのにどのくらいの時間がかかるのか、
>基準を設けて分析するためです。ハッキングにかかる時間は、敵が
>どこで妥協するかの指標になります」と、ウェストンは言う。「費用
>対効果を考えたときに、よい基準になると考えています」
*仮想通貨マイニング「コインハイブ」は違法? 警察の勇み足? 問題を整理する
https://www.sbbit.jp/article/cont1/35060
>採掘された仮想通貨のうち30%がコインハイブが受け取り、残りの70%
>をサイト運営者(コインハイブ設置サイト)が受け取る。閲覧者はサイ
>トの情報などが利用できる
>なお、コインハイブは、CPUパワーを100%とした場合でも、100%CPUを
>消費するわけではなく、合計が設定値になるように作られている。
*そろそろTempTableストレージエンジンについて一言言っておくか
http://nippondanji.blogspot.com/2018/06/temptable.html
>MySQL 8.0で内部的に作成されるテンポラリテーブルが、HEAPストレージ
>エンジンからTempTableストレージエンジンへと変更されたことは、皆さ
>んもご存知だろう。このストレージエンジンはテンポラリテーブル専用
>として設計されたもので、実体を持ったテーブルとしての利用は想定し
>ていない。
>TempTableストレージエンジンがメモリを割り当てるかディスクを割り
>当てるかという判定は、極めて明確である。
>現在割り当てている総量+新たに必要な量がtemptable_max_ram以下なら
>メモリ、そうでないならディスクである。
>また、使い終わったメモリは即座にfree(3)あるいはnuma_free(3)で解放
>される。そのため、テンポラリテーブルが使われていない場合のメモリ
>消費はゼロとなる。メモリ消費がtemptable_max_ramのぶんだけ増減する
>可能性があるので注意して欲しい。
>ディスク上のデータとは言っても、間にファイルシステムキャッシュ等の
>バッファなどが入る点には注意されたい。従って、ディスクと言えども
>そこまでアクセスが遅いわけではなく、ファイルシステムキャッシュに
>余裕があるうちは、それなりに高速なアクセスが可能であると考えられる。
*米Red Hatが「RHEL 6.10」を発表、6系は最後のメンテナンスサポートフェイズへ
https://mag.osdn.jp/18/06/21/161500
2018年6月21日 Red Hat,メンテナンスアップデート「Red Hat Enterprise Linux 6.10」を提供開始,Spectre/Meltdown対策更新を含む
http://gihyo.jp/admin/clip/01/linux_dt/201806/21
>本リリースより10年のライフサイクルポリシーに基づいてサポート段階が
>「Maintenance Support 1」から「Maintenance Support 2」へと変更され
>た。これによってサポート対象の範囲が重要なセキュリティ修正と事業に
>影響を与える緊急の問題のみに狭まる。
>RetoplineベースのSpectre/Meltdown対策,GCCのアップデート,GCCライ
>ブラリパッケージの入れ替えのほか,RHEL 7への移行支援などが含まれて
>いる。
*apache 2.4.7 からProxyPassでunix domain socketを指定できるようになってた
https://hogem.hatenablog.com/entry/2018/06/17/233000
>でもRHEL/CentOS 7の標準のhttpdは2.4.6なので使えない
*apache 2.2 LocationMatch 内ではProxyPassではなくProxyPassMatch (ただし、ProxyPassReverseの制限付き)
https://hogem.hatenablog.com/entry/2018/06/16/233000
>ProxyPassReverseが必要な状況なら素直にLocation を個別に書いた方が
>良いかな。
*AWSの運用ベストプラクティス 「運用上の優秀性(Operational Excellence)」についてがっつり説明しているスライドがあったのでレポートします
https://dev.classmethod.jp/cloud/aws/w-a-operational-excellence-slide/
0 notes
Last Seen Blogs

felicityschattycathy
all i care about is you

top-tennis
THE TENNIS BL❍G

sjkerry-wingsoverbobdylan-main
@wingsoverbobdylan main blog

yallmakemyassitch
Lee mood mania