#Spring Bean Autowiring
Explore tagged Tumblr posts
Visit Tumblr Blog
Explore Tumblr blogs with no restrictions, modern design and the best experience.
Last Seen Tumblr Blogs


Fun Fact
Tumblr has 4 main sources of revenue.
Text
Spring Bean Autowiring with @Autowired Annotation
Introduction: Spring Framework‘s Autowiring feature allows automatic injection of beans into your application. The @Autowired annotation is one of the ways to achieve this. It can be used to inject beans in various ways such as constructor, setter methods, properties, and more. The @Autowired annotation also has several parameters that you can use to fine-tune its behavior. 1. Constructor…
View On WordPress
0 notes
Text
What’s New in Spring Boot 3 for Java Developers in 2023

A guide to the latest Spring Boot versions, as well as the addition of new features and enhancements to the latest update.
The Spring team released Spring Boot 3 in November 2022; it includes GraalVM native image support, enhanced Log4j2, Improved @ConstructorBinding, and a handful of new features. This article examines what’s new for Java web development in Spring Boot 3.
What is Spring Boot?
It is an open-source Java development framework that incorporates conventional Spring MVC features allowing developers to leverage Spring framework’s functionalities. If we talk about features, it has robust tools for developing production-grade, robust, asynchronous, and non-blocking web apps. In addition to this, developers can explore a range of configured templates, pre-built modules for services, and security, allowing developers to developer to develop applications at a faster pace.
The Spring Boot 2.X line was a remarkable journey for Java developers as it delivered 95 distinct releases and new functionalities throughout its 4-year timeframe. Nonetheless, the Spring team has ensured open-source support for the 2.7 version until November 2023, and commercial support will continue till 2025.
What’s New in Spring Boot 3?
Moving on to the new features, Spring Boot 3 has some significant additions, including GraalVM native image support, which optimizes application performance. Developers can leverage this new feature to create native images for their Spring Boot applications, leading to faster startup times and lower memory footprints. Additionally, the latest version includes several other updates and enhancements that improve the development experience and provide a better user interface.
1. GraalVM Native Image Support
Furthermore, it’s worth noting that Spring Boot 3 now supports GraalVM native images. This development allows developers to convert Spring Boot applications into native images that have a lesser memory footprint and faster compilation.
For those who don’t know, GraalVM is a runtime environment that allows for the faster execution of Java code. You can learn more about GraalVM in Spring by exploring the resources available here.
2. Log4j2 enhancement
Log4j2, the logging tool available in the Spring Boot framework, includes a few incremental improvements, which are as follows:
Profile-specific Configuration
Environment Properties Lookup
Log4j2 System Properties
For more details, you can check the documentation page.
3. Improved @ConstructorBinding Detection
These improvements in constructor binding will make it easier to use constructor binding with @ConfigurationProperties classes and simplify the code.
When you use constructor-bound @ConfigurationProperties, Spring Boot no longer requires the @ConstructorBinding annotation if the class has a single parameterized constructor. However, if you have more than one constructor, you still need to use @ConstructorBinding to inform Spring Boot which one to use.
For most users, this updated logic will allow for simpler @ConfigurationProperties classes. However, if you have a @ConfigurationProperties and want to inject beans into the constructor rather than binding it, you’ll now need to add an @Autowired annotation.
4. Micrometer Updates
Micrometer, a monitoring tool for Spring applications, includes several enhancements and improvements.
Auto-configuration for Micrometer Observation API
Auto-configuration for Micrometer Tracing
Auto-configuration for Micrometer’s OtlpMeterRegistry
5. Prometheus Support
In Spring Boot 3, Auto-Configuration for Prometheus Exemplars and Push Gateway can be configured to perform a PUT on shutdown. Furthermore, Spring Boot has deprecated the existing push setting and now recommends using post instead.
6. Miscellaneous
Auto-configuration for the new Elasticsearch Java Client has been introduced.
Apache HTTP client a JdkClientHttpConnector will now be auto-configured
The @SpringBootTest annotation can now use the main of any discovered @SpringBootConfiguration class if it’s available. This means that tests can now pick up any custom SpringApplication configuration performed by your main method.
Read more at https://www.brilworks.com/blog/whats-new-in-spring-boot-3-for-java-developers-in-2023/
0 notes
Text
Spring Cloud Eureka and Hystrix Circuit Breaker using Microservices
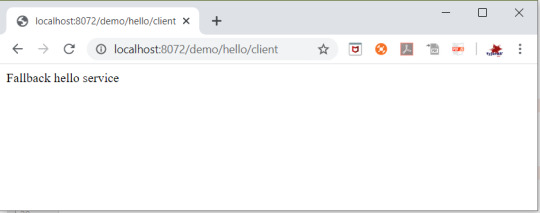
In this tutorial, we will use a microservice application created in previous post ( Microservices Example using Spring Cloud Eureka ) and add circuit breaker pattern using Hystrix Spring library in java. Using Hystrix in your application helps to add defensive mechanism and makes applications more resilient and fault tolerant. Tools Required – - Java 8 - IntelliJ IDE We have created three different applications as below – - Eureka Service– This Service will register every microservice and then the client microservice will look up the Eureka server to get a dependent microservice to get the job done.This Eureka Server is owned by Netflix and in this, Spring Cloud offers a declarative way to register and invoke services by using Java annotation. - demo-server – This service will return a simple hello message. - demo-client – It is similar to the standalone client service created in Bootiful Development with Spring Boot. It will consume the APIs provided by demo-server through Eureka Service . Hystrix Documentation - https://github.com/Netflix/Hystrix/wiki Microservices are deployed on Cloud . As cloud provides a distributed environment , there are more chances that some of your services may be down at some point of time. You can have several micro-services in your application which are dependent on each other. So one service can call to other service. If destination service is down then source will get an exception in normal scenario. But with the help of Hystrix annotations , you can add fallback mechanism and handle the exception in services. Thus it makes your service more fault tolerant, resilient . You need to add below dependency in your demo-client service application to enable Hystrix circuit breaker pattern - org.springframework.cloud spring-cloud-starter-hystrix 1.2.5.RELEASE We just have to add few annotations to handle fallback or break the service call in case your destination service(demo-server) is down. We need to change main class to enable Hystrix circuit breaker - package com.myjavablog.democlient; import org.springframework.boot.SpringApplication; import org.springframework.boot.autoconfigure.SpringBootApplication; import org.springframework.cloud.client.circuitbreaker.EnableCircuitBreaker; import org.springframework.cloud.client.discovery.EnableDiscoveryClient; import org.springframework.cloud.client.loadbalancer.LoadBalanced; import org.springframework.cloud.netflix.hystrix.EnableHystrix; import org.springframework.context.annotation.Bean; import org.springframework.context.annotation.Configuration; import org.springframework.web.client.RestTemplate; @EnableCircuitBreaker @EnableDiscoveryClient @SpringBootApplication public class DemoClientApplication { public static void main(String args) { SpringApplication.run(DemoClientApplication.class, args); } } @Configuration class Config{ @Bean @LoadBalanced public RestTemplate restTemplate(){ return new RestTemplate(); } } Also we need to change controller class to add fallback mehod as below - package com.myjavablog.democlient; import com.netflix.hystrix.contrib.javanica.annotation.HystrixCommand; import org.springframework.beans.factory.annotation.Autowired; import org.springframework.web.bind.annotation.GetMapping; import org.springframework.web.bind.annotation.RequestMapping; import org.springframework.web.bind.annotation.RestController; import org.springframework.web.client.RestTemplate; @RestController @RequestMapping("/demo/hello/client") public class TestController { @Autowired public RestTemplate restTemplate; @GetMapping @HystrixCommand(fallbackMethod = "handleFallback") public String test(){ String url = "http://demo-server/demo/hello/server"; return restTemplate.getForObject(url, String.class); } public String handleFallback(){ return "Fallback hello service"; } } By default hystrix has timeout of 1 second for every request. So we need to disable timeout by setting below property in application.properties file - hystrix.command.default.execution.timeout.enabled=false So now i am intentionally stopping demo-server microservice and then we will make call to api to see fallback is working properly .You can see demo-server is not registered with Eureka below -
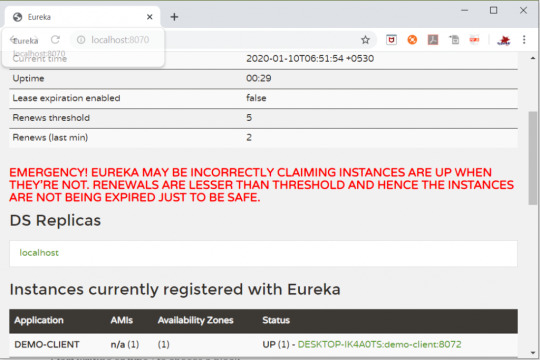
So now when you call the service ,it should show you a fallback message as below -
Github Downlod Link: Download Read the full article
0 notes
Link
This blog will teach you the basics of Spring Boot by looking at the available annotations. A lot of the magic in Spring Apps happens via annotations such as @Bean, @RestController, and @Component.

Why We Care about Spring Annotations
Spring has some powerful concepts like dependency injection (DI) which is made possible thanks to Spring-managed components. Here, all Classes annotated with @Component are candidates for DI and can be used by other Classes without explicit instantiation. Spring offers a feature called Inversion of Control Container which will do all necessary injections in the background, all magic happens without any work from the developer😊 This is a great example for learning Spring by studying annotations: The Java code of a given Class may look completely normal, but when we consider this metadata, much richer functionality is possible (like DI). There are many of those annotations that significantly add functionality unique to Spring. I dare to argue that a great way of learning Spring is by understanding the most common annotations. In the rest of this article, we will look at different annotations (from Spring as well as javax.persistence), describe their purpose, and show some code samples. I also created a Java Spring Boot app with all the described annotations included, so if you wanna look at a fully working example, checkout my Github repo.
Spring Annotations Overview
First let’s get an overview of what I consider the most important Spring annotations. Let me state that my selection is aimed at people interested in RESTful webservices. For other people, the optimal selection might vary slightly. Anyways, apart from Spring annotations, we’ll also cover metadata tags from the Javax Persistence API. The reason for this: we nearly always use a database in our backend, and this is a feature supported by Javax, not Spring, so I decided to include it here. Here's a list of annotations we'll cover:

As you can see in the table above, there’s quite some annotations to cover in this blog, so I decided to put them into functional groups. Let’s get started with syntactic metadata used in the Main class:
Main Class Annotations
Covered in this section:
@SpringBootApplication
@ServletComponentScan
Thankfully, in a Spring app, our Main Method doesn’t have to do much: we don’t need to code up any logic to assemble our service components and boot it up. Instead, all we need is to annotate the Main class with @SpringBootApplication and @ServletComponentScan. The first annotation applies the Spring Boot default configuration such as socket read timeout. The second triggers a search for HTTP endpoints, such as Classes annotated with @RestController. Here’s how our Main class would look like:
@SpringBootApplication @ServletComponentScan public class SpringBootAnnotationsApplication { public static void main(final String[] args) { SpringApplication.run(SpringBootAnnotationsApplication.class, args); } }
A fully working example can be found in my Github repo in SpringBootAnnotationsApplication.java.
REST Endpoint Annotations
Covered in this section:
@RestController
@RequestMapping
@PathVariable
@RequestBody
Say our web service should be able to answer to several REST requests. To implement this, we just need a Class annotated with @RestController which contains methods annotated with @RequestMapping. Each such method represents one REST endpoint. When a REST request arrives, Spring will automatically search for the corresponding method, deserialize the incoming request, put all incoming data into our method parameters, and we’re ready to perform our own business logic. In the end, our result (a Java object) will get serialized by Spring and returned over HTTP. All we need to worry about is having the right footprint for our method, which should include the following: URI, URI path parameters, URI query parameter, HTTP request body, and HTTP answer body.
@RequestMapping(method = RequestMethod.PATCH, path = "/api/account/{accountId}") public ResponseEntity<AccountRJ> activateAccount( @PathVariable(value = "accountId") Integer accountId, @RequestBody Integer startBalance) { // implement method ... }
Here’s an example for a corresponding REST request:
PATCH https://www.../api/account/5 Request Body: "10"
In our code snipped, the accountId would be 5 and startBalance would be 10. The REST answer should be an object of type AccountRJ. To be more specific, the method return value should be of type ResponseEntity<T>. This is a Spring class containing all HTTP reply data such as status code, body, header, etc. A fully working example can be found in my Github repo in WeatherRestController.java.
Periodic Task Annotations
Covered in this section:
@Scheduled
@EnableScheduling
Some web services need to do regular work in the background, such as archiving old data, aggregating data to create statistics etc. Spring makes the implementation of periodic tasks as easy as this:
@Configuration @EnableScheduling public class TaskConfig { @Scheduled(cron = "* * * * * ?") public void doTask() { System.out.println("hello world"); } }
As you can see, all we need is a Class annotated with @EnableScheduling and a method annotated with @Scheduled(cron=...). This method will run in the background according to our cron expression, e.g. every 10 minutes, or every hour. A fully working example can be found in my Github repo in WeatherStatsTask.java.
Configuration Annotations
Covered in this section:
@Configuration
@ConfigurationProperties
@Bean
To get your app up and running quickly, Spring Boot has lots of sensible default configurations like the REST configuration (e.g. read timeout, connect timeout). We can overwrite configuration defaults by defining our own Beans.
@Configuration public class RestConfig { @Bean public RestTemplate restTemplate(final RestTemplateBuilder builder) { return builder .setConnectTimeout(Duration.parse("PT5s")) .setReadTimeout(Duration.parse("PT10s")) .build(); } }
As displayed above, our Beans are put in a @Configuration-class and the method is annotated with @Bean. The return type is essential here: whenever Spring needs to work with a RestTemplate, it will configure it according to our specification. As for the third annotation covered in this section: @ConfigurationProperties can be used to automatically fetch configuration values from a .properties or .yaml file and put them into our Java class with the same data structure. This allows us to set config values in a configuration file, which can be easily altered later. A fully working example can be found in my Github repo in:
@Configuration, @Bean -> JpaConfig.java
@ConfigurationProperties -> AnnotationsAppProperties.java
Dependency Injection Annotations
Covered in this section:
@Component
@Service
@Repository
@Autowired
Spring offers an Inversion of Control (IoC) Container: Instead of manually initializing all members of an object, Spring will inject all necessary dependencies. In the graphic below, you can see a Class requiring an object of another Class:

The Class Parent contains a Child object:
public class Parent { private final Child child; public Parent(Child child) { this.child = child; } }
We can now annotate the dependency with @Component as follows:
@Component public class Child { … }
Now, when Spring IoC must create an object of type Parent, it will automatically create an object of Child, then pass the object as argument to the Parent constructor, thus creating an object where all dependencies are initialized. Note that the actual dependency chain in a complex application can have several hierarchy levels. Spring IoC will also work for complicated cases where one Class will require another one which again will require a third one and so on. Moreover, Spring IoC even works for Interface-Dependencies: when a Class requires an object of the type of an interface, Spring will search for a Class implementing that interface and inject it. Now that you understand the meaning behind @Component, let’s focus on the other annotations:
@Service: has the same meaning as @Component, but is used for the service layer of an app (with business logic).
@Repository: same as @Component, but for Classes performing database access. The standard database exceptions will automatically be caught by Spring and dealt with appropriately.
@Autowired: we need to start the dependency-injection-mechanism at the root of the dependency chain. When we ask Spring to initialize the top-level object, this will trigger the initialization and injection of all objects in the dependency chain. The @Autowired annotation can be used for this purpose and put before the top-level object.
A fully working example can be found in my Github repo in:
@Components -> AnnotationsAppProperties.java
@Service -> WeatherService.java
@Repository -> WeatherRepository.java
@Autowired -> WeatherIntegrationTest.java
Persistence Annotations
Covered in this section:
@Entity
@ Id
@GeneratedValue
@EnableJpaRepositories
@EnableTransactionManagement
Similar to the previous sections, annotations come in handy for data persistence: all we need is the right annotations! For the following example, let’s just focus on an SQL use case, and let’s use Spring Data Jpa. To do the ORM mapping, we need an @Entity class as follows:
@Entity public class WeatherPO { @Id @GeneratedValue(strategy=GeneratorionType.IDENTITY) private Long id; private Integer temperature; }
In the above code, the WeatherPO class holds all data elements which we want to represent from our relational database. The first member is also annotated with @Id which indicates that this is the primary key. Moreover, we define a strategy to generate new primary keys, again with an annotation! Now we are ready to define a JpaRepository with which we can fetch WeatherPO objects from the database:
@Repository public interface WeatherRepository extends JpaRepository<WeatherPO, Long> {}
When Spring sees the @Repository annotation, it will automatically create an implementing class to access the DB. We can use the Repository via dependency injection:
@Service public class WeatherService { private final WeatherRepository repo; public WeatherService(WeatherRepository repo) { this.repo = repo; } public WeatherPO find(Long id) { return repo.getOne(id); } }
For a complete list of all JpaRepository functions, like getOne() used in the code above, checkout out the official documentation here. So far, we’ve covered all Java code necessary to access a database. To make everything work, we additionally need the right Maven dependency: Spring’s spring-boot-starter-data-jpa. There exists a myriad of SQL databases, if we choose to use the simple H2 database, we need one more Maven dependency: com.h2database.h2. Optionally, we can configure our database (username, password, URL, etc). Note that the H2 database will work out of the box, but for others like an Oracle DB, you would need this additional configuration. Namely, you can force the search of repositories with @EnableJpaRepositories and you can create your own database related beans with the @EnableTransactionManagement annotation. A fully working example can be found in my Github repo in:
@Entity, @ Id, @GeneratedValue -> WeatherPO.java
@Repository -> WeatherRepository.java
@EnableJpaRepositories, @EnableTransactionManagement -> JpaConfig.java
Annotations for Testing
Covered in this section:
@SpringBootTest
@AutoConfigureMockMvc
Spring offers annotations just for testing purposes, a great feature to make your integration tests simpler! Since this post is already a bit longer than originally intended, I’ll stop here and refer you to the fully working example in WeatherIntegrationTest.java.
Summary
Congrats, you made it to the finish of this (rather lengthy) post😊 I hope this post has helped you to understand the most important annotations of Spring. If you want to know more details, I encourage you to have a look at my Github repo with a fully working Spring Boot service using all annotations from this post. Also, if you have a Spring annotation which you consider essential and it’s not covered here, please leave a comment and I will try to extend this article or creating a new one which includes your annotation.
0 notes
Text
Autowiring Conflicts in Spring Core with XML Configuration
Introduction: In Spring Framework, autowiring is a powerful feature that allows dependencies to be automatically injected into Spring-managed beans. However, when using XML configuration for dependency injection, it’s essential to understand how autowiring conflicts can arise and how to resolve them effectively. What is Autowiring? Autowiring is a technique in Spring that automatically wires the…

View On WordPress
1 note
·
View note
Text
Spring Basic (English)
1.Why should you use Spring?
Lightweight: Spring is lightweight when it comes to size and transparency.
Inversion of control (IOC): Objects give their dependencies instead of creating or looking for dependent objects.
Aspect oriented (AOP): Spring supports Aspect oriented programming and enables cohesive development by separating application business logic from system services.
Container: Spring contains and manages the life cycle and configuration of application objects.
MVC Framework: Provides a great alternative to other web frameworks such as Struts.
Transaction Management: Spring provides a consistent transaction management interface that can scale down to a local and scale up to global.
Exception Handling: Spring translate technology-specific exceptions into consistent, unchecked exceptions.
2. Modules
Core,
Bean,
Context,
Expression Language,
JDBC,
ORM,
OXM,
JMS,
Transaction,
Web,
Web-Servlet,
Web-Struts,
Web-Portlet
3. Inversion of Control (IOC)
This concept says that you do not create your objects but describe how they should be created. Dependency Injection is an example of it (spring injects dependencies into your attributes with @Autowire).
Containers - Bean Factory : Container providing basic support. - Spring ApplicationContext: adds more enterprise-specific functionality.
Types - Constructor-based: The container invokes a class constructor with a number of arguments. - Setter-based: Calling setter methods on your beans after invoking a no-argument constructor.
4. Scopes
Types instances that should be returned from Spring container:
Singleton: Bean definition to a single instance, it's the default.
Prototype: Single bean definition to have any number of object instances.
Request: A bean definition to an HTTP request
Session: A bean definition to an HTTP session
Global-session: A bean definition to a global HTTP session
5. Aspect-oriented programming (AOP)
It is a programming technique that allows programmers to modularize crosscutting concerns, or behavior.
Concern: It may be defined as a functionality we want to implement.
Cross-cutting concern: It's a concern which is applicable throughout the application and it affects the entire application.
Advice: This is the actual action to be taken either before or after the method execution. - Before: Run advice before a method execution. - After: Run advice after a method execution regardless of its outcome. - After-returning: Run advice after a method execution only if method completes successfully. - After-throwing: Run advice after a method execution only if method exits by throwing an exception. - Around: Run advice before and after the advised method is invoked.
Join: This represents a point in your application where you can plug-in AOP aspect.
Pointcut : This is a set of one or more join points where an advice should be executed.
6. Annotations
@Required: Indicates that the affected bean property must be populated at configuration time.
@Autowired: It can be used to autowire bean on the setter method, constructor, a property or methods with arbitrary names and/or multiple arguments.
@Qualifier: You can use @Qualifier annotation along with @Autowired to remove the confusion by specifying which exact bean will be wired, in case of more than one bean.
@Configuration: Indicates that the class can be used by the Spring IoC container as a source of bean definitions.
@Bean: It tells Spring that a method will return an object that should be registered as a bean.
@WebApplicationContext (@ApplicationContext): It defines a class as the main class in the project.
@Controller: Indicates that a class serves the role of a controller.
@RequestMapping: It is used to map a URL to either an entire class or a particular handler method.
@PostConstruct: This annotation can be used as an alternate of initialization callback.
@PreDestroy: This annotation can be used as an alternate of destruction callback.
@Resource: It takes a 'name' attribute which will be interpreted as the bean name to be injected.
@ResponseBody: Indicates that the return type should be written straight to the HTTP response.
@RequestBody: Indicate that a method parameter should be bound to the body of the HTTP request.
1 note
·
View note
Text
Spring Interview Questions and Answers
Spring Interview Questions
What is Spring Framework?
What are some of the important features and advantages of Spring Framework?
What do you understand by Dependency Injection?
How do we implement DI in Spring Framework?
What are the new features in Spring 5?
What is Spring WebFlux?
What are the benefits of using Spring Tool Suite?
Name some of the important Spring Modules?
What do you understand by Aspect Oriented Programming?
What is Aspect, Advice, Pointcut, JointPoint and Advice Arguments in AOP?
What is the difference between Spring AOP and AspectJ AOP?
What is Spring IoC Container?
What is a Spring Bean?
What is the importance of Spring bean configuration file?
What are different ways to configure a class as Spring Bean?
What are different scopes of Spring Bean?
What is Spring Bean life cycle?
How to get ServletContext and ServletConfig object in a Spring Bean?
What is Bean wiring and @Autowired annotation?
What are different types of Spring Bean autowiring?
Does Spring Bean provide thread safety?
What is a Controller in Spring MVC?
What’s the difference between @Component, @Repository & @Service annotations in Spring?
What is DispatcherServlet and ContextLoaderListener?
What is ViewResolver in Spring?
What is a MultipartResolver and when it’s used?
How to handle exceptions in Spring MVC Framework?
How to create ApplicationContext in a Java Program?
Can we have multiple Spring configuration files?
What is ContextLoaderListener?
What are the minimum configurations needed to create Spring MVC application?
How would you relate Spring MVC Framework to MVC architecture?
How to achieve localization in Spring MVC applications?
How can we use Spring to create Restful Web Service returning JSON response?
What are some of the important Spring annotations you have used?
Can we send an Object as the response of Controller handler method?
How to upload file in Spring MVC Application?
How to validate form data in Spring Web MVC Framework?
What is Spring MVC Interceptor and how to use it?
What is Spring JdbcTemplate class and how to use it?
How to use Tomcat JNDI DataSource in Spring Web Application?
How would you achieve Transaction Management in Spring?
What is Spring DAO?
How to integrate Spring and Hibernate Frameworks?
What is Spring Security?
How to inject a java.util.Properties into a Spring Bean?
Name some of the design patterns used in Spring Framework?
What are some of the best practices for Spring Framework?
Spring Interview Questions and Answers
Spring is one of the most widely used Java EE framework. Spring framework core concepts are “Dependency Injection” and “Aspect Oriented Programming”.
Spring framework can be used in normal java applications also to achieve loose coupling between different components by implementing dependency injection and we can perform cross-cutting tasks such as logging and authentication using spring support for aspect-oriented programming.
I like spring because it provides a lot of features and different modules for specific tasks such as Spring MVC and Spring JDBC. Since it’s an open source framework with a lot of online resources and active community members, working with the Spring framework is easy and fun at the same time.
Recommended Read: Spring Framework
Spring Framework is built on top of two design concepts – Dependency Injection and Aspect Oriented Programming.
Some of the features of spring framework are:
Lightweight and very little overhead of using framework for our development.
Dependency Injection or Inversion of Control to write components that are independent of each other, spring container takes care of wiring them together to achieve our work.
Spring IoC container manages Spring Bean life cycle and project specific configurations such as JNDI lookup.
Spring MVC framework can be used to create web applications as well as restful web services capable of returning XML as well as JSON response.
Support for transaction management, JDBC operations, File uploading, Exception Handling etc with very little configurations, either by using annotations or by spring bean configuration file.
Some of the advantages of using Spring Framework are:
Reducing direct dependencies between different components of the application, usually Spring IoC container is responsible for initializing resources or beans and inject them as dependencies.
Writing unit test cases are easy in Spring framework because our business logic doesn’t have direct dependencies with actual resource implementation classes. We can easily write a test configuration and inject our mock beans for testing purposes.
Reduces the amount of boiler-plate code, such as initializing objects, open/close resources. I like JdbcTemplate class a lot because it helps us in removing all the boiler-plate code that comes with JDBC programming.
Spring framework is divided into several modules, it helps us in keeping our application lightweight. For example, if we don’t need Spring transaction management features, we don’t need to add that dependency on our project.
Spring framework support most of the Java EE features and even much more. It’s always on top of the new technologies, for example, there is a Spring project for Android to help us write better code for native Android applications. This makes spring framework a complete package and we don’t need to look after the different framework for different requirements.
Dependency Injection design pattern allows us to remove the hard-coded dependencies and make our application loosely coupled, extendable and maintainable. We can implement dependency injection pattern to move the dependency resolution from compile-time to runtime.
Some of the benefits of using Dependency Injection are Separation of Concerns, Boilerplate Code reduction, Configurable components, and easy unit testing.
Read more at Dependency Injection Tutorial. We can also use Google Guice for Dependency Injection to automate the process of dependency injection. But in most of the cases, we are looking for more than just dependency injection and that’s why Spring is the top choice for this.
We can use Spring XML based as well as Annotation-based configuration to implement DI in spring applications. For better understanding, please read Spring Dependency Injection example where you can learn both the ways with JUnit test case. The post also contains a sample project zip file, that you can download and play around to learn more.
Spring 5 brought a massive update to Spring framework. Some of the new features in Spring 5 are:
Spring 5 runs on Java 8+ and supports Java EE 7. So we can use lambda expressions and Servlet 4.0 features. It’s good to see Spring trying to support the latest versions.
Spring Framework 5.0 comes with its own Commons Logging bridge; spring-jcl instead of standard Commons Logging.
Support for providing spring components information through index file “META-INF/spring.components” rather than classpath scanning.
Spring WebFlux brings reactive programming to the Spring Framework.
Spring 5 also supports Kotlin programming now. This is a huge step towards supporting functional programming, just as Java is also moving towards functional programming.
Support for JUnit 5 and parallel testing execution in the Spring TestContext Framework.
You can read about these features in more detail at Spring 5 Features.
Spring WebFlux is the new module introduced in Spring 5. Spring WebFlux is the first step towards the reactive programming model in spring framework.
Spring WebFlux is the alternative to the Spring MVC module. Spring WebFlux is used to create a fully asynchronous and non-blocking application built on the event-loop execution model.
You can read more about it at Spring WebFlux Tutorial.
We can install plugins into Eclipse to get all the features of Spring Tool Suite. However, STS comes with Eclipse with some other important kinds of stuff such as Maven support, Templates for creating different types of Spring projects and tc server for better performance with Spring applications.
I like STS because it highlights the Spring components and if you are using AOP pointcuts and advice, then it clearly shows which methods will come under the specific pointcut. So rather than installing everything on our own, I prefer using STS when developing Spring-based applications.
Some of the important Spring Framework modules are:
Spring Context – for dependency injection.
Spring AOP – for aspect oriented programming.
Spring DAO – for database operations using DAO pattern
Spring JDBC – for JDBC and DataSource support.
Spring ORM – for ORM tools support such as Hibernate
Spring Web Module – for creating web applications.
Spring MVC – Model-View-Controller implementation for creating web applications, web services etc.
Enterprise applications have some common cross-cutting concerns that are applicable to different types of Objects and application modules, such as logging, transaction management, data validation, authentication etc. In Object Oriented Programming, modularity of application is achieved by Classes whereas in AOP application modularity is achieved by Aspects and they are configured to cut across different classes methods.
AOP takes out the direct dependency of cross-cutting tasks from classes that are not possible in normal object-oriented programming. For example, we can have a separate class for logging but again the classes will have to call these methods for logging the data. Read more about Spring AOP support at Spring AOP Example.
Aspect: Aspect is a class that implements cross-cutting concerns, such as transaction management. Aspects can be a normal class configured and then configured in Spring Bean configuration file or we can use Spring AspectJ support to declare a class as Aspect using @Aspect annotation.
Advice: Advice is the action taken for a particular join point. In terms of programming, they are methods that gets executed when a specific join point with matching pointcut is reached in the application. You can think of Advices as Spring interceptors or Servlet Filters.
Pointcut: Pointcut are regular expressions that are matched with join points to determine whether advice needs to be executed or not. Pointcut uses different kinds of expressions that are matched with the join points. Spring framework uses the AspectJ pointcut expression language for determining the join points where advice methods will be applied.
Join Point: A join point is a specific point in the application such as method execution, exception handling, changing object variable values etc. In Spring AOP a join point is always the execution of a method.
Advice Arguments: We can pass arguments in the advice methods. We can use args() expression in the pointcut to be applied to any method that matches the argument pattern. If we use this, then we need to use the same name in the advice method from where the argument type is determined.
These concepts seems confusing at first, but if you go through Spring Aspect, Advice Example then you can easily relate to them.
AspectJ is the industry-standard implementation for Aspect Oriented Programming whereas Spring implements AOP for some cases. Main differences between Spring AOP and AspectJ are:
Spring AOP is simpler to use than AspectJ because we don’t need to worry about the weaving process.
Spring AOP supports AspectJ annotations, so if you are familiar with AspectJ then working with Spring AOP is easier.
Spring AOP supports only proxy-based AOP, so it can be applied only to method execution join points. AspectJ support all kinds of pointcuts.
One of the shortcomings of Spring AOP is that it can be applied only to the beans created through Spring Context.
Inversion of Control (IoC) is the mechanism to achieve loose-coupling between Objects dependencies. To achieve loose coupling and dynamic binding of the objects at runtime, the objects define their dependencies that are being injected by other assembler objects. Spring IoC container is the program that injects dependencies into an object and makes it ready for our use.
Spring Framework IoC container classes are part of org.springframework.beans and org.springframework.context packages and provides us different ways to decouple the object dependencies.
Some of the useful ApplicationContext implementations that we use are;
AnnotationConfigApplicationContext: For standalone java applications using annotations based configuration.
ClassPathXmlApplicationContext: For standalone java applications using XML based configuration.
FileSystemXmlApplicationContext: Similar to ClassPathXmlApplicationContext except that the xml configuration file can be loaded from anywhere in the file system.
AnnotationConfigWebApplicationContext and XmlWebApplicationContext for web applications.
Any normal java class that is initialized by Spring IoC container is called Spring Bean. We use Spring ApplicationContext to get the Spring Bean instance.
Spring IoC container manages the life cycle of Spring Bean, bean scopes and injecting any required dependencies in the bean.
We use Spring Bean configuration file to define all the beans that will be initialized by Spring Context. When we create the instance of Spring ApplicationContext, it reads the spring bean XML file and initializes all of them. Once the context is initialized, we can use it to get different bean instances.
Apart from Spring Bean configuration, this file also contains spring MVC interceptors, view resolvers and other elements to support annotations based configurations.
There are three different ways to configure Spring Bean.
XML Configuration: This is the most popular configuration and we can use bean element in context file to configure a Spring Bean. For example:
Java Based Configuration: If you are using only annotations, you can configure a Spring bean using @Bean annotation. This annotation is used with @Configuration classes to configure a spring bean. Sample configuration is:
Annotation Based Configuration: We can also use @Component, @Service, @Repository and @Controller annotations with classes to configure them to be as spring bean. For these, we would need to provide base package location to scan for these classes. For example:
<bean name="myBean" class="com.journaldev.spring.beans.MyBean"></bean>
@Configuration @ComponentScan(value="com.journaldev.spring.main") public class MyConfiguration { @Bean public MyService getService(){ return new MyService(); } }
To get this bean from spring context, we need to use following code snippet:
AnnotationConfigApplicationContext ctx = new AnnotationConfigApplicationContext( MyConfiguration.class); MyService service = ctx.getBean(MyService.class);
<context:component-scan base-package="com.journaldev.spring" />
There are five scopes defined for Spring Beans.
singleton: Only one instance of the bean will be created for each container. This is the default scope for the spring beans. While using this scope, make sure spring bean doesn’t have shared instance variables otherwise it might lead to data inconsistency issues because it’s not thread-safe.
prototype: A new instance will be created every time the bean is requested.
request: This is same as prototype scope, however it’s meant to be used for web applications. A new instance of the bean will be created for each HTTP request.
session: A new bean will be created for each HTTP session by the container.
global-session: This is used to create global session beans for Portlet applications.
Spring Framework is extendable and we can create our own scopes too, however most of the times we are good with the scopes provided by the framework.
To set spring bean scopes we can use “scope” attribute in bean element or @Scope annotation for annotation based configurations.
Spring Beans are initialized by Spring Container and all the dependencies are also injected. When the context is destroyed, it also destroys all the initialized beans. This works well in most of the cases but sometimes we want to initialize other resources or do some validation before making our beans ready to use. Spring framework provides support for post-initialization and pre-destroy methods in spring beans.
We can do this by two ways – by implementing InitializingBean and DisposableBean interfaces or using init-method and destroy-method attribute in spring bean configurations. For more details, please read Spring Bean Life Cycle Methods.
There are two ways to get Container specific objects in the spring bean.
Implementing Spring *Aware interfaces, for these ServletContextAware and ServletConfigAware interfaces, for complete example of these aware interfaces, please read Spring Aware Interfaces
Using @Autowired annotation with bean variable of type ServletContext and ServletConfig. They will work only in servlet container specific environment only though.
@Autowired ServletContext servletContext;
The process of injection spring bean dependencies while initializing it called Spring Bean Wiring.
Usually, it’s best practice to do the explicit wiring of all the bean dependencies, but the spring framework also supports auto-wiring. We can use @Autowired annotation with fields or methods for autowiring byType. For this annotation to work, we also need to enable annotation-based configuration in spring bean configuration file. This can be done by context:annotation-config element.
For more details about @Autowired annotation, please read Spring Autowire Example.
There are four types of autowiring in Spring framework.
autowire byName
autowire byType
autowire by constructor
autowiring by @Autowired and @Qualifier annotations
Prior to Spring 3.1, autowire by autodetect was also supported that was similar to autowire by constructor or byType. For more details about these options, please read Spring Bean Autowiring.
The default scope of Spring bean is singleton, so there will be only one instance per context. That means that all the having a class level variable that any thread can update will lead to inconsistent data. Hence in default mode spring beans are not thread-safe.
However, we can change spring bean scope to request, prototype or session to achieve thread-safety at the cost of performance. It’s a design decision and based on the project requirements.
Just like MVC design pattern, Controller is the class that takes care of all the client requests and send them to the configured resources to handle it. In Spring MVC, org.springframework.web.servlet.DispatcherServlet is the front controller class that initializes the context based on the spring beans configurations.
A Controller class is responsible to handle a different kind of client requests based on the request mappings. We can create a controller class by using @Controller annotation. Usually, it’s used with @RequestMapping annotation to define handler methods for specific URI mapping.
@Component is used to indicate that a class is a component. These classes are used for auto-detection and configured as bean when annotation based configurations are used.
@Controller is a specific type of component, used in MVC applications and mostly used with RequestMapping annotation.
@Repository annotation is used to indicate that a component is used as repository and a mechanism to store/retrieve/search data. We can apply this annotation with DAO pattern implementation classes.
@Service is used to indicate that a class is a Service. Usually, the business facade classes that provide some services are annotated with this.
We can use any of the above annotations for a class for auto-detection but different types are provided so that you can easily distinguish the purpose of the annotated classes.
DispatcherServlet is the front controller in the Spring MVC application and it loads the spring bean configuration file and initialize all the beans that are configured. If annotations are enabled, it also scans the packages and configure any bean annotated with @Component, @Controller, @Repository or @Service annotations.
ContextLoaderListener is the listener to start up and shut down Spring’s root WebApplicationContext. It’s important functions are to tie up the lifecycle of ApplicationContext to the lifecycle of the ServletContext and to automate the creation of ApplicationContext. We can use it to define shared beans that can be used across different spring contexts.
ViewResolver implementations are used to resolve the view pages by name. Usually we configure it in the spring bean configuration file. For example:
<!-- Resolves views selected for rendering by @Controllers to .jsp resources in the /WEB-INF/views directory --> <beans:bean class="org.springframework.web.servlet.view.InternalResourceViewResolver"> <beans:property name="prefix" value="/WEB-INF/views/" /> <beans:property name="suffix" value=".jsp" /> </beans:bean>
InternalResourceViewResolver is one of the implementation of ViewResolver interface and we are providing the view pages directory and suffix location through the bean properties. So if a controller handler method returns “home”, view resolver will use view page located at /WEB-INF/views/home.jsp.
MultipartResolver interface is used for uploading files – CommonsMultipartResolver and StandardServletMultipartResolver are two implementations provided by spring framework for file uploading. By default there are no multipart resolvers configured but to use them for uploading files, all we need to define a bean named “multipartResolver” with type as MultipartResolver in spring bean configurations.
Once configured, any multipart request will be resolved by the configured MultipartResolver and pass on a wrapped HttpServletRequest. Then it’s used in the controller class to get the file and process it. For a complete example, please read Spring MVC File Upload Example.
Spring MVC Framework provides the following ways to help us achieving robust exception handling.
Controller Based – We can define exception handler methods in our controller classes. All we need is to annotate these methods with @ExceptionHandler annotation.
Global Exception Handler – Exception Handling is a cross-cutting concern and Spring provides @ControllerAdvice annotation that we can use with any class to define our global exception handler.
HandlerExceptionResolver implementation – For generic exceptions, most of the times we serve static pages. Spring Framework provides HandlerExceptionResolver interface that we can implement to create global exception handler. The reason behind this additional way to define global exception handler is that Spring framework also provides default implementation classes that we can define in our spring bean configuration file to get spring framework exception handling benefits.
For a complete example, please read Spring Exception Handling Example.
There are following ways to create spring context in a standalone java program.
AnnotationConfigApplicationContext: If we are using Spring in standalone java applications and using annotations for Configuration, then we can use this to initialize the container and get the bean objects.
ClassPathXmlApplicationContext: If we have spring bean configuration xml file in standalone application, then we can use this class to load the file and get the container object.
FileSystemXmlApplicationContext: This is similar to ClassPathXmlApplicationContext except that the xml configuration file can be loaded from anywhere in the file system.
For Spring MVC applications, we can define multiple spring context configuration files through contextConfigLocation. This location string can consist of multiple locations separated by any number of commas and spaces. For example;
<servlet> <servlet-name>appServlet</servlet-name> <servlet-class>org.springframework.web.servlet.DispatcherServlet</servlet-class> <init-param> <param-name>contextConfigLocation</param-name> <param-value>/WEB-INF/spring/appServlet/servlet-context.xml,/WEB-INF/spring/appServlet/servlet-jdbc.xml</param-value> </init-param> <load-on-startup>1</load-on-startup> </servlet>
We can also define multiple root level spring configurations and load it through context-param. For example;
<context-param> <param-name>contextConfigLocation</param-name> <param-value>/WEB-INF/spring/root-context.xml /WEB-INF/spring/root-security.xml</param-value> </context-param>
Another option is to use import element in the context configuration file to import other configurations, for example:
<beans:import resource="spring-jdbc.xml"/>
ContextLoaderListener is the listener class used to load root context and define spring bean configurations that will be visible to all other contexts. It’s configured in web.xml file as:
<context-param> <param-name>contextConfigLocation</param-name> <param-value>/WEB-INF/spring/root-context.xml</param-value> </context-param> <listener> <listener-class>org.springframework.web.context.ContextLoaderListener</listener-class> </listener>
For creating a simple Spring MVC application, we would need to do the following tasks.
Add spring-context and spring-webmvc dependencies in the project.
Configure DispatcherServlet in the web.xml file to handle requests through spring container.
Spring bean configuration file to define beans, if using annotations then it has to be configured here. Also we need to configure view resolver for view pages.
Controller class with request mappings defined to handle the client requests.
Above steps should be enough to create a simple Spring MVC Hello World application.
As the name suggests Spring MVC is built on top of Model-View-Controller architecture. DispatcherServlet is the Front Controller in the Spring MVC application that takes care of all the incoming requests and delegate it to different controller handler methods.
The model can be any Java Bean in the Spring Framework, just like any other MVC framework Spring provides automatic binding of form data to java beans. We can set model beans as attributes to be used in the view pages.
View Pages can be JSP, static HTMLs etc. and view resolvers are responsible for finding the correct view page. Once the view page is identified, control is given back to the DispatcherServlet controller. DispatcherServlet is responsible for rendering the view and returning the final response to the client.
Spring provides excellent support for localization or i18n through resource bundles. Basis steps needed to make our application localized are:
Creating message resource bundles for different locales, such as messages_en.properties, messages_fr.properties etc.
Defining messageSource bean in the spring bean configuration file of type ResourceBundleMessageSource or ReloadableResourceBundleMessageSource.
For change of locale support, define localeResolver bean of type CookieLocaleResolver and configure LocaleChangeInterceptor interceptor. Example configuration can be like below:
Use spring:message element in the view pages with key names, DispatcherServlet picks the corresponding value and renders the page in corresponding locale and return as response.
<beans:bean id="messageSource" class="org.springframework.context.support.ReloadableResourceBundleMessageSource"> <beans:property name="basename" value="classpath:messages" /> <beans:property name="defaultEncoding" value="UTF-8" /> </beans:bean> <beans:bean id="localeResolver" class="org.springframework.web.servlet.i18n.CookieLocaleResolver"> <beans:property name="defaultLocale" value="en" /> <beans:property name="cookieName" value="myAppLocaleCookie"></beans:property> <beans:property name="cookieMaxAge" value="3600"></beans:property> </beans:bean> <interceptors> <beans:bean class="org.springframework.web.servlet.i18n.LocaleChangeInterceptor"> <beans:property name="paramName" value="locale" /> </beans:bean> </interceptors>
For a complete example, please read Spring Localization Example.
We can use Spring Framework to create Restful web services that returns JSON data. Spring provides integration with Jackson JSON API that we can use to send JSON response in restful web service.
We would need to do following steps to configure our Spring MVC application to send JSON response:
Adding Jackson JSON dependencies, if you are using Maven it can be done with following code:
Configure RequestMappingHandlerAdapter bean in the spring bean configuration file and set the messageConverters property to MappingJackson2HttpMessageConverter bean. Sample configuration will be:
In the controller handler methods, return the Object as response using @ResponseBody annotation. Sample code:
You can invoke the rest service through any API, but if you want to use Spring then we can easily do it using RestTemplate class.
<!-- Jackson --> <dependency> <groupId>com.fasterxml.jackson.core</groupId> <artifactId>jackson-databind</artifactId> <version>${jackson.databind-version}</version> </dependency>
<!-- Configure to plugin JSON as request and response in method handler --> <beans:bean class="org.springframework.web.servlet.mvc.method.annotation.RequestMappingHandlerAdapter"> <beans:property name="messageConverters"> <beans:list> <beans:ref bean="jsonMessageConverter"/> </beans:list> </beans:property> </beans:bean> <!-- Configure bean to convert JSON to POJO and vice versa --> <beans:bean id="jsonMessageConverter" class="org.springframework.http.converter.json.MappingJackson2HttpMessageConverter"> </beans:bean>
@RequestMapping(value = EmpRestURIConstants.GET_EMP, method = RequestMethod.GET) public @ResponseBody Employee getEmployee(@PathVariable("id") int empId) { logger.info("Start getEmployee. ID="+empId); return empData.get(empId); }
For a complete example, please read Spring Restful Webservice Example.
Some of the Spring annotations that I have used in my project are:
@Controller – for controller classes in Spring MVC project.
@RequestMapping – for configuring URI mapping in controller handler methods. This is a very important annotation, so you should go through Spring MVC RequestMapping Annotation Examples
@ResponseBody – for sending Object as response, usually for sending XML or JSON data as response.
@PathVariable – for mapping dynamic values from the URI to handler method arguments.
@Autowired – for autowiring dependencies in spring beans.
@Qualifier – with @Autowired annotation to avoid confusion when multiple instances of bean type is present.
@Service – for service classes.
@Scope – for configuring scope of the spring bean.
@Configuration, @ComponentScan and @Bean – for java based configurations.
AspectJ annotations for configuring aspects and advices, @Aspect, @Before, @After, @Around, @Pointcut etc.
Yes we can, using @ResponseBody annotation. This is how we send JSON or XML based response in restful web services.
Spring provides built-in support for uploading files through MultipartResolver interface implementations. It’s very easy to use and requires only configuration changes to get it working. Obviously we would need to write controller handler method to handle the incoming file and process it. For a complete example, please refer Spring File Upload Example.
Spring supports JSR-303 annotation based validations as well as provide Validator interface that we can implement to create our own custom validator. For using JSR-303 based validation, we need to annotate bean variables with the required validations.
For custom validator implementation, we need to configure it in the controller class. For a complete example, please read Spring MVC Form Validation Example.
Spring MVC Interceptors are like Servlet Filters and allow us to intercept client request and process it. We can intercept client request at three places – preHandle, postHandle and afterCompletion.
We can create spring interceptor by implementing HandlerInterceptor interface or by extending abstract class HandlerInterceptorAdapter.
We need to configure interceptors in the spring bean configuration file. We can define an interceptor to intercept all the client requests or we can configure it for specific URI mapping too. For a detailed example, please refer Spring MVC Interceptor Example.
Spring Framework provides excellent integration with JDBC API and provides JdbcTemplate utility class that we can use to avoid bolier-plate code from our database operations logic such as Opening/Closing Connection, ResultSet, PreparedStatement etc.
For JdbcTemplate example, please refer Spring JDBC Example.
For using servlet container configured JNDI DataSource, we need to configure it in the spring bean configuration file and then inject it to spring beans as dependencies. Then we can use it with JdbcTemplate to perform database operations.
Sample configuration would be:
<beans:bean id="dbDataSource" class="org.springframework.jndi.JndiObjectFactoryBean"> <beans:property name="jndiName" value="java:comp/env/jdbc/MyLocalDB"/> </beans:bean>
For complete example, please refer Spring Tomcat JNDI Example.
Spring framework provides transaction management support through Declarative Transaction Management as well as programmatic transaction management. Declarative transaction management is most widely used because it’s easy to use and works in most of the cases.
We use annotate a method with @Transactional annotation for Declarative transaction management. We need to configure the transaction manager for the DataSource in the spring bean configuration file.
<bean id="transactionManager" class="org.springframework.jdbc.datasource.DataSourceTransactionManager"> <property name="dataSource" ref="dataSource" /> </bean>
Spring DAO support is provided to work with data access technologies like JDBC, Hibernate in a consistent and easy way. For example we have JdbcDaoSupport, HibernateDaoSupport, JdoDaoSupport and JpaDaoSupport for respective technologies.
Spring DAO also provides consistency in exception hierarchy and we don’t need to catch specific exceptions.
We can use Spring ORM module to integrate Spring and Hibernate frameworks if you are using Hibernate 3+ where SessionFactory provides current session, then you should avoid using HibernateTemplate or HibernateDaoSupport classes and better to use DAO pattern with dependency injection for the integration.
Spring ORM provides support for using Spring declarative transaction management, so you should utilize that rather than going for Hibernate boiler-plate code for transaction management.
For better understanding you should go through following tutorials:
Spring Hibernate Integration Example
Spring MVC Hibernate Integration Example
Spring security framework focuses on providing both authentication and authorization in java applications. It also takes care of most of the common security vulnerabilities such as CSRF attack.
It’s very beneficial and easy to use Spring security in web applications, through the use of annotations such as @EnableWebSecurity. You should go through the following posts to learn how to use the Spring Security framework.
Spring Security in Servlet Web Application
Spring MVC and Spring Security Integration Example
We need to define propertyConfigurer bean that will load the properties from the given property file. Then we can use Spring EL support to inject properties into other bean dependencies. For example;
<bean id="propertyConfigurer" class="org.springframework.context.support.PropertySourcesPlaceholderConfigurer"> <property name="location" value="/WEB-INF/application.properties" /> </bean> <bean class="com.journaldev.spring.EmployeeDaoImpl"> <property name="maxReadResults" value="${results.read.max}"/> </bean>
If you are using annotation to configure the spring bean, then you can inject property like below.
@Value("${maxReadResults}") private int maxReadResults;
Spring Framework is using a lot of design patterns, some of the common ones are:
Singleton Pattern: Creating beans with default scope.
Factory Pattern: Bean Factory classes
Prototype Pattern: Bean scopes
Adapter Pattern: Spring Web and Spring MVC
Proxy Pattern: Spring Aspect Oriented Programming support
Template Method Pattern: JdbcTemplate, HibernateTemplate etc
Front Controller: Spring MVC DispatcherServlet
Data Access Object: Spring DAO support
Dependency Injection and Aspect Oriented Programming
Some of the best practices for Spring Framework are:
Avoid version numbers in schema reference, to make sure we have the latest configs.
Divide spring bean configurations based on their concerns such as spring-jdbc.xml, spring-security.xml.
For spring beans that are used in multiple contexts in Spring MVC, create them in the root context and initialize with listener.
Configure bean dependencies as much as possible, try to avoid autowiring as much as possible.
For application-level properties, the best approach is to create a property file and read it in the spring bean configuration file.
For smaller applications, annotations are useful but for larger applications, annotations can become a pain. If we have all the configuration in XML files, maintaining it will be easier.
Use correct annotations for components for understanding the purpose easily. For services use @Service and for DAO beans use @Repository.
Spring framework has a lot of modules, use what you need. Remove all the extra dependencies that get usually added when you create projects through Spring Tool Suite templates.
If you are using Aspects, make sure to keep the join pint as narrow as possible to avoid advice on unwanted methods. Consider custom annotations that are easier to use and avoid any issues.
Use dependency injection when there is an actual benefit, just for the sake of loose-coupling don’t use it because it’s harder to maintain.
That’s all for Spring Framework interview questions. I hope these questions will help you in coming Java EE interview. I will keep on adding more questions to the list as soon as I found them. If you know some more questions that should be part of the list, make sure to add a comment for it and I will include it
0 notes
Link
Spring 5: Learn Spring 5 Core, AOP, Spring MVC, Spring Security, Spring REST, Spring Boot 2, Thymeleaf, JPA & Hibernate
What you’ll learn
Develop a REAL-TIME project with Spring MVC, Spring REST and Hibernate CRUD … all from SCRATCH
You will TYPE IN EVERY LINE of code with me in the videos. I EXPLAIN every line of code to help you learn!
LEARN key Spring 5 features: Core, Annotations, Java Config, AOP, Spring MVC, Hibernate and Maven
I am a RESPONSIVE INSTRUCTOR … post your questions and I will RESPOND in 24 hours.
NEW VIDEOS recently added on Spring Boot 2, Spring Security, Spring REST, Spring Data JPA, Spring Data REST and Thymeleaf
Join an ACTIVE COMMUNITY of 67,000+ students that are already enrolled! Over 20,000+ Reviews – 5 STARS
Students have LANDED NEW JOBS with the skills from this course. Spring and Hibernate developers are in HIGH-DEMAND!
You can DOWNLOAD all videos, source code and PDFs. Perfect for offline LEARNING and REVIEW.
Requirements
Basic Java knowledge is required
Basic HTML knowledge is helpful
Description
UPDATED TO INCLUDE SPRING BOOT (fresh update January 2019)
MOST POPULAR SPRING-HIBERNATE COURSE ON UDEMY – OVER 20,000 REVIEWS – 5 STARS! #bestseller
—
THIS COURSE COVERS SPRING 5
LEARN these HOT TOPICS in Spring 5:
Spring Core
Spring Annotations
Spring Java Configuration
Spring AOP
Spring MVC
Hibernate CRUD
Spring MVC and Hibernate CRUD real-time project
Spring Security (with password encryption in the database)
Spring REST (with full database CRUD real-time project)
Spring Boot
Spring Boot REST (with full database CRUD real-time project)
Spring Boot with JPA and Spring Data JPA (with full database CRUD real-time project)
Spring Boot with Spring Data REST (with full database CRUD real-time project)
Spring Boot with Thymeleaf
Maven
—
[COURSE UPDATES]: January 2019: Added Spring Boot Videos … 34 videos, 4.5 hours of new content
October 2018: Added Spring Security Role-based Registration lecture
June 2018: Added ADVANCED Spring REST videos … 40 videos, 3 hours of new content
May 2018: Added Spring REST videos … 18 videos, 1.5 hours of new content
March 2018: Added Spring Security User Registration Lecture
February 2018: Added Spring Security JDBC videos … 16 new videos, 1 hour of new content
January 2018: Added more Spring Security videos … 52 videos, 3.5 hours of new content
December 2017: Updated course to SPRING 5, Tomcat 9 and Eclipse Oxygen
November 2017: Added Spring Security videos … 16 new videos, 1 hour of new content
October 2017: New Advanced Hibernate videos … 57 new videos, 4 hours of new content
—
This course covers the LATEST VERSIONS of Spring 5 and Hibernate 5! The course also includes Spring Boot and Spring Data JPA
Build a complete Spring MVC + Hibernate CRUD web app … all from scratch! (real-time project)
You will learn about: Spring Core, AOP, Spring MVC, Spring Security, Spring REST, Spring Boot, Spring Data JPA, Spring Data REST, Thymeleaf and Hibernate … all connected to a MySQL database
—
By the end of this course, you will create all of the source code for a complete Spring MVC – Hibernate CRUD real-time project.
You will also develop Spring REST APIs for a full CRUD REST API real-time project.
You will type in every line of code with me in the videos … all from scratch.
I explain every line of code that we create. So this isn’t a copy/paste exercise, you will have a full understanding of the code.
—
I am a RESPONSIVE INSTRUCTOR …. post your questions and I will RESPOND in 24 hours.
—
Join 67,000+ students that are already enrolled!
Over 20,000+ Reviews! (the most reviews for any Spring-Hibernate course on Udemy)
—
Sample of the reviews:
This is the best tutorial I’ve seen so far for Spring/Hibernate, each step is well explained and the tutorial videos are made to a high standard. I highly recommend this course! – Rob
Hats off to you Chad, the best Spring fundamentals course I have done on Udemy thus far. You never disappoint. – Morebodi Modise
Chad is an excellent natural teacher. His course is well organized. He makes difficult concepts very easy to understand. – Julie Hodgson
—
Live Coding – I code all of the real-time projects from scratch
All source code is available for download
Responsive Instructor – All questions answered within 24 hours
—
PDFs of all lectures are available for download
Closed-Captions / Subtitles available for English (new!)
Professional video and audio recordings (check the free previews)
—
This course includes mini-courses on Maven, Spring Security, Spring REST and Spring Boot. These mini-courses are designed to help you quickly get started with Maven, Spring Security, Spring REST and Spring Boot.
The Maven mini-course includes 16 videos (1 hour of video)
The Spring Security mini-course includes 68 videos (5 hours of video)
The Spring REST mini-course includes 55 videos (4.5 hours of video)
The Spring Boot mini-course includes 34 videos (4.5 hours of video)
This is all included in this existing course. 🙂
—
What Is Spring?
Spring is an enterprise Java framework. It was designed to simplify Java EE development and make developers more productive. Spring makes use of Inversion of Control and Dependency Injection to promote good software coding practices and speed up development time.
This course covers Spring Core, Annotations, All Java Spring Configuration, Spring AOP, Spring MVC, Spring Security, Spring REST, Spring Boot and Spring Data JPA.
What Is Hibernate?
Hibernate is an Object-to-Relational-Mapping (ORM) framework. It simplifies database access for Java applications. By using the framework, you can easily store and retrieve Java objects by setting up some simple configuration mappings.
This course covers basic Hibernate CRUD. Also, advanced Hibernate mappings are covered for one-to-one, one-to-many and many-to-many.
Benefits of Taking This Spring and Hibernate Course
Knowing Spring and Hibernate can get you a job or improve the one you have. It’s a skill that will put you more in demand in the enterprise Java industry, and make your software life easier, that’s why it’s so popular.
Nearly every job posting asks for skills in Spring and Hibernate!
This course will help you quickly get up to speed with Spring and Hibernate. I will demystify the technology and help you understand the essential concepts to build a real Spring and Hibernate application from scratch.
You Will Learn How To
Spring Core
Build a complete Spring MVC and Hibernate CRUD Project … all from scratch
Set up your Spring and Hibernate development environment with Tomcat and Eclipse
Wire beans together in the Spring container using Inversion of Control
Configure the Spring container for Dependency Injection
Define Spring Beans using the @Component annotation
Perform auto-scanning of Spring beans to minimize configuration
Automatically wire beans together using @Autowired annotation
Apply all Java configuration to Spring Beans (no xml)
.
Spring MVC
Set up your Spring MVC environment with configs and directories
Create controllers using @Controller annotation
Read HTML form data using @RequestParam
Leverage Spring MVC model to transport data between controller and view page
Define Request Mappings for GET and POST requests
Minimize coding with Spring MVC Form data binding
Apply Spring MVC form validation on user input
Create custom Spring MVC form validation rules
.
Hibernate
Perform object/relational mapping with Hibernate
Leverage the Hibernate API to develop CRUD apps
Develop queries using the Hibernate Query Language (HQL)
Apply advanced Hibernate mappings: one-to-one, one-to-many and many-to-many
Create a real-time project using Spring and Hibernate together in a Real-Time Project
.
Spring AOP
Apply Aspect-Oriented-Programming AOP for cross-cutting concerns
Examine AOP use-cases and how AOP can resolve code-tangling
Create AOP pointcut expressions to match on method invocations
Leverage AOP annotations: @Before, @After, @AfterReturning, @AfterThrowing, @Around
Create a real-time project using AOP and Spring MVC together in a Real-Time Project
.
Spring Security
Secure your web application with Spring Security
Set up your Maven pom.xml file with compatible Spring Security dependencies
Configure Spring Security with all Java configuration (no xml)
Create custom Spring Security login pages with Bootstrap CSS
Add logout support using default features of Spring Security
Leverage Spring Security support for Cross Site Request Forgery (CSRF)
Define users and roles for authentication
Display user login info and role using Spring Security tags
Restrict access to URLs based on user role
Hide and Display content based on user role
Add JDBC authentication, store user accounts and passwords in the database
Store encrypted passwords in the database using bcrypt
Register new users and encrypt passwords using Java code
Create a Spring Security Real-Time Project using authorization, authentication and database encryption
.
Spring REST Web Services – Spring REST APIs
Overview of REST Web Services – REST APIs
Investigating Spring REST support
Sending JSON data over HTTP
JSON Data Binding with the Jackson project
Converting JSON data to Java POJO with Jackson
Processing nested JSON objects and JSON arrays
Developing a Spring REST API
Setting up a Spring REST project with Maven
Creating the Spring REST Controller using @RestController
Running the Spring REST Controller with Eclipse and Tomcat
Testing Spring REST Web Services with Postman
Parameterize REST API endpoints using @PathVariable
Add Spring REST exception handling with @ExceptionHandler
Integrate global REST exception handling with @ControllerAdvice
Leverage ResponseEntity for fine-grained control of Spring REST HTTP response
Build REST API to execute CRUD actions on the Database with Hibernate
Create a Real-Time Project using REST API with full database CRUD
.
Spring Boot
What is Spring Boot?
Creating a Project with Spring Boot Initializr
Develop a REST API Controller with Spring Boot
Explore the Spring Boot Project Structure
Leverage Spring Boot Starters – A Curated List of Dependencies
Inherit Defaults with Spring Boot Starter Parents
Automatically Restart with Spring Boot Dev Tools
Add DevOps functionality with Spring Boot Actuator Endpoints
Secure Spring Boot Actuator Endpoints
Run Spring Boot apps from the Command-Line
Use the Spring Boot Maven Plugin to package and run Spring Boot apps
Inject custom application properties into a Spring Boot REST Controller
.
Spring Boot REST API CRUD
Develop a REST API Controller with Spring Boot with full CRUD support
Configure Spring Boot Data Source for MySQL Database
Create DAO implementations using JPA Entity Manager
Apply Best Practices by integrating a Service Layer
Expose REST API endpoints in Controller code (GET, POST, PUT and DELETE)
Access the REST API using Postman
Add support for Standard JPA API
Learn the benefits of the JPA API in Spring Boot applications
.
Spring Boot and Spring Data JPA
Minimize boilerplate code with Spring Data JPA and the JpaRepository
Refactor existing REST API to integrate with Spring Data JPA
Leverage new features of the the Java Optional pattern with JpaRepository
Test the Spring Data JPA repository with Postman
.
Spring Boot and Spring Data REST
Accelerate your development process with Spring Data REST
Leverage Spring Data REST to eliminate custom code for controllers and service
Automatically expose REST endpoints for your JPA Repositories
Customize REST base path endpoints
Apply pagination and sorting to REST API endpoints
Configure default page sizes for REST APIs
Investigate HATEOAS compliant REST responses
Test Spring Data REST with Postman
.
Spring Boot and Thymeleaf
Develop view templates with Thymeleaf in Spring Boot projects
Compare the functionality of Thymeleaf to JSP
Examine the auto-configuration of Thymeleaf in Spring Boot projects
Create a Spring Boot project with Thymeleaf using the Spring Initializer website
Develop a Spring MVC Controller and a Thymeleaf template
Leverage Thymeleaf expressions to access data from the Spring MVC Model
Apply CSS stylesheets to your Thymeleaf templates
.
Maven
Simplify your build process with Maven
Create Maven POM files and add dependencies
Search Central Maven repository for Dependency Coordinates
Run Maven builds from the Eclipse IDE
Use Maven during the development of Real-Time Projects for Spring MVC, Spring Security, Spring REST and Hibernate.
Compared to other Spring/Hibernate courses
This course is fully up to date and covers the latest versions of Spring 5 and Hibernate 5 (fresh update December 2018). The course also includes new content on Spring Boot, Spring Data JPA, Spring Data REST and Thymeleaf.
Beware of other Udemy Spring/Hibernate courses. Most of them are outdated and use old versions of Spring and Hibernate. Don’t waste your time or money on learning outdated technology.
Also, I create all of the code from scratch in this course. Beware of other courses, those instructors simply copy/paste from their github repo or they use pre-written code. Their approach is not ideal for real-time learning.
Take my course where I show you how to create all of the code from scratch. You can type the code along with me in the videos, which is the best way to learn.
I am a very responsive instructor and I am available to answer your questions and help you work through any problems.
Finally, all source code is provided with the course along with setup instructions.
Student Reviews Prove This Course’s Worth
Those who have reviewed the course have pointed out that the instruction is clear and easy to follow, as well as thorough and highly informative.
Many students had also taken other Spring and Hibernate courses in the past, only to find that this Spring and Hibernate course was their favorite. They enjoyed the structure of the content and the high quality audio/video.
Sample of the Student Reviews:
This is the best tutorial I’ve seen so far for Spring/Hibernate, each step is well explained and the tutorial videos are made to a high standard. I highly recommend this course! – Rob
Hats off to you Chad, the best Spring fundamentals course I have done on Udemy thus far. You never disappoint. – Morebodi Modise
Chad is an excellent natural teacher. His course is well organized. He makes difficult concepts very easy to understand. – Julie Hodgson
Quality Material
You will receive a quality course, with solid technical material and excellent audio and video production. This is my fifth course at Udemy.
My first four courses on Udemy were:
Eclipse IDE for Beginners
Java Database Connection (JDBC)
JavaServer Faces (JSF) for Beginners
JSP and Servlets for Beginners
These courses have received rave 5 star reviews and over 185,000 students have taken the courses. Also, these courses are the most popular courses in their respective categories.
Similar thing for this Spring course, it is ranked as #1 best seller for Spring courses.
I also have an active YouTube channel where I post regular videos. In the past year, I’ve created over 300 video tutorials (public and private). My YouTube channel has over 3.9 million views and 30k subscribers. So I understand what works and what doesn’t work for creating video tutorials.
No Risk – Money-Back Guarantee
Finally, there is no risk. You can preview 25% of the course for free. Once you purchase the course, if for some reason you are not happy with the course, Udemy offers a 30-day money back guarantee.
So you have nothing to lose, sign up for this course and learn how to build Spring and Hibernate Real-Time Projects from scratch!
Target Audience
Java Developers with basic Java experience
Who this course is for:
The course is appropriate for all Java developers: beginners to advanced
Created by Chad Darby Last updated 1/2019 English English
Size: 15.33 GB
Download Now
https://ift.tt/2icDdQD.
The post Spring & Hibernate for Beginners (includes Spring Boot) appeared first on Free Course Lab.
0 notes
Text
Spring Framework In Depth (2017)
Spring is an application framework and inversion-of-control (IOC) container for the Java platform. The framework’s core features can be used by any Java application and are ideal for enterprise and internet-based app development. Get a comprehensive overview of Spring, in this intermediate-level course with software architect Frank Moley. Frank develops applications and web services with Spring, and shares what he knows about configuring the ApplicationContext (the interface for accessing components, loading files, publishing events, and more), as well as the beans (objects within the Spring IOC container). He demonstrates a modern Java configuration workflow, as well as XML configuration for legacy software. He explores the Spring lifecycle in depth, so you can extend the framework and better troubleshoot any issues you have with your applications. Plus, learn how to use aspect-oriented programming to add behaviors to your apps in a reusable way.
Topics include:
Introduction to Spring Configuring the ApplicationContext Using the Spring expression language Configuring proxies Autowiring beans Using lifecycle methods Configuring beans with XML Understanding the initialization phases of the bean lifecycle Aspect-oriented programming and Spring
Duration: 2h 16m Author: Frank P Moley III Level: Intermediate Category: Developer Subject Tags: Web Web Development Software Tags: Spring Framework Spring ID: 2a6b0698b1d5996a5a517abb1a7db69f
Course Content: (Please leave comment if any problem occurs)
Welcome
The post Spring Framework In Depth (2017) appeared first on Lyndastreaming.
source https://www.lyndastreaming.com/spring-framework-in-depth-2017/?utm_source=rss&utm_medium=rss&utm_campaign=spring-framework-in-depth-2017
0 notes
Link
Spring & Hibernate for Beginners (includes Spring Boot)
Spring & Hibernate for Beginners (includes Spring Boot)
Spring 5: Learn Spring 5 Core, AOP, Spring MVC, Spring Security, Spring REST, Spring Boot 2, Thymeleaf, JPA & Hibernate
What you'll learn
Spring & Hibernate for Beginners (includes Spring Boot)
Develop a REAL-TIME project with Spring MVC, Spring REST, Spring Boot and Hibernate CRUD ... all from SCRATCH
You will TYPE IN EVERY LINE of code with me in the videos. I EXPLAIN every line of code to help you learn!
LEARN key Spring 5 features: Core, Annotations, Java Config, AOP, Spring MVC, Hibernate and Maven
I am a RESPONSIVE INSTRUCTOR ... post your questions and I will RESPOND in 24 hours.
POPULAR VIDEOS for Spring Boot 2, Spring Security, Spring REST, Spring Data JPA, Spring Data REST and Thymeleaf
Join an ACTIVE COMMUNITY of 110,000+ students that are already enrolled! Over 33,000+ Reviews - 5 STARS
Students have LANDED NEW JOBS with the skills from this course. Spring and Hibernate developers are in HIGH-DEMAND!
You can DOWNLOAD all videos, source code, and PDFs. Perfect for o
Requirements
Basic Java knowledge is required
Basic HTML knowledge is helpful
Description
SPRING BOOT SECTION NOW INCLUDES OVER 6.5 HOURS OF NEW VIDEOS
#1 BESTSELLING SPRING-HIBERNATE COURSE ON UDEMY - OVER 35,000 REVIEWS - 5 STARS! ⭐️⭐️⭐️⭐️⭐️
---
THIS COURSE COVERS SPRING 5
LEARN these HOT TOPICS in Spring 5:
Spring Framework 5
Spring Core
Spring Annotations
Spring Java Configuration (all Java, no XML)
Spring AOP
Spring MVC
Hibernate CRUD
JPA CRUD
Spring Security
Spring REST
Maven
SPRING BOOT
Spring Boot Starters
Spring Boot and Hibernate
Spring Boot and Spring Data JPA
Spring Boot and Spring Data REST
Spring Boot, Thymeleaf and Spring MVC
REAL-TIME PROJECTS
Spring MVC and Hibernate CRUD real-time project
Spring Security (with password encryption in the database)
Spring REST (with full database CRUD real-time project)
Spring Boot REST (with full database CRUD real-time project)
Spring Boot with JPA and Spring Data JPA (with full database CRUD real-time project)
Spring Boot with Spring Data REST (with full database CRUD real-time project)
Spring Boot with Thymeleaf (with full database CRUD real-time project)
---
[COURSE UPDATES]:
Added Spring Boot and Thymeleaf videos ... 12 videos, 2.5 hours of new content
Added Spring Boot videos ... 34 videos, 4 hours of new content
Added Spring Security Role-based Registration lecture
Added ADVANCED Spring REST videos ... 40 videos, 3 hours of new content
Added Spring REST videos ... 18 videos, 1.5 hours of new content
Added Spring Security User Registration Lecture
Added Spring Security JDBC videos ... 16 new videos, 1 hour of new content
Added more Spring Security videos ... 52 videos, 3.5 hours of new content
Updated course to SPRING 5, Tomcat 9 and Eclipse Oxygen
Added Spring Security videos ... 16 new videos, 1 hour of new content
New Advanced Hibernate videos ... 57 new videos, 4 hours of new content
---
This course covers the LATEST VERSIONS of Spring 5 and Hibernate 5! The course also includes Spring Boot and Spring Data JPA
Build a complete Spring MVC + Hibernate CRUD web app ... all from scratch! (real-time project)
You will learn about: Spring Core, AOP, Spring MVC, Spring Security, Spring REST, Spring Boot, Spring Data JPA, Spring Data REST, Thymeleaf and Hibernate ... all connected to a MySQL database
---
By the end of this course, you will create all of the source code for a complete Spring MVC - Hibernate CRUD real-time project.
You will also develop Spring REST APIs for a full CRUD REST API real-time project.
You will type in every line of code with me in the videos ... all from scratch.
I explain every line of code that we create. So this isn't a copy/paste exercise, you will have a full understanding of the code.
---
I am a RESPONSIVE INSTRUCTOR .... post your questions and I will RESPOND in 24 hours.
---
Join 118,000+ students that are already enrolled!
Over 35,000+ Reviews! (the most reviews for any Spring-Hibernate course on Udemy, more than DOUBLE the nearest competitor)
---
Sample of the reviews:
★★★★★
I worked in some company, so I can say that this course is 100% industry oriented. The best course for learning Spring Framework. Getting replies within 24 hours. - Premang
★★★★★
Chad Darby has done a superb job organizing this course and has made Spring Framework, MVC, AOP, Hibernate, Security easy to learn and use. I have a bs and ms in CS, have been developing software for 25 years, and have taken many courses over the years at the different companies I've been at and Chad is easily the best instructor I've had.
He's extremely well-organized and knowledgeable and lays out this course in a step-by-step approach to fully cover the material and make it easy to learn. I highly recommend this course and Chad as an instructor.
I'm adding to my review following Chad's recent updates to his course to cover Spring Boot, JPA, etc. After finishing the course originally, I found another Spring Boot class, and after working on this other class, I appreciate more what Chad has done here. He's made Spring Boot for CRUD applications with Thymeleaf very easy to follow and learn. I've taken half a dozen other software courses, and while other instructors might be good, Chad is the gold standard here. I can't recommend him highly enough. - Dave Zeltserman
★★★★★
This is the best tutorial I've seen so far for Spring/Hibernate, each step is well explained and the tutorial videos are made to a high standard. I highly recommend this course! - Rob
★★★★★
Hats off to you Chad, the best Spring fundamentals course I have done on Udemy thus far. You never disappoint. - More body Modise
★★★★★
Chad is an excellent natural teacher. His course is well organized. He makes difficult concepts very easy to understand. - Julie Hodgson
---
Live Coding - I code all of the real-time projects from scratch
All source code is available for download
Responsive Instructor - All questions answered within 24 hours
---
PDFs of all lectures are available for download
Closed-Captions / Subtitles available for English and other languages (new!)
Professional video and audio recordings (check the free previews)
---
This course includes mini-courses on Maven, Spring Security, Spring REST and Spring Boot. These mini-courses are designed to help you quickly get started with Maven, Spring Security, Spring REST and Spring Boot.
Mini-Courses
Maven mini-course includes 16 videos (1 hour of video)
Spring Security mini-course includes 68 videos (5 hours of video)
Spring REST mini-course includes 55 videos (4.5 hours of video)
Spring Boot mini-course includes 39 videos (6.5 hours of video)
This is all included in this existing course. :)
---
What Is Spring?
Spring is an enterprise Java framework. It was designed to simplify Java EE development and make developers more productive. Spring makes use of Inversion of Control and Dependency Injection to promote good software coding practices and speed up development time.
This course covers Spring Core, Annotations, All Java Spring Configuration, Spring AOP, Spring MVC, Spring Security, Spring REST, Spring Boot and Spring Data JPA.
What Is Hibernate?
Hibernate is an Object-to-Relational-Mapping (ORM) framework. It simplifies database access for Java applications. By using the framework, you can easily store and retrieve Java objects by setting up some simple configuration mappings.
This course covers basic Hibernate CRUD. Also, advanced Hibernate mappings are covered for one-to-one, one-to-many and many-to-many.
ALSO DOWNLOAD: NodeJS - The Complete Guide (incl. MVC, REST APIs, GraphQL)
Benefits of Taking This Spring and Hibernate Course
Knowing Spring and Hibernate can get you a job or improve the one you have. It's a skill that will put you more in demand in the enterprise Java industry, and make your software life easier, that's why it's so popular.
Nearly every job posting asks for skills in Spring and Hibernate!
This course will help you quickly get up to speed with Spring and Hibernate. I will demystify the technology and help you understand the essential concepts to build a real Spring and Hibernate application from scratch.
You, Will, Learn How To
Spring Core
Build a complete Spring MVC and Hibernate CRUD Project ... all from scratch
Set up your Spring and Hibernate development environment with Tomcat and Eclipse
Wire beans together in the Spring container using Inversion of Control
Configure the Spring container for Dependency Injection
Define Spring Beans using the @Component annotation
Perform auto-scanning of Spring beans to minimize configuration
Automatically wire beans together using @Autowired annotation
Apply all Java configuration to Spring Beans (no XML)
Spring MVC
Set up your Spring MVC environment with configs and directories
Create controllers using @Controller annotation
Read HTML form data using @RequestParam
Leverage Spring MVC model to transport data between controller and view page
Define Request Mappings for GET and POST requests
Minimize coding with Spring MVC Form data binding
Apply Spring MVC form validation on user input
Create custom Spring MVC form validation rules
Hibernate
Perform object/relational mapping with Hibernate
Leverage the Hibernate API to develop CRUD apps
Develop queries using the Hibernate Query Language (HQL)
Apply advanced Hibernate mappings: one-to-one, one-to-many and many-to-many
Create a real-time project using Spring and Hibernate together in a Real-Time Project
Spring AOP
Apply Aspect-Oriented-Programming AOP for cross-cutting concerns
Examine AOP use-cases and how AOP can resolve code-tangling
Create AOP pointcut expressions to match on method invocations
Leverage AOP annotations: @Before, @After, @AfterReturning, @AfterThrowing, @Around
Create a real-time project using AOP and Spring MVC together in a Real-Time Project
Spring Security
Secure your web application with Spring Security
Set up your Maven pom.xml file with compatible Spring Security dependencies
Configure Spring Security with all Java configuration (no XML)
Create custom Spring Security login pages with Bootstrap CSS
Add logout support using default features of Spring Security
Leverage Spring Security support for Cross-Site Request Forgery (CSRF)
Define users and roles for authentication
Display user login info and role using Spring Security tags
Restrict access to URLs based on user role
Hide and Display content based on user role
Add JDBC authentication, store user accounts and passwords in the database
Store encrypted passwords in the database using bcrypt
Register new users and encrypt passwords using Java code
Create a Spring Security Real-Time Project using authorization, authentication and database encryption
Spring REST Web Services - Spring REST APIs
Overview of REST Web Services - REST APIs
Investigating Spring REST support
Sending JSON data over HTTP
JSON Data Binding with the Jackson project
Converting JSON data to Java POJO with Jackson
Processing nested JSON objects and JSON arrays
Developing a Spring REST API
Setting up a Spring REST project with Maven
Creating the Spring REST Controller using @RestController
Running the Spring REST Controller with Eclipse and Tomcat
Testing Spring REST Web Services with Postman
Parameterize REST API endpoints using @PathVariable
Add Spring REST exception handling with @ExceptionHandler
Integrate global REST exception handling with @ControllerAdvice
Leverage ResponseEntity for fine-grained control of Spring REST HTTP response
Build REST API to execute CRUD actions on the Database with Hibernate
Create a Real-Time Project using REST API with full database CRUD
Spring Boot
What is the Spring Boot?
Creating a Project with Spring Boot Initializr
Develop a REST API Controller with Spring Boot
Explore the Spring Boot Project Structure
Leverage Spring Boot Starters - A Curated List of Dependencies
Inherit Defaults with Spring Boot Starter Parents
Automatically Restart with Spring Boot Dev Tools
Add DevOps functionality with Spring Boot Actuator Endpoints
Secure Spring Boot Actuator Endpoints
Run Spring Boot apps from the Command-Line
Use the Spring Boot Maven Plugin to package and run Spring Boot apps
Inject custom application properties into a Spring Boot REST Controller
Spring Boot REST API CRUD
Develop a REST API Controller with Spring Boot with full CRUD support
Configure Spring Boot Data Source for MySQL Database
Create DAO implementations using JPA Entity Manager
Apply Best Practices by integrating a Service Layer
Expose REST API endpoints in Controller code (GET, POST, PUT and DELETE)
Access the REST API using Postman
Add support for Standard JPA API
Learn the benefits of the JPA API in Spring Boot applications
Spring Boot and Spring Data JPA
Minimize boilerplate code with Spring Data JPA and the JpaRepository
Refactor existing REST API to integrate with Spring Data JPA
Leverage new features of the Java Optional pattern with JpaRepository
Test the Spring Data JPA repository with Postman
Spring Boot and Spring Data REST
Accelerate your development process with Spring Data REST
Leverage Spring Data REST to eliminate custom code for controllers and service
Automatically expose REST endpoints for your JPA Repositories
Customize REST base path endpoints
Apply pagination and sorting to REST API endpoints
Configure default page sizes for REST APIs
Investigate HATEOAS compliant REST responses
Test Spring Data REST with Postman
Spring Boot and Thymeleaf
Develop view templates with Thymeleaf in Spring Boot projects
Compare the functionality of Thymeleaf to JSP
Examine the auto-configuration of Thymeleaf in Spring Boot projects
Create a Spring Boot project with Thymeleaf using the Spring Initializer website
Develop a Spring MVC Controller and a Thymeleaf template
Leverage Thymeleaf expressions to access data from the Spring MVC Model
Apply CSS stylesheets to your Thymeleaf templates
Spring Boot, Thymeleaf and Database CRUD
Develop a real-time project with Thymeleaf and Spring Boot with full database CRUD support
Integrate the @Repository to execute CRUD actions on the Database with Spring Data JPA
Apply best practices with the @Service layer design pattern
Create a @Controller to handle web browser requests
Develop Thymeleaf templates to render database results
Beautify your Thymeleaf templates with Bootstrap CSS
Maven
Simplify your build process with Maven
Create Maven POM files and add dependencies
Search Central Maven repository for Dependency Coordinates
Run Maven builds from the Eclipse IDE
Use Maven during the development of Real-Time Projects for Spring MVC, Spring Security, Spring REST, Spring Boot and Hibernate.
ALSO DOWNLOAD: Learning Python for Data Analysis and Visualization
Compared to other Spring/Hibernate courses
This course is fully up to date and covers the latest versions of Spring 5 and Hibernate 5. The course also includes new content on Spring Boot, Spring Data JPA, Spring Data REST and Thymeleaf.
Beware of other Udemy Spring/Hibernate courses. Most of them are outdated and use old versions of Spring and Hibernate. Don’t waste your time or money on learning outdated technology.
Also, I create all of the code from scratch in this course. Beware of other courses, those instructors simply copy/paste from their GitHub repo or they use pre-written code. Their approach is not ideal for real-time learning.
Take my course where I show you how to create all of the code from scratch. You can type the code along with me in the videos, which is the best way to learn.
I am a very responsive instructor and I am available to answer your questions and help you work through any problems.
Finally, all source code is provided with the course along with setup instructions.
Student Reviews Prove This Course's Worth
Those who have reviewed the course have pointed out that the instruction is clear and easy to follow, as well as thorough and highly informative.
Many students had also taken other Spring and Hibernate courses in the past, only to find that this Spring and Hibernate course was their favorite. They enjoyed the structure of the content and the high-quality audio/video.
Sample of the Student Reviews:
★★★★★
I worked in some company, so I can say that this course is 100% industry oriented. The best course for learning Spring Framework. Getting replies within 24 hours. - Premang
★★★★★
Chad Darby has done a superb job organizing this course and has made Spring Framework, MVC, AOP, Hibernate, Security easy to learn and use. I have a bs and ms in CS, have been developing software for 25 years, and have taken many courses over the years at the different companies I've been at and Chad is easily the best instructor I've had.
He's extremely well-organized and knowledgeable and lays out this course in a step-by-step approach to fully cover the material and make it easy to learn. I highly recommend this course and Chad as an instructor.
I'm adding to my review following Chad's recent updates to his course to cover Spring Boot, JPA, etc. After finishing the course originally, I found another Spring Boot class, and after working on this other class, I appreciate more what Chad has done here. He's made Spring Boot for CRUD applications with Thymeleaf very easy to follow and learn. I've taken half a dozen other software courses, and while other instructors might be good, Chad is the gold standard here. I can't recommend him highly enough. - Dave Zeltserman
★★★★★
This is the best tutorial I've seen so far for Spring/Hibernate, each step is well explained and the tutorial videos are made to a high standard. I highly recommend this course! - Rob
★★★★★
Hats off to you Chad, the best Spring fundamentals course I have done on Udemy thus far. You never disappoint. - More body Modise
★★★★★
Chad is an excellent natural teacher. His course is well organized. He makes difficult concepts very easy to understand. - Julie Hodgson
Quality Material
You will receive a quality course, with solid technical material and excellent audio and video production. This is my fifth course at Udemy.
My first four courses on Udemy were:
Eclipse IDE for Beginners
Java Database Connection (JDBC)
JavaServer Faces (JSF) for Beginners
JSP and Servlets for Beginners
These courses have received rave 5-star reviews and over 220,000 students have taken the courses. Also, these courses are the most popular courses in their respective categories.
Similar thing for this Spring course, it is ranked as #1 best seller for Spring courses.
I also have an active YouTube channel where I post regular videos. In the past year, I’ve created over 300 video tutorials (public and private). My YouTube channel has over 4.5 million views and 33k subscribers. So I understand what works and what doesn’t work for creating video tutorials.
No-Risk – Money-Back Guarantee
Finally, there is no risk. You can preview 25% of the course for free. Once you purchase the course, if for some reason you are not happy with the course, Udemy offers a 30-day money-back guarantee.
So you have nothing to lose, sign up for this course and learn how to build Spring and Hibernate Real-Time Projects from scratch!
Target Audience
Java Developers with basic Java experience
Who this course is for:
The course is appropriate for all Java developers: beginners to advanced
Spring & Hibernate for Beginners (includes Spring Boot)
Created by Chad Darby
Last updated 1/2020
English
English, French [Auto-generated]
Size: 16.00 GB
DOWNLOAD COURSE
Content From: https://ift.tt/2Xfd5dX
0 notes
Text
Spring Digging Road 2-> Assembly of SpringBean
# Assembly of SpringBean
##SpringBean allocation plan
Spring container is responsible for creating bean in applications and coordinating the relationships among these objects through dependency injection.
But as a developer, you need to tell Spring which bean to create and how to assemble them together. When describing how bean are assembled, Spring has great flexibility and provides three main assembly mechanisms:
```
1. Implicit bean discovery mechanism-annotation;
2. Explicit configuration in Java -- JavaConfig;
3. Explicit configuration in XML -- XML configuration.
```
###Annotation assembly Bean
Spring realizes automatic assembly from two angles:
```
Component scanning : Spring will automatically discover bean created in the application context
Automatic assembly : Spring automatically satisfies the dependencies between bean.
```
**PS : The combination of component scanning and automatic assembly can minimize explicit configuration.
**
```
1.Create bean that can be discovered
2.Name the bean scanned by the component
3.Set the basic package for component scanning
4.Automatic assembly by adding annotations to bean
```
The directory structure is as follows

First of all, let everyone look at the contents of pom.xml and springConfig.xml on my side, as shown in the figure:

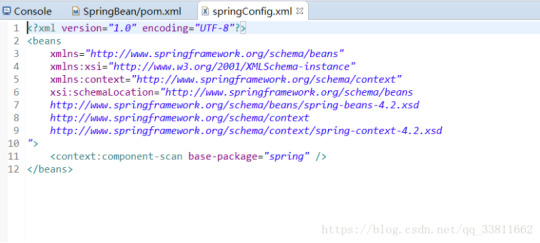
Several ways to annotate Bean assembly
```
Member variable injection
Constructor injection
Setting mode injection
```
Ok, it's time to code.
The following is member variable injection, which mainly adds @Autowire annotation to A to be passed into Class B.
public class SpringTest {
public static void main(String[] args) {
AbstractApplicationContext context = new ClassPathXmlApplicationContext("/spring/springConfig.xml");
B b = (B) context.getBean("b");
b.print();
}
}
@Component
class A {
@Override
public String toString() {
return "introduce Class A";
}
}
@Component
class B {
@Autowired
A a;
void print() {
System.out.println("In the method of Class B" + a);
}
}
Then there is constructor injection, at this time, the constructor of B is added @Autowired
public class SpringTest {
public static void main(String[] args) {
AbstractApplicationContext context = new ClassPathXmlApplicationContext("/spring/springConfig.xml");
B b = (B) context.getBean("b");
b.print();
}
}
@Component
class A {
@Override
public String toString() {
return "introduce Class A";
}
}
@Component
class B {
A a;
@Autowired
B(A a) {
this.a = a;
}
void print() {
System.out.println("In the method of Class B" + a);
}
}
Finally, set the way to inject. In one method, automatic assembly is performed. The method name can be arbitrary, only @Autowired needs to be added to the method name. here, for the sake of standardization, setA is used as the method name
public class SpringTest {
public static void main(String[] args) {
AbstractApplicationContext context = new ClassPathXmlApplicationContext("/spring/springConfig.xml");
B b = (B) context.getBean("b");
b.print();
}
}
@Component
class A {
@Override
public String toString() {
return "introduce Class A";
}
}
@Component
class B {
A a;
@Autowired
void setA(A a) {
this.a = a;
}
void print() {
System.out.println("In the method of Class B" + a);
}
}
###Java code assembly Bean
Although it is a more recommended way to realize automatic configuration of Spring through component scanning and annotation in many scenarios, sometimes the scheme of automatic configuration does not work, so it is necessary to explicitly configure Spring Bean.
For example, when you want to assemble a component in a third-party library into an application, you can't add @Component and @Autowired annotations to its class, so you can't use the automatic assembly scheme.
In this case, explicit configuration must be adopted. There are two alternatives for explicit configuration: JavaConfig and XML, and JavaConfig is a better one because it is more powerful, type-safe and friendly to refactoring. After all, JavaConfig belongs to Java code.
At the same time, JavaConfig is different from other Java codes, which is conceptually different from business logic and domain codes in applications. Although it uses the same language as other components, JavaConfig is the configuration code.
This means that it should not contain any business logic, and JavaConfig should not intrude into business logic code. Although it is not necessary, JavaConfig is usually put in a separate package, which makes it separate from other application logic, so that there is no confusion about its intention.
Several ways of assembling Bean with Java code:
```
Constructor injection
Setting mode injection
```
The first is constructor injection
@Configuration
public class JavaConfigTest {
@Bean
A newA() {
return new A();
}
@Bean
B newB() {
return new B(newA());
}
public static void main(String[] args) {
AbstractApplicationContext context = new AnnotationConfigApplicationContext(JavaConfigTest.class);
B b = (B) context.getBean("newB");
b.print();
}
}
class A {
@Override
public String toString() {
return "introduce Class A";
}
}
class B {
A a;
B(A a) {
this.a = a;
}
void print() {
System.out.println("In the method of Class B" + a);
}
}
Then setting mode injection
@Configuration
public class JavaConfigTest {
@Bean
A newA() {
return new A();
}
@Bean
B newB() {
B b = new B();
b.setA(newA());
return b;
}
public static void main(String[] args) {
AbstractApplicationContext context = new AnnotationConfigApplicationContext(JavaConfigTest.class);
B b = (B) context.getBean("newB");
b.print();
}
}
class A {
@Override
public String toString() {
return "introduce Class A";
}
}
class B {
A a;
void setA(A a) {
this.a = a;
}
void print() {
System.out.println("In the method of Class B" + a);
}
}
###Assemble Bean through XML
When Spring first appeared, XML was the main way to describe configuration, but XML was no longer the only alternative way to configure Spring. However, in view of the large number of Spring configuration projects based on XML, it is very important to understand how to assemble Sping projects through XML.
Several ways to assemble Bean through XML
```
Constructor injection
Setting mode injection
```
The first is constructor injection:
Project code is:
public class XMLTest {
public static void main(String[] args) {
AbstractApplicationContext context = new ClassPathXmlApplicationContext("/xml/springConfig.xml");
B b = (B) context.getBean("b");
b.print();
}
}
class A {
@Override
public String toString() {
return "introduce Class A";
}
}
class B {
A a;
B(A a) {
this.a = a;
}
void print() {
System.out.println("In the method of Class B" + a);
}
}
springconfig.xml As shown in figure:
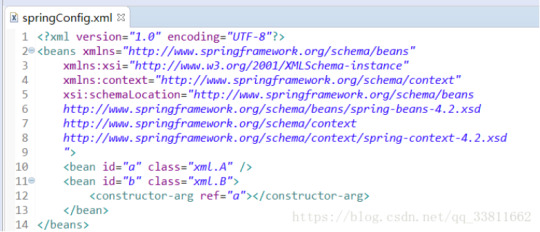
Then there is the setting mode injection
Project code is:
public class XMLTest {
public static void main(String[] args) {
AbstractApplicationContext context = new ClassPathXmlApplicationContext("/xml/springConfig.xml");
B b = (B) context.getBean("b");
b.print();
}
}
class A {
@Override
public String toString() {
return "introduce Class A";
}
}
class B {
A a;
public void setA(A a) {
this.a = a;
}
void print() {
System.out.println("In the method of Class B" + a);
}
}
springconfig.xml Figure:
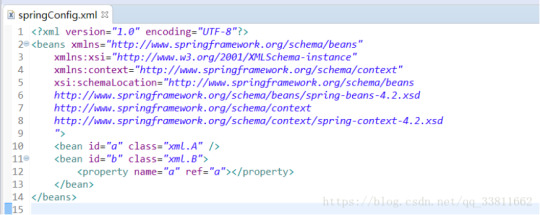
###Spring annotation
@Autowired : Automatically assemble member variables, and @Autowired(required=false) will not report an error if no matching Bean can be found.
@Qualifier : Comments specify the ID of the injected bean
@Component : Define a bean
@Controller : Controller
@Service : Define a service bean
@Repository : Used to take the class identity of data access layer (DAO) as a bean
@Scope : Set the type of bean
###Others:
Singleton: In the whole application, only one instance of bean is created :
```
value=ConfigurableBeanFactory.SCOPE_SINGLETON
```
Prototype : A new bean instance is created every time it is injected or acquired through Spring context
```
value=ConfigurableBeanFactory.SCOPE_PROTOTYPEE
```
Request : In a Web application, a bean instance is created for each request :
```
value=WebApplicationContext.SCOPE_REQUEST
```
Session : In a Web application, a bean instance is created for each session
```
value=WebApplicationContext.SCOPE_SESSION
```
0 notes
Text
Spring framework 5 : Uso de la anotación @Primary
Spring framework 5 : Uso de la anotación @Primary #java #spring-boot #springframework5 #devs4j
En el ejemplo anterior vimos como utilizar la anotación @Qualifier y como nos ayuda cuando tenemos multiples implementaciones de una interfaz. El problema de esa solución es cuando se utiliza @Autowired sin especificar el qualifier dado que Spring falla con el siguiente error:
Field userService in com.devs4j.qualifier.UserController required a single bean, but 2 were found
Esto se resuelve…
View On WordPress
0 notes
Link
In this post, I would try to explain how we reduced the storage occupied by the data by more than 50%. This would also kind of be a step by step guide from the basics, so if you're just interested in how Redis is being used, just skip the and go to the Optimization section.
Basic Setup
I would be using the latest version of Spring Boot from https://start.spring.io. Firstly, select our two of our main dependencies - Spring Boot Web and Spring Data Reactive Redis. You would find these in the pom.xml file when you download the starter project. The Spring Boot Web is for building basic web applications with Spring Boot, whereas Spring Data Reactive Redis would be used for connecting and using Redis inside the application. At its core, the Redis dependency by default uses the Lettuce Redis client, and is supported by the latest versions of Spring Boot. Note that I'm going to skip the installation of Redis, as there are other guides available for every operating system. You do need the Redis Server to be started for our application to work successfully. After downloading the basic application, you'll need to extract and open it in your favourite IDE (my favourite one is IntelliJ IDEA). In my case the project name is redis-util, and you'll find my "base packages" to be named com.darshitpp.redis.redisutil. This base package would have a class called RedisUtilApplication, which in my case has the following configuration.
@SpringBootApplication @ComponentScan(basePackages = {"com.darshitpp.redis.redisutil"}) public class RedisUtilApplication { public static void main(String[] args) { SpringApplication.run(RedisUtilApplication.class, args); } }
I have manually added the @ComponentScan annotation to specify a top-level package name under where Spring should look for defined Beans/Configurations. To connect to Redis, I create a configuration class called LettuceRedisConfiguration, under a new package named configuration(note that this should be under the basePackages path defined above. You could define the configuration in the RedisUtilApplication class itself, but I want this to be as "production-ready" as possible. Thus, it's a good practice to separate out your different parts of application. My configuration class is
@Configuration public class LettuceRedisConfiguration { @Bean public LettuceConnectionFactory redisConnectionFactory() { return new LettuceConnectionFactory(new RedisStandaloneConfiguration("localhost", 6379)); } }
It is a very simple class, which has the configuration of which URL to connect to for Redis. In my case, it is localhost, but in most production apps, it would be an external Redis server. Port 6379 is the default port on which the Redis server starts. This Bean would return us a "factory" of Redis connections. Think of this as something which would allow you to connect to Redis when required. At this point, my package structure looks like:
->src ->main ->java ->com.darshitpp.redis.redisutil ->configuration
Now that we know how to connect to a Redis server, we need to figure out what data we need to store in Redis. In our case, we would be storing User data. This is the "domain model" of our application (domain model could be translated to a table in a Database, but we don't have a table in our scenario). This User is stored in a package called domain. The User would have three fields, namely, firstName, lastName, and birthday. Before storing the objects in Redis, it is a good idea to identify how you will store the data so that it's efficient to fetch it back. What that means is Redis being a simple Key-Value store, you would need to identify the Key you would be storing the Value with. In our case, I am choosing firstName as the key. The data would be stored in a hash, so the hashKey that we select would be the lastName and the value mapped to the hashKey is the User object. This is because Hashes in Redis have the following structure:
key1 --- hashKey1 === value1 --- hashKey2 === value2 --- hashKey3 === value3 key2 --- hashKey4 === value4 --- hashKey5 === value5 . . .
You could also imagine it as a tree with the top level nodes being the Keys, the immediate next level to be hashKeys, and the leaf nodes to be the values. To access value2, you would need to have key1 and hashKey2. Our example is a bit incorrect, as a User could have same key=firstName and hashKey=lastName as another user, and Redis will overwrite value. However, for brevity, we will assume there are unique Users using our application. We would now be creating a controller class called NormalController which would act as an entry point for our API. We have named it NormalController for reasons that will be clear further in this article.
@RestController @RequestMapping("/normal") public class NormalController { private final NormalService normalService; @Autowired public NormalController(NormalService normalService) { this.normalService = normalService; } @GetMapping("/get") public User get(@RequestParam("firstName") String firstName, @RequestParam("lastName") String lastName) { return normalService.get(firstName, lastName); } @PostMapping("/insert") public void insert(@RequestBody User user) { normalService.put(user); } @PostMapping("/delete") public void delete(@RequestParam("firstName") String firstName) { normalService.delete(firstName); } }
NormalController also has a service named NormalService which is Autowired. The class should be defined in a new packaged named controller after which the package structure would look like
->src ->main ->java ->com.darshitpp.redis.redisutil ->configuration ->domain ->controller
Our basic operations would be simple CRUD like operations which NormalService implements using a custom Operations interface.
public interface Operations { User get(String firstName, String lastName); void put(User user); void delete(String firstName); }
To use Lettuce in our application, we need to do a couple of more things though. Just like to access JDBC, there's a provision for a JdbcTemplate, you must similarly use a RedisTemplate to operate on Redis. We must also define in what format will Redis store the data inside it. By default, it stores data as a String. However, know that you'll be storing User in Redis, and in order to facilitate the storage and fetch from Redis, you would need a way through which Redis will be able to identify and convert it back to the appropriate type of data you want. Think of this as talking with someone who doesn't know the same language as you do. If you want to communicate with someone who only speaks Spanish, you would need to find a translator who would convert English into Spanish for you. This process of conversion and recovery is known as Serialization and Deserialization. English to Spanish = Serialization Spanish to English = Deserialization Thus, we need a translator or a Serializer in our case too. We would be using Jackson for this process. Jackson is a nifty library which Spring Boot supports out-of-the-box to handle Json. We would need to create a Serializer which implements RedisSerializer for our purposes. In our case, I have created a class JsonRedisSerializer inside a new package called serializer.
class JsonRedisSerializer<T> implements RedisSerializer<T> { public static final Charset DEFAULT_CHARSET; private final JavaType javaType; private ObjectMapper objectMapper = new ObjectMapper() .registerModules(new Jdk8Module(), new JavaTimeModule(), new ParameterNamesModule(JsonCreator.Mode.PROPERTIES)) .configure(SerializationFeature.WRITE_DATES_AS_TIMESTAMPS, true) .configure(SerializationFeature.FAIL_ON_EMPTY_BEANS, false) .configure(DeserializationFeature.FAIL_ON_UNKNOWN_PROPERTIES, false) .setSerializationInclusion(JsonInclude.Include.NON_NULL); public JsonRedisSerializer(Class<T> type) { this.javaType = JavaTypeHandler.getJavaType(type); } public T deserialize(@Nullable byte[] bytes) throws SerializationException { if (bytes == null || bytes.length == 0) { return null; } else { try { return this.objectMapper.readValue(bytes, 0, bytes.length, this.javaType); } catch (Exception ex) { throw new SerializationException("Could not read JSON: " + ex.getMessage(), ex); } } } public byte[] serialize(@Nullable Object value) throws SerializationException { if (value == null) { return new byte[0]; } else { try { return this.objectMapper.writeValueAsBytes(value); } catch (Exception ex) { throw new SerializationException("Could not write JSON: " + ex.getMessage(), ex); } } } static { DEFAULT_CHARSET = StandardCharsets.UTF_8; } }
As you can see, it has two methods called serialize and deserialize. Each of these methods use the Jackson's ObjectMapper for conversion. There is also a class named JavaTypeHandler which helps you get the Type of the object you're trying to serialize.
final class JavaTypeHandler { static <T> JavaType getJavaType(Class<T> clazz) { return TypeFactory.defaultInstance().constructType(clazz); } }
Consequently, we would also need a class which returns us a RedisTemplate which utilizes this serializer. I would name this class RedisSerializationBuilder.
public final class RedisSerializationBuilder { public static <T> RedisTemplate<String, T> getNormalRedisTemplate(final LettuceConnectionFactory factory, final Class<T> clazz) { JsonRedisSerializer<T> jsonRedisSerializer = new JsonRedisSerializer<>(clazz); RedisTemplate<String, T> redisTemplate = new RedisTemplate<>(); redisTemplate.setConnectionFactory(factory); redisTemplate.setDefaultSerializer(RedisSerializer.json()); redisTemplate.setKeySerializer(RedisSerializer.string()); redisTemplate.setValueSerializer(RedisSerializer.string()); redisTemplate.setHashKeySerializer(RedisSerializer.string()); redisTemplate.setHashValueSerializer(jsonRedisSerializer); redisTemplate.afterPropertiesSet(); return redisTemplate; } }
Notice that the above method will return you a template specific to a particular domain model(in our case, the User) using Generics. It also specifies what connection factory is to be used, what should be the default key/value/hashKey/hashValue serializers. Consequently, the NormalService looks like
@Service public class NormalService implements Operations{ private final RedisTemplate<String, User> redisTemplate; private final HashOperations<String, String, User> hashOperations; public NormalService(LettuceConnectionFactory redisConnectionFactory) { this.redisTemplate = RedisSerializationBuilder.getNormalRedisTemplate(redisConnectionFactory, User.class); this.hashOperations = this.redisTemplate.opsForHash(); } @Override public User get(String firstName, String lastName) { return hashOperations.get(firstName, lastName); } @Override public void put(User user) { hashOperations.put(user.getFirstName(), user.getLastName(), user); } @Override public void delete(String firstName) { hashOperations.delete(firstName); } }
I then inserted a User, using the POST method, and URL: localhost:8080/normalService/insert Request Body:
{ "firstName": "Priscilla", "lastName": "Haymes", "birthday": "2020-04-12T11:15:00Z" }
If I then run this application for 100 Users, I find the following stats for the memory usage in Redis (I used the memory stats command using the redis-cli)
21) "keys.count" 22) (integer) 100 23) "keys.bytes-per-key" 24) (integer) 1044 25) "dataset.bytes" 26) (integer) 32840
Using the hgetall command for a key gives me
127.0.0.1:6379>hgetall "Priscilla" 1) "Haymes" 2) "{\"firstName\":\"Priscilla\",\"lastName\":\"Haymes\",\"birthday\":1586690100000}"
Notice that 2) gives us the actual type of data stored in Redis -> Json! Our basic structure for further optimizations is in place! Yay!
Optimization
MessagePack is here to the rescue! As I said, you'd need a "transalation" mechanism. What if the translator is an expert, and converts your English into Spanish in as few words as possible? MessagePack is the same! You would need to add two more dependencies in your pom.xml file.
<dependency> <groupId>org.msgpack</groupId> <artifactId>msgpack-core</artifactId> <version>0.8.20</version> </dependency> <dependency> <groupId>org.msgpack</groupId> <artifactId>jackson-dataformat-msgpack</artifactId> <version>0.8.20</version> </dependency>
We create a controller called MsgPackController and a service called MsgPackService almost similar to NormalController and NormalService. We would create a MsgPackSerializer to serialize using MessagePack.
class MsgPackRedisSerializer<T> implements RedisSerializer<T> { public static final Charset DEFAULT_CHARSET; private final JavaType javaType; private ObjectMapper objectMapper = new ObjectMapper(new MessagePackFactory()) .registerModules(new Jdk8Module(), new JavaTimeModule()) .configure(SerializationFeature.WRITE_DATES_AS_TIMESTAMPS, true) .configure(SerializationFeature.FAIL_ON_EMPTY_BEANS, false) .configure(DeserializationFeature.FAIL_ON_UNKNOWN_PROPERTIES, false) .setSerializationInclusion(JsonInclude.Include.NON_NULL); public MsgPackRedisSerializer(Class<T> type) { this.javaType = JavaTypeHandler.getJavaType(type); } public T deserialize(@Nullable byte[] bytes) throws SerializationException { if (bytes == null || bytes.length == 0) { return null; } else { try { return this.objectMapper.readValue(bytes, 0, bytes.length, this.javaType); } catch (Exception ex) { throw new SerializationException("Could not read MsgPack JSON: " + ex.getMessage(), ex); } } } public byte[] serialize(@Nullable Object value) throws SerializationException { if (value == null) { return new byte[0]; } else { try { return this.objectMapper.writeValueAsBytes(value); } catch (Exception ex) { throw new SerializationException("Could not write MsgPack JSON: " + ex.getMessage(), ex); } } } static { DEFAULT_CHARSET = StandardCharsets.UTF_8; } }
The only major noticeable change is an instance of MessagePackFactory being passed into the ObjectMapper. This would act as a bridge between binary and String formats of data between Redis and our Spring Boot application. Testing our changes (after clearing the previously utilized storage from redis gives us the following:
127.0.0.1:6379> hgetall "Priscilla" 1) "Haymes" 2) "\x83\xa9firstName\xa9Priscilla\xa8lastName\xa6Haymes\xa8birthday\xcf\x00\x00\x01qn\x19\x8b " 127.0.0.1:6379> memory stats . . . 21) "keys.count" 22) (integer) 100 23) "keys.bytes-per-key" 24) (integer) 876 25) "dataset.bytes" 26) (integer) 15976
Compare the dataset.bytes from the current memory to the previously recorded one. 15976 bytes vs 32840 bytes, nearly 50% reduction already! But wait, we can reduce it further. How, you ask. Compression! What if we compress the data and then store it? In our case it would work! This time, Snappy to the rescue! Your first question after this would be: compression and decompression takes time. Wouldn't it be detrimental on production? Snappy has the answer to this too.
It does not aim for maximum compression, or compatibility with any other compression library; instead, it aims for very high speeds and reasonable compression.
Using Snappy is also as simple as adding the dependency in pom.xml, and a couple of lines of code changes. Just add Snappy.compress while serialization and Snappy.decompress while deserialization.
<dependency> <groupId>org.xerial.snappy</groupId> <artifactId>snappy-java</artifactId> <version>1.1.7.3</version> </dependency>
Testing it again with the same inputs returns the following
127.0.0.1:6379> hgetall "Priscilla" 1) "Haymes" 2) "7\\\x83\xa9firstName\xa9Priscilla\xa8la\t\x13`\xa6Haymes\xa8birthday\xcf\x00\x00\x01qn\x19\x8b " 127.0.0.1:6379> memory stats . . . 21) "keys.count" 22) (integer) 100 23) "keys.bytes-per-key" 24) (integer) 873 25) "dataset.bytes" 26) (integer) 15720
You can see that the size of the data set is smaller, 15720 bytes vs 15976 bytes, a marginal difference, but with larger amounts of data, this difference increases. In my case, cleaning and restructuring the data, and utilizing the above techniques, we brought down the memory usage from 2GB to less than 500MB.
0 notes
Text
Best Institute for Core Java Course in Delhi, Noida & Gurgaon

High Technologies Solutions is a head training institute providing Best Core Java training in Delhi, Noida & Gurgaon from over two decades. High Technologies Solutions offer remarkable learning knowledge with the best infrastructure and most recent apparatuses. The course educational modules is planned so the applicant can begin practicing as the expert java engineer when they finish their program.
HIGH TECHNOLOGIES SOLUTIONS is one of the world’s most eminent institute providing Core Java Training Course in Delhi, Noida & Gurgaon to various associations and furthermore to understudies far and wide. With our learning accomplices, IBM and Oracle, High Technologies Solutions rendering Java programming course in Delhi, Noida & Gurgaon plans to give the best’s chance to competitors aspiring to work in MNC’s.
High Technologies Solutions, the Core JAVA Training Institutes in Delhi, Noida & Gurgaon will open entryways of chance for competitors. As the interest for java engineers in the industry is skyrocketing, organizations are looking for designers who have top to bottom learning in this field. Associations needs to procure resources not liabilities, an understudy without any abilities and learning of any domain is commonly not the primary decision for the organizations. Organizations would dependably favor applicants with some experience of working on Live Projects and top to bottom learning of the domain over some other factor.
At High Technologies Solutions all around prepared Core Java training center in Delhi, Noida & Gurgaon hopefuls take in the aptitudes for Java Language Environment, Java Fundamentals, Essentials of Object-Oriented Programming, Writing Java Classes, Packages, Exception Handling, I/O Operations in Java, Multithreaded Programming, DEVELOPING Java APPS, Network Programming, Java Util Package/Collections Framework, Generics, Inner Classes, Abstract Window Toolkit, Swing Programming, Java Training on continuous undertakings alongside Java arrangement training. Java Training in Delhi, Noida & Gurgaon has been planned according to most recent industry patterns and keeping in mind the propelled Java course substance and prospectus dependent on the expert prerequisite of the understudy; helping them to get position in Multinational organizations and accomplish their profession objectives.
Core java training in Delhi, Noida & Gurgaon program by High Technologies Solutions get ready understudies according to the industry request and causes them to get the best open door by providing them the important training and the experience on LIVE Projects. We are proud to be the Best Java Training Institute in Delhi, Noida & Gurgaon from last 19 years
Course Description
Core Java
Java OOPS concepts, need for Java
Classes and interfaces
Objects, Constructor, fields, methods, variables, keywords
Inheritance, method overloading and overriding, access specifiers
jar file, javadocapi creation
Package, comparing and printing objects
final variable and initializing
Bitwise operations, operators, data types
Generic types, Date, Calendar, Joda
Inner, anonymous classes
String, String Buffer, Regular Expressions, arrays, switch statement
Exception, Reflection, Clone, Assertion
File Handling, IO package classes
Enum type
Multi-threading, concurrency
Data structures, Collection framework, sorting
JDBC, SQL, database concepts, drivers
J2EE
Sockets, remote communication
Servlets, Webserver, http methods
RMI, networking
Java Server Pages(JSP), JSTL
Java Cryptography, encryption
Java mail, cryptographic protocols
JMS
XML
Spring
CSpring Framework, IoC, Dependency Injection
Spring Containers : Bean Factory, Application Context
XmlBeanFactory, ClassPathXmlApplicationContext,FileSystemXmlApplicationContext
Spring scope : singleton and prototype
Bean Life Cycle : setup and tear down, init-method and destroy-method
Bean Postprocessor
Spring Bean definition inheritance
Dependency Injection: Through Constructor, setter method
Injecting Collection, inner bean
Bean Auto wiring: by name, by type, by constructor
Annotation : Injection required true/false
Autowiring : setter, property, constructor, qualifier, Component, life cycle
Spring Wiring, loose coupling
youtube
#core java course in delh#core java course in noida#core java course in gurgaon#core java classes in delhi#core java institute in delhi#core java institute in#core java institute in gurgaon#core java institute in noida#core java course#java course in noida#java course in delhi#java course in gurgaon
0 notes
Link
1. Introduction With Spring Framework it is very easy to make an optional dependency injection thanks to the annotation @Autowired(required=false) . In this way we get that if the bean that is being referenced is not defined, its value will be a null and we can act accordingly to, for example, provide a default value. import org.springframework.stereotypeorg.Service; import …
0 notes