#Step-by-Step CorelDraw
Explore tagged Tumblr posts
Visit Tumblr Blog
Explore Tumblr blogs with no restrictions, modern design and the best experience.
Last Seen Tumblr Blogs


Fun Fact
Tumblr was named as a finalist in Lead411’s New York City Hot 125 in Aug 2010.
Text
Restaurant Banner design in coreldraw|metafreefile
youtube
#Smart AI #Advanced AI #Innovative AI #Cutting-edge AI #Efficient AI #Powerful AI #Adaptive AI #Insightful aI#RestaurantBannerDesign #CorelDrawTutorial #GraphicDesign #BannerDesign #CorelDrawTips #DesignTutorial #RestaurantMarketing #VisualDesign #CreativeDesign #DesignTips
#Intelligent#Smart#Advanced#Innovative#Cutting-edge#Efficient#Powerful#Adaptive#Insightful#metafreefile#comment#Restaurant Banner Design#CorelDraw Tutorial#Banner Design Tips#Restaurant Marketing#Graphic Design#CorelDraw for Beginners#How to Design Banners#Visual Design#Design Tips#Marketing Banners#Create Banners in CorelDraw#Pro Design Tips#Step-by-Step CorelDraw#CorelDraw Basics#Restaurant Banner Ideas#CorelDraw Projects#Beginner CorelDr#Youtube
0 notes
Text
🇲🇽 Mexico 2025 Gold Cup Font – Customize Your Jersey Like El Tri!

Get ready for the 2025 CONCACAF Gold Cup with the official Mexico Jersey Font. You can print your name or honor stars like Lozano, Santi Giménez, or Ochoa. This font pack has everything you need to make your own jersey at home.
👉 Get the Mexico 2025 Gold Cup Font on Etsy Here
🇲🇽 Adidas Mexico 2025 Gold Cup Kit + Font Collection
The Adidas Mexico 2025 Gold Cup Kit was released on March 14, 2025. It debuted in the Concacaf Nations League semi-final against Canada. This kit is a bold design that honors Mexican culture and tradition.

🔥 Design Features:
The kit is black with gold accents, inspired by Mariachi clothing
A special pixelated font mimics Aztec pyramids and architecture
The unique stepped and blocky numbers resemble historic pyramid structures like Teotihuacan and Chichen Itza
Green Trefoil keeper shirt provided by Adidas
A full merchandise collection was released alongside the jersey

This kit combines modern wear with ancient symbols, making it one of Mexico’s most stunning kits.
✍️ What’s Included in the Font Pack
✅ OTF & TTF Font Files (for easy installation)
✅ Perfect for Cricut, Silhouette, etc.)
✅ Numbers 0-9 & Full Alphabet
✅ Pixel-style font inspired by Aztec pyramids
✅ Perfect for fans, creators, and gift-makers
youtube
🖨️ How to Use and Print the Font
Want to customize a jersey with your own name or your favorite player’s number? Here's how:
How to Use the Font:
Download the font from Etsy after purchase
Install the OTF or TTF file on your computer
Use design tools like Canva, Cricut Design Space, or Illustrator
Choose your name + number layout
Print it using DTF paper or HTV (heat transfer vinyl)
Apply the print using a heat press
Done! You’ve created your custom Mexico jersey 🔥
💻 Best 5 Tools for Font Design
Here are our top picks to design with ease:
Canva – Easy-to-use and beginner-friendly
Cricut Design Space – Ideal for precise cutting
Adobe Illustrator – Pro-level vector editing
CorelDRAW – Another great option for advanced designers
Inkscape – Free, open-source alternative to Illustrator

🛍️ Why Buy from Etsy?
Etsy is a secure and trusted platform that supports independent creators. Buying from our official Etsy store guarantees:
Instant download after payment
Secure transactions
High-quality files
Personal use license
Fast customer support from real designers
👉 Get the Mexico 2025 Gold Cup Font on Etsy Here
❓ FAQ – Mexico Gold Cup Jersey Font
Can I use this with Cricut or Silhouette? Yes, the download includes SVG and AI files.
Is this the official font? It’s a fan-made version based on the 2025 Gold Cup jersey design.
Can I print my own name and number? Absolutely! The font is fully editable for any name or number.
Is it for personal or commercial use? This license is for personal use only.
How do I print it on a shirt? Use DTF or HTV paper and a heat press machine.
#Font Football#Font football jersey#Mexico 2025 Gold#Mexico 2025 Gold font#font#font design#fonts#fonts & typography#football#football jerseys#football numbers#jersey#soccer font#Soccer typography#TTF#OTF#script writing#Font script#mexico#Youtube
3 notes
·
View notes
Text
Maximize Your Printing Efficiency: The Ultimate Guide to Gang Sheet DTF Transfers for Custom Designs
Introduction
Hey there! If you're looking to streamline your printing process and discover a fabulous method for creating custom designs, you’ve landed in the right spot. In this ultimate guide, we’re diving into the world of gang sheet DTF transfers. Trust me; it’s a game-changer for anyone involved in the printing industry. Whether you’re running a small business or managing a larger commercial operation, understanding how to maximize your printing efficiency can save you time, effort, and money. So, roll up your sleeves, and let’s get started!
Maximize Your Printing Efficiency: The Ultimate Guide to Gang Sheet DTF Transfers for Custom Designs What is DTF Printing?
Direct to Film (DTF) printing is one of those innovative technologies that have transformed the way we think about fabric customization. Instead of traditional methods like screen printing or heat transfer printing that can be quite limiting, DTF allows for vibrant colors and complex designs on various fabrics with ease.
Key Features of DTF Printing:
Versatility: Works on cotton, polyester, and blends. Durability: Prints are resistant to cracking and fading. Ease of Use: Simple application process without extensive equipment.
Why should you consider Visit this page DTF? Well, if you want high-quality prints without breaking the bank or spending hours on setup, this might just be the route for you!
Understanding Gang Sheet DTF Transfers
So what exactly is a gang sheet? It's essentially a large sheet that contains multiple designs printed together for efficiency. Instead of wasting space on individual sheets, gang sheets optimize every inch by grouping designs—making them ideal for both small and large runs.
Benefits of Gang Sheets Cost-Effective: Reduces material waste. Time-Saving: Less time spent on setup means more production. Creative Freedom: Allows designers to experiment with multiple designs in one go.
When you're aiming to maximize efficiency in your operations, gang sheet DTF transfers should be at the top of your list!
The Process of Creating Gang Sheet DTF Transfers
Creating custom gang sheets isn’t as daunting as it sounds! Here’s a simple breakdown:
youtube
Step 1: Design Creation
Start by creating your digital artwork using design software like Adobe Illustrator or CorelDRAW. Make sure each design fits well within its designated area on the sheet.
Step 2: Print Setup
Load your film into a direct-to-film printer (the best DTF printer will make this step smoother). Adjust settings based on the material you’re using.

Step 3: Print
Print all designs onto the transfer film simultaneously! This is where you'll appreciate how much time you're saving.
Step 4: Apply Powder Adhesive
Sprinkle adhesive powder while the ink is still wet on your prints.
Step 5: Cure
Heat cure your prints using a heat press or oven until fully adhered.
Choosing the Right Equipment for DTF Printing
If you want to ensure quality results with minimal fuss, investing in reliable equipment is crucial. Here are some must-haves:
| Equipment | Description | |-------------------------|---------------------------------
2 notes
·
View notes
Text
Introduction to SkillonIT Learning Hub- Empowering Rural Talent With World-Class IT Skills
SkillonIT provides IN-Demand IT courses, connecting Rural talent with rewarding IT skills through affordable, accessible and career-focused education. with Guaranteed pathways to internship and high paying jobs, start with us and step into Opportunities at top Tech-leading Companies. Skillonit Learning Hub, located in Buldhana, Maharashtra, is a leading institute dedicated to equipping individuals with cutting-edge technology skills. With a mission to bridge the digital divide, the institute provides high-quality education in various IT and professional development domains. Skillonit focuses on practical, industry-oriented training, ensuring students gain the expertise needed to thrive in today’s competitive job market. The hub is committed to empowering rural talent and shaping the next generation of skilled professionals.

Courses Offered Skillonit Learning Hub offers a diverse range of courses tailored to industry demands, enabling students to master both technical and professional skills.
Blockchain Development — Smart Contracts (Solidity, Rust, Web3.js, Hardhat) — Blockchain Protocols (Ethereum, Solana, Binance Smart Chain, Fantom) — Decentralized Applications (DApps) Development
Front-End Development — HTML, CSS, JavaScript — Frameworks: React.js, Vue.js, Angular — Responsive Web Design & UI Frameworks (Bootstrap, Tailwind CSS)
Back-End Development — Server-side Programming (Node.js, Python, PHP, Java, .NET) — Database Management (MySQL, MongoDB, Firebase, PostgreSQL) — API Development (RESTful APIs, GraphQL, WebSockets)
Full-Stack Development — Front-End + Back-End Integration — MERN Stack Development — Database, Deployment & DevOps Practice
Mobile App Development — Cross-Platform Development (Flutter, React Native)
Unity 3D Game Development — Game Mechanics & Physics — C# Programming for Game Development — Virtual Reality (VR) & Augmented Reality (AR) Integration
Professional UI/UX Design — User Interface Design (Adobe XD, Figma, Sketch) — User Experience Principles — Prototyping, Wireframing & Usability Testing
Professional Graphic Design — Adobe Photoshop, Illustrator, and CorelDraw — Branding & Logo Design — Digital Art & Visual Communication
Digital Marketing — SEO, SEM, and Social Media Marketing — Content Marketing & Copywriting — Google Ads, Facebook Ads & Analytics
Spoken English — Communication Skills & Public Speaking — Accent Training & Fluency Improvement
Personality Development — Business & Corporate Etiquette — Confidence Building & Interview Preparation — Leadership & Teamwork Skills
Location & Contact : Address : Chhatrapati Tower, Above Maratha Mahila Urban, 3rd Floor, Chikhali Road, Buldhana, Maharashtra, 443001.
Contact us
Conclusion : Skillonit Learning Hub is revolutionizing IT and professional education by making technology and essential career skills accessible to aspiring developers, designers, marketers, and professionals. With a strong emphasis on practical learning, industry exposure, and career opportunities, it stands as a beacon of growth for young talent in Buldhana and beyond. Whether you are looking to build a career in tech, marketing, design, or personal development, Skillonit provides the ideal platform to achieve your goals. Join Our Social Community
Skillonit #Education #ITCourses #Buldhana #Maharashtra #IT #Blockchain #Fullstack #Front-end #Back-end #MobileApp #Unity3d #UIUX #Graphicdesign #Digitalmarketing #SpokenEnglish #Personality #development
2 notes
·
View notes
Text
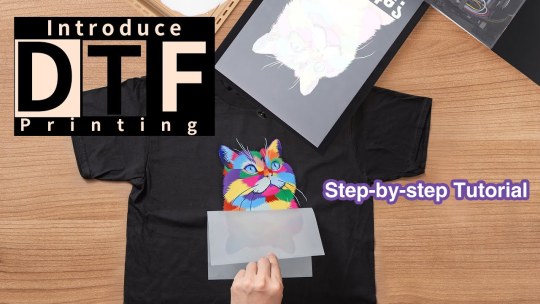
DTF Transfer Printing for Beginners: A Comprehensive Guide to Printing DTF Transfers at Home
As custom apparel and personalized items continue to gain popularity, creative enthusiasts are looking for efficient and affordable ways to produce high-quality prints from the comfort of their homes. Direct-to-Film (DTF) transfer printing has emerged as an accessible and versatile method for producing vibrant designs on various surfaces, especially textiles. DTF printing offers the advantage of application on a range of materials while maintaining exceptional color fidelity and detail. This article will introduce beginners to the DTF printers printing process, the equipment and materials needed, step-by-step instructions for printing transfers at home, tips for successful application, and the benefits of incorporating DTF printing into your crafting repertoire.
Understanding DTF Transfer Printing
DTF transfer printing is a relatively new technology that combines elements from both Direct-to-Garment (DTG) and traditional heat transfer methods. DTF printing involves printing designs onto a special film using specific inks that offer excellent adhesion and durability. The printed film is then coated with a layer of adhesive powder, which, when heated, bonds securely to the fabric. This process differentiates DTF from other transfer methods, providing vibrant prints, the ability to work with a wide variety of fabrics, and ease of application. For beginners, understanding the mechanics of DTF printing is essential for achieving high-quality results and exploring the potential of this versatile printing method.
Equipment and Materials Needed
To embark on your DTF printing journey, you'll need a collection of essential equipment and materials. The primary equipment required is a DTF printer, specifically an inkjet printer that can accommodate DTF transfer films. You’ll also need DTF inks, which are specifically formulated for this printing process, along with adhesive powder that helps form a strong bond between the transfer and fabric. Other necessary items include DTF transfer film, heat press, a weeding tool for removing excess film, and protective sheets to place between the fabric and heat press for safe application. While it may seem like a considerable investment upfront, many of these items can be purchased gradually as you become more comfortable with the process.
Step-by-Step Process for Printing DTF Transfers
Once you have gathered the necessary equipment and materials, the process of printing DTF transfers can begin.
1. Design Creation: Start by creating your design using graphic design software (like Adobe Illustrator or CorelDRAW) or purchasing premade designs. Ensure your design is in a compatible format and sized appropriately for your project.
2. Printing: Load the DTF transfer film into your printer. Print your design, ensuring to set it for "mirror" mode so that the image transfers correctly when applied to the fabric.
3. Adhesive Application: Once printed, sprinkle the adhesive powder evenly onto the wet ink immediately after printing. Gently shake off any excess powder.
4. Curing: Use a heat source, such as a heat press, to cure the transfer. This generally involves setting the heat press to a specific temperature (around 160-180°C) and applying even pressure for roughly 20-30 seconds. This step helps melt the adhesive powder into the print.
5. Weeding: Allow the transfer to cool, then weed out the unwanted areas of the film using a weeding tool, leaving you with your desired design.
6. Pressing on Fabric: Place your fabric on the heat press, position the transfer film (ink side down), apply the heat press again for another 10-15 seconds, and then let it cool before peeling off the film backing.
Tips for Successful DTF Transfers
To achieve the best results with DTF transfer printing, several tips can help ensure success. Begin by investing time in acclimating yourself to the equipment and practicing with various designs and fabrics. Experiment with different print settings, as printing at the right resolution and using suitable profiles for DTF printing can significantly influence the final output. It's also important to use high-quality DTF films and inks, as these will directly affect the vibrancy and durability of your prints. Lastly, always remember to conduct washing tests on fabric after the initial applications; this will provide insight into the longevity and durability of your DTF transfers and help you adjust your processes accordingly.
Benefits of DTF Printing for DIY Enthusiasts
For those interested in custom apparel, DTF transfer printing offers multiple benefits. One significant advantage is its versatility; DTF printing can be applied to a wide range of fabrics, including cotton, polyester, and blends. This flexibility enables crafters to experiment with different materials and styles without being restricted to specific substrates. Additionally, DTF transfers deliver vibrant colors and intricate details, making them ideal for creating striking designs on clothing. The process is also relatively straightforward compared to other printing methods, often requiring less upfront investment and offering rapid turnaround times for small batch production. Overall, DTF printing not only encourages creativity but also offers an efficient way to produce high-quality custom items.
Final Thought
In summary, DTF transfer printing provides an exciting opportunity for beginners and craft enthusiasts to produce professional-quality prints from home. By understanding the mechanics behind the process, gathering the right equipment, and following the steps outlined, you can start your venture into the world of custom printing today. Embrace the versatility and ease of DTF printing to create personalized apparel and accessories that reflect your unique style. As you gain experience and confidence, your creative possibilities will expand, allowing you to explore the full potential of DTF transfer printing. So grab your supplies, start experimenting, and watch your designs come to life through this innovative medium!
6 notes
·
View notes
Text
How to Print a Digital Download from Etsy
The whole downloaded-file-to-framed-print-on-your-wall process breaks down like this:
- Save the file you purchased to your computer or thumbdrive.
- Take the file to a job printer and get it printed to the size you want.
- Take the printed file to a framer, and have it framed so it fits your décor.
Digital files are often much, much cheaper on Etsy than buying their physical item counterparts. Plus, when you buy a digital file, you can finetune it to the exact size you want for your own wall. And once it’s printed, you can also choose the exact framing and matting combination you want.
Now, the details:
You were on Etsy or an artist’s website, and you fell in love with an image. Perfect for your wall, but you’re not sure how the whole printing thing works.
Not to worry! Lots of people use printable downloads every day for party decorations, invites, or coloring pages for kids (using their own home printer, if they have one), or for higher quality prestige printing for smashing wall art. The following is a list of steps for accessing your digital downloads, and how to turn them into art you’ll be proud to see on your wall.
So, what’s a digital download, or ‘printable’? It’s not a physical object; it’s an image file, in the form of 1s and 0s, saved on your computer or a thumbdrive. You bought it, you keep it, and you can always print it, as many times as you like. You can copy the file to two or three locations, so you don’t lose it.
Digital downloads come in various formats, including PDF, JPG, PNG, SVG, EPS, and more. Each type of file depends on what you need to use it for and how you are going to print it. Printing services will specify which formats they need.
Etsy places the file to your account in the orders section and you can download it on a desktop. They’ll also send you an email with a link to it.
Or, log into your account and click on “Purchases and Reviews.” Find the button that says “Download Files”. If you run into troubles, there’s a Help page. (Remember, you can’t access your digital download file through the mobile Etsy app.)
Now that it’s downloaded, you can open your file, just to check whether you have the right image at the right size. You’ll need to use the right software.
.bmp (Microsoft Windows Photos, Apple Preview or Apple Photos, Adobe Photoshop, Adobe Illustrator, CorelDRAW)
.doc (Microsoft Word)
.gif (Microsoft Windows Photos, Apple Preview or Apple Photos, Adobe Photoshop, Adobe Illustrator, CorelDRAW)
.jpeg (Microsoft Windows Photos, Apple Preview or Apple Photos, Adobe Photoshop, Adobe Illustrator, CorelDRAW)
.jpg (Microsoft Windows Photos, Apple Preview or Apple Photos, Adobe Photoshop, Adobe Illustrator, CorelDRAW)
.mobi (Calibre, Stanza, Sumatra PDF, Mobi File Reader, popular eReaders)
.mov (QuickTime, iTunes)
.mp3 (Windows Media Player or iTunes)
.mpeg (Windows Media Player, QuickTime)
.pdf (Adobe Acrobat Reader, Most Internet Browsers)
.png (Microsoft Windows Photos, Apple Preview or Apple Photos, Adobe Photoshop, Adobe Illustrator, CorelDRAW)
.psp (Corel PaintShop Pro, Adobe Photoshop, ACD Systems Canvas)
.rtf (Microsoft Word, WordPad)
.stl (AutoDesk Viewer, Microsoft 3D Viewer, Microsoft Print 3D, ShareCAD)
.txt (Windows NotePad, TextEdit on Mac)
.zip (Usually, you can unzip a .zip file with any computer.)
.ePUB (Various eReaders)
.iBook (Internet browser or Apple iBooks)
You can print image files on home printers. This is great for low-resolution art up to 8.5” x 11”, like recipes, or sewing instructions. The downside here is that the print will only be as good as the printer itself. For larger wall art, the best move is to take your file to a professional printshop.
This can be done online, or it can be done in person. Local Walgreens and Costcos are often quite good. You can upload your saved image file to them using their official website, and just pick up your image, printed the size you specify, on the paper you choose, the next time you’re in the neighborhood. There are also online choices like Shutterfly or Vistaprint, who will ship you your prints in the mail.
You’ve got your print, and you love it. But it’s just a big piece of paper right now; what about framing? One easy option is to select a standard sized frame, mat and glass available at the local stores or mall shops, and insert your new print yourself. Or maybe your print deserves first-cabin treatment, and you’ll want to check out the local frame shop for the right frame, matting and glass. Either way, totally legit. Then just hang it on the wall, and enjoy.
And that’s the whole process. Before you buy a digital download, you should check a couple of things:
- Be sure you have the software you’ll need to open the download at home, or be sure you know where online to find a site that will open the image (such as Photopea.com, for opening a layered .psd file, if you don’t happen to have Photoshop on your own machine).
- Be sure you understand the optimum print size of the download and its aspect ratio. Artists generally will inform you that their image will look best at a certain size, say, 24” x 18”. Printing it larger will seem overblown, with visible pixellation; printing it smaller will cause it to lose detail.
In other words, make sure the digital download fits your needs before you buy.
+++++++++++++
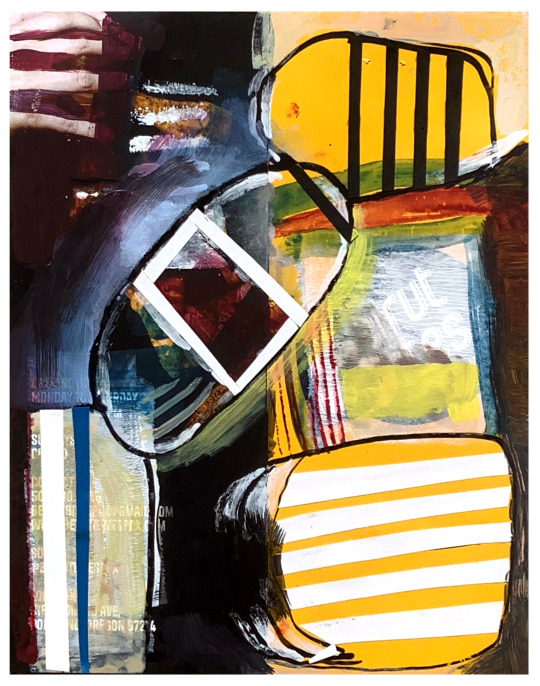
#collage#abstract#art#modernart#digital download#etsy#midcentury#kolaj#homedecor#interiordesign#design
4 notes
·
View notes
Text
Best Fashion Designing Course Bangalore | Eduleem Institute

Are you dreaming of a creative career in fashion? Do you want to learn how to design clothes, understand styles, and work in the fashion industry? Then it's time to join the Fashion Designing Course in Bangalore at Eduleem Institute.
At Eduleem, you will learn everything about fashion from sketching to sewing, from fabrics to styling in a simple and practical way. Whether you're a student or someone looking for a career change, this course can help you follow your passion.
Why Choose a Fashion Design Course in Bangalore?
Bangalore is not just a tech hub. It’s also a growing place for fashion, design, and creativity. Many fashion shows, design studios, and clothing brands are opening up here.
Doing a fashion designing course in Bangalore gives you a great opportunity to learn and find work in the same city. The city offers:
A vibrant fashion community
Internships and job options
Exposure to fashion events and exhibitions
Why Eduleem Offers the Best Fashion Designing Course in Bangalore
Eduleem is one of the best places to study fashion design. The course is made for beginners and also suits those who already have a little experience. What makes Eduleem special is its 100% practical training and career support.
Highlights of the Fashion Designing Course:
Easy-to-understand lessons
Experienced and friendly trainers
Hands-on classes with real materials
Sketching, garment construction, pattern making
Fashion illustration and styling
Fashion software training (like Adobe Illustrator & CAD tools)
Personal attention in small batches
Internship support and job placement guidance
You won’t just study from books. At Eduleem, you will create real outfits, develop your own style, and build a strong fashion portfolio.
What You Will Learn in This Fashion Designing Course
The Fashion design course in Bangalore by Eduleem covers every important topic to help you grow as a designer. Here’s what you will learn:
Foundation Modules:
Introduction to Fashion and Design
Drawing, Sketching, and Colour Theory
Types of Fabrics and Their Use
Core Designing Skills:
Pattern Making and Draping
Cutting and Stitching Techniques
Garment Construction
Fashion Software Skills:
Digital Fashion Sketching
Adobe Illustrator and CorelDRAW
Fashion Portfolio Making
Business & Styling:
Fashion Marketing and Merchandising
Styling for Photoshoots and Events
How to Start Your Own Fashion Brand
You will also take part in workshops, exhibitions, and mini fashion shows, so your learning is fun and creative.
Who Can Join the Course?
This fashion designing course Bangalore is open to everyone:
School or college students
Fashion lovers and hobbyists
Housewives or working professionals
Anyone looking for a creative career
You don’t need to know how to sew or draw perfectly. The course starts from basics and teaches you everything step by step.
Duration and Batch Options
Eduleem offers flexible course options so that you can choose what suits your time and goals:
6-month Professional Program
1-year Diploma Program
18-month International Program
You can choose between weekday and weekend classes, and even attend a free demo session before enrolling.
Career Options After This Fashion Designing Course
Once you finish the course, you can work in many exciting roles such as:
Fashion Designer
Fashion Illustrator
Stylist
Boutique Owner
Visual Merchandiser
Fashion Blogger
Costume Designer for films and TV
Fashion Entrepreneur
Eduleem helps you prepare for interviews, build your resume, and even supports you with internship and placement opportunities.
What Makes Eduleem the Best Fashion Design Institute in Bangalore?
Here’s why students trust Eduleem:
Updated syllabus based on industry needs
Practical learning environment
Trainers from top design backgrounds
In-house projects and portfolio support
Placement support in top fashion companies
Affordable fees with EMI options
Students at Eduleem don’t just learn fashion. They become confident, creative professionals ready to enter the fashion industry.
Enroll Today and Start Your Fashion Career
If fashion is your dream, don’t wait. Join the Fashion Designing Course in Bangalore at Eduleem Institute and take your first step towards a bright future in the fashion world.
Eduleem is ready to guide you, teach you, and help you grow as a designer.
0 notes
Text
The Science and Art Behind Acrylic Laser Engraving
Acrylic is one of the most versatile and visually appealing materials used in signage, displays, décor, and branding. When you want to add a personal, professional, or artistic touch to acrylic items, acrylic engraving services offer the perfect solution. This process allows you to create permanent marks, texts, and designs with incredible precision and durability.

Let’s explore what acrylic engraving is, how it’s done—especially with laser engraving—and why it’s widely used in various industries today.
What Is Acrylic Engraving?
Acrylic engraving is the process of etching or marking the surface of an acrylic sheet using tools or lasers to create a design. The engraved area appears frosted or white, giving a sharp contrast against the glossy surface of the acrylic.
Engraving is typically used for:
Logos and brand names
Personalized gifts or awards
Interior and exterior signs
Labels, panels, and nameplates
Decorative art and motifs
The finish is elegant, permanent, and visually striking—making engraved acrylic a preferred choice for high-end applications.
Why Choose Engraving for Acrylic?
Precision and Detail
Laser technology allows for highly detailed and intricate designs, including small text, complex logos, and decorative patterns.
Clean and Polished Finish
Unlike mechanical engraving, laser engraving leaves no physical contact marks. The result is a neat, frosted finish that enhances readability and aesthetics.
Speed and Efficiency
Engraving is fast and consistent, making it ideal for both single and bulk orders.
Customizability
You can easily modify designs digitally and apply them directly to acrylic surfaces using laser systems. This makes it perfect for customized products.
Types of Acrylic Suitable for Engraving
There are two main types of acrylic materials used in engraving:
Cast Acrylic: Best suited for laser engraving as it gives a smooth, frosted finish.
Extruded Acrylic: Tends to melt or warp under lasers, better suited for cutting than engraving.
For professional engraving services, cast acrylic is the preferred material due to its superior engraving response.
Applications of Acrylic Engraving Services
Laser-engraved acrylic is used in a wide variety of industries, including:
Retail & Corporate: Signboards, product displays, promotional materials
Events & Hospitality: Custom awards, trophies, table signs, and menu holders
Architecture & Interiors: Decorative panels, wall art, door nameplates
Personalized Gifts: Photo frames, keepsakes, wedding signage
The versatility and elegance of engraved acrylic make it a go-to material for both decorative and functional purposes.
How Is Acrylic Engraving Done?
Here’s a step-by-step overview of the process:
Design Creation: The design is created digitally using software like CorelDRAW or Adobe Illustrator.
Material Selection: Cast acrylic of appropriate thickness and size is chosen.
Machine Setup: The engraving machine is configured for power, speed, and focus based on the material.
Engraving Execution: The design is uploaded to the laser machine, which then etches it onto the surface with pinpoint accuracy.
Finishing Touches: The engraved item is cleaned and polished for final presentation.
Also Read : Top Quality Solutions from Acrylic Signage Suppliers Dubai: Helping Businesses Stand Out
In Conclusion
Acrylic engraving is an ideal way to create long-lasting, visually appealing designs on a modern, versatile material. Whether you need corporate signage, personalized décor, or artistic creations, engraving services using laser engraving offer unmatched precision and beauty.
For expertly crafted acrylic engravings with a flawless finish, choose Pleasant Plastic—your trusted partner in premium acrylic solutions.
0 notes
Text
Unlock Your Creative Potential with ZICA Borivali's Graphic Design Course in Mumbai
Are you passionate about design and looking to transform your creativity into a rewarding career? Zee Institute of Creative Art (ZICA) Borivali offers a comprehensive Graphic Design course in Mumbai that equips students with the skills and knowledge needed to excel in the dynamic world of visual communication.
Why Choose ZICA Borivali for Your Graphic Design Education?
1. Industry-Standard Curriculum
ZICA's Graphic Design course Mumbai covers essential topics such as:
Typography
Color Theory
Layout Design
Branding Strategies
Logo Design Techniques
Students gain proficiency in industry-standard software including Adobe Photoshop, Illustrator, InDesign, CorelDRAW, and Figma, ensuring they are well-prepared for the demands of the design industry.
2. Hands-On Learning Experience
The program emphasizes practical learning through:
Project-Based Assignments
Portfolio Development
Real-World Simulations
This approach ensures that students not only understand design concepts but also apply them effectively in various projects.
3. Expert Faculty and State-of-the-Art Infrastructure
Learn from experienced professionals who bring real-world insights into the classroom. ZICA Borivali boasts modern classrooms and labs equipped with the latest design tools, providing an ideal environment for creative learning.
4. 100% Placement Assistance
ZICA Borivali is committed to the career success of its students. The institute offers:
Personalized Career Guidance
Interview Preparation
Industry Internships
This support helps graduates secure positions in top design firms, advertising agencies, and digital media companies.
Convenient Location in Mumbai
Located in the heart of Borivali West, ZICA Animation Mumbai is easily accessible for students across the city. The institute's address is:
Showroom 1, 2nd Floor, Thakkar Shopping Centre, Swami Vivekananda Rd, Gyan Nagar, Mhatre Wadi, Borivali West, Mumbai, Maharashtra 400092
Who Should Enroll?
This course is ideal for:
Students after 10th, 11th, or 12th grade
Aspiring Graphic Designers
Individuals Seeking a Career Change into Creative Fields
Whether you're a beginner or have some experience, ZICA's curriculum caters to all skill levels.
Enroll Today and Start Your Creative Journey
Don't miss the opportunity to learn from industry experts and gain the skills needed to succeed in the competitive field of graphic design. Contact ZICA Borivali today to book a free demo class and take the first step towards a fulfilling career in design.
0 notes
Text
Why Choose Web Era Solutions for Graphic Design Services?

In today’s competitive digital world, design isn’t just about aesthetics—it’s about communication, branding, and creating an unforgettable first impression. Whether you’re a startup or an established business, having strong visual assets is crucial to success.
That’s where Web Era Solutions comes in. We are not just a digital agency—we are your creative partner in building a visual identity that speaks volumes. Here's why we are the go-to company for graphic design services that deliver real impact.
Creative Excellence That Captures Your Brand
Innovation is the driving force behind our work at Web Era Solutions. Our team of designers doesn’t just follow trends—they create them. Every design is tailored to reflect your brand’s story, voice, and audience.
Our creative capabilities include:
Custom logo design
Business cards, flyers, and brochures
Social media graphics
Website UI/UX designs
Infographics and illustrations
Corporate presentations and banners
We take time to understand your brand and ensure every design asset aligns with your vision and values.
Experienced & Professional Design Team
Our team of seasoned graphic designers brings years of industry experience and technical expertise to the table. They are proficient in:
Adobe Photoshop, Illustrator, InDesign
Figma and Adobe XD for UI/UX
Canva for fast social designs
CorelDRAW and Sketch for vector-based work
From pixel-perfect layouts to bold, artistic visuals—we have the skills to make your brand stand out.
Fast Turnaround Times with Zero Compromise
In business, time is money. We understand the importance of deadlines and pride ourselves on delivering creative work quickly without compromising on quality.
Why clients love our process:
Efficient project management
Quick revisions
Clear timelines and delivery schedules
Transparent communication at every step
You’ll always know what to expect and when.
Innovative, Trend-Driven Designs
Design is ever-evolving—and so are we. We stay updated with the latest graphic design trends, tools, and technology to ensure your visuals feel modern and fresh.
2025 design trends we implement:
Minimalist layouts with bold typography
3D and immersive visuals
Gradient overlays and dynamic color schemes
Responsive design for mobile and social platforms
Motion graphics and animated designs
Client-Centered Approach
What sets Web Era Solutions apart is our dedication to client satisfaction. We don’t just deliver what you ask—we guide you with our insights and ensure the final design exceeds your expectations.
We offer:
Free consultations
Collaborative feedback loops
Unlimited minor revisions
Friendly support and advice
“Web Era Solutions gave our brand a new life through their designs. Their creativity and dedication are unmatched.” – Priya T., Clothing Brand Owner
Affordable Packages for Every Business
We believe that high-quality design should be accessible to all businesses—big or small. That’s why we offer cost-effective graphic design services tailored to your budget.
Our packages include:
Startup kits (logo, business card, and social media kit)
Monthly design retainers for ongoing needs
One-time project-based pricing
Custom quotes for bulk or enterprise designs
Whether you need a single design or a full branding overhaul, we have a solution that fits.
Trusted by Brands Across Industries
Our customers are from a variety of industries, including:
E-commerce
Real estate
Health & wellness
Education
Hospitality
Technology startups
The same amount of enthusiasm, accuracy, and professionalism are given to every assignment.
Design That Converts
Beyond appearances, we prioritise designs that provide outcomes. Every banner, post, or brochure we create is crafted with a purpose—whether it's to:
Increase engagement
Improve brand recall
Drive more clicks
Generate leads or sales
Design isn’t just art—it’s strategy.
Final Thoughts
When you choose Web Era Solutions, you’re not just hiring a graphic design agency—you’re partnering with a creative powerhouse that’s passionate about helping your business grow.
Our blend of innovation, affordability, professionalism, and results-driven design makes us the smart choice for businesses that want to make a lasting impression.
Looking for the best graphic design services for your brand?
Let Web Era Solutions bring your ideas to life—beautifully and effectively.
0 notes
Text
The Lifecycle of a Patent Drawing: From Concept to Filing
Patent drawings are an indispensable part of a successful patent application. Whether you’re applying for a utility patent to protect functionality or a design patent to protect appearance, drawings help communicate your invention in a way that words alone cannot. But what’s the journey like from initial concept to the final version that’s submitted to a patent office?
In this article, we’ll walk through the complete lifecycle of a patent drawing, from the first sketch to the final, legally compliant illustration that supports your patent claim.
1. Conceptualising the Invention
Every patent drawing begins with a core idea: the invention itself. This is the stage where inventors:
Define the invention’s purpose and functionality
Identify its unique elements
Consider how to visually represent these features
At this point, inventors might use rough hand-drawn sketches, photos of prototypes, or digital mockups. These early visuals serve as a blueprint for the professional drafts that follow.
2. Gathering Reference Materials
Before engaging a patent drawing service, inventors or patent attorneys compile all necessary reference materials, such as:
Hand sketches or digital renderings
Engineering diagrams or CAD files
Product photos or 3D models
Notes about key features or moving parts
The more detailed and organised this material is, the more accurate and efficient the drawing process will be.
3. Choosing the Right Drawing Type
There are two major types of patent drawings, and the process varies slightly depending on the one you’re preparing:
Utility Patent Drawings: These focus on how the invention works. Views often include cutaways, cross-sections, and exploded diagrams.
Design Patent Drawings: These focus on how the invention looks. Multiple perspective views (top, bottom, front, rear, left, right, and isometric) are typically required.
Determining which type you're filing for helps define the visual approach, level of detail, and drawing style needed.
4. Hiring a Professional Patent Drawing Service
While some inventors attempt to create patent drawings themselves, most rely on professionals for a few good reasons:
Compliance with USPTO, EPO, or WIPO guidelines
Technical drawing expertise
Knowledge of required line weights, margins, labelling, and formatting
Professional illustrators use software such as AutoCAD, Adobe Illustrator, SolidWorks, or CorelDRAW to produce high-precision, legally compliant drawings.
5. Drafting the Initial Illustrations
The first formal version of the patent drawing is created based on the materials provided and in consultation with the inventor or patent attorney. This initial draft typically includes:
All required views (perspective, sectional, exploded, etc.)
Annotations or labels as needed
Appropriate line styles (solid, dashed, broken) to represent different features
This stage focuses on accuracy and completeness, with the goal of visually representing the invention in its entirety.
6. Review and Revisions
After the initial drawings are delivered, the inventor or attorney reviews them carefully to:
Ensure all features are represented correctly
Check compliance with patent office requirements
Request revisions or additional views if needed
Most professional services offer at least one or two free revision rounds. This collaborative phase ensures that the drawing effectively supports the written claims and specification.
7. Finalisation and Formatting
Once approved, the drawings are finalised. This step involves:
Applying consistent line thickness and shading
Adding proper figure numbers and labels
Ensuring spacing, margins, and dimensions meet submission standards
Exporting in correct formats (e.g., PDF, TIFF, DWG)
At this stage, the drawing is ready for submission and is often integrated into the patent application package by the patent attorney.
8. Submission with the Patent Application
The completed patent drawings are submitted alongside the patent specification and claims to the relevant patent office. Depending on the jurisdiction, the drawings must:
Be printed on specific paper sizes (like A4 or letter)
Include identification data (inventor name, application number)
Be in black and white, unless colour is explicitly requested and justified
Compliance at this stage is crucial; non-compliant drawings can lead to office actions, delays, or outright rejection.
9. Post-Filing Updates or Revisions (If Needed)
Sometimes, the patent examiner may request changes or clarifications after reviewing the application. This may include:
Adding new views
Correcting labelling errors
Enhancing clarity or removing unnecessary details
In such cases, updated drawings must be submitted promptly and in the same compliant format.
In a Nutshell
The lifecycle of a patent drawing is a structured, collaborative, and highly technical process. What starts as a rough sketch or idea must be transformed into a professional, legally acceptable illustration that supports the core of your patent claims.
Understanding this process ensures fewer delays, better compliance, and a stronger patent application for first-time inventors and seasoned professionals alike. Investing in high-quality patent drawing services can make all the difference between rejection and protection.
0 notes
Text
Best Graphic Designing Training in Bhubaneswar – Learn from the Experts at ProSkill Media School
Visual communication is the key to impactful marketing and branding. Whether you're a student, a job seeker, or an aspiring freelancer, learning graphic design can open doors to countless career opportunities. If you are searching for the Best Graphic Designing Training in Bhubaneswar, look no further than ProSkill Media School, Odisha’s trusted name in creative education.
🎓 Why Choose Graphic Designing as a Career?
Graphic designing is not just about aesthetics—it's about solving problems visually and making powerful impressions. With businesses shifting online, the demand for skilled designers is skyrocketing. From branding and advertising to social media and UI/UX design, the opportunities are endless. At ProSkill Media School, we understand the evolving design industry and equip our students with hands-on training, real-world projects, and professional tools to make them job-ready from day one.
🌟 What Makes ProSkill Media School the Best Graphic Designing Training Institute in Bhubaneswar?
What sets us apart is our industry-oriented curriculum, expert mentors, and practical learning approach. Here's what you'll get when you enroll in the Best Graphic Designing Training in Bhubaneswar at our institute:
In-depth training in Adobe Photoshop, Illustrator, CorelDraw, and Canva
Real-time project experience and portfolio development
One-on-one mentorship from experienced graphic designers
100% practical classes with doubt-clearing sessions
Internship and job assistance for all students
Flexible batch timings with both offline and online options

💼 Who Can Join Our Graphic Designing Course?
Whether you're a school/college student, a graduate, a homemaker, or a working professional, our course is designed for all skill levels. No prior experience is required—just a passion to create and learn. If you’re someone looking to start freelancing, launch your own design studio, or get placed in a reputed company, this course is your first step toward becoming a certified professional graphic designer in Bhubaneswar.
📍 Why Bhubaneswar is Emerging as a Hub for Creative Careers?
Bhubaneswar, the capital of Odisha, is fast transforming into an educational and creative hub. With rising startups, ad agencies, and tech companies, the demand for graphic design professionals in Bhubaneswar is higher than ever. ProSkill Media School is proud to lead this transformation by offering the Best Graphic Designing Training in Bhubaneswar with world-class facilities.
🚀 Enroll Today – Build Your Creative Future with ProSkill Media School
Ready to start your creative journey? Don’t miss the chance to learn from the best. Join ProSkill Media School today and gain the confidence to turn your imagination into impactful designs. We help you not just learn, but grow, practice, and succeed in the ever-evolving design industry.
For more information
Contact - 9777955252
Our address-16/A, Cuttack Rd, Budheswari Colony, Laxmisagar, Bhubaneswar, Odisha 751006
Our location- https://maps.app.goo.gl/1LGHbRHyPhixSmM8A
Our website- https://proskillmediaschool.in/
#GraphicDesigning#GraphicDesignCourse#LearnGraphicDesign#DesignSkills#PhotoshopTraining#CreativeDesign#VisualDesign
0 notes
Text
The Process Behind Neon Sign Board Design in Chennai
In the bustling streets of Chennai, one thing that grabs attention faster than anything else is a vibrant neon sign board design in Chennai. Whether it’s a cozy café in Besant Nagar, a trendy salon in T. Nagar, or a grand showroom in Anna Salai, neon signage has become the go-to branding element for businesses looking to stand out.
But what really goes into crafting these glowing masterpieces? Let’s walk through the detailed process behind neon sign board design in Chennai, so you know exactly what happens from idea to installation.
1. Understanding the Client’s Vision – The First Step in Neon Sign Board Design in Chennai
Every neon sign begins with a story. It could be a brand identity, a name, or even a quote. At TN Signs, the process starts with an in-depth discussion to understand the purpose, location, brand color, and design preferences. Whether the board is for a corporate office, a wedding setup, or a startup café, the aim is to translate emotion into design.
The uniqueness of neon sign board design in Chennai lies in its customization. Local brands often want Tamil typography, bilingual text, or a touch of cultural flair — and this is where the initial concept plays a vital role.
2. Designing the Layout – The Creative Blueprint
Once the vision is locked, the design team begins sketching out rough drafts and digital mockups. Using tools like Adobe Illustrator and CorelDRAW, designers experiment with fonts, colors, glow effects, and positioning.
This phase is crucial to ensure that the neon sign board design in Chennai fits its final location, whether it’s a wall-mounted display, window signage, or a hanging fixture. Customers are shown visual samples, and modifications are made based on their feedback.
3. Material Selection & Color Planning
Choosing the right material is a game-changer. High-quality neon flex, durable acrylic backing, stainless steel frames, and waterproofing coatings are carefully selected. In Chennai’s humid and coastal climate, selecting weather-resistant and heat-resistant materials is vital for long-lasting boards.
Since colors set the tone, designers ensure the selected shades match the brand palette. A glowing red for urgency, blue for trust, or even pink for a playful vibe — every neon sign board design in Chennai tells a visual story through light and color.
4. Fabrication – Where Art Meets Engineering
Once the design and materials are finalized, the real magic begins — bending the neon tubes or flex LED into precise shapes and letters.
At TN Signs, this is done using state-of-the-art equipment to ensure accuracy and safety. Every curve and angle is hand-checked to ensure it mirrors the digital design. Skilled technicians bring years of experience in fabricating complex shapes and fine detailing — especially for cursive fonts or logos.
The fabrication phase defines the visual impact and durability of the neon sign board design in Chennai.
5. Electrical Work and Quality Testing
A neon board isn’t just about design; it’s a powered device. Ensuring the safe operation of transformers, connectors, and wiring is essential. Our team performs rigorous testing to ensure uniform glow, zero flicker, and low power consumption.
Especially in neon sign board design in Chennai, where boards are often displayed for long hours, energy efficiency and low maintenance are key selling points. We ensure that every board passes electrical and quality checks before dispatch.
6. Installation at the Client’s Location
The final step is installing the signboard at the site — a crucial part of the process. Depending on the size and complexity, the TN Signs team ensures perfect alignment, secure mounting, and safe power connection.
From Chennai’s commercial buildings to small boutique interiors, we adapt installation methods accordingly. Our experts make sure that the glow effect looks as impactful as it did during the design phase — or even better.
If you’re looking for professional installation services, TN Signs offers end-to-end assistance for all types of neon sign board design in Chennai.
Why Custom Neon Sign Board Design in Chennai is Worth It
While ready-made signage may save a few bucks, a custom neon board is a one-time investment in your brand's visibility and identity. It enhances walk-in rates, makes your store Instagram-friendly, and gives you an edge over competitors.
Moreover, in a city as creative and colorful as Chennai, a custom-designed neon board makes your brand voice louder and brighter.
Final Thoughts
From concept development to final installation, the journey of neon sign board design in Chennai is a blend of creativity, technology, and craftsmanship. Each board is more than just glowing text — it’s an extension of a brand’s soul.
If you're a business owner, event planner, or startup in Chennai looking for a powerful visual identity, explore custom signage options with TN Signs — one of the leading names in neon sign board design in Chennai.
Let your brand shine — quite literally!
0 notes
Text
Unlock Your Creative Potential with the Best Graphic Designing Course in Lucknow
Are you passionate about design, colors, and visual storytelling? Do you want to turn your creativity into a successful career? If yes, then enrolling in a Graphic Designing Course in Lucknow is the perfect first step — and Design Gateway, a premier Graphic Design Training Institute in Lucknow, is your ultimate destination.
Why Choose Graphic Designing as a Career?
Graphic designing is one of the most in-demand skills in today’s digital age. From advertising agencies and media houses to IT firms and startups, almost every industry needs skilled graphic designers to communicate ideas visually. With the right training, you can pursue exciting roles such as logo designer, brand identity specialist, UI/UX designer, motion graphic artist, and more.
Why Design Gateway?
At Design Gateway, we focus on building a strong foundation for aspiring designers through hands-on training and real-world projects. As one of the leading graphic design institutes in Lucknow, we blend creativity with technology to help students master the art and science of design.
Here’s what sets us apart:
Industry-Driven Curriculum: Learn Adobe Photoshop, Illustrator, InDesign, CorelDRAW, Figma, and more — all tools that professional designers use.
Expert Mentors: Get trained by experienced industry professionals who bring real-life design knowledge to the classroom.
Live Projects & Internships: Work on real client briefs and build an impressive portfolio before you graduate.
Flexible Timings: Weekday and weekend batches available to suit students, working professionals, and freelancers.
Placement Assistance: We provide 100% placement support through tie-ups with top design studios, marketing agencies, and IT companies.
Who Can Join?
Whether you’re a student, freelancer, entrepreneur, or job-seeker, our graphic designing course in Lucknow is designed for all skill levels — from beginners to those looking to upskill.
Take the First Step Toward Your Creative Career
If you’re looking for a graphic design training institute in Lucknow that combines creativity, professionalism, and results — Design Gateway is your answer. Turn your imagination into impact and your passion into profession. Admissions are now open!
Contact Design Gateway Today and begin your journey in the world of design.
#graphic design training institute in Lucknow#graphic designing training in lucknow#graphics design#Graphic Designing Training in Lucknow
0 notes
Text
Graphic Designing Course in Rawalpini And Islamabad
FIT Computer Institute offers a comprehensive Graphic Designing Course in Rawalpindi and Islamabad designed to equip students with essential design skills using industry-standard software. This Course covers Adobe Illustrator, Adobe Photoshop, and CorelDRAW, providing learners with the tools and techniques needed to create professional-quality graphics.With experienced instructors and a practical learning environment,Enroll today and take the first step towards a successful career in graphic design with FIT’s trusted and affordable training in the heart of Rawalpindi and Islamabad.
Address:
2nd Floor, FIT Computer institute, Al-Mustafa Plaza, near Chandni Chowk, C Block Block C Satellite Town, Rawalpindi, Punjab 46000, Pakistan
Phone: +92 344 5701828
#graphicdesigningcourse#graphicdesigningcourseinrawalpindi#bestgraphicdesigningcourseinrawalpindi#bestgraphicdesigningcourse

0 notes
Text
Future Scope of Graphic designing & Multimedia Careers

Introduction
In today’s visually-driven world, graphic and multimedia design has become one of the most exciting and rewarding career options for creative minds. With digital media shaping communication across industries, the demand for skilled designers is higher than ever before.
Whether you’re a student passionate about visual storytelling or someone looking to switch careers, a graphic designing coursecan set you on the right path to a successful career.
Why Choose Graphic & Multimedia Design?
From advertising to entertainment, from web design to animation – graphic and multimedia design skills are needed across all major industries. These fields blend creativity with technology, allowing professionals to craft visual content that communicates, engages, and sells.
A graphic design course can help you master design software like Adobe Photoshop, Illustrator, InDesign, CorelDRAW, and even 2D/3D animation tools, which are must-haves in today’s market.
Top Career Opportunities After Graphic Design Courses
Once you complete your training at a Graphic Designing Coaching Institute in Yamuna Vihar, you can explore a wide range of job roles, such as:
Graphic Designer
UI/UX Designer
Motion Graphics Artist
Visualizer
Illustrator
Animator
Multimedia Developer
Web Designer
In fact, many professionals also work as freelancers or build their own design studios. The flexibility and income potential in this field are enormous with the right skills and portfolio.
Graphic Design Industry Outlook in India
India’s digital economy is booming, and visual communication plays a big part in it. Whether it's social media, e-commerce, education, or entertainment, everyone needs eye-catching design.
That’s why many students are enrolling in graphic designing classes to build strong foundational skills. Courses offered at Graphic Designing Training Institutes focus on hands-on learning with real-world projects to prepare students for industry demands.
Importance of Practical Training & Certification
If you’re considering a diploma in graphic design or short-term graphic design courses in Delhi, make sure the institute emphasizes software training, portfolio building, and industry-relevant skills.
Certification from a trusted graphic design institute in Uttam Nagar can enhance your resume and increase your job prospects.
Scope of Multimedia Design
Multimedia design is a broader field that covers animation, audio-visual production, interactive design, and more. It blends visual arts, storytelling, and technology to create engaging user experiences.
With rising demand in sectors like OTT platforms, advertising, gaming, and online education, the need for skilled multimedia designers has skyrocketed. That’s why courses from Multimedia Coaching Institutes are becoming increasingly popular.
Students can opt for a Multimedia Course in Delhi to learn animation software, audio-video editing, and interactive design tools – skills that can open doors to jobs in media houses, production companies, e-learning platforms, and more.
Where to Start Your Journey
If you're searching for the best graphic design course in Yamuna Vihar Delhi or graphic designing classes near me, it’s essential to choose an institute that offers:
Industry-experienced trainers
Modern lab infrastructure
Portfolio development guidance
Internship or placement assistance
Flexible batch timings
There are several graphic designing centres in Yamuna Vihar and graphic designing coaching institutes in Uttam Nagar offering beginner to advanced courses for students, graduates, and professionals alike.
Conclusion
The future of graphic and multimedia design careers is bright and full of creative opportunities. With industries going digital, the scope of skilled designers is only going to expand.
Whether you're located near Delhi, enrolling in a well-structured graphic designing training institute in Delhi can be your first step toward a high-growth and fulfilling career.
So if you're a student eager to explore the creative world, start with a graphic designing course in Yamuna Vihar or multimedia training in Uttam Nagar and turn your passion into a profession that shapes the digital future.
Suggested Links:
Adobe After Effects
Website Designing Training
Digital Marketing
Graphic Designing
#graphic designing course#graphic designing course in uttam nagar#graphic designing training in yamuna vihar#graphic designing course in yamuna vihar#photoshop editing course#multimedia course
0 notes