#Step-by-StepGuide
Explore tagged Tumblr posts
Visit Tumblr Blog
Explore Tumblr blogs with no restrictions, modern design and the best experience.
Last Seen Tumblr Blogs


Fun Fact
Tumblr has 4 main sources of revenue.
Text
I Made $60,000 in Sales Selling Simple Story Books. (STEP-BY-STEP GUIDE)
youtube
Welcome to Earn to Invest Academy, where I teach people the step by step process of how to generate wealth! 💰✨ Whether you're an entrepreneur, a digital creator, or someone looking to escape the 9-to-5 grind, this channel is your ultimate resource for building wealth online.
Each video is packed with actionable tips, detailed guides, and real-life strategies to help you start, grow, and scale your digital business. Ready to unlock your earning potential? Hit Subscribe and join the Earn to Invest community—where we transform ideas into wealth! 🚀
➡️ New videos weekly to help you make the most of today’s AI revolution. Start today, because your financial freedom is just one click away!
#earntoinvests#invests#step-by-stepprocess#step-by-stepguide#howto#howtogeneratewealth#empowers#content#financial#financialfuture#buildmultipleincome#income#achieve#success#Youtube
2 notes
·
View notes
Link
1 note
·
View note
Link
#BMV#BusinessExpansion#Entrepreneurs#MexicanStockExchange#Mexico#securitiesbasedloans#Step-by-StepGuide
1 note
·
View note
Text
Exploring the Majestic Gorilla Yoga Pose

Exploring the Majestic Gorilla Yoga Pose Read the full article
#FlexibilityandStrength#GorillaYogaPose#Mindfulness#PhysicalandMentalBenefits#PrimalPower#Step-by-stepguide
0 notes
Text
Welcome to The Vector Graphic Store!

We’re excited to announce the beginning of something extraordinary here at The Vector Graphic Store! As we start building this site, we’re working tirelessly to create a hub for all things graphic design, art, and digital creativity. Whether you're an artist, designer, or just someone passionate about creative content, The Vector Graphic Store will soon become your go-to resource. In the near future, we’ll be launching a range of in-depth articles, including: - Graphic Design News: Stay up-to-date with the latest trends and innovations in the design world. You can sign-up for our newsletter to receive exclusive graphics that won't be added to the website, along with insider news, and valuable insight into the world of commercial art & design. - Art Tutorials: From beginners to advanced designers, we’ll have step-by-step guides to help enhance your skills. - How-To Articles: Learn new tools, techniques, and methods for creating vector graphics and digital artwork. - Exclusive Content: Be on the lookout for special features that dive deep into the art of digital creation. But that’s not all! Our goal is to build a thriving community of creatives, offering insights and resources you won’t find anywhere else. As we continue to grow, expect even more exciting content, including exclusive interviews, spotlights on designers, and industry tips to keep your inspiration flowing. We can't wait to share this journey with you as we prepare to officially launch. Stay tuned for more updates, and get ready to dive into a world of design and creativity at The Vector Graphic Store! Follow us for upcoming news, tutorials, and the official launch date announcement! Read the full article
#artcommunity#arttutorials#creativecontent#creativeinspiration#designinnovations#designnewsupdates#designtechniques#designtips#designerinterviews#digitalartwork#digitalcreationtools#digitalcreativity#exclusivecontent#graphicdesignnews#graphicdesignresources#graphicdesigntrends#how-toarticles#step-by-stepguides#TheVectorGraphicStore#vectorarttutorials#vectorgraphics
0 notes
Text
Simplify the LLP registration process with Vyapar’s expert assistance. We make it easy for you to set up your Limited Liability Partnership quickly and correctly. Get professional support, complete documentation, and hassle-free registration. Start your LLP journey today with Vyapar!
0 notes
Video
tumblr
20ft expandable container house: step by step guide 20ft expandable container house: step by step guide In this video, I'll show you 20ft expandable container house: step by step guide. It's essential for every to understand how to 20ft expandable container house: step by step guide. Enjoy and subscribe this video! #20ftexpandablecontainerhouse #stepguide #DXprefabhouse #bentleyhouseproductions #containerhouse #awnieshouse #Container #dockercontainer #luxuryexpandablecontainerhouse #AskThisOldHouse
0 notes
Text
How to register as Patent Agent in India: Step-by-Step Guide

This article on 'How to get Registered as a Patent Agent in India' was written by Shruti Korgaonkar, an intern at Legal Upanishad.
Introduction
The subject of intellectual property law (IP) is expanding rapidly. We are seeing a paradigm shift where businesses are shifting their focus from purchasing physical assets like land and machines to acquiring intellectual assets. Startups and R&D facilities, which are nothing more than intellectual inventions, are proliferating in India. The goal of intellectual property law is to safeguard your intellectual property and allow you to profit from it. People defend their creations. They require an additional group of individuals to deal with this universal human inclination. Let's discuss in-depth Patent Agents and its qualification.
Patent Agent in India
A person who is registered as a patent agent according to Section 2(n) of the India Patent Act, 1970 is referred to as a patent agent. Who qualifies as a patent agent is defined under the statute. In simple words, the definition implies"a person who files the patent application." The patent agent is in charge of the procedure involved in putting together a patent application. In other words, he assists anybody seeking a patent with the document preparation process, including the drafting, submission, and prosecution of an application before the controller. According to the 2003 Patent Rules, a Patent Agent is required to be registered for practicing. Before the Indian Patent Office, the patent agent must file a Form 22 application for registration as a patent agent. The information of the registered Patent Agent should be added to the Register of Patent Agents, which is kept by the Controller, following the Indian Patent Office's approval of the application. All of the registered patent agent's information, including name, address, and other crucial facts, should be included in the Register of Patent Agents.
Who is Qualified to Become a Patent Agent Patent Agent in India?
Criteria mentioned in Section 126 of the said act shall be met to be registered as a Patent Agent in India. The qualification required is as follows: - He should be a citizen of India; - Should have completed 21 years of age; - He must have earned a degree in Science, Engineering, or Technology from a university recognized by law as being currently in effect in the Indian subcontinent, or hold other equivalent credentials as determined by the Central Government. Final-year students are also eligible to apply as long as they can provide their degree certificate and complete mark sheet within two months of the announcement of the patent agent examination. - He must have paid the required fees. - He must have completed the required qualifying examination, passed it, and either served as an examiner, carried out the Controller's duties under Section 73, or both, for a total of at least 10 years. However, he must no longer hold any such position at the time the registration application is submitted. Prior to the act's 2005 amendment, a person was required to have a degree in law in addition to a specific degree in one of the fields listed under clause (c). Through the amendment of 2005, this requirement was eliminated.

Register as Patent Agent in India
The procedure for registration
Step 1: Application for examination for registration A person who wants to register as a patent agent in India must ask the Controller to appear for the qualifying examination, according to Rule 109 of the Patents Rules, 2003. The applicant must write a letter to the closest patent office with this request made in it and address it to the Controller. The letter must be provided with the necessary paperwork, including citizenship and age proofs, in accordance with Section 126(1)(c) of the Patents Act of 1970 After paying the required fee as specified in the First Schedule, the requests must be made. The Government of India's official website specifies the timeframe for making such payments. The Controller must receive the registration together with the payment information. Also, there is no restriction on how many times a person can apply for the qualification of the examination. Step-2 Passing the qualifying examination For the qualifying examination, a candidate must meet the requirements outlined in Section 126 of the Patents Act of 1970. The qualifying examination's specifics are listed in Rule 110 of the Patents Rules, 2003, and are as follows: The office of the Controller administers a written test that consists of two papers at 100 points each. The questions on Paper-I concern the patent legislation and its regulations. Questions about the development and interpretation of patent specifications and other related papers are included in Paper II. A viva, which carries 50 marks, is held to assess the applicant's practical expertise. The candidate must receive a minimum of fifty points on the written test and a combined total of 60 percent of the possible points in order to pass the qualifying examination. Once a year, the Indian Patent Examination is held. Two months prior to the scheduled exam date, candidates get notified of the exam. Results of the qualifying examination are released on the official website developed by the Indian government. Step 3: The controller registers patent agents In accordance with Rule 111 of the Patents Rules, 2003, the Controller enters the applicant's name in the register of Patent Agents and issues a certificate of registration to him after the application has been submitted to the Controller office in the prescribed format and the applicant has successfully completed the qualifying examination and has the credentials required by Rule 110. Only the territory of India is the scope of the registration certificate's applicability.
Register of Patent Agent in India
In line with Section 125 of the Act and Rule 108 of the Rules, the Controller is responsible for maintaining the register of Patent agents. The information that must be recorded in the register includes: - Name - Nationality - Address of the main office and the locations of any branch offices. - Each patent agent's credentials and the time of their registration. - Any further information that the Controller thinks necessary and appropriate, including information about their registration renewal, must be provided. To maintain registration, the fee must be paid at the conclusion of each fiscal year. Generally speaking, the date of the fee for the continuation is calculated from the date of registration as a patent agent. Every year, a notice is published on the official website outlining the method of paying the required fees as well as other information, such as the hotline number to call in the event of payment errors or other procedural concerns. After the first registration, the registration is renewed annually. However, the fees for continuation can be paid at the time of registration. - Specimen signatures and photographs of the individuals listed as patent agents. - Furthermore, each branch office must retain a copy of the Register of Patent Agents. Additionally, subject to any applicable precautions that may be mandated in this respect, the Controller may retain such facts on computer floppies, diskettes, or in any other electronic format. That is, only those who have been properly allowed by the Controller may access it, and anybody who has not received such authorization from the Controller is not permitted to make any entries, changes to any entries, or corrections to any entries in the said register.
Conclusion
Patent agents in India are in high demand as the field of intellectual property law develops. Since they have the necessary knowledge and experience in that area, those who want to get a patent registration frequently engage a patent agent. To practice as a patent agent in India, one must register in accordance with the legal requirements. Although drawn out, the registration process for patent agents is straightforward. Anyone in India with the necessary credentials can work as a patent agent.
Bibliography
- Aishwarya SM and Sangini Nagpal, "What do patent agents do and how can you become a patent agent in India?", iPleaders Blog, 7 November 2019, available at: https://blog.ipleaders.in/patent-agents-become-patent-agent-india/ - Tripti Khiwal, "Procedure for Registration of Patent Agents in India", Biz Advisor, 17 December 2021, available at: https://www.bizadvisors.io/learning/procedure-for-registration-of-patent-agents-in-india/ Read the full article
0 notes
Text
Enroll in PresentationsSkills Training Coursesto Bring Out theCompelling Speaker in You
If you are a public speaker or believe in delivering powerful presentations that make a difference, you need to always keep polishing your skills. It is always beneficial to add an extra string to your bow especially when speaking in front of others. Practicing and polishing your presentation skills that includes developing a coherent structure, writing for flow and impact, speaking convincingly and authentically, will not only engage your audience, but it will provoke a positive response. All you need is a hands-on course that teaches you effective strategies to apply.
The first question to ask before you enroll in an Effective Presentations Training Workshop is why you need one?
A persuasive public speaking skills seminar will help you in every facet of your career, whether you are speaking to management about a business plan, your team, a large audience, or needing to convince business partners or clients. A good training can open doors to share your ideas effectively with the audience.
Here's how the course at the International Presentation Academy will help you:
Experts will speak about -
Bringing the right structure to your content.
Bringing clarity on your purpose.
Keeping content around audience needs.
Story-telling ideas to make presentations more interesting.
Building understandable content in memorable key points.
Supporting your presentation with viewer-friendly visuals – that allow you to still speak authentically.
Adapt your presentation message, in content and style, to specific cultures around the world.
You will be thoroughly trained after taking our Presentations Skills Workshop - Deutschland from the International Presentation Academy. The training will not only help you with working on the content structure but also show you how to deliver it – with different factors such as speaking freely as part of your training.
The sessions will be conducted by experts who not only are experienced trainers, but are also polished speakers themselves.
What Can You Expect From 2-Day Workshop?
This is a 2-day Presentations Training where the professionals help you in a step-by-stepguided approach which includes lots of practice – and personal feedback from the trainer. The several voice and speaking exercises will bring out a confident speaker in you.
If you are also looking for an Effective SalesPresentation Training Workshop, this is the course that will help. There's room for improvement with personalized feedback, input sessions and real-time practice. You will also learn how to adapt your message to specific markets in our section on Intercultural Presentations Training. Every participant will learn the helpful methods in this program – that will serve you throughout your career. We invite you to join this workshop, with our proven methods.It is one of the best programs that you’ll find to pursue effective presentation skills at home or internationally. For more information, contact: [email protected]
1 note
·
View note
Text
1 note
·
View note
Text
How to make pizza dough
A great pizza starts with a great dough, this is the foundation on which the rest of the ingredients rest and will determine the success of your pie. Our step-by-stepguide will teach you how to make a basic easy pizza dough recipe. We provide you the proper tips and guidance for how to make pizza dough. For more information, visit us at Homepizzaparlor.
0 notes
Text
Exploring the Half Moon Yoga Pose: Balance, Strength, and Inner Harmony

Exploring the Half Moon Yoga Pose: Balance, Strength, and Inner Harmony Read the full article
#Alignment#Balance#Breath#EmotionalWell-being#HalfMoonYogaPose#InnerHarmony#MentalWell-being#Modifications#PhysicalBenefits#Preparations#Step-by-stepguide#Strength#Tips#Variations
0 notes
Text
youtube
#aibusiness #makedigitalmoney #makemoneyonline via Earn to Invests https://www.youtube.com/channel/UC6cyTg470eyTk9L7PYnADSw January 20, 2025 at 10:31AM
#earntoinvests#invests#step-by-stepguide#howtogeneratewealth#financial#financialfuture#wealth-building#wealth-buildingjourney#Youtube
0 notes
Text
Create your website in just 5 steps.

For the past few weeks, I have been getting emails from different people asking me to explain step by step on how I actually started my website. Today I will show you how to create your website in just 5 steps. Normally this should have been my first article, but this step-by-step guide took me a bit longer then expected. I do apologize for the delay in publishing this post. Let’s get started.
How to create your website in just 5 steps?
Creating your own website is not hard at all. Within the next two hours you can have a simple website up and running. You just need to have a Domain name, a (shared) Hosting account and a website builder or WordPress. With those 3 components, you create your website and you are online. That was easy wasn’t it? So far you have created your website and the easy part is done. The only thing remaining would be to get your ‘valuable’ content into your website and you are good to go… It seems just too simple doesn’t it? As I have mentioned in my previous articles, creating, and most importantly maintaining your website to be valuable and interesting requires hard work. Before you think of creating a website you will need to make sure you will put in time and effort in order for it to work. You need to consider it as work, your own brand new company in where you are the CEO and founder.
STEP 1: Why do you want to create a website?
Open a sticky note or notepad so you can take some notes while reading through this. The first question you will need to ask yourself even before you choose a domain name is: What is your website going to be about? For me, and this is the honest truth, I wanted to help people and make money. Those were the two reasons why I wanted to start my website. There are millions of ways to help others on the internet but I have decided to make this about my journey and to share with you all the ups and downs I come across while doing this. It is now up to you to think about what YOU would like to write about. What are you very good at? Are you passionate about something in particular? Do you prefer writing product reviews (where you can promote affiliated products)? Just take about a good 15 minutes to think about this and just type/ write down anything that comes into your mind.

15 minutes later…. So know that you have chosen what your website is going to be about, it is time to go to step 2 of you journey to create your website in just 5 steps.
STEP 2: Choose your domain name.
Choosing a domain name can be a time-consuming and hair pulling experience! You might already have several names into your brightly focused mind on how to call your website, but to check if your name is still available?

What is important in this step is that when you have created your domain name, you will NOT be able to change it afterwards. If this should happen, you will be able to unregister that particular domain (so you are no longer the owner of it) and purchase the correct one, if that one is available! My recommended websites for Domain names are Namecheap.com and Bluehost.com. They both are much respected providers which have excellent customer services and everything you need to do is explained to the dot on their website. Personally I have purchased my domain name with Namecheap.com. Namecheap.com was more cost effective as per my budget at the time of purchase. Please check them both out and I will leave it up to you which fits you best. In both of them you will be able to enter your desired domain name and check for its availability. If it is available, just click on the purchase button and follow the steps to buy. Namecheap.com Go to Namecheap.com and enter your desired domain name. Click search to find out if your chosen name is still available.
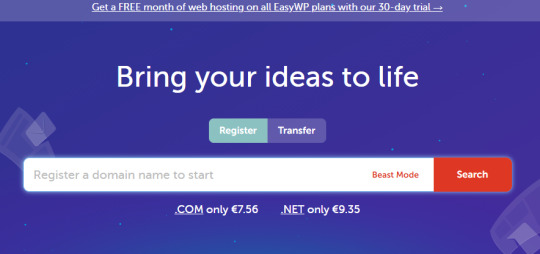
Or go to Bluehost.com. Enter your domain name and click on check availability. Depending on your needs, I would advice to take the domain name for at least 2 years. This is entirely up to you! Once you have created your account and purchased your domain, you are now the proud owner of your very own website !

Congratulations!!
STEP 3 Choose your Hosting account.
Again I will only talk about my two preferred websites and you all know that I went with Namecheap.com for both my Domain name and my shared hosting account (as per my personal budget). One of the best advises that I can give you, if you are a beginner like me, is to purchase the domain and the shared hosting account as a bundle. This will be more cost effective (if you are on a budget) and for a beginner like me, it is way easier to contact support if I need to in one place, rather than two. Please see below the bundle offers for both of the websites. I would like to add that these are my affiliated links. This means that when you click on the link and purchase the product, I will make a commission at NO extra cost to you! ( Later on I will explain as well how you can do the same)


So you have now purchased your Domain name and your Hosting account. You are now a proud owner of your very own Website. Congratulations and welcome to the new website owner…. Hooray to YOU!
Step 4: Creating your website for real.
When you have completed the first 3 steps, you are now in the possession of a domain name and your shared hosting account. Either Bluehost or Namecheap has sent you an email with every single detail you need to know about both your domain and hosting and keep this email safe. You never know when you might need it! You now have everything you need to start your brand new website. Take a 5 to 10 minutes break. Take that time to think how you visualize your website, how you want it to look!

STEP 5: Start creating
Now it is time for you to have some fun. With both Bluehost and Namecheap, you will be able to use a simple Website builder to start building your website. These are basically drag and drop functions you can use and it is really user friendly. How to use the website builder in Namecheap: https://www.youtube.com/watch?v=0AhWIMGNMfU Although those are very good tools for a beginner to create your website, WordPress is still my favorite to use. With WordPress, you have tons of plugins which will make your life easier. The major websites has been built with WordPress and their compatibility is just enormous. I have personally used WordPress to create my website but as this is your website, you will choose how to structure and create it. How to use website builder (Wordpress) in Bluehost https://www.youtube.com/watch?v=dG0bmozea6g How to use wordpress with namecheap https://www.youtube.com/watch?v=vQ0RCh-iVy4 There you go. You now have all the information necessary in order to continue creating and designing your website. Go and explore your possibilities and make this your piece of art! You know know how to create your website in just 5 steps! Make sure that when you add content, you make this content valuable towards your audience and stick to your Niche (what you have decided that your website is going to be out). When you change your Niche in the middle of the website, your audience might get confused and may not return. Be careful because this can make or break your website! Let me know how this is going for you so far. To do so, go to my contact page and pop me a message. You will get a reply from me! In the next article, I be talking about getting you signed up to your very own affiliated program. You can search for products to promote in relation to your niche, and can start earning some money from your website. Read the full article
0 notes
Text
Create your website in just 5 steps.

For the past few weeks, I have been getting emails from different people asking me to explain step by step on how I actually started my website. Today I will show you how to create your website in just 5 steps. Normally this should have been my first article, but this step-by-step guide took me a bit longer then expected. I do apologize for the delay in publishing this post. Let’s get started.
How to create your website in just 5 steps?
Creating your own website is not hard at all. Within the next two hours you can have a simple website up and running. You just need to have a Domain name, a (shared) Hosting account and a website builder or WordPress. With those 3 components, you create your website and you are online. That was easy wasn’t it? So far you have created your website and the easy part is done. The only thing remaining would be to get your ‘valuable’ content into your website and you are good to go… It seems just too simple doesn’t it? As I have mentioned in my previous articles, creating, and most importantly maintaining your website to be valuable and interesting requires hard work. Before you think of creating a website you will need to make sure you will put in time and effort in order for it to work. You need to consider it as work, your own brand new company in where you are the CEO and founder.
STEP 1: Why do you want to create a website?
Open a sticky note or notepad so you can take some notes while reading through this. The first question you will need to ask yourself even before you choose a domain name is: What is your website going to be about? For me, and this is the honest truth, I wanted to help people and make money. Those were the two reasons why I wanted to start my website. There are millions of ways to help others on the internet but I have decided to make this about my journey and to share with you all the ups and downs I come across while doing this. It is now up to you to think about what YOU would like to write about. What are you very good at? Are you passionate about something in particular? Do you prefer writing product reviews (where you can promote affiliated products)? Just take about a good 15 minutes to think about this and just type/ write down anything that comes into your mind.

15 minutes later…. So know that you have chosen what your website is going to be about, it is time to go to step 2 of you journey to create your website in just 5 steps.
STEP 2: Choose your domain name.
Choosing a domain name can be a time-consuming and hair pulling experience! You might already have several names into your brightly focused mind on how to call your website, but to check if your name is still available?

What is important in this step is that when you have created your domain name, you will NOT be able to change it afterwards. If this should happen, you will be able to unregister that particular domain (so you are no longer the owner of it) and purchase the correct one, if that one is available! My recommended websites for Domain names are Namecheap.com and Bluehost.com. They both are much respected providers which have excellent customer services and everything you need to do is explained to the dot on their website. Personally I have purchased my domain name with Namecheap.com. Namecheap.com was more cost effective as per my budget at the time of purchase. Please check them both out and I will leave it up to you which fits you best. In both of them you will be able to enter your desired domain name and check for its availability. If it is available, just click on the purchase button and follow the steps to buy. Namecheap.com Go to Namecheap.com and enter your desired domain name. Click search to find out if your chosen name is still available.

Or go to Bluehost.com. Enter your domain name and click on check availability. Depending on your needs, I would advice to take the domain name for at least 2 years but this is entirely up to you! Once you have created your account and purchased your domain, you are now the proud owner of your very own website !

Congratulations!!
STEP 3 Choose your Hosting account.
Again I will only talk about my two preferred websites and you all know that I went with Namecheap.com for both my Domain name and my shared hosting account (as per my personal budget). One of the best advises that I can give you, if you are a beginner like me, is to purchase the domain and the shared hosting account as a bundle. This will be more cost effective (if you are on a budget) and for a beginner like me, it is way easier to contact support if I need to in one place, rather than two. Please see below the bundle offers for both of the websites. I would like to add that these are my affiliated links. This means that when you click on the link and you purchase the product, I will make a small commission on this at NO extra cost to you! ( Later on I will explain as well how you can do the same)


So you have now purchased your Domain name and your Hosting account. You are now a proud owner of your very own Website. Congratulations and welcome to the new website owner…. Hooray to YOU!
Step 4: Creating your website for real.
When you have completed the first 3 steps, you are now in the possession of a domain name and your shared hosting account. Either Bluehost or Namecheap has sent you an email with every single detail you need to know about both your domain and hosting and keep this email safe. You never know when you might need it! You now have everything you need to start your brand new website. Take a 5 to 10 minutes break. Take that time to think how you visualize your website, how you want it to look!

STEP 5: Start creating
Now it is time for you to have some fun. With both Bluehost and Namecheap, you will be able to use a simple Website builder to start building your website. These are basically drag and drop functions you can use and it is really user friendly. How to use the website builder in Namecheap: https://www.youtube.com/watch?v=0AhWIMGNMfU Although those are very good tools for a beginner to create your website, WordPress is still my favorite to use. With WordPress, you have tons of plugins which will make your life easier. The major websites has been built with WordPress and their compatibility is just enormous. I have personally used WordPress to create my website but as this is your website, you will choose how to structure and create it. How to use website builder (Wordpress) in Bluehost https://www.youtube.com/watch?v=dG0bmozea6g How to use wordpress with namecheap https://www.youtube.com/watch?v=vQ0RCh-iVy4 There you go. You now have all the information necessary in order to continue creating and designing your website. Go and explore your possibilities and make this your piece of art! You know know how to create your website in just 5 steps! Make sure that when you add content, you make this content valuable towards your audience and stick to your Niche (what you have decided that your website is going to be out). When you change your Niche in the middle of the website, your audience might get confused and not return to your website. Be careful because this can make or break your website! Let me know how this is going for you so far. To do so, go to my contact page and pop me a message. You will get a reply from me! In the next article I will be talking about getting you signed up to your very own affiliated program so you can search for products to promote in relation to your niche so you can start earning some money from your website. Read the full article
0 notes