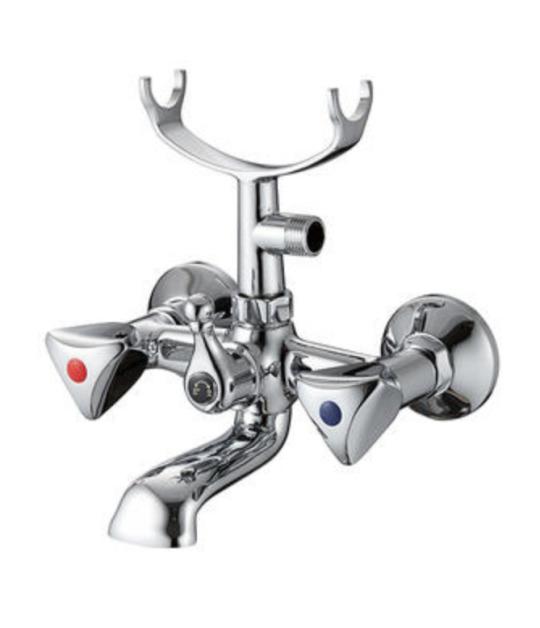
#Teflon Lined Pipes
Text
Teflon lined pipes are essentially standard pipes that are lined with a layer of Teflon, a brand name for polytetrafluoroethylene (PTFE). Teflon is known for its exceptional chemical resistance and non-stick properties.
0 notes
Text
#Teflon Lined Pipes#Concentric Eccentric Reducers#PTFE Slide Bearings#PTFE Lined Pipes#PTFE Expansion Joints#PTFE Pipes And Fittings#Lined Pipe Fittings#Lined Pipe Manufacturers#Sparger Manufacturer In India#Dip Pipes Suppliers#PTFE Lined Pipe Manufacturer#PTFE Lined Pipe Suppliers#PTFE Lined Pipes and Fittings#PFA molded fittings near me
1 note
·
View note
Note
I know you don't like Twitter, and I'm not sure how much of this has leaked into the mainstream, but Republicans are *freaking out* because gas stoves aren't all that healthy for kids and aren't great for the environment. And obviously electric stoves are terrible. Someone started talking about induction burners, and isn't that what you use? Or did once? Does it work really well? Or was it just better than what you had?
Yep, when I moved out of my old place (gas stove) and into my new place (elderly electric stove in a much smaller kitchen) I bought an induction burner and set it up. FWIW, Republicans are not the only ones freaking out -- pretty much every news outlet I've seen has covered the issue, some ongoing for weeks now. So it behooves us to talk about alternatives!
Point to know: the study found that gas stoves are dangerous because they tend to leak significant parts per million into the air when not turned on -- ie, they don’t have good seals against leakage when they aren’t in operation. In a well-ventilated home this is not a huge deal, but it’s still not great. What this means is that simply buying and using an induction burner instead of your gas stove is not a solution -- you need to have the gas line capped and/or gas turned off completely, in order to solve the issue.
Anyway, you can get a full induction stovetop (they're not cheap) and I've never worked with those, but the more common setup is a single induction burner that plugs into the wall, basically like a hot plate, but with the control, heat, and speed of a gas burner. That's what I have; I'm on my second, since my first wore out. They run about $40-$100 for a single burner. I got a decent one from Ikea of all places. When not in use, I hang it on a hook on the wall to make counter space, which is nice.
Induction burners do not in themselves get hot; they use magnetism to heat the pan sitting on them, which does get hot. Food cooks at roughly the same speed as it would on a gas stove, and you can control the heat in much the same way, although most induction burners have a digital touchpad where you raise or lower the temperature rather than a knob. The single burners can be a bit noisy -- “have to turn my podcast up while cooking” noisy though, not like “jet engine” noisy.
I don't really understand how they function other than “magnets are involved”. The downside of an induction burner is that there are limits to the pans you can use. The pan has to be made of a metal that is reactive to magnets -- so I can't use my lovely spun aluminum pans or the ceramic pans I have, and most nonstick pans don't work (teflon's bad for you anyway but sometimes you just need a damn nonstick pan). If you have an induction range or want to cook on an induction burner you need to take a magnet with you if you shop for pans, because if the magnet won't stick the pan won't work on the burner. Cast iron does work on induction burners, as do most steel and steel-clad pans.
I love my induction burner. I'd love to get a full induction stove but it just wasn't in the cards this time around, and electric stoves have come a long way so I’m not displeased with my electric stove. The induction burner I have works great, heats fast, functions like a gas stove in pretty much every respect, it just doesn't have an open flame and some of my pans don't work on it. Can recommend, especially if you are sensitive to gas or live in a home not piped for gas, it's a great way to go. Not cheap, but worth the cost.
214 notes
·
View notes
Text
Installing a Gas Line for Your Kitchen Stove: A Step-by-Step Guide
Installing a gas line for your kitchen stove can be a precise but rewarding project if done correctly. Follow these steps to ensure a safe and efficient installation:
Turn Off the Gas Supply: Begin by shutting off the main gas supply to avoid any leaks or accidents.
Plan the Gas Line Route: Determine the shortest, most direct route from the main gas line to the stove.
Install the Shut-Off Valve: Attach a shut-off valve to the main line where the new line will branch off.
Measure and Cut the Pipe: Measure the required length of pipe and cut it to size using a pipe cutter.
Connect the Pipes: Use pipe fittings and connectors to attach the new line, ensuring a tight fit.
Seal the Connections: Apply pipe thread sealant or Teflon tape to prevent leaks.
Test for Leaks: Turn the gas back on and use a soap and water solution to check for any leaks along the connections.
Install the Stove Connection: Attach the line to your stove, ensuring it's securely connected.
Test the Stove: Finally, test the stove to make sure the gas is flowing properly and that there are no issues.

1 note
·
View note
Text
Exploring the Versatility of Hoses in Industrial and Domestic Applications
Hoses are indispensable components in both industrial and domestic settings, offering flexibility, strength, and durability for a wide range of applications in drainage pipes and fittings. From garden hoses used at home to high-pressure industrial hoses used in manufacturing, the versatility of hoses makes them essential tools in various sectors. This article explores the different types of hoses, their applications, and the benefits they offer.

Types of Hoses
1. Garden Hoses
- Material: Typically made from vinyl, rubber, or a combination of both.
- Applications: Used for watering plants, cleaning outdoor areas, and filling pools with the foot valve.
- Benefits: Lightweight, flexible, and easy to store. Rubber hoses are more durable and resistant to kinks and abrasions compared to vinyl.
2. Industrial Hoses
- Material: Made from a variety of materials including rubber, PVC, polyurethane, and hybrid compounds.
- Applications: Used in manufacturing, construction, and transportation for tasks such as conveying air, water, chemicals, and bulk materials.
- Benefits: High durability, resistance to harsh chemicals, and the ability to withstand extreme temperatures and pressures.
3. Air Hoses
- Material: Made from rubber, PVC, or polyurethane.
- Applications: Used to convey compressed air in pneumatic tools, paint sprayers, and HVAC systems.
- Benefits: Flexible, lightweight, and designed to handle high pressure.
4. Hydraulic Hoses
- Material: Typically made from synthetic rubber and reinforced with layers of braided steel wire.
- Applications: Used in hydraulic systems to transmit fluid power in machinery, automotive systems, and heavy equipment.
- Benefits: High strength, flexibility, and the ability to handle high-pressure fluids.
5. Chemical Hoses
- Material: Made from materials resistant to corrosive chemicals, such as PTFE (Teflon), EPDM, or UHMWPE.
- Applications: Used in chemical plants, laboratories, and industries dealing with hazardous materials.
- Benefits: Resistance to a wide range of chemicals, high flexibility, and durability.
6. Food-Grade Hoses
- Material: Made from non-toxic materials like silicone or PVC and compliant with FDA standards.
- Applications: Used in food and beverage industries for transferring consumable liquids and solids.
- Benefits: Safe for food contact, flexible, and easy to clean.
Applications of Hoses
1. Domestic Applications
- Watering and Irrigation: Garden hoses are essential for maintaining gardens, lawns, and landscapes.
- Cleaning: Hoses are used in pressure washers for cleaning driveways, patios, and vehicles.
- Plumbing: Flexible hoses are used for connections in sinks, toilets, and washing machines.
2. Industrial Applications
- Manufacturing: Industrial hoses are used to transport air, water, and chemicals in manufacturing processes.
- Construction: Hoses are used in pneumatic tools, water delivery systems, and concrete pumping.
- Agriculture: Hoses are crucial for irrigation systems, chemical spraying, and transferring agricultural products.
3. Automotive Applications
- Fuel Systems: Hoses are used to transfer fuel from tanks to engines.
- Cooling Systems: Radiator hoses are essential for circulating coolant to maintain engine temperature.
- Brake Systems: Hydraulic hoses transmit brake fluid in vehicle braking systems.
4. Healthcare Applications
- Medical Devices: Hoses are used in various medical devices, such as oxygen delivery systems and fluid transfer in IV lines.
- Laboratories: Chemical-resistant hoses are used for transferring reagents and samples.
Benefits of Using Hoses
1. Flexibility
- Hoses offer excellent flexibility, allowing them to be used in various configurations and tight spaces. This is especially important in applications where rigid pipes would be impractical.
2. Durability
- Modern hoses are designed to withstand harsh conditions, including high pressure, extreme temperatures, and exposure to chemicals. This durability ensures long service life and reliability.
3. Versatility
- Hoses are available in a wide range of materials and designs, making them suitable for a multitude of applications, from simple garden watering to complex industrial processes.
4. Ease of Installation
- Hoses are relatively easy to install and replace compared to rigid piping systems. This ease of installation reduces downtime and maintenance costs.
5. Cost-Effectiveness
- Hoses can be a more cost-effective solution than rigid pipes, especially in applications requiring flexibility and frequent reconfiguration.
6. Safety
- In many applications, hoses provide a safer alternative to rigid piping, especially in systems dealing with high pressure or hazardous materials. Flexible hoses can absorb vibrations and movements, reducing the risk of leaks and failures.
Hoses are versatile and essential components in both industrial and domestic settings. Their flexibility, durability, and adaptability make them ideal for a wide range of applications, from watering gardens to transporting chemicals in manufacturing plants. Understanding the different types of hoses and their specific benefits helps in selecting the right hose for each application, ensuring efficiency, safety, and longevity. As technology advances, the development of new materials and designs will continue to enhance the versatility and performance of hoses, further expanding their role in various industries.
0 notes
Text
Importance of Angle Stop Corks
An angle stop cork, also known as an angle stop valve or angle shut-off valve, is a type of valve used in plumbing systems to control the flow of water to a specific fixture or appliance.
Installing an angle stop cork is a straightforward process that can be done by a professional plumber or a DIY enthusiast with some basic plumbing knowledge. The following steps outline the general procedure for installing an angle stop cork:
Turn Off the Water Supply: Before starting any installation, ensure that the water supply to the area is turned off to prevent any accidents.
Locate the Pipe: Identify the pipe that supplies water to the fixture or appliance where the angle stop cork will be installed.
Cut the Pipe: Using a pipe cutter or a hacksaw, cut the pipe at the desired location for the angle stop cork.
Debur the Pipe: Smooth the cut edges of the pipe to remove any burrs or sharp edges that could damage the seal of the angle stop cork.
Apply Thread Sealant: Apply a layer of thread sealant, such as Teflon tape or pipe joint compound, to the threads of the angle stop cork.
Attach the Angle Stop Cork: Screw the angle stop cork onto the pipe, ensuring that it is tightened securely but not overtightened, which could damage the threads.
Connect the Fixture: Attach the water supply line from the fixture or appliance to the outlet of the angle stop cork.
Test for Leaks: Turn the water supply back on and check for any leaks around the angle stop cork. If leaks are present, tighten the connections further or apply more thread sealant as needed.
0 notes
Text
Excellence in PTFE Production and Global Reach - Goa Polymer
In the dynamic world of industrial materials, Polytetrafluoroethylene (PTFE) stands out as a versatile and high-performance polymer. Known for its exceptional chemical resistance, low friction, and high thermal stability, PTFE is a go-to material in various applications, from electrical insulation to chemical processing. In India, Goa Polymer has emerged as a leading name in the manufacturing of PTFE products, setting benchmarks for quality, innovation, and reliability. This comprehensive guide explores Goa Polymer's journey, its role as a premier PTFE product manufacturer in India, and how it stands out in the competitive landscape.
Goa Polymer: A Legacy of Excellence
Goa Polymer was founded with a vision to revolutionize the polymer industry in India. With years of expertise and a commitment to quality, the company has established itself as a leading player in the PTFE market. From its humble beginnings to becoming a trusted name among industrial giants, Goa Polymer's journey is marked by relentless pursuit of excellence and innovation.
The Significance of PTFE Products
PTFE, commonly known by its brand name Teflon, is celebrated for its remarkable properties. The material's resistance to high temperatures, chemicals, and electrical conductivity makes it indispensable across a range of industries:
Chemical Processing: PTFE's non-reactive nature allows it to withstand harsh chemicals, making it ideal for linings, seals, and gaskets in chemical reactors.
Electrical Insulation: With its excellent dielectric properties, PTFE is widely used for insulating wires and cables in high-frequency applications.
Food Processing: The non-stick nature of PTFE is used in cooking equipment and food processing machinery to prevent sticking and ensure easy cleaning.
Aerospace and Defense: PTFE's resistance to extreme temperatures and chemicals makes it suitable for various aerospace and defense applications.
Given its importance, the demand for high-quality PTFE products is ever-growing, and Goa Polymer has risen to meet this need with unparalleled expertise.
Goa Polymer’s Product Portfolio
Goa Polymer offers an extensive range of PTFE products designed to meet diverse industrial requirements. Each product is crafted with precision to ensure it adheres to the highest standards of quality and performance. The company’s product portfolio includes:
PTFE Sheets: Ideal for use as liners, seals, and gaskets, these sheets are available in various thicknesses and sizes.
PTFE Rods: Used in manufacturing custom components, these rods offer excellent machinability and durability.
PTFE Films: Thin and flexible, PTFE films are used in applications requiring high clarity and electrical insulation.
PTFE Tubes and Pipes: Essential for conveying fluids and gases in corrosive environments, these tubes and pipes maintain their integrity under extreme conditions.
PTFE Gaskets and Seals: Customized to fit specific applications, these gaskets and seals provide reliable performance in sealing applications.
Quality Assurance at Goa Polymer
Quality is the cornerstone of Goa Polymer's operations. The company employs stringent quality control measures at every stage of production to ensure that each product meets the highest standards. Key aspects of their quality assurance process include:
Raw Material Inspection: Only the highest quality PTFE resins are used in manufacturing, sourced from reputable suppliers.
Advanced Manufacturing Techniques: Goa Polymer utilizes state-of-the-art machinery and processes to produce PTFE products with precise dimensions and superior performance.
Rigorous Testing: Each product undergoes thorough testing for chemical resistance, temperature tolerance, and mechanical strength to ensure it performs reliably in real-world applications.
Certifications: Goa Polymer holds various industry certifications that affirm its commitment to quality, including ISO 9001 for quality management systems.
Innovation and Technology
At Goa Polymer, innovation is a driving force. The company invests in research and development to enhance its product offerings and stay ahead of industry trends. Some of the technological advancements include:
Custom Solutions: Goa Polymer offers tailored PTFE solutions to meet specific customer needs, including bespoke dimensions and specialized formulations.
Advanced Manufacturing Techniques: The use of cutting-edge technologies in extrusion, molding, and machining ensures the production of high-quality PTFE products.
Sustainability Initiatives: Goa Polymer is committed to sustainability, implementing eco-friendly practices in its manufacturing processes and striving to reduce its environmental footprint.
Industry Applications and Success Stories
Goa Polymer’s PTFE products are employed across various industries, each benefiting from the material’s unique properties. Some notable applications and success stories include:
Chemical Industry: Goa Polymer has supplied PTFE liners and seals for major chemical processing plants, enhancing their operational efficiency and safety.
Electrical Industry: The company’s PTFE insulating materials are used in high-frequency cable assemblies, ensuring reliable performance in critical applications.
Food Processing: PTFE-coated equipment provided by Goa Polymer has been instrumental in improving the efficiency and hygiene of food processing operations.
Aerospace: Goa Polymer’s PTFE components have been used in aerospace applications, contributing to the performance and reliability of advanced systems.
Customer-Centric Approach
Goa Polymer’s commitment to customer satisfaction is evident in its customer-centric approach. The company values long-term relationships and strives to understand and meet the unique needs of its clients. Key aspects of their approach include:
Consultative Sales Process: Goa Polymer’s sales team works closely with clients to provide expert advice and recommendations tailored to their specific requirements.
Timely Delivery: The company ensures prompt delivery of products, adhering to agreed timelines and minimizing downtime for clients.
After-Sales Support: Goa Polymer offers comprehensive after-sales support, addressing any issues or concerns that may arise post-purchase.
Global Presence and Market Reach
While Goa Polymer is a prominent name in India, its reputation extends globally. The company has established a strong market presence through strategic partnerships and export operations. By adhering to international quality standards, Goa Polymer has successfully catered to clients across various countries, further solidifying its position as a leading PTFE product manufacturer.
Future Outlook and Expansion Plans
Looking ahead, Goa Polymer is poised for continued growth and innovation. The company plans to expand its product range, enhance its manufacturing capabilities, and explore new markets. With a focus on sustainability and technological advancements, Goa Polymer aims to maintain its leadership position in the PTFE industry and continue delivering exceptional value to its customers.
Conclusion
Goa Polymer’s standing as one of the leading PTFE product manufacturers in India is a testament to its unwavering commitment to quality, innovation, and customer satisfaction. Through its extensive product portfolio, state-of-the-art manufacturing processes, and customer-centric approach, Goa Polymer has set new standards in the industry. As the demand for PTFE products continues to grow, Goa Polymer remains at the forefront, driving excellence and shaping the future of polymer technology.

For more information about Goa Polymer and its range of PTFE products, visit their website or contact their sales team to explore how they can meet your industrial needs with precision and reliability.
0 notes
Text
Condensate pot manufacturer, condensate pot supplier
In the grand symphony of industrial processes, even the apparently insignificant components play important roles. One such unsung hero is the condensate pot, a critical piece of gadget liable for correctly coping with condensate buildup inside compressed air systems.
At Instrumxx, a main condensate pot producer and provider, we apprehend the significance of the right installation for the most efficient overall performance. Today, we delve into the quality practices and tips to ensure your condensate pot capabilities flawlessly.
Understanding the Power of the Pot:
Before diving into set up, allow's revisit the condensate pot's position. Compressed air, while essential for powering various gadgets, contains moisture alongside the manner. As the air cools, this moisture condenses into liquid shape, probably leading to numerous issues:
Reduced System Efficiency: Accumulated condensate can limit airflow, hindering machine overall performance and growing power intake.
Corrosion: Water trapped in the system can result in corrosion of pipes and gadget, ensuing in pricey maintenance and downtime.
Pneumatic Tool Damage: Water droplets entering pneumatic gear can cause malfunction and shorten their lifespan.
Here's where the condensate pot steps in. This inventive tool separates condensate from the compressed air circulate, making sure smooth operation and protecting your equipment.
The Installation Imperative: A Step-by means of-Step Guide
Now that we admire the condensate pot's significance, permit's explore the set up procedure:
Selecting the Optimal Location: Placement is essential. Choose a low-point within the compressed air line wherein condensate is maximum possible to build up. Ensure smooth get right of entry for maintenance and recollect factors like ambient temperature and ability vibration.
Power Up (if relevant): Some condensate pots make use of electric connections for automatic draining. If your selected model calls for power, make sure a right electrical connection is to be had near the installation web page.
Plumbing Preparations: Inlet and outlet ports at the Condensate pot manufacturer need to be related to the compressed air line. Use suitable piping substances and make certain right sealing with Teflon tape or thread sealant to prevent leaks. Consider using a close-off valve on the inlet line for isolation during maintenance.
Mounting Matters: Securely mount the condensate pot using appropriate brackets or a mounting plate. Ensure the pot is stage and solid to save you harm from vibrations or unintended bumps.
Drainage Decisions: Depending on the condensate pot supplier, you will have drainage options. Automatic condensate pots characteristic a built-in waft mechanism that triggers automated draining whilst the condensate level reaches a sure point. For manual drain fashions, a drain valve is present for periodic manual draining.
Safety First: Before pressurizing the device, double-take a look at all connections for leaks. Tighten any loose fittings and make certain the right drainage operation.
Beyond Installation: Essential Tips for Optimal Performance
While proper set up is vital, right here are some additional recommendations to ensure your condensate pot functions optimally:
Regular Maintenance: Schedule periodic preservation to test for leaks, easy inner components, and make sure the automatic drain mechanism is functioning correctly (if applicable). Refer to the producer's instructions for precise preservation strategies.
Choosing the Right Size: Selecting a condensate pot with insufficient capacity can lead to overflow and machine inefficiencies. Consider elements like compressed air glide charge and maximum running pressure while deciding on the right size in your application.
The Power of Quality: Invest in a splendid condensate pot from a reputable manufacturer like Instrumxx. Our condensate pots are constructed with sturdy materials and cling to strict great standards, making sure lengthy-lasting overall performance and reliability.
Conclusion: A Well-Installed Pot, a Smoothly Running System
By following these fine practices and recommendations, you could ensure your condensate pot setup is a success. Remember, a nicely-functioning condensate pot safeguards your compressed air device, optimizes performance, and minimizes the danger of high-priced downtime.
For all your condensate pot needs, from top-exceptional merchandise to expert recommendations, Instrumxx is your trusted accomplice. Visit our internet site to discover our various range of condensate pots and locate the suitable solution to your application.
Together, allow's make sure your compressed air gadget operates at top performance, one nicely-set up condensate pot at a time!
0 notes
Text
The best and convenient way is to reach the top manufacturers and place an order for the best quality Teflon lined pipes. They are durable pipes that come with a number of added features and specialties.
0 notes
Text
10 Tips for Installing Automatic Water Shut Off Valves
Installing an automatic water shut off valve can save you from potential water damage and high repair costs. Here are ten tips to ensure a smooth and effective installation:
Choose the Right Automatic Water Shut Off Valve: There are various types of automatic water shut off valves available, each designed for different applications. Ensure you select one that fits your specific needs, whether it's for your main water line or specific appliances like washing machines or dishwashers.
Read the Manufacturer’s Instructions: Before starting the installation, carefully read the instructions provided by the manufacturer. Each automatic water shut off valve may have unique installation steps and requirements.
Turn Off the Water Supply: Always turn off the main water supply before beginning the installation. This step is crucial to prevent any water leakage or flooding during the process.
Gather Necessary Tools: Ensure you have all the necessary tools at hand, including wrenches, pipe cutters, and Teflon tape. Having everything ready will make the installation process smoother and faster.
Check for Proper Placement: Identify the best location for installing the automatic water shut off valve. It should be easily accessible for maintenance and close to the area you want to protect, such as near the main water line or specific appliances.
Clean the Installation Area: Before installing the valve, clean the pipes and surrounding area. Dirt and debris can interfere with the proper sealing and functioning of the valve.
Use Teflon Tape: Apply Teflon tape to the threads of the pipes to ensure a secure and leak-proof connection. This step is crucial for preventing water leaks after installation.
Test the Valve Before Final Installation: Before finalizing the installation, test the automatic water shut off valve to ensure it is functioning correctly. This can prevent the need for reinstallation if there are any issues.
Secure the Valve Properly: Make sure the automatic water shut off valve is securely attached to the pipes. Loose connections can lead to leaks and reduced effectiveness of the valve.
Regular Maintenance: After installation, perform regular maintenance checks on your automatic water shut off valve. Ensure it is free of debris and functioning properly to provide continued protection against water damage.
By following these tips, you can ensure that your automatic water shut off valve is installed correctly and operates effectively, providing peace of mind and protection for your home or business. Remember, a properly installed automatic water shut off valve is a crucial component in safeguarding your property from potential water damage.

0 notes
Text
How to Install an Outdoor Shower: A Step-by-Step Guide

Installing an outdoor shower can elevate your backyard or garden, providing a refreshing way to cool off during hot days, a convenient spot to rinse off after a swim, or simply a unique addition to your outdoor space. Whether you’re a seasoned DIY enthusiast or a beginner, this guide will walk you through the process of installing an outdoor shower.
Materials and Tools Needed
Outdoor shower kit or components (showerhead, fixtures, etc.)
PVC pipes and fittings
Hose bibb (optional, for hose connection)
Garden hose (optional)
Drill and drill bits
Adjustable wrench
Pipe wrench
Pipe tape (Teflon tape)
Screws and wall anchors
Measuring tape
Shovel
Concrete or gravel (for shower base)
Waterproof sealant
Step 1: Planning and Choosing a Location
The first step is to decide where you want to install your outdoor shower. Consider the following factors:
Proximity to Water Source: Choose a location near an existing water source, like an outdoor faucet or garden hose connection, to simplify plumbing.
Drainage: Ensure the area has proper drainage to avoid water pooling. You may need to create a simple drainage system with gravel or a French drain.
Privacy: Select a spot that offers privacy or consider installing a privacy screen or enclosure.
Step 2: Gathering Materials and Tools
Once you’ve selected the location, gather all necessary materials and tools. Outdoor shower kits are available that include most of the components you’ll need. Alternatively, you can purchase individual parts to customize your shower.
Step 3: Installing the Plumbing
Shut Off Water Supply: Turn off the water supply to the area where you’ll be working.
Connect the Pipes: If you’re connecting to an existing faucet or garden hose, use PVC pipes and fittings to extend the water line to your chosen shower location. Use Teflon tape on threaded connections to ensure a watertight seal.
Mount the Shower Fixtures: Attach the showerhead and other fixtures to a sturdy post, wall, or fence. Use a drill and screws to secure the fixtures in place. Make sure everything is level and securely fastened.
Install the Hose Bibb (Optional): If you’re using a garden hose to supply water, install a hose bibb near the shower area. Connect the hose bibb to the PVC pipe using appropriate fittings.
Connect the Water Supply: Attach the garden hose to the hose bibb or connect the PVC pipe to the existing water line. Turn on the water supply and check for leaks.
Step 4: Creating a Shower Base
To prevent mud and ensure proper drainage, create a solid base for your outdoor shower:
Excavate the Area: Dig a shallow area where the shower will be located. Make it slightly larger than the shower base.
Add Gravel or Concrete: Fill the area with gravel or pour a concrete slab. If using concrete, let it cure according to the manufacturer’s instructions.
Install Drainage (Optional): For better drainage, consider installing a simple French drain beneath the shower base.
Step 5: Finishing Touches
Seal Connections: Apply waterproof sealant around pipe connections and fixtures to prevent leaks.
Test the Shower: Turn on the water supply and test the shower. Adjust the water pressure and check for any leaks or issues.
Add Privacy and Comfort: Install a privacy screen or outdoor shower enclosure if desired. Consider adding hooks for towels and shelves for toiletries.
Maintenance Tips
Regular Cleaning: Keep the shower area clean to prevent mold and mildew buildup.
Winterizing: In colder climates, disconnect and drain the water supply to prevent freezing and damage.
Inspect for Leaks: Periodically check for leaks and tighten connections as needed.
0 notes
Text
How to Install a Ball Valve: Step-by-Step Instructions - D Chel Valve

D Chel Valve has firmly established itself as the premier provider of Ball Valve Manufacturers in India. Over time, these essential components have continually evolved to meet the growing needs of various industrial processes, ensuring the utmost precision and effectiveness.
As a respected Ball Valve Manufacturer, our primary responsibility is to furnish the necessary tools for controlling the flow of liquids or gases throughout different operations. These valves possess the ability to start, stop, and redirect various pathways. Typically, fluids move from high-pressure areas to low-pressure areas, but our valves enable us to adjust the direction of flow as required. Our organization operates within India, actively engaged in the production, distribution, and global trade of these vital valves.We are recognized as the leading Ball valve manufacturers in Mumbai, India, delivering products of exceptional quality.
Valves Manufacturer cater to the diverse needs of industries, including chemical, paper pulp, electricity, shipbuilding, and more. Our unwavering commitment to quality ensures that all our products adhere to strict international standards. Furthermore, we take pride in our status as the premier Gate Valve Manufacturers in India.
Ball valves are an essential part of many plumbing setups, giving users the ability to manage the flow of water easily. Putting in a ball valve is a simple task that only requires a few basic tools and some basic knowledge. In this step-by-step guide, we'll show you how to properly install a ball valve.
Tools and Materials Needed
Before you begin, gather the following tools and materials:
Ball valve
Pipe cutter or hacksaw
Pipe wrench or adjustable wrench
Teflon tape or pipe sealant
Pipe cleaner or sandpaper
Bucket or towel (to catch any residual water)
Safety gloves and goggles
Step 1: Turn Off the Water Supply
Turning off the main water supply is the essential first step when installing a ball valve. Identify the primary valve that controls the water flow to your house or the specific location where you'll be working, and switch it to the off position. This will drain any leftover water from the pipes and release the built-up pressure.
Step 2: Cut the Pipe
To install the ball valve, first, you must cut the pipe at the desired location. Measure and mark the section where you want to place the valve. Then, using a pipe cutter or a hacksaw, make a clean, straight cut. Remember to wear safety equipment, such as gloves and goggles, to safeguard yourself from any metal fragments or debris.
Step 3: Clean the Pipe Ends
After slicing the pipe, employ a pipe cleaning tool or sandpaper to meticulously clear the pipe's ends. This crucial step guarantees a snug fit and prevents unwanted leaks. Carefully eliminate any rough edges, rust, or residue from the cut portions, resulting in a uniformly smooth finish.
Step 4: Apply Teflon Tape or Pipe Sealant
To guarantee a watertight joint, coat the pipe's threads with Teflon tape or pipe sealant. Wrap the Teflon tape around the threads in a clockwise direction, slightly overlapping each layer. For pipe sealant, spread a thin, uniform coating over the threads.
Step 5: Install the Ball Valve
Securing the ball valve is the next step. Properly position the valve in line with the pipe openings, with the handle conveniently placed for use. Carefully screw the valve onto the pipe, turning it right until it is snug by hand. Take caution to avoid misaligning the threads during installation.
The Quantity of Ball Valves Sold Experienced a Significant Rise.
Choke Valve Manufacturers in India
Butterfly Valve Manufacturers in India
Plug Valve Manufacturers in India
Needle Valve Manufacturer in India
Check Valve Manufacturer in India
Step 6: Tighten the Valve
Grab a pipe wrench or an adjustable wrench, and give the ball valve a firm tightening. However, be careful not to go overboard, as that could harm the threads or the valve itself. The goal is to get a snug, secure fit to stop any leaks, but too much pressure can create issues. Find the right balance to ensure a proper, effective seal.
Step 7: Check for Leaks
After ensuring the valve is firmly installed, it's crucial to check for any water leaks. Slowly turn the water back on and closely monitor the valve area for any signs of moisture. If you detect any leaks, immediately shut off the water supply and give the valve a slight additional tightening. If the leaks persist, you may need to wrap the threads with Teflon tape or apply pipe sealant, and then reinstall the valve.
Step 8: Test the Valve
Confirming the proper functioning of the ball valve is crucial. Begin by inspecting it for any signs of leakage. Then, turn the valve handle, observing its smooth and effortless movement when opening and closing. When the valve is in the closed position, it should completely prevent water from flowing, creating a tight seal. A properly installed ball valve should be easy to operate and effectively control the water flow.
Step 9: Finish Up
To wrap up the job, take care of the work space. Thoroughly wipe away any extra pipe sealant and clean up any water that got spilled while installing the valve. Get rid of any pipe pieces and used supplies the right way. When the area is clean and dry, the ball valve installation is done.
Additional Tips
Picking the Ideal Valve: Pick a ball valve that works with your plumbing setup, taking into account the size and material of your pipes.
Prioritize Safety: Wear proper safety gear like gloves and goggles to shield yourself from possible dangers.
Use the Right Equipment: Having the correct tools makes installing the valve easier and faster.
Get Expert Assistance: If you're unsure about any part of the installation, it's best to consult a professional plumber. Improper setup can result in leaks and water issues.
To know more, visit:Any Queries, Website:: dchelvalve.com
#ballvalvemanufacturers#ballvalve#ballvalvemanufacturerinindia#ballvalvemanufacturer#ballvalvesuppliersinindia
0 notes
Text
The Ultimate Guide to Whole House Filtration Systems: Clean Water for Every Tap
Water is essential to our daily lives, yet many of us take for granted the quality of water flowing through our homes. Whole house filtration systems are an increasingly popular solution for ensuring clean, safe water from every tap in your home. This comprehensive guide will walk you through everything you need to know about these systems, including the benefits, challenges, a step-by-step installation guide, a real-world case study, and a thorough conclusion.
Why Whole House Filtration Systems Matter
Water quality can vary significantly depending on your location and the source of your water supply. Whether you’re using municipal water, well water, or another source, contaminants can find their way into your home’s water system. These contaminants include chlorine, sediment, heavy metals, pesticides, and microorganisms. Installing a whole house filtration system ensures that every drop of water in your home is clean, safe, and pleasant to use.
Benefits of Whole House Filtration Systems
Comprehensive Filtration: Unlike point-of-use filters, whole house systems treat water at the point of entry, ensuring clean water throughout your home.
Improved Health: Reducing exposure to harmful contaminants can improve overall health and reduce the risk of waterborne illnesses.
Better Taste and Smell: Filtered water often tastes and smells better, making it more enjoyable to drink and cook with.
Protects Appliances: Clean water reduces wear and tear on appliances, such as water heaters, dishwashers, and washing machines, extending their lifespan.
Eco-Friendly: Using a whole house filtration system can reduce the need for bottled water, decreasing plastic waste and your environmental footprint.
Common Challenges with Whole House Filtration Systems
While whole house filtration systems offer numerous benefits, they also come with some challenges:
Initial Cost: These systems can be expensive to purchase and install compared to single-point filters.
Maintenance: Regular maintenance is required to keep the system functioning effectively, including filter replacements and system checks.
Space Requirements: Whole house systems can be bulky and require a dedicated space for installation.
Water Pressure: Some systems may reduce water pressure, which can be inconvenient.
Complexity of Installation: Installing a whole house system is more complex than installing a point-of-use filter, often requiring professional assistance.
Step-by-Step Guide to Installing a Whole House Filtration System
Installing a whole house filtration system can seem daunting, but with the right preparation and knowledge, it can be a manageable task. Here’s a step-by-step guide to help you through the process:
1. Assess Your Water Quality
Before choosing a filtration system, test your water to identify the contaminants present. This will help you select the appropriate filter type for your needs.
2. Choose the Right Filtration System
Based on your water quality assessment, select a system that addresses your specific concerns. Common types include activated carbon filters, reverse osmosis systems, and sediment filters.
3. Gather Necessary Tools and Materials
You’ll need various tools and materials for installation, including wrenches, pipe cutters, Teflon tape, and the filtration system components. Ensure you have everything on hand before starting.
4. Turn Off the Water Supply
Shut off the main water supply to your home to prevent any leaks or water damage during installation.
5. Select an Installation Location
Choose a location near the main water line entry point. Ensure there’s enough space for the system and easy access for maintenance.
6. Cut the Main Water Line
Using a pipe cutter, carefully cut the main water line where you’ll install the filtration system. Be prepared for some water to spill out.
7. Install the Filter System
Follow the manufacturer’s instructions to install the filtration system. Typically, this involves attaching the system to the cut pipes, securing it with fittings, and using Teflon tape to ensure a tight seal.
8. Connect Bypass Valves
Install bypass valves around the system to allow for maintenance without shutting off your home’s entire water supply.
9. Turn On the Water and Check for Leaks
Slowly turn the water supply back on and check for any leaks. Tighten fittings as necessary to ensure there are no leaks.
10. Flush the System
Flush the system according to the manufacturer’s instructions to remove any initial contaminants and activate the filter media.
Case Study: Transforming a Home with a Whole House Filtration System
Background
The Johnson family, living in a suburban neighborhood, noticed that their tap water had a strong chlorine odor and often left mineral deposits on fixtures. Concerned about the long-term health effects and the impact on their plumbing, they decided to invest in a whole house filtration system.
The Solution
After testing their water, they chose a multi-stage filtration system that included sediment pre-filters, activated carbon filters, and a UV purifier. The installation was professionally done in their basement, near the main water line entry.
Results
The difference was immediate and remarkable. The chlorine smell was completely gone, the water tasted significantly better, and there were no more mineral deposits on their fixtures. The family also noticed an improvement in their skin condition, which they attributed to the removal of harsh chemicals from their water.
Long-Term Impact
Over the following months, the Johnsons reported fewer plumbing issues and a reduction in maintenance costs for their appliances. They were also pleased to see a decrease in their bottled water consumption, aligning with their goal to be more environmentally conscious.
Conclusion: Is a Whole House Filtration System Right for You?
Investing in a whole house filtration system can dramatically improve the quality of water in your home, offering health benefits, better-tasting water, and protection for your plumbing and appliances. While there are challenges such as initial cost and maintenance, the long-term benefits often outweigh these concerns.
Final Thoughts
If you’re considering a whole house filtration system, start by testing your water to understand the specific contaminants you need to address. Choose a system that fits your needs and budget, and be prepared for the installation process. Whether you decide to do it yourself or hire a professional, the end result will be worth the effort for clean, safe water throughout your home.
Remember, clean water is not just a luxury; it’s a necessity. A whole house filtration system ensures that every tap in your home provides the highest quality water, contributing to your overall health and well-being.
By following this guide and carefully considering your options, you can make an informed decision about whether a whole house filtration system is the right choice for your home. Embrace the peace of mind that comes with knowing your family has access to clean, safe water every day.
0 notes
Text
Top Fire Safety Products Supplier in Delhi
In today’s world, ensuring safety against fire hazards is not just a necessity but a responsibility. At ManxImpex, we are dedicated to providing top-notch fire safety products that guarantee protection and peace of mind. As a leading supplier and distributor, we offer a comprehensive range of fire safety equipment designed to meet the highest standards of reliability and efficiency. Let's explore our extensive product lineup that caters to all your fire safety needs.
Hose Pipes: The Lifeline of Firefighting
Hose pipes are essential for directing water to the fire effectively. ManxImpex offers robust and durable hose pipes that can withstand high pressure and rough handling, ensuring that firefighters can control and extinguish fires swiftly. Our hose pipes are made from premium materials, ensuring longevity and reliability in critical situations.
Hose Clamps: Secure and Reliable Connections
Hose clamps are crucial for maintaining secure connections between hoses and other firefighting equipment. Our hose clamps are designed to provide a tight seal, preventing leaks and ensuring a steady flow of water. At ManxImpex, we offer a variety of hose clamps that are easy to use and adjust, making them an essential part of any firefighting arsenal.
Couplings and Branches: Efficient Water Distribution
Couplings and branches play a vital role in the distribution and direction of water during firefighting operations. Our high-quality couplings and branches are engineered for seamless connection and efficient water flow. With ManxImpex couplings and branches, you can ensure that every drop of water is utilized effectively to combat fires.
Hydrant Valves and Accessories: Reliable Access to Water
Hydrant valves are critical for providing access to water supplies in firefighting. ManxImpex supplies a range of hydrant valves and accessories that are built to be reliable and easy to operate. Our hydrant valves ensure that water is readily available when needed, providing an essential resource for firefighting teams.
Fire Extinguishers: Immediate Response to Fires
Fire extinguishers are the first line of defense in fire emergencies. ManxImpex offers a diverse range of fire extinguishers suited for various types of fires, including ABC dry powder, CO2, and foam extinguishers. Our fire extinguishers are designed for quick response and effective fire suppression, ensuring safety in residential, commercial, and industrial settings.
Fire Extinguisher Accessories: Enhancing Efficiency
ManxImpex also provides a wide array of fire extinguisher accessories, including mounting brackets, signage, and safety pins. These accessories are designed to enhance the usability and maintenance of fire extinguishers, ensuring they are always ready for action.
Fire Extinguisher Agents: Specialized Fire Suppression
Different fire scenarios require different extinguishing agents. ManxImpex offers a variety of fire extinguisher agents, including ABC dry powder, CO2, and foam, tailored to combat specific types of fires. Our agents are effective, environmentally friendly, and compliant with safety standards.
Fire Sprinklers: Automated Fire Protection
Fire sprinklers are a crucial component of any fire safety system. At ManxImpex, we supply state-of-the-art fire sprinklers that activate automatically in response to heat, providing immediate suppression to contain and extinguish fires. Our sprinklers are designed for optimal performance, ensuring comprehensive protection for your property.
PTFE Teflon Tape: Ensuring Leak-Free Connections
PTFE Teflon tape is indispensable for sealing pipe threads and preventing leaks in fire safety systems. ManxImpex offers high-quality PTFE Teflon tape that provides excellent resistance to heat and chemicals, ensuring reliable and durable connections in your firefighting equipment.
Conventional Fire Alarm Systems: Comprehensive Safety Monitoring
ManxImpex's conventional fire alarm systems offer reliable detection and alerting capabilities for various environments. Our systems are designed to detect smoke, heat, or flames and provide early warnings, allowing prompt evacuation and response. These systems are essential for ensuring the safety of occupants and minimizing property damage.
Standalone Alarm Systems: Compact and Effective
For smaller applications, our standalone alarm systems provide effective fire detection and alerting. These systems are easy to install and operate, offering an efficient solution for homes, small offices, and other compact spaces. With ManxImpex standalone alarm systems, you can ensure timely alerts and enhance safety.
Why Choose ManxImpex?
At ManxImpex, we pride ourselves on delivering high-quality fire safety products that meet stringent safety standards. Our commitment to excellence, reliability, and customer satisfaction makes us the preferred choice for fire safety solutions. Trust ManxImpex to protect what matters most.
For more information on our products and to discuss your specific fire safety needs, visit our website or contact our expert team today. Your safety is our priority, and we are here to provide you with the best fire safety solutions available.
Visit our website: https://manximpex.com
You can contacts us on : [email protected], +91- 7428115550, +91- 7065192900
0 notes
Text
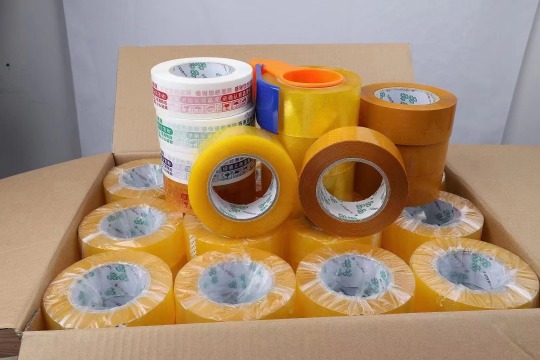
What are the classifications and uses of adhesive tape?
Adhesive Tape comes in a variety of types, each designed for specific applications. Here is a classification of different tapes along with their common uses:
1. Packaging and Sealing Tapes
Packing Tape: Used for sealing boxes and packages for shipping. It typically comes in clear or brown.
Common Uses: Shipping, storage, and moving boxes.
Water-Activated Tape (Gummed Tape): Activated by water and bonds strongly with cardboard.
Common Uses: Sealing heavy or high-value packages, providing tamper-evident security.
2. Adhesive Tapes
Cellophane Tape : A clear, thin tape used for light-duty sealing.
Common Uses: Wrapping gifts, sealing envelopes, light repairs.
Double-Sided Tape: Adhesive on both sides, used for bonding surfaces together.
Common Uses: Mounting photos, attaching posters, crafting.
Duct Tape: Cloth or scrim-backed tape with a strong adhesive, water-resistant.
Common Uses: Heavy-duty repairs, sealing, and waterproofing.
Masking Tape: Easy-to-tear paper tape, used mainly in painting.
Common Uses: Masking off areas during painting, labeling, and bundling.
3. Electrical and Electronic Tapes
Electrical Tape: Made from vinyl, used for insulating electrical wires.
Common Uses: Insulating wires, color-coding cables, minor electrical repairs.
Kapton Tape: Polyimide tape used for high-temperature and electrical insulation.
Common Uses: Electronics manufacturing, aerospace applications.
Copper Tape: Conductive tape used for electrical connections and shielding.
Common Uses: EMI shielding, circuit repairs, and antennae manufacturing.
4. Specialty Tapes
Gaffer Tape: Cloth tape with a matte finish, easily removable without residue.
Common Uses: Securing cables, stage and film production, temporary repairs.
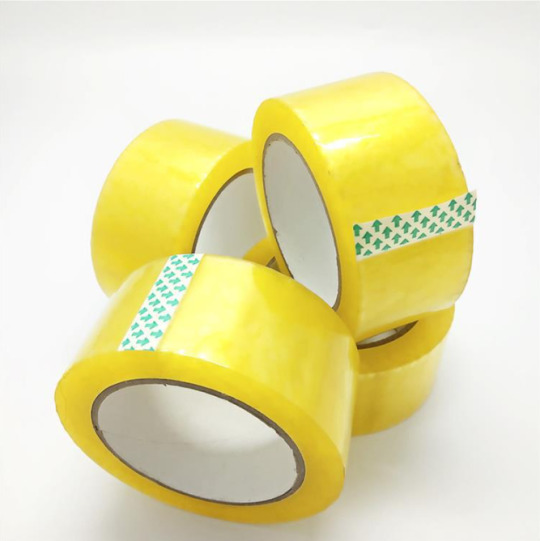
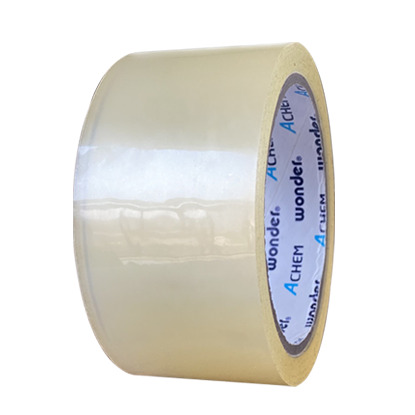
Teflon Tape (PTFE Tape): Used in plumbing to seal pipe threads.
Common Uses: Plumbing, preventing leaks in threaded connections.
Anti-Slip Tape: Textured tape that provides traction on slippery surfaces.
Common Uses: Stairs, walkways, ramps, and industrial equipment.
VHB Tape (Very High Bond Tape): High-strength bonding tape used in place of mechanical fasteners.
Common Uses: Automotive assembly, construction, electronics.
5. Medical Tapes
Surgical Tape: Used to secure dressings and bandages.
Common Uses: Medical dressings, securing IV lines, wound care.
Micropore Tape: Breathable tape used for delicate skin.
Common Uses: Wound care, securing lightweight dressings, skin protection.
6. Decorative and Craft Tapes
Washi Tape: Decorative paper tape used for arts and crafts.
Common Uses: Scrapbooking, card making, decorating.
Fabric Tape: Adhesive tape made from fabric.
Common Uses: Hemming, temporary fabric repairs, crafting.
7. Industrial and Construction Tapes
Foil Tape: Aluminum or copper foil backing with an adhesive, used for sealing and insulation.
Common Uses: HVAC duct sealing, insulation, reflective shielding.
Strapping Tape: High tensile strength tape used for bundling and reinforcing.
Common Uses: Securing heavy loads, palletizing, and reinforcing packages.
Conclusion
Different tapes are designed to meet specific needs, whether for everyday household use, industrial applications, or specialized tasks. Understanding the classifications and uses can help in selecting the right tape for the job, ensuring optimal performance and efficiency.
These tapes are integral to many industries and applications, providing essential solutions for a wide range of tasks and challenges.
0 notes
Text
this lone hose bib was leaky and serving multiple purposes
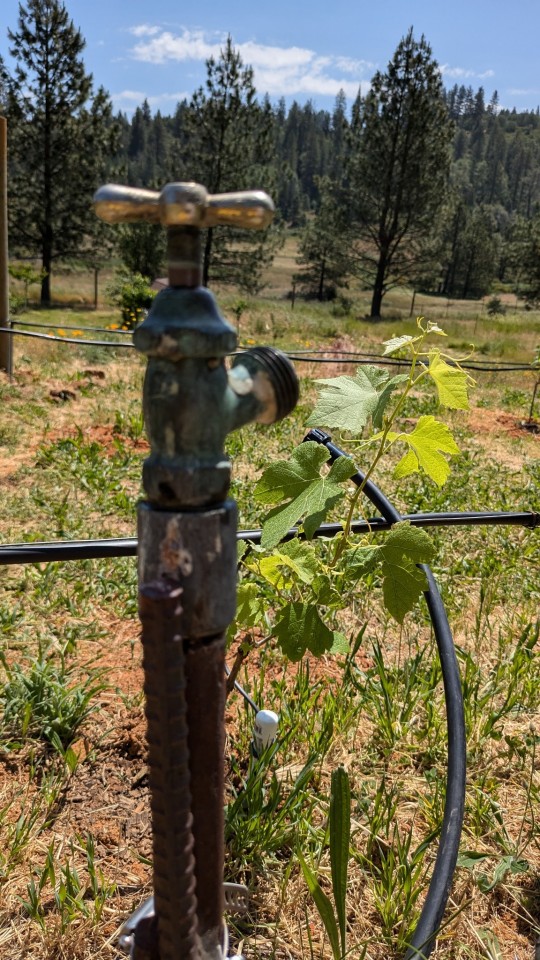
and i needed to run an automatic valve to water the new syrah vines, so it was time to remove it, replace it and add more
yeah my big crescent and yuge pipe wrench wouldn't budge any of it
so i finally put heat on one part to get it to expand slightly (and also burn out some ancient pipe dope compound) and it finally let go
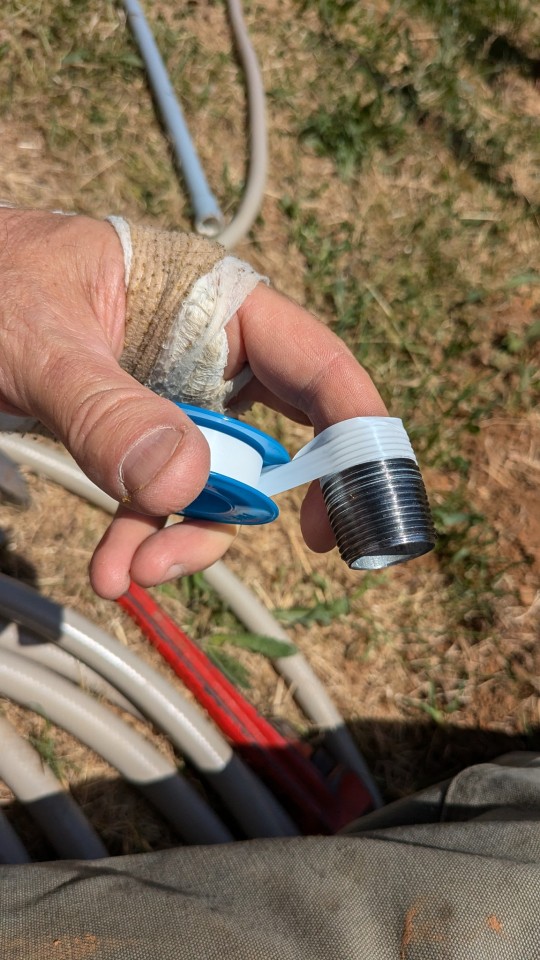
i was hoping to get the coupling off but was only able to get the old bib off of it so i had to add a short nipple to connect the new stuff to the coupling
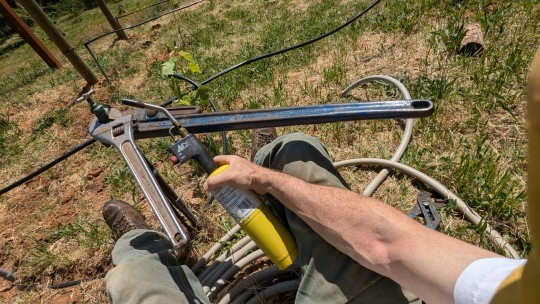
these days we use a teflon tape (not sticky just slippery) instead of dope to help the threaded parts together as best possible
when you put tape on, hold the tape roll in your left hand like this ^ and start with the tape going over the top of the threads - and then press the tape into the threads and rotate the part with the other hand (not pictured) so the part takes up the tape (to the right in this case) and apply light tension as you go - usually three wraps over all the thread you expect to be engaging into the other part.
the reason here is that the end of the tape is left such that it won't catch on the threads and unroll off the part
so let's take it off
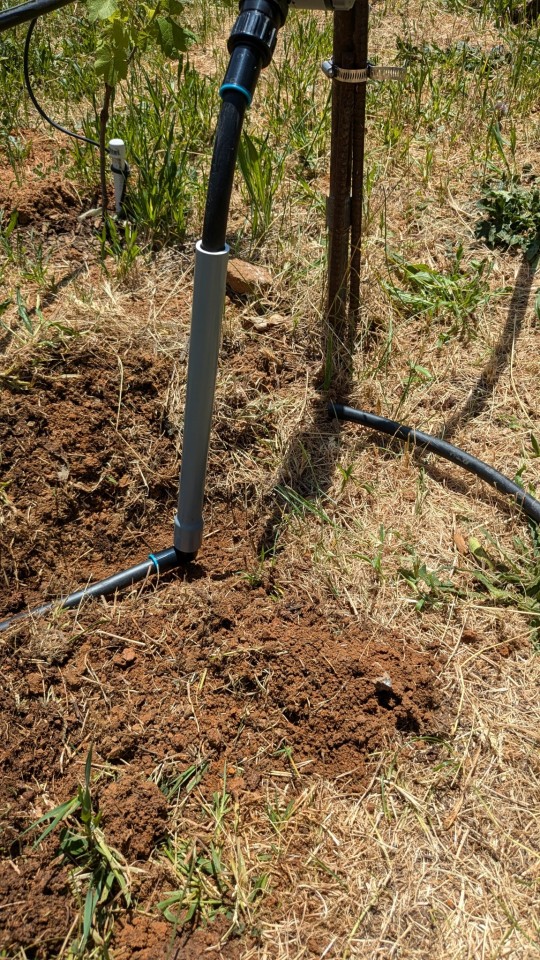
i have a semi-permanent drip line that's going to be hooked up so it's in a shallow trench so it won't get tripped on. i put it through a piece of pvc pipe where it comes out of the ground so that a weed trimmer will be less likely to damage it

the final product
grapes going off to the left, another garden plot fed on the right, and general purpose hose connection on top
1 note
·
View note
Last Seen Blogs

hirobasace
Untitled

sublimnall
Get Your Life Together While you’re At It.

stephaniejordanne
Untitled

hypnosisfan-mochi
MochiTheKitsune

jarofsmetana
Jar of smetana