#TumblrGuide
Explore tagged Tumblr posts
Visit Tumblr Blog
Explore Tumblr blogs with no restrictions, modern design and the best experience.
Last Seen Tumblr Blogs


Fun Fact
69% of Tumblr users are millennials.
Text
I had a semi-successful (i use that extremely loosely) blog back in the day, and spent every waking minute on it. With the way everything is going, i’d like to go back to my roots and see what’s going on over here. It’s only been 2 years since i was last on, but i know a lot has changed. fill me in on what’s new over here, if you have the time :-)
2 notes
·
View notes
Text
🌟 Ready to Explore Tumblr? Create Your Account in Minutes! 📖✨
Want to join the creative world of Tumblr but not sure where to start? Our easy step-by-step guide will have you scrolling, posting, and reblogging in no time! 🚀
✅ Simple sign-up process
✅ Customize your blog like a pro
✅ Tips to connect with the Tumblr community
🔗 Read the full guide—Link in bio!
👉 [Aatif's Tech Tips]
Tag a friend!

1 note
·
View note
Text
#getstartedontumblr#howtousetumblr#tumblrtutorial#socialmediatips#tumblrguide#french#tumblrhelp#german#italian#portuguese
0 notes
Text
https://davidmitchell1977.systeme.io/givevaluewithtumble.
Hey Tumblr fam! 👋
I recently stumbled upon an amazing resource that I think you all will absolutely love! It's called "Give Value with Tumble" by David Mitchell. If you're someone who wants to make a positive impact and create meaningful connections through your Tumblr presence, this is definitely for you.
"Give Value with Tumble" is a comprehensive guide that teaches you practical strategies and tips to enhance your Tumblr experience. Whether you're a blogger, an artist, or simply someone who enjoys sharing their thoughts and talents, this resource is packed with valuable insights.
David Mitchell, the creator of "Give Value with Tumble," is a seasoned Tumblr user himself, so you can trust that his advice comes from firsthand experience. With his guidance, you'll learn how to sharpen your content creation skills, engage with your audience effectively, and ultimately contribute more value to the Tumblr community.
What sets this guide apart is its focus on building genuine connections. "Give Value with Tumble" goes beyond the surface-level tactics and dives deep into cultivating authenticity in your interactions. It encourages meaningful conversations and encourages you to foster a supportive community that uplifts one another.
Whether you're new to Tumblr or a seasoned user, "Give Value with Tumble" is a fantastic resource to help you level up your Tumblr game. So, if you're ready to boost your impact, create valuable connections, and make a difference in the Tumblr world, I highly recommend checking out David Mitchell's "Give Value with Tumble" here:
Let's all come together and make Tumblr an even more incredible place! 🌟
#TumblrGuide#GiveValueWithTumble#ContentCreationTips#EngagementStrategies#AuthenticConnections#MeaningfulConversations#SupportiveCommunity#TumblrInfluence#MakeADifference#EnhanceYourTumblrGame#DavidMitchell#ResourceRecommendation
0 notes
Text
How To Customize Your Tumblr Blog!
Alright! Here is the long-awaited blog post I’ve been meaning to make for a long time now. When I was trying to customize my tumblr blog, I found it extremely difficult(especially because the first time I got on tumblr I didn’t customize my own page at all) So hopefully, this will help you try to create a masterlist, how to navigate features and implement a theme for your blog! Also I hope this can answer some questions people have if they’ve come to an error when creating your blog.
I’ll also be making a AO3 guide(mainly how to customize your writing on the HTML page on ao3) so if you’re looking for that go here.
I’ll also be making a potential youtube video for these two guides. Since I don’t have a lot of time today, I’ll be making a video on these two guides the next time I decide to revamp my blog and I’ll be sure to link those.
Alright! Let’s start!

Alright! So starting in your homepage we’d be focusing on choosing, implementing and setting up a theme for your blog.
But before we do that, I highly—HIGHLY suggest you go through your blog and delete the clutter on your page. By clutter I mean—reblogs. Or at least delete MOST of them. Reason being—if you are a fic writer(like myself) and you publish your stories on your tumblr blog, your masterlist etc; and you want to link your chapters on your masterlist or you want to locate your masterlist(the original post NOT the reblog) it’s hard to do that with all the reblogs cluttering your page. This is crucial for later when we create our masterlist. If you are a fic writer and you’ve been uploading your chapters and you already have a masterlist—locate them, copy their link addresses(which I will teach you how to get copy link addresses in this guide) and paste them on a google doc or a notes of some sort. It’d save you so much time later when creating/revamping your masterlist.
If you absolutely refuse to de-clutter your blog and/or you’ve never published on tumblr but you plan to so you don’t necessarily need to scroll so much to find your original masterlist post/story post/chapters etc; then ignore this step.
But if you are a fic writer or writer in general and you have a masterlist and/or story posts/chapters published on your tumblr blog—go ahead and scroll to find those original posts(NOT the reblog) and get their copy link addresses and paste those links in a separate google doc, notes etc. You can refer to this doc/notes when creating/revamping your masterlist/story post without having to delete any of your reblogs. I must warn you tho, it WILL take you a lot of time. Especially if you reblog A LOT. Happy scrolling!

TUMBLR THEME:
Okay—moving on—THEME! Alright so you need to find a theme for your blog. What is a theme?
A theme is a decorative set up for your blog.
But before you go looking for/implementing a theme, here is some things you need to know:
1- Many of these themes are made by fellow tumblr creators who have spent SO MUCH time creating the codes for these themes. In saying that, when you do select a theme by a creator, READ THEIR RULES! It’s very important that we’re following the rules that these creators put for some of these themes.
2 - The general rules for themes if you plan on using one:
*Do not change/steal the themes and/or use them as a base to implement a different theme.
3 - If you want to change something, look at the rules and see what you are allowed to change and what you’re not allowed to change. If its not listed, reach out to the creator to see if making these changes are okay. Generally, these creators are good at listing their rules and/or do’s/don’ts for their themes.
4 - Reblog the theme you chose! Not only does this let the creator know you’re using their theme, it also lets other people check out their page in search of themes.
Now that’s out the way—I’m going to list a couple of theme pages I frequent:
· https://maziekeen.tumblr.com/
· https://glenthemes.tumblr.com/
· https://raiidens.tumblr.com/
· https://amboise.tumblr.com/
· https://kosmique.tumblr.com/tagged/t:recs
· https://magnusthemes.tumblr.com/
· https://seyche.tumblr.com/tagged/%26themes
· https://egg.design/tagged/egg%20theme
· https://lemonfawn.tumblr.com/
· https://yeolithm.com/portfolio
· https://xuethms.tumblr.com/tagged/codes-by-xue
· https://warugaki-themes.tumblr.com/tagged/warutemas
· https://www.floralcodes.com/page/2
If you find that you don’t like any of the themes I’ve listed here, you could always search on tumblr, “tumblr themes” and a whole list of pages come up.
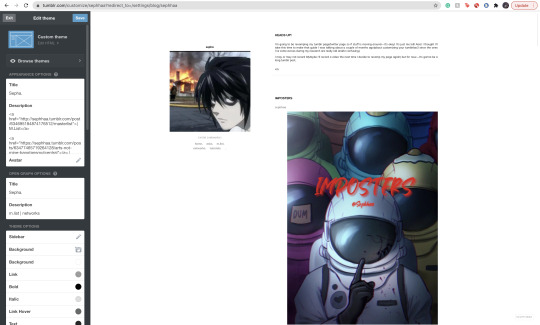
Once you’ve found your theme, let’s head on over to “Edit Theme.”

Once you’ve located “Edit Theme” in your settings, click on it and it’d open up to a new tab where you’d be implementing your new theme.

Today I’ll be using a theme from @maziekeen !

Once you have opened your “Edit Theme” page, you’d see that theres a bunch of functions to your right. This is where we will be implementing our new theme, specifically this bar:

Now, you’re going to click, “Edit HTML,” this will open a window that will look like this:
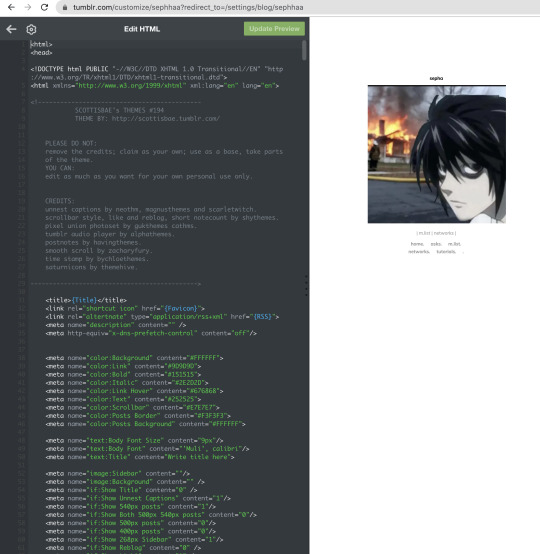
It will open up a window with a bunch of coding, here we will be deleting that code to replace it with a new code that is our new theme. To quickly delete this old code you’d press down on keys:
SHIFT+CMD+A(MAC)
SHIFT+ALT+A(Windows)
This will select all the code:
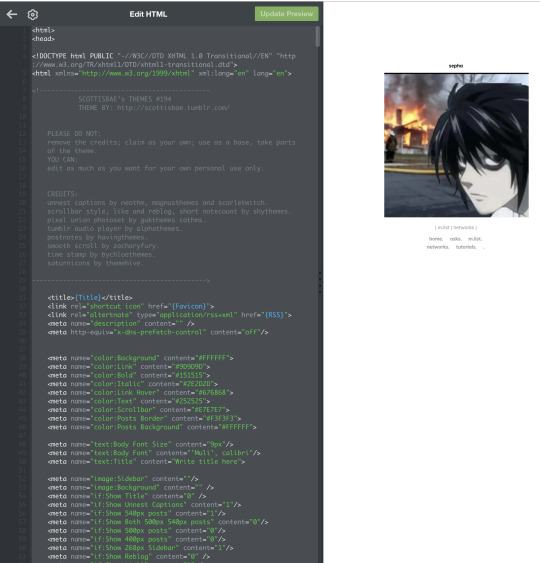
Now as you can see, all of that code is highlighted. You’re going to go ahead and delete it by clicking:
delete(MAC)
or
backspace(Windows)
Once all of it is empty we’re going to head on over to our new code theme.

On your creators theme page(or the theme post, whichever is fine) Many creators have different verbiage for getting codes. Sometimes it’d say, “CODE”, “GET CODE”, “Download,” etc. Either way,(and in my case) you’d click “Get Code,” which will redirect you to a website to download the code.
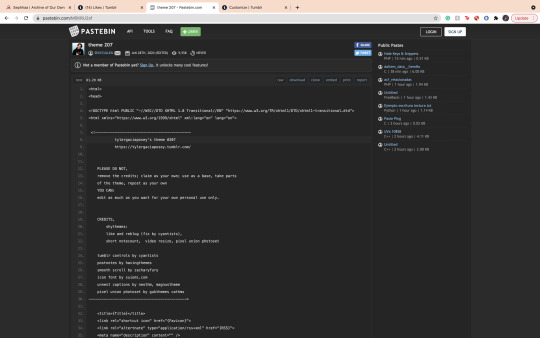
Many creators use Pastebin as a way to paste these VERY long codes. If there’s an option, you’re going to find and click “download.” If you can’t find a download option, it’s likely that you have to click “RAW” to download the code. In my case, the download option is available for me so it’d just click download and it’d open in a separate document. I find that if you download on raw, it will open to a new tab with a long list of code. Either one is fine.
I also want to mention that—some themes you might come across are priced. VERY affordable and if you have some money to spare, def buy a theme and support the creator!
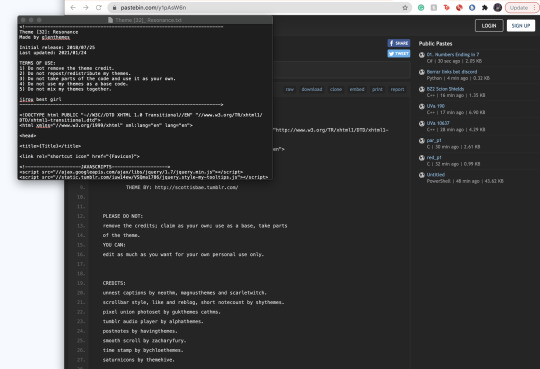
Once you’ve downloaded your theme’s code it will open in a separate doc(or open in a separate tab) with a long list of code. Here you will select all the code:
SHIFT+CMD+A(MAC)
SHIFT+ALT+A(Windows)
This will select all the code, copy the code:
CMD+C(MAC)
ALT+C(Windows)
Go back to your Edit Theme page. You’re going to go ahead and paste your new code onto the empty HTML space:

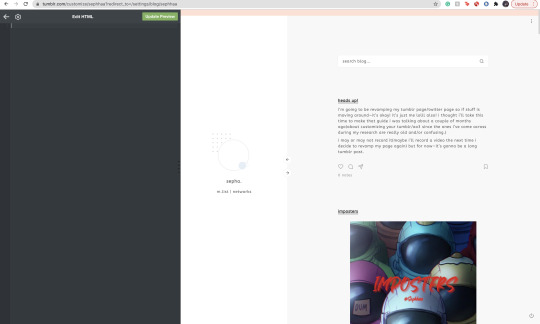
Now with your new code, you will click on “Update Preview” Once it loads, your entire page will change to that new theme’s layout:
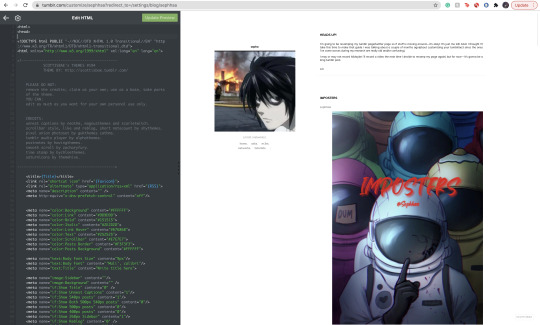
Now click save!
Alright! Now, let’s say you don’t really like the colors, or you want your profile icon to appear on said theme layout(sometimes your avatar icon won’t appear at all or you won’t have that option. If you want that option it’s likely you’re going to have to search for another theme where it’s obvious you can put your profile picture in one of the icons.) You’re going to go to the sidebar, scroll until you see all of these functions:

Here on the sidebar you can change the colors to your theme! You can also change the theme’s background, and in this case(photo icon) in the sidebar feature. You can also scroll down a bit where it says “links” and add names and links to things people can click on.

That’s all for adding your theme!!
COPY ADDRESS LINK:
Now, here is where de-cluttering your blog comes in handy. Here, we’re going to locate our chapters, story post, masterlist etc(if you publish all your written posts on your tumblr) or if you’ve already published all of your story posts/chapters onto your masterlist here on Tumblr then we need to locate the original master post.
The reason we need to locate the original master post is so that when people/readers click your masterlist—it won’t be a reblogged version of it with a bunch of writing you have previously posted on that reblog. The original, 9 times out of 10 looks a lot more organized etc.
Once you have located your masterlist—go on ahead and follow these steps:
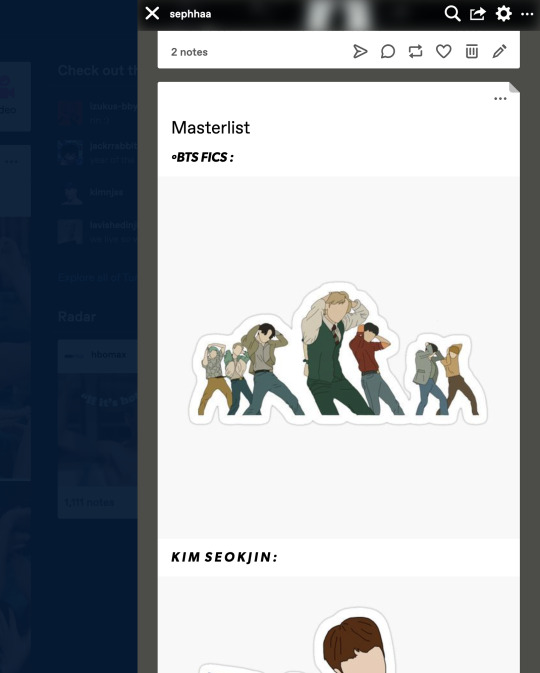
*Hover your mouse on the very top, right hand corner of your masterlist.
*A flap animation is going to appear(like the above photo)
*Once it appears, right click it
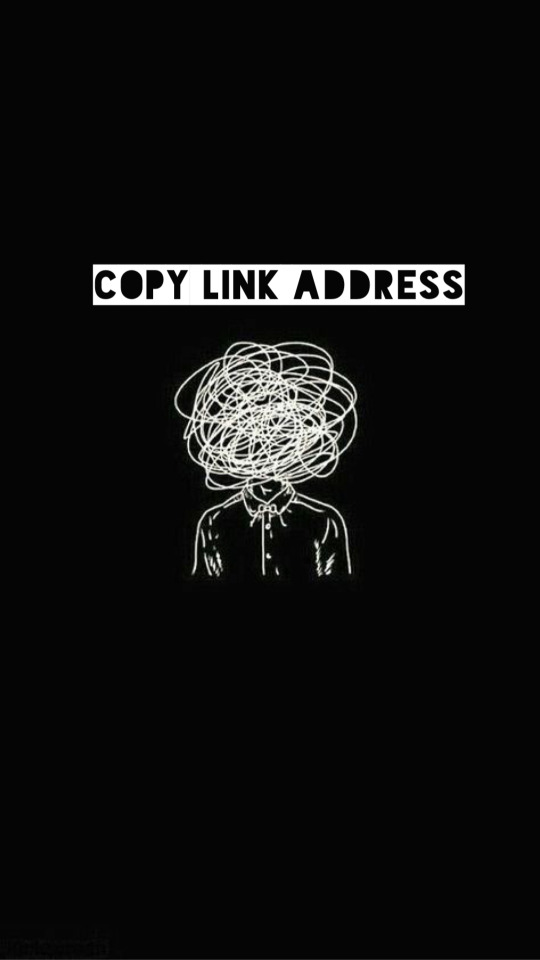
*A little window will appear, it’d look like this:
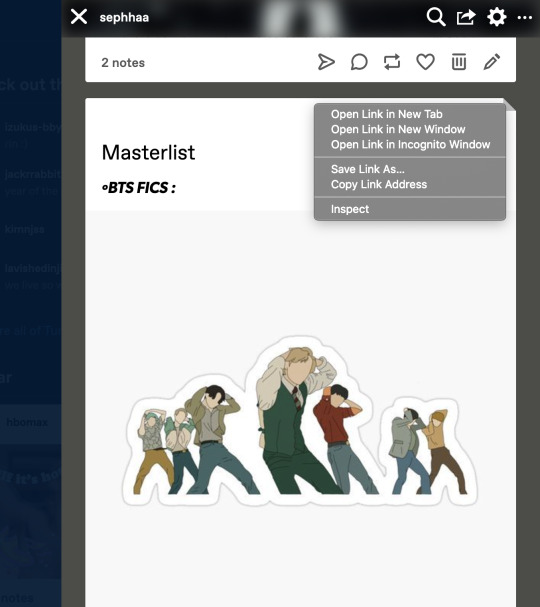
Here you’re going to click, “Copy Link Address.”
Once you have copied the link address you can place this link on your Edit Theme bio so people can click your link to your Masterlist. You can also use this to copy link addresses for all your chapters/story posts when you’re trying to link your chapters within your masterlist. I’ll explain how to do that later in this guide.

MASTERLIST:
Okay! Moving on to creating/revamping your masterlist!
If you already have a masterlist then completely ignore this step and go on over to how to put your masterlist on your bio/any errors you might have come across when trying to put your masterlist on your bio.
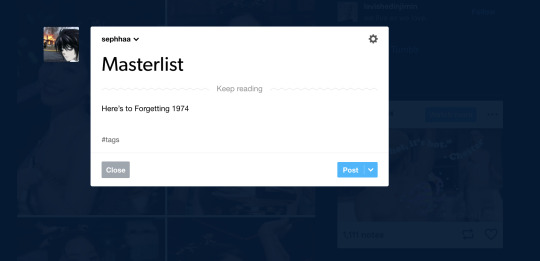
You’re going to go to your homepage and create a new post:
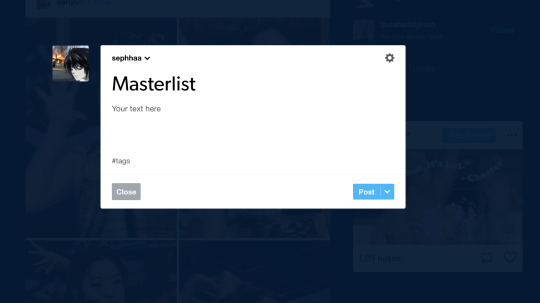
Here you’re going to title your masterlist, add images etc. Here are some features I find that a lot of people don’t know about/where to locate these features:

The, “Keep Reading” feature is a feature I find more than often a lot of people don’t know how to locate/add to their posts. The read more option is especially great if you have a really long chapter or a long post(such as this one) It’s especially helpful if you have a very long masterlist. I’m going to use my masterlist as a example to add the read more feature:
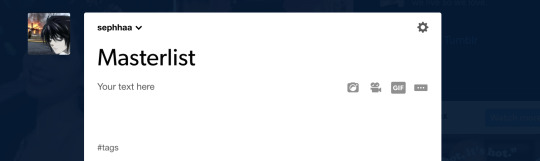
On your masterlist post, you can add the “Keep reading” feature by simply clicking the little three dots icon:

By clicking it—it immediately creates a page break saying, “Keep reading”

Another feature I find people not knowing how to do is linking their stories(story posts) on their masterlist. Here’s how to do it:

Here’s my fic, “Here’s to Forgetting 1974″ and I’m trying to add it to my masterlist. We’re going to copy the address link on this post(make sure if you’re going to add a story to your masterlist that it is the original post) once we have the link let’s go back to our Masterlist:
First we need to set up a title or some sort of text for this feature to work. I simply just titled, “Here’s to Forgetting 1974″ as my text. You’re going to highlight your title—immediately, a set of features will appear:
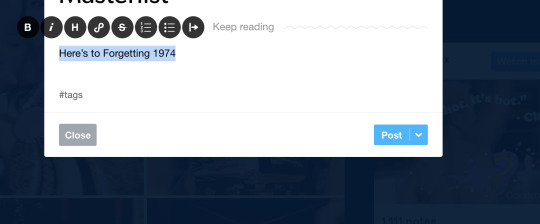
Here we’re going to click on this icon:

This will open to a smaller window to paste a link in:
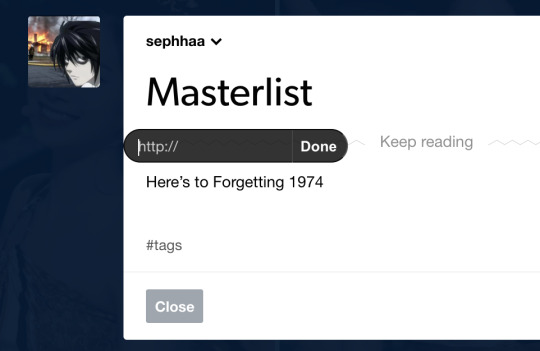
Here we will paste our copy link address from our story post onto this small window link. Once you’ve done that, click “Done.”

Immediately your title is underlined and if you hover your mouse over it and/or click it, it’d redirect you to your story from your masterlist post.
This process is similar if you want to link your chapters onto your story posts.

Here’s my story, “The Case of 1979″ and lets say I published a new chapter for this fic and I want to put the chapter link onto my story post.
*Go copy the copy address link of your new chapter
*Locate your story post:

Let’s say I’m adding a surprise chapter 12(lol)
Type your text, “Chapter 1.” “1, 2, 3″ any type of text. Here I’m just going to title my text, “Chapter 12,”:

And follow the same steps as before:
*Highlight the text
*Click on the link icon
*Paste the copy link address of your published chapter onto the https:// window
*Click done
Once you do that, hover your mouse above the chapter text/click it and it’d redirect you to the chapter from your story post.
Now that your masterlist is set up, here is the very long, and complicated process of adding your masterlist(or any link in general) to your bio.
Head on over to the “Edit Theme,” page.
Here, we will be paying extra attention to the “Description” bar.

Now, there is a bit of coding you’d have to do here and how you write the code MATTERS:
The coding is:
<a href=“
that is:
<a SPACE href= QUOTATION MARK ( “ )
Now. You cannot—CANNOT copy and paste this code in/copy and paste your links on your bio(in case you want to go ahead and copy everything in your bio and save it on a separate doc to save for later) I love copy and paste—less time consuming etc—but unfortunately, the description bar DOES NOT like it so we gotta deal with it lol.
Now you’re going to go ahead and locate your original masterlist post, copy the address link and start setting up the format:
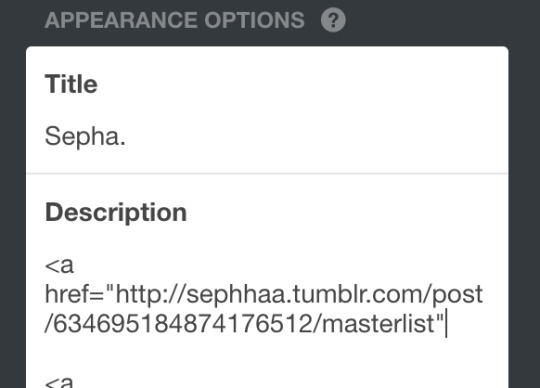
After you have pasted your link and ended it with a quotation mark( “ ) at the end. We need to set up some kind of text so that the entire link doesn’t show up on your bio. I’ll title my text: “ | M.List. | ” You can write any title, as long as its within this coding:
</a> (Beginning)
</a> (End)
</a> TEXT </a>
(of course, all together, no spaces. For the sake of this example I just want to separate the text from the code so you can clearly see what you’d have to do.)
You’re going to put your text in between this coding:
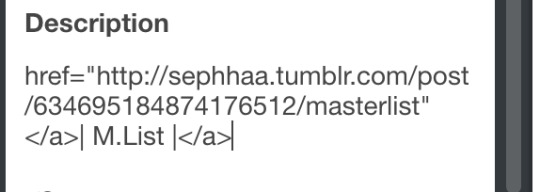
Your link should look like this and it’d appear like this on your theme layout:
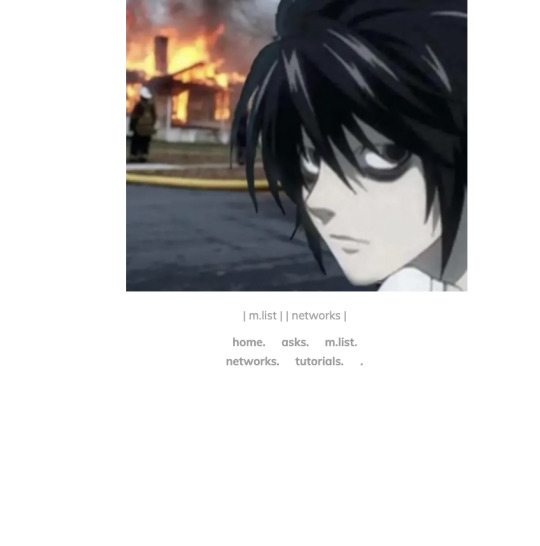
You should be able to click these links even in the theme layout.
And that’s how you set up your links in your bio!
Here is a common problem that happens when you add links to your bio. Let’s say you go ahead, go to settings and decide to change your “Edit Appearance,” to your blog:

Alright, you change your page’s coloring, the background, your profile picture—cool! Not so cool for your links!
Almost immediately, you’d find that your links will cease to work if you change your profile’s appearance. Why? because when you change it, your links are in that bio where the coloring is—those links are also being changed since they’re there.
You’d need to go back to, “Edit Theme” go to the description bar and TYPE out your entire code/text again. You can just copy and paste your copy address link of your masterlist but you’d have to type out the coding and text all over again.
And you’d have to do this every time you decide to change your Tumblr blog’s appearance.
Alright! That is all for this guide! I hope you’ve found this useful! I’ll be uploading an ao3 guide under my “guides” link on my bio where I’ll share how to navigate ao3 and all it’s weird functions. I’ll also teach you guys how to customize your writing(indenting, images, fonts(bold, underlined etc) on the HTML format in the case you don’t like the the other writing format that ao3 has to offer(it’s real ugly lowkey lol) also I’ll be providing some tips and tricks to make posting your ao3 chapters on HTML more simpler.
If you’re interested in me or my stories, I write both BTS content and Anime content( Currently it’s Voltron but I do plan on writing a fic for Death Note and Inyuasha(cuz there isn’t enough Sango and Miroku content and that’s a CRIME) follow me and give my stories a read!
Until my next guide!
7 notes
·
View notes
Photo

*️⃣ How to start using Tumblr: beginner’s guide *️⃣ https://bit.ly/382kW4b In 2019 Tumblr won the biggest International Internet award Webby Awards for Best Online Community. It is hardly the first time for the platform to claim a victory in this category. This clearly shows that, even with the rapid development of Instagram and other social media, it still remains very popular. We are going to tell you about the service and its advantages for business. Read more on our blog 👉 https://bit.ly/382kW4b
0 notes
Text
How to have a popular tumblr
•Download tumblr
•Create account
•?????
•Profit(?)
0 notes
Text
^prev tags
At some point i will have to be more discerning about the follow backs but right now i'm easy this is a free for all
#moveing guides#<tag 4 tumblrguides 4 twitter users#IDK HAOW WELL THE ALT WILL WRK ALL PROBABLY B IRONING THINGS OUT IN IT L8R . this is my 1st time makeing 1 soo#vee tag#reblog w tags#EDIT IT ALREADY BROKE *** *********#fixing it.....
22 notes
·
View notes
Text
New Blog Tab
We have recently added a new section to our main profile to help you guys navigate better. This tab is the OUR TUMBLR GUIDE tab.
https://ourdndlog.tumblr.com/TUMBLRGUIDE
There you will find a simple guide on what each tab is for and what hashtags to use to find specific content.
Enjoy!
1 note
·
View note
Text
COMMERCE REFERRAL
Refer new users to Sovrn. Earn 15% of the net revenue from that partnership for 6 months.
Copy the link below to share with other people you think would be a good fit to work with Sovrn.
Your unique referral link
https://platform.sovrn.com/account/signup?comref=366520
#getstartedontumblr#tumblrtutorial#tumblrguide#tumblrhelp#howtousetumblr#french#socialmediatips#german#italian#portuguese
0 notes
Text
item on air, not selling, so get in now and get at reduced forced price, you control the sale, 20 left, get in now, call to action urgent, if i sell this, they will give me job, tjc channel 22 british tv
#tjc#tumblrhelp#tumblrtutorial#howtousetumblr#french#italian#portuguese#german#getstartedontumblr#tumblrguide#socialmediatips
0 notes
Text
#tumblrhelp#socialmediatips#tumblrtutorial#german#french#howtousetumblr#getstartedontumblr#tumblrguide#italian#portuguese
0 notes
Text
0 notes
Text
0 notes
Text
0 notes
Text
Hello, and welcome to Daily Dashboard Tips! In our first post, we're going to walk you through the process of setting up a Tumblr account. Whether you're new to the platform or just getting started, creating a Tumblr account is quick and easy. Let's dive in!
0 notes