#UIViewControllers
Explore tagged Tumblr posts
Visit Tumblr Blog
Explore Tumblr blogs with no restrictions, modern design and the best experience.
Last Seen Tumblr Blogs


Fun Fact
Tumblr’s reach among the 26-to-35-year-olds in the US is 11%.
Text
Augmented Reality App Development Using ARKit

Augmented Reality (AR) has transformed the way users interact with the digital world, blending virtual elements with the real environment. ARKit, Apple's powerful framework for AR development, provides developers with the tools they need to create immersive AR experiences on iOS devices. This post will guide you through the basics of ARKit, its features, and how to get started with AR app development.
What is ARKit?
ARKit is a framework developed by Apple that enables developers to create augmented reality applications for iOS. It uses advanced computer vision and device motion tracking to integrate virtual content into the real world seamlessly. ARKit is designed to work with iPhone and iPad devices, making it accessible to a wide range of users.
Key Features of ARKit
Motion Tracking: Tracks the device's position and orientation in 3D space.
Environmental Understanding: Detects flat surfaces, such as tables or floors, to place virtual objects accurately.
Light Estimation: Adjusts the lighting of virtual objects to match the real-world environment.
Face Tracking: Recognizes and tracks facial features, enabling immersive experiences like filters or animations.
AR Anchors: Allows you to place virtual objects in the real world and keep them in place as the user moves around.
Getting Started with ARKit
Set Up Your Development Environment:
Install Xcode, Apple's integrated development environment (IDE).
Create a new project and choose the "Augmented Reality App" template.
Choose a Programming Language: ARKit supports both Swift and Objective-C. Swift is recommended for new projects.
Familiarize Yourself with ARKit API: Explore the ARKit documentation to understand key classes like ARSession, ARConfiguration, and ARAnchor.
Basic Example: Creating a Simple AR App
This example shows how to create a simple AR app that places a virtual cube on a detected flat surface:import UIKit import ARKit class ViewController: UIViewController, ARSCNViewDelegate { @IBOutlet var sceneView: ARSCNView override func viewDidLoad() { super.viewDidLoad() sceneView.delegate = self sceneView.showsStatistics = true let tapGesture = UITapGestureRecognizer(target: self, action: #selector(didTapScreen)) sceneView.addGestureRecognizer(tapGesture) let configuration = ARWorldTrackingConfiguration() configuration.planeDetection = [.horizontal] sceneView.session.run(configuration) } @objc func didTapScreen(gesture: UITapGestureRecognizer) { let location = gesture.location(in: sceneView) let hitTestResults = sceneView.hitTest(location, types: .existingPlaneUsingExtent) if let result = hitTestResults.first { let cube = SCNBox(width: 0.1, height: 0.1, length: 0.1, chamferRadius: 0) let material = SCNMaterial() material.diffuse.contents = UIColor.red cube.materials = [material] let cubeNode = SCNNode(geometry: cube) cubeNode.position = SCNVector3(result.worldTransform.columns.3.x, result.worldTransform.columns.3.y + 0.05, result.worldTransform.columns.3.z) sceneView.scene.rootNode.addChildNode(cubeNode) } } }
Best Practices for AR Development
Optimize 3D Models: Keep the polygon count low for better performance.
Test on Real Devices: Always test AR experiences on actual iOS devices for accurate performance.
Consider User Experience: Provide clear instructions for users on how to interact with the AR elements.
Leverage Lighting: Use realistic lighting to enhance the integration of virtual objects into the real world.
Advanced Features to Explore
Image Tracking: Recognize and track images in the environment.
Object Detection: Place virtual objects based on recognized physical objects.
Face Tracking: Utilize ARKit's face tracking capabilities for interactive experiences.
Multi-user Experiences: Implement shared AR experiences where multiple users can interact in the same virtual space.
Conclusion
ARKit provides developers with a robust framework for creating immersive augmented reality experiences on iOS. By leveraging the powerful features of ARKit, you can build innovative applications that engage users in new and exciting ways. Start exploring ARKit today and be part of the future of technology!
0 notes
Text
Scheduling Work in Swift using `NSTimer`
NSTimer can be used to perform scheduled work in Swift. Sometimes it is simpler than other options like GCD (Grand Central Dispatch) or NSOperationQueue, particularly if what you are scheduling needs to run on the main UI thread to access UIView instances anyway. There are also more options coming in the future such as Actors.
Here is an example of using NSTimer running a block of code five times, one second apart:
import Foundation import PlaygroundSupport import UIKit let maxRepeats = 5 var currentRepeats = 0 let blockTimerWith5Runs = Timer.scheduledTimer(withTimeInterval: 1.0, repeats: true) { timer in currentRepeats += 1 print("Block ran \(currentRepeats) times(s)!") if (currentRepeats >= maxRepeats) { timer.invalidate() } }
In an iOS app, RunLoop.main will already be running. In XCode playgrounds you also need:
RunLoop.main.run(until: Date(timeIntervalSinceNow: 6))
Output:
Block ran 1 times(s)! Block ran 2 times(s)! Block ran 3 times(s)! Block ran 4 times(s)! Block ran 5 times(s)!
It can also be used to run a function:
class FunctionTimerExample { init() { Timer.scheduledTimer(timeInterval: 1.0, target: self, selector: #selector(self.peep), userInfo: nil, repeats: false) } @objc func peep() { print("Function ran once!") } } let functionTimerExample = FunctionTimerExample() RunLoop.main.run(until: Date(timeIntervalSinceNow: 2))
Output:
Function ran once!
The function can optionally receive the Timer itself as an argument with some user info attached:
class Counter { var count : Int init(_ count: Int) { self.count = count } } class FunctionTimerWithArgExample { init() { let userInfo = Counter(0) Timer.scheduledTimer(timeInterval: 1.0, target: self, selector: #selector(self.peepArg), userInfo: userInfo, repeats: true) } @objc func peepArg(timer: Timer) { guard let userInfo = timer.userInfo as? Counter else { return } userInfo.count += 1 print("Function with arg ran \(userInfo.count) time(s)!") if (userInfo.count >= maxRepeats) { timer.invalidate() } } } let functionTimerWithArgExample = FunctionTimerWithArgExample() RunLoop.main.run(until: Date(timeIntervalSinceNow: 6))
Output:
Function with arg ran 1 time(s)! Function with arg ran 2 time(s)! Function with arg ran 3 time(s)! Function with arg ran 4 time(s)! Function with arg ran 5 time(s)!
An example use case is debouncing a search input
class DebouncedSearchViewController: UIViewController { var textField = UITextField(frame: CGRect(x: 20, y: 20, width: 200, height: 24)) var timer : Timer? override func viewDidLoad() { super.viewDidLoad() view.addSubview(textField) textField.placeholder = "Enter search" textField.backgroundColor = .green self.textField.addTarget( self, action: #selector(self.textFieldDidChange(textField:)), for: .editingChanged); } @objc func textFieldDidChange(textField: UITextField){ print("Text changed: " + textField.text!) timer?.invalidate() timer = Timer.scheduledTimer(withTimeInterval: 2.0, repeats: false, block: { _ in guard let text = textField.text else { return } print("Submit debounced search query for: \(text)") }) } } let vc = DebouncedSearchViewController() vc.view.frame = CGRect(x: 0, y: 0, width: 300, height: 300) PlaygroundPage.current.needsIndefiniteExecution = true PlaygroundPage.current.liveView = vc.view
Demo of typing `ABC` quickly followed by `Z` after waiting for a second:

At one company I worked at, we found having a 500ms debounce instead of 200ms reduced the number of network calls, and thus reduced operational costs, without impacting user engagement. So there are debounce values you can use that will save things like cost, network bandwidth, and battery life without hurting user experience.
Warning: If doing some blocking operation like networking or file IO, make sure to start the timer off the main thread, or create a different run loop and add it to that run loop manually. Everything above runs on the main UI thread, so could lock up the user interface on the user if blocking operations were added.
2 notes
·
View notes
Text
Implementing Builder Pattern to create Navigation Stack for UIViewController on iOS
Implementing Builder Pattern to create Navigation Stack for UIViewController on iOS
Photo by helloimnik on Unsplash Introduction A Builder pattern is one of Design Pattern that belongs to the creational Design Pattern. The pattern exist to solve issue on creating a complex object. This pattern can helps developer to create an object in a simple and elegant way. To use the pattern, we need to create our own type of the object that we want to build. Let’s dive in to the…

View On WordPress
#Builder Pattern#Builder Pattern Swift#Creational Design Patterns#Design Pattern#Design Patterns#iOS#iOS Design Patterns#Ios Development#Object Oriented Design Patterns
1 note
·
View note
Link
original source : https://stackoverflow.com/questions/26923003/how-do-i-make-a-custom-initializer-for-a-uiviewcontroller-subclass-in-swift
class ViewController: UIViewController { var imageURL: NSURL? // this is a convenient way to create this view controller without a imageURL convenience init() { self.init(imageURL: nil) } init(imageURL: NSURL?) { self.imageURL = imageURL super.init(nibName: nil, bundle: nil) } // if this view controller is loaded from a storyboard, imageURL will be nil /* Xcode 6 required init(coder aDecoder: NSCoder) { super.init(coder: aDecoder) } */ // Xcode 7 & 8 required init?(coder aDecoder: NSCoder) { super.init(coder: aDecoder) } }
0 notes
Text
Week 320
Happy Thursday! The first beta of Xcode 11.4 is out, and it’s a big one 😁. Go read the release notes and I’m sure you’ll find at least a few things that will make you happy. Swift 5.2? Support for push notifications in the simulator? iOS/macOS bundles and universal purchases? A fix for that annoying bug that doesn’t let you add a 0 constant constraint in Interface Builder? Huge improvements for XCTest? I’ve been having fun watching the reactions on Twitter, and there really is something for everyone. A lot of people were excited for different things. Great job by the people working on dev tools at Apple! 👏
Marius Constantinescu
Articles
Using Self Executing Closures to Run Code in SwiftUI, by @simmelj
Snatch Bugs with This Lightweight Bug-Reporting iOS Library, by @dabodamjan
Using UIView and UIViewController in SwiftUI, by @V8tr
Building ViewModels with Combine framework, by @mecid
Architecting a Feature Toggle Service for iOS Apps, by @andreaslydemann
Mastering Xcode Previews with SnapKit + UIKit, by @lyeskin
Gradient in SwiftUI, by @sarunw
Dynamic Master Detail View Background Colors, by @jordanmorgan10
Tools/Controls
Swift Crypto - Open-source implementation of a substantial portion of the API of Apple CryptoKit suitable for use on Linux platforms, by Apple
URLFormat - Type safe url pattern matching without regular expressions and arguments type mismatches based on parser combinators, by @ilyapuchka
UI/UX
Multitasking User Interface, by @_nb
Videos
iOS Conference SG 2020, by @iosconfsg
Credits
V8tr, sarunw, goranbrl, mecid, andreaslydemann, lyeskin
1 note
·
View note
Text
Projeto Pitch Perfect da Udacity
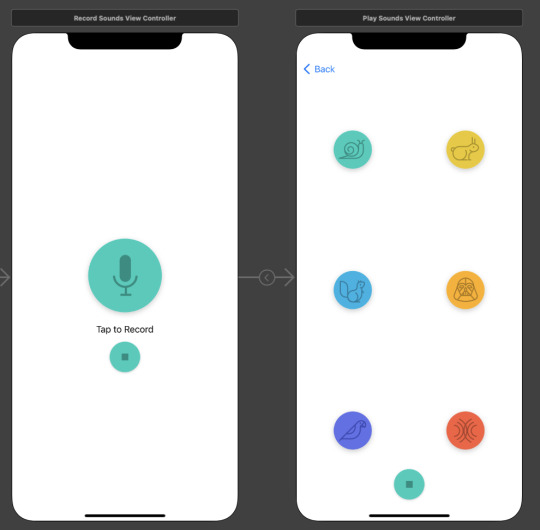
O aplicativo grava a sua voz, e toca ela com o efeito que desejar.
Nesse primeiro projeto do Nanodegree, ja pude revisar e aprender varias bases do desenvolvimento de aplicativos iOS.
Criar um novo projeto usando template "iOS App".
Adicionar botões, imagens/assets, labels e criar uma interface usando UIKit e Storyboard.
Os princípios da arquitetura: Model View Controller (MVC) isso incluindo escrever um model code customizado, e usando UIViewController e UIView.
Criar conexões Outlet e Action, entre views e views controllers, usando o benefício dos Delegates no código.
Navegar entre 2 cenas/telas/views usando UINavigationController
Gravando arquivos de áudio usando o AVFoundation e AVAudioEngine class.
Testar o aplicativo em um simulador.
Procurar por funções na documentação, resolver bugs e ver códigos da comunidade.
0 notes
Text
Just finished refactoring a 115+ screens #SwiftUI app to UIKit navigation. Every screen has its own UIViewController and is self-contained. Feels so good 😇 As long as SwiftUI is still based on UIKit, using UIKit is a safer bet.
— Khoa Pham (@onmyway133) April 2, 2022
0 notes
Text
New Features in iOS 15 and Swift 5.5
Introduction
At Worldwide Developers Conference 21, Apple has overcome many limitations by announcing some important features for developers. Apple has made sure while introducing the new features in iOS 15 and Swift 5.5 that every developer can build the best interactive applications with minimal time and effort. In this blog post, we will learn a few new features that have been introduced and see how we can implement them in our code.
New Features in iOS 15 and Swift 5.5
1. UISheetPresentationController
Apple provided some new API improvements in WWDC 21 to present the bottom sheets. In iOS 14, they introduced this, but it didn’t have any customization, but from iOS 15, we can implement apple maps like a bottom sheet with a smaller height. It has customization like height adjustment, adding a grabber to the top of the sheet.
UIViewController has a new property called sheetPresentationController; you can present the bottom sheet. We can access the sheetPresentationController property to get the instance of UISheetPresentationController for customizing its appearance.
Read more for New Features in iOS 15
0 notes
Text
Major Difference between iOS and Android App
Major Difference between iOS and Android App
For the inexperienced eye, creating mobile apps for Android or iOS can be very similar, but the truth is that each operating system has its peculiarities. In addition to the technical bases for the development of apps, in the process of creating an application there are many differences if it is Android or iOS. Not only on a technical level, but also on a design and mobile strategy level.
That is, the complete conception of the app will depend on the operating system. For this reason, it will be above all the Android or iOS programmer who goes from one operating system to another, who will notice it the most.
Then, what are the major differences between iOS and Android Apps?
Development differences
Let’s first see the differences that we can find at the mobile app development level when we have to create apps for Android or iOS mobile devices.
Read More Blogs:
cost to develop an on-demand delivery app like Doordash
Programming language
As they are different operating systems, apps are programmed with different programming languages. It is precisely its most distinctive feature: iOS uses Objective-C / Swift, while Android uses Java to create mobile apps.
Test the app
The testing phase of an app is essential in the process of creating mobile applications, just like for games and any other type of software. We must check that our development works perfectly. For this, we usually use the iOS simulator and the Android emulator for the two respectively.
The differences that we can see are that the iOS simulator is much faster than its equivalent for Android. But the advantage of the Android emulator is that it is an effective virtual machine with a virtualized CPU, so it is more realistic than that of iOS. In fact, the iOS simulator often fails to give realistic and accurate representations of Apple devices.
However, we will always recommend testing and testing on real mobile devices in order to see the interaction flow of the app and the failures in real hardware.
Graphic interface
Here we run into the visual differences when creating an app for Android or developing it for iOS. It will also be the end user who perceives the differences in the design.
At a technical level, the developer will mount XML files in the interfaces on Android. They are very similar to iOS XIB files , but the latter are not readable.
As for the animations, iOS is much better prepared than Android. Although Google has tried to solve it in the preview of Android L and with the trend of Material Design in terms of app design.
While Apple has always focused on smooth, complex and powerful animations, taking great care of aesthetics and user experience; Google, for its part, has taken care of them taking into account the hardware as the main objective.
‘Go back’
Another major difference between Android and iOS is the functionality of the ‘Back’ button, which does exist in Android but does not exist in iOS. So, throughout the development, this subsection must be taken into account.
In the case of Android, that button will be used for navigation, while in iOS it must be approached in another way. Either indicating on the screen how to go back, or with another type of interaction flow when it is not necessary.
Other differences in development
Delegate vs Adapter: iOS uses the delegate pattern when using delegate patterns. In Android, that pattern is represented by an adapter. Although they are different platforms and words, they are very similar concepts.
UIViewController vs Activity: in Android we use the Activity class to render a screen on an Android mobile device. On iOS, it’s the UIViewController that does that job. With it, we can also manage the life cycles of events, subviews, etc. Although it is not exactly the same, they have the same role.
Unlock: Android devices are unlocked by dragging up and on iOS to the right.
Preferences and permissions: better grouped in iOS devices, we find them all together in the general preferences of the device. In Android, they are more dispersed and it is necessary to navigate through the device to reach them.
Maps: in iOS development we can use Apple maps or Google Maps, but in Android we will generally use Google Maps .
Other differences when creating apps
Not only the technical part presents differences in operating systems when creating an app. Since the design and marketing part are clearly affected at a very basic level. Let’s see how these differences come to play:
Cost of creating apps
We have already talked to you on occasion about the cost differences when creating apps for Android or iOS . In fact, although the difference is not very big, the development for iOS is slightly more expensive. Due to a smaller offer than in Android since the initial material to develop iOS is more expensive as it requires original Apple materials.
App design
As we have already said before, the design of an app is closely related to development . Therefore, visually the iOS design is also different from the Android design.
Each of them has their respective logic of interaction and style strongly influenced by the creator brands of the operating systems. Therefore, it is advisable to have app designers who are experts in one or both operating systems. Thus, they will advise you according to your project. Only in this way can we create really good and interesting apps.
Read More Blogs:
cost to develop food delivery app like UberEATS
App Store Optimization
As might have been known already, app store optimization is not the same for both Android and iOS Apps. We will have to take it into account when optimizing the app so that it is properly positioned in the stores. You will have to pay special attention to the differences in title and description, since the rest of the variables are more or less the same for both cases.
Monetization and return on investment
As a general rule, the return on investment is not the same for both iOS and Android apps. If we talk about the income route, that is, the way to monetize the app itself, we see that on iOS, it is more common to charge for downloads and purchases within the app.
In contrast, on Android, applications are usually free to download and are monetized through embedded ads within the mobile application.
After analyzing the differences between iOS and Android, which operating system do you prefer? And if you want an app for your company, don’t hesitate to contact us at Brillmindz Technologies, The best mobile app development company in Bangalore India!
0 notes
Text
How to Build a Login Screen in SwiftUI
In WWDC 2019 Apple announced a completely new user interface development framework called SwiftUI. SwiftUI is a user interface toolkit that lets us design apps in a declarative way. There was lots of talk about whether we should use Storyboard or build UI programmatically. SwiftUI is the answer to all these questions. You can now develop the app's UI with a declarative Swift syntax.
No more storyboard, Interface Builder and Auto-layout
Earlier we used to develop user interfaces with storyboards, xib's and auto layout. But with SwiftUI, storyboard and auto-layout are completely out of the picture. Now the code editor is available with a preview canvas.
Migrating from UIKit to SwiftUI
If you've used UIKit before then you need to understand what's the UIKit component equivalent in SwiftUI. Many of the classes you know just by removing prefix UI but few have been renamed. Let's have a look at the list.
1. UIViewController: View
2. UITableViewController: List
3. UITabbarController: TabView
4. UINavigationController: NavigationView
5. UIAlertController: Alert
6. UIAlertController with style .actionSheet: ActionSheet
7. UILabel: Text
8. UITextField: TextField
9. UITextField with secure entry: SecureField
10. UISwitch: Toggle
11. UISlider: Slider
12. UIButton: Button
13. UIStackView with horizontal axis: HStack
14. UIStackView with vertical axis: VStack
15. UIImageView: Image
16. UISegmentedControl: SegmentedControl
17. UIStepper: Stepper
18. UIDatePicker: DatePicker
19. UIPickerView: Picker
20. UITabbar: TabView
21. UINavigationBar: NavigationView
22. UIScrollView: ScrollView
Creating Project:
Step 1 - Creating a new project with SwiftUI
Step 2 - Add the VStack in the View. It will act as Vertical StackView
Step 3 - Add title text as Login in the View and can set style to the Text.
Step 4 - Adding Image to the top of the Screen to show that its user's login and adding frame of width and height as shown below.
Fig 1 - Adding Image and Text
Step 5 - Adding Text Field for Phone Number and password with TestField and SecureField inside the VStack and Alignment to leading.
Step 6 - Adding placeholder to the textfield , Add Text and Value will be saved in the Variable.
Step 7 - Give Divider() for allowing space between two textfield and add style as required for the textfield to be displayed.
Step 8 - Adding padding to bottom and given 15.
Step 9 - Adding Button of forgot password inside the HStack to align the right corner of the screen with the Text as shown below.
Fig 2 - Adding Textfield and SecureField with Forget Password
Step 10 - Add a button with the title “Login” for clicking the login functionality inside the VStack.
Step 11 - In this button Action will be added inside the action closure function and can add text to the button (i.e Title) and Style the button as shown.
Fig 3 - Adding Button with Action and Text
Step 12 - Add a button which will have an action to move to SignUp Screen inside the HStack with spacing. Where the SignUp text will be clickable which we implement using Attribute text Similarly in SwiftUI it is implemented in Simple Way.
Fig 4 - "Don't have an Account ? Sign Up"
Final Result - Login Screen with PhoneNumber and Password using SwiftUI
Conclusion
SwiftUI is new to everyone and might take time to get stable as a framework. But SwiftUI is the future of iOS development. There are a lot of things to learn in SwiftUI.
0 notes
Text
HackingWithSwift Day 24/25/26
Introduction to WKWebview
“The delegation solution is brilliant: we can tell WKWebView that we want to be informed when something interesting happens. In our code, we're setting the web view's navigationDelegate property to self, which means "when any web page navigation happens, please tell me – the current view controller.” Definition of delegation by the author, this will comes in handle when we create our own custom delegate after this.
class ViewController: UIViewController, WKNavigationDelegate
Parent class comes first, then only protocol next
@objc func openTapped() { let ac = UIAlertController(title: "Open page…", message: nil, preferredStyle: .actionSheet) ac.addAction(UIAlertAction(title: "apple.com", style: .default, handler: openPage)) ac.addAction(UIAlertAction(title: "hackingwithswift.com", style: .default, handler: openPage)) ac.addAction(UIAlertAction(title: "Cancel", style: .cancel)) ac.popoverPresentationController?.barButtonItem = self.navigationItem.rightBarButtonItem present(ac, animated: true) }
func openPage(action: UIAlertAction) { let url = URL(string: "https://" + action.title!)! webView.load(URLRequest(url: url)) }
action.title is refer to the title set at the new instance of UIAlertAction
================== And the very first delegate we use under WKNavigationDelegate
func webView(_ webView: WKWebView, didFinish navigation: WKNavigation!) { title = webView.title }
Whenever web view finished load a page, it will change the navigation title to be the same as web view title
==================
Now introduce UIToolbar and UIProgressView
var progressView: UIProgressView = UIProgressView(progressViewStyle: .default) progressView.sizeToFit() let progressButton = UIBarButtonItem(customView: progressView)
let spacer = UIBarButtonItem(barButtonSystemItem: .flexibleSpace, target: nil, action: nil) let refresh = UIBarButtonItem(barButtonSystemItem: .refresh, target: webView, action: #selector(webView.reload))
toolbarItems = [progressButton, spacer, refresh]
Wrap the progress button in UIBarButtonItem and add it to toolbarItems =============
Key-value observing (KVO)
To update the progressView we need to know the web view loading progress
webView.addObserver(self, forKeyPath: #keyPath(WKWebView.estimatedProgress), options: .new, context: nil)
Usually when do addObserver(), one need to take care of removeObserver() to ensure everything run fine
Then add the following method to get the value
override func observeValue(forKeyPath keyPath: String?, of object: Any?, change: [NSKeyValueChangeKey : Any]?, context: UnsafeMutableRawPointer?) { if keyPath == "estimatedProgress" { progressView.progress = Float(webView.estimatedProgress) } }
Since we want to observe the key path of WKWebView.estimatedProgress, then inside the method, we check if the key path of the value is actually same as WKWebView.estimatedProgress. If it’s the same, we get the estimate progress and update the progressView progress.
The extra float casting is needed since webView.estimatedProgress is a Double, and progressView.progress only accept Float.
================= func webView(_ webView: WKWebView, decidePolicyFor navigationAction: WKNavigationAction, decisionHandler: @escaping (WKNavigationActionPolicy) -> Void) { let url = navigationAction.request.url
if let host = url?.host { for website in websites { if host.contains(website) { decisionHandler(.allow) return } } }
decisionHandler(.cancel) }
To ensure user can’t navigate to other page, need this delegate method to control the site, but need to read more on @escaping closure
===================
0 notes
Link
original source : https://developer.apple.com/library/content/featuredarticles/ViewControllerPGforiPhoneOS/index.html#//apple_ref/doc/uid/TP40007457-CH2-SW1
The Role of View Controllers
View controllers are the foundation of your app’s internal structure. Every app has at least one view controller, and most apps have several. Each view controller manages a portion of your app’s user interface as well as the interactions between that interface and the underlying data. View controllers also facilitate transitions between different parts of your user interface.
Because they play such an important role in your app, view controllers are at the center of almost everything you do. The UIViewController class defines the methods and properties for managing your views, handling events, transitioning from one view controller to another, and coordinating with other parts of your app. You subclass UIViewController (or one of its subclasses) and add the custom code you need to implement your app’s behavior.
There are two types of view controllers:
Content view controllers manage a discrete piece of your app’s content and are the main type of view controller that you create.
Container view controllers collect information from other view controllers (known as child view controllers) and present it in a way that facilitates navigation or presents the content of those view controllers differently. (content를 다루지 않는다. root view만 관리한다)
Most apps are a mixture of both types of view controllers.
View Management
The most important role of a view controller is to manage a hierarchy of views. Every view controller has a single root view that encloses all of the view controller’s content. To that root view, you add the views you need to display your content. Figure 1-1 illustrates the built-in relationship between the view controller and its views. The view controller always has a reference to its root view and each view has strong references to its subviews.

NOTE
It is common practice to use outlets to access other views in your view controller’s view hierarchy. Because a view controller manages the content of all its views, outlets let you store references to the views that you need. The outlets themselves are connected to the actual view objects automatically when the views are loaded from the storyboard.
A content view controller manages all of its views by itself. A container view controller manages its own views plus the root views from one or more of its child view controllers. The container does not manage the content of its children. It manages only the root view, sizing and placing it according to the container’s design. Figure 1-2 illustrates the relationship between a split view controller and its children. The split view controller manages the overall size and position of its child views, but the child view controllers manage the actual contents of those views.

For information about managing your view controller’s views, see Managing View Layout.
Data Marshaling
A view controller acts as an intermediary between the views it manages and the data of your app. The methods and properties of the UIViewController class let you manage the visual presentation of your app. When you subclass UIViewController, you add any variables you need to manage your data in your subclass. Adding custom variables creates a relationship like the one in Figure 1-3, where the view controller has references to your data and to the views used to present that data. Moving data back and forth between the two is your responsibility.

You should always maintain a clean separation of responsibilities within your view controllers and data objects. Most of the logic for ensuring the integrity of your data structures belongs in the data objects themselves. The view controller might validate input coming from views and then package that input in the format that your data objects require, but you should minimize the view controller’s role in managing the actual data.
A UIDocument object is one way to manage your data separately from your view controllers. A document object is a controller object that knows how to read and write data to persistent storage. When you subclass, you add whatever logic and methods you need to extract that data and pass it to a view controller or other parts of your app. The view controller might store a copy of any data it receives to make it easier to update views, but the document still owns the true data.
User Interactions
View controllers are responder objects and are capable of handling events that come down the responder chain. Although they are able to do so, view controllers rarely handle touch events directly. Instead, views usually handle their own touch events and report the results to a method of an associated delegate or target object, which is usually the view controller. So most events in a view controller are handled using delegate methods or action methods.
For more information about implementing action methods in your view controller, see Handling User Interactions. For information about handling other types of events, see Event Handling Guide for iOS.
Resource Management
A view controller assumes all responsibility for its views and any objects that it creates. The UIViewControllerclass handles most aspects of view management automatically. For example, UIKit automatically releases any view-related resources that are no longer needed. In your UIViewController subclasses, you are responsible for managing any objects you create explicitly.
When the available free memory is running low, UIKit asks apps to free up any resources that they no longer need. One way it does this is by calling the didReceiveMemoryWarning method of your view controllers. Use that method to remove references to objects that you no longer need or can recreate easily later. For example, you might use that method to remove cached data. It is important to release as much memory as you can when a low-memory condition occurs. Apps that consume too much memory may be terminated outright by the system to recover memory.
Adaptivity
View controllers are responsible for the presentation of their views and for adapting that presentation to match the underlying environment. Every iOS app should be able to run on iPad and on several different sizes of iPhone. Rather than provide different view controllers and view hierarchies for each device, it is simpler to use a single view controller that adapts its views to the changing space requirements.
In iOS, view controllers need to handle coarse-grained changes and fine-grained changes. Coarse-grained changes happen when a view controller’s traits change. Traits are attributes that describe the overall environment, such as the display scale. Two of the most important traits are the view controller’s horizontal and vertical size classes, which indicate how much space the view controller has in the given dimension. You can use size class changes to change the way you lay out your views, as shown in Figure 1-4. When the horizontal size class is regular, the view controller takes advantage of the extra horizontal space to arrange its content. When the horizontal size class is compact, the view controller arranges its content vertically.

Within a given size class, it is possible for more fine-grained size changes to occur at any time. When the user rotates an iPhone from portrait to landscape, the size class might not change but the screen dimensions usually change. When you use Auto Layout, UIKit automatically adjusts the size and position of views to match the new dimensions. View controllers can make additional adjustments as needed.
For more information about adaptivity, see The Adaptive Model.
다음 내용 ) https://developer.apple.com/library/content/featuredarticles/ViewControllerPGforiPhoneOS/TheViewControllerHierarchy.html#//apple_ref/doc/uid/TP40007457-CH33-SW1
#ios#Content view controllers#controller#view#views#controllers#contatiner view controllers#UIViewController#UIDocument#root#root view#didReceiveMemoryWarning#memeory#resource
0 notes
Text
Week 303
Happy Thursday! This week we got the release of macOS Catalina, and with that, the first Catalyst apps are out. However, that does not include two of the most anticipated apps, announced at WWDC: Twitter and Asphalt 9 for macOS using Catalyst aren’t out yet, and they’ve also been removed from the Apple’s Catalyst website. There are, however, other Catalyst apps that are launched, but it seems to me that the general impression of developers on Catalyst is that there’s still work to be done.
In Xcode release news, we got Xcode 11.1 GM, which is the same as the GM Seed 1 from 24 September. It’s kind of hard to keep up with the Xcode releases, but xcodereleases.com helps with that :).
Marius Constantinescu
Articles
Rewriting iOS Purchase Layer for #1 Top Grossing App using Modules, by @schung7
How to build a modular architecture in iOS, by @benoitpasquier_
What is Module Stability in Swift and why should you care?, by @donnywals
Advanced iOS Memory Management with Swift: ARC, Strong, Weak and Unowned Explained, by @V8tr
Dynamic Type in SwiftUI, by @mecid
Implementing Dark Mode in iOS 13, by @timonus
Catalytic Converter, by @jamesthomson
SwiftUI Tutorial for Slider Control, by @ExyteHQ
Tools/Controls
Yaap - Yet Another (Swift) Argument Parser, by @dhartbit
ScrollStackController - Create complex scrollable layout using UIViewControllers and simplify your code, by @danielemargutti
ColorCompatibility - Use iOS 13+ system colors while defaulting to light colors on iOS
4 notes
·
View notes
Link
0 notes
Text
iOSのネットワーク接続状態の検出にはReachabilityよりシンプルなNWPathMonitorを使いましょう。
from https://qiita.com/meSummery/items/9d096162a351e2e922c5?utm_campaign=popular_items&utm_medium=feed&utm_source=popular_items
iOSでネットワーク接続状態の取得といえばReachabilityを使うといった印象が強くありませんか。
Reachabilityを使うには、まず https://developer.apple.com/library/archive/samplecode/Reachability/Introduction/Intro.html からApple の提供しているサンプルコードをダウンロードして・・・なんて手間がありましたが、もっと手軽に利用できるApple標準のクラスがありました。
簡単にネットワーク接続のモニタリングが可能
NWPathMonitor
ネットワークの接続状態やネットワークインターフェースなどの情報をモニタリングできるNetwork frameworkのクラス。iOS 12.0以降から利用可能。 https://developer.apple.com/documentation/network/nwpathmonitor
実装ステップ
利用箇所でまずフレームワークをインポートしておきましょう。
モニタリング用クラスのインスタンス化
解放されるとコールバックが受け取れないので、ViewControllerのプロパティなどとして保持しておきましょう。
let monitor = NWPathMonitor()
requiredInterfaceType引数を指定して、ネットワークインターフェース別にモニタリングすることも可能です。
let wifiMonitor = NWPathMonitor(requiredInterfaceType: .wifi)
サポートしているインターフェースのタイプは以下に記載があります。 https://developer.apple.com/documentation/network/nwinterface/interfacetype
ネットワーク接続状態の変更をハンドリングする
monitor.pathUpdateHandler = { path in if path.status == .satisfied { // Connected } }
後述しますが、モニタリングは通常バックグラウンドキューで指定して実行されます。 クロージャー内でUIを操作する場合には、メインスレッドで行うようにしましょう。
ネットワーク接続状態のモニタリングを開始する
モニタリングイベントを配信するためのDispatchQueueを定義して、モニタリングを開始します。
private let queue = DispatchQueue(label: "com.sample") monitor.start(queue: queue)
ソースコード全体
import UIKit import Network final class ViewController: UIViewController { private let monitor = NWPathMonitor() private let queue = DispatchQueue(label: "com.sample") override func viewDidLoad() { super.viewDidLoad() monitor.pathUpdateHandler = { path in if path.status == .satisfied { print("Connected") } else { print("Not Connected") } } monitor.start(queue: queue) } }
まとめ
動画で載せたデモアプリの実装ですが、ViewController内を30行前後で書くことができました。 iOS12以降対応ですし、実用性もばっちりですね。 「ネットワーク接続状態の検出にはNWPathMonitor!」が定着すれば良いなと思います。
以上です

ありがとうございました。
0 notes