#USB Restricted Mode
Explore tagged Tumblr posts
Visit Tumblr Blog
Explore Tumblr blogs with no restrictions, modern design and the best experience.
Last Seen Tumblr Blogs


Fun Fact
The “We are the 99%” Tumblr blog became the slogan for the Occupy Wall Street movement.
Text

🧠 PLEASE DO NOT PIRATE THE HUNDRED LINE: LAST DEFENSE ACADEMY ON APRIL 24TH 🧠
WHY THO? ➡️ Kazutaka Kodaka has said on many occasions that this is literally make or break for TooKyo Games due to production issues and the resulting debt while making it. The company did not have money for ports or for additional languages, or physical versions in some areas. Additionally, he will likely leave the game industry if it doesn't sell. I suppose that final bit could be a joke, but I'd rather not risk it.
In short: to pirate The Hundred Line is not sticking it to Bethesda's spaghetti coding or EA's nonsensical manufacturing line of Sims DLC, but rather an indie studio.
But we're all short on money these days and shit's expensive. I understand. I get by on an income of lint and those mint chocolates you can eat at the Olive Garden. So while I ultimately can't control what you do, random citizen, I've provided alternate means to pirating on this post.

➡️ "I would like to try the game before buying it."
Here is the Steam demo.
Here is the Switch demo.
Both provide about 5ish hours of gameplay, both story and tactical modes, and it should be enough for you to make a decision.
➡️ "I would like to play the actual game."
Digitally, you can get it on Steam or on the Switch, as stated.
(Good news: it'll also be compatible with the Switch 2!)
Physical copies will be sold in the US and Japan. (Unsure on China.) Take a look online or at your local retailer! There's even a spectacular pre-order package with eggstras.
You can also try joining a Steam Family with a friend who owns a copy of the game. Of course, you'll have to sort-of take turns playing it, but it's better'n nothing.
If you're really desperate, see if you're qualified for a short-term pay-over-time plan from Paypal etcetera. I don't recommend it, but I assume we're all adults here. Make your own financial decision!
➡️ "I don't mind if I just experience the game."
Have a friend stream it for you over Discord or another platform! Pool money if you must to purchase one (1) person the copy.
There's also no restrictions on streams and no restrictions on spoilers, so...
...your favorite Let's Players or streamers might be glomming onto the game ASAP, if you don't mind waiting a bit.
You can also politely ask/suggest that your fave content creators, if they're small enough that they still listen to individual fans, play or stream the game. (Don't be annoying, though, and make sure they're into games like this first.)
➡️ "I would like a physical copy."
See the third bullet under "I would like to play the actual game."
There is sadly no official physical copy for Europe as of writing, so I would look at the other sections if you're over yonder. I believe you can import into Europe, though.
You might also be able to flash a cartridge or USB or CD or something of the digital version if you already own it please. (Don't make a cartridge of it if you didn't buy the game, like. That's defeating the point.) I don't quite know how this works, but I'm putting it here anyway.
➡️ "You're a bootlicker/I am owed this content/sorry Kodaka but I'm built different/Danganronpa sucks and this will too/I'm not giving money to a [racist implication about Japanese culture]."
ok

463 notes
·
View notes
Text
How to Remove or Disable YouTube on Samsung Devices
If you're looking to remove the YouTube app from your Samsung device, it's important to note that YouTube is often a pre-installed system app, which means it cannot be completely uninstalled through standard methods. However, there are several approaches you can take to disable or remove it from your device.
1. Disable the YouTube App
Disabling the app prevents it from running and removes it from your app drawer.
Open Settings.
Navigate to Apps.
Scroll down and select YouTube.
Tap on Disable.
Confirm by tapping Disable again.
While in the YouTube app settings, tap on Storage.
Select Clear Data and Clear Cache.
This method doesn't uninstall the app but prevents it from running and frees up storage space.
2. Remove YouTube Using ADB (Advanced Users)
For a more permanent solution, you can use Android Debug Bridge (ADB) to uninstall the app. This method requires a computer and some technical knowledge.
Steps:
Enable Developer Options on Your Phone:
Go to Settings > About phone.
Tap on Build number seven times to activate Developer Mode.
Return to Settings and access Developer options.
Enable USB debugging.
Set Up ADB on Your Computer:
Download and install the Minimal ADB and Fastboot tool.
Connect Your Phone to the Computer:
Use a USB cable to connect your device.
When prompted on your phone, allow USB debugging.
Uninstall YouTube via ADB:
Open the ADB command interface on your computer.
Enter the following command to list connected devices: nginxCopyEditadb devices
Once your device is recognized, enter: cssCopyEditadb shell pm uninstall --user 0 com.google.android.youtube
This command removes the YouTube app for the current user. Note that this method doesn't delete the app from the system partition, so a factory reset might restore it.
3. Remove Your YouTube Account
If your goal is to disassociate your account from the YouTube app:
Open the YouTube app.
Tap on your profile icon in the top right corner.
Select Manage your Google Account.
Navigate to the Data & privacy tab.
Scroll down and tap on Delete a Google service.
Enter your password when prompted.
Next to YouTube, click the trash bin icon.
Follow the on-screen instructions to permanently delete your YouTube account.
Be aware that this action will delete all your YouTube data, including playlists, subscriptions, and history.
⚠️ Important Considerations
System Apps: YouTube is often a system app on Samsung devices, meaning it can't be fully uninstalled without rooting your device.
Rooting Risks: Rooting can void your warranty and may lead to security vulnerabilities. Proceed with caution.
Alternative Solutions: If you want to limit YouTube usage without removing it, consider setting up Parental Controls or using Digital Wellbeing features to restrict access.
By following these methods, you can effectively remove or disable the YouTube app on your Samsung device, depending on your needs and technical comfort level.
2 notes
·
View notes
Text
Mysextoysindia long distance app control vibrator for couple
APP Remote Control & Custom Vibration: This couple vibrator connects to the APP via Bluetooth, compatible with iOS and Android. More than 10 vibration modes can allow you to experience a variety of sexual feelings, allowing you to reach mind-blowing orgasm. In addition, the vibrator can also be controlled manually
Remote Vibrator & No Space Restrictions: No matter where you are, remote vibrator allows you to interact with your partner. He/she can control the vibrator through the APP, adjust the vibration intensity of the vibrator. So that the partner tries to stop but cannot, enjoys the orgasm, and experiences the fun of curling up toes
Multiple Gameplay & Multiple Stimulation: Different vibration functions such as phone shake, musical, video, Interactive mode, different frequency range etc. This vibrator can make you enjoy a pleasant sex time. Looking forward to your unlocking more usage methods
Private & Quiet: Our toys will be delivered to you in private packaging. The decibel of this vibrator is less than 45. It can be used in scenes such as shopping, running and during shower, and it will not be heard. This will provide unlimited fun and maximize your sexual pleasure
USB Rechargeable & IPX6 Waterproof: This female vibrator is made of skin-friendly silicone, safe, healthy, odorless, and waterproof. You can use it to enjoy sex with your partner in the bathroom. With USB charging cable for charging, it can be used for 1 hour after charging for 2 hours
1 note
·
View note
Text
Price: [price_with_discount] (as of [price_update_date] - Details) [ad_1] ⚡Professional Power + USB On the Go (OTG) is compatible with your LG K30for connecting any compatible USB Accessory Device Like Keyboards, Mouse, Gamepads, Drives and More! (Black)✅SPECIFICATIONS:●Unleash the power of your device by giving it access the same USB peripherals that makes your PC easier use!●Works with keyboards, mice, flash drives, game controllers, gamepads, storage drives, encryption devices, almost ANY USB Device that is set for OTG/On-The-Go adaption!●The Long 8 Inch Cable is original standardized guaranteed the best results while making access easier.●Consider getting one for home, office and travel so you’ll always be close a quick charge and full use of whatever device you need to use.●Provide power for USB peripherals so that the battery for your android smart phone or tablet will not be drained so quickly like others ordinary OTG cable. Note:Some updates may make it not possible to use as only a charge, meaning you need to have a USB Device added to also charge your device.✅ENHANCEMENTS:●The Tek Styz™ OTG adapter gives Works for your host devices an opprtunity add on any USB peripherals such as keyboards, mice, USB Hub, flash drives, external hard drives, USB card readers, game controllers or whatever.●Compatible with TV and Fire Stick, Games, Cyrpto USB Keys, X-box, PS1 PS2 PS3 PS4, PC, Google Chromecast, Android, Raspberry Pi Zero, NES N64 Devices and MORE. Suitable for Android, Windows, IOS, and other systems, no system restrictions.●This can provide both Power and OTG Works for Works for your TV Stick, PlayStation Classic, Google Chromecast, Raspberry Pi Zero, NES N64 Nintendo Devices and many other streaming media player which powered by Micro USB charging cable. ✅POWER + DEVICE SYNC: Power your device while using hundreds of accessories like keyboards, mice, flash drives, game controllers, gamepads, storage drives, encryption devices, and more! (Only Charges One Item, not Two) ✅EXPAND LIKE CRAZY: With the On The Go Standards/Protocols you can expand to any device you wish, have at it, EXPAND your use like a Computer or Mac does! ✅PLUG and PLAY: Simply connect the Micro USB male port to your host devices and the micro USB female port to your usb power cable, then it is ready to go. Set it up in minutes without any extra effort or configuration. ✅FULL CHARGING: Whatever charger you plus in, up to 5 amps will transfer to your device and charge. ✅EXPERT MODE ADVICE: Once you verified your device works with others, you may have to enable OTG or USB Mode in your USB Settings. Try restarting while this cable and the accessory are plugged in. Or Edit USB FUnctions to OTG or USB Mode. Some default to only charge, you must change this. [ad_2]
0 notes
Text
How to Fake Location on Find My iPhone
youtube
Want to protect your privacy, prank your friends, or access geo-restricted features in Find My iPhone? Today, I'll show you how to fake your location on Find My iPhone — all with just one click. It’s fast, easy, and completely safe.
There are many reasons people want to fake their iPhone’s location —" ✅ To protect privacy from tracking ✅ To simulate travel for fun or testing ✅ To hide your real location on Find My ✅ To trick apps or games that use GPS
A location changer tool — I recommend TunesKit Location Changer because it works with just one click and supports Find My iPhone, Snapchat, WhatsApp, Tinder, and more.
🎯 Step 1: Download and install TunesKit Location Changer on your computer. [Show install process briefly]
📱 Step 2: Connect your iPhone via USB and tap “Trust This Computer” on your phone. [Show real-time footage]
🗺️ Step 3: Open the software. Choose "Teleport Mode" from the top right corner. 🖱️ Step 4: Enter the location you want to spoof, or drop a pin on the map. ⚡ Step 5: Click "Move" — and boom! Your iPhone GPS location is now changed.
Now, open the Find My app — you’ll see your fake location in real time!
0 notes
Text
L’Evercade VS est une console de salon rétro conçue par Blaze Entertainment pour les passionnés de jeux vidéo classiques. Sortie en décembre 2021, elle se distingue par son approche unique : elle utilise des cartouches physiques contenant des collections de jeux sous licence officielle, couvrant les ères 8, 16 et 32 bits, incluant des titres d’arcade, de consoles mythiques (Atari, NES, SNES, Mega Drive, PlayStation) et d’ordinateurs (Commodore 64, Amiga). Avec plus de 600 jeux disponibles sur plus de 60 cartouches, elle offre une bibliothèque riche et variée, allant de classiques comme Street Fighter II, Double Dragon et Tomb Raider à des pépites moins connues.
Compacte et élégante, la VS arbore un design rétro blanc et rouge inspiré de la NES, avec un clapet protégeant ses deux emplacements de cartouches, permettant d’accéder simultanément à jusqu’à 40 jeux. Elle se connecte à votre téléviseur via HDMI, offrant une sortie en 1080p avec des options d’affichage comme le mode « pixel perfect » ou l’ajout de scanlines pour une expérience authentique. Dotée d’un processeur quad-core ARM Cortex-A53 à 1,5 GHz et de 512 Mo de RAM, elle assure une émulation fluide, avec des sauvegardes sur cartouche pour reprendre vos parties sur une autre console Evercade, comme la portable EXP.
La VS brille par sa convivialité : interface intuitive, Wi-Fi pour les mises à jour, et support de jusqu’à quatre joueurs en multijoueur local grâce à quatre ports USB compatibles avec les manettes Evercade ou tierces (XInput). Une nouveauté, le mode TATE (rotation verticale) sur la version VS-R, ravit les fans de shoot’em up. Les cartouches, vendues entre 20 et 25 €, regroupent généralement 6 à 10 jeux, rendant la collection abordable et attrayante.
Cependant, quelques points faibles subsistent : les manettes officielles, jugées parfois peu ergonomiques, et l’absence de fonctionnalités en ligne comme le multijoueur ou une boutique numérique. De plus, certains jeux, comme les collections Namco 1 et 2, ne sont pas compatibles en raison de restrictions de licence.
L’Evercade VS, et sa version améliorée VS-R (sortie en juillet 2024 à 89,99 €), s’adresse aux collectionneurs et aux nostalgiques cherchant une expérience rétro légale et tactile, sans les tracas de l’émulation illégale. Avec son écosystème en expansion, incluant les consoles portables Evercade et les bartops Alpha, elle redonne vie à l’âge d’or du jeu vidéo tout en restant accessible et moderne.
#aiartcommunity#aiartworks#aiartist#aiinart#algorithmicart#artandtechnology#artofthefuture#artwithai#creativeai#digitalart#article#game#gaming
0 notes
Text
Want to root your android? We have listed down simple steps on how to root your android. Its common in geeks to root android device and install more apps that can not be installed on a regular android tablet or phone. In recent years Android has become the most popular operating system among all mobile platforms. Latest Android App Statistics show that there are currently 1.5 million Android apps available in the market. But you can not take advantage of those apps that requires the root access of the operating system in your smartphone. This is where the concept of “rooting” comes into the picture when you want something advanced from what is provided you by the manufacturer. Rooting gives you the opportunity to do much more than your Android phone can do originally. Before coming to the process you must know about what is rooting and why do you need it. What Is "Rooting" Rooting means to “break your fencing”, to overcome from the limitations put by the manufacturer on your device. Rooting makes you a superuser of your Android phone, now you must be wondering what does a superuser mean here. If you have used desktop computer that allows more than one user account, then you must have noticed that some of those accounts have more rights and access than the other ones. The account with more power & rights is called Admin account. On an Android phone, a superuser is just like an admin on a desktop computer. Why Do You Need Rooting In Your Android Phone There are two types of technology user, one who utilizes the device as it is provided by manufacturer, and another one who wants to jump deeper into it and want to make it more adaptable & customizable according to his requirement. While purchasing a new android phone you are just like a general user. You can use the phone like a normal user with restrictions i.e. you can not make the changes in the system files. If you want some advanced features and functionalities which are kept hidden from you, or want to become a master user, you need rooting of your Android phone. What Can You Do When You Root Your Android? Below are Few Reasons why you should root your device Customization of the look and feel of your phone Enhance the performance Increase the battery life Allows you to install incompatible apps Better backups and restore How To Root Your Android Phone Now you know what is rooting and why do you need it, but how can you root your phone yourself? Here are 4 easy steps to root your Android phone in just a few minutes. Step 1 The easiest way to root your phone is to use Kingo Android Root Software. It is a one click android rooting software which can be downloaded and installed easily. Step 2 After downloading and installing of the Kingo Rooting software, you need to enable the USB debugging mode in your phone and then save the settings. Step 3 Now, run the Kingo Android root on your PC and connect your phone via USB cable. After waiting for a few seconds your device will show a popup “Allow USB debugging”. Tick the “Always allow from this computer” and then click OK. Step 4 Click root and wait until the process completes. After following up the above 4 steps you get the permission to access everything on your phone. Now you are free from all limitations and can install those apps that require root access, can customize your Android phone and get the benefit of advanced features and functionalities. In future if you want to unroot your device for any reason, then you just need to relaunch the Kingo root software and click on “Remove Root” button that will return your phone to regular operation. Advantages Of Rooting Wondering what can you do when you root your android? Below are some things that you can do on a rooted android phone. Running Special Application The greatest advantage of rooting your Android phone is to install and run those powerful applications that require privileges more than the non rooted device. For example the apps that can only be installed in rooted device like:
Root Explorer: - Allows you to access the complete android’s file system. SetCPU: -Allows you to change the CPU settings. ROM Manager: - Allows you to manage ROM, perform backup and restore. ProxyDroid: - Allows you to set proxy while using Wi-Fi networks. Backup And Restore Better The built in backup and restore functionality of android phone is a little weak. To have better backup and restore the root access is required. The app like Titanium Backup is the most powerful backup and restore tool in your android phone. Custom ROM After Rooting your device you can install custom ROM. It allows a user to use the most recent version of Android and make your smartphone run in a better way. It also improves your phone’s performance with increased battery life. Block Unwanted Ads You may have seen unwanted ads while playing games like angry birds, Stick Cricket or Subway Surfer. By rooting your phone, you would be able to install adblock plus app and block all unwanted ads. Risk In Rooting Your Android Phone Warranty Get Voided Don’t try to give your phone for service, because after rooting, your phone is at your own risk. You are not able to complain to the customer care center in case if any problem comes. Attack Of The Virus Rooting allows the user to install apps that are incompatible and most of them can be from unknown sources. It can harm your device so you have to be careful about the virus attack in your phone. The Risk Of Bricking Bricking your phone means playing up with your phone in such a way that damage it completely and it becomes like a useless brick and then you have to purchase a new Android phone. The Conclusion Rooting your Android phone lets you play with it and enjoy new themes, designs and apps. However, for some users rooting is just for downloading incompatible app, whereas for some users it is for customization of ROM. Whatever purpose you have with rooting, you need to be careful while doing it otherwise you might end up having problems with your phone. Gaurav Sharma is a founder of Antipull & a Digital Strategist at Nine Hertz, a Mobile app development company and a Marketing - Tech writer. He has expertise in SEO, ASO, CRO, PPC and other parts of Online Marketing fields. He is an enthusiast and love to explore new stuffs. You can check him out on Facebook and Twitter or mail him personally.
0 notes
Text
How To Set Up The GL.iNet GL-AXT1800 Router
It is a compact yet powerful travel router to offer high speed and secure internet connectivity. With the help of WiFi 6 technology the robust security feature and VPN support is an excellent choice for the travellers, remote workers and tech enthusiasts. This guide will walk you through the configuration process to get the best performance from your GL-AXT1800 router.
Unboxing And Hardware Overview
When you first get GL.iNet GL-AXT1800 router, ensures that your package include
GL-AXT1800 router
Ethernet cable
Power adaptor
User manual
GL.iNet GL-AXT1800 Setup Key Features
Provide speed up to 1200 Mbps 5GHz and 600 Mbps on 2.4GHz.
Support 1.2GHz quad core processor for the fast performance.
It built in the VPN support for wire guard and open VPN.
Adguard home to block ads and tracking scripts.
Multiple connection options such as WAN, LAN or USB 3.0 port
Manual Setup
Follow below few simple steps
Power On Your Router
Plug the power adaptor into the router and connect it with the power outlet.
After that wait for the router to boot up.
The LED light indicates that the device is now powered on and ready.
Connect To The Router
Use ethernet cable to attach the router WAN port to the modem or existing network.
Access Or Go To Admin Panel
Open the web browser and type 192.168.8.1 in the address bar. Login by entering the default credentials which are written on the router package. Consider all the setup process instructions to change the WiFi SSID, password and admin credentials for the security purposes.
Configuring Internet Connection
The GL.iNet GL-AXT1800 Router supports various internet connection methods.
Wired Connection:
If you are using a wired connection, go to the network settings and then tap on the internet. After that, verify DHCP mode is enabled.
WiFi Repeater Mode:
If you want to extend an existing WiFi network:
In the admin panel go to the repeater settings.
Now, scan for the available WiFi networks and pick up the desired one.
Enter WiFi password and save all settings.
Connect Modem Or Smartphone
Just connect the USB modem or the smartphone via the USB 3.0 port.
Select the connection mode in the admin panel and consider all the prompts.
Setup VPN For Secure Browsing
Using Wire-Guard VPN
Go to VPN and then tap the wire guard client.
Now, upload or manually enter the wire guard VPN configuration.
Enable the VPN and check connection status.
Using Open VPN
Navigate to VPN and OpenVPN client.
After that upload the open VPN configuration file which is provided by the VPN provider.
Later, connect and verify your IP address for successful connection.
With AdGuard Home Enhanced Security
It is a powerful tool for blocking ads and tracking.
To enable this, go to the navigation and click on AdGuard home. After that, enable the services and customize settings. Further, add a filter list to enhance blocking effectiveness.
Additional Features & Customization
Guest WiFi:- It creates a separate WiFi network for the visitors with restricted access.
Custom DNS Server: Uses cloudflare, google or a custom DNS provider for the faster and more protective browsing.
After the router GL iNet GL AXT1800 setup if you are facing any issue then try the below troubleshooting tips to fix the issue such as AX1800 router not working properly.
Solution Tips
Check/Identify All Cable Connections
Must verify that all the cables must be perfectly plugged in.
Look Up For Overheating
If your router gets hot then move it to the well ventilated area to cool it down.
Use Different Power Source
Try to use a different USB-C power adapter
Power Cycle Router
Press the router power button to turn it off. Now, take out the router power plug from the specified working socket. After that, wait for at least 2 minutes and put the router plug back in the socket. At the end, press router power to turn it on.
After trying the apart basic router troubleshooting tips if you fail to fix an issue. Then don’t be worried just try the below advanced troubleshooting tips steps.
Update Router Software/Firmware
Early go to the router admin panel.
After that, tap on settings and then hit on firmware.
Further, update the latest version.
Alternatively, install the firmware from the GL.iNet website and open it manually.
Reset Router From Factory Default
Early, look for the reset button on your router.
After that, take a paper pin and insert it in the router reset button.
Now, all LEDs of the GL.iNet GL-AXT1800 router are completely turned off.
Hence, your router is reset now.
Note: After resetting all default settings, do the GL.iNet GL-AXT1800 setup and installation process again.
Therefore, after the entire study or information of this article you can do the setup of your router with the modem. After router installation if you face any issue then also fix it easily by trying the apart troubleshooting tips.
0 notes
Text
Mon IPTV Ne Fonctionne Pas en Partage de Connexion : Solutions et Conseils

Mon IPTV Ne Fonctionne Pas en Partage de Connexion : Vous avez configuré votre service IPTV sur votre smartphone ou tablette, mais vous rencontrez des problèmes lorsque vous essayez d’utiliser le partage de connexion pour diffuser du contenu sur un autre appareil ? Ne vous inquiétez pas, ce problème est courant et peut être résolu avec quelques étapes simples. Dans cet article, nous allons explorer pourquoi votre IPTV ne fonctionne pas en partage de connexion , les causes possibles, et surtout, comment y remédier.

chaînes premium IPTV Pourquoi Mon IPTV Ne Fonctionne Pas en Partage de Connexion ? Le partage de connexion (ou hotspot) permet de partager votre connexion Internet mobile avec d’autres appareils via Wi-Fi, USB, ou Bluetooth. Cependant, certaines configurations peuvent empêcher votre service IPTV de fonctionner correctement. Voici les principales raisons : - Limitations des Fournisseurs de Réseau Certains fournisseurs bloquent les connexions utilisées pour le streaming IPTV lors du partage de connexion. Ils détectent souvent ces activités comme étant à haut débit et les restreignent. - Débit Internet Insuffisant Le streaming IPTV nécessite une connexion stable et rapide. Si votre partage de connexion n’offre pas suffisamment de bande passante, le streaming sera interrompu ou de mauvaise qualité. - Configuration Incorrecte de l’Appareil Une mauvaise configuration du réseau ou des paramètres de partage peut également causer des problèmes. - Problèmes avec l’Application IPTV Certaines applications IPTV ne sont pas optimisées pour fonctionner via un hotspot mobile. Étapes pour Résoudre le Problème Voici comment résoudre les problèmes liés à votre IPTV qui ne fonctionne pas en partage de connexion : 1. Vérifiez la Qualité de Votre Connexion Internet - Testez la vitesse de votre connexion mobile en utilisant des outils comme Speedtest by Ookla . Pour un streaming IPTV fluide, il est recommandé d’avoir au moins 5 Mbps en téléchargement. - Si votre connexion est trop lente, envisagez de changer de forfait ou d’utiliser une connexion Wi-Fi fixe. 2. Activez le Mode Avion Temporairement - Parfois, désactiver temporairement les données mobiles et activer le mode avion peut réinitialiser la connexion et résoudre les problèmes de partage. 3. Configurez Correctement le Partage de Connexion - Allez dans les paramètres de votre smartphone et activez le partage de connexion. Assurez-vous que l’appareil connecté utilise bien le réseau créé par votre téléphone. - Essayez différentes méthodes de partage : Wi-Fi, USB, ou Bluetooth. 4. Utilisez un VPN - Les fournisseurs de réseau bloquent parfois les services IPTV. Un VPN fiable peut contourner ces restrictions en masquant votre activité en ligne. - Installez un VPN sur votre smartphone avant d’activer le partage de connexion. Assurez-vous que le VPN est compatible avec le streaming IPTV. 5. Redémarrez Vos Appareils - Redémarrez votre smartphone et l’appareil connecté (comme votre Fire Stick ou Smart TV). Cela peut résoudre des conflits temporaires. 6. Mettez à Jour Votre Application IPTV - Assurez-vous que votre application IPTV (par exemple, IPTV Smarters Pro , Perfect Player , ou Iron TV Pro ) est à jour. Les mises à jour corrigent souvent des bugs liés à la compatibilité réseau. 7. Utilisez un Adaptateur Ethernet (Optionnel) - Si vous utilisez un boîtier IPTV ou une Smart TV, envisagez d’utiliser un adaptateur Ethernet pour connecter directement l’appareil à Internet, évitant ainsi les limitations du partage de connexion. Causes Fréquentes et Solutions Rapides ProblèmeCause PossibleSolutionBuffering constantDébit Internet insuffisantAméliorez la vitesse de votre connexion ou utilisez un réseau plus stable.Pas de signal ou connexion perdueProblème de configuration réseauVérifiez les paramètres de partage de connexion et redémarrez vos appareils.Blocage par le fournisseurRestrictions sur le trafic IPTVUtilisez un VPN pour contourner les blocages.Application incompatibleMauvaise version de l’application IPTVMettez à jour l’application ou essayez une alternative. Conseils pour Optimiser Votre Expérience IPTV Pour éviter les problèmes de partage de connexion à l’avenir, voici quelques conseils pratiques : - Utilisez une Connexion Wi-Fi Fixe : Si possible, préférez une connexion Wi-Fi stable plutôt que le partage de connexion mobile. - Choisissez un Forfait Mobile Haut Débit : Optez pour un forfait avec une limite de données élevée ou illimitée pour éviter les restrictions. - Testez Différents Appareils : Certains appareils gèrent mieux le partage de connexion que d’autres. Essayez plusieurs configurations pour trouver celle qui fonctionne le mieux. - Surveillez Votre Consommation de Données : Le streaming IPTV consomme beaucoup de données. Suivez votre utilisation pour éviter de dépasser votre quota mensuel. Pourquoi Choisir Iron TV Pro pour Votre IPTV ? Si vous cherchez un service IPTV fiable et performant, Iron TV Pro est une solution idéale. Avec plus de 28,000 chaînes en direct , un catalogue VOD complet, et une qualité HD/4K exceptionnelle, il s’adapte parfaitement à vos besoins. 👉 Téléchargez Iron TV Pro APK sur https://irontvmax.org . 📞 Besoin d’aide ? Contactez-nous au +1 (949) 767-1251 . Conclusion : Profitez de Votre IPTV en Toute Simplicité Avec les bonnes configurations et solutions, vous pouvez facilement résoudre les problèmes liés à votre IPTV qui ne fonctionne pas en partage de connexion . Que ce soit en optimisant votre réseau, en utilisant un VPN, ou en choisissant un service IPTV fiable comme Iron TV Pro , il existe toujours une solution pour profiter de votre contenu préféré sans interruption. 👉 Découvrez Nos Forfaits et Obtenez un Code Gratuit FAQ – Questions Fréquentes 1. Pourquoi mon IPTV ne fonctionne pas en partage de connexion ? Cela peut être dû à des limitations de votre fournisseur de réseau, un débit Internet insuffisant, ou une mauvaise configuration du réseau. 2. Comment améliorer la vitesse de mon partage de connexion ? Essayez de désactiver d’autres appareils connectés, utilisez un VPN, ou changez de méthode de partage (Wi-Fi, USB, Bluetooth). 3. Est-il légal d’utiliser un VPN pour IPTV ? Oui, utiliser un VPN est légal et peut aider à contourner les restrictions imposées par certains fournisseurs de réseau. 4. Quel est le meilleur service IPTV pour le partage de connexion ? Des services comme Iron TV Pro offrent une expérience fluide et sont optimisés pour fonctionner même sur des connexions limitées. Read the full article
#ApplicationTVenstreamingavancée#CodeIPTVSmartersProgratuit|AccèsComplet#LeslecteursOTT#MonIPTVNeFonctionnePasenPartagedeConnexion
0 notes
Text
Text Editor - Notepad3
Why Notepad3 is a Must-Have Text Editor for Coders and Casual Users Alike
In a world full of complex software tools, sometimes the simplest solutions are the best. Notepad3 is a lightweight, fast, and versatile text editor that has gained a strong following among both casual users and programmers alike. While it may look simple at first glance, Notepad3 is packed with features that can improve your productivity and make everyday tasks much easier.
1. Fast and Lightweight
One of the standout features of Notepad3 is its speed. Unlike some of the more bloated text editors, Notepad3 launches quickly and runs smoothly, even on older computers. It uses very little system resources, so you won’t have to worry about it slowing down your machine, no matter how many files you’re working with.
This makes Notepad3 a great choice for anyone who values a quick and responsive editor. Whether you're working on a large text file or need to make a few edits on the fly, Notepad3 is ready for the job.
2. Syntax Highlighting and Support for Multiple Programming Languages
Notepad3 isn't just for writing plain text—it’s also a powerful tool for coding. With built-in syntax highlighting, Notepad3 makes it easier to read and write code in various programming languages, including Python, HTML, CSS, JavaScript, C++, and many more.
The color-coded syntax helps you quickly identify keywords, variables, and structure, reducing errors and improving code readability. Plus, with features like line numbers and auto-indentation, you’ll have everything you need to code more efficiently.
3. Customization Options to Fit Your Workflow
Everyone works differently, and Notepad3 recognizes that by offering extensive customization options. You can adjust the font, theme, and layout to suit your preferences, making it easy to create a personalized workspace that helps you stay focused.
If you prefer dark mode, Notepad3 has several themes to choose from, so you can reduce eye strain during those late-night coding sessions. If you need a particular font size or style, you can easily tweak that as well.
4. Search and Replace Functionality
Notepad3 makes finding and replacing text a breeze. With its powerful search feature, you can quickly locate a word or phrase within a document. And with advanced options like regular expressions, you can perform complex search-and-replace operations with ease.
This functionality isn’t just useful for coding; it’s a time-saver for anyone who works with long documents or needs to make bulk edits.
5. Portable and No Installation Required
One of the best things about Notepad3 is its portability. You can run it from a USB drive without the need for installation, making it perfect for people on the go. If you need to use a text editor on multiple computers, simply carry Notepad3 with you and access your tools anywhere.
This portability also means you can use Notepad3 in environments where installing software is restricted, such as on public computers or at work.
6. Free and Open-Source
Perhaps the best feature of Notepad3 is that it’s completely free to use, and it’s open-source software. This means you can download, use, and even modify the code if you wish. The development community behind Notepad3 continues to improve and update the software, ensuring it remains useful and reliable for years to come.
Final Thoughts
Whether you’re a casual user looking for a quick text editor or a developer needing a fast, lightweight code editor, Notepad3 is an excellent choice. With its rich set of features, customization options, and user-friendly interface, it stands out as one of the most efficient and accessible text editors available today.
So, next time you need to edit a text file or write some code, give Notepad3 a try—it might just become your new go-to tool.

0 notes
Text
Apple releases security update
Apple has released an emergency security update in the form of iOS 18.3.1 and iPadOS 18.3.1. The company has urged all iPhone and iPad users to install it immediately. The company has said that some dangerous security flaws have been found in iPhones and iPads. According to a report, the iOS 18.3.1 update fixes a flaw in which USB Restricted Mode can be denied by a physical attack.
0 notes
Text
FRP bypass
FRP Bypass: A Comprehensive Guide
FRP (Factory Reset Protection) is a built-in security feature on Android devices designed to protect the user's data from unauthorized access in case the device is reset to factory settings. It requires the user to log in with the Google account credentials that were previously used on the device. While this feature adds an essential layer of security, it can sometimes create hurdles when someone legitimately forgets their Google account login details or purchases a used phone locked with FRP. This is where FRP bypass comes in.
What is FRP Bypass?
FRP Bypass is a process that helps users unlock the device without needing the original Google account credentials. Whether you've forgotten your password, bought a second-hand device that’s locked, or encountered a bug preventing access to your device, an FRP bypass method can help you regain access to the phone. By performing an FRP Bypass, the security measure is disabled, allowing users to bypass the Google account verification screen.
Why FRP Bypass Matters
For legitimate users, FRP is generally a safeguard against theft. However, the process can be overly complex or restrictive for users who are locked out of their own devices. Since there are instances where a person might need to reset the phone and forgot their credentials, an FRP bypass is helpful for resetting the phone without knowing the previous Google account.
Moreover, for those buying second-hand devices, the FRP lock can often be a frustrating challenge. If the previous owner did not remove their account from the phone, it may remain locked even after a factory reset. A reliable FRP bypass tool allows new users to quickly and easily get their hands on a functional device without having to go through complex procedures with the previous owner.
How to Perform an FRP Bypass
While bypassing FRP may be a solution for legitimate users, it's essential to note that you should always obtain proper authorization to perform a bypass on any device. Unauthorized access or bypassing for malicious purposes is illegal and can result in serious legal consequences.
Using FRP Bypass Tools: There are several tools available online that help in FRP bypass, such as Tenorshare 4uKey for Android, DroidKit, and iMyFone LockWiper. These software tools allow you to unlock Android phones, and their FRP bypass solutions are widely used due to their ease of use.
Through USB OTG Cable: This method involves connecting a USB OTG (On-the-Go) cable with a USB drive that contains a special file used to bypass the Google verification step. Using this technique often requires the user to follow specific steps in the recovery or safe mode of the device.
Using ADB (Android Debug Bridge): This method is more technical and requires enabling Developer Options on the device before performing the bypass. It's recommended for advanced users or technicians who are familiar with coding and operating systems.
Using Samsung FRP Bypass: For Samsung devices, Samsung provides a specific FRP bypass tool as part of its "Find My Mobile" service, which can allow users to unlock their phone if they've lost access to their Google account.
Caution About FRP Bypass
While these FRP bypass solutions are useful, it’s critical to be careful about where you get them. Many websites and tools claim to offer an easy FRP bypass, but some may come with hidden dangers like malware or theft of personal data. Always download tools from reputable sources, and be cautious about providing any sensitive information.
Conclusion
FRP Bypass can be a lifesaver for users locked out of their devices due to Google account verification, and it's essential to know that the process should always be done legally and responsibly. Whether using bypass tools, a USB OTG cable, or technical methods like ADB, users should carefully consider all options before proceeding to ensure they can safely access their devices without compromising security or privacy. Remember to keep software updated and back up your data to avoid future challenges related to account recovery and FRP lockout.
1 note
·
View note
Text
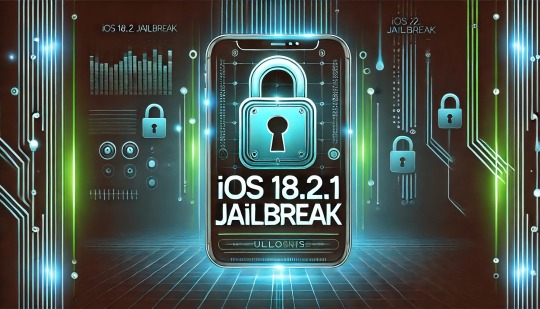
Unlock Your iPhone with iOS 18.2.1 Jailbreak
Jailbreaking has long been popular for iOS enthusiasts who want to maximize their device's potential. With the release of iOS 18.2.1, the jailbreak community has introduced exciting opportunities for users to customize, tweak, and enhance their iPhones and iPads. This comprehensive guide will walk you through everything you need about the iOS 18.2.1 jailbreak and how to install it safely.
What is Jailbreaking?
Jailbreaking is removing software restrictions imposed by Apple on iOS devices. By jailbreaking your iPhone or iPad, you can access system files and install apps, tweaks, and themes unavailable through the official App Store.
For iOS 18.2.1, jailbreaking means:
Full control over your device’s appearance and functionality.
Access to third-party app stores like Cydia or Sileo.
The ability to install tweaks, themes, and IPA files to enhance your user experience.
Why Jailbreak iOS 18.2.1?
Here are some of the key reasons to jailbreak iOS 18.2.1:
Custom Themes and Tweaks: Personalize your device with unique themes, fonts, and layouts.
Access to Unofficial Apps: Download apps and tools unavailable on the App Store.
Enhanced Features: Add powerful tweaks that improve multitasking, enhance notifications, and provide advanced control over system settings.
Ad-Free Experience: Block ads in apps and games for uninterrupted usage.
Improved Productivity: Optimize your workflow with productivity-focused tweaks.
Features of iOS 18.2.1 Jailbreak
The iOS 18.2.1 jailbreak is packed with features that allow users to:
Install Third-Party Apps: Explore apps and games restricted by Apple’s guidelines.
Customize the Control Center: Add widgets and shortcuts to streamline device navigation.
Unlock Hidden Features: Access features Apple has disabled, such as screen recording with more options or system-wide dark modes.
Use Tweaks for Performance: Enhance your device’s speed, battery life, and overall usability.
How to Jailbreak iOS 18.2.1 Safely
To jailbreak your iPhone or iPad running iOS 18.2.1, follow these steps:
Backup Your Device: Before starting, use iCloud or iTunes to back up all your data.
Download a Trusted Jailbreak Tool: Visit https://www.instantjb.com/ to download the official jailbreak tool for iOS 18.2.1.
Install the Tool: Install the downloaded jailbreak software on your computer.
Connect Your Device: Use a USB cable to connect your iPhone or iPad to the computer.
Run the Jailbreak Process: Launch the jailbreak tool and follow the instructions. The tool will guide you through the process step by step.
Reboot and Explore: After the process completes, your device will reboot, and you’ll notice apps like Cydia or Sileo installed. These are your gateways to tweaks, themes, and customizations.
Is Jailbreaking Safe?
Jailbreaking is generally safe if you use reputable tools and follow best practices. However, keep the following points in mind:
Security Risks: Jailbreaking removes Apple’s security restrictions, which could make your device more vulnerable to malware. Only download tweaks from trusted sources.
Warranty Void: Jailbreaking may void your device’s warranty, so proceed cautiously.
Software Updates: Jailbroken devices often require special steps to update to new iOS versions.
Benefits of Jailbreaking
Jailbreaking your iOS 18.2.1 device offers a wide range of benefits, such as:
Unlimited Customization: Modify every aspect of your device, from icons to system sounds.
Improved Functionality: Add features like call recording, advanced multitasking, and more.
Access to Tweaks: Explore powerful tweaks that enhance performance, usability, and accessibility.
Third-Party App Stores: Gain access to app stores like Cydia and Sileo for exclusive apps and games.
Frequently Asked Questions (FAQs)
1. Is Jailbreaking Legal?
Yes, jailbreaking is legal in most countries. However, it may void your warranty, so proceed at your own risk.
2. Can I Undo a Jailbreak?
You can restore your device to its original state by performing a factory reset through iTunes or Finder.
3. Does Jailbreaking Affect Performance?
Jailbreaking doesn’t slow down your device; installing too many tweaks or incompatible ones can impact performance.
4. Will I Lose My Data?
No, jailbreaking doesn’t erase your data. However, it’s always a good idea to back up your device before starting.
5. Are Jailbreak Tweaks Free?
Many tweaks are free, but some premium tweaks may require a small payment.
Tips for a Smooth Jailbreaking Experience
Backup Your Data: Always create a backup before jailbreaking.
Use Trusted Tools: Only download jailbreak tools from reputable sources like https://www.instantjb.com/.
Install Compatible Tweaks: Ensure that tweaks and apps are compatible with iOS 18.2.1 to avoid issues.
Stay Updated: Keep your jailbreak tool and tweaks updated for optimal performance.
Conclusion
Jailbreaking iOS 18.2.1 is a fantastic way to unlock your device’s full potential. From custom themes and tweaks to exclusive apps, the possibilities are endless. Following the steps outlined in this guide and using trusted tools, you can safely and effectively jailbreak your iPhone or iPad.
Ready to enhance your iOS experience? Download the iOS 18.2.1 jailbreak tool from https://www.instantjb.com/ and start exploring the limitless potential of your device today!
0 notes
Text
Price: [price_with_discount] (as of [price_update_date] - Details) [ad_1] ABOUT WIRELESS VIDEO GAME: Wireless Retro Game Console, New Game Stick Lite 2023 Best Childhood Memories, Plug and Play Video Game Stick Built in 10000+ Games, 9 emulator console, 4K High Definition HDMI Output, Dual 2.4G Wireless Controllers Happy parent-child time with your kids! Built-in 10000+ Classic Games: Arcade retro games, Logic & math, Sports, Puzzle, Arcade, Shooting, Action, Racing, Fighting games, Strategy, Adventure, Card games and more to meet your demand to play varieties of games what you like. Support 9 Game Emulators: Support for PS1/ATARI/MAME/SFC/FC/GBA/GB/GBC/MD game formats. Play all major games! You deserve it! 2.4GHz Wireless Controllers & Support 2 Players Play: This wireless retro handheld game console with built in games comes with 2 PCS 2.4GHz wireless game controllers, wireless connection between game controller and game stick, no road restrictions, more fun. How to connect the retro game stick to TV Just connect the game stick to the power source, then plug to the TV, and adjust the TV source to the HD channel to display the game list screen on the TV. The Specific Steps Are As Follows: Insert the TF Card: Before connecting the power supply, insert the TF card. Connect to TV: Insert the game stick into the TV/Computer HDMI interface. Power Supply for Game Stick: Using the charging adapter to connect to the power will automatically turn on. (Please use a 5V/1A or higher power adapter to provide power to the game console ) Packing List: 2 X Wireless Game Console 1 X Game Stick 1 X Receiver 1 X USB Cable 1 X TF Card 1 X User Manual 🎮 2.4GHz Wireless Controllers, Support Two-Player Games:Equipped with two 2.4G wireless joysticks, Sensitive without delay, get rid of the shackles of the thread.the connection distance of the controller is 8-10 meters,Plug and play, comfortable feel, you can better Enjoy the fun of classic nostalgic games with family or friends. 🎮 【4K High Definition Hdmi Output】Equipped With Upgraded Chip, High-Performance Chip Powerful Operation Ability, The Game Is More Smooth And Stable. Perfect For Your Graphical Quality And Game Fluency Needs. Hdmi Hd Output, Please Make Sure Your Screen Has An Hdmi Input Port So That The Console Can Connect To Your Tv/Tv Set-Top Box 🎮 【Built-In 10000+ Retro Games】This Wireless Tv Game Console Built In 10000+ Rich Games, Bringing You Back To Childhood Memories Instantly . These Games Are Challenging, Engaging And Fun. Is Pre-Install 9 Emulators, And Pack With 64Gb Tf Card. No Need To Download And Install By Yourself, No Internet Required, You Can Play 10000+ Classic Games Just By Connecting To The Tv 🎮 【Multi Formats Compatible And Languages】Which You Can Switch Modes And Enjoy The Sense Of Experience I Have In The World With One Machine In Hand. Support Multiple Languages, With The Manual We Made For You, Don’T Be Afraid Of Not Being Able To Operate 🎮 【Dual 2.4G Wireless Controllers】With 2 Pcs 2.4Ghz Wireless Controller Adapters, The Connection Is Stable And Almost Zero Latency, The Maximum Connection Distance Is 32.8 Ft. The Video Game Console Supports 2 People To Play Games At The Same Time, Avoiding The Interference Of Wires While Gaming. (2 Wireless Controllers Need To Install 4 Aaa Batteries, Not Included In Package) 🎮 Easy To Use】Just Connect The Game Stick To The Power Source, Then Plug To The Tv, And Adjust The Tv Source To The Hd Channel To Display The Game List Screen On The Tv. The Specific Steps Are As Follows: 1. Connect The Hd Output Of The Tv First 2. Insert The Built-In Tf Game Content Card 3. Using The Charging Adapter To Connect To The Power Will Automatically Turn On. (2 Wireless Controllers Need To Install 4 Aaa Batteries, Not Included In The Package) 🎮 【Holiday Gifts】 Can'T Find Topics To Communicate With Children? The Game Consoles With Built In Games Allow Your Child To Experience Growing Experiences And Happiness, And Enhance Communication And Feelings With Children.
It Can Also Be Used As A Gift To A Friend'S Child To Let The Children Experience The Growth Of Their Parents. This Clasic Edition Console Will Be A Great Holiday Gift 🎮 Two 2.4 Ghz Wireless Joystick Controllers, Support Two-Player Games. Fast Response, Vibration Motor And Powerful Vibration, Provide You With A More Exciting And Interesting Gaming Experience, Perfect For Fighting With Friends And Family 🎮Double Playing Happiness For Two - This Wireless Retro Handheld Game Console With Built-In Games Is Equipped With 2 Pcs 2.4Ghz Wireless Game Controllers, Supports 2 Players To Play Together, Wireless Connection Between Game Controllers And Sticks, No Road Restrictions, Have More Fun [ad_2]
0 notes
Text
Some popular dry herb vaporizer for sale
If you're looking to purchase a dry herb vaporizer for sale, there are many brands and models available on the market. Here are some popular dry herb vaporizer for sales that are highly recommended:
Arizer Solo 3: This is a high-quality dry herb vaporizer for sale manufactured by Arizer, offering precise temperature control and a hybrid heating chamber for a powerful vapor experience. While it's not the most portable option due to its glass stem and larger size, its impressive battery life and high-quality construction make it an ideal choice for home use.
Venty: This is a new vaporizer from the well-known German company Storz & Bickel, featuring outstanding new functions to ensure the best vapor quality. The Venty has excellent airflow, capable of reaching up to 20 liters per minute, and a convenient wheel for easy airflow adjustment. Although it's larger than most other vaporizers, it works exceptionally well and is considered one of the best vaporizers overall.
Utillian 722: The Utillian 722 vaporizer is an upgrade to the award-winning Utillian 700 series. It heats up quickly within 30 seconds and uses convection for a large amount of vapor. It also has a boost mode for larger clouds. With its powerful 2300mAh battery, it can run for about 60 minutes, which is quite good for a convection vaporizer. You can also use the Utillian 722 for wax by adding a wax pod, making it very versatile. Overall, it's a great choice for those who want high-quality vapor and large clouds at an affordable price.
Arizer Solo 2 Max: This is the latest dry herb vaporizer for sale from Arizer. It's designed to provide high quality and excellent performance. The device has a special heating system that ensures you get smooth and flavor-rich vapor when you inhale. The upgraded heater and glass aroma tube make the vapor purer and more enjoyable, which is why it's very popular among vapor enthusiasts. The Solo 2 Max also has a convenient LED screen that displays the temperature, which you can easily adjust according to your preference from 50°C to 220°C. It comes with a powerful 3400mAh battery that lasts up to 3 hours and can be conveniently charged using a USB-C cable. The Solo 2 Max combines user-friendliness with an amazing vapor experience, making it an outstanding portable dry herb vaporizer for sale on the market.
Davinci IQ2 and Arizer Solo 2: These are personal favorite choices for dry herb vaporizer for sales.
When selecting a dry herb vaporizer for sale, you should consider factors such as heating method (conductive or convective, many portable units also use a hybrid method), type of vaporizer (session vaporizers vs. on-demand vaporizers), oven capacity (personal use or sharing?), portability (always on the go or home use? pocket vs. desktop), etc. Most vaporizers are adjustable, so you can find the temperature that best suits you and your vaping style.
Please note that different regions may have different legal restrictions on the sale and use of vaporizers, so make sure to understand and comply with local laws and regulations before making a purchase.
0 notes
Text
iPhones are full of the information you don’t other people to have, and the company actually isn’t the best when it comes to protecting that information. You need to take your own steps to make sure that your security is secure against theft. There are many ways to do this, but using just some simple tips will help you take your phone from insecure to protected. Furthermore, with Apple’s new iOS 12, the latest software has many new security features you should be taking advantage of. Create an Alphanumeric PasscodeA basic layer of security that you should be aware of is your password. It should be both complex and something you don’t use elsewhere. Combining numbers and letters to make an alphanumeric passcode will also be another layer of defense. You can also make the most out of the Touch and Face ID to prevent people from gaining unauthorized access to your data and information. While Apple isn’t the best about security, their Face ID software is actually some of the most advanced and secure. Disabled AccessOn your iPhone, each application has its own access to specific functions and data on your phone. Any iPhone user can sneak into your phone and get information through the control center. This is why you should disable certain functions and access to specific applications. For example, your phone can access your microphone and camera through apps like Instagram. If you have Siri enabled on the lock screen, someone could ask questions and give commands to it in order to secure information. Disabling notification, control center, and Siri from interacting with your personal data will help you protect yourself against hackers. Clear your HistoryAnother basic but extremely important thing is to clear your history. This can help keep your personal information safe and prohibit hackers from finding things about you through your web history. Deleting cookies will also help prevent savvy and maleficent people from getting access to your phone. Be sure to take advantage of incognito and private modes as well.Keep iOS UpdatedYou should also make sure that you are always running the most recent version of iOS, including smaller point updates. Hackers can find flaws in Apple’s coding, which they exploit and provide access to personal information. While they aren’t perfect, updating your system can be a great way to close loopholes and establish a secure phone system. Not only will you get the benefits of the company closing imperfections in the software, they actually add new security features that are getting better and better to combat hackers’ evolving set of tools. Use USB Restricted ModeWhile this feature is difficult to find, the new USB restricted mode prevents accessories from connecting to your device. These include cables and headphones. When your iPhone has been locked for more than an hour, the iPhone will prevent hackers and police from using tools to bypass your lock screen to get to your password and data. Use Two-Factor AuthenticationOne of the best ways to keep your account safe is to use two-factor authentication. When someone steals your password, they will also need your phone to break into the account. While it has been on iPhones for a while, it has been inefficient and nonsensical. With iOS 12, a new feature auto-fills the codes and takes the frustration out of having to memorize the whole thing. Insuring your PhoneThere are now many ways to protect your phone, but according to MoneyPug, a site used to find the best mobile phone insurance, hacking techniques are evolving all the time. It is still advisable to get insurance for it so that you never get hacked or get your information stolen. Nothing can be guaranteed safe, the more layers of defenses you have the better off you will be. Insurance is just another layer. If you pay attention to simple things like your settings, history, and the newest features, you will be able to protect yourself from hackers and identity thieves. Keeping up to date is half the battle.
Understand where the threat is coming from and you will be that much better off defending against it. Do yourself a favor and secure your iPhone today. You won’t regret it, especially if you are attacked.
0 notes