#Unusual camera
Explore tagged Tumblr posts
Visit Tumblr Blog
Explore Tumblr blogs with no restrictions, modern design and the best experience.
Last Seen Tumblr Blogs


Fun Fact
Average visit duration of Tumblr.com is 10 mins and 25 secs.
Text
Alpa Rotocamera 6070
As I've mentioned in previous blog posts, I am fond of panoramic cameras and the odd and unusual cameras that most people wouldn't guess are cameras, so I always have my eyes open for these oddball items to add to my collection. The Alpa Rotocamera is just one of these items. Not only is it an odd-looking item that resembles a miniature robot-looking item, but it's also a 360-degree panoramic camera that shoots on 120 or 70-mm film.
I've owned lenses that shoot 360-degree images and have even written posts on them. The first lens I had that shot 360-degree images was a Be Here Portal S1 lens, which fit onto my Nikon DSLR camera, and with software, it produced a tremendous 360-degree photo. That lens got damaged, and to this day, I'm continually searching for another one of these lenses. In my mind, I kept telling myself that there's something different between shooting with a 360-degree lens and having a camera that can produce a 360-degree negative.
I found an Alpa Rotocamera on an online auction. When I saw it shot 360-degree images on 120 or 70mm film, I was immediately hooked and wanted to get it. Not knowing much about the camera other than a few tidbits I quickly found online, I bid on the camera lot. To my surprise, I won the camera. I was excited to get the camera and load film into it and start to make some tremendous images that were a view that is mind-boggling when you see them.
This blog will be different from my other posts because I've spent tens of hours on this specific camera because of its condition. I want to give you a brief overview of the camera, then explain how I received it and what I've done to get it back into working condition.
The Camera:
This camera is a Beast!!!! I didn't realize until I received it, but the camera and film back weigh just under 17 lbs. and are 16 lbs. 15.6 oz. That does not include the power source and cables. It’s built from cast metal with a pebble finish and, it’s 12” tall, 9” wide, and 8” deep and was built in the early 1980s.
As mentioned, the Alpa RotoCamera produces a 360-degree image on either 120/220 or 70mm film. The camera is powered by a 12v rechargeable battery that powers motors in the camera's base, which rotate the head around a cylinder. According to the manual, you can produce either 90, 180, 270 or 360-degree views with the camera. On the front of the camera is a Rodenstock Grandagon-N 75mm f6.8 lens. Just to the right of the front lens is a lever used for vertical adjustment. If you want to shoot higher or lower, you can slide the lever up or down to adjust the vertical height to avoid getting too much foreground in the photos. There is also a viewer on the side that can be used to see the camera's vertical adjustment.
The camera has two speeds, and the head rotates around the cylinder. The speed is set on the center column by a switch with an "A" for the faster speeds and "B" for the slower speeds. There also are a series of slits in the head that allows for the camera to shoot at different shutter speeds depending on the motor speed and slit width. Switches on the top of the camera head control the slits. One series of switches is for the slit width, and there is another that allows for the slit angle if you're in a situation where you'll want to control excessive brightness in the sky or ground. The camera can shoot anywhere from 1/20 to 1/250 shutter speed depending on the motor speed and slit width. On the rear of the film's back is a chart showing where to put the different switches should you want faster or slower speeds, along with a controlling light on top or bottom.
The camera also has a removable film back, and 70mm or 120/220 film can be loaded into it. There is a small hard wheel just below the take-up spool on the film back, which is connected to the film advance cog and fits into the film reel. Just below the slits on the head is a rubber band that goes all around the cylinder. As the head rotates around the cylinder, the hard wheel runs along the rubber under the slit advancing the film as the head spins around the cylinder.
There are two settings on the camera remote control. One is a switch for "Auto" or "Manual," and the other setting is "Rotation." The Auto setting works in conjunction with the angle set on the column for 90, 180, 270, or 360 pans. The manual setting allows you to press as long as you want the camera to pan for. The "rotate" button is pressed to open the shutter and start the camera rotation. The remote and power cable are joined; one end fits into the power pack, and the other fits into the bottom of the camera's center column. There is also an on/off switch for the camera close to where the power and remote cable fit into the camera.
In theory, you load film into the film back, making sure the take-up spool is engaged into the drive gear on the back. Put the back onto the camera. Plug the cables into the power supply and the camera. Turn the camera on, set the aperture on the lens, and check the height adjustment. Meter your scene, then set the appropriate shutter combination by the series of switches on top of the camera and the speed adjustment on the column. Set the rotation distance, and press "Auto" to start the camera rotation. According to the manual, on a roll of 120 film, you'll get 1- 360-degree or 270-degree images, 2-180-degree images or 4-90-degree images.
The Restoration:
The one thing I didn't realize and wasn't shown in the images at the online auction was the mechanical and physical condition of the Alpa Rotocamera internally because when I received the camera, it wasn't in "good working order." On the outside, the camera looked good. Everything seemed to be there, but when I went to take the back off the camera to view the inside of the camera body, the wheels came off the bus. My heart sank as the excitement of having a working camera came to a crashing halt.
The film back still had two 70mm film cassettes inside, but it looked like someone had packed the back of the camera with grease. For what reason, I wasn't immediately aware of it, and the rubber wheel that the film rotates on to advance the film had deteriorated into a yellow mass of goop that looked worse than it was. Another item that was missing was the power supply for the camera. I had the cables for the power supply that led to the camera and the remote control on it. I also had the instruction manual along with a car inverter to charge the battery when in your car. Still, there was no power supply, so I couldn't check whether the camera operated.
I let the camera sit for a few hours as I started thinking about how to get the camera into a somewhat presentable condition. My mind wasn't even on getting the camera, but on starting to clean up all the goop that was not only in visible areas but in areas of the camera I wasn't even sure I could get to. I did another more exhausting internet search when I came across someone who had done a restoration on the camera itself. Bayless Projects has a tremendous video on YouTube that is very comprehensive. He lives in London, so I started an email chain with him, letting him know I, too, had a camera I needed to restore. He helped me with the power supply and with many other questions I had about the camera.
It was time to get the camera back in (hopefully) working condition. I spent the next couple of days cleaning up the goop on the film back, which got into places I needed to disassemble to clean out. With many Q-tips, Isopropyl alcohol, and lightly soapy water, I cleaned the film back up nicely. The film holders moved well, and the film drive gear turned as I rotated the hard wheel, which wasn't moving smoothly previously.
Now, to move onto the camera head. I removed some of the stickers that someone placed with film data from the previous owner. Something was rattling in the head, so I needed to take the top off to see what was rattling around. Once I removed the top, I could see a ground glass still intact and not broken that went where the viewer went. This was used to check the vertical adjustment for the images. Once I got the ground glass in place, it was time to tackle the back of the camera, which had the remnants of the previous rubber band that goes around the cylinder. Luckily, this came off very easily, and I didn't need much cleaning.
Now, to move onto the camera head. I removed some of the stickers that someone placed with film data from the previous owner. Something was rattling in the head, so I needed to take the top off to see what was rattling around. Once I removed the top, I could see a ground glass still intact and not broken that went where the viewer went. This was used to check the vertical adjustment for the images. Once I got the ground glass in place, it was time to tackle the back of the camera, which had the remnants of the previous rubber band that goes around the cylinder. Luckily, this came off very easily, and I didn't need much cleaning.
Thomas (Bayless Projects) helped me with the power supply, which I purchased from him, and he made it for me and sent it over from the UK. I bought a battery to put in the housing. Once I got the battery in the power supply and connected it to see if the camera was working, my heart sank aging…..nothing. With the power on and the battery connected, I turned the head a bit, and luckily, the head on the Rotocamera started to spin. At that point, I was so happy to see the camera spinning. Was that a fluke? I unplugged the battery and let it sit for a few minutes before I tried it again. The camera started to spin without any help from me, so at this point, I knew the camera was functional. You could also hear the shutter open and close as I pressed the rotation button. What a relief. Now, I had a camera that "could" make images (hopefully). The one thing I couldn't figure out was the "Auto" setting. Nothing in the column needs to be pressed to set the camera at different angles for shooting. Thomas said his camera does the same thing, so I can only use the camera in the "manual" position, where I set the angle of view by pressing the rotation button.
I needed to replace the rubber band around the cylinder to get the film to rotate when the film was back on the camera. I purchased a replacement that had the same specs that Thomas recommended. He also said it's not perfect, but I wanted to try it. When I received the rubber, it was horrible. The glue backing didn't hold at all. It was so bad that the paper they put on the product to protect the glue didn't stick on. It was also rolled in the opposite direction, so the end of the rubber kept popping out. I tried two-sided tape to hold it in, but that didn't work either.
Then, I had the idea to turn the rubber around so the curve was going around the cylinder instead of against it. The tape on the back side of the rubber would give more friction as the film wheel rotated. I put a roll of film into the camera and gave the camera a try. Unfortunately, the camera rotated about 90-100 degrees, then stopped as one of the ends of the rubber came off and jammed in the camera. In theory, it made sense, but the rubber was too thick, and the end didn't fit together and kept coming apart.
The rubber needed to be a little thinner and without the crappy glue. I rubbed the glue off the rubber, and to get it to be a bit thinner, I stretched the rubber when I put the two-sided tape on the curved side to make it thinner. To keep the ends together, I added some two-sided tape to one side of the rubber so that when it went around the cylinder. There was extra tape to hold the second end in place. I put it back into the cylinder, and it worked well. It's time to put another roll of film into the camera for another test.
I took the camera to the front of my house, set up the tripod, and crossed my fingers to see if it would work. I put a roll of B&W film into the back, set the camera to the settings the light meter said, and pressed the rotate button. The camera worked!!!! I could hear the shutter open, the camera rotated, and the film come off the spool and wrap around the take-up spool. SUCCESS.
With such success on the test roll, I decided to take the camera into Portland near the river with bridges and see what I could get there. Knowing the Cherry trees were recently blooming, I even packed some color film to see the river's edge and beautiful cherry blossoms in the photo. Having lugged the camera to the river's edge, setting the camera up, plugging in the power supply, and pressing the rotation button, I could hear the shutter open, but the head didn't start to turn. So I gave it a gentle push, and it began to turn. Unfortunately, I could also see it wasn't moving smoothly, which would cause banding.
The one thing I did notice is that when you have the film in the back of the camera, the camera has a little harder time doing the rotation because of the extra tension the film brings to the camera. Pulling the film out of the spool and running it across the shutter, I'm still trying to figure out if it's the rubber around the cylinder or the power to the motor. I'll continually work on how this works together to make the film move correctly.
The first roll was B&W, which I processed when I got home and has banding. I also picked up the color film and noticed. At the same time, the camera did a somewhat better job at rotating; the drive wheel that moves the film from one spool to the other didn't have as much pull as it did with the test in front of my house. For the 2-3 rolls I did away from home, the camera film transport didn't pull the film off the spool. It left the tail end of the film exposed to light. Something is going on here, whether the rubber band around the cylinder or the drive wheel needs lubrication. I also agree with the film I did on location; portions of the film look like motion blur, so the film is not transporting, causing slight banding and blur.
My Results:
Here is the image taken in front of my house during the test. I didn't change the vertical adjustment, and I had the lens pretty high, so there's no foreground or yards in the houses on my block.
These next images were taken down by the river in Portland, Or.
Conclusion:
This camera is still a work in progress. I did order a slightly thinner rubber to try on the cylinder, so I'm crossing my fingers that it will work well on the camera.
Thank you for taking a few minutes from your day to read about an odd and unusual camera that hopefully will be as rewarding in the images it creates as it is frustrating to get it back in good working order.
Until next week, please be safe.
#Alpa#Alpa camera#Swiss camera#camera from Switzerland#Precision camera#Rotating camera#panoramic#panoramic camera#panoramic photo#120 film#Film#film#film cassettes#film back#70mm film#Rodenstock#Rodenstock lens#360 degree camera#Unusual camera#odd camera#Alpa Rotocamera#120 camera#120 film camera#Heavy camera#motorized camera#Camera restoration#Restoring a camera#Restoring an Alpa#Bayless projects
0 notes
Text


°•°• S P R I N G •°•°
#spring#nature#outdoors#photography#photos#hobby#sky#pretty#colours#flowers#photographers on tumblr#artists on tumblr#nature photography#nature photographer#camera#hope#trees#leaves#sunshine#aesthetic#countryside#happy#love#beauty#May#walk#garden#nature core#Weather#unusual
42 notes
·
View notes
Text

Kuroshitsuji 2024 countdown art: 4 days til broadcast!
Our little guy himself, plus his gangly out-of-frame butler, by sub-character designer and chief animation director Akira Takada.
Source
#kuroshitsuji#kuroshitsuji 2024#o!ciel#sebastian michaelis#official art#SON#looks like sebas is being unusually camera-shy
156 notes
·
View notes
Text

Psycho ~ Alfred Hitchcock ~ 1960
Feat: Anthony Perkins
Follow Rhade-Zapan for more visual treats
#Psycho#Gif#Alfred Hitchcock#Film#Anthony Perkins#horror#60s film#60s horror#film gif#norman bates#unusual camera angle
134 notes
·
View notes
Text

Mmmmmm?
20 notes
·
View notes
Text

She heard me doing things so she came up to the side of her baby bin and blelelelele'd at me until I noticed her. She greets me every morning where we spend the first hour of every day together, her just resting in my hand and me holding her, often gently petting her head and tiny scales. If there is a heaven, that first hour we spend together is it.
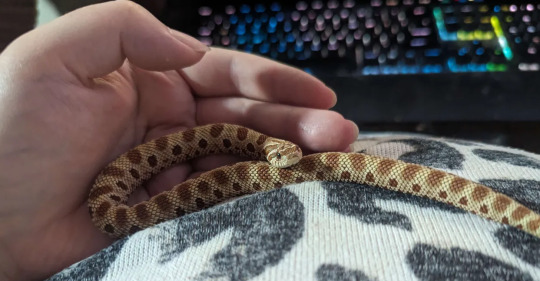
She is getting a larger enclosure for her birthday in a month and a half. :D Hopefully I can get it done in time, as I haven't sculpted a custom enclosure before and will be trying some new artistic critiques. I do have experience sculpting though. My biggest worry is the paints and sealing them properly! Art I can do- but food safe art that will be in a moist bioactive enclosure is new for me.
#From her enclosure camera#hognose#hognose snake#snake#pets#She is getting a bigger enclosure soon it is preordered and we need to wait#She greets me like this every morning#She ate yesterday and should be in a food coma!#You can even see her lump#So I gave her pets and told her I love her#From inside her enclosure the photo of her being held is from yesterday#She really enjoys pets#Especially after a big meal#I need to get a video of her asking for pets#She will pet herself with her chin#And when I stop sometimes she will pet herself with her chin asking for more!#And then I will pet her and she will relax looking like she is in heaven#Those posts saying “snakes cannot enjoy being pet and will only learn to tolerate it” are absolute BS outdated information#from people who are insecure that they are less valid as humans if animals are capable of feeling love and asking for affection#My snake will LITERALLY ASK TO BE PET#And she will pet me too!#I think she saw me petting her#Thought “This feels nice. Is this what we do for each other?”#And when we are snuggling she'll wiggle over to my arm or shoulder and start petting me. She doesn't pet me in any other places.#It is a lot of effort as she has no hands and has to use her chin#moving her whole upper body#So she'll only pet me maybe 20-10 times and take a rest#Does anyone else's snake pet them?#It is unusual but I think maybe she learned it from copying me and it makes her happy ^_^#What a wonderful world we live in where snakes enjoy being pet
38 notes
·
View notes
Text
A northern flicker 🍁✨
3 notes
·
View notes
Text
i highly recommend having some sort of concrete thing you're looking forward to in the future after tomorrow so that you have something specific, however small, to live for if shit breaks really bad
#i for example bought an unusual film camera on ebay#and it hasn't even shipped yet#so that oughtta get me through even if they have to spend days tallying the votes like last time
7 notes
·
View notes
Text
Babygirl I got so much paranoia that- uh actually hold on. *triple-checks that we are in fact alone in the room that’s been completely empty of other life forms for hours*
#‘mama a girl behind you’ there had better fucking not be#that Talking Angela thing kickstarted my fear of being observed when I was a lass 💖#any unusual or inconsistent noise can be a Being if you’re messed in the head enough ;333#my phone front camera could be hacked at any moment even though I know that’s logically not gonna fucking happen#and oh yes what if the blinds magically got pulled to reveal the inside of my bedroom when I wasn’t looking#the feeling that there is a mysterious figure behind me overriding the rational thought saying there is not a figure behind me
3 notes
·
View notes
Text

Rod Serling ֍ The Twilight Zone Season 2 Episode 10: A Most Unusual Camera (1960)
NARRATOR: [Closing Narration] Object known as a camera, vintage uncertain, origin unknown. But for the greedy, the avaricious, the fleet of foot, who can run a four-minute mile so long as they're chasing a fast buck, it makes believe that it's an ally, but it isn't at all. It's a beckoning come-on for a quick walk around the block - in The Twilight Zone.
2 notes
·
View notes
Text
Did some underwater filming of the local lake during sunset tonight.
#underwater camera#underwater#unusual#under water#camera#cameras#water#lakes#lakeside#lake#summer time#summer#july#rocks#stones#nature#nature video#sunsets#thursday
4 notes
·
View notes
Text
It wasn't until after NG++ and S-Ranking all missions in Armored Core 6 that I realized you're supposed to stop trying to move the camera when using the lock-on mechanic.
#armored core 6#I'd say the camera is this game's biggest flaw#which honestly isn't unusual for FromSoft
7 notes
·
View notes
Text
.
#it is snowing in unusual parts of the country#and you'd better believe I am looming out of the window every couple of minutes to see if there are clouds#last time we had snow in my area I didn't even have a phone or camera yet so this time I am READY 📸#also. it is COLD#*looking#update: Joburg seems to have used up all the snow :(#(also. it got slightly warmer. but maybe once it's night... or early tomorrow morning#i was dumb for getting my hopes up. but seeing those videos of snow falling in Johannesburg made me go 👀
9 notes
·
View notes
Text
Corfield Periflex Camera
The Corfield Periflex is a relatively new camera to my collection. I've only had it for a few months, but I've desired to own one for many years. The opportunity arose to purchase one of the earlier models that was in good working condition and at a reasonable price for this camera in its condition, so I grabbed the opportunity and purchased it.
When the camera arrived, it was in good working condition and in the cosmetic condition described, so I was pleased with the purchase. I knew from purchasing the camera that my aim was to do a blog post on it, as the camera has many unique features that have not been seen in cameras before or since.
The Periflex is a 35mm camera with an appearance that resembles a Leica only because of the size and initial shape of the camera. Unlike the Leica cameras, the Periflex doesn't offer the photographer rangefinder focus, sprockets film advance, removable baseplate, or take-up spool, but it does offer the same lens thread mount and excellent optics in a small and compact camera made in the United Kingdom.
The Company:
Sir Kenneth Corfield (1924–2016) was a British engineer, entrepreneur, and photographer whose work significantly influenced the photographic industry in the UK, mainly through his company, Corfield Ltd. Known for his pioneering approach to camera design, Sir Kenneth's legacy is deeply intertwined with the Corfield Camera Company, which he founded in the mid-20th century. His innovative ideas, especially those focused on making quality, compact cameras, helped the brand gain a reputation in the photography community, although its operations ended in the 1970s.
Kenneth Corfield was born in the UK in 1924 and trained as an engineer. He developed a passion for cameras and photography from an early age, and this interest led him to create camera equipment designed to fill the gaps he observed in the photographic tools available at the time. His mechanical expertise and curiosity about precision instruments motivated him to create Corfield Ltd., a company that produces cameras for professional and amateur photographers alike.
Corfield founded his company in the post-war period when there was increasing demand for affordable, portable, high-quality photographic equipment. Starting in the 1940s, Corfield Ltd. initially operated as a small workshop but soon expanded to meet the needs of a growing photography market in the UK. Unlike the more prominent, established companies primarily located in Germany and Japan, Corfield's British roots gave his products a unique appeal in the domestic market. They also partnered with British Optical Lens Co. in Walsall, which designed and made the Lumar optics for Corfield.
The company's first significant product was the Periflex, introduced in 1953. This camera became known for its innovative use of a periscope-type viewing system. This device made the Periflex one of the more unique 35mm cameras available at the time, as it allowed users to see the image through the lens without needing an expensive reflex mirror. The camera was compact, affordable, and relatively simple compared to other rangefinders, and it catered to a market that wanted quality at an accessible price.
The Periflex series became the backbone of Corfield Ltd.'s reputation. The first model, the Periflex I, was followed by several iterations, including the Periflex II, III, and Gold Star. Each version introduced new features and enhancements to meet photographers' increasing demands, such as improved shutter speeds, lens mounts, and more durable designs.
The defining characteristic of the Periflex cameras was the periscope-like focusing mechanism. This mechanism, placed directly above the lens, allowed photographers to focus accurately without the bulk or complexity of a traditional single-lens reflex (SLR) system. This feature made the Periflex a unique hybrid of a rangefinder and SLR qualities, appealing to those who valued compact design but still wanted accurate focus control. Although some photographers found the system unorthodox, others appreciated the camera's compactness and precision, making it popular among professionals and amateurs.
Despite its successes, Corfield Ltd. faced stiff competition from German and Japanese camera manufacturers, producing high-quality cameras on a much larger scale. Companies like Leica, Nikon, and Canon dominated the market with advanced SLRs, and Corfield's unique designs needed to catch up with the rapid technological advancements. While the Periflex series had gained a loyal following, it required more sophistication and reliability than its competitors, ultimately limiting its market appeal.
In the 1970s, Corfield Ltd. ceased producing its cameras, and the Periflex series also ended production. Although the brand did not survive, the innovations introduced by Kenneth Corfield influenced camera design and highlighted the potential for high-quality British-made photographic equipment.
Kenneth Corfield's contributions to the photographic world extended beyond his camera company. Even after Corfield Ltd. ceased operations, he remained active in the photography industry. Later in his career, Corfield was involved with Gandolfi, a British large-format camera manufacturer, and his influence continued to be felt through his consulting and design work in the field.
Corfield's legacy is remembered by photography enthusiasts and collectors who admire his innovative approach to camera design. The Periflex cameras, in particular, are valued among collectors for their uniqueness and historical significance. Sir Kenneth's work reflects a time of British ingenuity in the photographic industry. It is a testament to a small, independent company's impact on a competitive global market.
Bev Parker has a wonderful website dedicated to The Corfield Company.
My Camera:
My Corfield Periflex camera isn't the first model, as the first 200 Periflex camera had a black top and bottom plate like mine. Still, they were covered in brownish pigskin on the body. I believe mine is the third version, as the engraving has been moved to the periscope but still has the black top and bottom plate, black leatherette covering, and chrome lens.
My Periflex camera is 5.5" wide by 3.25" tall, including the periscope, and 3.25" deep from the back of the camera to the front of the lens focused to infinity. With the standard Lumar 50mm f3.5 lens, it weighs 1 lb 1.4 oz. The camera is made from aluminum, as opposed to brass, which was a more common construction material at the time. Aluminum was easy to work with for both the body and lenses and was less expensive.
This hybrid camera doesn't have a rangefinder to focus. Still, it has a very small mirror that drops down into the camera and points out through the lens, allowing the photographer to focus on the subject, which is very similar to a single-lens reflex camera. The periscope is achieved by the center tube over the lens, which has a small knob on the back that you pull down and look through the optics on the top to view your subject.
I was very skeptical at first, but it does work and focuses very crisply on the subject as it should. There are some things that could be improved in this system. First, you need to open the aperture to get the brightest image to focus on, so you don't do this quickly. Once the camera is focused, you stop the lens down to the desired aperture setting to get the proper exposure, move your eye to the mounted viewfinder on the top to frame your subject, and then take the photo. Once you do it a few times, it becomes manageable. But it would be best if you remembered to reset your aperture, which I didn't do on a few frames. That's just a matter of getting to know the camera and using it more often. I DID like looking through the lens in a small compact camera to focus on the subject.
My Periflex has shutter speeds from 1/1000 to 1/30 sec exposure times along with "B" for timed exposures. Above the shutter speed indicator is a knob that needs to be turned to cock the shutter before making an exposure. Advancing the film DOES NOT cock the shutter. These are two separate operations and are not intertwined. You do, however, need to advance the film winding lever AND cock the shutter before the camera will fire. This makes it impossible to take a double exposure on this camera. At least, I am still looking for a way to do it. The shutter release button is on the front of the camera, similar to the Topcon cameras, so it's more of a squeezing motion than a pressing down motion. There is a removable collar around the shutter release to attach a Leica-style cable release for time exposures.
Another oddity about my camera is that I didn’t discover it until after I had shot all the photos for this post. I didn’t think there were aperture settings on the lens, but after I reread the instruction manual, there is a small black mark on the lens that goes along the depth of field scale which indicates what aperture you’re using. Looking at the Corfield Periflex instruction manual, they discuss apertures and depth of field, but there is where the aperture settings are. All my exposures were guesses of the size of the aperture needed. The focus on my lens is smooth, the aperture ring moves well, too, and the Lumar lens system has a Leica Thread mount, so the advantage is you can use any LTM lens with this camera.
Loading the film is very simple, and there is another camera oddity in the loading process on the camera. To open the back to load the film, you turn the chrome circle on the camera next to the tripod socket until the arrow points to the white dot. Once that is done, the camera's back will slide downward, exposing the film chamber. I first noticed that there was no drive gear to advance the film, and the take-up spool (drum) on the camera was much larger than the usual 35mm cameras on the market. The take-up spool is actually a drum that advances 180 degrees per wind of the film advance, so as the film is pulled and wrapped around the drum, the spacing of the film frames becomes more significant as you go from the first to the last frame.
Once the film is loaded, you slide the back into position on the camera and turn the chrome wheel on the bottom away from the white dot to lock the back onto the camera. When finished taking the roll of photos, rewind the film back into the film cassette. The drum/take-up spool release is a small chrome button between the shutter and film advance knobs. Press that button down, and you can rewind the film back into the cassette for processing.
My results:
I took the camera for a walk in the neighborhood on a sunny afternoon to see what I could do with the camera. It took some time to think about the metering process on the subject. Opening the aperture, setting the shutter speed, pressing down the periscope to focus (which was fun and easy), resetting the aperture to a size opening I thought might be the correct aperture size, putting the viewfinder to my eye to compose the photo, then taking the photo. Certainly not like cameras today with autofocus, automatic light meter settings, etc. You slow down, take your time and compose the shot, which I enjoy doing.
Here are a few of the images from the camera.
Conclusion:
I enjoyed shooting with the Corfield Periflex. It slows you down and makes you think about the process of creating an image rather than taking one. Not that the photos shown are any works of art, but I like the slower and more methodical process of taking the photo.
The camera is small and compact, has the shutter speeds needed, and has good optical sharpness. After finding where the aperture settings are, it makes more sense on how to do the aperture settings. I only wish I knew that before using the camera for the first time.
Thank you for taking a few minutes from your day to read my review of the Corfield Periflex, a gem of a camera.
Until next week, please be safe.
#Corfield#Corfield camera#Corfield Periflex#Periflex#35mm#35mm film#35mm camera#35mm film camera#hybrid camera#periscope#leica copy#lunar lens#british camera#cameras from UK#fun camera#interesting camera#odd camera#unusual camera#dancuny#Dan Cuny#dan cuny photography#aluminum camera#british made#British camera#Film#film camera#1950s camera#1950s cameras
0 notes
Text
Dear all delivery drivers who baby talk my dogs when you drop off, I love you and would die for you
#I always check my cameras cause it's not unusual for my orders to go to my neighbors and I can plan to stop by their house#When I get home. I love hearing the ppl baby talk the dogs
0 notes
Text
10 Most Unusual-looking Cameras That You Should Know About
Before the 21st century, camera designs were very distinct from what we see today. Back then, the gear would be large, often heavy, or would need the longest exposures. However, that was the case with traditional cameras used by innovators and photographers in mainstream business. However, a quick search on the internet will make you realize that before we reached this stage, some creators…
1 note
·
View note