#WAVLINK Wireless Routers
Explore tagged Tumblr posts
Visit Tumblr Blog
Explore Tumblr blogs with no restrictions, modern design and the best experience.
Last Seen Tumblr Blogs


Fun Fact
When “GIF” was named word of the year in 2012, Oxford Dictionaries U.S.A. credited Tumblr for pushing the word.
Text
WAVLINK Wireless Routers: The Ultimate Guide
Introduction to WAVLINK Wireless Routers
In today’s fast-paced digital world, staying connected to the internet has become more crucial than ever. WAVLINK wireless routers have become a popular choice for users looking for reliable, high-speed internet connectivity. The brand has made its mark by providing routers that not only meet the basic needs of everyday internet usage but also cater to the demands of more advanced applications like gaming, streaming, and working remotely. WAVLINK routers are designed to offer a seamless internet experience, delivering robust performance and reliable speeds, whether for a single device or multiple connected gadgets. By integrating the latest technology into their routers, WAVLINK ensures that users can maintain a strong and stable connection at all times. With a focus on ease of use, performance, and security, WAVLINK routers provide an ideal solution for those who demand more from their home or office network.

Design and Durability of WAVLINK Routers
WAVLINK routers are known for their functional yet stylish designs. Many of their models feature sleek and minimalistic exteriors that make them blend seamlessly with any home or office decor. The routers are compact, ensuring they won’t take up too much space while offering excellent performance. The materials used in the construction are sturdy, designed to withstand the rigors of daily use without easily showing signs of wear and tear. External antennas, which can be adjusted for better signal distribution, are a common feature of many WAVLINK models. These antennas allow users to fine-tune the signal strength for optimal coverage. Some routers are also equipped with internal cooling systems that prevent overheating, ensuring the device operates efficiently even under heavy usage. WAVLINK's focus on both design and durability makes their routers reliable options that can stand the test of time while still looking good in any environment.
Exceptional Features for Home and Business Use
WAVLINK routers come with a range of features that make them suitable for both home and business environments. One of the key features is dual-band Wi-Fi, which gives users the ability to connect to both 2.4 GHz and 5 GHz frequencies. This helps reduce network congestion, as each band can be used for different tasks. The 2.4 GHz band is ideal for basic browsing, while the 5 GHz band provides faster speeds for high-bandwidth activities like video streaming or online gaming. Another great feature is MU-MIMO technology, which stands for Multi-User, Multiple Input, Multiple Output. This allows the router to communicate with multiple devices at once without a significant drop in performance. For households with numerous devices connected to the network, this feature ensures that each device gets its fair share of bandwidth, avoiding lag or slow speeds. WAVLINK routers also come equipped with high-powered amplifiers that help extend the Wi-Fi range, making them suitable for larger homes or office spaces where a single router might not be enough to provide full coverage.
Reliable Performance and Speed
WAVLINK wireless routers are engineered for performance, providing fast and reliable speeds that can support a variety of internet activities. Whether you are browsing the web, streaming HD video, or participating in online gaming, WAVLINK routers are built to ensure that your internet connection stays stable and fast. The routers are equipped with advanced processors and wireless technologies that ensure smooth performance even when many devices are connected to the same network. Their ability to handle high speeds and multiple simultaneous connections is a significant advantage in homes and offices where many devices rely on a single router. The dual-band technology enables users to prioritize different activities by assigning devices to the optimal frequency band. This allows users to engage in more bandwidth-heavy activities, like gaming or streaming, without negatively affecting other users on the network. With WAVLINK routers, users can expect a reliable connection that meets their diverse online needs, whether they are using one device or several at a time.
Ease of Setup and Use
WAVLINK routers are designed with user-friendliness in mind, making the setup process quick and hassle-free. Most models come with a simple and intuitive setup guide, allowing users to get their router up and running in just a few steps. For those who prefer a more hands-on approach, many models include a mobile app or web interface that guides users through the entire setup process. The interface is straightforward, making it easy for users to configure settings such as Wi-Fi names, passwords, and network security. This simplicity is especially beneficial for people who may not have much technical knowledge but still want a high-quality router for their internet needs. Many WAVLINK routers also offer plug-and-play functionality, which means that after plugging the router into a modem, it can automatically detect settings and configure itself for optimal performance. This easy setup experience makes WAVLINK routers a great choice for people who want a fast, no-fuss installation.
Enhanced Security Features
Security is an essential consideration when setting up a Wi-Fi network, and WAVLINK routers come equipped with a variety of security features to protect your data and privacy. These routers support the latest encryption protocols, including WPA3, which is one of the most secure standards available today. WPA3 encryption ensures that your Wi-Fi network is protected from unauthorized access and potential cyber threats. In addition to this, many WAVLINK models come with built-in firewalls that help protect your network from external attacks, providing another layer of security for your connected devices. For those concerned with privacy, WAVLINK routers offer the option to create guest networks, ensuring that visitors can connect to the internet without gaining access to your main network. This is particularly useful in office settings or when hosting guests at home, as it helps keep sensitive information secure. Furthermore, the routers often include parental control features that allow parents to monitor and limit internet access for their children, ensuring safe online browsing.
Customer Support and Warranty
A key factor that sets WAVLINK apart from other router manufacturers is their commitment to customer support. Users who encounter issues with their routers can reach out to WAVLINK's dedicated support team for assistance. The company provides a variety of resources to help users troubleshoot problems, including an extensive knowledge base and helpful FAQ sections on their website. For more complex issues, WAVLINK’s customer service team is available to provide guidance and solutions, ensuring that users can resolve problems quickly. Many customers appreciate the availability of instructional videos and guides, which can help solve common problems without the need for professional help. WAVLINK also offers a warranty for its routers, which protects customers against manufacturing defects and other issues. The warranty offers peace of mind, knowing that the company stands behind its products. This combination of excellent customer support and a reliable warranty makes WAVLINK an attractive option for users looking for a dependable router.
youtube
Conclusion: Why Choose WAVLINK Wireless Routers?
WAVLINK wireless routers offer a perfect blend of performance, ease of use, and security, making them an excellent choice for both home and office networks. Their powerful features, such as dual-band Wi-Fi, MU-MIMO technology, and advanced security protocols, ensure a seamless and secure internet experience for users. WAVLINK routers provide exceptional coverage and speed, allowing users to stream, browse, and game without interruptions. The user-friendly setup process and intuitive interface make these routers accessible even to those with limited technical knowledge. Additionally, WAVLINK’s commitment to customer support and product warranty ensures that users can feel confident in their purchase. With their sleek design, reliable performance, and robust features, WAVLINK wireless routers are an excellent investment for anyone looking to upgrade their internet connectivity. Whether you're working from home, enjoying entertainment, or managing a smart home, WAVLINK routers deliver the performance and security you need for a modern digital lifestyle.
0 notes
Text
#wavlink router#wavlink#router#wavlink login#wavlink wi fi router#wavlink wifi router#wavlink router setup#wavlink router setup bangla#wifi router#how to setup wavlink n300 wifi router#wavlink repeater#wavlink n300 router#wavlink router configure#how to setup wavlink router#wavlink router password change#change wifi password wavlink router#wavlink ac1200#router wavlink#router wifi wavlink#wireless router#wav link router setup#wavlink router review
0 notes
Text
Price: [price_with_discount] (as of [price_update_date] - Details) [ad_1] From the brand WAVLINK PRODUCT WAVLINK PRODUCTS WAVLINK PRODUCTS WAVLINK PRODUCTS Wavlink was founded in 2011, Eggie Award Best Seller APAC in 2019, Award PCM Best Performance / Best Value in 2023 Fast Growing Reputation Wavlink has achieved certain reputation with customers, with fast-growing market shares and distributor-friendly system. The Most Advanced Technology Wavlink is among the world’s first to adopt the latest technology, which gives end users good options. Why WAVLINK? We targeting the Wireless and Audio & Video and Connectivity (LINK) business. Adventurers and scientists aspire to the abstruse sea and universe, Wavlink hopes that our unique and innovative products will take you to explore the interesting world of science and technology, with more creative possibilities! Are our goods of the highest quality? We are committed to bringing our customers superior and surprising products, and we are strict with ourselves in order to get great praise from you. Believe us, WAVLINK will be the choice you won't regret! 【Ultra-fast USB 3.0 & UASP Accelerated】: Transfer 1GB file in 3 seconds. The SATA interface of this enclosure supports UASP accelerated transmission protocol, 70% faster than traditional USB 3.0. The USB 3.0 interface supports up to 5Gbps transfer rate, also backward compatible with USB 2.0 and USB 1.1 ports. 【Various Application 】: Easily connects your 2.5 inch SSD & HDD to PC, laptop, PS4, TV, router for data transferring or expanding storage. It protects the hard disk from outside scratches and makes SATA hard drive portable for data store. It is awesome for booting up old hdd/ssd and recovering important files of broken PC. 【Universal Compatibility】: Supports Windows, Mac OS X and above systems. Fit with most 2.5" SATA III / II / I HDD (Hard Disk Drive) and SSD (Solid State Drive) up to 4TB. 【Easy Installation】: Tool free installation. Plug & Play, no driver needed for this SATA enclosure. Just push out the cover, plug in the drive, close the cover and go.
Hot-swap supported. No request for extra power supply. 【Great Portability for Your Hard Drive】: Ideal for harnessing your old 2.5" HDD and SSD hard drive as an external USB drive, it will provide you greater convenience of use and versatility of digital data storage. An ideal choice for digital lovers, movie lovers and business elites. [ad_2]
0 notes
Text
How To Find And Change Your Wavlink Default Password In Seconds
The wavlink default password is the factory-set login credential used to access the router's settings. Typically, this is set to "admin" for both the username and password. It's crucial to change the default password for enhanced security and to prevent unauthorized access to your network and router settings. Struggling with your Wavlink default password? It’s easier than you think to find and change it!
Follow these quick steps: 1️⃣ Connect to your Wavlink router via Wi-Fi or Ethernet. 2️⃣ Open a browser and type the router’s IP address (usually 192.168.10.1) into the address bar. 3️⃣ Log in using the default credentials (often "admin" for both username and password). 4️⃣ Navigate to the “Settings” or “Wireless Settings” section. 5️⃣ Change your password to something secure. 6️⃣ Save and restart the router.
0 notes
Text
Understanding Wavlink Halo Setup
Wavlink Halo Setup is a powerful and versatile wireless router that offers top-notch performance and extensive coverage. Setting up your Wavlink Halo is a straightforward process that begins with connecting the router to your modem and powering it on. Once the router is connected, you can access its web-based setup page by typing the default IP address into a web browser. From there, you can customize your network settings, including security protocols and wireless network names. It’s essential to follow the setup process meticulously to ensure a seamless and secure connection.

Embracing Firmware Updates for Optimal Performance
Firmware updates are pivotal for keeping your Wavlink Halo functioning at its best. These updates often include bug fixes, security enhancements, and new features that can improve the overall performance and stability of your router. To update your Wavlink Halo firmware, you can navigate to the router’s web interface and check for any available updates in the firmware section. It’s imperative to adhere to a regular firmware update schedule to safeguard your network from potential vulnerabilities and ensure optimal performance.
Performing a Factory Reset for Troubleshooting
In the event of persistent network issues or the need to revert to the router’s default settings, a factory reset may be necessary. Performing a factory reset on your Wavlink Halo router entails pressing and holding the reset button for a specific duration, usually indicated in the router’s user manual. Following a factory reset, the router will revert to its initial configuration, allowing you to start anew with the setup process and troubleshoot any persistent issues effectively.
Addressing Common Issues and Troubleshooting Tips

Unveiling the Features of Wavlink Halo
The Wavlink Halo router boasts an array of features designed to deliver exceptional performance and versatility. Its dual-band technology enables simultaneous usage of both 2.4GHz and 5GHz frequencies, catering to a wide spectrum of network requirements.
Moreover, the router’s advanced security protocols and parental control features empower users to prioritize network security and regulate access effectively. With its robust performance and user-friendly interface, the Wavlink Halo router is a compelling choice for individuals seeking a reliable and high-performance networking solution.
In conclusion, mastering the setup, firmware updates, factory reset, and troubleshooting tips for your Wavlink Halo router is essential for ensuring a seamless and optimal networking experience. By familiarizing yourself with these fundamental aspects and leveraging the router’s impressive features, you can harness the full potential of your Wavlink Halo and enjoy a robust and secure network environment
0 notes
Text
Different Ways To Complete Wavlink Setup
Everybody wants maximum bandwidth while using the internet. Well, Wavlink is becoming an emerging brand as it provides maximum possible bandwidth to its users. There is a wide range of Wavlink routers and extenders for the different needs of consumers. Similarly, there are different ways to complete the Wavlink Setup so that you can use your router as you want. No doubt, there is a universal method to log in with the help of a link. For Wavlink, the login link is wifi.wavlink.com. But there are other ways as well explained in this blog. So, let’s get to know about the other ways in this blog.
Ways For Wavlink Setup
This section defines the two different ways to complete the login for the Wavlink setup. These two ways are: using wifi.wavlink.com and using the ap. setup.
Using wifi.wavlink.com
Following are the instructions to complete the Web-based Wavlink setup using wifi.wavlink.com.
Step 1: Connect the system and Wavlink router with each other using a cut-free ethernet cable.
Step 2: Now, open the updated and desired web browser in your system.
Step 3: In the address bar, enterwifi.wavlink.com as the address.
Step 4: Press enter key on the keyboard.
Step 5: The Wavlink router’s login screen will open up.
Step 6: Enter the default username in the username field.
Step 7: Then, enter the default password in the password field.
Step 8: After that, click on the Login button to go to the setup screen.
If you have entered the username and password right, then you will be on the admin panel of the Wavlink router. From there, you can configure and complete the Wavlink setup as you want. Don’t forget to save the changes in the end in order to apply them.
Using ap. setup
Following are the instructions to complete the Web-based Wavlink setup using the ap. setup.
Step 1: Connect the system and Wavlink router with each other using a cut-free ethernet cable or using the wireless network.
Step 2: Now, go to your web browser like Google Chrome.
Step 3: Enter the ap. setup as an address in the URL field.
Step 4: Press the Enter key on the keyboard.
Step 5: The Wavlink router’s login screen will open up.
Step 6: Enter the default username in the username field.
Step 7: Then, enter the default password in the password field.
Step 8: After that, click on the Login button to go to the setup screen.
So, these are the steps to log in for the Wavlink router. In case, you face issues then follow the troubleshooting steps given in the next section.
Troubleshooting Wavlink Setup Login
If the above steps have not helped you in the login process for the Wavlink setup, then go with troubleshooting. For this, you need to go with the following instructions.
Step 1: Make sure your system is properly connected to the internet.
Step 2: The network status should be active as down-servers can create the issue.
Step 3: Ensure that you are using the right login credentials for username and password.
Step 4: If someone has changed the default credentials, then log in with the current credentials.
Step 5: Try to use the default IP address instead of wifi.wavlink.com or ap. setup.
Step 6: If you have no idea about the current username and password, then reset your router.
Resetting the router will bring all the settings back to the default. Hence, it means, you can now log in with the help of the default credentials.
Don’t Skip Anything!
Summing up! These are the different ways and troubleshooting for the Wavlink setup. Make sure, you don’t skip any steps during the login for the Wavlink router with wifi.wavlink.com or ap. setup. Still, if you face any problem with the Wavlink setup even after troubleshooting, contact our expert team for instant help. Once all the problems are resolved, you can connect your wireless devices to the Wavlink router and access the internet.
Visit Us: https://wifiwav.com/
1 note
·
View note
Text
wifi.wavlink.com

Wifi.wavlink.com connects you to 192.168.10.1, which is an IP address. The default web address for logging in or customising the wavlink wifi extender is http://wifi.wavlink.com or http://ap.setup.The IP address 192.168.10.1 is redirected by wifi.wavlink.com. Use the site address http://wifi.wavlink.com or http://ap.setup to get to the Wavlink extender setup page. If both web addresses are unavailable, the default IP address of 192.168.10.1 may be used. A Wavlink extender setup must be installed in order to fill the Wi-Fi signals in every nook and cranny of your home. The Wavlink wifi repeater is well-known for covering all dead spots in your area. For Wavlink Extender Setup, Wait for the power light on the wavlink system to become stable and steady after plugging it in close to your current router. Look for the wavlink wifi extender’s default SSID and enter its wireless passkey in your client device’s wireless settings. If you have any additional questions about the wavlink device, you can contact our support team for assistance. Our staff will be delighted to assist you.
#wifi.wavlink.com#wavlink extender setup#wavlink extender login#wifi.wavlink.com not working#wavlink repeater setup#wavlink#extender#setup#login
1 note
·
View note
Text
Wavlink Ac1200 router setup
You can enjoy incredible wireless coverage in every part of your home. The process of the Wavlink Ac1200 router setup is simply straightforward. You can complete it using a web-based method using your computer system. For more information visit our website
1 note
·
View note
Text
1PC Wavlink Technology High Power Outdoor Weatherproof Wireless WIFI Router/AP Repeater Color: White
1PC Wavlink Technology High Power Outdoor Weatherproof Wireless WIFI Router/AP Repeater Color: White
NOTE: The free plug adapter will be delivered as well regarding your COUNTRY.
Package Included: 1 x WiFi AP/Router 2 x Antenna 1 x power Adapter 1 x POE Converter 1 x RJ-45 Networking Cable 1 x Main body holder 1 x Screw fitting 2 x Cable ties 1 x Quick Installation
Specifications: – Model Number: WL-WN570HA1 – With Modem Function: No – Wi-Fi Transmission Standard: 802.11ac – Max. LAN Data Rate: 300Mbs – 2.4G…
View On WordPress
1 note
·
View note
Link
1 note
·
View note
Text
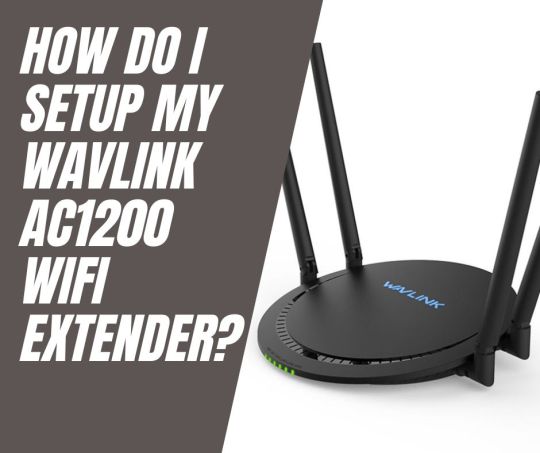
How Do I Setup My Wavlink AC1200 Wifi Extender?
Wavlink AC1200 provides fast speeds and reliable connections for multiple devices. With two high-gain antennas, it provides wide coverage and stable connections. A USB port allows users to access shared files easily. The device is easy to set up and use and works with most wireless devices. You can also set up parental controls to keep your children safe online. It takes a few minutes to complete the Wavlink AC1200 setup. You can use the WPS and web browser to start the setup process of the Wavlink AC1200 wifi extender.
WPS Method To Wavlink AC1200 Setup
A step-by-step guide to Wavelink AC1200 Setup WPS is here.
Your extender's power adapter can be connected to a power outlet.
Isolate all wires before connecting them.
When the extender is powered on, a blue light will appear.
The Wavlink extender can be connected to your WiFi router.
You must press the WPS button on both the router and the extender at the same time.
The two buttons need to be pressed together for two minutes for this step.
Ensure that the LED light is solid blue.
When the router and extender are both connected, a solid blue LED will illuminate.
Whenever an extender is connected to a wireless network, it automatically boosts it. Both devices will have the same SSID and password.
It will be possible for you to log in using the same password.
You can use your Wavlink AC1200 device after you complete the setup process.
Using a Web Browser for Wavlink AC1200 Setup
The Wavlink AC1200 setup can also be done via a web browser. It also depends on users' preferences which they want to use. Here are the steps for setting up the system.
Wavlink AC1200 devices must be plugged into power outlets.
You will need to configure your device to repeat the connection.
You can find the network settings on your laptop by going to the settings menu.
By finding the network, you can connect to Wavlink.AC 1200.
To access 192.168.10.1, launch any web browser and type the address in the address bar.
There will be a configuration page for the Wavlink AC1200.
By following the instructions on the screen, you can now connect your home's network to the extender.
The Wavlink AC1200 setup is now ready for use. Once the router is plugged in, the LED lights will indicate when the router is properly connected to the modem. After that, users can access the router's settings page via any web browser to customize their network setup and connect their devices to the internet.
Once the LED lights are lit, users will be able to connect their devices to the router's network and access the internet. They can also access the router's settings page, which will allow them to customize their network setup and adjust settings such as the network name and password.
Wrapping Up
You can use above both methods for the Wavlink AC1200 setup. Users need to read all the instructions so they can follow all steps perfectly.
0 notes
Text
Another choice for outdoor wireless network applications, WAVLINK launches WN573hx1 outdoor router
http://dlvr.it/SmRwxP
0 notes
Text
Another choice for outdoor wireless network applications, WAVLINK launches WN573hx1 outdoor router
http://dlvr.it/SmRw1R
0 notes
Text
Another choice for outdoor wireless network applications, WAVLINK launches WN573hx1 outdoor router
http://dlvr.it/SmRvk8
0 notes
Text
Wavlink WING 12M Extender Setup
You may connect the extender to your wireless router or modem by following the Wavlink AC1200 WING 12M setup guide. By using a WIFI setup you can improve the signal of your existing wireless network and guarantee continuous access to far-reaching devices.
Installation of the Wavlink WING 12M extender
Instruction manual for The Wing AC1200 12m Range Extender:
Connect the wireless devices to the Wing Extender.
To launch the browser, type ap.setup or the IP address 192.168.10.1.
To access the setup page, log in using the default username and password.
The repeater looks around for indications.
Click it to select the WiFi network at your residence.
After entering the WiFi setup, click Next.
Before linking the amp to your home network, wait 30 seconds.
Now that installation of the Wing 12m Extender units is complete.
To improve connectivity, put the extender near the area without internet.
Manual setup for the Wavlink WING 12M Extender
how to get to the manual setup page for the Wing 12m wifi extender:
The Wing 12m extender must be inserted into the outlet after the package has been opened.
Press the power button as soon as the power LED light goes green.
Now connect your WiFi device to the Ap extender configuration _Ext network.
In any active online browser, type Ap.setup.
You are presently on the setup page for the Wavlink Wing 12m Ac1200.
After creating your account, follow the AP Login procedures.
Note: If you need any assistance regarding your Wing 12m wifi extender so contact our technician or visit the official website that is ap setup login.
Wavlink Wing 12m Extender WPS Setup
One of the most common methods to connect the extender to an existing wifi network during installation is by pressing the wireless protected setup (W.P.S) button.
To install the extender, set up your Wing ac1200 according to by the following instructions:
Place the extension near to the main wifi modem or router as a first move.
The Wavlink wifi extender is working right now.
then watch for an important green power edge to appear.
To switch on the extension's power light, press the W.P.S button.
Click the W.P.S icon on the modem or network now.
Your extender and router's green light is blinking.
Allow 1-2 minutes for the extender and home wifi to join.
meets the specifications of IEEE 802 11a, b, g, and n.
The Dual-Band RJ45 Connection with setup Integrated Passive Power Over Ethernet (PoE), Up to 2.4GHz 300Mbps and 5GHz 867Mbps Speeds, and is intended for flexible placement based on its antenna offers excellent long-distance performance.
can generate 1000mW of energy and has a superior receiver design.
A sturdy, waterproof receptacle can withstand severe weather.
WPA and WPA2 3 LED Lightning Adapter with Built-in Bluetooth Signal Power and Maximum Security (15kV ESD)
Wavlink WING 12M access mode setup
You can begin the installation process once the real connection and wavlink ac1200 login steps are complete. Follow these simple guidelines:
The Wavlink AC1200's display will show the settings signs.
By using the drop-down options, you can select your time zone and country/region.
To access your web interface page, log in using the updated information.
After selecting the "Access Point" operating mode, adhere to the directions shown on the screen.
Choose the wifi network that is linked to the primary device and to which you want to add a second connection.
You should use the same wifi password for your external extender as you did for your home network.
Give the change a chance to take effect. There could be some labour necessary.
0 notes
Text
The Best Wireless Router For Smart Tv In 2022

Smart TVs have become more popular than ever before, with new sets coming out every week. Smart TVs use a digital streaming service like Netflix, Amazon Prime Video, or YouTube to access content from a remote app on your phone or tablet. To watch that content, you need a wireless router that’s capable of connecting to both the TV and the streaming services.
Smart routers are great for enabling wireless networking in your home because they can do so much more than just connect devices wirelessly. They can help you organize your home network by creating separate guest networks that only allow certain people access at any time and control traffic on the network with bandwidth control management software.
After nearly 20 hours of research, we were able to come up with many top products from prominent brands like Netgear, Wavlink, Tp-link, Google, Asus, Linksys. Among them, We think the best wireless router for smart tv is NETGEAR Nighthawk WiFi 6 Router. This WiFi router lets you do all your favorite activities in the same room. Alternatively, if you're simply looking for another option, you may go with WAVLINK WiFi Router AC1200 Dual Band Wireless Internet Router.
Our article today focuses mainly on giving you guidelines and tips to be able to buy the right product that best suits your needs. Explore with us right here.
Article Source: https://www.theaudiocritic.com/best-wireless-router-for-smart-tv
0 notes