#WPforms authorize.net addon
Explore tagged Tumblr posts
Visit Tumblr Blog
Explore Tumblr blogs with no restrictions, modern design and the best experience.
Last Seen Tumblr Blogs


Fun Fact
The KCSC sent more than 20K requests to delete posts related to prostitution and porn to Tumblr from January to June 2017.
Text
WPforms authorize.net Payment Gateway addon
WPforms authorize.net Payment Gateway addon
If you want to receive your payments with your form on the website then WPForms introducing the best payment gateway to accept your online payment through the WPForms Authorize.Net add-on on your website. Why I should use Authorize.Net? WPforms authorize.net Payment Gateway addon is one of the best way payment add-on to accept your payments with the help of forms on your websites. It is super…

View On WordPress
#authorize.net addon#Authorize.net Payment Gateway#Authorize.net Payment Gateway addon#wpform addon#wpforms#WPforms authorize.net addon#WPforms authorize.net Payment Gateway#WPforms authorize.net Payment Gateway addon
0 notes
Text
6 Best Authorize.Net WordPress Plugins (Compared)
Are you looking for the best Authorize.net plugin for WordPress?
Authorize.net is a popular payment gateway that allows you to easily accept credit card payments on your website.
In this article, we’ll compare the best Authorize.Net WordPress plugins that you can use to accept online payments on your website.

Why Use Authorize.Net WordPress Plugins to Take Payments?
Authorize.Net lets you easily accept payments on your website. It’s a seamless process for your customers because they can pay through credit or debit card directly on your website.
Since Authorize.Net works with your normal merchant bank account, it often have lower fees compared with popular online payment gateways like Stripe and PayPal.
With that said, let’s take a look at the best Authorize.Net plugins for WordPress that lets you easily accept online payments (without writing any code).
1. WPForms

WPForms is the best WordPress form builder on the market. It comes with an easy to use drag and drop interface with pre-made form templates to easily make any type of form including payment forms.
You’ll need at least their Elite plan to access the Authorize.net addon. This also gives you access to WPForms’s all other addons including Stripe and PayPal payment gateways.
Simply create an online payment form and install the WPForms ‘Authorize.Net’ addon.
WPForms lets you easily configure your form to send an email notification to more than one person. For instance, you could send a receipt to the customer and send order details to your team members.
You can use WPForms for all types of forms, like contact forms and even surveys and polls.
2. MemberPress
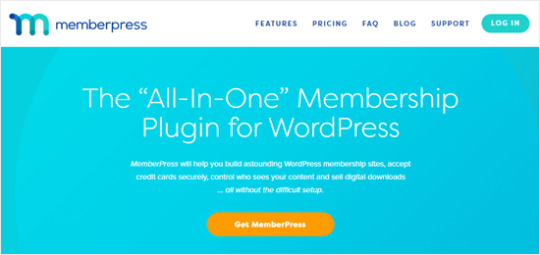
MemberPress is the best WordPress membership plugin out there. It allows you to easily build a membership website and restrict any content to paid subscribers and members.
If you want, you can even protect just part of a post or page by using a shortcode. This can be a great way to provide an introduction or teaser for your content, before encouraging your site’s visitors to subscribe.
With MemberPress, you can charge a one-off fee or set up a recurring subscription. Plus, you can set up a cheap or free trial period to encourage new users to join.
MemberPress also gives you content dripping features. These let you restrict content, so it’s only shown once someone has been a member for a certain period of time. This makes MemberPress a great tool for running online courses.
With the ‘Developer’ plan, you can use Authorize.Net as your payment gateway for MemberPress. This is a great option if you process a lot of credit card transactions.
3. WooCommerce

WooCommerce is the most popular eCommerce plugin for WordPress that lets you build a complete online store.
Along with Stripe and PayPal, WooCommerce also has payment gateway integrations for Authorize.Net and many other payment gateway solutions.
To accept payments on your online store using Authorize.Net, you will need to use an extension like WooCcommerce Authorize.net or YITH’s WooCommerce Authorize.Net.
If you’re looking to build a complete eCommerce store with all the powerful features like shipping, taxes, inventory management, etc, then we recommend using WooCommerce.
For simple order forms or payment forms, WPForms is the best option.
Related: See our guide on how to start an online store and our comparison of the best eCommerce plugins.
4. GiveWP

GiveWP is the best donations plugin for charities and nonprofits who want to raise money online. It’s really easy to use and has lots of powerful features to help you reach your fundraising goals.
With GiveWP, you can tweak every aspect of the donation process. You can accept multi-level donations, set campaign level donation goals, offer different currency options, provide tax-deductible donation receipts, and much more.
You also get detailed reports in GiveWP, where you can view how your different campaigns are performing. You can easily see who your top donors are and you can even add notes about them for internal use by your team.
GiveWP integrates with Authorize.Net, even on the ‘Basic’ plan. This makes it really affordable for you to take credit and debit cards directly from your site.
5. Restrict Content Pro

Restrict Content Pro is another great option if you want to create members-only content on your site. It works really well with the WordPress interface, and beginners find it easy to get started with.
You can easily send welcome emails to your members, create different subscription packages with multiple levels, offer discount codes, and much more. Restrict Content Pro is a fully-featured plugin that lets you do everything you need to run a membership site.
It’s got built-in integration with Easy Digital Downloads, too, making it a great option if you’re already using that. You can also hide content within a post or page using shortcodes, as with MemberPress.
You can use Authorize.Net with Restrict Content Pro’s cheapest ‘Personal’ license as the Authorize.Net addon itself is free. This makes it a good alternative to MemberPress if you’re on a tight budget.
Note: There’s also a free version called Restrict Content. However, this doesn’t let you use Authorize.Net.
6. WP Invoicing

WP Invoicing is a great invoicing plugin for anyone who needs to create and send invoices. It has a lot of other useful features, too.
For instance, WP Invoicing lets you manage taxes and VAT for European countries. It also gives your customers the opportunity to settle your invoices directly on your website through various payment gateways, including Authorize.Net.
You can set up automatic email reminders using WP Invoicing, saving you time on chasing up payments. This is particularly useful for freelancers who may not have any administrative support. You can also set up recurring payments.
WP Invoicing integrates with a number of other apps, so that you can make invoices automatically. You can even create an invoice or quote when a specific contact form is submitted.
The post 6 Best Authorize.Net WordPress Plugins (Compared) appeared first on The Coding Bus.
from WordPress https://ift.tt/3hVrXW1 via IFTTT
0 notes
Text
6 Best Authorize.Net WordPress Plugins (Compared)
Are you looking for the best Authorize.net plugin for WordPress?
Authorize.net is a popular payment gateway that allows you to easily accept credit card payments on your website.
In this article, we’ll compare the best Authorize.Net WordPress plugins that you can use to accept online payments on your website.
Why Use Authorize.Net WordPress Plugins to Take Payments?
Authorize.Net lets you easily accept payments on your website. It’s a seamless process for your customers because they can pay through credit or debit card directly on your website.
Since Authorize.Net works with your normal merchant bank account, it often have lower fees compared with popular online payment gateways like Stripe and PayPal.
With that said, let’s take a look at the best Authorize.Net plugins for WordPress that lets you easily accept online payments (without writing any code).
1. WPForms
WPForms is the best WordPress form builder on the market. It comes with an easy to use drag and drop interface with pre-made form templates to easily make any type of form including payment forms.
You’ll need at least their Elite plan to access the Authorize.net addon. This also gives you access to WPForms’s all other addons including Stripe and PayPal payment gateways.
Simply create an online payment form and install the WPForms ‘Authorize.Net’ addon.
WPForms lets you easily configure your form to send an email notification to more than one person. For instance, you could send a receipt to the customer and send order details to your team members.
You can use WPForms for all types of forms, like contact forms and even surveys and polls.
2. MemberPress
MemberPress is the best WordPress membership plugin out there. It allows you to easily build a membership website and restrict any content to paid subscribers and members.
If you want, you can even protect just part of a post or page by using a shortcode. This can be a great way to provide an introduction or teaser for your content, before encouraging your site’s visitors to subscribe.
With MemberPress, you can charge a one-off fee or set up a recurring subscription. Plus, you can set up a cheap or free trial period to encourage new users to join.
MemberPress also gives you content dripping features. These let you restrict content, so it’s only shown once someone has been a member for a certain period of time. This makes MemberPress a great tool for running online courses.
With the ‘Developer’ plan, you can use Authorize.Net as your payment gateway for MemberPress. This is a great option if you process a lot of credit card transactions.
3. WooCommerce
WooCommerce is the most popular eCommerce plugin for WordPress that lets you build a complete online store.
Along with Stripe and PayPal, WooCommerce also has payment gateway integrations for Authorize.Net and many other payment gateway solutions.
To accept payments on your online store using Authorize.Net, you will need to use an extension like WooCcommerce Authorize.net or YITH’s WooCommerce Authorize.Net.
If you’re looking to build a complete eCommerce store with all the powerful features like shipping, taxes, inventory management, etc, then we recommend using WooCommerce.
For simple order forms or payment forms, WPForms is the best option.
Related: See our guide on how to start an online store and our comparison of the best eCommerce plugins.
4. GiveWP
GiveWP is the best donations plugin for charities and nonprofits who want to raise money online. It’s really easy to use and has lots of powerful features to help you reach your fundraising goals.
With GiveWP, you can tweak every aspect of the donation process. You can accept multi-level donations, set campaign level donation goals, offer different currency options, provide tax-deductible donation receipts, and much more.
You also get detailed reports in GiveWP, where you can view how your different campaigns are performing. You can easily see who your top donors are and you can even add notes about them for internal use by your team.
GiveWP integrates with Authorize.Net, even on the ‘Basic’ plan. This makes it really affordable for you to take credit and debit cards directly from your site.
5. Restrict Content Pro
Restrict Content Pro is another great option if you want to create members-only content on your site. It works really well with the WordPress interface, and beginners find it easy to get started with.
You can easily send welcome emails to your members, create different subscription packages with multiple levels, offer discount codes, and much more. Restrict Content Pro is a fully-featured plugin that lets you do everything you need to run a membership site.
It’s got built-in integration with Easy Digital Downloads, too, making it a great option if you’re already using that. You can also hide content within a post or page using shortcodes, as with MemberPress.
You can use Authorize.Net with Restrict Content Pro’s cheapest ‘Personal’ license as the Authorize.Net addon itself is free. This makes it a good alternative to MemberPress if you’re on a tight budget.
Note: There’s also a free version called Restrict Content. However, this doesn’t let you use Authorize.Net.
6. WP Invoicing
WP Invoicing is a great invoicing plugin for anyone who needs to create and send invoices. It has a lot of other useful features, too.
For instance, WP Invoicing lets you manage taxes and VAT for European countries. It also gives your customers the opportunity to settle your invoices directly on your website through various payment gateways, including Authorize.Net.
You can set up automatic email reminders using WP Invoicing, saving you time on chasing up payments. This is particularly useful for freelancers who may not have any administrative support. You can also set up recurring payments.
WP Invoicing integrates with a number of other apps, so that you can make invoices automatically. You can even create an invoice or quote when a specific contact form is submitted.
Final Thoughts: Which is the Best Auhorize.Net plugin for WordPress?
We believe that the best Authorize.Net WordPress plugin will vary based on your exact needs, but for the wide-variety of use-cases: WPForms is the best Authorize.Net plugin for WordPress.
If you’re looking to create a membership site or online course, then MemberPress is the best solution.
If you’re looking to create a full-featured eCommerce store, then WooCommerce is the best solution.
We hope this article helped you find the best Authorize.Net WordPress plugins. You may also want to see our comparisons of the best business phone services, and the best email marketing services for growing your small business.
If you liked this article, then please subscribe to our YouTube Channel for WordPress video tutorials. You can also find us on Twitter and Facebook.
The post 6 Best Authorize.Net WordPress Plugins (Compared) appeared first on WPBeginner.
from WPBeginner https://www.wpbeginner.com/plugins/best-authorize-net-wordpress-plugins/
0 notes
Text
Ultimate Guide to Creating a WordPress Membership Site
Do you want to build a membership website? For a long time, website owners relied solely on advertising and affiliate revenue to monetize their content.
A membership website allows you to make money online by allowing users to pay for premium content, features, and access to the community.
You will need a platform that has features for managing users, memberships, payments, etc. Luckily, there are some really great membership plugins for WordPress that make it super easy.
In this step by step guide, we will show you how to easily create a WordPress membership site without any coding knowledge.
What Do You Need to Start a WordPress Membership Website?
Unlike 10 years ago, it’s quite easy to make a website these days. Out of all the platforms and website builders, WordPress makes it the easiest for anyone to build their own membership website and start selling with little to no technical skills.
You’ll need the following three things to start:
A domain name. This will be your website’s address (Example, wpbeginner.com).
A web hosting account. This is where your website files are stored.
A membership addon (It will convert your regular website into a membership platform).
You can set up a fully functional membership website with WordPress in less than 30 minutes, and we’ll walk you through every step of the process.
Below are the steps that we will cover to help you make a powerful membership website with WordPress.
Getting started with a membership site
Choosing a WordPress membership plugin
Setting up your membership website
Adding payment methods
Adding membership levels
Restricting access based on membership plans
Creating members only content
Creating a pricing page
Adding sign up and login forms
Customizing email templates
Viewing reports to grow your website
Extending your membership website
Ready? Let’s get started.
Step 1. Getting Started with a WordPress Membership Site
To create a membership site, you must make sure that you are using the right WordPress platform. Yes, there are two types of WordPress.
We recommend using the self-hosted WordPress.org version because it gives you unrestricted access to all features and tools that you need (see the full comparison of WordPress.com vs WordPress.org).
For a self hosted WordPress site, you’ll need a WordPress hosting account, domain name, and a SSL certificate.
Typically, a domain name costs around $14.99 / year, web hosting around $7.99 / month, and SSL certificate costs around $69.99 / year.
If you are just starting out, then these startup costs can add up quickly.
Thankfully, we have a way to fix that.
Bluehost, an official WordPress recommended hosting provider, has agreed to offer our users a free domain name, free SSL certificate, and a discount on web hosting.
Basically, you can get all of the above for $2.75 per month.
→ Click here to Claim this Exclusive Bluehost offer ←
Note: At WPBeginner we believe in full transparency. If you sign up with Bluehost using our referral link, then we will earn a small commission at no extra cost to you (in fact, you will save money and get a free domain + SSL certificate). We would get this commission for recommending just about any WordPress hosting service, but we only recommend products that we use personally and believe will add value to our readers.
Once you have signed up for hosting, the next step is to install WordPress. Follow the instructions in our step by step guide on how to start a WordPress blog, and you’ll be up and running in no time.
Since Bluehost already comes with WordPress pre-installed, you can move on to setting up your WordPress membership site.
Step 2. Choosing a WordPress Membership Plugin
There are plenty of free and paid WordPress membership plugins that you can use. However, each one of them has its own pros and cons. We have a full comparison of the best WordPress membership plugins.
To choose the right WordPress membership plugin, you need to decide what kind of membership website do you want to build and what features will you need?
If you just want to allow user registration on your WordPress site, then you can use WPForms. It is a WordPress form builder plugin that allows you to easily create user login and registration forms. You can even allow users to submit articles without accessing the WordPress admin area.
On the other hand, if you want to sell subscriptions, paid content, or digital downloads, then you’ll need a more robust WordPress membership plugin, like MemberPress.
MemberPress comes with advanced membership features that allow you to accept payments, create membership levels, restrict access based on levels, and more.
Selling online courses can be another possible scenario. In this case, you’ll need LearnDash, a complete WordPress LMS plugin with all the learning management features.
You can also integrate LearnDash into MemberPress to create a powerful website with online courses as well as membership subscriptions.
That being said, let’s start setting up your WordPress membership website.
Step 3. Setting up Your WordPress Membership Website
We are choosing MemberPress as our go-to plugin because it has all the features we mentioned above, and it works perfectly with third-party plugins necessary for the growth of your business.
First thing you need to do is install and activate the MemberPress plugin. For more details, see our step by step guide on how to install a WordPress plugin.
Upon activation, you need to visit the MemberPress » Options page to configure the plugin settings.
Step 4. Add a Payment Method
The options page is divided into different tabs. The first thing you need to set up is a payment gateway because it allows you to accept payments on your membership site.
You can do this by switching to the ‘Payments’ tab and then selecting your payment gateway.
MemberPress supports PayPal (Standard, Express, and Pro), Stripe, and Authorize.net out of the box. You need to select the payment method you want to setup and provide the required credentials.
You can also add multiple payment methods by clicking on the add button to add another payment method.
We typically use two options: Stripe for credit cards and PayPal as a secondary option because some users prefer PayPal over giving out credit card details.
Don’t forget to click on the ‘Update Options’ button at the bottom of the page to save your settings.
Step 5. Creating Membership Levels
The next step is to create membership levels that your users can purchase. Each membership level can have different pricing plans, perks, and access. You can even have a free membership plan.
To create a membership level, you need to go to MemberPress » Memberships page and click on the ‘Add New’ button at the top.
On the next page, enter a title for this particular membership plan and then provide the plan details in the post editor.
You will need to set the pricing and expiration for this plan under the membership terms section.
In the example above, we have created a yearly membership plan.
After that, you need to scroll down to the membership options meta box below the post editor. This is where you can customize permissions and membership options for this particular plan.
Once you are satisfied with the membership plan, you can click on the publish button to make it available.
Go ahead and repeat this process to create as many membership plans that you need.
Step 6. Restrict Access for Membership Plans
The next step is to select which content would be available to different membership plans on your website. MemberPress makes it very easy to control access using ‘Rules’.
You can setup rules by visiting the MemberPress » Rules page and clicking on the Add New button at the top.
The rule edit page allows you to select different conditions and associate them to a membership plan.
For example, you can select all content that matches a particular tag or category to be available only to members with the silver subscription plan.
You can also create more specific rules. For example, a single post or page, child pages, or a specific URL.
Below the rules editor, you’ll see the content drip and expiration options.
Drip content allows you to gradually release content to users instead of giving it all away at once. The expiration option makes the content unavailable after a defined period of time.
If you are not sure, then you should leave them unchecked.
Once you are satisfied, go ahead and click on the ‘Save Rule’ button to save your rule settings.
Repeat the process to create more rules as needed for your membership site.
Step 7. Adding Members Only Content
MemberPress makes it super easy to create members-only content using Rules.
In the above example, we created a rule that restricted all content tagged as paid to be restricted. Now all we need to do is to create our paid content and add the paid tag to it.
MemberPress also adds ‘MemberPress Unauthorized Access’ metabox below the post editor. This allows you to select what logged out users (non-members) will see when they reach this content.
You can use the global default settings, or you can show excerpts, login form, or a custom message.
Once you have added members-only content, you can go ahead and publish it. As the page reloads, you will see a success message that this content is protected.
Step 8. Create a Pricing Page
This is the page your users will see when they want to sign up for a membership plan. On this page, users will be able to select a membership plan and then move to the payment page.
Users who try to access the restricted or paid areas of your website will also be redirected to this page.
You can configure this by going to MemberPress » Groups page and clicking on the Add New button at the top.
First, enter a title for the group plan page. This will also be the title for the plans page that users will see.
Next, go down to ‘Group options’ metabox and add memberships that you want to display on the page.
You can also select a theme for the pricing table. MemberPress comes with few ready-made templates for that.
Once satisfied, click on the ‘Publish’ button to make your plan publicly visible.
To preview your pricing page, click on the ‘View Group’ link after publishing it.
Redirect users to pricing page
Now that we have the pricing page ready, the next step is to redirect unauthorized users to the pricing page.
To do that, first you need to visit MemberPress » Groups page and copy the URL next to the group you created in the previous step.
After that, go to MemberPress » Options page and scroll down to the ‘Unauthorized Access’ section.
You need to check the box next to ‘Redirect unauthorized visitors to a specific URL’ option and then paste the group URL you copied earlier.
Click on the ‘Update Options’ button to save your settings.
Now unauthorized users will be redirected to the pricing plans page when they try to access a members only area.
Step 9. Add Sign up and User Login Forms
Now that you have everything set up, it is time to allow your users to easily find their way around your website.
First, you need to add a user login form so that members can sign in to their accounts.
Go to Appearance » Widgets and add ‘MemberPress login’ widget to a sidebar.
Next, we will be adding the pricing page link to the navigation menu, so that new users can select a plan and register.
You can do this by visiting the Appearance » Menus page in your WordPress admin. From the left column, you need to click on the Groups tab to expand it. It will show the pricing plan group you created earlier.
Check the box next to your pricing page and then click on the ‘Add to menu’ button.
The pricing plan page will now appear in the right column. You can drag and drop to rearrange its position in the menu. You can also edit it and change the link text.
Don’t forget to click on the save menu button to store your changes.
You can now log out of the WordPress admin area and visit your website to see everything in action.
Step 10. Customizing Membership Email Templates
Your WordPress membership plugin will send several email notifications to members. MemberPress allows you to easily edit those emails and make changes to include your own branding.
Simply go to MemberPress » Options page and click on the ‘Emails’ tab. From here you can manage email notifications sent by MemberPress.
You will see all the email notifications sent by MemberPress to members as well as Administrators. You can click on the edit button to customize any of these notices.
You can use a simple text editor to edit the email message with basic formatting options and smart tags to insert dynamic items like names, username, membership level, and more.
Make sure that you click on ‘Send Test’ button to send yourself a couple of test notifications. This will ensure that MemberPress can send email notifications.
If you are having trouble receiving email notifications, then see our guide on how to fix WordPress not sending email issue.
Step 11. Viewing Reports to Grow your Membership Website
To grow any business, you need data to make informed decisions. MemberPress comes with built-in reports to see how your membership website is doing.
Simply go to the MemberPress » Reports page. From here, you can sort reports by monthly, yearly, or all time data.
It will show you number of active, inactive, free, paid, and total members. It will also show you average member lifetime value and other data. You can scroll below to see more charts and click on a date to view transactions.
However, the most important metric of judging a membership website’s success is user engagement.
This is where you’ll need Google Analytics. It allows you to see where your users are coming from and what they do when they are on your website.
MonsterInsights, the most popular Google Analytics plugin for WordPress, offers a complete MemberPress integration that makes it easy to enable Enhanced Ecommerce Tracking for MemberPress.
For detailed instructions, see our guide on how to track user engagement using Google Analytics in WordPress.
Taking Your Membership Website to The Next Level
MemberPress is a powerful WordPress membership plugin. It allows you to easily grow your membership website.
It works beautifully with LearnDash, which allows you to easily create courses and leave the selling part to MemberPress.
You can also use it alongside BuddyPress and bbPress.
Here are some other useful resources to help you grow your WordPress membership site.
Essential WordPress plugins – Our expert pick of the must have WordPress plugins for all business websites.
WordPress Speed and Performance – The ultimate guide on how to speed up WordPress and boost performance.
WordPress Security guide – This step by step guide will help improve your WordPress site’s security.
Selecting the Perfect Theme – Beginner’s guide on how to select the perfect theme for your website.
Common WordPress errors – The ultimate list of common WordPress errors and how to fix them.
That’s all, we hope this article helped you setup your WordPress membership website. You may also want to see our step by step WordPress SEO guide for beginners.
If you liked this article, then please subscribe to our YouTube Channel for WordPress video tutorials. You can also find us on Twitter and Facebook.
The post Ultimate Guide to Creating a WordPress Membership Site appeared first on WPBeginner.
😉SiliconWebX | 🌐WPBeginner
0 notes
Text
Ultimate Guide to Creating a WordPress Membership Site
Do you want to build a membership website? For a long time, website owners relied solely on advertising and affiliate revenue to monetize their content.
A membership website allows you to make money online by allowing users to pay for premium content, features, and access to the community.
You will need a platform that has features for managing users, memberships, payments, etc. Luckily, there are some really great membership plugins for WordPress that make it super easy.
In this step by step guide, we will show you how to easily create a WordPress membership site without any coding knowledge.
What Do You Need to Start a WordPress Membership Website?
Unlike 10 years ago, it’s quite easy to make a website these days. Out of all the platforms and website builders, WordPress makes it the easiest for anyone to build their own membership website and start selling with little to no technical skills.
You’ll need the following three things to start:
A domain name. This will be your website’s address (Example, wpbeginner.com).
A web hosting account. This is where your website files are stored.
A membership addon (It will convert your regular website into a membership platform).
You can set up a fully functional membership website with WordPress in less than 30 minutes, and we’ll walk you through every step of the process.
Below are the steps that we will cover to help you make a powerful membership website with WordPress.
Getting started with a membership site
Choosing a WordPress membership plugin
Setting up your membership website
Adding payment methods
Adding membership levels
Restricting access based on membership plans
Creating members only content
Creating a pricing page
Adding sign up and login forms
Customizing email templates
Viewing reports to grow your website
Extending your membership website
Ready? Let’s get started.
Step 1. Getting Started with a WordPress Membership Site
To create a membership site, you must make sure that you are using the right WordPress platform. Yes, there are two types of WordPress.
We recommend using the self-hosted WordPress.org version because it gives you unrestricted access to all features and tools that you need (see the full comparison of WordPress.com vs WordPress.org).
For a self hosted WordPress site, you’ll need a WordPress hosting account, domain name, and a SSL certificate.
Typically, a domain name costs around $14.99 / year, web hosting around $7.99 / month, and SSL certificate costs around $69.99 / year.
If you are just starting out, then these startup costs can add up quickly.
Thankfully, we have a way to fix that.
Bluehost, an official WordPress recommended hosting provider, has agreed to offer our users a free domain name, free SSL certificate, and a discount on web hosting.
Basically, you can get all of the above for $2.75 per month.
→ Click here to Claim this Exclusive Bluehost offer ←
Note: At WPBeginner we believe in full transparency. If you sign up with Bluehost using our referral link, then we will earn a small commission at no extra cost to you (in fact, you will save money and get a free domain + SSL certificate). We would get this commission for recommending just about any WordPress hosting service, but we only recommend products that we use personally and believe will add value to our readers.
Once you have signed up for hosting, the next step is to install WordPress. Follow the instructions in our step by step guide on how to start a WordPress blog, and you’ll be up and running in no time.
Since Bluehost already comes with WordPress pre-installed, you can move on to setting up your WordPress membership site.
Step 2. Choosing a WordPress Membership Plugin
There are plenty of free and paid WordPress membership plugins that you can use. However, each one of them has its own pros and cons. We have a full comparison of the best WordPress membership plugins.
To choose the right WordPress membership plugin, you need to decide what kind of membership website do you want to build and what features will you need?
If you just want to allow user registration on your WordPress site, then you can use WPForms. It is a WordPress form builder plugin that allows you to easily create user login and registration forms. You can even allow users to submit articles without accessing the WordPress admin area.
On the other hand, if you want to sell subscriptions, paid content, or digital downloads, then you’ll need a more robust WordPress membership plugin, like MemberPress.
MemberPress comes with advanced membership features that allow you to accept payments, create membership levels, restrict access based on levels, and more.
Selling online courses can be another possible scenario. In this case, you’ll need LearnDash, a complete WordPress LMS plugin with all the learning management features.
You can also integrate LearnDash into MemberPress to create a powerful website with online courses as well as membership subscriptions.
That being said, let’s start setting up your WordPress membership website.
Step 3. Setting up Your WordPress Membership Website
We are choosing MemberPress as our go-to plugin because it has all the features we mentioned above, and it works perfectly with third-party plugins necessary for the growth of your business.
First thing you need to do is install and activate the MemberPress plugin. For more details, see our step by step guide on how to install a WordPress plugin.
Upon activation, you need to visit the MemberPress » Options page to configure the plugin settings.
Step 4. Add a Payment Method
The options page is divided into different tabs. The first thing you need to set up is a payment gateway because it allows you to accept payments on your membership site.
You can do this by switching to the ‘Payments’ tab and then selecting your payment gateway.
MemberPress supports PayPal (Standard, Express, and Pro), Stripe, and Authorize.net out of the box. You need to select the payment method you want to setup and provide the required credentials.
You can also add multiple payment methods by clicking on the add button to add another payment method.
We typically use two options: Stripe for credit cards and PayPal as a secondary option because some users prefer PayPal over giving out credit card details.
Don’t forget to click on the ‘Update Options’ button at the bottom of the page to save your settings.
Step 5. Creating Membership Levels
The next step is to create membership levels that your users can purchase. Each membership level can have different pricing plans, perks, and access. You can even have a free membership plan.
To create a membership level, you need to go to MemberPress » Memberships page and click on the ‘Add New’ button at the top.
On the next page, enter a title for this particular membership plan and then provide the plan details in the post editor.
You will need to set the pricing and expiration for this plan under the membership terms section.
In the example above, we have created a yearly membership plan.
After that, you need to scroll down to the membership options meta box below the post editor. This is where you can customize permissions and membership options for this particular plan.
Once you are satisfied with the membership plan, you can click on the publish button to make it available.
Go ahead and repeat this process to create as many membership plans that you need.
Step 6. Restrict Access for Membership Plans
The next step is to select which content would be available to different membership plans on your website. MemberPress makes it very easy to control access using ‘Rules’.
You can setup rules by visiting the MemberPress » Rules page and clicking on the Add New button at the top.
The rule edit page allows you to select different conditions and associate them to a membership plan.
For example, you can select all content that matches a particular tag or category to be available only to members with the silver subscription plan.
You can also create more specific rules. For example, a single post or page, child pages, or a specific URL.
Below the rules editor, you’ll see the content drip and expiration options.
Drip content allows you to gradually release content to users instead of giving it all away at once. The expiration option makes the content unavailable after a defined period of time.
If you are not sure, then you should leave them unchecked.
Once you are satisfied, go ahead and click on the ‘Save Rule’ button to save your rule settings.
Repeat the process to create more rules as needed for your membership site.
Step 7. Adding Members Only Content
MemberPress makes it super easy to create members-only content using Rules.
In the above example, we created a rule that restricted all content tagged as paid to be restricted. Now all we need to do is to create our paid content and add the paid tag to it.
MemberPress also adds ‘MemberPress Unauthorized Access’ metabox below the post editor. This allows you to select what logged out users (non-members) will see when they reach this content.
You can use the global default settings, or you can show excerpts, login form, or a custom message.
Once you have added members-only content, you can go ahead and publish it. As the page reloads, you will see a success message that this content is protected.
Step 8. Create a Pricing Page
This is the page your users will see when they want to sign up for a membership plan. On this page, users will be able to select a membership plan and then move to the payment page.
Users who try to access the restricted or paid areas of your website will also be redirected to this page.
You can configure this by going to MemberPress » Groups page and clicking on the Add New button at the top.
First, enter a title for the group plan page. This will also be the title for the plans page that users will see.
Next, go down to ‘Group options’ metabox and add memberships that you want to display on the page.
You can also select a theme for the pricing table. MemberPress comes with few ready-made templates for that.
Once satisfied, click on the ‘Publish’ button to make your plan publicly visible.
To preview your pricing page, click on the ‘View Group’ link after publishing it.
Redirect users to pricing page
Now that we have the pricing page ready, the next step is to redirect unauthorized users to the pricing page.
To do that, first you need to visit MemberPress » Groups page and copy the URL next to the group you created in the previous step.
After that, go to MemberPress » Options page and scroll down to the ‘Unauthorized Access’ section.
You need to check the box next to ‘Redirect unauthorized visitors to a specific URL’ option and then paste the group URL you copied earlier.
Click on the ‘Update Options’ button to save your settings.
Now unauthorized users will be redirected to the pricing plans page when they try to access a members only area.
Step 9. Add Sign up and User Login Forms
Now that you have everything set up, it is time to allow your users to easily find their way around your website.
First, you need to add a user login form so that members can sign in to their accounts.
Go to Appearance » Widgets and add ‘MemberPress login’ widget to a sidebar.
Next, we will be adding the pricing page link to the navigation menu, so that new users can select a plan and register.
You can do this by visiting the Appearance » Menus page in your WordPress admin. From the left column, you need to click on the Groups tab to expand it. It will show the pricing plan group you created earlier.
Check the box next to your pricing page and then click on the ‘Add to menu’ button.
The pricing plan page will now appear in the right column. You can drag and drop to rearrange its position in the menu. You can also edit it and change the link text.
Don’t forget to click on the save menu button to store your changes.
You can now log out of the WordPress admin area and visit your website to see everything in action.
Step 10. Customizing Membership Email Templates
Your WordPress membership plugin will send several email notifications to members. MemberPress allows you to easily edit those emails and make changes to include your own branding.
Simply go to MemberPress » Options page and click on the ‘Emails’ tab. From here you can manage email notifications sent by MemberPress.
You will see all the email notifications sent by MemberPress to members as well as Administrators. You can click on the edit button to customize any of these notices.
You can use a simple text editor to edit the email message with basic formatting options and smart tags to insert dynamic items like names, username, membership level, and more.
Make sure that you click on ‘Send Test’ button to send yourself a couple of test notifications. This will ensure that MemberPress can send email notifications.
If you are having trouble receiving email notifications, then see our guide on how to fix WordPress not sending email issue.
Step 11. Viewing Reports to Grow your Membership Website
To grow any business, you need data to make informed decisions. MemberPress comes with built-in reports to see how your membership website is doing.
Simply go to the MemberPress » Reports page. From here, you can sort reports by monthly, yearly, or all time data.
It will show you number of active, inactive, free, paid, and total members. It will also show you average member lifetime value and other data. You can scroll below to see more charts and click on a date to view transactions.
However, the most important metric of judging a membership website’s success is user engagement.
This is where you’ll need Google Analytics. It allows you to see where your users are coming from and what they do when they are on your website.
MonsterInsights, the most popular Google Analytics plugin for WordPress, offers a complete MemberPress integration that makes it easy to enable Enhanced Ecommerce Tracking for MemberPress.
For detailed instructions, see our guide on how to track user engagement using Google Analytics in WordPress.
Taking Your Membership Website to The Next Level
MemberPress is a powerful WordPress membership plugin. It allows you to easily grow your membership website.
It works beautifully with LearnDash, which allows you to easily create courses and leave the selling part to MemberPress.
You can also use it alongside BuddyPress and bbPress.
Here are some other useful resources to help you grow your WordPress membership site.
Essential WordPress plugins – Our expert pick of the must have WordPress plugins for all business websites.
WordPress Speed and Performance – The ultimate guide on how to speed up WordPress and boost performance.
WordPress Security guide – This step by step guide will help improve your WordPress site’s security.
Selecting the Perfect Theme – Beginner’s guide on how to select the perfect theme for your website.
Common WordPress errors – The ultimate list of common WordPress errors and how to fix them.
That’s all, we hope this article helped you setup your WordPress membership website. You may also want to see our step by step WordPress SEO guide for beginners.
If you liked this article, then please subscribe to our YouTube Channel for WordPress video tutorials. You can also find us on Twitter and Facebook.
The post Ultimate Guide to Creating a WordPress Membership Site appeared first on WPBeginner.
from WPBeginner https://www.wpbeginner.com/wp-tutorials/ultimate-guide-to-creating-a-wordpress-membership-site/
0 notes
Text
How to Easily Accept Credit Card Payments on Your WordPress Site
Do you want to learn how to accept credit card payments on your WordPress site? By default, WordPress does not come with credit card payment options, but there are plenty of plugins and tools that can help solve that. In this article, we will show you how to easily accept credit card payments on your WordPress site.
Note: You will need to enable HTTPS / SSL on your website to accept credit card payments.
Accepting Credit Card Payments in WordPress without Shopping Cart
Often users don’t want to setup a full-fledged shopping cart to accept credit card payments. This makes a lot of sense specially if you’re only selling a single product or accepting payments for consulting / services.
In this case, all you need is an online order form with a credit card payment option.
Here is how you can easily accept credit card payments without adding a shopping cart to your website.
First thing you need to do is install and activate the WPForms plugin. For more details, see our step by step guide on how to install a WordPress plugin.
WPForms is the most beginner friendly WordPress form builder plugin. While they have a Lite version that’s free, you will need their PRO plan to access the payment add-ons.
Upon activation, you need to visit WPForms » Settings page to enter your license key. You can find this information in your WPForms account area.
Next, you need to head over to WPForms » Addons page and locate the Stripe addon. Go ahead and click on the ‘Install Addon’ button and then click on the ‘Activate’ button.
Stripe is a credit-card processing platform that makes it easy for businesses to accept credit card payments on their website. WPForms makes it easy to connect your WordPress website to Stripe.
Once the Stripe addon is activated, we need to connect WPForms to your Stripe account. To do that, head over to WPForms » Settings page and click on the ‘Payments’ tab.
You will need to enter your Stripe API keys. You can find this information in your account settings on Stripe’s website.
Don’t forget to click on the ‘Save Settings’ button to store your changes after entering the API keys.
WPForms is now ready to accept credit card payments. Let’s create an online billing or order form that you can add to your website for accepting credit card payments.
Head over to WPForms » Add New page. From here you need to provide a title for your form and then select ‘Billing / Order Form’ template.
WPForms will pre-load the form builder with a billing/order form template with commonly used fields. You can point and click to edit any form field. You can also add new fields from the left column.
Next, you need to scroll down to the Payment Fields section in the left column. From here you can add payment related form fields.
WPForms allows you to add multiple items as well as single items that users can order. You can click on the item field to change item details and pricing.
After editing item details, go ahead and click to add the credit card field to your form.
Now that your form is setup, let’s enable payments for this form. To do that, you need to click on the Payments tab on the left and then select Stripe.
You will need to click on the checkbox next to ‘Enable Stripe payments’ option and provide a description of the payment. Optionally, you can send an email receipt to your users by selecting the email field from the drop-down menu.
Next, you may want to receive an email notification for new orders and purchases. You can also send a confirmation email to notify the user that you have received their order.
Let’s setup notifications for your billing form.
You need to start with clicking the ‘Settings’ tab on the left and then select ‘Notifications’. You will notice that WPForms has already created a notification that sends an email to your WordPress admin email address when a new order is placed.
You can edit this notification message. For example, you can provide additional email addresses, change email copy, subject, and more.
If you want to send a separate notification to your users, then click on the ‘Add New Notification’ button.
You will be asked to provide a name for the new notification. Let’s call it ‘Customer Notification’. After that you will see the notification fields that you can edit.
You need to click on the ‘Show Smart Tags’ link next to ‘Send to email address’ option and select the ‘Email’ field. This allows WPForms to use the email address that your customer provided when submitting the form.
You can edit rest of the notification email by providing a subject line and message. You can also use smart tags to use the form fields submitted by the user to add item details, user’s name, and other personalized information.
Once you are done, you can click on the save button at the top and exit the form builder.
Your online credit card payment form is now ready, and you can add it to any WordPress page on your site.
Simply edit a page or create a new one, and then click on the ‘Add Form’ button above the page editor.
This will bring up a popup where you can select the order form and click on the add form button to continue. WPForms will now enter the required shortcode to your post edit area.
You can now save or publish your page and click on the preview button to see your form in action.
Note: Don’t forget to test your form to make sure everything is working fine. If you are unable to send or receive email notifications, then follow the instructions in our guide on how to fix WordPress not sending email issue.
WPForms is the simplest way to accept credit card payments in WordPress, and it is the easiest way to create just about any type of form in WordPress. This is why it ranks #1 in our list of the best WordPress contact form plugin. WPForms has over 1 million active installs and a 4.9 out of 5 star rating average.
If you don’t want to use Stripe, then you can also use PayPal to accept credit card payments using the WPForms PayPal addon.
However a simple payment form isn’t a perfect solution for everyone. Based on use-case, you may need a different solution for accepting credit card payments on your website. Here are some other ways to accept credit card payments in WordPress.
Accepting Credit Card Payments in an Online Store
If you want to add a shopping cart and sell multiple items, then you will need an eCommerce plugin like: WooCommerce. It is the best WordPress eCommerce plugin on the market. WooCommerce makes it easy to sell things online and accept credit card payments.
For complete step by step instructions, see our guide on how to start an online store for beginners.
Accept Credit Card Payments on a Membership Website
If you want to build a membership website to sell membership subscriptions and paid content, then we recommend using MemberPress. It is the most powerful WordPress membership plugin that easily integrates with Stripe, PayPal, or Authorize.net to accept credit card payments on your website.
Here is a complete guide on how to create a membership website with step by step instructions.
Accept Payments by Selling Online Courses
If you want to sell online courses, then we recommend using LearnDash. It is the best LMS plugin for WordPress and allows you to process credit card payments on your website.
For details, see our guide on how to how to sell online courses with WordPress with step by step instructions.
We hope this article helped you learn how to accept and process credit card payments in WordPress. You may also want to see our list of the must have WordPress plugins for business websites.
If you liked this article, then please subscribe to our YouTube Channel for WordPress video tutorials. You can also find us on Twitter and Facebook.
The post How to Easily Accept Credit Card Payments on Your WordPress Site appeared first on WPBeginner.
from WPBeginner http://www.wpbeginner.com/wp-tutorials/how-to-easily-accept-credit-card-payments-on-your-wordpress-site/
0 notes
Text
Ultimate Guide to Creating a WordPress Membership Site
Do you want to create a WordPress membership site? Due to its flexibility and ease of use, WordPress has become the top choice for building a membership website. In this step by step guide, we will show you how to create a WordPress membership site like a pro (without the coding knowledge).
What Do You Need to Start a WordPress Membership Website?
Unlike 10 years ago, it’s quite easy to make a website these days. Out of all the platforms and website builders, WordPress makes it the easiest for anyone to build their own membership website and start selling with little to no technical skills.
You’ll need the following three things to start:
A domain name. This will be your website’s address (Example, wpbeginner.com).
A web hosting account. This is where your website files are stored.
A membership addon (It will convert your regular website into a membership platform).
You can setup a fully functional membership website with WordPress in less than 30 minutes, and we’ll walk you through every step of the process.
In this tutorial you will learn:
How to get a domain name for free
How to choose the best web hosting
How to get a free SSL certificate (required to accept payments)
How to Install WordPress
How to choose a WordPress membership plugin
Setting up your your membership website
Adding payment methods
Adding membership levels
Creating members only content
Creating pricing and sign up pages
Extending your membership website
Ready? Let’s get started.
Step 1. Starting Your WordPress Membership Site
First, you need to make sure that you are using the right WordPress platform. Yes there are two types of WordPress. We recommend using the self-hosted WordPress.org version because it gives you unrestricted access to all features and tools that you need (see the full comparison of WordPress.com vs WordPress.org).
For a self hosted WordPress site, you’ll need a WordPress hosting account, domain name, and a SSL certificate.
Typically, a domain name costs around $14.99 / year, web hosting around $7.99 / month, and SSL certificate costs around $69.99 / year.
If you are just starting out, then these startup costs can add up quickly.
Thankfully, we have a way to fix that.
Bluehost, an official WordPress recommended hosting provider, has agreed to offer our users a free domain name, free SSL certificate, and a discount on web hosting.
Basically, you can get all of the above for $2.75 per month.
→ Click here to Claim this Exclusive Bluehost offer ←
Note: At WPBeginner we believe in full transparency. If you sign up with Bluehost using our referral link, then we will earn a small commission at no extra cost to you (in fact, you will save money and get a free domain + SSL certificate). We would get this commission for recommending just about any WordPress hosting service, but we only recommend products that we use personally and believe will add value to our readers.
Once you have signed up for hosting, the next step is to install WordPress. Follow the instructions in our step by step guide on how to start a WordPress blog, and you’ll be up and running in no time.
Now that you have installed WordPress, you can move on to setting up your WordPress membership site.
Step 2. Choosing a WordPress Membership Plugin
The best part about WordPress is that there are plenty of good plugins available that you can use to build your WordPress membership website. However, each one of them has its own pros and cons. We have a full comparison of the best WordPress membership plugins.
To choose the right WordPress membership plugin, first you need to decide what kind of membership website do you want to build and what features will it need?
If you just want to allow user registration on your WordPress site, then you can use WPForms. It is a WordPress form builder plugin that allows you to easily create user login and registration forms. You can even allow users to submit articles without accessing the WordPress admin area.
On the other hand, if you want to sell subscriptions, paid content, or digital downloads, then you’ll need a more robust WordPress membership plugin, like MemberPress.
MemberPress comes with advanced membership features that allow you to accept payments, create membership levels, restrict access based on levels, and more.
Selling online courses can be another possible scenario. In this case, you’ll need LearnDash, a complete WordPress LMS plugin with all the learning management features.
You can also integrate LearnDash into MemberPress to create a powerful website with online courses as well as membership subscriptions.
That being said, let’s start setting up your WordPress membership website.
Step 3. Setting up Your WordPress Membership Website
We are choosing MemberPress as our go-to plugin because it has all the features we mentioned above, and it works perfectly with third-party plugins necessary for the growth of your business.
First thing you need to do is install and activate the MemberPress plugin. For more details, see our step by step guide on how to install a WordPress plugin.
Upon activation, you need to visit the MemberPress » Options page to configure the plugin settings.
Step 3. Add a Payment Method
The options page is divided into different tabs. The first thing you need to setup is a payment gateway because it allows you to accept payments on your membership site.
You can do this by switching to the ‘Payments’ tab and then selecting your payment gateway.
MemberPress supports PayPal (Standard, Express, and Pro), Stripe, and Authorize.net out of the box. You need to select the payment method you want to set up and provide the required credentials.
You can also add multiple payment methods by clicking on the add button to add another payment method. We typically use two options: Stripe for credit cards and PayPal as a secondary option because some users prefer PayPal over giving out credit card details.
Don’t forget to click on the ‘Update Options’ button at the bottom of the page to save your settings.
Step 4. Creating Membership Levels
The next step is to create membership levels that your users can purchase. Each membership level can have different pricing plans, perks, and access. You can even have a free membership plan.
To create a membership level, you need to go to MemberPress » Memberships page and click on the ‘Add New’ button at the top.
On the next page, enter a title for this particular membership plan and then provide the plan details in the post editor.
You will need to set the pricing and expiration for this plan under the membership terms section.
In the example above, we have created a yearly membership plan.
After that, you need to scroll down to the membership options meta box below the post editor. This is where you can customize permissions and membership options for this particular plan.
Once you are satisfied with the membership plan, you can click on the publish button to make it available.
Go ahead and repeat this process to create as many membership plans that you need.
Step 5. Restrict Access for Membership Plans
The next step is to select which content would be available to different membership plans on your website. MemberPress makes it very easy to control access using ‘Rules’.
You can setup rules by visiting the MemberPress » Rules page and clicking on the Add New button at the top.
The rule edit page allows you to select different conditions and associate them to a membership plan.
For example, you can select all content that matches a particular tag or category to be available only to members with the silver subscription plan.
You can also create more specific rules. For example, a single post or page, child pages, or a specific URL.
Below the rules editor, you’ll see the content drip and expiration options.
Drip content allows you to gradually release content to users instead of giving it all away at once. The expiration option makes the content unavailable after a defined period of time.
If you are not sure, then you should leave them unchecked.
Once you are satisfied, go ahead and click on the ‘Save Rule’ button to save your rule settings.
Repeat the process to create more rules as needed for your membership site.
Step 6. Adding Members Only Content
MemberPress makes it super easy to create members only content using Rules.
In the above example, we created a rule that restricted all content tagged as paid to be restricted. Now all we need to do is to create our paid content and add the paid tag to it.
MemberPress also adds ‘MemberPress Unauthorized Access’ metabox below the post editor. This allows you to select what logged out users (non-members) will see when they reach this content.
You can use the global default settings, or you can show excerpts, login form, or a custom message.
Once you have added members-only content, you can go ahead and publish it. As the page reloads, you will see a success message that this content is protected.
Step 7. Create a Pricing Page
This is the page your users will see when they want to sign up for a membership plan. On this page, users will be able to select a membership plan and then move to the payment page.
Users who try to access the restricted or paid areas of your website will also be redirected to this page.
You can configure this by going to MemberPress » Groups page and clicking on the Add New button at the top.
First, enter a title for the group plan page. This will also be the title for the plans page that users will see.
Next, go down to ‘Group options’ metabox and add memberships that you want to display on the page.
You can also select a theme for the pricing table. MemberPress comes with few ready-made templates for that.
Once satisfied, click on the ‘Publish’ button to make your plan publicly visible.
To preview your pricing page, click on the ‘View Group’ link after publishing it.
Step 8. Redirect Users to Pricing Page
Now that we have the pricing page ready, the next step is to redirect unauthorized users to the pricing page.
To do that, first you need to visit MemberPress » Groups page and copy the URL next to the group you created in the previous step.
After that, go to MemberPress » Options page and scroll down to the ‘Unauthorized Access’ section.
You need to check the box next to ‘Redirect unauthorized visitors to a specific URL’ option and then paste the group URL you copied earlier.
Click on the ‘Update Options’ button to save your settings.
Now unauthorized users will be redirected to the pricing plans page when they try to access a members only area.
Step 9. Add Sign up and User Login Forms
Now that you have everything setup, it is time to allow your users to easily find their way around your website.
First, you need to add a user login form so that members can sign in to their accounts.
Go to Appearance » Widgets and add ‘MemberPress login’ widget to a sidebar.
Next, we will be adding the pricing page link to the navigation menu, so that new users can select a plan and register.
You can do this by visiting the Appearance » Menus page in your WordPress admin. From the left column, you need to click on the Groups tab to expand it. It will show the pricing plan group you created earlier.
Check the box next to your pricing page and then click on the ‘Add to menu’ button.
The pricing plan page will now appear in the right column. You can drag and drop to rearrange its position in the menu. You can also edit it and change the link text.
Don’t forget to click on the save menu button to store your changes.
You can now logout of the WordPress admin area and visit your website to see everything in action.
Taking Your Membership Website to The Next Level
MemberPress is a powerful WordPress membership plugin. It allows you to easily grow your membership website.
It works beautifully with LearnDash, which allows you to easily create courses and leave the selling part to MemberPress. You can also use it alongside BuddyPress and bbPress.
Here are some other useful resources to help you grow your WordPress membership site.
Essential WordPress plugins – Our expert pick of the must have WordPress plugins for all business websites.
WordPress Speed and Performance – The ultimate guide on how to speed up WordPress and boost performance.
WordPress Security guide – This step by step guide will help improve your WordPress site’s security.
Selecting the Perfect Theme – Beginner’s guide on how to select the perfect theme for your website.
Common WordPress errors – The ultimate list of common WordPress errors and how to fix them.
That’s all, we hope this article helped you setup your WordPress membership website. You may also want to see our step by step WordPress SEO guide for beginners.
If you liked this article, then please subscribe to our YouTube Channel for WordPress video tutorials. You can also find us on Twitter and Facebook.
The post Ultimate Guide to Creating a WordPress Membership Site appeared first on WPBeginner.
from WPBeginner http://www.wpbeginner.com/wp-tutorials/ultimate-guide-to-creating-a-wordpress-membership-site/
0 notes