#apple icloud login
Text
iCloud Login: Sign in to iCloud on all your devices
Signing in to iCloud on all your devices is a straightforward process. Here's how to do it:
Go to iCloud Login
For iPhone, iPad, or iPod touch:
Go to Settings.
Tap on your name at the top (or "Sign in to your [device]" if you haven't signed in yet).
Enter your Apple ID (email or phone number) and password.
You might be prompted for a two-step verification code if you have it enabled. Enter the code received on your trusted device.
For Mac:
Open System Preferences.
Click on Apple ID.
Enter your Apple ID (email or phone number) and password.
You might be prompted for a two-step verification code if you have it enabled. Enter the code received on your trusted device.
For Windows PC:
Download and install iCloud for Windows from the official Apple website Apple Software Download: support.apple.com/downloads/.
Open iCloud for Windows.
Enter your Apple ID (email or phone number) and password.
Choose the features you want to use with iCloud on your PC (Photos, Mail, iCloud Drive, etc.) and click "Apply."
Important Notes:
You can choose which apps and data store information in iCloud on each device individually.
Make sure you're using the same Apple ID and password on all your devices for seamless syncing.
Two-step verification adds an extra layer of security to your account. Consider enabling it if you haven't already.
Related:
https://kisscartoon-alternatives.tumblr.com/
https://paramountpluslogin.tumblr.com/
https://stream2watchlive.tumblr.com/
https://sigmacare.tumblr.com/
https://hbomaxtvsignin.tumblr.com/
https://book32-gambling.tumblr.com/
https://disneyplusidentitybegin.tumblr.com/
https://icloudlogin.tumblr.com/
https://netflixloginweb.tumblr.com/
https://wwwhululogincomactivate.tumblr.com/
0 notes
Text


trying to make my dsaf playlist but apple KILLED ALL OF MY NOTES THAT I’VE MADE THROUGHOUT THE PAST 3 YEARS and apple id login does not work so i can’t access the icloud. so the note where i kept all my animatic ideas vanished. and i can’t remember all of them so there Should be more here but my mind is drawing a blank. Anyway. here’s the ones i remember
it’s a general playlist, so it’s not about any one character or subject but multiple. i tried my best to group the ones about the same subject with each other though, and make the changes into a different subject feel organic. basically it’s:
puppet boy, freakshow, eighth wonder: general songs that fit the themes/multiple characters
red flags - i can’t decide: davesport :3 because it felt natural to go from several characters to two characters rather than one character. red flags first just cuz it’s Silly then for shipwrecked, can’t take my eyes off you, and perfect day it’s more of dave’s perspective. no children shifts more to jack, specifically in legacy routes! And speaking of that:
smile! no one cares how you feel: legacy jack :)
crows: blackjack! another jack!
dr gaster, when he died - henryyyyy!!!!!!!!!!!!!!!!!!!!
walking my gargoyle - also TECHNICALLY henry. but i think like. the song is about dave, from the perspective of other people. dave is the gargoyle. henry is the singer for the first few verses and then after “i found him on a church / he helps with my research” it would switch to jack being the singer. would Maybe fit earlier on? but i think the playlist flows better with this at the end
i really wish i could remember the other ones…if anyone wants to hear my thoughts in-depth on any songs let me know bc i have a Lot of them :3
4 notes
·
View notes
Text
I’m using my mom’s old MacBook till I can afford a new one. It needs to be updated but I need to login into my iCloud to do that. The MacBook also refuses to accept my iCloud password. I know it’s right because my phone keeps giving me the two factor authentication code but my laptop keeps telling me it’s wrong.
Also apple’s website refuses to just let me make an appointment
2 notes
·
View notes
Text
so yall know i gotta lor sis righ. well. fuck dude. those obligations from earlier. part rant part support seeking skip to the very end for that second part
context. 17 y/o not in school, homeless, lowkey estranged from her parents. father is unemployed and lying abt it, abusive and his ego is constantly reacting to his material precaritys impact on his manhood, sits at my old shop all day doing nothing. mom, actually employed, covering for dad, also used to work at my old shop before being fired for stealing a stack of cash, getting worse w her precarity and also sits at the shop a lot a lot. no idea where her lor bro sleeps. no idea how old he is too, could be 12 in an 8 year olds body for all i kno

so i pick her up at 1030, we go to the mall and check the ubreakifix type place and they dont work on iphone 8s. bet. we have a spare XR she bought off her big bro. missing sim tray, got a free replacement from the shop. go to the apple store, the XR is permalocked unless factory reset from the icloud acct tethered to the device (truly dystopian imo), schedule genius bar appt for tmrw at 11. take her back to her friends house, the one i hired a month before i left so she could have a comrade and a place to stay nearish work that isnt her moms (although they were kicked out of their motel right when i hired steven i think. so, unhappy coincidence?).
sis works then so i drop her off at work at 9 and take her phone w me. go home come back to the mall. genius at the bar says its busted, whatever. not like i been sayin that. its missing like the bottom 1/5 of the backing like straight up exposed circuitry and she leans it on its bottom edge on whatever flat surface she can find at her perpetually wet food service job. refurbished options more expensive than the cheap 'new' products, not saying much tho. deliver busted phone and info to her -- her mom and dad are there ofc -- go home. later pick her up that night (last night) and drive her to her gfs in the heights. oh also dropping steven and their mutual friend off at stevens on the way. whatever its like literally en route its actually kinda perfect every time.
apparently im picking her up this morning. Okay. oh yeah shes locked out of her paycard account. she locks the card when shes at 0 in case she gets an auto withdrawal thatll overdraft her. she got paid today so she was gonna unlock it but how did she access her acct previously? thumbprint. no password memory whatsoever. pretty fair, id say? she texted me asking for the last 4 of her SSN this morning. nobody picked up her call to the bank(?) until she called them in the car with me. the form required to change login credentials when u dont have account access required those digits and a form of photo id. no ability to access it from her ADP because the pw changed at some point but it still took her print.
reminder. shes homeless and out of school. she has a birth certificate but thats where my certainty of her documentation ends. ive run into this before where i wanted to start a real bank acct for her but they require legally viable photo id and even non driver state ids require 1. proof of permanent residence (X) and 2. proof of enrollment in school for minors (X) at the MVA.
so anyways weve kinda hit a wall with the limitations her unsupportive parents / guardians have provided! its taking up a large portion of my emotional, mental, physical, and temporal space in life right now so i wanted to make a post about it. my little bandaid desire is to at least set her up with a new phone which i estimate would be $200 minimum for actual 'verified third party vendors of used phones' but ugh i didnt budget for this.
oh the support seeking! if you know me and wanna ease the load on my sisters shoulders a but, id be grateful for some help raising funds for a new phone! ill include some $ links. if were unacquainted but youre reading this anyway and have a spare $5 wed love the support! thanks for reading :)
cashapp: $rmwperfect | venmo: @rmwperfect | paypal: @37q
11 notes
·
View notes
Text
How to use Apple's built-in and free password manager, iCloud Keychain

With new capabilities in iOS 15, macOS Monterey, and other 2021 software updates, Apple has improved its password management game. Previously, iCloud Keychain was a password manager in the background that would come up from time to time, generally to the user's surprise, to provide a strong password or autofill something. In a separate Settings box, it now searches for password breaches, warns about repeated passwords, and provides two-factor authentication (2FA) keys many business listings.
Many iPhone and Mac users rely on third-party password managers, not aware that Apple's is fully functional and, in some cases, more secure than some of the market's most popular solutions. Here's how to set up and use iCloud Keychain on your devices, as well as how to keep your passwords up to date.
ICloud Password Manager on iPhone
Apple designed the iCloud Keychain to be imperceptible when in use. A prompt will show in place of your keyboard if you're on a website or in an app that employs a properly designed password field.
If you've previously entered a user name or email address, an auto-suggested password will appear on the online form for the password. By default, this is a string of twenty characters that includes two dashes, upper and lower case letters, and a symbol. Accept the option and click "remember login" when prompted on the following box. You'll never have to remember that complicated password again.
This user name and password will be kept and linked to that app or website automatically. The password auto-fill will show instead of the keyboard on subsequent logins, and a Face ID or Touch ID prompt will confirm that you are the one inputting the password.
The new login information will sync over iCloud utilising end-to-end encryption, so you don't have to worry about unwanted users stealing your password in transit. Navigate to the passwords area of the Settings app to examine the passwords you've stored, check for any security warnings, or erase password business listings.
It's also possible to add two-factor authentication codes.
What is the best way to obtain a dedicated Passwords app icon?
Apple's iCloud Keychain doesn't have its own app, but the password manager is found in the Settings app. If you don't want to go to this page every time you need to manage your passwords, you can always make a custom Shortcut and add it to your Home Screen with a direct link.
Step 1 - Open Shortcuts
Step 2 - Tap the "+" in the top right corner
Step 3 - Name the action "Passwords"
Step 4 - Tap "add action" and search "URL" to add that action
Step 5 - Paste in "prefs:root=PASSWORDS" into the URL field
Step 6 - Search for "Open URL," add the action, and select "URL" in variables within the action
Step 7 - Add the Shortcut to the Home Screen using the settings icon in the top right corner
The new Passwords shortcut will display on your Home Screen when you select an icon or custom picture, providing you easy access to your passwords with a single press. You may simply instruct Siri to "display passwords" if you choose.
ICloud Password Manager on Mac
"Keychain Access," vintage software integrated into macOS, serves as a catch-all app for authentication certificates, passwords, and other security prompts. However, starting with macOS Monterey, the System Preferences app has a more user-friendly option.
It's not for the faint of heart to use Keychain Access. It defaults to the "Other" folder in the app launcher and displays password information in a list manner. While users may retrieve their passwords from here, we recommend utilising the "Passwords" option in System Preferences instead free business listings.
The Passwords feature, like its iOS counterpart, is a straightforward list of all stored websites, complete with login details and notifications for duplicate or compromised passwords. During normal use, you won't need to utilise the Passwords feature in System Preferences often. Instead, all websites should automatically fill in the password or provide secure passwords.
Setting up two-factor authentication
The option to auto-fill two-factor authentication codes has been added to Apple's iCloud Keychain. Users may trust on the built-in secure and reliable system rather than using a third-party programmer devoted to 2FA.
While creating a 2FA code might be a nuisance, it is one of the most secure features when done correctly. Some people may be familiar with 2FA because of the text message codes they receive when validating their phone number, however they are insecure.
Many websites and applications now use a method that produces codes using a time signature and a text key. This code refreshes every thirty seconds in the Password tool, which users may view.
If the website is programmed to give a 2FA key to a password manager, this can be done automatically, but otherwise, users will have to manually set up the code.
To use iCloud Keychain for 2FA on iOS and macOS, follow these steps:
Steps 1 - Open the passwords tool
Step 2 - Select the login you're adding 2FA to
Step 3 - Select "Set Up Verification Code"
Step 4 - Select "Enter Setup Key" if you have a string of text
Step 5 - Otherwise scan the QR code on iPhone or right click the code on Mac
Step 6 - Enter the key on the website to verify it has been setup properly
On websites that have been properly developed for this system, the 2FA key will show above the keyboard, much like passwords. Otherwise, users will have to go to the Passwords tool and manually copy and paste the code.
On the Mac, iPad, and iPhone, there's more than Keychain
Although Apple's iCloud Keychain isn't the only choice, it may be the best for most people. Edge situations and commercial uses for password managers are not covered by the built-in solution.
Apple's version of a Windows programmer and a Chrome extension for passwords is included in the iCloud Keychain, so you're not limited into a single environment.
Although some password managers are free and cross-platform, they generally need the use of a specific browser or add-on. For those seeking for a password manager that isn't part of Apple's ecosystem, Google's password manager is a great alternative.
If iCloud Keychain doesn't meet your needs, there are a number of commercial alternatives available. For corporations or groups who need to share a centralized set of passwords, 1Password is a popular option.
For a casual user or family member, though, we'll always recommend iCloud Keychain first because of its ease and accessibility.
1 note
·
View note
Text
Apple’s Passwords App In iOS 18: Basic Privacy And Security
Apple introduces passwords app
The updated Passwords app in iOS 18 is a major step forward for Apple’s ongoing goal of improving security while streamlining the user experience. With this new strategy, Apple users can still anticipate the same high standards of privacy while also benefiting from improved password management, streamlined login procedures, and better security measures. Examining iOS 18’s main features, usability, security improvements, and how it stacks up against alternative password solutions, this article will examine Apple’s most recent attempts to streamline password management and security.
Overview: The Mystery of the Password
iOS 18 passwords app
Though they are one of its weakest points, passwords have long served as the foundation of digital security. A significant security risk is created when users reuse the same password across several services since they frequently find it difficult to remember multiple complicated passwords. iCloud Keychain and the Passwords app in iOS 18 are two of Apple’s recent efforts to address the problems caused by passwords. The company was made aware of these difficulties in the past.
Built with a more intuitive UI, biometric authentication built in, and seamless cross-device syncing, the Passwords app in iOS 18 is an improved version that builds on earlier advances. In some circumstances, Apple’s method can completely replace traditional passwords, as it not only streamlines password administration but also integrates emerging technologies like passkeys. With iOS 18, Apple ensures that consumers can enjoy convenience without compromising security by providing a comprehensive solution to the password dilemma.
Important Characteristics of the iOS 18 Passwords App
In order to enhance user experience and security, the Passwords app in iOS 18 has a number of new features. These characteristics consist of:
Consolidated Password Administration
Using iCloud Keychain and additional stored passwords from apps and browsers, the new Passwords app centralizes all of your login information in one location. Users can simply access, manage, and update all of their passwords on various devices, including Mac, iPad, and iPhone, thanks to this.
The Future of Login with Passkeys
Passkeys, which seek to do away with the necessity for conventional passwords completely, are one of the most noteworthy features in iOS 18. Passkeys use public-private key pairs to authenticate users without passwords. Face ID or Touch ID protects passkeys, which are stored in the Secure Enclave on the user’s device. Since passkeys can’t be phished or published online, they’re more secure.
Better Authentication Through Biometrics
App and website secure login is made simpler and faster with the Passwords app’s integration with Apple’s biometric authentication methods, such as Face ID and Touch ID. Not only does this integration guarantee that only authorized users can access user credentials, but it also removes the need for complicated password entry.
Passwords That Automatically Adopt
When creating new accounts, iOS 18 has the capability to automatically suggest strong, one-of-a-kind passwords as part of Apple’s ongoing effort to promote excellent security practices. Passwords app users can change the generated passwords to their liking, and these ideas are safely saved inside.
Exchange of Passwords
With iCloud Family Sharing, iOS 18 brings secure password sharing. Without disclosing other private information, users can communicate some passwords to dependable family members. Families that share subscriptions or accounts may find this option especially helpful.
Handled Two-Factor Authentication (2FA) Integration
Two-factor authentication (2FA) codes may now be easily managed by the app. When signing in, users who depend on this extra security layer will have less friction because it can create 2FA codes for websites and apps that enable it. These codes will automatically fill in.
Security Recommendations and Auditing Passwords
In order to verify that saved passwords match databases of known compromised credentials, Apple has improved the password security auditing capability. Users can change their passwords and receive advice from the Passwords app if any of their credentials have been compromised. Not only that, but users receive recommendations for better, more secure passwords to use in place of weak or repurposed ones.
Apple passwords app
With iOS 18, Apple continues to prioritize security and privacy. A number of security measures are incorporated into the Passwords app to guarantee that user credentials are kept secret and safe.
Encryption at the Device
End-to-end encryption is used to protect all passkeys and passwords, which are kept locally on the device. As a result, consumers may be as private as possible because not even Apple has access to their credentials.
Protected Area
A specific hardware element in Apple products called the Secure Enclave is where passkeys are kept safe. Apple makes sure that their authentication data is safe from hackers and malware by storing passkeys here and limiting access to just the user.
Not using a centralized database
By keeping critical information decentralized, Apple’s solution differs from standard password managers that store user data on cloud servers. The iCloud allows passwords to be synchronized between devices, but they stay encrypted and can only be unlocked on machines that the user has designated as trusted. Mass data breaches, a frequent weakness for password management services, are significantly less likely as a result.
Secure Biometrics
Using passkeys and accessing the Passwords app requires biometric authentication, which adds an additional degree of protection. You would still need to enable Face ID or Touch ID to view or use your passwords even if someone were to physically reach your device.
Summary: Using iOS 18 to Simplify Passwords
Apple has committed to enhancing security and user experience once more with the release of the Passwords app in iOS 18. Apple is spearheading the shift away from passwords and toward a future where they are not only easier to manage but may someday become obsolete with its advanced features like passkeys, integrated 2FA, and secure password sharing.
Read more on Govindhtech.com
#Apple#applepasswordsapp#passwordsapp#iOS18#ios18features#govindhtech#TechNews#NEWS#Technology#technoogytrends#technologynews#passwordsappinios#technologytrends
0 notes
Text
Why Is My Apple ID Locked or Disabled?
Apple ID is a crucial component for accessing the wide array of Apple services, including iCloud, the App Store, iTunes, and more. However, there are times when users may find their Apple ID locked or disabled. This situation can be frustrating, especially if it occurs unexpectedly. Understanding the reasons behind a locked or disabled Apple ID, along with the steps to recover it, is essential for Apple users. This article delves into the common causes, preventive measures, and recovery steps associated with a locked or disabled Apple ID, with an emphasis on the keyword "recovery Apple id ."
Common Causes of a Locked or Disabled Apple ID
Several factors can lead to an Apple ID being locked or disabled. Below are some of the most common reasons:
1. Security Concerns and Suspicious Activity
Apple is committed to ensuring the security of its users' data. If Apple detects suspicious activity, such as unusual login attempts from different locations or devices, it may lock the Apple ID as a precautionary measure. This helps prevent unauthorized access and protects sensitive information.
2. Multiple Failed Login Attempts
Entering an incorrect password multiple times can result in an Apple ID being locked. This feature is designed to protect against brute force attacks, where a malicious party attempts to gain access by systematically guessing the password.
3. Unpaid Bills or Charges
If there are unpaid bills or disputed charges on your Apple account, your Apple ID may be disabled. Apple takes such issues seriously, and resolving any outstanding financial obligations is necessary to regain access.
4. Violation of Apple’s Terms and Conditions
Apple has strict guidelines regarding the use of its services. Violating these terms, such as attempting to manipulate App Store reviews or engaging in fraudulent activities, can lead to the disabling of your Apple ID.
5. Compromised Account
If Apple believes that your account has been compromised, either through a data breach or other means, they may lock the Apple ID to prevent further unauthorized access.
How to Identify If Your Apple ID Is Locked or Disabled
Determining whether your Apple ID is locked or disabled is straightforward. Here are the common signs:
Login Failure: You cannot sign in to Apple services like iCloud, App Store, or iTunes.
Notification from Apple: You receive an email or notification from Apple stating that your account is locked or disabled for security reasons.
Error Messages: You encounter messages such as "Your Apple ID has been locked for security reasons" or "This Apple ID has been disabled for security reasons" when attempting to sign in.
Steps for Apple ID Recovery
If your Apple ID is locked or disabled, follow these steps to recover it:
1. Using iForgot Website
The iForgot website is Apple's official platform for account recovery. Here’s how to use it:
Go to iforgot.apple.com.
Enter your Apple ID and follow the on-screen instructions.
Depending on your account settings, you may be prompted to answer security questions, enter a recovery email address, or use two-factor authentication.
2. Two-Factor Authentication
If you have two-factor authentication enabled, you can use a trusted device or phone number to unlock your account. Here’s how:
Go to a trusted device and navigate to the “Settings” app.
Tap on your name, then “Password & Security.”
Select “Change Password” and follow the prompts to reset your password.
3. Contacting Apple Support
If the above methods don’t work, contacting Apple Support is a reliable option. Be prepared to verify your identity by providing personal information and answering security questions.
4. Using the Apple Support App
You can also use the Apple Support app, available for download on iOS devices, to get help. The app offers step-by-step guides and the option to chat with an Apple support representative.
Preventive Measures
To avoid having your Apple ID locked or disabled, consider the following preventive measures:
1. Enable Two-Factor Authentication
Two-factor authentication adds an extra layer of security to your Apple ID. Even if someone knows your password, they can't access your account without the second form of identification.
2. Keep Your Information Up to Date
Ensure that your recovery email address, security questions, and phone numbers are current. This makes it easier to recover your account if you get locked out.
3. Be Cautious of Phishing Attempts
Phishing scams often trick users into revealing their Apple ID credentials. Always verify the source of emails and messages claiming to be from Apple and never click on suspicious links.
4. Monitor Your Account Activity
Regularly check your account activity for any unauthorized purchases or changes. Report any suspicious activity to Apple immediately.
What to Do If You Can't Recover Your Apple ID
In some cases, recovering your Apple ID may be more challenging. Here are some steps you can take if you’re unable to regain access:
1. Request Account Recovery
If you can’t sign in or reset your password, you can request account recovery. This process might take several days, depending on how much information you can provide to verify your identity.
2. Visit an Apple Store
If possible, visit an Apple Store or an authorized service provider. Bring a valid ID and any proof of purchase for your Apple device, as this can expedite the recovery process.
3. Create a New Apple ID
As a last resort, you may consider creating a new Apple ID. However, note that this means losing access to all content, purchases, and subscriptions associated with the previous account.
Conclusion
A locked or disabled Apple ID can be a significant inconvenience, but understanding the reasons behind it and knowing the steps for recovery can ease the process. From security measures and account settings to proactive monitoring, there are multiple ways to prevent your Apple ID from being locked or disabled. Remember, recovery apple id access promptly is crucial for maintaining the security and functionality of your Apple devices and services.
By following the steps outlined in this guide, you can efficiently recover a locked or disabled Apple ID. Whether it's through the iForgot website, two-factor authentication, or contacting Apple Support, the key is to act quickly and provide accurate information. This not only ensures a swift recovery process but also helps protect your account from future issues.
0 notes
Text
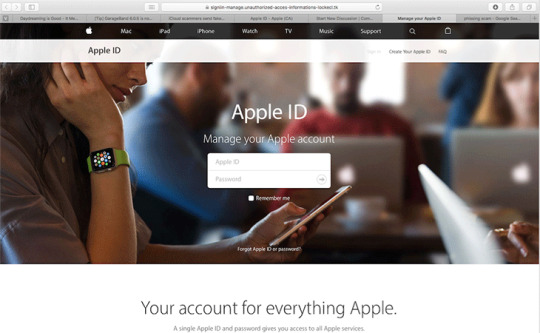
Iforgot.Apple.Com Scam: How To Avoid?
Imagine receiving an email with the subject line “URGENT ACTION NEEDED!” The body of the message claims your Apple ID has been compromised due to suspicious activity. Panic might set in, but before you hit that “reset password” button, take a deep breath. This could very well be a phishing attempt designed to steal your login credentials.
Phishing scammers are on the field again, this time targeting Apple users with emails claiming their accounts have been compromised and directing them to a fake website (iforgot.apple.com) to “reset” their passwords. Don’t be fooled. In this article, we’ll discuss the Iforgot.apple.com scam and How to Avoid it.
What Is The IForgot.Apple.Com Scam?
Before knowing about the scam, let’s know what iForget is. iForgot is Apple’s official website to help users recover their Apple IDs and reset passwords. So, if you have forgotten your Apple ID password, head on to the website to ensure prompt and secure resolution of iCloud ID issues. Then what is the scam all about?
That’s where the scam starts. Cyber scammers and fraudsters exploit the iForgot feature to get your Apple IDs and passwords. They will send you fake emails from the iForgot email ID, containing fake links and malware. The email would resemble the original email that you received from the official iForgot website. When you tap on the link or download any attachment, you’ll be redirected to a website where they’ll ask you to enter your old Apple ID and password.
How Does The IForgot.Apple.Com Scam Work?
Here’s how the iForgot Apple scam works.
The Phishing Email: You receive a cleverly disguised email, supposedly from Apple Support. The subject line might be alarming, something like “Your Apple ID has been locked” or “Unauthorized sign-in attempt.“
Sense of Urgency: The email body creates a sense of panic. It might claim that your account has been compromised or that suspicious activity has been detected. The message insists you must act immediately.
The Fake Link: Within the email, there’s a prominent link that seemingly leads to iforgot.apple.com, Apple’s legitimate password reset site. However, the displayed text and the actual link destination are different. This trick is designed to fool you.
The Phishing Website: Upon clicking the link, you’re redirected to a fake Apple ID login page that closely resembles the official one. Unaware, you enter your Apple ID credentials and password.
Data Theft: The moment you submit your information on the fake site, it reaches the scammers. They now have full control over your Apple ID.
How To Prevent IForgot.Apple Scam?
If you receive anonymous mail, the safest thing you can do is ignore it or even delete it. If you don’t click on any link, download any software, or interact with the email in any way, there’s nothing a scammer can do. The scams only work if you click on their links.
To save yourself from falling victim to such scams, exercise caution with any email or message requesting personal information, particularly if it comes from an unfamiliar source. Always verify the sender’s authenticity before clicking on any links or providing login details. If you’re uncertain whether a website is genuine or fake, it’s advisable to navigate directly to the official Apple website and log in from there. Here are some other things that you can consider:
Never click any link from emails: If you want to reset your password, go to “iforgot.apple.com” directly in your web browser or navigate to it through the official Apple website. Never click links within suspicious emails.
Enable Two-Factor Authentication: This adds an extra layer of security to your Apple ID. When you enable it, you will need a code to log into your Apple account.
Strengthen Your Password: Use a unique, complex password for your Apple ID and change it regularly. Avoid reusing the same password across different services.
Trust Your Instincts: If something feels “off” about an email, it probably is. The safest thing is to be vigilant.
How To Spot An IForgot.Apple Scam?
The iForgot scam mail is received by many users. To protect yourself from such scams, you need to know what the mail or the scam looks like. Here’s all you need to know about the mail:
Email Sender: Carefully scrutinize the sender’s address. While it might look official at first glance, it likely won’t end in “@apple.com.” Scammers often use slight misspellings or unrelated domains.
Poor Grammar and Spelling: Genuine Apple communications are rigorously edited. Typos, strange phrasing, or awkward wording should raise suspicion.
Urgent Mail: Scammers want you to panic and make rash decisions. In the mail, you’ll see aggressive time limits like “verify within 24 hours” or dire threats like “your account will be permanently deleted.”
Unexpected Links: Hover your mouse over any links in the email (without clicking) to reveal their true address. If it doesn’t match a legitimate Apple domain, it’s a scam.
Requests for Personal Info: Apple will never ask for your password, credit card numbers, social security numbers, or similar sensitive information directly in an email.
What Happens If You Mistakenly Click On The Link?
If you get a link in your email asking for your Apple ID and password or just an attachment to download, it’s better not to open the link. But what happens if you open the link and even enter your ID and password? Here’s what can happen:
Account Takeover: Scammers could immediately change your password, locking you out of your account.
Identity Theft: Access to your Apple ID allows access to personal data like your name, address, and potentially credit card information.
App Store Fraud: Scammers might make unauthorized purchases on the App Store using your linked payment methods.
Data Hijacking: It could give them iCloud access, which means photos, documents, and other sensitive files.
Phishing Your Contacts: Scammers controlling your account could send similar scam emails to your contacts list, spreading the trap further.
Conclusion
That’s all about the iforgot.apple.com scam and how you can avoid such scams. The scam works only if you give your information. If you don’t react to such mail, it is useless and will not cause any harm. In case you have already entered your ID and password, it is better to change your password as soon as possible. If you can’t, head to the nearest Apple center. The best prevention is to be vigilant about such mail. Refer to the article for more details. In case of any doubt, do let us know in the comment section below.
0 notes
Text
Hack Someones Phone Without Them Knowing

In today’s digital age, the thought of someone hacking into your phone can be unsettling. With an ever-growing reliance on smartphones for both personal and professional use, the security of these devices is of paramount importance. This blog aims to demystify the concepts of hacking someone’s phone, outline the possible methods used by hackers, and provide essential tips for safeguarding your phone.
What is Phone Hacking?
Phone hacking refers to any method used to gain unauthorized access to a phone’s data and functions. This could involve accessing text messages, emails, photos, or even remotely controlling the device. Hackers use various techniques to achieve this, exploiting vulnerabilities in the phone’s software or deceiving users into revealing sensitive information.
Common Methods of Phone Hacking
1. Phishing Attacks
Phishing involves tricking a user into providing personal information by masquerading as a trustworthy entity. Hackers may send emails or text messages that appear to be from legitimate sources, such as banks or social media platforms, prompting the user to click on a link or download an attachment.
2. Malware
Malware, or malicious software, can be installed on a phone without the user’s knowledge. This can occur through downloading infected apps, clicking on suspicious links, or connecting to compromised networks. Once installed, malware can capture keystrokes, record conversations, and even access the phone’s camera and microphone.
3. Man-in-the-Middle Attacks
In a man-in-the-middle attack, a hacker intercepts the communication between two parties. This often occurs on unsecured Wi-Fi networks, where the hacker can eavesdrop on conversations, steal login credentials, and monitor data traffic.
4. Exploiting Software Vulnerabilities
Hackers often look for bugs or vulnerabilities in a phone’s operating system or installed apps. When these vulnerabilities are discovered, they can be exploited to gain unauthorized access to the device.
5. Social Engineering
Social engineering involves manipulating individuals into divulging confidential information. This could be through impersonation, deception, or exploiting human psychology. For example, a hacker might pose as a tech support agent to convince a user to reveal their password.
How Can Someone Hack My iPhone?
Despite Apple’s robust security measures, iPhones are not immune to hacking. Here are some ways someone might attempt to hack an iPhone:
1. iCloud Credentials
If a hacker obtains your iCloud credentials, they can access your data stored in the cloud. This includes photos, emails, contacts, and even your device’s backup.
2. Spyware
Spyware can be installed on an iPhone if the device is jailbroken or through sophisticated phishing attacks. This software can track your location, read messages, and monitor your online activity.
3. Public Wi-Fi Networks
Connecting to unsecured public Wi-Fi networks can expose your iPhone to man-in-the-middle attacks. Hackers can intercept data being transmitted over the network and gain access to your personal information.
4. Siri Exploits
There have been instances where Siri could be exploited to bypass the lock screen. While Apple regularly patches such vulnerabilities, it’s essential to keep your device updated with the latest software.
How to Get Into Someone’s iPhone Without the Password
Gaining unauthorized access to someone’s iPhone without their password is illegal and unethical. However, understanding how it might be done can help you better protect your device.
1. Brute Force Attacks
In a brute force attack, a hacker uses software to guess the password by trying various combinations until the correct one is found. Apple’s security measures, such as the increasing delay between failed attempts and data wipes after ten incorrect tries, make this method less effective.
2. Exploiting Security Vulnerabilities
Hackers may exploit security flaws in the iOS operating system to bypass the lock screen. Keeping your device updated with the latest security patches can mitigate this risk.
3. Social Engineering
As mentioned earlier, social engineering can trick a user into revealing their password. Hackers might pose as tech support or use other deceptive tactics to gain access.
How to Access Someone’s WhatsApp
Accessing someone’s WhatsApp messages without their consent is a violation of privacy and illegal. However, it’s important to know how it might be done to prevent unauthorized access to your account.
1. WhatsApp Web
If someone gains physical access to your phone, they can set up WhatsApp Web on their computer by scanning the QR code with your phone. This allows them to read and send messages from your account.
2. Spyware
Installing spyware on a phone can give a hacker access to WhatsApp messages. This can be done through phishing attacks or by tricking the user into installing malicious software.
3. SIM Swap Attacks
In a SIM swap attack, a hacker convinces your mobile carrier to transfer your phone number to a SIM card in their possession. This allows them to receive your WhatsApp verification code and gain access to your account.
How to Access Someone’s Phone Remotely
Remote access to a phone can be achieved through various means, but it is generally illegal without the owner’s consent.
1. Remote Access Tools (RATs)
RATs are a type of malware that allows hackers to control a device remotely. These tools can be installed through phishing attacks or by exploiting software vulnerabilities.
2. Cloud Services
If a hacker gains access to your cloud service credentials (such as iCloud or Google Drive), they can remotely access your data, including backups of your phone.
3. Bluetooth Vulnerabilities
Exploiting vulnerabilities in Bluetooth can allow a hacker to connect to your phone without your knowledge. Ensure your Bluetooth is turned off when not in use and keep your device updated with the latest security patches.
Is it Possible for Someone to Hack Your Phone?
Yes, it is possible for someone to hack your phone, but it requires considerable effort and resources. Understanding the methods used by hackers can help you protect your device.
1. Security Best Practices
Adopting security best practices can significantly reduce the risk of your phone being hacked. These include using strong passwords, enabling two-factor authentication, keeping your software updated, and being cautious of suspicious emails and messages.
2. Awareness
Being aware of the potential threats and staying informed about the latest security trends can help you identify and avoid potential hacking attempts.
How to Hack Someone’s Phone Texts
Accessing someone’s text messages without their consent is illegal. However, it’s important to know how it might be done to protect your own messages.
1. Spyware
Spyware can be installed on a phone to monitor text messages. This software can capture and relay text message content to the hacker.
2. SIM Swap Attacks
As mentioned earlier, SIM swap attacks can give a hacker access to your phone number and text messages.
3. Phishing Attacks
Phishing attacks can trick users into revealing their login credentials or installing malicious software that captures text messages.
How to Hack into a Boyfriend’s Phone
Hacking into someone’s phone without their consent is a breach of trust and illegal. Open communication and trust are the foundation of any healthy relationship. If you have concerns about your boyfriend's activities, it’s best to address them directly rather than resorting to unethical methods.
Hacking a Phone Without Physical Access
Hacking a phone without physical access is more challenging but still possible through remote methods.
1. Phishing Attacks
Phishing remains one of the most effective ways to gain remote access. A hacker can control the device remotely by tricking the user into revealing sensitive information or installing malware.
2. Remote Access Tools (RATs)
RATs can be installed through phishing or by exploiting software vulnerabilities, allowing a hacker to control the phone from a distance.
3. Cloud Services
Access to the victim’s cloud service credentials can provide remote access to their phone’s data.
Conclusion
Phone hacking is a serious concern in our increasingly connected world. Understanding the methods used by hackers and taking proactive steps to secure your device can help protect your personal information. Always prioritize your privacy and security by adopting best practices and staying informed about the latest threats. Remember, hacking into someone’s phone without their consent is illegal and unethical. Instead, focus on protecting your own device and maintaining healthy, trust-based relationships.
0 notes
Text
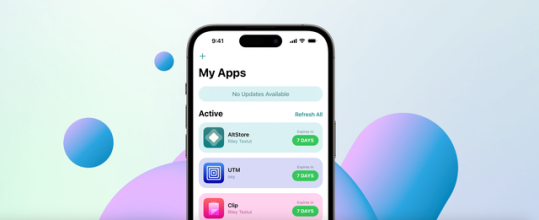
How To On Sideload Apps Iphone Using Altstore
Using AltStore to sideload apps on your iPhone is a great method to get access to more apps than just those available in the official App Store. With AltStore, users may install apps from outside the Apple ecosystem with greater customisation and flexibility than with other app installers. Sideloading with AltStore can provide endless opportunities for anyone interested in exploring new programs, be they a developer, beta tester, or just an app enthusiast. We'll walk you through the entire process of sideloading apps on your iPhone with AltStore in this in-depth guide, making sure it's a safe and easy approach.
What is AltStore?
For iOS devices that aren't jailbroken, AltStore is a substitute app store that may be used to sideload apps. It offers a more open and flexible method of managing apps by enabling users to install programs from sources other than the App Store. With the use of the user's personal development certificate, AltStore, an iOS app, resigns apps and forwards them to AltServer, a desktop program that installs the resigned apps back onto the device via iTunes WiFi sync.
With security in mind, AltStore offers comprehensive details about an app's permissions directly from its store page. In order to guarantee sideloading with trust, it also automatically notifies users whenever an app's permissions change. A committed two-person team develops the open-source app store, which is fully funded by community donations. Users have the ability to peruse applications from reputable developers or add more "sources" to expand their selection.
What Is the role of Altserver?
As your computer's companion app, AltServer is an essential part of the AltStore ecosystem. Enabling AltStore to sideload software onto your device is its main purpose. AltServer needs to be directly connected via USB or operating on the same WiFi network as your iPhone in order to accomplish this. This enables AltStore to interact with AltServer and carry out different operations like sideloading, refreshing, and turning on and off programs.
In the first place, Altstore is installed via AltServer as well. You can manually update your AltStore if it expires by reinstalling it using AltServer and leaving the current AltStore intact. This guarantees that the sideloading process continues smoothly. Furthermore, AltServer facilitates AltStore's weekly automated app refreshes. AltServer can be made to run in the background and be launched at computer startup to make sure AltStore can work effectively. In general, AltServer serves as a conduit between your computer and iPhone, making sideloading easier and improving the user experience all around.
How to setup Altstore?
Prior to executing the stages, it is important to keep a few things in mind. Users will require a PC with iTunes and iCloud installed, as AltServer requires weekly Apple ID login. Additionally, customers running iOS 16 or higher must enable developer mode. This is how you do it:
Open the Settings app.
Navigate to Privacy and Security.
Scroll down to Developer Mode.
Toggle it on.
Additionally, make sure you download and install iCloud [here] and iTunes [here] from Apple's website rather than the Windows Store if you intend to install the server on a Windows device. After downloading:
Download AltStore on your computer and transfer it to your applications folder.
After installation, connect your iPhone to the computer and designate it as a trusted device.
Download and launch AltServer on your computer, then run it.
Open the iTunes app and enable the “Sync with this iPhone over Wi-Fi” setting.
Click on the AltServer icon located in the top left menu bar and select the “Install AltStore” button.
Choose your device from the dropdown menu.
Enter your Apple ID and password.
You should receive an AltServer notification confirming that the app was successfully installed.
On your iPhone, navigate to Settings > General > Profiles & Device Management, then click on the Trust button.
Install apps from Altstore
You must configure AltServer on your Windows computer and link it to your iPhone or iPad in order to install an app from AltStore. Install AltServer first by downloading it from the AltStore website. Next, launch the AltServer application on your computer and adhere to the instructions to install AltStore on your gadget. Make sure your iPhone and PC are linked to the same wireless network. Locate the app you wish to install using AltStore on your device, then choose it by clicking the "Install" button. Your device will receive a sideload of the app. By choosing the "My Apps" tab and pressing the "Plus" symbol to add the IPA file, you may also install apps using IPA files.
open the AltStore application.
Find the software that you want to install.
Maintain the AltServer app open and make sure you are linked to the same wireless network as the server device.
Once the app is installed, you're done!
0 notes
Text
Mastering the Art of Apple ID Recovery
In the digital age, our lives are intricately woven into the fabric of technology. Among the many facets of our digital existence, our Apple ID holds a paramount position. It serves as the gateway to a myriad of Apple services, from iCloud and the App Store to Apple Music and message. However, what happens when you find yourself locked out of this digital fortress? Fear not, for Apple provides a robust system for recovering your Apple ID, ensuring that you can regain access to your digital domain swiftly and securely. In this comprehensive guide, we will explore the various methods and best practices for recovering your Apple ID, empowering you to navigate this process with confidence and ease.
Understanding the Importance of Your Apple ID
Before delving into the intricacies of recover apple id, it's essential to understand the pivotal role it plays in your digital ecosystem. Your Apple ID serves as a unique identifier, linking you to all your Apple devices and services. It enables seamless synchronization of data across devices, facilitates purchases and downloads from the App Store and iTunes Store, and provides access to essential features like iCloud backup and Find My iPhone. With so much riding on your Apple ID, ensuring its security and accessibility is paramount.
Common Scenarios Leading to Apple ID Recovery
There are several scenarios that may necessitate the recovery of your Apple ID:
Forgotten Password: Perhaps the most common scenario, forgetting your Apple ID password can happen to anyone. This could result from infrequent usage of your Apple device, changing your password and subsequently forgetting it, or simply human error.
Account Locked: Apple may lock your Apple ID for security reasons, such as multiple failed login attempts, suspicious activity, or violation of Apple's terms and conditions.
Lost or Stolen Device: If your Apple device is lost or stolen, you may need to recover your Apple ID to prevent unauthorized access to your personal data.
Change of Email Address: If you no longer have access to the email address associated with your Apple ID, you'll need to update your account information or recover your Apple ID using alternative methods.
Recovering Apple ID via Apple's Account Recovery System
Apple provides a streamlined account recovery process designed to assist users in regaining access to their Apple ID. Here's how you can initiate the recovery process:
Visit the Apple ID Account Page: Navigate to the Apple ID account page using any web browser on your computer or mobile device.
Click on "Forgot Apple ID or password": This option is typically located beneath the login fields. Clicking on it will prompt you to enter your Apple ID.
Enter Your Apple ID: Input the email address associated with your Apple ID and click "Continue."
Choose a Recovery Method: Apple offers several recovery options, including email authentication, answering security questions, and using two-factor authentication (2FA) if enabled.
Follow the On-Screen Instructions: Depending on the chosen recovery method, follow the on-screen instructions to verify your identity and reset your Apple ID password.
Contacting Apple Support for Assistance
If you encounter difficulties with the self-recovery process or if your account is locked for security reasons, you can reach out to Apple Support for personalized assistance. Here's how you can contact Apple Support:
Visit Apple's Support Page: Navigate to Apple's official support page using any web browser.
Choose Your Device and Issue: Select the device associated with your Apple ID and describe the issue you're experiencing.
Schedule a Call or Chat Session: Apple offers various support options, including phone calls, chat sessions, and scheduling appointments at an Apple Store Genius Bar.
Verify Your Identity: During the support session, you may need to verify your identity by providing personal information or answering security questions.
Follow Support Team's Guidance: The Apple Support team will guide you through the recovery process, offering tailored solutions to address your specific issue.
Best Practices for Apple ID Security and Recovery
While Apple provides robust mechanisms for recovering your Apple ID, prevention is always better than cure. Here are some best practices to enhance the security of your Apple ID and minimize the likelihood of needing to recover it:
Enable Two-Factor Authentication (2FA): 2FA adds an extra layer of security by requiring a verification code in addition to your password when signing in to your Apple ID from a new device or browser.
Use Strong, Unique Passwords: Avoid using easily guessable passwords and refrain from reusing passwords across multiple accounts. Consider using a password manager to generate and store complex passwords securely.
Keep Your Account Information Up to Date: Regularly review and update your account information, including your email address, phone number, and security questions. This ensures that you can receive notifications and reset instructions in case of emergencies.
Stay Vigilant Against Phishing Attempts: Be cautious of unsolicited emails, messages, or websites requesting your Apple ID credentials or personal information. Verify the authenticity of such requests by directly visiting Apple's official website or contacting iforgot.apple.com.
Backup Your Data Regularly: Regularly back up your important data to iCloud or other trusted backup solutions. In the event of a lost or inaccessible Apple ID, having a recent backup ensures that you can restore your data seamlessly.
Conclusion
Your Apple ID is the linchpin of your digital identity within the Apple ecosystem, granting access to a wealth of services and features. In the event of a forgotten password, account lockout, or other issues, Apple provides robust mechanisms for recovering your Apple ID and regaining access to your digital domain. By familiarizing yourself with the account recovery process and implementing best practices for security and prevention, you can ensure the safety and accessibility of your Apple ID, empowering you to enjoy the full spectrum of Apple's offerings with peace of mind. Remember, with the right knowledge and a precaution, mastering the art of Apple ID recovery is well within your grasp.
0 notes
Text
Your Go-To Guide for iPad Factory Reset
iPad is the pride of its owner due to its advanced features and configurations. But, if you wish to use the iPad without any hassles or worries, you need to have a basic understanding of iPad troubleshooting and iPad factory reset is one of them.
iPad factor reset will help you have a fresh start for the device if you’re facing some persistent software issues. In today’s post, we’re going to talk about the factory iPad factory reset in detail so that you can make it happen without any hassle.
Why You Need to Perform iPad Factory Reset
Performing an iPad factory reset can help you resolve tons of hassles in one go. For instance:
It can fix many kinds of software glitches or mal-functioning
It can help you get rid of unwanted files and settings that may have accumulated over time
It will remove all the saved passwords and login details in one click. This is useful when you want to sell iPads in Delhi.
Thorough Steps for Performing iPad Factory Reset
Follow the below-mentioned steps for a smooth and easy iPad factory reset.
Step #1- Take Backup
Before you start the factory reset process for the iPad, you need to take the back of the important data present in it. You can either upload the crucial details on your iCloud or transfer them to the hard disk.
Step #2- Deactivate ‘ Find My iPad’
If you have activated the ‘Find My iPad’ setting, disable it before you start the factory reset for the iPad. For this, you need to go to Settings>iCloud> Find My iPad. Just toggle off the switch, enter the Apple ID and corresponding passwords, and confirm it.
Step #3- Erase all the details
To delete the entire content on the iPad, you need to go to Settings > General > Reset > Erase All Content and Settings. You need to provide your iPad passcode to confirm this action.
Step #4- Wait for Reset
As you will provide your passcode, the iPad factory reset will start. Depending upon the amount of data stored, reset might take 5-10 minutes or more. Make sure that your iPad is on charge and is connected through a stable internet connection. It’s better to use a WiFi connection.
Step #5- Start the set-up
Once thefactory reset is finished, the iPad set-up will start. The initial setup will require the following basic details like providing Apple ID for sign-up and link to the iCloud account.
Step#6- Restart the iPad
To apply the reset settings, you need to restart the iPad. Simply, press & hold the Power button and slide to Power Off to shut down the iPad.
Some iPad models even ask for recovery mode to restart the iPad. If you have set up the Face ID, you can restart the iPad by pressing and releasing the Volume Up button first and then the Volume Down button. Hold the power button for a while as the recovery mode screen will show up.
Some iPad models can run in recovery mode using the home button. In this case, you need to press and hold the Home button for a while and use the USB to link the iPad to a data-device to activate the recovery mode.
Final Say
Factory Reset for iPad can fix tons of hassles and can help you enjoy seamless operations. However, you need to do it the right way and under the guidance of the iPad repair service centre in Delhi to avoid losing crucial data or messing up the process. The best iPad repair centre in Delhi FixMyMobile can take away all your worries and help you use the iPad easily.
0 notes
Text
como usar open vpn iphone
🔒🌍✨ Ganhe 3 Meses de VPN GRÁTIS - Acesso à Internet Seguro e Privado em Todo o Mundo! Clique Aqui ✨🌍🔒
como usar open vpn iphone
Configurações OpenVPN iPhone
O OpenVPN é uma ferramenta popular para criar conexões seguras de internet por meio do uso de redes privadas virtuais (VPNs). Quando se trata de configurar o OpenVPN no iPhone, existem algumas etapas simples que podem ser seguidos para garantir uma conexão segura e confiável.
Antes de mais nada, é importante baixar o aplicativo do OpenVPN na App Store do seu iPhone. Uma vez instalado, o próximo passo é obter os arquivos de configuração necessários do seu provedor de VPN. Estes arquivos geralmente incluem certificados, chaves de criptografia e arquivos de configuração.
Com os arquivos de configuração em mãos, você pode importá-los para o aplicativo OpenVPN no seu iPhone. Isso pode ser feito através de serviços de armazenamento em nuvem como iCloud ou Dropbox, ou mesmo por e-mail. Basta abrir o arquivo de configuração na mensagem ou no aplicativo de armazenamento e selecionar a opção "Copiar para OpenVPN".
Uma vez importados os arquivos de configuração, você pode se conectar ao servidor VPN de sua escolha através do aplicativo OpenVPN no iPhone. Basta selecionar o perfil desejado e tocar em "Conectar". O aplicativo irá então estabelecer uma conexão segura e criptografada, protegendo assim sua privacidade e segurança online.
Com esses passos simples, você poderá desfrutar de uma conexão VPN segura em seu iPhone utilizando o OpenVPN. Lembre-se sempre de utilizar uma VPN confiável e de manter seus arquivos de configuração seguros e protegidos.
Passos conexão VPN iPhone
Uma VPN, ou Rede Virtual Privada, é uma ferramenta essencial para proteger a sua privacidade e segurança online. No caso do iPhone, configurar uma conexão VPN pode ser feito facilmente seguindo alguns passos simples.
Primeiramente, é importante escolher um provedor de VPN confiável e eficiente. Existem várias opções disponíveis na App Store do iPhone, como ExpressVPN, NordVPN e CyberGhost, que oferecem uma conexão segura e estável.
Após escolher o provedor de VPN, o próximo passo é configurar a conexão no seu iPhone. Para isso, basta acessar as configurações do dispositivo, selecionar a opção "VPN" e adicionar uma nova conexão. Você precisará inserir as informações fornecidas pelo seu provedor de VPN, como o endereço do servidor, tipo de conexão e suas credenciais de login.
Uma vez configurada a conexão VPN, basta ativá-la sempre que desejar navegar de forma mais segura e privada. Uma VPN criptografa o seu tráfego de internet, tornando mais difícil para terceiros monitorarem suas atividades online.
Em resumo, configurar uma conexão VPN no seu iPhone é simples e pode trazer diversos benefícios em termos de privacidade e segurança online. Não deixe de proteger seus dados e sua privacidade ao navegar na internet, utilizando uma VPN confiável e seguindo esses passos simples.
Aplicativo VPN iOS
Os aplicativos VPN para iOS são uma ferramenta útil para proteger a sua privacidade e manter a sua segurança online enquanto utiliza dispositivos Apple. Com a crescente preocupação com a segurança e privacidade dos dados dos usuários, o uso de uma VPN tornou-se essencial para quem deseja navegar na internet de forma segura.
Existem diversas opções de aplicativos VPN disponíveis na App Store, que oferecem diferentes recursos e níveis de proteção. Ao utilizar um aplicativo VPN no seu dispositivo iOS, você pode navegar anonimamente, proteger seus dados de hackers e aumentar a segurança da sua conexão em redes Wi-Fi públicas.
Além da proteção da privacidade e segurança, os aplicativos VPN para iOS também permitem contornar restrições geográficas, possibilitando acessar conteúdos que estejam bloqueados em determinadas regiões. Isso é especialmente útil para quem gosta de assistir a filmes e séries em plataformas de streaming que tenham restrições de países.
Para escolher o melhor aplicativo VPN para iOS, é importante considerar a reputação da empresa, a quantidade de servidores disponíveis, a velocidade da conexão e a facilidade de uso da interface. Com a instalação de um aplicativo VPN confiável no seu dispositivo iOS, você pode desfrutar de uma experiência online mais segura e privada, garantindo a proteção dos seus dados enquanto navega na internet.
OpenVPN Protocolo iPhone
O OpenVPN é um dos protocolos de segurança mais confiáveis e amplamente utilizados para garantir uma conexão segura à internet. No entanto, configurar o OpenVPN em um iPhone pode parecer um desafio para muitos usuários. Felizmente, com um pouco de orientação, é possível configurar o OpenVPN de forma rápida e fácil em seu dispositivo iOS.
Para começar, você precisará baixar um aplicativo de cliente OpenVPN na App Store. Existem diversas opções gratuitas e pagas disponíveis para atender às suas necessidades. Após instalar o aplicativo em seu iPhone, você precisará obter os arquivos de configuração do servidor OpenVPN que deseja se conectar. Esses arquivos geralmente são disponibilizados pela provedora do serviço VPN que você utiliza.
Com os arquivos de configuração em mãos, basta importá-los para o aplicativo OpenVPN em seu iPhone. Isso pode ser feito por meio de um arquivo de configuração ou escaneando um código QR, dependendo do método suportado pelo aplicativo que você escolheu. Uma vez importados os arquivos de configuração, você estará pronto para se conectar ao servidor OpenVPN de sua escolha.
É importante lembrar que a configuração do OpenVPN pode variar dependendo do provedor de VPN que você utiliza. Por isso, é recomendável seguir as instruções específicas fornecidas pela sua provedora. Com o OpenVPN configurado em seu iPhone, você poderá navegar na internet com segurança e privacidade, protegendo seus dados contra possíveis ameaças online.
Tutorial VPN iPhone
Um Tutorial VPN iPhone ajuda a proteger a sua privacidade e dados enquanto navega na internet utilizando o seu dispositivo iOS. Uma VPN, ou Rede Privada Virtual, cria uma conexão segura entre o seu iPhone e a internet, o que ajuda a proteger as suas informações pessoais de hackers, rastreadores e até mesmo do seu provedor de internet.
Para configurar uma VPN no seu iPhone, siga estes passos simples:
Escolha um provedor VPN respeitável e faça o download do aplicativo na App Store.
Abra o aplicativo e siga as instruções para criar uma conta e se conectar a um servidor VPN.
Acesse as configurações do seu iPhone e toque em "VPN" para ativar a conexão.
Selecione o servidor VPN ao qual deseja se conectar e insira suas credenciais, se necessário.
Com a VPN ativada, o seu tráfego de internet será criptografado, tornando mais difícil para terceiros monitorarem as suas atividades online. Além disso, uma VPN pode permitir-lhe contornar restrições geográficas, acessando conteúdos bloqueados comuns em determinadas regiões.
Lembre-se de que, embora uma VPN ofereça uma camada adicional de segurança e privacidade, é importante escolher um serviço confiável e respeitável. Além disso, manter o aplicativo atualizado e tomar precauções básicas de segurança cibernética é essencial para uma proteção eficaz.
Com este tutorial VPN iPhone, você pode desfrutar de uma experiência online mais segura e privada, garantindo que suas informações pessoais permaneçam protegidas.
0 notes
Text
como cancelar assinatura vpn no ios
🔒🌍✨ Ganhe 3 Meses de VPN GRÁTIS - Acesso à Internet Seguro e Privado em Todo o Mundo! Clique Aqui ✨🌍🔒
como cancelar assinatura vpn no ios
Como cancelar assinatura VPN no iOS
Para cancelar a assinatura de uma VPN no iOS, siga alguns passos simples para garantir que sua assinatura não seja renovada automaticamente. Ao cancelar a assinatura, você garantirá que não haverá cobranças futuras pelo serviço de VPN. Aqui está um guia passo a passo sobre como cancelar sua assinatura de VPN no iOS:
Passo 1: Acesse o aplicativo "Ajustes" no seu dispositivo iOS.
Passo 2: Desça e toque em "Seu nome" para acessar as configurações da conta do iCloud, iTunes e App Store.
Passo 3: Em seguida, toque em "iTunes e App Store".
Passo 4: Toque no seu ID Apple na parte superior da tela.
Passo 5: Selecione a opção "Ver ID Apple" e faça login, se solicitado.
Passo 6: Role para baixo e selecione a opção "Assinaturas".
Passo 7: Você verá uma lista de todas as assinaturas ativas, incluindo a VPN que deseja cancelar. Toque na assinatura da VPN.
Passo 8: Toque em "Cancelar Assinatura" e confirme a ação quando solicitado.
Cumprindo esses passos simples, você terá cancelado com sucesso a assinatura da VPN no seu dispositivo iOS. Certifique-se de verificar se a assinatura foi cancelada antes da data de renovação para evitar cobranças indesejadas. Esperamos que este guia tenha sido útil para você cancelar sua assinatura de VPN no iOS.
Processo de cancelamento de VPN no iOS
O processo de cancelamento de uma VPN no iOS, ou seja, a exclusão de uma rede privada virtual de um dispositivo Apple, é bastante simples e pode ser feito facilmente seguindo alguns passos. Existem diversas razões pelas quais alguém pode querer cancelar sua VPN, como mudança de provedor, necessidade de mais espaço no dispositivo, ou simplesmente por não precisar mais dela.
Para cancelar uma VPN no iOS, primeiro é necessário acessar as configurações do dispositivo. Em seguida, selecione a opção “General” e depois “VPN”. Nesta seção, você verá todas as VPNs configuradas no aparelho. Basta selecionar a que deseja cancelar e em seguida escolher a opção “Delete VPN”. Confirme a exclusão e pronto, sua VPN estará cancelada.
É importante ressaltar que ao cancelar uma VPN, todas as configurações e dados relacionados a ela serão removidos do dispositivo. Portanto, caso decida utilizar uma VPN novamente no futuro, será necessário configurá-la novamente com as informações necessárias.
Lembrando sempre que uma VPN é uma ferramenta importante para garantir a segurança e privacidade dos dados enquanto se navega na internet, por isso, ao cancelar uma VPN, certifique-se de que realmente não precisará mais dela. Em caso de dúvidas ou problemas durante o processo de cancelamento, consulte a ajuda do dispositivo ou entre em contato com o suporte técnico.
Etapas para encerrar assinatura VPN no iOS
Encerrar uma assinatura VPN no iOS pode ser um processo simples e direto seguindo algumas etapas básicas. Uma VPN, ou Rede Privada Virtual, é uma ferramenta útil para garantir a segurança e privacidade de sua conexão à internet. No entanto, se você não precisa mais dos serviços da VPN ou deseja trocar de provedor, é importante saber como encerrar a assinatura adequadamente.
Aqui estão algumas etapas para encerrar uma assinatura VPN no iOS:
Abra o aplicativo da VPN: Primeiramente, abra o aplicativo da VPN em seu dispositivo iOS. Geralmente, isso pode ser feito tocando no ícone do aplicativo na tela inicial.
Acesse as configurações da conta: Dentro do aplicativo da VPN, procure a opção de configurações da conta. Isso geralmente está localizado no menu do aplicativo, muitas vezes representado por um ícone de engrenagem.
Cancelar a assinatura: Dentro das configurações da conta, procure a opção para cancelar ou encerrar a assinatura. Cada provedor de VPN pode ter um processo ligeiramente diferente, mas geralmente haverá uma opção clara para cancelar a assinatura.
Siga as instruções: Siga as instruções na tela para confirmar o cancelamento da assinatura. Dependendo do provedor de VPN, você pode precisar fornecer um motivo para o cancelamento ou confirmar sua decisão.
Seguindo essas etapas, você poderá encerrar sua assinatura VPN no iOS de forma rápida e eficiente. Lembre-se de que é importante garantir que a assinatura tenha sido cancelada corretamente para evitar cobranças adicionais.
Tutorial para interromper assinatura VPN no iOS
Hoje em dia, a utilização de VPNs em dispositivos iOS tornou-se uma prática comum para garantir a segurança e privacidade online dos utilizadores. No entanto, pode chegar o momento em que desejamos interromper a assinatura de uma VPN no nosso dispositivo. Neste tutorial, vamos explicar passo a passo como interromper a assinatura de uma VPN no iOS.
O primeiro passo é aceder às definições do seu dispositivo iOS. Em seguida, procure a secção onde estão listadas as suas subscrições de VPN. Geralmente, esta opção encontra-se em "VPN" ou "Configurações de Rede".
Depois de encontrar a lista das suas subscrições de VPN, identifique a que deseja cancelar. Toque na opção e surgirá a opção de cancelar a subscrição. Confirme e a sua subscrição será interrompida.
É importante mencionar que cancelar a subscrição de uma VPN no iOS irá desativar o serviço, e a sua privacidade online pode ficar comprometida. Certifique-se de estar ciente das implicações de interromper a utilização de uma VPN.
Por fim, lembre-se de verificar se a subscrição foi efetivamente cancelada. Verifique se a VPN não está mais ativa no seu dispositivo e confirme junto do provedor de VPN, se necessário.
Seguindo estes passos simples, poderá interromper a assinatura de uma VPN no seu dispositivo iOS de forma rápida e fácil. Lembre-se sempre de priorizar a sua privacidade e segurança online ao utilizar serviços de VPN.
Passo a passo para cancelar VPN no iOS
Para cancelar sua VPN no iOS, siga estes simples passos:
Acesse as configurações do seu dispositivo iOS. Toque no ícone "Ajustes" na tela inicial.
Role para baixo e selecione "Geral". Em seguida, toque em "VPN" na parte inferior da lista.
Na tela de configurações da VPN, você verá a lista de todas as conexões VPN configuradas no seu dispositivo. Toque na conexão VPN que deseja cancelar.
Uma nova janela será aberta com os detalhes da conexão VPN. Localize o botão "Desconectar" e toque nele para interromper a conexão VPN ativa.
Uma mensagem de confirmação será exibida solicitando que você confirme o cancelamento da conexão VPN. Toque em "Desconectar" para confirmar.
Pronto! Sua conexão VPN foi cancelada com sucesso. Você será redirecionado de volta para a lista de conexões VPN, onde poderá verificar que o status da conexão foi alterado para "Desconectado".
Ao seguir estes passos simples, você poderá cancelar facilmente sua conexão VPN no seu dispositivo iOS. Lembre-se de que, ao cancelar a VPN, sua conexão de rede pode ficar vulnerável, por isso é importante estar ciente dos riscos e tomar medidas adicionais de segurança, se necessário.
0 notes
Text
What should I do after buying a second-hand phone?
What should I do after buying a second-hand phone?
While buying any second-hand mobile, check the hard copy or soft copy of the original bill for that mobile and keep it with you. Keep an eye on the IMEI number of the mobile phone. The IMEI number, which is written in the original cash memo (bill) of the mobile, should be on the mobile.
Things to do after buying a second-hand phone
Almost everyone knows what to do before buying a second-hand phone. If you don't already know about this, you can visit Banglatech's dedicated post. If you bought a used phone or a second-hand phone, what should you do next? Learn about what to do after buying a second-hand phone in this post. Let's begin.
to clean
It is normal for a used phone not to look like a brand new phone. It is normal for most used phones to not be clean or have dust scratches. So after buying a second-hand phone, you must clean it.
It is best if the screen protector already on the phone is replaced, as it is normal to have no idea about its durability. Besides, you can buy a cover for the phone to reduce the loss of the phone for any reason. It is good to say that after buying a second-hand phone, if there is any type of SIM card or memory card in the phone, it is better to remove it and hand it over to the owner of the phone.
to reset
Before buying a used phone from someone, he must ask them to remove all his accounts, such as his Google account, Apple ID, Facebook ID, etc., from the said phone. Although, for some reason, these old IDs remain on the phone, remove them first. Then you can reset your Android and iPhone normally.
It is good to say that if you reset the phone without logging out of the Google account or Apple ID that is already logged in to the second-hand phone, then after the reset, you have to log in to those accounts again. And if there is no login information for the account, then after the reset, you will have trouble logging into the account, and the phone will be locked and unusable. Therefore, remember to log out of your Google account, Apple ID, and iCloud before resetting the second-hand phone. Remember, if iCloud is locked by someone else's account on the iPhone, you cannot use that phone; it will be locked at any time.
Visit to buy and sell used phones.
Purchase of necessary accessories
A phone needs important accessories such as chargers, headphones, etc. for proper use. Most of the time, when you buy a second-hand phone, you don't get a charger, headphones, etc. In that case, after buying a second-hand phone, do not forget to buy a charger compatible with the device. Many people use earphones or headphones to listen to audio or talk on the phone. They can buy headphones according to their needs.
Setting up accounts
After buying a second-hand Android phone, reset the phone, and then the first thing to do is to login to your Google account on the phone. After logging into the Google account, do not forget to activate the Google Find My Device service; in this case, it will help to find the phone if it is lost.
On the other hand, after buying a used iPhone, reset the phone and login to your own Apple ID. Logging in with someone else's Apple ID can block your phone at any time. So always use your Apple ID on your iPhone. After the account setup, turn on the Find My iPhone service so that it is easy to find the phone if it is lost.
0 notes
Text
Understanding the Importance of iPhone iCloud Check

iCloud is a cloud storage and cloud computing service provided by Apple Inc. that allows users to store data such as photos, videos, documents, and music on remote servers for download to iOS, macOS, or Windows devices. iCloud also provides services such as email, calendar, and contacts syncing across devices. For iPhone users, iCloud is an essential tool for backing up data and ensuring that their information is safe and accessible from anywhere.
One important aspect of using iCloud for iPhone users is performing regular iCloud checks. This process involves verifying the status of your iCloud account, checking for any issues or discrepancies, and ensuring that your data is secure and up to date. By regularly checking your iCloud account, you can prevent data loss, identify potential security breaches, and troubleshoot any problems that may arise.
There are several reasons why performing an iPhone iCloud check is important. First and foremost, it helps you ensure that your data is being properly backed up and synchronized across all your devices Check iPhone iCloud. By regularly checking your iCloud account, you can verify that your photos, videos, contacts, and other important information are being securely stored in the cloud and are accessible when you need them.
Another reason to perform regular iCloud checks is to identify any potential security vulnerabilities. iCloud accounts can be compromised through various means, including weak passwords, phishing attacks, and unauthorized access. By checking your iCloud account regularly, you can spot any suspicious activity or unauthorized logins and take immediate action to secure your data.
Additionally, performing an iPhone iCloud check can help you troubleshoot any syncing or connectivity issues you may be experiencing. Sometimes, data may not properly sync across devices, or you may encounter errors when trying to access your iCloud account. By checking the status of your iCloud account, you can quickly identify any issues and take steps to resolve them, such as updating your software or resetting your iCloud settings.
In conclusion, performing regular iPhone iCloud checks is essential for ensuring the security, reliability, and accessibility of your data. By verifying the status of your iCloud account, you can prevent data loss, identify security breaches, and troubleshoot any problems that may arise. Make it a habit to check your iCloud account regularly and enjoy peace of mind knowing that your data is safe and secure in the cloud.
1 note
·
View note
Last Seen Blogs

handsingsweapon
hand sings weapon

inuyasha1sasuke
Palletshipping | Comashipping

saraadel-00
سَرسُورة

dhodaonline-blog
Untitled

karabita
MY DEPENDABLE KARAMATSU