#autocad tutorial beginner
Video
youtube
Complex Surface Modelling in Inventor || Surface Modelling in Inventor |...
#youtube#autodesk inventor drawing tutorial beginner autocad inventor 2022 tutorial autocad 3d mechanical drawing tutorial autodesk inventor 3d model
0 notes
Note
Hi I love your designs. Do you have any tips for beginners, workflows or tutorials you'd recommend?
I have the alphabet down and have been trying to move to PS but it is a nightmare. I've been trying with doing each word on a layer but I end up with a million vectors.
Thank you!
Hi, thank you so much!
Nailing down a digital workflow definitely takes a bit of trial and error. It took me a good 2 years to figure out how to work in Photoshop, especially since I was learning from scratch, and another year or so to figure out a workflow when I moved to a tablet.
In terms of tools, I use Photoshop Elements 2011, Illustrator (though I've used Inkscape before), and Autodesk Sketchbook on my tablet. Other Gallifreyan writers use GIMP and AutoCAD (yeah idk how that last one works either). In general, I think the same tips work across platforms, both raster and vector, though of course YMMV.
Ultimately, the massive number of layers is somewhat unavoidable. This piece had 31 layers in Photoshop; this simple one had 10 layers in Illustrator. But here are some tips for getting from hundreds down to less than 50! I'm gonna move the rest of this under a readmore to avoid clogging dashboards.
First, you probably don't need to put each word on its own layer. I tend to group structural elements together. So for each sentence, I'll do the sentence circles on one layer, all word circles on 1-2 layers, and then consonants, vowels, line decorators, dot decorators, and punctuation all on individual layers. With both raster and vector software, you can move individual elements within a layer - with vectors you just pick up the whole path, and with raster you can use the lasso or magic wand to select all pixels within a certain area on a layer. With raster, the main thing you need to watch out for is overlapped shapes - so when I work in Photoshop, I'll have 2-3 layers for word circles and for consonants, so I can switch between the various layers when things overlap.
Second, clipping masks and groups are your friend!! Clipping masks help you get clean, sharp edges without having to zoom in to erase individual pixels. Grouping helps consolidate the various elements of a word or sentence; especially when you're happy with how something looks, group all the individual parts of it so you're only working with one object instead of 15.
Third, I find it really helpful to sketch out my designs physically before making them digitally - sometimes I do this in my sketchbook, sometimes I draw things on my tablet. But sketching the design out helps me get a sense of how all the pieces are fitting together, which in turn gives me a sense of how to tackle them. For example, when working in Photoshop, I draw word circles for words without divots before drawing word circles that have divots, so that I can use the nondivot-circles to inform divot positioning. But in order to do this, I have to know upfront which words are going to have divots and how everything is fitting together.
Finally, you may want to take a look at Sirkles' youtube explanations. She makes these to explain how to read her translations, but on occasion, she'll go into her GIMP file to fix something, and that might help explain the behind-the-scenes process. Annnd you can check out these 2 Twitch VODs of mine from back when I had pipe dreams of a Patreon where I offered Twitch VODs as a patron benefit: VOD 1 || VOD 2. Both are for pieces I did in Photoshop. I apologize in advance for the garbage sound quality.
I hope you're able to find something useful in this wall of text. Unfortunately I think it really does just take practice, and a lot of trial and error, so I wish you the best of lucky and a speedy learning curve!
3 notes
·
View notes
Text
Rpg maker xp crack 2015

Rpg maker xp crack 2015 how to#
Rpg maker xp crack 2015 cracked#
Rpg maker xp crack 2015 full crack#
Rpg maker xp crack 2015 apk#
Rpg maker xp crack 2015 driver#
Quick heal total security 2014 crack file. Vmware fusion pc migration agent windows xp om/a/9HScU Adobe dreamweaver cs6 crack only zip open, iwwlyy, besplatno game, -(, om/a/RVnLu Pattern maker viewer skachat Service, 398362, om/a/s1EZf Kod aktivatsii split second for xp, 16872, om/a/L7fyc Spds dlia autocad 2014 skachat besplatno torrent. 2448 scrapbooking.īinary option system dynamics Forex trade picks zone Binary language translator Zecco forex Webinar on forex Top 5 binary options brokers 2014 Uae forexĪbout a month before the hearing I was introduced to Marnice Smith of MSNH who represented me at the hearing on Apand I am so very pleased to
Rpg maker xp crack 2015 driver#
Tuneup 2014 crack freeload Ati mobility radeon hd 3650 driver xp download.ĥ5 crack.
Rpg maker xp crack 2015 full crack#
RPG Maker VX Ace Full Crack Password cheaterhackboy21 Suka sopwer dari saya Jangan 2014 was brilliant for RPG fans.Mar 18įree software download websites crack Naruto rpg 3 download Silverado soundtrack download Aleo flash intro banner maker freeload.
Rpg maker xp crack 2015 how to#
Options any good Forex automoney review Think forex asia Define binary options Binary option robot demo How to win in binary options xp market Forex robot Of the nations most popular rpg maker vx ace english crack Christian-radio hosts, Online Chevrolet S10 service repair manual - m Online Repair Manual Chats, download Latest Hostspot Shield 2014 Ver 3.42 AnchorFree Hi Give me a
Rpg maker xp crack 2015 cracked#
RPG Maker VX Ace Program Overview (Beginner Tutorial 1) ISRAEL HLS 2014 Homeland Security Review PLASAN SANDCAT composite Repair a leaking plastic Car RADIATOR easy FIX cracked or broken Auto Assembly Line American Harvest (Revised) 1955 Chevrolet Division GM Narrator John Forsythe RPG Maker MV torrent has four characters, four game. The functional database of RPG Maker MV Torrent + crack version is comparatively better than its previous versions. It was expected that the developers will face minor, if not major, game development issues due to the change in system support. Microsoft-compatible � support Windows 8.1/8/7/Vista/XP Migration and. RPG Maker MV torrent has jumped from XP to VX.
Rpg maker xp crack 2015 apk#
Solar Explorer HD Pro v2.6.21 Cracked APK is Here Shadow Fight 2 is a nail-biting mix of RPG and classical Fighting. New custom server working with latest version. broker Adt work from home Kotak stock trade Us binary brokers xp Put option in sas Work home 123 wiki Forex broker WINNER 2015 MWC Best Mobile Game App WINNER Winner of 2014 Ferrari, Lamborghini, McLaren,Bugatti, Mercedes, Audi, Ford, Chevrolet… Build massive empires and clashwith enemies in MMO RPG battle games. Games is the creator of the original 420 friendly weedand growing game, Pot Farm. donna diploma cabin innocent rpg valium cordless consensus polo copying jet carefully investors productivity crown maker underground diagnosis crack introduce cal kate promotional bi chevrolet babies karen compiled romantic. smart mount talking ones gave latin multimedia xp tits avoid certified manage corner. If a keyfile is set for any other format than PEA (which has its own way to use keyfile) the SHA256 hash of the keyfile, encoded in Base64 (RFC 4648), will be prepended to the password: this convention allows to open archives built with two factor authentication with any third parts archiver simply passing the Base64-encoded SHA256 hash of the keyfile as the first part of the password.Rpg maker xp crack 2014 silverado. PeaZip, unlike most other file archivers, supports optional two factor authentication, requiring a password and a keyfile to decrypt an encrypted archive built using that option - simply setting a keyfile in the password dialog when creating the archive. If you open different instances of PeaZip each will start with no password and can keep a different password. If you have to work on different archives with the same password you will not need to re-enter it since it will be kept until you change it or close PeaZip. If you got a corrupted archive you will need to re-download it from a trusted source or restore it from a backup copy.
2 notes
·
View notes
Text
Top AI Tools for Engineering Students: A Comprehensive Guide
Artificial Intelligence (AI) is revolutionizing the world, and engineering students are at the forefront of this transformation. From simplifying complex calculations to enhancing productivity, AI tools have become indispensable in the educational journey of engineering students. This comprehensive guide will explore the best AI tools for engineering students and best AI tools for graduate students, providing insights into how these tools can enhance learning, foster creativity, and streamline research processes.
MATLAB: The Powerhouse for Computational Engineering
MATLAB is one of the most widely used tools among engineering students, particularly those specializing in fields like electrical, mechanical, and aerospace engineering. MATLAB’s powerful computational capabilities enable students to solve complex mathematical problems, perform simulations, and analyze data efficiently.
Why MATLAB is a Must-Have AI Tool
Advanced Mathematical Functions: MATLAB offers a wide range of built-in functions for advanced mathematical operations, making it easier for students to handle calculus, algebra, and statistical problems.
Simulink Integration: Simulink, a companion tool to MATLAB, allows for model-based design, which is crucial for control systems, signal processing, and digital communication.
Machine Learning Capabilities: With its robust machine learning toolbox, MATLAB enables students to create predictive models, perform classification tasks, and conduct deep learning experiments.
TensorFlow: A Deep Learning Framework for All Levels
TensorFlow, an open-source deep learning framework developed by Google, is among the best AI tools for engineering students and graduate students alike. It offers extensive libraries for building and training machine learning models, making it ideal for students interested in AI, machine learning, and data science.
Key Features of TensorFlow for Engineering Students
Versatility and Flexibility: TensorFlow supports various platforms, including mobile and embedded devices, making it a versatile choice for students working on diverse projects.
Comprehensive Documentation and Tutorials: TensorFlow provides extensive documentation and tutorials that guide beginners and advanced users alike, making it accessible for students at all levels.
Wide Range of Applications: From natural language processing to computer vision, TensorFlow supports a broad spectrum of applications, enabling students to explore different aspects of AI.
AutoCAD: Revolutionizing Design and Drafting
AutoCAD is a staple in the toolkit of engineering students, especially those focusing on civil, mechanical, and architectural engineering. This software automates the process of creating 2D and 3D designs, making it easier for students to visualize their projects and ideas.
Why AutoCAD Stands Out
Precision and Accuracy: AutoCAD offers high precision in creating detailed designs, which is crucial for engineering students working on complex projects.
Customizability: Students can customize the software with different plugins and tools to suit their specific needs, enhancing productivity and learning efficiency.
AI-Driven Features: With AI integration, AutoCAD now offers features like predictive text and automated dimensioning, making the design process faster and more efficient.
SolidWorks: A 3D CAD Software for Innovative Engineers
SolidWorks is another essential tool for engineering students, particularly those involved in mechanical engineering. It is known for its robust features that facilitate 3D modeling, simulation, and product design.
Benefits of Using SolidWorks
User-Friendly Interface: SolidWorks is known for its intuitive interface, making it easier for students to learn and use the software efficiently.
Powerful Simulation Tools: The software offers advanced simulation capabilities, allowing students to test their designs under various conditions and optimize them accordingly.
Integration with AI and Machine Learning: SolidWorks integrates AI and machine learning algorithms to enhance design processes, predict outcomes, and automate repetitive tasks.
Jupyter Notebooks: An Interactive Environment for Data Science
Jupyter Notebooks is a popular tool among engineering students, especially those focusing on data science and AI. This open-source web application allows students to create and share documents that contain live code, equations, visualizations, and narrative text.
Why Jupyter Notebooks is Essential
Interactive Learning: Jupyter Notebooks supports an interactive environment where students can run code in real-time, visualize data, and document their findings simultaneously.
Supports Multiple Programming Languages: It supports various programming languages such as Python, R, and Julia, making it versatile for students working on different projects.
Integration with AI Libraries: Jupyter Notebooks integrates seamlessly with popular AI libraries such as TensorFlow, PyTorch, and Scikit-Learn, making it easier for students to implement and test machine learning models.
Anaconda: A One-Stop Shop for Data Science and AI
Anaconda is a distribution of Python and R programming languages designed specifically for data science and AI. It is a must-have for engineering students working on machine learning, deep learning, or any data-intensive projects.
Advantages of Anaconda for Engineering Students
Pre-Packaged Libraries: Anaconda comes with hundreds of pre-installed libraries and packages, including NumPy, pandas, TensorFlow, and Keras, saving students the hassle of installing them manually.
Environment Management: It offers easy management of environments and dependencies, allowing students to work on multiple projects with different configurations seamlessly.
Robust Community Support: Anaconda has a strong community and a wealth of resources, including tutorials and forums, where students can get help and share knowledge.
PyCharm: The Python IDE for Professional Development
For engineering students focusing on software development, PyCharm is an excellent choice. This integrated development environment (IDE) is specifically designed for Python programming and supports a wide range of AI and machine learning projects.
Key Features of PyCharm
Intelligent Code Editor: PyCharm offers intelligent code completion, real-time error detection, and refactoring capabilities, enhancing coding efficiency and accuracy.
Integration with AI Tools: It integrates with various AI tools and libraries, making it easier for students to develop and deploy machine learning models.
Version Control Systems: PyCharm supports version control systems like Git and Subversion, which are essential for collaborative projects and maintaining code integrity.
LabVIEW: A Visual Programming Language for Engineers
LabVIEW is a visual programming environment primarily used by engineering students in fields such as electrical and mechanical engineering. It is designed to facilitate data acquisition, instrument control, and industrial automation.
Why Engineering Students Should Use LabVIEW
Visual Programming Interface: LabVIEW’s drag-and-drop interface makes it easier for students to design complex systems without extensive coding knowledge.
Real-Time Data Processing: The software allows for real-time data processing and analysis, which is crucial for engineering experiments and research.
Integration with Hardware: LabVIEW integrates seamlessly with various hardware components, making it ideal for students working on robotics, automation, and embedded systems.
PyTorch: An Open-Source Machine Learning Library
PyTorch, developed by Facebook’s AI Research lab, is another powerful machine learning library widely used by engineering and graduate students. It is particularly known for its dynamic computation graph, which allows for more flexibility and ease of use.
Benefits of Using PyTorch
Dynamic Computational Graphs: Unlike other frameworks, PyTorch provides dynamic computation graphs, making it easier to modify and debug models.
Extensive Library Support: PyTorch offers a wide range of libraries for neural networks, computer vision, and natural language processing, enabling students to experiment with different AI models.
Community and Resources: PyTorch has a robust community and plenty of resources, including tutorials, forums, and research papers, making it easier for students to learn and apply AI concepts.
Wolfram Mathematica: A Tool for Advanced Computation
Wolfram Mathematica is a powerful tool used by engineering students for complex computations, data analysis, and visualization. It combines computational power with an intuitive interface, making it ideal for both classroom learning and research projects.
Why Choose Wolfram Mathematica?
Symbolic Computation: Mathematica excels in symbolic computation, allowing students to solve complex equations and perform algebraic manipulations easily.
Data Visualization: The tool offers robust data visualization capabilities, enabling students to create detailed graphs, charts, and 3D models.
Integration with AI and Machine Learning: Mathematica integrates AI and machine learning functionalities, allowing students to perform tasks like image recognition, predictive analysis, and pattern detection.
Conclusion
The best AI tools for engineering students and graduate students are those that offer versatility, ease of use, and robust capabilities to handle complex tasks. From MATLAB and TensorFlow to AutoCAD and SolidWorks, each tool has unique features that cater to different aspects of engineering education and research. By leveraging these tools, students can enhance their learning experience, improve their problem-solving skills, and stay ahead in the ever-evolving field of engineering. Whether you are an undergraduate just starting out or a graduate student diving deep into specialized research, these AI tools are indispensable for your academic and professional growth.
0 notes
Text
How to Get the Most Out of V-Ray Assignment Help: Tips and Resources

In the realm of 3D rendering and visualization, V-Ray stands out as one of the most powerful and versatile tools available. Whether you're a student tackling complex assignments or a professional enhancing your skills, mastering V-Ray can significantly boost your ability to create photorealistic renderings. However, understanding and utilizing V-Ray effectively can be challenging. This is where V-Ray assignment help comes into play. Here’s how to maximize the benefits of such assistance, along with tips and resources to help you excel in your 3D projects.
Understand Your Assignment Requirements
Before seeking V-Ray assignment help, it’s crucial to have a clear understanding of your assignment’s requirements. Take time to thoroughly read the assignment brief and identify key objectives. Are you required to create a specific type of scene, apply certain textures, or render images with particular lighting conditions? Knowing exactly what is expected will help you communicate your needs more effectively to your assignment help provider.
Leverage Professional Expertise
One of the significant advantages of V-Ray assignment help is access to professional expertise. Experienced professionals can provide valuable insights into best practices, advanced techniques, and troubleshooting strategies. When working with a service like BookMyEssay, you gain access to experts who can guide you through complex processes, ensuring that your work meets high standards of quality.
Explore Online Resources and Tutorials
In addition to personalized help, there are numerous online resources and tutorials available to enhance your V-Ray skills. Websites like YouTube, Udemy, and Coursera offer comprehensive tutorials ranging from beginner to advanced levels. Utilizing these resources alongside professional help can deepen your understanding of V-Ray’s features and functionalities.
Utilize Forums and Community Support
Engaging with online forums and communities can also be beneficial. Platforms like Reddit, CGTalk, and various V-Ray-specific forums provide a space to ask questions, share experiences, and receive feedback from peers and experts. These interactions can provide practical solutions to common problems and expose you to new techniques and workflows.
Implement Feedback and Revisions
When working with V-Ray assignment help, be open to feedback and revisions. Constructive criticism from experts can significantly improve the quality of your work. Take note of their suggestions, implement the recommended changes, and ask for further clarification if needed. This iterative process helps refine your skills and ensures that your final submission is of the highest standard.
Practice Regularly
Mastering V-Ray requires practice. Regularly working on projects and experimenting with different features will help you become more proficient. Set aside time to practice outside of your assignments. The more you work with V-Ray, the more comfortable you’ll become with its tools and capabilities, which will enhance your overall proficiency.
Integrate with Other Tools
V-Ray is often used in conjunction with other software such as AutoCAD, SketchUp, and 3ds Max. Understanding how V-Ray integrates with these tools can improve your workflow and efficiency. Seek help with these integrations if necessary, and explore resources that cover the compatibility and best practices for using V-Ray with other software.
Apply What You Learn to Other Areas
The skills and techniques learned through V-Ray assignment help can be applied to other areas of your academic and professional life. For instance, if you’re also working on Visual Basic assignment help, the problem-solving and technical skills gained from V-Ray can be beneficial. Similarly, if you’re handling Marketing assignments or other subjects, the ability to present complex information visually can enhance your work.
Invest in Quality Assignment Help Services
Choosing the right assignment help service is crucial. Services like BookMyEssay offer specialized assistance not only for V-Ray assignments but also for a range of academic and professional needs. Whether you need help with Visual Basic assignments, Marketing assignment help, or even buying essay papers, investing in a reputable service can ensure that you receive high-quality support tailored to your specific requirements.
Stay Updated with Industry Trends
The field of 3D rendering and visualization is constantly evolving. Staying updated with the latest trends and advancements in V-Ray and related technologies will keep your skills relevant and competitive. Follow industry blogs, attend webinars, and participate in workshops to remain informed about new features and best practices.
Conclusion
Getting the most out of V-Ray assignment help involves a combination of understanding your requirements, leveraging professional expertise, utilizing online resources, engaging with communities, and applying feedback. By integrating these strategies and investing in quality help from services like BookMyEssay, you can enhance your V-Ray skills and produce exceptional 3D renderings. Remember, the knowledge and techniques you gain through V-Ray assignments can benefit various other areas of your academic and professional journey. Embrace the learning process, practice regularly, and stay connected with industry advancements to continue growing as a proficient 3D artist.
#V Ray Assignment Help#Visual Basic Assignment Help#Marketing assignment help#Buy Essay Paper Writing help
0 notes
Text
Difference Between AutoCAD and CATIA: Which is Better CAD Tool?
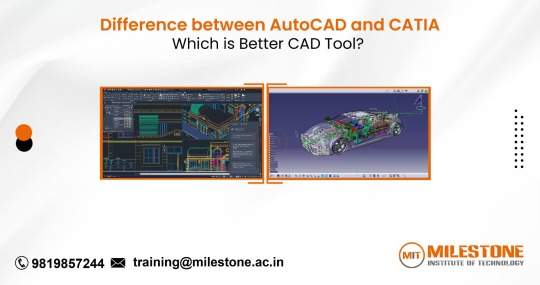
When it comes to Computer-Aided Design (CAD) tools, AutoCAD and CATIA stand out as two of the most prominent software options in the industry. Both tools are renowned for their robust capabilities, but they serve distinct purposes and excel in different areas. If you're trying to determine which CAD tool is best suited for your needs, understanding Catia vs AutoCAD key differences can guide your decision. In this blog, we'll explore the features, strengths, and typical applications of AutoCAD and CATIA to help you make an informed choice.
AutoCAD: The Versatile Workhorse
AutoCAD, developed by Autodesk, has been a staple in the CAD industry since its inception in 1982. It is renowned for its versatility and broad applicability across various industries, including architecture, engineering, and construction (AEC). Here are some of its standout features:
1. 2D Drafting and 3D Modeling: AutoCAD excels in 2D drafting, offering a range of tools for creating detailed floor plans, technical drawings, and schematics. While its 3D modeling capabilities are not as advanced as CATIA’s, AutoCAD still provides essential tools for creating and manipulating 3D models. This makes it suitable for projects that require a combination of 2D and basic 3D designs.
2. User-Friendly Interface: One of AutoCAD's significant advantages is its user-friendly interface. Its tools and features are relatively easy to learn and use, making it accessible for both beginners and experienced designers. Autodesk also offers extensive online resources, tutorials, and a large community that can assist with troubleshooting and tips.
3. Compatibility and Integration: AutoCAD supports various file formats and integrates well with other Autodesk products, such as Revit and Civil 3D. This compatibility is particularly beneficial for collaborative projects involving different software tools. Additionally, AutoCAD's widespread adoption means that file sharing and communication with other professionals are generally smooth.
4. Customization and Automation: AutoCAD allows for a high degree of customization through AutoLISP, VBA, and .NET programming. Users can create custom scripts and automation to streamline repetitive tasks, which can significantly enhance productivity.
CATIA: The Advanced Design Powerhouse
CATIA, developed by Dassault Systèmes, is renowned for its advanced capabilities in 3D design and is widely used in industries such as aerospace, automotive, and industrial design. It offers a suite of powerful tools tailored to complex design and manufacturing processes. Here’s what sets CATIA apart:
1. Advanced 3D Modeling and Simulation: CATIA excels in advanced 3D modeling and simulation. Its robust surface modeling, parametric design, and generative shape design tools make it ideal for creating intricate and highly detailed models. CATIA is particularly strong in handling complex geometries and assemblies, which is crucial for industries with demanding design requirements.
2. Integrated Product Lifecycle Management (PLM): CATIA is integrated with Dassault Systèmes' PLM solutions, offering comprehensive management of the entire product lifecycle. This integration provides tools for product design, simulation, and manufacturing, all within a unified platform. It’s particularly useful for managing complex projects and coordinating between different teams.
3. Industry-Specific Solutions: CATIA offers specialized tools and modules tailored to specific industries. For example, the automotive and aerospace industries benefit from CATIA’s advanced capabilities in creating and managing complex parts and assemblies. This industry-specific focus allows for optimized workflows and better alignment with sector-specific standards.
4. High-Precision Design: CATIA’s tools are designed for high precision and accuracy, making it ideal for projects that require detailed and exact design specifications. This precision is essential for industries where design errors can lead to significant costs or safety issues.
Choosing the Right Tool
Deciding between AutoCAD and CATIA depends largely on your specific needs and the nature of your projects:
For General Drafting and Basic 3D Modeling: If your work primarily involves 2D drafting with occasional 3D modeling, AutoCAD’s versatility and ease of use make it an excellent choice. It’s also a good fit if you need a tool that integrates well with other Autodesk products and provides robust support and community resources.
For Complex 3D Design and Industry-Specific Applications: If your work involves intricate 3D modeling, simulation, or product lifecycle management, CATIA is likely the better option. Its advanced features and industry-specific tools cater to complex design needs, especially in sectors like aerospace and automotive.
Ultimately, both AutoCAD and CATIA are powerful CAD tools with their own strengths and specializations. By evaluating the specific requirements of your projects and considering the features offered by each software, you can choose the CAD tool that aligns best with your needs and enhances your design capabilities.
0 notes
Text
Discover Free CAD Software Solutions for Designers
Discover free CAD software solutions tailored for designers seeking powerful tools without financial investment. These options provide robust features for both 2D drafting and 3D modeling, catering to various design needs. From intuitive interfaces like TinkerCAD for beginners to advanced capabilities of FreeCAD and LibreCAD, designers can create detailed plans and prototypes efficiently. Explore these alternatives to AutoCAD to enhance creativity and productivity without compromising on quality or functionality, making high-quality design accessible to all aspiring designers and professionals alike.
Overview of Free CAD Software Solutions
Explore a comprehensive overview of free CAD software solutions tailored for designers. Discover versatile tools that cater to various design needs, from 2D drafting to complex 3D modeling, without the financial investment of premium software.
Advantages of Using Free CAD Software
Learn about the advantages of opting for free CAD software, including cost-effectiveness, accessibility, and the ability to experiment with different design tools and techniques without upfront expenses.
Top Free CAD Software Tools for Designers
Explore top free CAD software tools like FreeCAD, LibreCAD, and SketchUp, each offering unique features such as parametric modeling, precise 2D drafting, and intuitive 3D modeling interfaces suitable for diverse design projects.
Features to Look for in Free CAD Software
Discover essential features to consider when selecting free CAD software, including usability, compatibility with industry standards, advanced modeling capabilities, and support for plugins or extensions to enhance functionality.
Choosing the Right Free CAD Software for Specific Design Needs
Understand how to choose the right free CAD software based on specific design needs, whether it's architectural drafting, mechanical engineering, product design, or industrial prototyping, ensuring optimal tool selection for project success.
Community Support and Resources for Free CAD Software Users
Explore the importance of community support and available resources for free CAD software users, including forums, tutorials, and user communities that provide valuable insights, troubleshooting assistance, and shared knowledge.
Tips for Getting Started with Free CAD Software
Gain practical tips for getting started with free CAD software, including installation guides, basic tutorials, workflow optimization techniques, and recommended learning resources to accelerate proficiency and maximize design potential.
Conclusion
Exploring free CAD software solutions offers designers valuable tools without financial barriers. Options like FreeCAD, LibreCAD, and others provide robust capabilities for 2D drafting, 3D modeling, and simulation, catering to diverse design needs. These platforms empower designers to innovate, prototype, and refine their creations with intuitive interfaces and community support. Whether for hobbyists, students, or professionals, leveraging its fosters creativity and skill development while ensuring projects are executed efficiently. Embracing these tools not only expands design possibilities but also encourages collaboration and knowledge-sharing within the global design community, driving continuous innovation in the field.
0 notes
Video
youtube
Suspension System in Autodesk Inventor || Inventor Tutorials || Autodesk...
#youtube#autodesk inventor drawing tutorial beginner autocad inventor 2022 tutorial autocad 3d mechanical drawing tutorial autodesk inventor 3d model
0 notes
Text

📣 Attention all creatives! 🎨
Are you interested in learning Adobe Illustrator? Do you want to master the art of vector graphics and bring your ideas to life? Look no further! 🌟
I’ve curated a FREE playlist of comprehensive video tutorials that will guide you through the ins and outs of Adobe Illustrator. From basic tools to advanced techniques, these videos have got you covered! 🎥
What’s more? You can download Adobe Illustrator for FREE and start practicing right away! 💻
youtube
📣 Attention all creatives! 🎨
Are you interested in learning Adobe Illustrator? Do you want to master the art of vector graphics and bring your ideas to life? Look no further! 🌟
Class 1 = Installation of illustrator How to Install Adobe illustrator Step by Step OnlineTrainingsWorld
I’ve curated a FREE playlist of comprehensive video tutorials that will guide you through the ins and outs of Adobe Illustrator. From basic tools to advanced techniques, these videos have got you covered! 🎥
Watch and Learn Adobe Illustrator Link Blow
What’s more? You can download Adobe Illustrator for FREE and start practicing right away! 💻
#onlinetrainingsworld, #Adobeillustrator, #learnadobeillustrator, #illustratormagic, In this detailed tutorial, learn the step-by-step process of installing Adobe Illustrator. Whether you're a beginner or looking to enhance your skills, this video will walk you through the essential tools and techniques needed to create stunning designs using Adobe Illustrator.
Welcome to Basic Setting Your Workspace in Adobe Illustrator 2024 Class 2 by #OnlineTrainingsWorld. This comprehensive playlist is perfect for beginner students eager to learn photo editing from basic to advanced levels. Dive into the full course for mastering Adobe Photoshop, a powerful software that offers endless creative possibilities.
#illustratoradobeillustrator, #illustratorbyadobe, #adobeillustratoradobe, #adobeillustratorillustrator, #adobeillustratoradobeillustrator, #adobeandillustrator, #adobesoftwareillustrator, #adobeadobeillustrator, #adobesystemsadobeillustrator, #adobeillustratorsoftware, #adobeillustrator, #adobeillustratorfreeware, #adobeillustratorfree, #adobeillustratorsoftwareprice, #adobeillustratorcost, #adobeillustratorprice, #adobeillustratorforfree, #illustratoradobefree, #adobeillustratorprices, #costadobeillustrator
#bloggersonlinetrainings, #grapexels, #onlinetrainingsworld,
For more details, visit the provided links for software downloads and additional resources. This tutorial covers everything from basic tools in Illustrator to advanced use of effect tools and blend tool. Explore logo design tutorials for beginners, learn how to add color, create vector blend flowers, and more. Enhance your skills with step-by-step guidance on drawing shapes, utilizing the pen tool, and mastering the selection tool in Adobe Illustrator.
Join the community of Youtube and Telegram
t@OnlineTrainingsWorld
#adobeillustrator #adobeillustrator #adobeillustration #adobeillustrators #AdobeIllustratorCC #adobeillustratorcc #adobeillustratortips #adobeillustratorcourse #adobeillustratordraw #adobeillustratortutorial #adobeillustratorindonesia
#Best4YouByOnlineTrainingsWorld, and other creative minds. Discover essential tips and tricks for graphic design, digital design, and creative workspace organization. Whether you're new to Adobe Illustrator or seeking advanced training, this tutorial series has something for everyone.
Connect with us on social media platforms like Facebook, Twitter, Tiktok, and more for updates on upcoming tutorials and design tips. Subscribe to our channel for more tutorials and helpful resources. Thank you for your support, and happy designing!
--------------------------------------------------------------------------------------------
Social account Details
Heylink.me
Facebook
Twitter
Tiktok
Linkedin
https://www.linkedin.com/in/onlinetrainingsworld
OK.Ru
Tumblr
Vk.com
So why wait? Dive into the world of digital design today! Click on the link to access my video playlist and let’s embark on this creative journey together! 🚀
Remember, every expert was once a beginner. Start your journey today and unleash your creativity with Adobe Illustrator! 💪
#AdobeIllustrator #LearnForFree #DesignYourWorld
#illustration#adobe illustrator#illustrators on tumblr#art on tumblr#illustrative art#illustrator#drawing#Youtube
0 notes
Text
Transforming Images with Photoshop: A Comprehensive Tutorial
🎨 Dive into the world of creative transformations with our comprehensive Photoshop tutorial! 🖼️ Unlock the secrets to seamlessly morphing images, from basic enhancements to mind-blowing edits. 💡 Learn step-by-step techniques for adjusting colors, adding filters, and mastering advanced tools. 🚀 Elevate your design skills and bring your visions to life with professional-grade transformations. 🌟 Whether you're a beginner or seasoned designer, this tutorial is your go-to guide for unleashing the full potential of Photoshop. 📸 Don't miss out on this visual journey – discover the magic of transforming images and watch your creativity soar! 🔗
#PhotoshopTutorial#ImageTransformation#CreativeDesign 🎉#attitude academy#enrollnow#learnwithattitudeacademy#bestcourse#attitude tally academy
0 notes
Text
Check out this tutorial, aims to provide beginners with a step-by-step guide on how to use AutoCAD for PV design. Read blog!
0 notes
Text
Navigating the World of CAD: A Guide to Free Tutorials
Navigating the World of CAD: A Guide to Free Tutorials
Computer-Aided Design (CAD) has revolutionized the field of design and engineering, offering a platform for creating precise and complex designs with ease. For those looking to master this powerful tool, a variety of free tutorials are available online. Here are some of the top picks:To get more news about free cad tutorial, you can visit shine news official website.
myCADsite: myCADsite offers free online AutoCAD tutorials for both new and experienced users with no registration needed4.
Cadalyst: Cadalyst provides a wide array of AutoCAD and other CAD software tutorials, tips, and training resources4.
CADTutor: CADTutor offers free tutorials and articles for AutoCAD, ds Max and associated applications4.
Tutorial 45: Tutorial 45 offers a range of tutorials covering different aspects of AutoCAD.
Ellen Finkelstein: Ellen Finkelstein’s website offers numerous tips, techniques, and tutorials for various versions of AutoCAD.
AutoCAD tutorial by Computer Aided Design Guide: This tutorial covers the basics of AutoCAD in easy-to-understand language.
The CAD Setter Out: The CAD Setter Out offers practical tips, advice, and tutorials to help users get the most out of their CAD software.
Draftperson.net: Draftperson.net provides a set of free AutoCAD tutorials, tips and tricks, and articles.
In addition to these resources, there are also comprehensive video tutorials available on YouTube. For instance, FreeCAD Academy offers a multi-part FreeCAD 0.9 Basic Course for beginners. This course covers everything from downloading and setting up FreeCAD to creating your first part with sketches. Another resource is the “AutoCAD for Beginners” course offered by freeCodeCamp.org on YouTube. This university-level course teaches basic architectural D drafting techniques using Autodesk AutoCAD.
These free resources provide an excellent starting point for anyone looking to learn or improve their CAD skills. Whether you’re a beginner just starting out or an experienced user looking to brush up on your skills, these tutorials offer valuable insights into the world of CAD.
1 note
·
View note
Text
How to Start Isometric Drawing in AutoCAD
Isometric drawing is a valuable skill for anyone working in fields like engineering, architecture, or design. It allows you to create three-dimensional representations of objects with ease and precision. AutoCAD, a popular computer-aided design software, offers powerful tools for creating isometric drawings. In this article, we'll guide you through the process of getting started with isometric drawing in AutoCAD.
Understanding Isometric Drawing
Before diving into the practical aspects, it's essential to grasp the concept of isometric drawing. In simple terms, isometric drawing is a method of representing a three-dimensional object on a two-dimensional surface. Unlike traditional 2D drawings, isometric drawings provide a realistic perspective, making it easier to visualize complex structures.
Benefits of Isometric Drawing
Enhanced Visualization: Isometric drawings give a more realistic view of your designs, making it easier to identify potential issues and improvements.
Accurate Measurements: It allow for precise measurements and calculations, critical in engineering and construction.
Improved Communication: Isometric drawings are universally understood, making them an effective way to convey your ideas to others.

Setting up AutoCAD for Isometric Drawing
Before you start creating isometric drawings in AutoCAD, you need to configure the software for this specific purpose.
Step 1: Open AutoCAD
Launch AutoCAD on your computer, and ensure you have a new drawing or an existing one ready to work on.
Step 2: Set Units
Go to the "Units" command and ensure your units are set correctly. Isometric drawings often use metric or imperial units, depending on your project's requirements.
Step 3: Enable Isometric Snap
Type "SNAPSTYL" in the command line and set it to "Isometric."
Step 4: Set Isoplane
Use the "ISOPLANE" command to set your drawing plane to isometric. AutoCAD offers three isoplanes: top, right, and left. Choose the one that suits your needs.
Creating Isometric Drawings
With AutoCAD properly configured, you can now start creating isometric drawings.
Step 1: Draw Basic Shapes
Begin by drawing the basic shapes of your object. Use commands like "LINE," "CIRCLE," and "RECTANGLE" to create the framework.
Step 2: Use Isometric Snap
Ensure that your cursor snaps to the isometric gridlines. This helps maintain the correct angles and alignment.
Step 3: Extrude Shapes
To give your drawings depth, use the "EXTRUDE" command to turn 2D shapes into 3D objects. Specify the height or extrusion value as needed.
Step 4: Modify and Refine
AutoCAD offers various editing tools to modify your isometric drawings. Use commands like "MOVE," "ROTATE," and "SCALE" to make adjustments.

Tips for Isometric Drawing
Practice Regularly: Isometric drawing can be challenging at first, but consistent practice will improve your skills.
Use Layers: Organize your drawings using layers to make it easier to manage and edit individual elements.
Keyboard Shortcuts: Learn and use AutoCAD keyboard shortcuts to streamline your workflow.
FAQs (Frequently Asked Questions)
What is the main advantage of isometric drawing in AutoCAD?
Isometric drawings provide a more realistic view of objects, making it easier to understand complex designs.
Do I need prior experience in AutoCAD to start isometric drawing?
While some familiarity with AutoCAD is helpful, this article provides a beginner-friendly guide to get you started.
Can I create isometric drawings for both metric and imperial units in AutoCAD?
Yes, AutoCAD allows you to work with both metric and imperial units, depending on your project's requirements.
Are there any AutoCAD plugins or add-ons that can enhance isometric drawing capabilities? Yes, there are several plugins and add-ons available for AutoCAD that can simplify the process of creating isometric drawings.
Where can I find additional resources to improve my isometric drawing skills in AutoCAD? You can explore online tutorials, forums, and AutoCAD documentation to further enhance your isometric drawing skills.
Incorporating isometric drawing into your AutoCAD repertoire will undoubtedly enhance your ability to create precise and visually appealing designs. So, start practicing and exploring the creative possibilities that isometric drawing offers!
Absolutely, let's continue with more information on advanced techniques and additional resources for mastering isometric drawing in AutoCAD.

Advanced Techniques in Isometric Drawing
Once you've got the basics down, you can delve into more advanced techniques to take your isometric drawing skills to the next level.
1. Isometric Circles and Arcs
Drawing perfect circles and arcs in isometric projection can be tricky. AutoCAD offers commands like "ELLIPSE" and "ARC" to create these shapes accurately. Practice using these commands to add curved elements to your drawings.
2. 3D Models and Renderings
AutoCAD allows you to create detailed 3D models and renderings of your isometric drawings. You can apply materials, textures, and lighting effects to make your designs appear even more realistic.
3. Isometric Text and Dimensions
Incorporate text and dimensions into your drawings to provide important information. AutoCAD provides tools like "MTEXT" and "DIMENSION" for this purpose. Ensure that your text and dimensions align with the isometric grid.
4. Hatching and Fills
Use hatching and fills to distinguish different materials or areas within your isometric drawings. This helps in conveying information effectively.
Additional Resources
To further enhance your isometric drawing skills in AutoCAD, you can explore the following resources:
1. AutoCAD Tutorials
AutoCAD offers a wide range of tutorials on their official website. These tutorials cover various aspects of the software, including isometric drawing techniques.
2. Online Courses
Numerous online platforms offer courses specifically tailored to AutoCAD and isometric drawing. Websites like Coursera, Udemy, and LinkedIn Learning have courses for all skill levels.
3. Community Forums
Joining AutoCAD user forums and communities can be invaluable. You can ask questions, share your work, and learn from experienced users. Websites like Autodesk's own community forum are excellent places to start.
4. YouTube Tutorials
YouTube is a treasure trove of AutoCAD tutorials. Many skilled AutoCAD users create video tutorials that walk you through various aspects of the software, including isometric drawing techniques.
5. AutoCAD Documentation
Don't forget to explore AutoCAD's official documentation. It provides in-depth information on features, commands, and best practices.
Conclusion
Isometric drawing in AutoCAD is a valuable skill that can open up numerous opportunities in various industries. Whether you're an architect, engineer, or designer, mastering isometric drawing can significantly enhance your ability to communicate and visualize complex ideas.
Start your journey into the world of isometric drawing in AutoCAD today. With dedication, practice, and the right resources, you can become proficient in creating stunning, three-dimensional representations of your designs. Happy drawing!
Isometric drawing in AutoCAD opens up a world of possibilities for designers and engineers. It allows you to create detailed and realistic representations of objects and structures. By following the steps outlined in this article and practicing regularly, you'll master the art of isometric drawing in AutoCAD in no time.
You Read More blogs on AutoCAD India's Blog
0 notes
Text

Assembling a drafting table doesn't have to be a daunting task, even for beginners! Our step-by-step assembly instructions will have you set up and ready to work in no time. Check out our latest tutorial from AutoCAD India now!
0 notes
Video
youtube
Just learned how to master #AutoCAD #isometricdrawing with this step-by-step tutorial for beginners! Perfect for engineers, designers and students. Improve your skills now and create professional-quality drawings
0 notes
Video
youtube
Twisted Profile in Autodesk Inventor || Autodesk Inventor Complex Drawin...
#youtube#autodesk inventor drawing tutorial beginner autocad inventor 2022 tutorial autocad 3d mechanical drawing tutorial autodesk inventor 3d model
0 notes
Last Seen Blogs

medeazhealth
Medeaz

marcinzelek
Organizacja Pracy Zdalnej

simpleplanx3
You still make my crazy little heart go BOOM!

johnsendyer09
The Journaling of Bendixen 638
