#calligraphyflourishes
Text
Calligraphy Pen Techniques: Master the Art

Calligraphy Pen Techniques: Essential Skills for Beautiful Lettering
Calligraphy is a beautiful art form that can transform your writing into a visual masterpiece. Whether you're a beginner or looking to refine your skills, mastering calligraphy pen techniques is the key to improving your handwriting and creating stunning lettering styles. In this article, we'll explore tips and tricks for choosing the right materials, practicing various pen strokes, and enhancing your ink flow to achieve impressive results.
Key Takeaways:
- Mastering calligraphy pen techniques can elevate your writing into a visual masterpiece.
- Choose the right calligraphy pen that suits your style and desired effects.
- Practice different pen strokes and incorporate flourish techniques to create beautiful lettering styles.
- Ensure a steady ink flow for smooth and effortless writing in calligraphy.
- Explore different lettering styles and expand your calligraphy toolkit as your skills progress.
Choosing the Right Calligraphy Pen

When it comes to calligraphy, the choice of pen is crucial. The right pen can make a significant difference in your lettering and overall calligraphy technique. Consider starting your calligraphy journey with a classic graphite pencil to practice your lettering before moving on to calligraphy pens.
Fountain pens and felt-tip pens are popular options for creating fine lines and precise pen strokes in calligraphy. Fountain pens offer smooth ink flow, while felt-tip pens provide consistent results. Experiment with different nib sizes, flexibility, and ink compatibility to find the pen that suits your style and desired effects.
Ensuring a steady ink flow is essential for achieving smooth and consistent lines in calligraphy. Practice proper pen maintenance, regularly cleaning your pen to prevent any clogs or interruptions in the ink flow. With the right calligraphy pen and consistent practice, you'll be able to create stunning lettering styles and elevate your writing into a visual masterpiece.
Table: Types of Calligraphy Pens
Pen Type
Features
Recommended for
Fountain Pen
Smooth ink flow, customizable nibs
Intermediate to advanced calligraphers
Felt-tip Pen
Precise strokes, consistent results
Beginner to intermediate calligraphers
Dip Pen
Flexible nibs, wide range of ink compatibility
Advanced calligraphers
Mastering Pen Strokes and Techniques

Mastering different pen strokes is essential in the art of calligraphy. By practicing various brush lettering techniques, you can create beautiful and expressive lettering styles that captivate the eye. Varying the height, pressure, and shape of your pen strokes will allow you to achieve different effects and create unique compositions.
Experiment with thin upstrokes and thick downstrokes to add contrast and depth to your writing. The flexibility of your pen's tip plays a crucial role in achieving the desired stroke width variation. By applying more pressure on your downstrokes, you can create elegant and bold lines, while lighter pressure on your upstrokes will produce delicate and fine lines.
Incorporating flourish techniques is another way to add flair and personality to your calligraphy. Loops, curls, and serifs are all examples of flourish techniques that can enhance the overall elegance of your lettering. Introduce flourishes to specific letters or words to create visual interest, or incorporate them throughout your entire piece for a flowing and intricate composition.
Practicing Different Pen Strokes
Here are some brush lettering techniques and pen strokes to practice:
- Thin upstrokes: Lightly apply pressure to create thin lines.
- Thick downstrokes: Apply more pressure to create bold lines.
- Varying pressure: Experiment with applying different levels of pressure for varied line widths.
- Loop flourish: Add loops to your letters for an elegant touch.
- Curl flourish: Incorporate curls into your lettering to create a playful and whimsical style.
Remember, mastering pen strokes and techniques takes time and practice. Be patient with yourself and enjoy the process of honing your skills. With dedication and perseverance, you'll soon create calligraphy that truly stands out.
Enhancing Ink Flow for Smooth Writing
When it comes to calligraphy, achieving a consistent ink flow is crucial for smooth and effortless writing. A steady and uninterrupted flow of ink ensures that your pen glides smoothly across the paper, resulting in clean and precise strokes. Here are some tips to enhance the ink flow in your calligraphy pen techniques:
- Choose the right ink: Opt for high-quality inks that are specifically formulated for calligraphy. These inks are designed to have optimal viscosity and flow, ensuring smooth writing. Experiment with different types of inks such as fountain pen inks, India inks, or even homemade inks to find the one that suits your style.
- Clean and maintain your pen: Regularly cleaning your calligraphy pen is essential to prevent any clogs or interruptions in the ink flow. Rinse the pen nib with warm water or a mild cleaning solution after each use to remove any dried ink or debris. Additionally, make sure to properly store your pen to protect it from dust and ink buildup.
- Adjust your writing angle: The angle at which you hold your pen can greatly affect the ink flow. Experiment with different angles to find the one that allows the ink to flow smoothly from the nib. Avoid holding the pen too upright or too slanted, as it can cause ink flow issues.
- Keep the pen nib moist: If you're using a dip pen, ensure that the nib stays moist throughout your writing session. Dip the nib in ink frequently or use a damp cloth to keep it moist. Dry nibs can result in scratchy and uneven lines.
By implementing these techniques, you can enhance the ink flow in your calligraphy pen and achieve a smooth and effortless writing experience. Remember, practice and experimentation are key to finding the perfect balance for your individual calligraphy style.
Table: Comparison of Different Calligraphy Inks
Ink Type
Viscosity
Flow
Drying Time
Waterproof
Fountain Pen Ink
Medium to High
Smooth
Varies
No
India Ink
High
Rich
Fast
Yes
Sumi Ink
High
Flowing
Varies
No
Homemade Ink
Varies
Dependent on Recipe
Varies
Dependent on Ingredients
“The ink flow in calligraphy is like the rhythm of a dance. It should be smooth, flowing, and effortless. Mastering the ink flow is the key to creating beautiful and harmonious lettering.”
Experimenting with Different Inks
Part of enhancing the ink flow in calligraphy involves experimenting with different types of inks. Each ink has its own unique characteristics and can produce varying effects on the paper. By exploring a range of inks, you can add depth, vibrancy, and uniqueness to your calligraphy creations. Consider trying out watercolor inks for a delicate and translucent look, or metallic inks for an eye-catching shimmer. Don't be afraid to mix different colors or create custom ink blends to achieve your desired effect.
Remember, the ink flow is an integral part of the calligraphy process. By understanding the importance of ink choice, cleanliness, writing angle, and nib moisture, you can enhance your ink flow and create stunning calligraphy pieces that truly stand out.
Exploring Different Lettering Styles

Calligraphy offers a wide range of lettering styles to explore. From traditional styles such as Copperplate and Spencerian to more modern and experimental forms of calligraphy, there are endless possibilities to unleash your creativity. Practice different lettering styles by studying calligraphy alphabets and replicating them in your own writing. Don't be afraid to add your own unique touch and experiment with combining different styles to create a signature look.
To help you navigate the world of lettering styles, here are a few popular options:
- 1. Modern Calligraphy: This style embraces a more relaxed and informal approach to calligraphy, often incorporating decorative elements and flourishes.
- 2. Blackletter: Also known as Gothic calligraphy, this style features bold, angular letterforms that are commonly associated with medieval manuscripts.
- 3. Italic: This elegant style emphasizes fluidity and slanted letterforms, with a focus on maintaining consistent spacing and rhythm.
- 4. Brush Calligraphy: Utilizing a brush pen, this style creates thick and thin strokes, resulting in bold and dynamic lettering.
Remember, the key to mastering different lettering styles is practice. Take the time to experiment with various techniques and find the styles that resonate with you the most. Whether you prefer classic elegance or contemporary flair, there's a lettering style out there that will allow you to express your unique artistic vision.
Table: Comparison of Different Lettering Styles
Lettering Style
Description
Key Features
Modern Calligraphy
A contemporary take on calligraphy, often characterized by decorative flourishes and a more relaxed approach.
- Emphasis on individuality and creativity
- Incorporation of modern design elements
- Use of non-traditional letterforms
Blackletter
A traditional style with bold, angular letterforms, commonly associated with medieval manuscripts.
- High contrast between thick and thin strokes
- Elaborate and intricate letterforms
- Gothic aesthetic
Italic
An elegant style characterized by slanted letterforms and a focus on rhythm and spacing.
- Fluid and graceful lettering
- Consistent slant and angle
- Balance between thick and thin strokes
Brush Calligraphy
A dynamic style created with a brush pen, resulting in bold and expressive lettering.
- Thick and thin strokes
- Gestural and energetic
- Versatile for a range of artistic effects
Exploring different lettering styles is an exciting journey within the world of calligraphy. So, grab your pen, experiment with various techniques, and let your imagination guide you as you create beautiful and unique lettering that reflects your personal style.
Tips for Calligraphy Practice

Consistent practice is essential for improving your calligraphy skills and developing your own unique lettering style. Here are some tips to help you make the most of your calligraphy practice:
Set Aside Dedicated Time
Make it a priority to set aside dedicated time for calligraphy practice. Whether it's 10 minutes a day or an hour a week, consistent practice will help you build muscle memory and improve your pen control. Treat your practice sessions as a form of meditation, allowing yourself to fully immerse in the art of calligraphy.
Start with Basic Exercises
Begin your practice sessions with basic exercises to warm up your hand and familiarize yourself with different pen strokes. Write out the alphabet in both upper and lower case, focusing on maintaining consistent letter shapes and stroke thickness. This will help you develop a solid foundation for more complex lettering styles.
Seek Inspiration and Feedback
Expand your knowledge and refine your technique by seeking inspiration from calligraphy books, online resources, and workshops. Study the work of experienced calligraphers and try to replicate their lettering styles. Additionally, consider joining online communities or participating in calligraphy challenges to receive valuable feedback and connect with fellow enthusiasts.
Remember, calligraphy is a journey of continuous growth and improvement. Embrace the practice, explore different lettering styles, and let your creativity flourish. With dedication and patience, you'll be able to create stunning calligraphy pieces and improve your handwriting along the way.
Embracing the Art of Flourishing
https://www.youtube.com/watch?v=H6YQwLqWD8Q
Flourishing is a captivating technique within calligraphy that allows you to add decorative elements and embellishments to your writing, transforming it into a work of art. By incorporating flourish techniques, such as loops, curls, and serifs, you can elevate your lettering and bring a touch of elegance to your compositions.
To truly embrace the art of flourishing, it's important to find a balance between adding decorative elements and maintaining readability. Whether you choose to incorporate flourishes into specific letters, words, or throughout your entire piece, it should enhance the overall composition without overpowering the text.
"Flourishing adds a sense of flow and grace to your calligraphy, allowing your unique style to shine through," says renowned calligrapher Jane Adams.
One way to start incorporating flourishes into your calligraphy is by studying different examples and practicing various techniques. Look for inspiration from calligraphy books, online resources, and workshops to learn different flourish styles and understand how they can complement your lettering. As you experiment and gain confidence, you'll develop your own personal flair and create a signature look that sets your calligraphy apart.
Flourish Techniques
Description
Loops
Graceful loops can be added to the ascenders and descenders of your letters to create an elegant and flowing composition.
Curls
Curled embellishments can be incorporated into the serifs of your letters, adding a touch of whimsy and playfulness to your calligraphy.
Serifs
Elaborate serifs can be applied to the ends of strokes, providing a sophisticated and intricate detail to your letterforms.
Remember, flourishing is an art form that can take time to master. Regular practice and experimentation will help you refine your skills and develop a keen eye for incorporating flourishes in a way that enhances the overall aesthetics of your calligraphy. So let your creativity flourish and allow your calligraphy to captivate and inspire.
Expanding Your Calligraphy Toolkit
As you delve deeper into the art of calligraphy, you'll find that your creativity knows no bounds. To further enhance your skills and create even more captivating lettering styles, it's time to expand your calligraphy toolkit. Here are some essential materials and tools you can consider adding to your collection:
- Brush Pens: These versatile pens are perfect for creating bold and expressive lettering styles. With their flexible tips, you can achieve both thick and thin strokes, adding depth and personality to your calligraphy.
- Pointed Pens: If precision and intricate details are what you seek, pointed pens are a must-have. These pens come in various nib sizes and allow you to create delicate and refined lettering.
- Paper Varieties: Experimenting with different types of paper can have a significant impact on your calligraphy. Smooth and high-quality papers, such as vellum or hot-pressed watercolor paper, provide optimal surfaces for your ink to glide effortlessly.
- Ink Colors: While black ink is a classic choice, don't be afraid to explore a world of colors. Consider adding a range of ink colors to your collection to add vibrancy and visual interest to your calligraphy.
- Specialized Inks: To truly take your calligraphy to the next level, consider experimenting with specialized inks. Metallic or shimmering inks can add a touch of elegance and uniqueness to your lettering creations.
Remember, each tool and material offers its own unique possibilities, so don't hesitate to mix and match to create your desired effects. Building a well-rounded calligraphy toolkit will give you the freedom to explore various styles and push the boundaries of your creativity.
Sample Brush Pen Comparison
When choosing brush pens for your calligraphy, it's essential to consider factors such as ink flow, flexibility, and overall performance. Here's a comparison table of popular brush pens to help guide your decision-making process:
Brand
Ink Flow
Flexibility
Price Range
Pentel Sign Pen
Medium
Medium
$
Tombow Dual Brush Pen
High
High
$$
Kuretake Zig Clean Color Real Brush
Low
High
$$
Prima Marketing Watercolor Brush Pen
High
Low
$
Keep in mind that this table is just a starting point, and personal preference plays a significant role in choosing the right brush pen for you. Consider your desired effects, budget, and comfort when selecting the perfect brush pen to add to your calligraphy toolkit.
Showcasing Your Calligraphy Creations
Once you've honed your calligraphy skills, it's time to showcase your creations. Sharing your work on social media platforms allows you to connect with a wider audience and gain valuable feedback. Create personalized gifts for friends and family, showcasing your calligraphy skills while spreading joy and appreciation. You can even consider selling your calligraphy art through online platforms or local markets, turning your passion into a source of income.
Participating in calligraphy challenges and joining online communities of fellow calligraphers can provide further opportunities to showcase your work. These platforms offer a supportive and collaborative space where you can receive constructive criticism, exchange ideas, and find inspiration. Engaging in challenges pushes you to explore new techniques and broaden your skill set, contributing to your growth as a calligrapher.
Remember, the journey of calligraphy is a continuous one. Embrace opportunities to learn from others and stay up-to-date with the latest trends and techniques. Workshops, online courses, and calligraphy conferences are excellent resources to expand your knowledge and refine your technique. By actively showcasing your calligraphy creations, you not only inspire others but also gain recognition for your talent and dedication in the calligraphy community.
Table: Online Calligraphy Challenges
Take part in these popular online calligraphy challenges to showcase your skills and connect with a supportive community:
Challenge Name
Website
Description
#CalligraphyChallenge
www.calligraphychallenge.com
A monthly calligraphy challenge with different themes each month.
Read the full article
0 notes
Photo
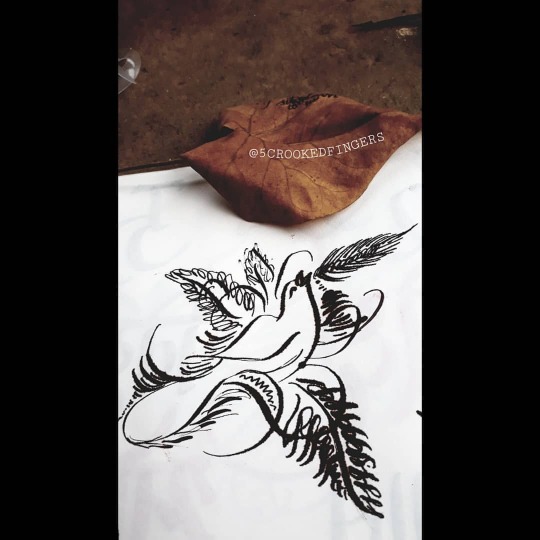
My obsession with bird flourishes~ Part I #birdflourish #birdflourishing #copperplatecalligraphy #copperplatecalligraphypointpen #obliquepen #obliquepencalligraphy #calligraphyflourishes #myobsessionwithbirdfloirishes #birdsofinstagram #birdsart #lineart #5crookedfingers #notkabooter https://www.instagram.com/p/CCdAXlOnPvz/?igshid=oil67w3yp16r
#birdflourish#birdflourishing#copperplatecalligraphy#copperplatecalligraphypointpen#obliquepen#obliquepencalligraphy#calligraphyflourishes#myobsessionwithbirdfloirishes#birdsofinstagram#birdsart#lineart#5crookedfingers#notkabooter
11 notes
·
View notes
Photo

Tonight on #FlourishinPoetry: a little bit of Sylvia Plath. #calligraphy #calligraphyph #script #copperplate #flourishing #calligraphyflourishes #pointedpen #pointedpencalligraphy #poetry #poems #sylviaplath #madgirlslovesong
#script#flourishinpoetry#poems#calligraphyflourishes#calligraphy#flourishing#poetry#madgirlslovesong#copperplate#sylviaplath#pointedpencalligraphy#calligraphyph#pointedpen
23 notes
·
View notes
Photo
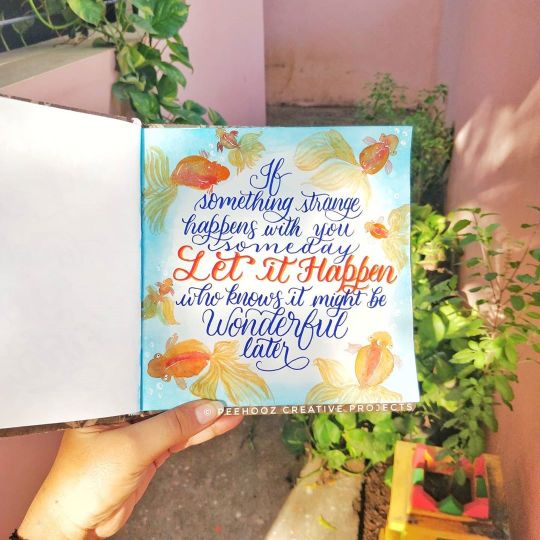
What are the odds? A weirdly beautiful movie I saw lately! It had different concepts packed as one and I absolutely loved it! The music in the entire movie is something that I would love to listen over and over again! A small ode to this beautiful movie that made my quarantine better and gave a wonderful lesson that will last ❤️✨ . . . . @yashaswinidayama @karanvirm @abhaydeol @officialwhataretheodds @netflix_in . . . . . #whataretheodds #netflixshows #netflixandchill #moviequotes #moviesandseries #calligraphyartist #calligraphyflourish #calligraphyaddict #beautifulcalligraphy #watercolorillustrations #goldfishofinstagram #watercoloring #watercolorcalligraphy #watercolorcalligrapher #calligraphyillustration #brushcalligraphy #pentelbrushpen #pentelsignpen #pentelchallenge #lbbchennai #indianillustrator #indiandesigners #indiancalligraphy #indiancalligrapher #indiancalligraphyartist #chennaiartist #watercolorinspiration #thegoodquote #journalxfinitebrains https://www.instagram.com/p/CA3SN-pnGNX/?igshid=1f3a3sumuxr8i
#whataretheodds#netflixshows#netflixandchill#moviequotes#moviesandseries#calligraphyartist#calligraphyflourish#calligraphyaddict#beautifulcalligraphy#watercolorillustrations#goldfishofinstagram#watercoloring#watercolorcalligraphy#watercolorcalligrapher#calligraphyillustration#brushcalligraphy#pentelbrushpen#pentelsignpen#pentelchallenge#lbbchennai#indianillustrator#indiandesigners#indiancalligraphy#indiancalligrapher#indiancalligraphyartist#chennaiartist#watercolorinspiration#thegoodquote#journalxfinitebrains
0 notes
Photo

@amina.of.the.sea forgive your friend who just can't seem to get the ✉ ready 😣😣😣 . . . #moderncalligraphy #calligraphylove #calligraphy #calligraphyquote #whiteinkcalligraphy #drphmartin #bleedproofwhite #flatlay #copperplate #copperplatecalligraphy #flourish #calligraphyflourish #snailmail #cute #goldink http://ift.tt/2veF8vR
1 note
·
View note
Photo
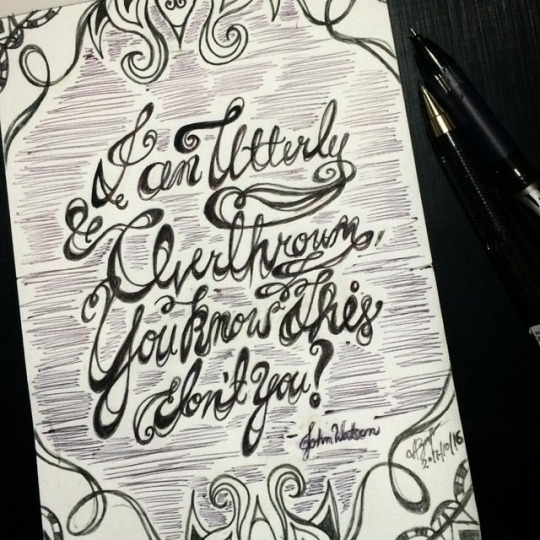
Inktober- day 16 Pilot fine and frixion ballpen on canson doodlepad. I've only been sparingly practicing for about a week now and I gotta say, calligraphy is hard hahaha The quote came from the Johnlock series by PoppyAlexander "Dawn before the rest of the world" on AO3. You can also order it as a hardcopy online(I certainly did hahaha) #LWBallpenCalligraphyChallenge #inktober #GPCWeeklyChallenge #calligraphy #ballpencalligraphy #fauxcalligraphy #practice #beginnercalligraphy #art #artwork #artwork2017 #inktoberph #artph #inktober2017 #flourishing #calligraphyflourishing #johnlock #johnlockfanfic #fanficrec #bbcsherlock #dawnbeforetherestoftheworld #poppyalexander
#inktober2017#johnlockfanfic#bbcsherlock#beginnercalligraphy#fanficrec#flourishing#calligraphy#johnlock#dawnbeforetherestoftheworld#fauxcalligraphy#art#calligraphyflourishing#artwork#practice#ballpencalligraphy#lwballpencalligraphychallenge#poppyalexander#inktober#artwork2017#artph#inktoberph#gpcweeklychallenge
0 notes
Text
Calligraphy Flourishing Styles: Adding Elegance

Calligraphy Flourishing Styles Secrets: Transform Your Handwriting into Art!
Calligraphy flourishes are more than just fancy twists and curls at the edges of letters. They add elegance to your calligraphy and create an opportunity for individual style and experimentation.
Flourishes can be added to both modern and traditional calligraphy styles. It's important to master the basics of calligraphy before delving into flourishing. Practice with a monoline pen or start with a pencil to achieve smooth strokes and understand the basic shapes of flourishes.
Key Takeaways:
- Calligraphy flourishes add elegance and individual style to your writing.
- Master the basics of calligraphy before attempting flourishing.
- Start practicing with a monoline pen or pencil for smooth strokes.
- Flourishes can be added to both modern and traditional calligraphy styles.
- Experiment with different flourishes to enhance your calligraphy compositions.
What Is A Decorative Flourish In Calligraphy?
A decorative flourish in calligraphy refers to the artistic and graceful strokes added to writing to enhance its visual appeal. These flourishes can take various forms, ranging from simple curves and loops to intricate designs where curves intersect. The purpose of adding flourishes is to create a more impressive and elegant piece of calligraphy, allowing for personal style and experimentation. By incorporating flourishes into your calligraphy, you can transform the look of a word or phrase, making it visually captivating.
Mastering decorative flourishes requires attention to detail and an understanding of basic calligraphy techniques. It is important to have a solid foundation in calligraphy before delving into flourishing. Start by practicing with a monoline pen or a pencil to achieve smooth strokes and familiarize yourself with the basic shapes of flourishes. Once you have mastered the fundamentals, you can explore different styles and techniques to create beautiful flourishing styles that enhance the overall composition of your calligraphy.
Calligraphy flourishes are like the graceful dance of an artist's hand on paper, adding a touch of elegance and sophistication to your writing.
Whether you are practicing modern or traditional calligraphy, decorative flourishes can be incorporated into any project. From invitations and envelopes to quotes and artwork, flourishes can elevate the visual impact of your calligraphy. The key is to pay attention to detail, be mindful of the composition, and experiment with different flourished elements. With practice and creativity, you can enhance your calligraphy with beautifully crafted flourishes that leave an unforgettable impression.
Table: Examples of Decorative Flourishes
Style
Description
Curved Flourishes
Simple, flowing curves that add a touch of elegance to letters and words.
Intricate Intersects
Complex designs where curves cross over each other, creating visually captivating patterns.
Flourished Borders
Decorative strokes that frame the calligraphy, adding a sense of completion and sophistication.
Hanging Flourishes
Strokes that extend from certain letters, such as the tails of "y" or "g," adding a sense of movement and grace.
These examples are just a starting point, and as you explore the world of decorative flourishes in calligraphy, you will discover endless possibilities for creating beautiful and unique styles. Let your creativity flow as you experiment with different flourishes, and watch as your calligraphy flourishes with elegance and charm.
Tools and Techniques for Practicing Flourishes

Mastering calligraphy flourishing requires the right tools and techniques. To begin your practice, you'll need a writing utensil such as a monoline pen or a pencil. These tools allow for precise strokes and control, helping you develop muscle memory and achieve smooth lines.
Using practice sheets is essential in honing your flourishing skills. These sheets provide guidelines and letterforms to follow, allowing you to focus on perfecting your flourishes. Additionally, they help you understand the basic shapes and movements involved in creating beautiful flourishes.
Proper pen grip is crucial for consistent and controlled flourishing. Hold the pen lightly between your thumb and index finger, allowing for fluid movement. Experiment with different pen grips to find the one that works best for you.
When it comes to paper and ink, choose options that are compatible with your writing utensil and desired style. Smooth, bleed-resistant paper ensures clean and precise lines, while ink that dries quickly prevents smudging. Tailor your paper and ink choices to suit different project types and personal preferences.
Tools and Techniques for Practicing Flourishes
Benefits
Monoline pen or pencil
Allows for precise strokes and control
Practice sheets
Provides guidelines and letterforms to follow
Proper pen grip
Ensures consistent and controlled flourishing
Calligraphy-friendly paper
Ensures clean and precise lines
Quick-drying ink
Prevents smudging
"The right tools and techniques are essential in the practice of calligraphy flourishing. They provide the foundation for creating beautiful and precise flourishes, allowing you to develop your own unique style." - Anonymous
Modern Calligraphy Flourish Tips
When practicing modern calligraphy flourishing, it's helpful to keep a few tips in mind:
- Start with simple flourishes and gradually increase complexity as you become more comfortable.
- Experiment with different flourish shapes, such as loops, curves, and spirals, to add variety to your compositions.
- Focus on maintaining consistent spacing and rhythm between each flourish and letter.
- Study the work of talented calligraphers and explore different calligraphy styles to gain inspiration and insights into flourishing techniques.
- Practice regularly to develop muscle memory and refine your skills over time.
By incorporating these tips into your practice routine, you'll be on your way to mastering calligraphy flourishing and creating visually stunning pieces of art.
Basic Guidelines for Creating Flourishes

The art of calligraphy flourishing involves adding elegant and decorative strokes to your writing. To create visually appealing and balanced flourishes, it's essential to follow some basic guidelines:
Guideline 1: Base on Ovals
To maintain a fluid and harmonious look, all flourishes should be based on ovals rather than sharp angles. This guideline ensures that the curves of your flourishes flow smoothly and seamlessly with the rest of the calligraphy.
Guideline 2: Crosses at 90-Degree Angles
When incorporating crosses into your flourishes, it's important to ensure that they happen at 90-degree angles. This helps maintain the visual balance and symmetry of your calligraphy, resulting in a more visually pleasing composition.
Guideline 3: Avoid Crossings of Thick Lines
To prevent smudging and maintain visual clarity, it's recommended to avoid crossing two thick lines in your flourishes. By doing so, you can create a cleaner and more refined look. Instead, focus on incorporating thinner lines or crossing thin and thick lines to maintain the overall balance of your composition.
By following these basic guidelines, you can create flourishes that enhance the beauty and elegance of your calligraphy. Let's take a look at some examples of well-executed flourishes:
Flourish Example 1
Flourish Example 2
Flourish Example 3
These examples showcase the application of basic guidelines in creating beautiful and visually captivating flourishes. Use them as inspiration to develop your own unique style and experiment with different flourishes in your calligraphy.
Remember, mastering calligraphy flourishing takes practice and patience. By applying these guidelines and studying examples from talented calligraphers, you can elevate your calligraphy to new heights and create stunning works of art.
Adding Flourishes to Different Parts of Your Calligraphy
Once you have mastered the basics of calligraphy and practiced the art of flourishing, you can start adding flourishes to different parts of your calligraphy to enhance its visual appeal. By strategically placing flourishes, you can create a unique and captivating composition. Here are some popular ways to incorporate flourishes into your calligraphy:
1. End Letter of a Word
Adding a flourish to the end letter of a word is a common technique that adds a touch of elegance and sophistication. This flourish can be as simple as a curved line or as intricate as an elaborate loop. Experiment with different styles to find what best complements your calligraphy and the overall aesthetic you want to achieve.
2. Beginning Letter of a Word
Starting a word with a flourish instantly grabs attention and creates a striking visual impact. This technique is particularly effective when you want to emphasize the first letter of a word or create a decorative element that sets the tone for the entire piece. Be creative with your flourishes and explore various shapes and designs.
3. Hanging Tail of Certain Letters
Some letters naturally have a descending stroke at the end, such as "y," "g," or "j." Adding a flourish to the hanging tail of these letters can turn them into beautiful decorative elements. Experiment with different flourishes and find the ones that enhance the overall flow and balance of your calligraphy.
4. Cross on a "t" or an "A"
The cross on a "t" or an "A" presents an excellent opportunity to incorporate a flourish. This can be a simple diagonal line or a more elaborate design that adds flair to the letterform. Consider the overall composition and ensure that the flourish complements the rest of the calligraphy.
By adding flourishes to different parts of your calligraphy, you can create stunning and unique pieces of art that captivate the viewer's attention. Remember to practice and experiment with different styles and designs to develop your own flourishing techniques and create truly original calligraphy.
Part of Calligraphy
Flourishing Technique
End Letter of a Word
Curved lines or elaborate loops
Beginning Letter of a Word
Eye-catching flourishes to set the tone
Hanging Tail of Certain Letters
Decorative elements for descending strokes
Cross on a "t" or an "A"
Flourishes that enhance the letterform
Using Flourishes to Enhance Block Lettering
Block lettering provides a bold and striking foundation for calligraphy, but it can be taken to the next level by incorporating elegant flourishes. By adding loops, strokes, and connecting letters, you can transform simple block lettering into a work of art that captures attention. The key to mastering calligraphy flourishing in block lettering lies in identifying possible letters to connect and creating visually appealing designs.
One approach is to consider adding flourishes to the right side of a letter, which can create a sense of movement and elegance. This technique works particularly well with letters that have ascenders or descenders, such as "l," "g," or "y." By carefully curving or looping the right side of these letters, you can add a touch of sophistication and enhance the overall composition of your block lettering.
Another option is to incorporate flourishes at the beginning or end of a word. This can be achieved by extending certain strokes or adding decorative loops that flow seamlessly into the surrounding letters. By doing so, you create a sense of continuity and visual interest that draws the reader's eye and elevates the impact of your block lettering.
Block Letter
Flourished Version
B
B
L
L
O
O
C
C
K
K
Table: Examples of Block Lettering and Their Flourished Versions
Lastly, the crossbars of letters like "t" or "A" present an excellent opportunity to incorporate flourishes. By extending these crossbars with elegant curves or loops, you can add a touch of sophistication and individuality to your block lettering. The flourishes on the crossbars can mirror or complement the flourishes used elsewhere in the lettering, creating a cohesive and visually appealing composition.
Remember, the goal of adding flourishes to block lettering is to enhance its visual appeal and create a sense of elegance. Experiment with different flourishes, strokes, and curves to find the style that best reflects your artistic expression. With practice and dedication, you can master calligraphy flourishing in block lettering and create stunning works of art.
Using Calligraphy Flourishing on Envelopes and Stationery

Calligraphy flourishes are not limited to paper alone. They can also be used to elevate the look of envelopes and stationery, adding a touch of creativity and artistry to your correspondence. By incorporating flourishes around the letters or connecting them to the letters, you can create a frame that enhances the calligraphy and makes it more visually appealing.
When adding flourishes to envelopes, consider the style and design of the calligraphy itself. Flourishes can convey different vibes, from festive and playful to elegant and sophisticated. Choosing the right flourishes that complement the overall aesthetic can make your envelopes stand out and leave a lasting impression.
Flourishes can also be used on personalized stationery items, such as gift tags and return addresses. These small details can add an extra touch of beauty and elegance to your stationery, making it more memorable for the recipient. Whether you're sending invitations, thank-you notes, or just a handwritten letter, incorporating calligraphy flourishes on envelopes and stationery can make your words even more special.
Benefits of using calligraphy flourishes on envelopes and stationery:
- Enhances the visual appeal of your correspondence
- Adds a personal and artistic touch to envelopes and stationery
- Makes your correspondence more memorable and unique
- Conveys a festive or elegant vibe, depending on the design
Resources for Learning Calligraphy Flourishing
If you're a beginner looking to enhance your calligraphy with beautiful flourishes, there are several resources available to help you master the art of calligraphy flourishing. Whether you prefer online courses, free tutorials and worksheets, or following talented calligraphers for inspiration, these resources can provide valuable guidance and practice opportunities.
Online Courses
Online courses are a great way to learn calligraphy flourishing at your own pace. Intermediate modern calligraphy and pointed pen calligraphy courses often include sections dedicated to mastering flourish techniques. These courses provide step-by-step instructions, demonstrations, and valuable feedback to help you refine your skills and develop your own unique style.
Free Tutorials and Worksheets
If you're just starting out and want to practice basic flourishes, there are many free tutorials and worksheets available online. These resources provide guidelines, stroke practice sheets, and examples to help you understand the fundamental principles of calligraphy flourishing. They're a great way to build your foundation and explore different flourishes before developing your own style.
Inspiration from Talented Calligraphers
Following talented calligraphers who specialize in flourishing can provide inspiration and insights into different techniques and styles. Take the time to explore their artwork, follow their work on social media, and observe their flourishes. By studying their creations, you can gain a deeper understanding of the possibilities and push the boundaries of your own calligraphy flourishing.
Resource
Description
Online Courses
Intermediate modern calligraphy and pointed pen calligraphy courses offer step-by-step guidance and feedback for mastering calligraphy flourishing techniques.
Free Tutorials and Worksheets
Free online tutorials and worksheets provide stroke practice sheets and examples to help beginners practice and develop their calligraphy flourishing skills.
Inspiration from Talented Calligraphers
Following experienced flourishers on social media can provide inspiration and insights into different techniques and styles of calligraphy flourishing.
Best Nibs and Inks for Pointed Pen Calligraphy Flourishing
When it comes to creating beautiful and intricate flourishes in pointed pen calligraphy, the choice of nibs and inks plays a significant role in achieving the desired effect. Different nibs and inks offer unique qualities that can enhance your flourishing and add depth to your calligraphy.
Recommended Nibs for Pointed Pen Calligraphy Flourishing
If you're looking to create dramatic and contrasting flourishes, the Brause EF66 and the Brause Rose nibs are highly recommended. The EF66 nib has a flexible pointed tip that allows you to achieve delicate and intricate flourishes with ease. On the other hand, the Brause Rose nib is slightly stiffer and provides more control, making it suitable for both thin hairline strokes and bold, flourishing lines.
Preferred Inks for Pointed Pen Calligraphy Flourishing
When it comes to choosing the right ink for your flourishing, iron gall ink is often preferred. Iron gall ink offers excellent flow and allows you to create thin upstrokes, giving your flourishes a delicate and elegant look. Additionally, iron gall ink develops depth and character as it ages, adding a unique charm to your calligraphy. However, it's important to note that any ink can be used for flourishing based on personal preference.
Experimenting with different nibs and inks will help you discover the ones that resonate with your style and the effect you want to achieve in your calligraphy flourishing. Remember, practice and patience are key to mastering the art of flourishing, so keep exploring and refining your techniques to create stunning works of art.
Nib
Recommended for
Brause EF66
Dramatic and intricate flourishes
Brause Rose
Thin hairline strokes and bold flourishes
Flourishing Examples and Inspiration

If you're looking for inspiration to enhance your calligraphy with beautiful flourishes, exploring flourishing examples can provide valuable insights.
Read the full article
0 notes
Text
Calligraphy Flourishing Practice: Add Flair to Letters

Calligraphy Flourishing Practice Secrets: Transform Your Handwriting into Art!
Adding flourishes to your calligraphy can transform it from basic to eye-catching. Flourishes are decorative strokes that add elegance and flair to letters. They can range from simple curves and loops to more complex designs. By learning the art of calligraphy flourishing, you can take your lettering to the next level and create unique and beautiful pieces of art.
Key Takeaways:
- Flourishes are decorative strokes that add elegance and flair to calligraphy.
- Calligraphy flourishing can transform plain letters into unique and eye-catching works of art.
- Flourishes can be used to frame words, enhance specific letters, or add decorative elements to envelopes and place cards.
- Having the right tools, such as pointed pens and oblique pen holders, is essential for practicing calligraphy flourishing.
- Following basic guidelines, such as creating smooth curves and avoiding thick line crossings, can help improve flourishing techniques.
What is Calligraphy Flourishing?

Calligraphy flourishing is the art of adding decorative strokes and embellishments to your calligraphy, transforming it from plain writing to a visually captivating masterpiece. These decorative flourishes can range from simple swirls and curls to more intricate and complex designs, adding a touch of elegance and style to your lettering.
With calligraphy flourishing, you have the opportunity to unleash your creativity and explore various artistic elements. These flourishes can be used to highlight specific letters, create ornamental borders, or enhance the overall composition of your calligraphy. Whether you prefer a more minimalistic approach or elaborate designs, calligraphy flourishing offers endless possibilities for artistic expression.
By incorporating decorative flourishes into your calligraphy, you can transform ordinary words into visually striking works of art. The addition of these embellishments adds depth, character, and a personalized touch to your lettering. From simple to complex, calligraphy flourishing allows you to experiment with different styles and techniques, showcasing your artistic skills and making your calligraphy truly unique.
Where to Use Calligraphy Flourishing

You can use calligraphy flourishing in various ways to enhance your lettering. One way is to use flourishes to frame a word or phrase, adding a decorative element around it. This technique, known as letter framing, can draw attention to the main text and give it an elegant and sophisticated look. For example:
Example
Description
Letter framing using calligraphy flourishing.
In addition to letter framing, you can connect flourishes to specific letters in your calligraphy. For example, you can add a flourish to the end letter or the beginning letter of a word to create a visually appealing design. Another option is to incorporate flourishes into the hanging tail of letters like "g", "j", and "y", adding a graceful and decorative element. Furthermore, you can experiment with adding flourishes to the cross on letters like "t" or "A", turning a simple stroke into an intricate embellishment.
Calligraphy flourishing can also be used to add a personalized touch to your projects. You can incorporate flourishes into envelopes, place cards, or even wedding invitations, adding a unique and special flair. By using calligraphy flourishing strategically, you can create eye-catching and distinctive pieces that stand out from the crowd.
Tools for Calligraphy Flourishing

In order to practice calligraphy flourishing effectively, you'll need the right tools. Here are some essential instruments and materials to get you started:
- Pointed Pen: A pointed pen is the primary tool used for calligraphy flourishing. It allows for greater control and flexibility when creating fine lines and detailed flourishes.
- Calligraphy Flourishing Tools: There are various specialty tools available specifically designed for calligraphy flourishing. These tools can help you create different types of flourishes and add intricate details to your lettering.
- Monoline Pen: If you're a beginner or prefer a simpler style, a monoline pen can be a great option. It provides a consistent line thickness and is easier to handle when practicing basic flourishing techniques.
- Pencil: A pencil can be a useful tool for sketching and planning your flourishes before committing them to paper with ink. It allows for easy erasing and modifications.
- Brush Pens: Brush pens are another popular tool for calligraphy flourishing, especially for larger-scale projects. They offer a wide range of stroke thickness and allow for expressive and dynamic flourishes.
- Oblique Pen Holder: An oblique pen holder is commonly used for pointed pen calligraphy flourishing. It provides a slanted grip that helps achieve the desired angle for creating elegant curves and graceful flourishes.
- Writing Utensils: Apart from the main tools, you may also need rulers, erasers, and other writing utensils to assist with planning and executing your flourishes.
- Worksheets: Worksheets are a valuable resource for practicing calligraphy flourishing. They provide guided exercises and examples to help you improve your technique and develop your own style.
- Practice: Last but not least, regular practice is essential for honing your calligraphy flourishing skills. Set aside dedicated time for practice and exploration to refine your technique and cultivate your own unique flourished lettering style.
By having these tools at your disposal and dedicating time to practice, you'll be well-equipped to explore the art of calligraphy flourishing and create stunning pieces of artwork.
Table: Comparison of Calligraphy Flourishing Tools
Tool
Description
Pros
Cons
Pointed Pen
A traditional tool used for calligraphy flourishing, versatile and allows for intricate details.
- Greater control and flexibility
- Various nib options for different line thicknesses
- Requires practice to master
- Ink may smudge if not dry
Brush Pens
Brush pens offer a wide range of stroke thickness and dynamic flourishes.
- Expressive and versatile
- Ideal for larger-scale flourishing
- No need for separate ink container
- Require practice to control brush pressure
- Limited to predetermined brush tip shapes
Monoline Pen
A simple and beginner-friendly tool for basic flourishing techniques.
- Consistent line thickness
- Easier to handle for beginners
- Limitation in creating intricate details
- Less expressive compared to pointed pen
Oblique Pen Holder
Specifically designed for pointed pen calligraphy, provides a slanted grip for optimal angle.
- Achieves desired angle for elegant curves
- Fits various pointed pen nibs
- Requires adjustment period for traditional users
- Additional cost for specialized holder
How to Do Calligraphy Flourishing
Mastering the technique of calligraphy flourishing may seem challenging at first, but with practice and dedication, you can develop your skills and create beautiful and intricate flourishes. To successfully execute calligraphy flourishing, it is important to follow some basic guidelines that will help you achieve consistent and visually appealing results.
Basic Guidelines
When creating flourishes, keep in mind that they are typically based on oval shapes. Strive to create smooth and consistent curves, ensuring that each flourish flows seamlessly with the rest of your calligraphy. This will add elegance and grace to your lettering. Another key aspect to consider is the angle at which your lines intersect. Aim for crosses between lines to be as close to 90-degree angles as possible, as this will greatly enhance the aesthetic appeal of your flourishes.
While experimenting with flourishes, it's important to maintain legibility and avoid smudging. Avoid crossing two thick lines, as this can detract from the overall clarity of your calligraphy. By focusing on these basic guidelines and practicing regularly, you will refine your calligraphy flourishing technique and develop your own unique style.
Developing Skills
Developing your calligraphy flourishing skills requires dedication and consistent practice. Start by working on individual flourishes, focusing on creating smooth curves and practicing different styles. By dedicating time to regular practice sessions, you will gradually improve your control and gain a better understanding of how flourishes can enhance your calligraphy.
There are also online resources, such as tutorials and worksheets, that can help you further develop your skills. These resources provide step-by-step guidance and exercises to help you improve your technique and explore new styles and designs. By utilizing these resources and continuing to practice, you will see growth in your calligraphy flourishing abilities.
Summary
Mastering calligraphy flourishing requires practice, attention to detail, and adherence to basic guidelines. By focusing on creating smooth curves, maintaining proper angles, and avoiding smudging, you can create stunning and visually appealing flourishes. Dedicate time to regular practice sessions and utilize online resources to further enhance your skills. With persistence and patience, you will develop your own unique style and create beautiful, eye-catching flourished calligraphy.
Tips and Inspiration for Calligraphy Flourishing

When it comes to calligraphy flourishing, there are some additional tips and inspiration to keep in mind. Adding shading to your flourishes can create depth and sophistication. By subtly varying the thickness and darkness of specific strokes, you can bring a three-dimensional effect to your lettering, making it more visually dynamic.
Another tip is to remember that bigger is often better when it comes to flourishes. Large, sweeping embellishments tend to have more impact and can make a bold statement. Smaller flourishes, while still beautiful, may appear unintentional or get lost in the overall composition. So don't be afraid to go big and make a statement with your flourishes.
They say that less is more, and that applies to calligraphy flourishing as well. Sometimes a few well-placed, strategic flourishes are more effective than filling every available space with decorative strokes. Maintaining overall balance and harmony in your compositions is key, so be selective and avoid overcrowding your lettering with too many flourishes.
Finally, don't be afraid to experiment with incorporating graphic elements into your flourishes. Graphic elements can be symbols, motifs, or even small illustrations that convey specific ideas or themes. Adding these elements to your flourishes can make your calligraphy more unique and visually captivating.
Tips for Calligraphy Flourishing
Inspiration
Experiment with shading for depth and sophistication
"Flourishing adds an ethereal quality to lettering, almost giving the words a life of their own." - Calligraphy artist Phyllis Macaluso
Go big with your flourishes for impact
"I love the drama of bold, sweeping flourishes. They can really make a statement and grab attention." - Calligraphy artist Schin Loong
Less is more - be selective and avoid overcrowding
"Empty space is just as important as the flourishes themselves. It's all about finding that perfect balance." - Calligraphy artist Suzanne Cunningham
Incorporate graphic elements for a unique touch
"I often add small illustrations to my flourishes. It adds a playful, whimsical touch to the lettering." - Calligraphy artist Maureen Vickery
By following these tips and finding inspiration from experienced calligraphy artists, you can take your flourishing to the next level. Remember to practice regularly, experiment with different techniques, and let your creativity shine through in your flourished calligraphy.
Resources for Improving Calligraphy Flourishing
https://www.youtube.com/watch?v=H6YQwLqWD8Q
Enhancing your calligraphy flourishing skills requires access to valuable resources and tools that can provide guidance and practice opportunities. Whether you are a beginner or an experienced calligrapher looking to refine your techniques, these resources can help you elevate your flourishing abilities.
Tutorials and Online Courses
Online courses and tutorials offer comprehensive instruction and demonstrations on calligraphy flourishing. They provide step-by-step guidance and exercises to help you understand the fundamentals and develop your own unique style. Some popular online courses include the Intermediate Modern Calligraphy Online Course and Flourish With Me: A Pointed Pen Calligraphy Online Course. These courses offer flexibility and convenience, allowing you to learn at your own pace and from the comfort of your home.
Worksheets and Practice Drills
Worksheets specifically designed for calligraphy flourishing can be invaluable tools for practice and improvement. These worksheets provide guided exercises that focus on various aspects of flourishing, such as loop formations, cross angles, and connecting strokes. By consistently practicing with these resources, you can refine your technique and build confidence in your flourishing abilities.
Community and Online Forums
Engaging with the calligraphy community can provide additional support and inspiration. Online forums and communities dedicated to calligraphy offer a platform for sharing ideas, seeking feedback, and finding inspiration from fellow calligraphers. These communities often have sections or threads specifically dedicated to flourishing, where you can learn from others, ask questions, and share your own progress.
Resource
Description
Tutorials and Online Courses
Comprehensive online courses and tutorials that provide step-by-step guidance on calligraphy flourishing techniques
Worksheets and Practice Drills
Specially designed worksheets and practice drills to refine and improve your calligraphy flourishing skills
Community and Online Forums
Engaging with the calligraphy community to share ideas, seek feedback, and find inspiration
By utilizing these resources, you can enhance your calligraphy flourishing skills and unlock new levels of creativity and expression. Remember to practice regularly, explore different styles, and embrace the journey of continual improvement. With dedication and the right tools at your disposal, you can create stunning and personalized flourished calligraphy pieces that leave a lasting impression.
Flourishers to Follow for Inspiration
If you're looking for inspiration to enhance your calligraphy flourishing skills, there are several talented artists to follow. These artists have mastered the art of flourishing and can provide valuable insights and ideas for your own designs. Let's explore some of the notable flourishers in the calligraphy community:
- Phyllis Macaluso: Known for her exquisite floral-inspired flourishes, Phyllis Macaluso creates stunning botanical elements within her lettering. Her work is a testament to the beauty of incorporating natural motifs into calligraphy.
- Schin Loong: Schin Loong's organic and fluid style of flourishing is truly captivating. Her flourishes effortlessly flow throughout her lettering, adding a touch of grace and elegance.
- Suzanne Cunningham: Suzanne Cunningham's flourishes are always impressive, with each stroke meticulously crafted. Her attention to detail and mastery of complex designs make her work truly inspiring.
- Jake Weidmann: Jake Weidmann is renowned for his intricate and elaborate flourished compositions. His work showcases the possibilities of combining calligraphy with flourishing to create breathtaking pieces of art.
- Maureen Vickery: Maureen Vickery's flourishes are characterized by their elegance and versatility. Her designs range from delicate and whimsical to bold and dramatic, showcasing the endless possibilities of flourishing.
- Kathy Milici: Kathy Milici's flourishes are a true embodiment of creativity and innovation. Her unique approach to flourishing incorporates various graphic elements, resulting in visually stunning lettering compositions.
By following these talented flourishers, you can gain inspiration, learn new techniques, and develop your own flourishing style. Take the time to study their work, observe their techniques, and incorporate their ideas into your own calligraphy projects. Remember, flourishing is an art form that requires practice and experimentation, so keep honing your skills and let your creativity flourish!
Conclusion - Calligraphy Flourishing Practice
Incorporating calligraphy flourishing into your lettering can elevate it to new heights, adding style and elegance to your projects. By practicing this technique, you can create a personalized touch that sets your work apart.
Elevating your lettering through flourishes requires continual practice. Through dedication and using the right tools and resources, you can develop your own unique style and create beautiful, eye-catching flourished calligraphy.
Adding flourishes to your lettering not only enhances its visual appeal but also allows for artistic expression. With each stroke, you can infuse your personality into your work, making it truly one-of-a-kind.
Remember, the key to achieving beautiful and consistent flourishes is practice. Keep experimenting, honing your technique, and never stop learning. With time and dedication, you'll be able to create stunning pieces of art that showcase your flourishing skills and leave a lasting impression.
FAQ - Calligraphy Flourishing Practice
What is calligraphy flourishing?
Calligraphy flourishing is the act of adding decorative strokes and embellishments to your calligraphy, transforming plain words or phrases into works of art.
Where can I use calligraphy flourishing?
Read the full article
#artisticletters#calligraphyflourishing#calligraphypractice#decorativewriting#handwritingenhancement
0 notes
Photo
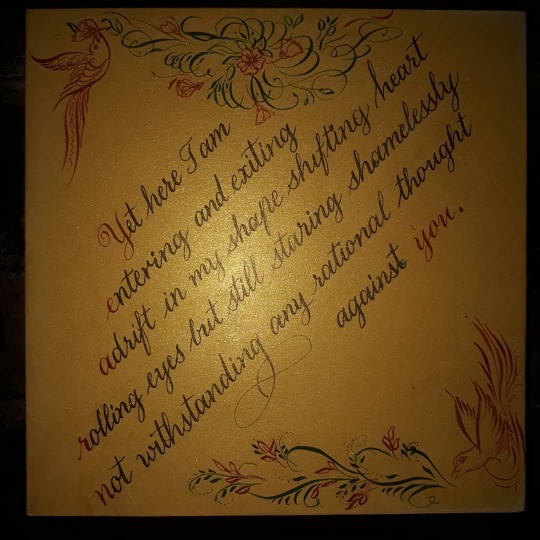
Acrostic credit: hinalegend.tumblr.com #yearn #calligraphyflourishes #calligraphyflowers #calligraphybirds #copperplatecalligraphy #copperplateflourishes #5crookedfingers #acrostic #calligraphy #calligraphypoem #acrosticpoem https://www.instagram.com/p/CFZjEVrn8aV/?igshid=15mqmxlowrveq
#yearn#calligraphyflourishes#calligraphyflowers#calligraphybirds#copperplatecalligraphy#copperplateflourishes#5crookedfingers#acrostic#calligraphy#calligraphypoem#acrosticpoem
4 notes
·
View notes
Photo
Merry Chirstmas😄 Font: Flourished italic hand Pen: Inclined Ink: fountain #storyprompt #calligraphyflourishes #calligraphy #inclinedpen #flourishedcalligraphy #flourisheditalic #cutnibcalligraphy #merrychristmas #christmaswishes #christmas2020🎄❤⛄ #christmascalligraphy #coldplaylyrics #coldplay #christmaslights #christmaslightscoldplay #5crookedfingers https://www.instagram.com/p/CJNWzNPnvA5/?igshid=zmoiw9319pkt
#storyprompt#calligraphyflourishes#calligraphy#inclinedpen#flourishedcalligraphy#flourisheditalic#cutnibcalligraphy#merrychristmas#christmaswishes#christmas2020🎄❤⛄#christmascalligraphy#coldplaylyrics#coldplay#christmaslights#christmaslightscoldplay#5crookedfingers
1 note
·
View note
Photo
Thomas Edison's last words #copperplatecalligraphy #copperplateflourishes #copperplatefont #calligraphyflourishes #calligraphersofinstagram #calligraphylettering #calligraphyquotes #calligraphyquoteoftheday #lookingforalaska #lookingforalaskaquotes #lookingforalaskafanart #thomasedison #lastwords #pudge #lookingforalaskahulu #5crookedfingers #daisywreath #cigar #cigaretteart https://www.instagram.com/p/CFroSe2HIPB/?igshid=nd4y5zwoh46j
#copperplatecalligraphy#copperplateflourishes#copperplatefont#calligraphyflourishes#calligraphersofinstagram#calligraphylettering#calligraphyquotes#calligraphyquoteoftheday#lookingforalaska#lookingforalaskaquotes#lookingforalaskafanart#thomasedison#lastwords#pudge#lookingforalaskahulu#5crookedfingers#daisywreath#cigar#cigaretteart
2 notes
·
View notes
Photo

The bleeding ink #flowerflourish #calligraphyflourishes #copperplateflourishes #copperplatecalligraphy #obliquepens #blackflorals #blackstagram #5crookedfingers #calligraphyflowers #bleedingink #floralmotifs https://www.instagram.com/p/CElo6rFnCAk/?igshid=11l423m2opubt
#flowerflourish#calligraphyflourishes#copperplateflourishes#copperplatecalligraphy#obliquepens#blackflorals#blackstagram#5crookedfingers#calligraphyflowers#bleedingink#floralmotifs
2 notes
·
View notes
Photo

'The fellow is either mad or he is composing verse' (Latin) #copperplateflourishes #copperplatefont #copperplatecalligraphy #calligraphyflourishes #calligraphyquotes #calligraphylettering #latin #latinquotes #latincalligraphy #5crookedfingers #insanity #crazygenius #moderncalligraphy https://www.instagram.com/p/CFz-nSjHgd4/?igshid=xzywccrwlk60
#copperplateflourishes#copperplatefont#copperplatecalligraphy#calligraphyflourishes#calligraphyquotes#calligraphylettering#latin#latinquotes#latincalligraphy#5crookedfingers#insanity#crazygenius#moderncalligraphy
1 note
·
View note
Photo

Too cheesy Script: copperplate #storyprompt #copperplatefont #copperplatepen #copperplatecalligraphy #copperplatescript #copperplateflourishes #calligraphyflourishes #copperplateflourishing #lyricscalligraphy #taylorswiftfanart #dontblameme #taylorswift #5crookedfingers #redcalligraphy https://www.instagram.com/p/CJVSraXHBHc/?igshid=161j90q09zecz
#storyprompt#copperplatefont#copperplatepen#copperplatecalligraphy#copperplatescript#copperplateflourishes#calligraphyflourishes#copperplateflourishing#lyricscalligraphy#taylorswiftfanart#dontblameme#taylorswift#5crookedfingers#redcalligraphy
0 notes
Photo
This week on #FlourishinPoetry: Phenomenal Woman by Maya Angelou in honor of Women's Day (and Women's History Month). ☺ I love how this poem showcases everything at makes a woman: from her strength to her beauty. We all have these in us; we are all phenomenal women. ❤ . . . . . . . #womensday #womenshistorymonth #poems #poetry #phenomenalwoman #mayaangelou #mayaangelouquotes #woman #calligraphy #calligraphyph #script #offhandflourishing #flourishing #pointedpen #pointedpencalligraphy #birdflourish #calligraphyflourishes #flourishforum #openrp
#flourishing#calligraphyflourishes#phenomenalwoman#flourishforum#pointedpencalligraphy#offhandflourishing#script#womenshistorymonth#poetry#calligraphy#openrp#calligraphyph#pointedpen#womensday#mayaangelouquotes#poems#mayaangelou#birdflourish#woman#flourishinpoetry
10 notes
·
View notes
Photo

Tonight on #FlourishinPoetry: Bonsai by Edith L. Tiempo. I read this back when I was a freshie in college, and I've loved how beautifully this poem depicts how we do our best to hold on to love, even in its smallest form. ☺ #poems #poetry #edithltiempo #bonsai #philippinepoetry #philippineliterature #calligraphy #calligraphyph #script #flourishing #offhandflourishing #calligraphyflourishes #pointedpen #pointedpencalligraphy #blackandwhite
#poetry#philippinepoetry#calligraphyph#pointedpencalligraphy#blackandwhite#script#edithltiempo#flourishinpoetry#offhandflourishing#bonsai#flourishing#calligraphyflourishes#philippineliterature#pointedpen#calligraphy#poems
10 notes
·
View notes
Last Seen Blogs

vitamin-jam
Vitamin Jam

philthy770
Philthy770

ganondilf
Hamish's Online Web Page

starry-palette
Music In The Sky

musicistheair-blog
Music Is The Air