#chromecast.com setup
Explore tagged Tumblr posts
Visit Tumblr Blog
Explore Tumblr blogs with no restrictions, modern design and the best experience.
Last Seen Tumblr Blogs


Fun Fact
Hackers stole 65M passwords from Tumblr in 2013.
Text
www.chromecast/setup
We can ensure you that we provide the best set of solutions with the Chromecast Setups. These setups are the digital streaming devices from non-other than Google. So, if you are out there lingering with the queries related to the setup, visit us www.chromecast/setup. We'll guide you from installation to configurations of your Chromecast setup. Therefore, please let us know all about it.
#chromecast.com/setup#chromecast setup#chromecast.com/help#chromecast help#google chromecast setup#www.chromecast/setup#chromecast/help#chromecast.com help#chromecast.com setup#www.chromecast/help#chromecast support
1 note
·
View note
Text
What exactly is Chromecast, and how does it work?
Chromecast is a plug-in video streaming device from Google that works similarly to a Roku or Apple TV device. It allows you to download streaming applications and watch them on your television via your WiFi network.
Netflix, Amazon Prime, Hulu, and other streaming applications and services are available with Chromecast. You can browse and control your Chromecast using your mobile device's Google Home app (which also serves as your Chromecast app), just like you would with remote control.
How can I get Chromecast to work with my TV?
The setup for your Chromecast should be simple, however, it varies significantly depending on whether you have a standard Chromecast or an enhanced Chromecast Ultra.
To set up your basic Chromecast device, follow these steps:
1. To begin, connect one end of the USB cord to your Chromecast device and the other end to the power adapter.
2. Then, on your TV, connect your Chromecast device to an HDMI connector.
3. Connect the power adapter to an electrical socket to complete the installation process.
To set up your Chromecast Ultra, follow these steps:
1. Connect one end of the supplied power cord to your Chromecast Ultra and the other end to an available wall socket.
2. Make sure you just use the Chromecast Ultra's included power supply—it won't work with any other USB cable you have lying around, and it won't work with a USB connection into a TV.
3. HDMI connector on your TV should be used to connect Chromecast Ultra.
That concludes our discussion. You may now connect your chromecast setup to the internet and use the Google Home/Chromecast app. All you have to do now is press the Cast button.
How can I get my Chromecast to connect to WiFi?
Depending on whether you have an Android or iOS mobile device, connecting Chromecast to your WiFi will be slightly different.
1. Connect the supplied USB cable to Chromecast, then the included power adapter.
2. Then, on your TV, connect your Chromecast device to an HDMI connector.
3. After that, insert the power adapter into a wall socket.
4. Download the Google Home app on your smartphone or tablet. This will function as a Chromecast app.
5. Make sure your Bluetooth is turned on if you're using an iOS device. (An Android smartphone will immediately connect.)
6. Open the Google Home app, and the WiFi setup instructions should display.
7. If they don't, go to your home screen's "Add" menu, select "Set up the device," and then follow the steps.
That concludes our discussion. Your Chromecast should now be connected to the internet and ready to stream content.
How can I get Chromecast to work with my phone or tablet?
All you need is the Google Home app, which also serves as your Chromecast app, to link your phone or tablet with Chromecast or Chromecast Ultra. After you've downloaded the app, ensure sure your phone is linked to the same WiFi network as your Chromecast. Then, launch Google Home and follow the prompts to pair your iPhone or iPad (an Android device should connect automatically).
Simply press the Cast button to start streaming once you've linked everything.
What's the best way to get Chromecast to switch WiFi networks?
Open the Google Home app on the mobile device you're using to control your Chromecast to change the WiFi. Locate the WiFi menu in Settings, then locate your presently connected network and choose "forget the network." Reset your Google Chromecast device on a different WiFi network by going back to your home screen.
Why doesn't Chromecast appear on my computer? Is it possible to enable Chromecast in my Chrome browser?
Chromecast is now only available for mobile devices. If you previously used Chromecast on a PC, you'll need to switch to Chromecast on an iPhone or Android smartphone.
Instead of using Chrome to switch on Chromecast, you'll need to download the Google Home app and use it to control your Chromecast.
Why isn't Chromecast included in the Google Home app?
First, make sure your gadget is connected in and turned on. Make sure your Google Home and Chromecast are both connected to the same WiFi network if your home has several ones. This may be done in each device's settings.
Finally, check that the Google Home app on your mobile device has the appropriate location permissions. Make sure Location is toggled to "on" in the Google Home app settings.
Why isn't Chromecast included in the Google Home app?
Though the specifics may vary depending on the type you have (Chromecast vs. Chromecast Ultra), resetting Chromecast is simple. You may either go into the Google Home app's settings and select "Factory Reset," or you can press and hold the device's button for at least 25 seconds. The solid light will begin to flicker, indicating that your Chromecast reset has begun.
Consult Google's chromecast.com/help guide for full information on how to reset Chromecast based on your device's generation.
Read Also: hulu activate | showtimeanytime.com activate
1 note
·
View note
Text
How to Setup Your New Chromecast on Mobile Windows and Mac OS.
Chromecast setup Guide 2018: If you have a TV, odds are you have seen notices where individuals show their telephone stuff on TV with the snap of a catch or perhaps simply sliding their finger on their touchscreen. You may have contemplated internally how this really functions. Indeed, on the off chance that you were pondering it was the TV doing astounding things, you are mostly right. Your TV is doing astonishing stuff by throwing your telephone's substance on it, however it does as such with the assistance of an outer gadget that you have to associate with it.

There are numerous such gadgets accessible in the market today, created by probably the best organizations around the globe. One such gadget, created by Google, is Chromecast. Today we will show you Chromecast setup to cast recordings on to your TV or a PC.

1. Sign in to your Google account. (If you already are signed in, jump to step 2) 2. Go to Play Store and install Google Home app (It’s Might take a few minutes) 3. Open the app and choose the account you want to use the Google Home app with. If you do not use multiple accounts on your phone, you will not be prompted to choose anything. 4. Give the app location access. 5. It will then ask you to turn on Wi-Fi. Make sure your Wi-Fi is switched on and let your phone connect to it. 6. Once your setup is done, click on the left menu icon and select “Cast Screen/Audio” 7. Click on the blue “Cast Screen/Audio” button. It will start looking for devices, so you need to plug your device in first. To do so, get your Chromecast out and follow Step 8. 8. Plug in the smaller side of the USB cable that your Chromecast box comes with, into the Chromecast. 9. The bigger end of the USB cable can be connected in two ways. It can either be plugged into the Television’s USB port directly or it can be plugged into the adapter which can be plugged into an external source of power. It is advisable to use the adapter and an external power source as TV cannot supply enough power for the Chromecast. 10. The Chromecast has an HDMI end, plug that into one of the HDMI slots of your TV. This completes your hardware connection. 11. Getting back on the software part, now that the app will be able to find the device, follow the instructions accordingly and continue doing what you are said to do. 12. Once the set up is done. Open the app of your choice and click on the ‘cast’ icon which you should see on the phone screen somewhere around the top portion. And you will see your phone’s display mirrored on your TV screen. 13. You can lock your phone and keep it aside while you are casting a video on TV
End:
In this way, you are finished with the procedure of Chromecast Setup and consequently you can begin gushing recordings utilizing your Chromecast. There are numerous applications accessible that help throwing and to begin spilling you just need to tap on the "Cast" symbol present on the landing page.
Ideally, this well ordered instructional exercise would push you to Setup Chromecast on your TV and permit you spilling recordings effortlessly.
1 note
·
View note
Text
How to use chrome cast
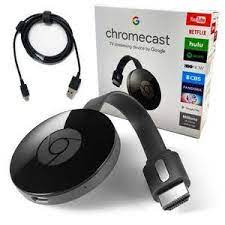
Google Chromecast is a $35 device that enables you to stream movies, images, and music from your computer or mobile device to your TV. What the gadget lacks in toughness, it more than makes up for in ease of use. Instead of a remote, a Chromecast is controlled by a computer or mobile device. Chromecast gets instructions and then streams content directly from the Web, rather than directly from your smartphone, tablet, or PC. You may, however, stream material straight from your computer and mobile devices via its applications. What is Chromecast and how do I put it up? A TV with an HDMI connector, a Wi-Fi connection, and either a computer or a mobile device with Google's Chrome browser are all you need to set up Chromecast. Connect the Chromecast to the HDMI connection on your TV, then go to chromecast.com/setup on your PC, download the programme, and follow the on-screen instructions. Where can I locate Chromecast apps? Because Chromecast is only a receiver, it doesn't have its own menu. As a consequence, determining which streaming providers have dedicated Chromecast applications isn't always straightforward. While you can potentially broadcast anything from Chrome to a Chromecast, certain sites are built specifically for it and have a dedicated broadcast button. On its website, Google gives a limited list of these programmes. The Chromecast isn't as flexible as a Roku, which offers more channels and a more user-friendly operating system. Nonetheless, the Chromecast is one of the most affordable streaming devices on the market, and it is easier to set up than most of its rivals. Here's how to get started with your Chromecast and get the most out of it. What is the best way to broadcast from a computer? Broadcasting multimedia to Chromecast is straightforward whether you're using Windows, Mac, Linux, or Chrome OS on a desktop or laptop. All you have to do now is hit the Broadcast button on your material, and it will display on the large screen after the basic setup. Check out our step-by-step tutorial for more information. How to broadcast from your Android or iOS device It's easy to use a Chromecast with a mobile device. The procedure is the same whether you're using an Android or iOS device. You may stream material from Netflix, YouTube, Pandora, and other popular services using the Chromecast mobile app. What is tabcasting? Google Cast, sometimes known as "tabcasting," is a tool that lets you stream anything to your TV from your computer's Chrome browser, not only Chromecast applications. Go to the website you wish to watch, then click the Google Cast icon in the upper-right corner of the browser. How to discover the MAC address of a Chromecast Chromecast should work with any home Wi-Fi network, but if your security is tight, you'll need to establish an exception in your router. The method differs per router, but you'll need the device's media access control (MAC) address in every instance. Look to the bottom of the Settings page on your computer's Chromecast app to discover it. How to Reset a Chromecast to Factory Settings You may need to restore your Chromecast to factory settings if it stops working or if you encounter an issue that won't go away. This may be done in two ways, both of which are quite simple. The first method is to go to the Chromecast app's Settings menu, either on your PC or on your mobile device, and then choose Restore Factory Settings. The second method is to press and hold the physical button on the Chromecast for 25 seconds.
0 notes
Link
Windows Computer/Laptop Chromecast Setup
Go to the Google Chrome browser's type in address bar Url: chromecast.com/setup link on your device.
Make sure that the current version of the Chrome browser is updated.
Select 'Set up Chromecast using this computer'.
Google Chrome finds devices like Chromecast that need to be set up.
On the TV screen, when you see the Chromecast name matches your Chromecast name, select 'Set Me Up'.
Press 'Privacy & Terms' and Then, select 'Accept'.
Setup automatically tries to connect to the Google Chromecast Through a Wi-Fi hotspot. If you didn't find the Wifi setup for Chromecast, then you need to take the support from our experts.
Select 'Next'.
On your screen, you will see a code that should match the code which appears on the TV. Select 'Yes' if both codes match.
Now you can update your Chromecast device's name, select your country, and then select 'Looks Good.'
By selecting the upside-down arrow, select the Wi-Fi network Then Enter your network password, followed by selecting 'Connect'.
Select 'Next' if the computer is connected to the internet.
You can see a list of available Cast devices after the Chromecast Setup PC is completed.
From your Google Cast setup app, you can now cast or use 'cast a tab' from your computer's Google Chrome browser.
Official Site: https://sites.google.com/view/chromcast-com-setup/
0 notes
Text
chromecast/help
We can make things much easier for you with your Chromecast setup. So, stop dealing with everything on your own when we can help you here chromecast/help. You can find everything that can help you to successfully install your Chromecast setup, configure it and even troubleshoot the issues with it. Therefore, do not hesitate to visit us with your queries.
#chromecast/help#chromecast.com help#chromecast.com setup#www.chromecast/help#chromecast support#chromcast help#google chromecast setup
0 notes
Text
Chromecast.com Setup: How to Install & Use a Chromecast
With the everyday headway in innovation, the digitalization is likewise developing on. Something amazing like that of chromecast.com Setup which is one of the propelled procedure work for overseeing computerized media players. This is a one of a kind gadget that looks precisely like a dongle which will empower those of a cell phone or even a customized framework. For the most part the gadget is…
View On WordPress
0 notes
Photo

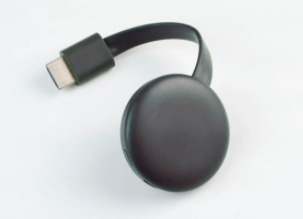
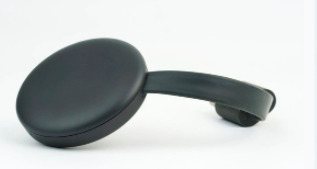
The Google Chromecast is designed as a small dongle that enables the user to use the internet to stream audio-visual content in high-definition. Google’s Chromecast is a cute little circular dongle that takes video and audio from a smartphone, tablet, laptop, Mac or PC, and stream a TV.
http://mychromecastsetup.com
#chromecast.com/setup#Chromecast Setup#Chromecast com setup#chromecast.com/setup android#chromecast.com/setup tv#chromecast app for android#chromecast setup laptop
0 notes
Text
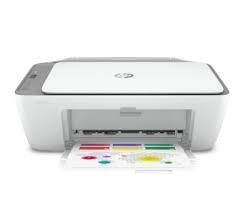
Setup HP Printer Using USB
The HP printer is connected to your Windows PC through a USB wire. Install the full-featured HP driver to get the most out of a USB-connected printer.
Step 1: Getting Ready for HP Printer Setup using a USB Drive
Remove the previously installed printer version from Windows after studying the prerequisites in order to prepare for USB connection setup and driver installation.
1. Review the following prerequisites and materials before you begin:
● The printer has been powered up and is ready to go.
● Make sure your USB cord isn't longer than 3 meters (9 feet 10 inches).
● A USB port is present on your PC. The printer may not receive enough electricity to work correctly when connected via a USB hub or docking station.
● In order to remove the printer from the installed device and complete printer setup if the USB connection was connected before HP driver download, follow these instructions. If this is the case, move on to the next step to install the driver.
2. Your computer's USB cord should be removed. Do not reconnect the cable until directed to do so during the driver installation procedure.
3. In Windows, type “devices” into the search box and choose the Devices and Printers control panel settings from the results. 123 hp com setup
4. Remove the device by right-clicking the icon for your printer model. Delete all icons on the same printer if there are more than one.
5. Proceed to the following step after closing the Devices and Printers window.
Step 2: Set up the connection after installing the driver.
To finish the USB connection, download and install the appropriate printer driver.
1. 123 hp com setup Enter the access code for your printer model, then follow the on-screen instructions to download the driver. The driver-guided installation program HP Easy Start will be downloaded depending on your printer model.
● Once the driver or HP Easy Start has been downloaded, follow the onscreen instructions to open the download file and begin setup. When you're prompted to choose a kind of connection, go with USB. You do not need to finish the further steps in this section if the setup was successful.
● Continue with the instructions below to install the driver from the HP website if the download fails or your printer does not display on “www.123.hp.com/setup.”
2. After entering your printer model, go to “HP Customer Support – Software and Driver Downloads” to access the (HP Customer Support HP driver and software downloads). When requested, I'll double-check that the operating system version is right.
3. [Begin by identifying your product.] If the page appears, click [printer] and input the printer's model number, then [send] and click.
4. If you need to alter the operating system, click Change and then Change to pick the version.
5. Click Download for the entire software package, or Basic Driver for alternative driver options, under the Driver header.
6. If the installer asks you to choose a printer connection type, choose USB to proceed and finish the installation.
7. Depending on your printer's capabilities, try printing, scanning, or faxing.
Wireless HP Printer Setup
Learn how to connect a wireless HP printer to your home network.
You may print wirelessly from your computer, smartphone, or tablet by connecting your 123hp.com setup printer to your local Wi-Fi network.
Step 1: Join a Wi-Fi network with your printer.
Connect your printer to the same local wireless network as your computer or mobile device before printing wirelessly.
If you change your Internet service provider, you must complete the same processes. In the event that you need to replace your router and reconnect your printer.
” Please input your printer's WPS PIN. Please proceed with the instructions below if you receive a notice that” is shown, the window [Cancel] and click.
1. Keep the printer in close proximity to the wireless router.
2. Turn on the printer and double-check that the ink cartridges are inserted and that the main tray is full with paper.
3. Connect your printer to your wireless network, whether it's at home or at the office.
Touch Screen Control Panel Printers:
1. Pick [wireless], [Settings] from the printer's menu, or click Restore Settings from the menu Restore Network Settings and select (or similar option).
2. Get the SSID (service set identifier) and password for the network. See Finding your wifi password for additional information.
3. Select [Wireless] from the menu Wireless Setup Wizard, then [Settings] or [Network Settings] from the menu Wireless Setup Wizard, then input your network name and password.
Printers without a control panel with a touch screen:
1. For 5 seconds or until the light on the printer begins to flicker, press and hold the Wireless button. For Tango printers, press and hold the Wireless and Power buttons on the back of the printer until the blue bar flashes.
2. Press and hold the Wi-Fi Protected Settings WPS button on your router for 2 minutes, or until the connection procedure starts. When the connection is complete, the printer's flashing lamp will turn off.
Continue with the instructions below if your router does not have a WPS button.
3. HP Smart –Microsoft Store, 123hp.com setup (Android, iOS) (English). App Store for HP Smart-Mac Install the HP Smart app from the App Store (English).
4. Set up the printer to connect to a wireless network.
Hold down the Wireless and Cancel buttons on most HP printers without a touch screen until the power and wireless lights flash.
5. Press and hold the Wireless button until the caution light flashes on HP laser printers without a touch screen. It is possible that the printer will resume.
Before the blue headlight flashes, press and hold the Wireless button on the rear of the printer for 5 seconds.
6. Follow the steps in the HP Smart app to set up a wireless network and install a printer in under two hours.
Step 2: Connect your computer or mobile device to the printer.
Complete the printer connection by installing the HP Printer Setup By Wireless software or the HP Smart app.
1. Examine the device that is linked to the wireless network.
2. Go to www.123.hp.com/setup and enter your printer's model and serial number.
3. Install the HP Smart software or driver on your PC or mobile device.
4. To complete the wireless connection configuration, open this program and follow the recommended installation instructions.
5. If you see the message "Confirm Printer PIN" when setting up your printer, enter the PIN found on the sticker attached to your printer. If a password is required, enter your PIN number.
How to Setup an HP Printer on a Mac
How to set up an HP printer on a Mac?
HP printer setup for Mac — Apple computers and mobile devices have a built-in printing solution. Most apps with a print capability can be used to print.
Setup and installation instructions for an HP printer
1. Connect your printer to your network in the first step.
● To use your printer, you'll need to connect it to your Mac. Set up your printer so that it shares the same wireless network as your Mac.
● The printer should be turned on and connected to your computer or network, based on your preferences.
● Wireless connections are possible with printers that include a touchscreen or LCD menu control panel. When you go to 123.hp.com/Setup, Network, or Wireless on the printer, choose the Wireless Setup Wizard option. Then, follow the instructions on the screen to connect the printer. To carry out.
● To get the printer to connect to the wireless network, all that's needed is the button. Press and hold the wireless button for three seconds to see the wireless light begin to flash. As soon as you hit the WPS button on your router, your printer should automatically start connecting to the network.
● Connect the USB cord to the USB connection on the back of the printer and an open USB port on your computer.
● Using a Hardwired (Ethernet) Network Connection: Connect the printer's Ethernet port to your router's or access point's Ethernet port. There should be a green light and an orange blinking activity light on the port.
2. Open a document or a photo, click [file], [Print], and then click the.
● If your printer is shown under [Printer] in the drop-down menu, choose it by clicking on it. Try printing by clicking the printer's name. Check that www.123.hp.com/setup is complete by printing a test page.
● [Printer] If your printer isn't displayed in the menu, look towards the bottom of the list. If your printer isn't included in any of the listings, move on to the next step.
Step 2: In your printer queue, add the AirPrint printer.
You can be sure you're using AirPrint by adding a printer in System Preferences.
1. Click System Preferences from the Apple menu, then Print & Scan or Printers & Scanners.
2. [Printer] Please do one of the following methods to see if your printer's name appears in the list, followed by.
● Remove your printer from the list and re-add it to make sure it's set up for AirPrint.
➢ Select the printer's name from the drop-down menu.
➢ To delete the printer, press the minus symbol.
➢ To add a printer or scanner, click the plus (+) sign.
➢ To go on to the following stage, tap the printer's name.
● To go to the following stage, click the + sign, Add Printer or Scanner, and then the name of your printer.
● If your printer does not display in the Add Printer or Scanner box, see the document's FAQ, address any connectivity difficulties, reconnect your printer, and then continue to the next step.
3. Check that AirPrint or Secure Mac is selected in the Use or Use for Printing option, then click Add.
4. Open a document or photo, choose [file], [Print], and then click.
Read Also: espn.com activate | fitbit.com/setup | chromecast.com/setup
0 notes
Text
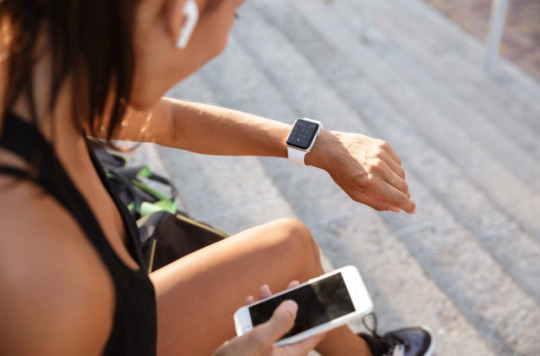
Which music services are compatible with Fitbit smartwatches?
When you're in the middle of a workout, a good playlist may provide an adrenaline boost precisely when you need it. Modern smartwatches frequently have the capacity to play and store music, allowing you to workout without your phone. If you have a Fitbit smartwatch, we'll show you how to configure Fitbit music services on your Sense, Versa, or Ionic wristwatch.
Is it possible to listen to music on my Fitbit?
First and foremost, not every fitbit com setup is capable of playing music. You'll need a Fitbit Sense, Versa 3, Versa 2, Versa, or Ionic wristwatch to save music on your Fitbit. It's worth noting that the Fitbit Versa Lite doesn't have any music storage.
With that in mind, there are a variety of options for putting music on your Fitbit wristwatch. Fitbit offers an app to sync your playlists offline if you have a Deezer or Pandora account. The alternative technique necessitates the creation of an offline music collection. Let's have a look at both possibilities.
How to download music to your Fitbit smartwatch
Transferring music from your computer to your Fitbit is a simple process that needs the installation of an app on your computer.
1. Begin by downloading the Fitbit Connect app from fitbit.com/setup on your computer or Mac. To proceed, finish the installation process after it has been downloaded.
2. When you first open the app, you'll be given three alternatives. You can't set up a Fitbit smartwatch on a computer; instead, you'll need to utilize the mobile app.
● Do you require further assistance? For additional information, see our step-by-step Fitbit setup guide.
● When you tap the Manage My Music tile, you'll be prompted to sign in to your Fitbit account.
● Now go to your watch and open the Music app by swiping left. Switch on Wi-Fi and make your watch discoverable to the app by tapping the Transfer Music button.
● To send a playlist to the Fitbit, go back to the desktop app and import an existing one or build a new one. You may pick folders to import into the app by tapping the gear icon in the top-right corner.
● After you've built up or imported your playlists, hit the circle symbol next to them to start the transfer process. Be patient; this will take some time.
Your Fitbit should now have your chosen playlists. It's time to put your Bluetooth earbuds on and go for a run.
How can I connect my Deezer music to my Fitbit?
Fitbit allows you to sync your Deezer playlists with your Fitbit if you've gone all-in on streaming music and don't have a local music collection. You will, of course, require a Deezer Premium subscription to access this feature.
1. From the Fitbit app's settings menu, go to the Music page.
2. Choose Deezer.
3. To get the activation code, open the Deezer app on your watch. To link the watch with your Deezer account, go to fitbit.com/deezer.
4. Log in or create an account to use the service. You'll now be provided with a variety of playlists to sync down to your Fitbit, both your own and those created by Deezer.
5. Sit back and listen to the music you've chosen. Depending on the amount of music you're trying to sync, this procedure might take a long time. It's best to charge your Fitbit while listening to music.
How can I link Pandora music to my Fitbit?
1. Go to the Music page under your Fitbit's settings in the Fitbit app, just like you did with Deezer.
2. Tap the login button after selecting Pandora.
3. To download music to your Fitbit, you'll need to subscribe to the top-tier Pandora Premium subscription. If you want to try it out before committing to the service, you may do so with a one-month trial.
4. You'll note that Pandora doesn't have as many alternatives as Deezer once you've joined in. You will be able to select up to three of your favorite stations through the integration. You may also use Pandora's Workout section to find playlists. In addition, a Thumbprint radio station is downloaded depending on your listening habits.
How to use your Fitbit to listen to Spotify
Spotify streaming on Fitbit requires a Spotify Premium account and the Spotify app, which can be downloaded through the Fitbit mobile app.
1. On your phone, open the Fitbit app.
2. Apps can be tapped.
3. The Spotify app may be found under All Apps. To install, simply tap the button.
4. Now go to My Apps and press the gear icon next to Spotify to access the settings.
5. Go to your Spotify account and sign in.
Spotify on fitbit.com setup smartwatches, unlike some other streaming services, does not have an offline mode and instead works as a remote for streaming from your phone.
It does, however, have Spotify Connect capabilities, allowing you to use your Fitbit to control playing on any other compatible device. Aside from that, the app allows you to listen to music from your collection and recent plays, but it does not allow you to search for playlists.
Read Also: Oculus.com/setup | chromecast.com/setup
0 notes