#custommessage
Text
The Dynamic experience of Drone Light Show

Drone light shows powered by Lunalite offer a truly dynamic and captivating experience that pushes the boundaries of modern entertainment. Lunalite is at the forefront of this technology, creating mesmerizing displays that combine cutting-edge drone technology with artistic creativity.
Imagine a night sky illuminated by a swarm of drones, each one equipped with colorful LED lights that can be synchronized and choreographed to dance gracefully through the air. These drones move in perfect harmony, creating intricate patterns, shapes, and even 3D images. The result is a stunning visual spectacle that leaves audiences in awe.
What sets Lunalite's drone light shows apart is their ability to create fluid and dynamic formations. The drones move with precision, effortlessly transitioning from one formation to another, giving the illusion of a living, breathing entity in the night sky. This level of choreography and synchronization is achieved through advanced software and hardware that allows for precise control over each drone's movements.
Lunalite's team of skilled artists and engineers work together to design unique and captivating shows for various occasions, from large-scale events like concerts and festivals to corporate gatherings and celebrations. They meticulously plan every aspect of the performance, considering factors such as wind conditions, airspace regulations, and safety protocols to ensure a flawless execution.
One of the most remarkable aspects of drone light shows is their versatility. The drones can be programmed to display custom messages, logos, and branding, making them a powerful tool for marketing and advertising. They can also be synchronized with music, adding an immersive audiovisual element to the performance.
The dynamic experience of witnessing a drone light show powered by Lunalite is unlike any other. It transports audiences into a realm where technology and artistry merge, leaving lasting impressions and fond memories. As this technology continues to evolve, we can only anticipate even more breathtaking displays that push the boundaries of what's possible with drones and light.
#dronelightshow#lunalite#dynamicexperience#modernentertainment#artisticcreativity#colorfulLEDlights#visualspectacle#choreography#precisemovements#uniqueperformances#largeevents#immersivetechnology#custommessages#audiovisualelement#technologyandart#lastingimpressions#breathtakingdisplays#boundarypushing#droneartistry#evolvingtechnology#lunalitedroneshow
1 note
·
View note
Text

Morse Code Bracelet: The Symbol of Elegance https://bit.ly/45GNIT3
#MorseCodeBracelet #SecretMessageJewelry #UniqueBracelet #PersonalizedGift #MorseCodeGift #MeaningfulJewels #HandmadeBracelet #CustomMessage #GiftsWithHiddenMeaning #SymbolicJewelry
0 notes
Text
Get ready to hop into the Easter spirit with our pre-made video Easter greetings cards! Our cute and unique AI art designs are sure to bring a smile to your loved ones' faces, and with just a few clicks, you can send them a video message that's eco-friendly and hassle-free. Plus, our cards are perfect for anyone looking to reduce their carbon footprint this Easter season. Order now and spread some joy and happiness this Easter with our whimsical and adorable designs. #EasterGreetings #VideoCards #PreMade #AIart #Cute #Unique #Personalized #EcoFriendly #HassleFree #SpreadJoy #Whimsical #Adorable #AllAges#EasterWishes #EasterCelebration #EasterBunny #EasterLove #EasterEggHunt #HappyEaster #EasterSeason #EasterCheer #EasterSurprise #VideoGreetings #ElectronicCard #GreetingCard #EcoFriendlyCard #UniqueDesign #AIartwork #SmileWorthy #SpreadHappiness #CuteDesign #CustomMessage
0 notes
Photo

輕鬆擁有韓星完美身形 放寬之後多咗出街食飯,報復式狂食之後,肥到俾蝦子餅話我虎背熊腰😣自己都唔相信,照照鏡真喺嚇一嚇😱 缺心減肥之後,忍口唔食雪糕 但減肥速度太慢,同事原來食開韓國嘅保健品,有助溶脂塑形,一日一次就有效果,我都忍不住試吓! 韓國Healthy Place 溶脂美容塑形丸採用LF溶脂多肽,有助促進脂肪燃燒保護肌肉,去除多餘脂肪。咁就食少少甜品都無咁內疚🤣 Healthy Place 溶脂美容塑形丸獲得韓國食藥局KGMP「有助減少體脂肪」安全性功能認證獨家減脂配方,有效降低皮下脂肪、內臟脂肪等體內頑固脂肪、縮小體內脂肪細胞,有效促進身體代謝,呈現更完美的BMI。 幾鍾意佢個包裝,仲寫明星期一到星期日服用日程,唔驚食多咗,又唔驚食少咗,夠晒貼心。 食完一盒效果唔錯,個肚腩即刻縮返入去😍 有興趣嘅朋友,請到網站看詳細資料 https://www.newki.com/mobile/goods/70127?customMessage=69702 #減肥 #瘦身 #健康 #營養 #減肥酵素 #HealthyPlace #减肥瘦身 #美容塑形丸 #塑形片 #减肥丸 #新奇站 #keepfit #hkinfluencer #hkigers #hkiger #hkkol #ootdhk #portrait #stylishlook #瘦身成功 (在 Hong Kong) https://www.instagram.com/p/Clqu2fbSPpr/?igshid=NGJjMDIxMWI=
#減肥#瘦身#健康#營養#減肥酵素#healthyplace#减肥瘦身#美容塑形丸#塑形片#减肥丸#新奇站#keepfit#hkinfluencer#hkigers#hkiger#hkkol#ootdhk#portrait#stylishlook#瘦身成功
0 notes
Photo

"Keep Calm" & [Custom Text] Crown in navy BG Coffee Mug #KeepCalmAnd #CustomMug #happyPuppy #zazzle #zazzlemade #happyPuppyprintondemand #keepcalm #keepcalmand #customtext #personalize #personalizedgifts #personalize #personalizedgiftideas #mug #gift #crown #Custommessage #customname #keepcalmandcustomtext https://www.instagram.com/p/CH-4LbqHB86/?igshid=n8hbujd8gygd
#keepcalmand#custommug#happypuppy#zazzle#zazzlemade#happypuppyprintondemand#keepcalm#customtext#personalize#personalizedgifts#personalizedgiftideas#mug#gift#crown#custommessage#customname#keepcalmandcustomtext
1 note
·
View note
Link
Howdy, Magento Folks!
Notifications about customer actions on your website are important. However they provide a default function, but if you want to show a custom message along with the text. Deep dive into How to Display Complex Error & Success Messages in Magento 2.
Complete Take at How to Display Complex Error & Success Messages in Magento 2
0 notes
Photo

Veg tanned leather is the perfect piece for leather burned inscription! Link in bio! #tanleather #vegtanleather #leatherbracelet #custommessage #customleather #personalizedleather #mensbracelets #memsstyle #boholeather #etsy #etsysellersofinstagram (at Toronto, Ontario) https://www.instagram.com/p/B_tlDGnncub/?igshid=6o605tu4v8fz
#tanleather#vegtanleather#leatherbracelet#custommessage#customleather#personalizedleather#mensbracelets#memsstyle#boholeather#etsy#etsysellersofinstagram
0 notes
Photo

The sweetest order of them all! With a private handwritten message too 🌹 #martisor #greetingcards #custommessage #forher #giftforher #anaisbeautifulinside https://www.instagram.com/p/B9Uhplup2FV/?igshid=5y2ih4sh165q
0 notes
Photo
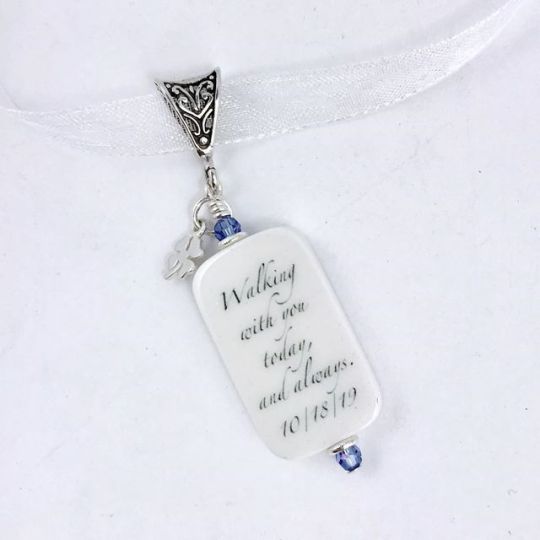
Add a little luck of the Irish to your bouquet charm with this tiny sterling #shamrock. It’s a sweet addition to this brides Something Blue Memorial photo charm. #weddingbouquetcharm #Etsyseller #bouquetcharm #memorycharm #photocharm #Customjewelry #Somethingblue #Picturecharm #Custommessage #weddingcharm #delaneyjewelrydesigns #etsyjewelry #etsyshop https://www.instagram.com/p/B2w4C8eByu2/?igshid=1u4iktp3h82g0
#shamrock#weddingbouquetcharm#etsyseller#bouquetcharm#memorycharm#photocharm#customjewelry#somethingblue#picturecharm#custommessage#weddingcharm#delaneyjewelrydesigns#etsyjewelry#etsyshop
0 notes
Text
How Can I Communicate with Customers During Severe Weather?

Florida can experience a lot of severe weather during summer and fall, followed by outages.
Thankfully, we are almost through the Atlantic hurricane season, which officially started on June 1 and runs until Nov. 30. Peak season spans mid-August to late October. Did you know there are several options available for you to notify your customers and route calls in the event of a hurricane or severe weather?
If your company loses internet, you can ask VoiceOnyx to forward calls to designated cell phone(s) using the Transfer to Mobile Phone feature.
If you have multiple locations, you can direct calls from a closed location to one that is unaffected by the storm.
You can route calls to voicemail and check them via your email or remotely dial in to check a particular voicemail box.
You can move your Polycom phones to a temporary location with internet service, such as a hotel business center or your home, if it is out of the main storm surge area. Check with a technician first, if possible.
Last year, during Hurricane Irma, several customers were able to keep their operations running from different locations with internet. VoiceOnyx servers were functional during Hurricane Irma and during every major storm since our inception in 2006.

A custom message will let your customers know you're closed for extreme weather.
Custom Closed Message and Schedules
In the event you cannot make it to your business, call or receive email, there is another option. VoiceOnyx will put a custom message in place for your business notifying customers of extreme weather conditions. The closure message is scheduled to run per your specifications, and can be extended or removed based on weather conditions and restoration of internet service.
VoiceOnyx is proud to provide customers with a variety of options for contingency planning, whether it be occasional internet loss, stormy weather, or unexpected closures. You may reach VoiceOnyx Technical Support from any Polycom phone by dialing 611 or by calling 888-321-3350.
Read the full article
0 notes
Photo

Make your notebook unique with your logo and personal message. we use only the highest grade materials to ensure absolute perfection.
https://tinyurl.com/Custom-Books
#Custombooks#pens#giftboxes#custompens#giftideas#corporategifts#silkscreen#gifts#logonotebooks#journals#customlogo#custommessage
0 notes
Photo

PythonでAmazon Cognitoのユーザープールを作成してみる https://ift.tt/2QqBIkW
概要
前回、Amazon CognitoでMFAをお試ししてみましたが、ユーザープールを作成するのにAWS マネジメントコンソールを利用して、若干面倒だったので、AWS SDKを利用して作成してみました。
環境構築
ソースはGitHubにアップしていますので、よければご参考ください。
https://github.com/kai-kou/create-cognito-user-pool-at-python
仮想環境を作成していますが、ここは素でも、Dockerコンテナ上でもお好きにどうぞ。
> python --version Python 3.6.6 > mkdir 任意のディレクトリ > cd 任意のディレクトリ > python -m venv venv > . venv/bin/activate
Pythonの場合、boto3というSDKがありますので、それを利用します。
boto/boto3
https://github.com/boto/boto3
> pip install boto3
実装
公式ドキュメントが詳しかったのでそちらを参考にしました。
CognitoIdentityProvider – Boto 3 Docs 1.9.39 documentation
https://boto3.amazonaws.com/v1/documentation/api/latest/reference/services/cognito-idp.html#CognitoIdentityProvider.Client.admin_create_user
> touch main.py
SDKの各パラメータは今回、最低限の設定のみとしています。[Cognitoのユーザープール名] 、[ユーザー名] 、[仮パスワード] は任意で指定してください。
main.py
import boto3 def main(): client = boto3.client('cognito-idp') poot_name = '[Cognitoのユーザープール名]' # ユーザープールの作成 user_pool = _create_user_pool(client, poot_name) # アプリクライアントの作成 _create_user_pool_app_client(client, user_pool) # TOTPを利用したMFAを有効にする _set_user_pool_mfa_config(client, user_pool) # ユーザーの作成 _create_user(client, user_pool, '[ユーザー名]', '[仮パスワード]') def _create_user_pool(client, pool_name): response = client.create_user_pool( PoolName=pool_name, Policies={ 'PasswordPolicy': { 'MinimumLength': 8, 'RequireUppercase': True, 'RequireLowercase': True, 'RequireNumbers': True, 'RequireSymbols': True } }, # LambdaConfig={ # 'PreSignUp': 'string', # 'CustomMessage': 'string', # 'PostConfirmation': 'string', # 'PreAuthentication': 'string', # 'PostAuthentication': 'string', # 'DefineAuthChallenge': 'string', # 'CreateAuthChallenge': 'string', # 'VerifyAuthChallengeResponse': 'string', # 'PreTokenGeneration': 'string', # 'UserMigration': 'string' # }, # AutoVerifiedAttributes=[ # 'phone_number'|'email', # ], # AliasAttributes=[ # 'phone_number'|'email'|'preferred_username', # ], # UsernameAttributes=[ # 'phone_number'|'email', # ], # SmsVerificationMessage='string', # EmailVerificationMessage='string', # EmailVerificationSubject='string', # VerificationMessageTemplate={ # 'SmsMessage': 'string', # 'EmailMessage': 'string', # 'EmailSubject': 'string', # 'EmailMessageByLink': 'string', # 'EmailSubjectByLink': 'string', # 'DefaultEmailOption': 'CONFIRM_WITH_LINK'|'CONFIRM_WITH_CODE' # }, # SmsAuthenticationMessage='string', MfaConfiguration='OFF', # DeviceConfiguration={ # 'ChallengeRequiredOnNewDevice': True|False, # 'DeviceOnlyRememberedOnUserPrompt': True|False # }, # EmailConfiguration={ # 'SourceArn': 'string', # 'ReplyToEmailAddress': 'string' # }, # SmsConfiguration={ # 'SnsCallerArn': 'string', # 'ExternalId': 'string' # }, # UserPoolTags={ # 'string': 'string' # }, AdminCreateUserConfig={ 'AllowAdminCreateUserOnly': False, 'UnusedAccountValidityDays': 7, # 'InviteMessageTemplate': { # 'SMSMessage': 'string', # 'EmailMessage': 'string', # 'EmailSubject': 'string' # } }, # Schema=[ # { # 'Name': 'string', # 'AttributeDataType': 'String'|'Number'|'DateTime'|'Boolean', # 'DeveloperOnlyAttribute': True|False, # 'Mutable': True|False, # 'Required': True|False, # 'NumberAttributeConstraints': { # 'MinValue': 'string', # 'MaxValue': 'string' # }, # 'StringAttributeConstraints': { # 'MinLength': 'string', # 'MaxLength': 'string' # } # }, # ], # UserPoolAddOns={ # 'AdvancedSecurityMode': 'OFF'|'AUDIT'|'ENFORCED' # } ) return response def _create_user_pool_app_client(client, user_pool): user_pool_id = user_pool['UserPool']['Id'] user_pool_name = user_pool['UserPool']['Name'] response = client.create_user_pool_client( UserPoolId=user_pool_id, ClientName=f'{user_pool_name}-client', # GenerateSecret=True|False, RefreshTokenValidity=30, # ReadAttributes=[ # 'string', # ], # WriteAttributes=[ # 'string', # ], # ExplicitAuthFlows=[ # 'ADMIN_NO_SRP_AUTH'|'CUSTOM_AUTH_FLOW_ONLY'|'USER_PASSWORD_AUTH', # ], # SupportedIdentityProviders=[ # 'string', # ], # CallbackURLs=[ # 'string', # ], # LogoutURLs=[ # 'string', # ], # DefaultRedirectURI='string', # AllowedOAuthFlows=[ # 'code'|'implicit'|'client_credentials', # ], # AllowedOAuthScopes=[ # 'string', # ], # AllowedOAuthFlowsUserPoolClient=True|False, # AnalyticsConfiguration={ # 'ApplicationId': 'string', # 'RoleArn': 'string', # 'ExternalId': 'string', # 'UserDataShared': True|False # } ) return response def _set_user_pool_mfa_config(client, user_pool): user_pool_id = user_pool['UserPool']['Id'] response = client.set_user_pool_mfa_config( UserPoolId=user_pool_id, # SmsMfaConfiguration={ # 'SmsAuthenticationMessage': 'string', # 'SmsConfiguration': { # 'SnsCallerArn': 'string', # 'ExternalId': 'string' # } # }, SoftwareTokenMfaConfiguration={ 'Enabled': True # True|False }, MfaConfiguration='ON' # 'OFF'|'ON'|'OPTIONAL' ) return response def _create_user(client, user_pool, user_name, password): user_pool_id = user_pool['UserPool']['Id'] response = client.admin_create_user( UserPoolId=user_pool_id, Username=user_name, # UserAttributes=[ # { # 'Name': 'string', # 'Value': 'string' # }, # ], # ValidationData=[ # { # 'Name': 'string', # 'Value': 'string' # }, # ], TemporaryPassword=password, # ForceAliasCreation=True|False, MessageAction='SUPPRESS' # 'RESEND'|'SUPPRESS', # DesiredDeliveryMediums=[ # 'SMS'|'EMAIL', # ] ) return response if __name__ == '__main__': main()
いくつか抜粋して説明してみます。
大まかな流れ
今回は、前回の記事で利用するユーザープールを作成したかったので、MFAを有効にしてTOTPを選択して、検証用のユーザーが作成できるようにしています。
Amazon Cognitoのワンタイムパスワード(TOTP)認証をNode.jsで試してみた
https://cloudpack.media/44521
ポイントとしては、ユーザープール作成時にMFA有効化する場合、SMSのみ指定が可能でTOTPが指定できません。(2018/11/08時点)
ですので、ユーザープール作成後にset_user_pool_mfa_config というメソッドでMFAを有効化するようにしました。
main.py(抜粋)
def main(): client = boto3.client('cognito-idp') poot_name = 'create-user-pool-at-lambda' # ユーザープールの作成 user_pool = _create_user_pool(client, poot_name) # アプリクライアントの作成 _create_user_pool_app_client(client, user_pool) # TOTPを利用したMFAを有効にする _set_user_pool_mfa_config(client, user_pool) # ユーザーの作成 _create_user(client, user_pool, '[ユーザー名]', '[仮パスワード]')
各パラメータの指定方法
下記記事で良い方法を紹介されていました。
CloudFormationでCognito UserPoolを作る
https://wp-kyoto.net/create-cognito-userpool-by-cloudformation/
「作りたいリソースを一旦手組みして、作成されたリソースのパラメータをYAML化する」という流れが多分一番ストレスなく作れます。
ということでまずAWS マネジメントコンソールからCognito UserPoolを作りましょう。
作成できたらAWS-CLIを使って、どんな設定を書けばいいかを確認します。
下記ドキュメントに各リソース情報を取得するコマンドが記載されています。
cognito-idp
https://docs.aws.amazon.com/cli/latest/reference/cognito-idp/index.html#cli-aws-cognito-idp
MFAの有効化
AWS マネジメントコンソールのユーザープール画面では、MFAを必須にするには、ユーザープール初回時とあります。
ユーザープールの初回作成時にのみ [必須] を選択できます。
ただ、下記のように、MfaConfiguration='ON' として、設定すると、必須が指定できました。記述か実装のどちらかが間違っているのでしょうか???

main.py(抜粋)
response = client.set_user_pool_mfa_config( UserPoolId=user_pool_id, # SmsMfaConfiguration={ # 'SmsAuthenticationMessage': 'string', # 'SmsConfiguration': { # 'SnsCallerArn': 'string', # 'ExternalId': 'string' # } # }, SoftwareTokenMfaConfiguration={ 'Enabled': True # True|False }, MfaConfiguration='ON' # 'OFF'|'ON'|'OPTIONAL' )
動作確認
実行して、Cognitoのユーザープールが作成されるか確認します。
> python main.py
実行時に、AWSへアクセスするのに、.aws/credentials を参照しますので、AWS CLIをインストールしておくとスムーズかと思います。
AWS CLIやboto3の利用に関しては下記が参考になります。
AWS CLIのインストール
https://qiita.com/yuyj109/items/3163a84480da4c8f402c
boto3を使った一時的なAWS認証情報の取得
https://qiita.com/speg03/items/9ba5a34d721c9f4f90c5
AWS マネジメントコンソールで確認してみます。

はい。
ユーザープールが作成できました。アプリクライアントやユーザーも作成できています。
前回実装したNode.jsで認証してみます。

はい。うまく認証できました。
やったぜ。
まとめ
思っていたより簡単に作成することができました。公式ドキュメントが最新の仕様に追いついていない感がありますので、SDKを利用する場合には実際に動作させながらが良さそうです。
参考
CognitoIdentityProvider — Boto 3 Docs 1.9.39 documentation
https://boto3.amazonaws.com/v1/documentation/api/latest/reference/services/cognito-idp.html
CloudFormationでCognito UserPoolを作る
https://wp-kyoto.net/create-cognito-userpool-by-cloudformation/
Amazon Cognitoのワンタイムパスワード(TOTP)認証をNode.jsで試してみた
https://cloudpack.media/44521
元記事はこちら
「PythonでAmazon Cognitoのユーザープールを作成してみる」
November 28, 2018 at 02:00PM
0 notes
Photo

Be a fabulously fierce flaming flamingo! Stand tall and proud, don't fit in when you were born to stand out... #zazzle #zazzlemade #happyPuppy #design #minimal #summer #summertime #flamingo #flamingos #fabulous #flamingflamingo #fierce #rainbowflag #rainbow #pride #beproud #beyou #custommessage https://www.instagram.com/p/CA2fiK4HeqL/?igshid=cenkhvjworj5
#zazzle#zazzlemade#happypuppy#design#minimal#summer#summertime#flamingo#flamingos#fabulous#flamingflamingo#fierce#rainbowflag#rainbow#pride#beproud#beyou#custommessage
1 note
·
View note
Link
Hello, Magento Buddies!
Magento 2's most important feature is customization. Storefronts, as well as admin panels, can be customized as required. The admin panel can be customized to make the work easier and more intuitive. Learn Add Custom Message to Admin Sales Order View, Invoice, and Credit Memo.
0 notes
Photo

Personalized genuine bracelet with hand leather burned custom message! What would your bracelet say? Link in bio! #personalizedgifts #personalizedjewelry #personalizedbracelet #customleatherbracelet #custommessage #genuineleather #leatherjewelry #leatherbracelets #mensbracelets #mensstyle #menstrends #mensfashion #menjewelry #etsy #etsytopicks (at Toronto, Ontario) https://www.instagram.com/p/B_YQJ5FHXLx/?igshid=ln261tu6wi9p
#personalizedgifts#personalizedjewelry#personalizedbracelet#customleatherbracelet#custommessage#genuineleather#leatherjewelry#leatherbracelets#mensbracelets#mensstyle#menstrends#mensfashion#menjewelry#etsy#etsytopicks
0 notes
Photo

Custom hand written message. We gladly offer this service togheter with gift wrap. #custommessages #handwrittenmessage #greetingcards #anaisbeautifulinside https://www.instagram.com/p/CBTiXVDJU5k/?igshid=1eppo4c3xe7r2
0 notes
Last Seen Blogs

sugatu
Sugatu- Best Solar Power Inverter in Mumbai

thesweeperblog
The Sweeper

sevenchakrablog
CHAKRA LOVE

juliantovar
Tovar

sdadazin-blog
Você e Talvez Eu