#daylightresources
Explore tagged Tumblr posts
Visit Tumblr Blog
Explore Tumblr blogs with no restrictions, modern design and the best experience.
Last Seen Tumblr Blogs


Fun Fact
Celebrities use Tumblr as well.
Text

Warning: Image heavy
By popular demand, aka 2 people, here is a gif tutorial. This will include how I do screenshots and actually make the gif.
You will need:
Photoshop. I use the Photoshop CC 2021 version but that’s only because I’m paying for it. There are sites you can download Photoshop on but I prefer the legal way.
MPV player or any screencapping program that takes continuous screencaps.
IMPORTANT: As I have learned, the video file you use must be 1080p or else they will look like absolute crap. Always try to get a 1080p copy no matter how long it takes.
THE PROGRAM
As stated before, I use MVP player. That can be downloaded here. If you have a mac, I would move the app off of your desktop after downloading and to the applications folder. That way it is out of your iCloud and saves so much pain and frustration.
Try to download the 0.29.0 version because later versions on macs have a glitch where there are duplicate screenshots (according to @/kylos). I had to download the 0.29.1 version because the other version won’t open at all for me after the last apple update (fuck bug sur). Anyway, I’ll probably mess up explaining this part so you can find out how to get it working here and here.
To actually screencap, press option + s. The left and right arrow keys will help you move through the video. For more shortcuts, click here.
Once that is all downloaded, now you can begin the giffing process.
THE PROCESS
Load the film you want to gif into the program, which is just a simple drag and drop. Then go through and find the scene you want to screencap.

Once I find the scene, I pause and then press option + s as mentioned above and screencap the scene. Press option + s again to stop capturing.
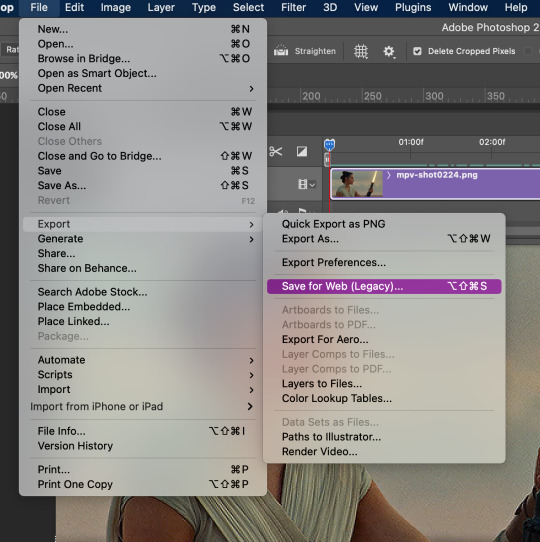
Now you go open photoshop and go to File --> script --> load files into stack
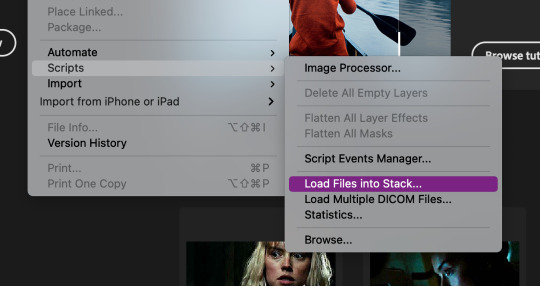

Then this will pop up. Hit browse...

Then open your folder with the screenshots, select the screenshots by dragging down, and then click open.
This is what it should look like. Now go through and delete the extra images you don’t need.
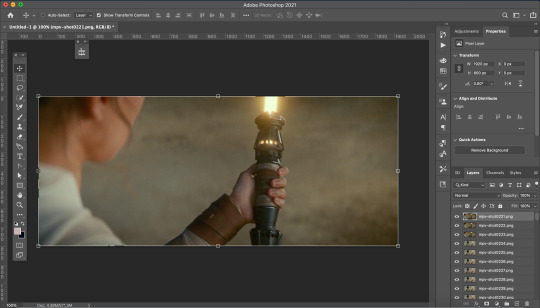
Now we need to crop the future gif. Click the cropping tool and at the top left there is a way to set the crop dimensions.
The ones I have saved are Tumblr’s dimension sizes. The height doesn’t matter as much as the width does. For Tumblr; 540px is for one post across, 268px is 2 posts across, and 178px is 3 across. When doing 3 across make the last one 177px or else the last one will be blurry. Click here for more info on sizing.
Today I’m going to make this 540:280. When you’re satisfied with the crop, click enter.
Here is where the fun begins! I downloaded @kylos gif action here. To activate it double click on it. To view your actions go to window --> actions. A window should pop up with your action.


There will be a folder in there called GIF ACTION. Open the folder and select the SELECT HERE!. With that selected click on the play button to activate the action.
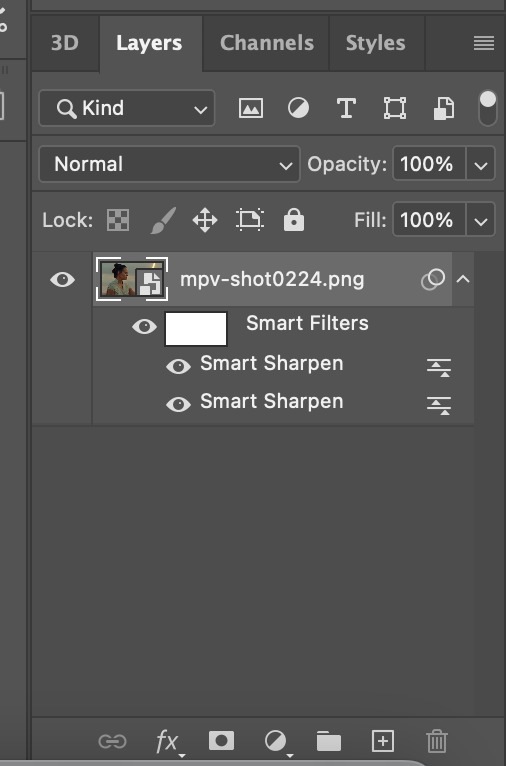
Just like magic, you now have a gif! Your layers panel should now look like this. Next we just need to resize the gif.

Go to Image --> Image size and this box will pop up.

Resize the image to your crop size and hit ok. Your image will now be a lot smaller.
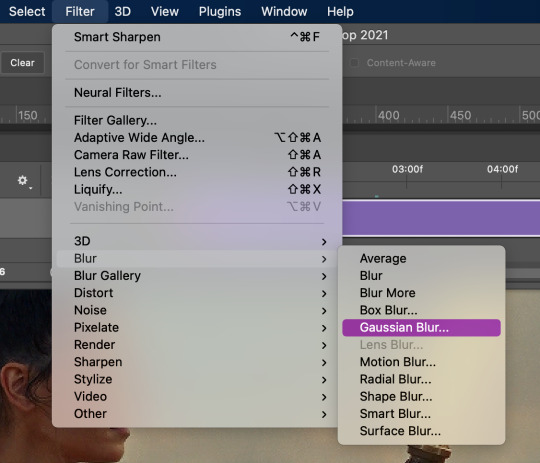
Next I go to Filter --> Blur --> Gaussian Blur. Set the blur to 1.0.

Now this will take away the sharpness when I just want it to be a bit softer. To fix this double-click on the lines next to the smart filter.
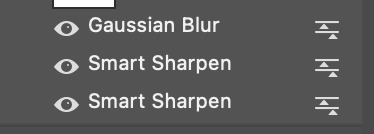
This will bring up another box to change the opacity of the blur. I change it to 20% or less. This one I’ll make 15%. Hit ok when done.

One last thing is I fix the radius of the sharpening. Click on the bottom sharpening layer. A box should open.


Change the radius to 0.4 and hit ok.
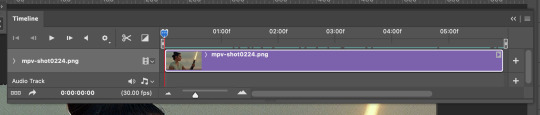
Before closing, open the timeline window by window --> timeline. If you want to cut down on the frames, grab either one of the grey bars on the beginning and end of the gif and drag to where you want it to start and end.
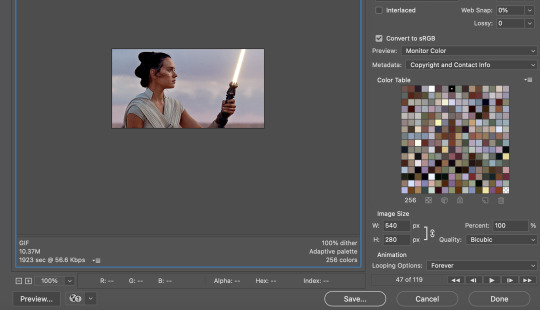
It’s now time to save. Go to File --> Export --> Save for Web (Legacy)...
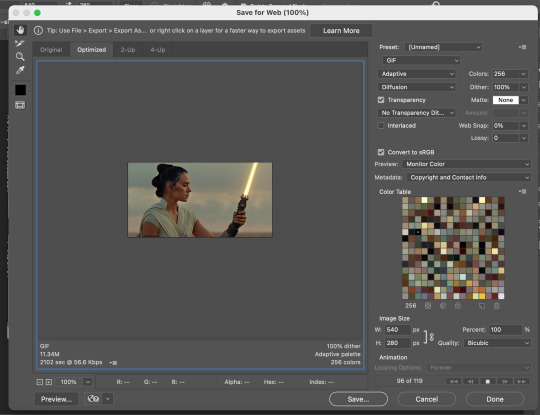
This will pop up. Here you can see how many frames you have and how big the file is. I usually start off as close to 10mb as I can get. There are multiple ways you can save it but here are my settings.

Then save your gif to wherever you want it. But we aren’t done yet.
Close the gif. You don’t have to save the psd but you can if you want to. Then reopen the gif in Photoshop. Everything you used before should still be open, aka the windows for actions and timeline.
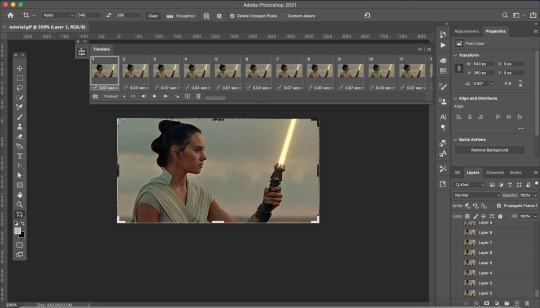
Your screen will look like this. As you may notice, the gif speed is all over the place. The best speed for gifs is 0.5. This guide is very helpful.
To get the gif to that speed, I dowloaded another action here. Add it to your actions as instructed above.

Open the Change to .05 folder and select the SELECT HERE!. With that selected click on the play button to activate the action, same as above.

And viola it is now the correct speed! But our gif doesn't look too great. It’s time to fix that up with some coloring.
COLORING

These are my coloring layers. Make sure they are on top of all of the layers.
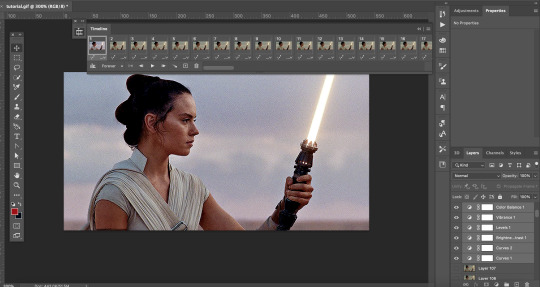
Here is what it looks like now after the coloring. You may notice the effect has only been added to one layer of the X amount of frames you have.
To fix this select the coloring layers and then go to the 3 lines at the top right of the box.
Click on this to open a dropdown box and click match layer across frames.


Make sure all the checks are marked and hit ok.
Now all the layers have the coloring layers applied.

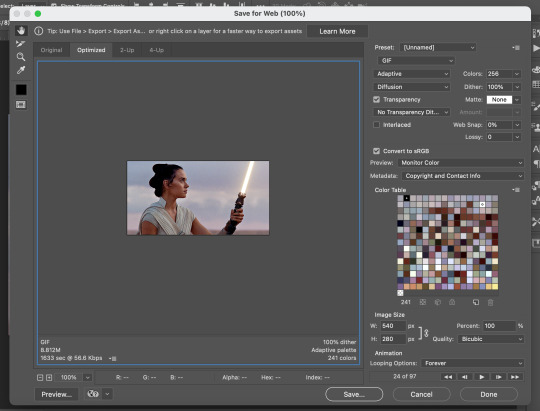
Remember when we were saving the gif and it was over 10mb. Well now it’s time to fix that.
I like to go in and check the size after coloring because sometimes that can lower the gif size.
It did in this case so that creates less work. Close out of that and go back to your timeline. It’s time to delete some frames.
You can select multiple frames at once by holding down shift as you select. I typically click around 5 to 10 at a time and make sure you don’t miss a single frame. I’m going to select more towards to the end.

Then click delete (the trashcan icon).
Go back to export. If it is still too big delete some frames. In my case it was still too big so I have to delete more frames.
I now have it to around where I want it. It is less than 10 mb and sometimes that is better. So save your gif. I usually save it as [filename]final.
QUALITY
To check the quality of the gif I go to Tumblr and go to make a photo post.

DO NOT post. Instead save it as a draft. Go to your drafts and see how it looks from your dash. If it looks pixelated then go back into photoshop and delete fames. Repeat the following steps until it is to your liking.

And then you have your final product!
I hope this was helpful to you and I can’t wait to see what you create with this.
#tutorial#yeahps#completeresources#resources#gif tutorial#quirkyresources#hisources#my giffs#rey#star wars#swedit#starwarsedit#daylightresources#jessielynnposts#i struggled with this can't you tell lol
233 notes
·
View notes
Text

GUIDE FOR COLORING SUPERNATURAL GIFS (requested by @leftistdean)
Since we all know that spn can be a pain in the ass when you start coloring gifs and since I’ve recieved some asks about how i do that, here’s your ‘guide’ where I will show you my steps for making this show looking good.
First of all you should remember about the fact that I’m not the best at coloring gifs and this tutorial just showing how I do that in the way that looks good in my own eyes. This is a very basic tutorial, because since i call myself a ‘gRapHicMakEr’ and most of time I make only graphics, I use a lot of optional layers, like textures, color layers, gradient maps and it all make some color correcting in the end, but for simple gifs I use the same algorithm.
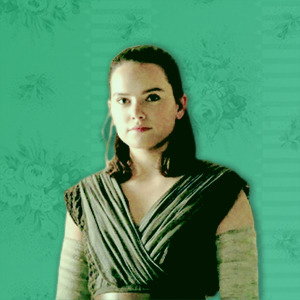
So this is how my gif looks just cropped and sharpenned and now we need to make it look a little prettier:

I always make a curves layer first for brighten gif a little. Most of time I use an ‘auto’ button, but it doesn’t always work good and I need to fix it a little.

After this I’m adding second curves layer, which helps me give a gif a little contrast and a little more brighten. I use only curves bcs I just don’t like ‘brightness/contrast’ option lmao.

Now I’m gonna put some vibrance in this gif. First seasons have a very pleasant aesthetic and color correcting but for gifs we need to boost it up a little.

This was a very base steps and sometimes when you’re a talented human being who can color in two or three layers that’s enough, but I’m gonna use some layers and they’re very optional and I change settings in them with every gif. For this example I’m gonna put here a color filter layer and gradient map for make gif look a little bit warmer but... not very warm. I set gradient map on ‘soft light’ with opacity around 25-40%.


Now I wanna make a ‘selective color’ layer which is probably my fave adjust layer. Even after 8 years of using photoshop I still don’t know how this option works, so I’m just playing with this till I love the result. Here I played with reds, yellows, greens and blues, and you can see how selective color can boost all up.

Now if you want you can add a ‘color balance’ layer and play with settings, but most of time I’m just adding another selective color layer and fixing some little things.

In the end, I making another vibrance layer if I need this, like when the frames were very dark or dull in the beginning.

Now we’re done and gif should look like this:

When I make graphics, most of time I make them black and white with pop of color. I’m using ‘black and white’ option and add a gradient map on ‘soft light’ with opacity 15-20%.

Congrats, now you know how to color this hell show! Yeehaw.
OTHER EXAMPLES:
In this gif i changed selective color layer settings and played with blues, cyans, yellows and reds. As you can see it worked here as good as on the previous one.

Here i turned off color filter and gradient map layers because it was too warm for me.

213 notes
·
View notes
Note
hi elena do you know where to get hq scans of the folklore album? i know there are users on here that scanned all of them and i so appreciate them doing that but one was just photos of the photos and the other scan scans have tons of lines through them and quality loss making graphics really hard :( i don't want to sound ungrateful i'm just at a loss for real hqs and wondered if you knew of any
sorry i’m not too sure but you can check out @daylightresources or taylorpictures.net if you haven’t already! ♡
7 notes
·
View notes
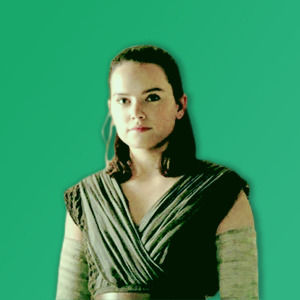
Photo


Even more Rey Lightsaber Icons (TLJ) Reblog or ♡ if you save, use, or just genuinely like these
#my icons#swladies#quirkyresources#daylightresources#rey#rey icons#star wars icons#star wars#the last jedi#the last jedi icons#tlj#tlj icons#jessielynnposts
47 notes
·
View notes
Photo


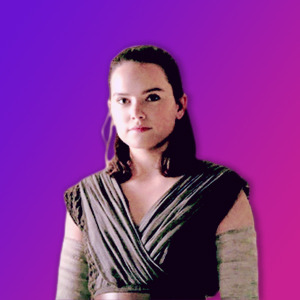

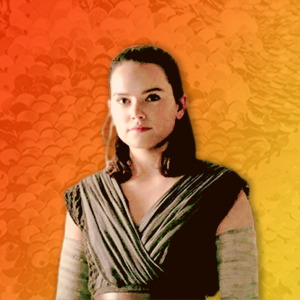
Rey The Last Jedi Icons Reblog or ♡ if you save, use, or just genuinely like these
#my icons#rey#star wars#swladies#quirkyresources#daylightresources#rey icons#star wars icons#the last jedi icons#tlj icons#the last jedi#jessielynnposts#tbh im not a fan of these
44 notes
·
View notes